How-To Geek
How to turn on the develop menu in safari on mac.
The Develop menu lets you view page source in Safari on Mac.

Quick Links
How to enable the develop menu in safari on mac, how to view page source in safari on mac.
When you right-click on any web page in Safari on Mac, it doesn't reveal the Show Page Source and Inspect Element buttons. To see these, you need to enable the Develop menu---we'll show you how to do that.
Once you've enabled the Develop menu, right-clicking a blank space on any website will reveal the Inspect Element and Show Page Source buttons. These allow you to take a look at the source code of any website, which is useful for things like downloading images from websites and debugging code or finding out what it looks like behind any site (for website designers).
You can easily turn on the Develop menu in Safari by following a couple of steps. Open Safari on your Mac and click the "Safari" button in the menu bar.
Next, select "Preferences." Alternatively, you can use the keyboard shortcut Command+, (comma). This will also open up Safari preferences.
Go to the "Advanced" tab.
Check the box for "Show Develop Menu in Menu Bar."
Now the Develop menu will appear between Bookmarks and Window at the top.
Apart from being able to view the page source, this will allow you to access developer-focused features, such as disabling JavaScript on any website.
Once you've enabled the Develop menu, there are a couple of ways to view the page source in Safari.
Open any website in Safari and right-click the blank space on the page. Now, select "Show Page Source." You can also get to this menu by using the keyboard shortcut Option+Command+u.
If you're looking for images or other media elements from any web page, Safari makes it easy to find these. In the left-hand pane, you will see various folders such as Images, Fonts, etc. Click the "Images" folder to quickly find the photos that you need.
After selecting an image, you can view its details easily by opening up the details sidebar. The button to open this is located at the top-right of the console, just below the gear icon. You can also open this with the shortcut Option+Command+0.
Click "Resource" at the top of the details sidebar to view details, such as the size of the image and its full URL.
You can change the position of the page source console easily, too. There are two buttons at the top-left of this console, right next to the X button. Click the rectangle icon to move the console to a different side within the browser window.
If you'd like to open the page source console in a separate window, you can click the two-rectangles icon. This will detach the console and open it in a separate window.
To check out the code for any specific element on the page, you can right-click that element and select "Inspect Element." This will take you directly to the code for the element that you selected.
Whenever you're done looking at the code, click the X button to close the page source console and return to browsing on Safari. You can also check out how to view a website's page source in Google Chrome here.
Related: How to View the HTML Source in Google Chrome
Safari Developer Tools: The Complete Guide for Web Developers
Introduction to safari developer tools.
Safari is one of the major web browsers along with Chrome, Firefox, and Edge. As an Apple product, it comes pre-installed on Macs and iOS devices. Over the years, Safari has evolved to include robust developer tools accessible from the Develop menu. These built-in tools provide web developers with capabilities for debugging JavaScript, inspecting CSS, monitoring network requests, analyzing performance, auditing accessibility, and more.
Safari's developer tools are especially useful for testing and debugging web apps specifically within the Safari browser on macOS and iOS. They allow you to inspect cross-browser compatibility issues that may arise during development.
In this comprehensive guide, we'll explore the key features of Safari's developer tools and how to use them for front-end web development. Whether you are just getting started or looking to optimize your debugging workflow, you'll find tips and examples to help improve your process. Let's take a high-level look at what we'll cover:
- Using the JavaScript debugger to set breakpoints, inspect scope and objects, profile code performance, and log errors/warnings
- Inspecting and modifying CSS styles applied to page elements in real-time
- Monitoring network requests and analyzing load performance with Waterfall charts
- Throttling CPU and network to simulate mobile devices and slow connections
- Auditing for accessibility issues like color contrast, focus order, ARIA roles
- Testing responsive design across multiple device sizes and orientations
- Integrating with Xcode tools for advanced Swift/Obj-C debugging
- Additional tips like saving element inspection settings, keyboard shortcuts, and more
By the end, you'll have a solid understanding of how to leverage Safari developer tools in your web projects and debug more efficiently. Let's get started!
Debugging JavaScript with Safari Developer Tools
The JavaScript debugger is one of the most powerful features of Safari dev tools. It allows you to pause code execution at any point and step through your JavaScript line-by-line.
To start debugging, open the Sources tab and set breakpoints by clicking line numbers in your scripts. As you interact with your page, execution will pause when a breakpoint is hit. You can then step over, step into, or step out of functions and examine the current state.
For example, you can use the debugger to identify exactly where a promise-based function is failing by stepping through the promise callbacks line-by-line until you encounter the error.
In the Scope pane, you can inspect variable values in the current closure or parent scopes. The Call Stack shows the sequence of function calls. Object properties can be expanded in the Scope pane for detailed analysis.
The JavaScript debugger is especially useful for debugging asynchronous code like promises, timers, and events. Set breakpoints within callbacks to pause execution at the right moment.
The Console allows you to log messages like values, errors, warnings, and custom output. Use console.log() strategically throughout your code to understand control flow. The Console also displays runtime errors and exceptions to identify bugs.
For performance profiling, the Timelines tab provides JavaScript profiling. It visualizes script activity over time to identify slow functions. This helps pinpoint optimization opportunities.
Inspecting and Editing CSS
Safari dev tools make CSS debugging painless. The Elements tab lists all styles applied to the selected element, including information like specificity and inheritance.
The Styles pane displays media query breakpoints allowing you to view the cascade and specificity at different viewport sizes. This helps debug responsive layout issues.
You can edit CSS rules live in the Styles pane and instantly see the changes reflected on the page without having to save and refresh. This rapid feedback loop allows quick iteration on styling issues.
The magnifying glass tool lets you visually inspect padding, margins, and other box model properties overlaid on the page. This helps debug complex layouts and positioning issues.
To test state changes, you can force elements into states like :hover , :focus , and :active from the Styles pane. This allows you to debug styles applied on interaction without needing to actually interact with the element.
The Coverage tab identifies unused CSS rules that can safely be removed to optimize page load size. It also shows which rules have the greatest impact on render performance.
Debugging Network Requests and Performance
Safari developer tools provide rich insights into network requests, page load performance, and optimization opportunities.
The Network tab logs all requests sent by the page along with details like HTTP headers, response bodies, times, and more. Requests are color coded by type and can be searched and filtered.
Waterfall charts visualize resource loading over time, making it easy to spot assets that delay page render. Performance metrics like First Meaningful Paint help quantify user experience.
To simulate slow network connections, you can throttle CPU or bandwidth. This allows you to debug on 3G, or even EDGE mobile connections right from your desktop.
Auditing for Accessibility
The Audit tab in Safari dev tools scans your page for common accessibility issues and standards compliance.
It checks for insufficient color contrast, missing ARIA roles and attributes, invalid HTML, and more. Each issue links to detailed references to help fix it.
You can also manually inspect if elements have logical focus order, are navigable via keyboard, and meet other requirements. The Accessibility Tree view outlines the semantic structure.
Safari's built-in Reader mode provides a quick way to experience your site through a screen reader. It strips away formatting and extra elements, allowing you to focus on content structure.
Running regular audits during development prevents major accessibility regressions down the road and ensures your site meets guidelines like WCAG 2.1 AA.
Simulating Mobile Devices with Responsive Design Mode
Responsive web design requires continuously testing across viewport sizes. Safari dev tools make this easy with Responsive Design Mode.
You can select preset device dimensions like iPhone, iPad, and desktop or enter custom sizes. Safari will resize to match those dimensions so you can view your responsive layouts.
For mobile testing, you can simulate touch events like pinch/zoom and swipe scrolling. This reveals any issues with touch targets or scroll performance.
Responsive Design Mode also allows flipping between portrait and landscape orientations. Test how your UI adapts to both modes during mobile use cases.
To access experimental features, enable the Safari Technology Preview for additional device simulation capabilities like user agent spoofing. This allows you to test in even more specific mobile scenarios.
Matching real device sizes while building responsive features ensures they'll work correctly across the vast device ecosystem. No more guessing at breakpoints!
Additional Tips and Tricks
Safari developer tools contain many handy power user features beyond the basics. Here are some tips to level up your skills:
- You can save and reapply custom element selection settings like force states, orientation, and device frames.
- Changes made in the Console and Sources tabs persist on reload so you can iteratively debug.
- The dev tools window can be docked to the bottom of the Safari window for more vertical space.
- Open multiple instances of dev tools to compare different pages side-by-side.
- Learn keyboard shortcuts for common debugging actions like pause, step over, log, etc.
- Enable the experimental features tab for tools like WebGL profiler, layer borders, and more.
Debugging Safari Extensions
If you build Safari extensions, enable extension debugging in Preferences > Advanced to load them unpacked.
This allows inspecting extension files, storage, dev tools console, and inter-process communication. You can debug injected scripts, content scripts, cross-origin messages, and more.
Integration with Xcode Developer Tools
For native iOS apps with web views, Safari dev tools integrate tightly with Xcode.
You can connect them to share cookies, caches, and other state. Set Xcode breakpoints in Swift or Obj-C that pause JavaScript execution in Safari tools.
The Xcode CPU profiler helps find JavaScript bottlenecks. Memory debugging, Energy Impact, and other Xcode tools provide additional low-level details when debugging Safari web views in iOS simulators and on physical devices.
Conclusion and Key Takeaways
Safari developer tools provide a robust feature set optimized for front-end web development. Their tight integration and ease of use can boost productivity.
Key strengths include the precise JavaScript debugger, real-time CSS manipulation, detailed network and performance analysis, thorough accessibility auditing, and accurate mobile simulation.
Web developers should consider integrating Safari dev tools into their broader workflows, especially for projects targeting Apple devices. They excel at responsive design testing and debugging native iOS web views.
While Safari dev tools may not be as fully-featured as competitors, their focus on web fundamentals like JavaScript, CSS, performance, and accessibility makes them very capable for many use cases.
With the tips, guides, and examples covered in this post, you should feel empowered to debug websites efficiently using Safari's built-in developer tools. They can help track down bugs faster, optimize performance, and build high-quality responsive experiences.
If you build developer tools for iOS or macOS, be sure to test them thoroughly with Safari developer tools during the launch process. The comprehensive debugging capabilities can help identify and resolve issues specific to Apple devices and browser engines. Consider submitting your app to DevHunt to get discovered by the developer community.
Related posts
- Master Chrome DevTools for Next-Level Web Development
- Unlock Chrome's Power with These Dev Tools
- Safari Developer Tools Help Debug Websites and Apps
- Dev Tools on Chrome - Your Web Debugging Swiss Army Knife
Safari User Guide
- Change your homepage
- Import bookmarks, history, and passwords
- Make Safari your default web browser
- Go to websites
- Find what you’re looking for
- Bookmark webpages that you want to revisit
- See your favorite websites
- Use tabs for webpages
- Pin frequently visited websites
- Play web videos
- Mute audio in tabs
- Pay with Apple Pay
- Autofill credit card info
- Autofill contact info
- Keep a Reading List
- Hide ads when reading articles
- Translate a webpage
- Download items from the web
- Share or post webpages
- Add passes to Wallet
- Save part or all of a webpage
- Print or create a PDF of a webpage
- Customize a start page
- Customize the Safari window
- Customize settings per website
- Zoom in on webpages
- Get extensions
- Manage cookies and website data
- Block pop-ups
- Clear your browsing history
- Browse privately
- Autofill user name and password info
- Prevent cross-site tracking
- View a Privacy Report
- Change Safari preferences
- Keyboard and other shortcuts
- Troubleshooting
Use the developer tools in the Develop menu in Safari on Mac
If you’re a web developer, the Safari Develop menu provides tools you can use to make sure your website works well with all standards-based web browsers.
If you don’t see the Develop menu in the menu bar, choose Safari > Preferences, click Advanced, then select “Show Develop menu in menu bar.”
Open Safari for me
How To Get Developer Tools In Safari

- Software & Applications
- Browsers & Extensions

Introduction
Safari, the sleek and innovative web browser developed by Apple, is known for its user-friendly interface and seamless integration with Apple devices. While Safari offers a smooth browsing experience for users, it also provides powerful tools for web developers to create and optimize websites and web applications. One of the key features that sets Safari apart is its built-in Developer Tools, which offer a comprehensive set of resources for web development and debugging.
Whether you are a seasoned web developer or just starting out, having access to Safari's Developer Tools can significantly enhance your workflow and productivity. These tools enable you to inspect and modify web page elements, debug JavaScript, analyze network activity, and optimize website performance, among other capabilities. By leveraging Safari's Developer Tools, you can gain valuable insights into the structure and behavior of web pages, identify and troubleshoot issues, and fine-tune the performance of your web projects.
In this article, we will delve into the process of enabling and utilizing Safari's Developer Tools for web development. We will explore the various features and functionalities offered by these tools, providing practical insights and tips for leveraging them effectively. Whether you are a web developer, designer, or simply curious about the inner workings of websites, this guide will equip you with the knowledge and skills to harness the full potential of Safari's Developer Tools.
Let's embark on a journey to uncover the hidden gems of Safari's Developer Tools and unlock the power of web development within the confines of this innovative browser . Whether you're seeking to enhance your web development skills or gain a deeper understanding of web technologies, Safari's Developer Tools are your gateway to a world of possibilities. So, without further ado, let's dive into the realm of web development with Safari as our trusted companion.
Enabling Developer Tools in Safari
Enabling Safari's Developer Tools is a straightforward process that unlocks a treasure trove of functionalities for web development. Whether you're a seasoned developer or a curious enthusiast, accessing these tools can significantly enhance your web development experience within the Safari browser .
To enable Developer Tools in Safari, follow these simple steps:
Open Safari Preferences : Launch Safari and navigate to the "Safari" menu located in the top-left corner of the screen. From the drop-down menu, select "Preferences."
Access Advanced Settings : In the Preferences window, click on the "Advanced" tab. This will reveal a set of advanced settings for Safari.
Enable Develop Menu : Within the Advanced tab, locate the option labeled "Show Develop menu in menu bar" and ensure that it is checked. This action activates the Develop menu, which houses a plethora of web development tools and features.
Verify the Development Menu : After enabling the Develop menu, you should see it appear in the menu bar at the top of the screen, alongside other Safari menu options.
Once you have completed these steps, Safari's Developer Tools will be readily accessible, empowering you to delve into the intricacies of web development and gain valuable insights into the structure and behavior of web pages.
By enabling Developer Tools in Safari, you gain access to a suite of powerful resources that can elevate your web development capabilities. From inspecting and modifying web page elements to analyzing network activity and optimizing website performance, Safari's Developer Tools provide a comprehensive toolkit for enhancing your web projects.
With Developer Tools at your fingertips, you are poised to embark on an enriching journey through the realms of web development, armed with the tools and insights needed to create, optimize, and fine-tune captivating web experiences within the Safari browser.
Using Developer Tools for Web Development
Safari's Developer Tools offer a robust set of features and functionalities that empower web developers to streamline their workflows, troubleshoot issues, and optimize web projects. By leveraging these tools, developers can gain valuable insights into the inner workings of web pages and applications, ultimately enhancing the user experience and performance of their creations.
Inspecting and Modifying Web Page Elements
One of the fundamental capabilities of Safari's Developer Tools is the ability to inspect and modify web page elements in real time. By right-clicking on any element within a web page and selecting "Inspect Element," developers can access a detailed view of the HTML and CSS properties associated with that element. This feature is invaluable for understanding the structure and styling of web pages, allowing developers to make on-the-fly adjustments and see the immediate impact on the page layout.
Debugging JavaScript and Analyzing Console Output
Safari's Developer Tools include a robust JavaScript debugger, enabling developers to identify and resolve issues within their JavaScript code. By setting breakpoints, stepping through code, and examining variable values, developers can pinpoint and troubleshoot errors, ultimately improving the functionality and reliability of their web applications. Additionally, the console within Developer Tools provides a space for logging messages, errors, and warnings, offering valuable insights into the runtime behavior of JavaScript code.
Network Analysis and Performance Testing
Another powerful aspect of Safari's Developer Tools is the network panel, which allows developers to analyze network activity and optimize the performance of web pages. By monitoring network requests, loading times, and resource sizes, developers can identify opportunities for optimization, such as minimizing file sizes, leveraging caching strategies, and reducing unnecessary network requests. This capability is instrumental in creating fast and efficient web experiences for users across various devices and network conditions.
Modifying and Testing CSS in Real Time
Safari's Developer Tools provide a seamless environment for modifying and testing CSS styles directly within the browser. Developers can experiment with different styles, colors, and layouts, observing the immediate effects on web page elements. This real-time feedback accelerates the design and development process, allowing developers to fine-tune the visual presentation of their websites with precision and agility.
Leveraging Additional Tools and Resources
In addition to the aforementioned features, Safari's Developer Tools offer a wide array of resources, including the Elements panel for inspecting and editing the DOM, the Application panel for managing web storage and service workers, and the Security panel for identifying potential security vulnerabilities within web applications. These tools collectively provide a comprehensive toolkit for web developers, empowering them to create secure, performant, and visually compelling web experiences.
By harnessing the power of Safari's Developer Tools, web developers can elevate their skills, optimize their workflows, and deliver exceptional web experiences to users. Whether you are fine-tuning the layout of a responsive website, debugging complex JavaScript interactions, or optimizing the performance of a web application, Safari's Developer Tools are your indispensable companions in the journey of web development.
Inspecting and Debugging Web Pages
Inspecting and debugging web pages is a fundamental aspect of web development, and Safari's Developer Tools provide a robust set of features for this purpose. When it comes to understanding the structure and behavior of web pages, as well as identifying and resolving issues, the inspection and debugging capabilities within Safari's Developer Tools are indispensable.
Inspecting Web Page Elements
The ability to inspect web page elements is a cornerstone of Safari's Developer Tools. By right-clicking on any element within a web page and selecting "Inspect Element," developers can access a detailed view of the HTML and CSS properties associated with that element. This feature provides a comprehensive breakdown of the selected element, including its position, dimensions, styling, and any associated event listeners. This level of insight allows developers to gain a deep understanding of the composition and layout of web page elements, facilitating precise modifications and optimizations.
Modifying Web Page Elements in Real Time
In addition to inspecting web page elements, Safari's Developer Tools enable developers to modify elements in real time. By directly editing the HTML and CSS properties of elements within the Elements panel, developers can experiment with different styles, content, and layouts, observing the immediate impact on the web page. This real-time editing capability is invaluable for fine-tuning the visual presentation of web pages and rapidly iterating on design and layout changes.
Safari's Developer Tools include a powerful JavaScript debugger, which allows developers to identify and resolve issues within their JavaScript code. By setting breakpoints, stepping through code, and examining variable values, developers can pinpoint and troubleshoot errors, ultimately improving the functionality and reliability of their web applications. Additionally, the console within Developer Tools provides a space for logging messages, errors, and warnings, offering valuable insights into the runtime behavior of JavaScript code. This feature is instrumental in diagnosing and addressing JavaScript-related issues, ensuring the smooth execution of interactive and dynamic web elements.
In essence, Safari's Developer Tools provide a comprehensive suite of capabilities for inspecting and debugging web pages. From gaining insights into the structure and styling of web page elements to identifying and resolving JavaScript-related issues, these tools empower developers to create, optimize, and fine-tune web experiences with precision and efficiency. By leveraging the inspection and debugging features within Safari's Developer Tools, developers can elevate their skills, streamline their workflows, and deliver exceptional web experiences to users.
Modifying and Testing CSS and JavaScript
Modifying and testing CSS and JavaScript is a crucial aspect of web development, and Safari's Developer Tools offer a seamless environment for making real-time adjustments and testing code changes. Whether you're refining the visual presentation of a website or fine-tuning the functionality of interactive elements, Safari's Developer Tools provide a comprehensive toolkit for working with CSS and JavaScript.
Real-time CSS Modifications
Safari's Developer Tools allow developers to modify CSS styles directly within the browser, providing immediate feedback on the visual appearance of web page elements. By accessing the Styles panel, developers can experiment with different styles, colors, and layouts, observing the instant effects on the web page. This real-time editing capability accelerates the design and development process, enabling developers to iterate on visual enhancements with agility and precision.
Testing JavaScript Code
In addition to CSS modifications, Safari's Developer Tools facilitate the testing and debugging of JavaScript code. The JavaScript debugger within Developer Tools empowers developers to set breakpoints, step through code, and inspect variable values, facilitating the identification and resolution of JavaScript-related issues. By leveraging the debugging capabilities, developers can ensure the reliability and functionality of interactive elements, such as dynamic user interfaces and client-side interactions.
Performance Optimization
Furthermore, Safari's Developer Tools provide insights into the performance of CSS and JavaScript code. Developers can analyze the impact of CSS styles and JavaScript functions on web page loading times and responsiveness, identifying opportunities for optimization. By monitoring the execution of CSS and JavaScript, developers can fine-tune code to enhance the overall performance and user experience of web applications.
In summary, Safari's Developer Tools offer a comprehensive suite of features for modifying and testing CSS and JavaScript. From real-time CSS adjustments to JavaScript debugging and performance optimization, these tools empower developers to create visually compelling and functionally robust web experiences. By harnessing the capabilities within Safari's Developer Tools, developers can refine the presentation and behavior of web pages with precision, ensuring an exceptional user experience across various devices and platforms.
Network analysis and performance testing are critical components of web development, and Safari's Developer Tools provide a robust set of features for evaluating the network activity and optimizing the performance of web pages and applications.
Monitoring Network Activity
Safari's Developer Tools offer a comprehensive Network panel, which allows developers to monitor and analyze the network activity associated with a web page. This includes tracking network requests, such as HTTP requests for resources like HTML, CSS, JavaScript, images, and other assets. By examining the network waterfall, developers can gain insights into the timing and sequence of network requests, identifying potential bottlenecks and optimizing the loading process.
Resource Size and Loading Times
The Network panel within Safari's Developer Tools provides detailed information about the size and loading times of individual resources. Developers can assess the impact of resource sizes on web page performance, identifying opportunities to optimize assets for faster loading. By analyzing the loading times of resources, developers can prioritize critical content and streamline the delivery of essential assets, ultimately enhancing the overall user experience.
Safari's Developer Tools empower developers to optimize the performance of web pages by identifying and addressing potential performance bottlenecks. By leveraging the insights from the Network panel, developers can implement strategies to minimize file sizes, leverage browser caching, and reduce unnecessary network requests. Additionally, developers can assess the efficiency of third-party integrations and external resources, ensuring that web pages load quickly and responsively across various devices and network conditions.
Network Throttling
One of the standout features of Safari's Developer Tools is the ability to simulate different network conditions using network throttling. Developers can emulate various network environments, such as 3G , 4G, or slower connections, to assess the performance of web pages under different bandwidth constraints. This capability enables developers to optimize web pages for a wide range of network conditions, ensuring a consistent and reliable user experience for diverse audiences.
In essence, Safari's Developer Tools provide a comprehensive suite of capabilities for network analysis and performance testing. By monitoring network activity, assessing resource sizes and loading times, optimizing web page performance, and simulating network conditions, developers can create fast, efficient, and responsive web experiences. Leveraging the insights and tools within Safari's Developer Tools, developers can fine-tune the performance of web pages, ultimately delivering exceptional user experiences in the ever-evolving landscape of the web.
In conclusion, Safari's Developer Tools serve as a gateway to the intricate world of web development, offering a rich array of features and functionalities that empower developers to create, optimize, and fine-tune web experiences with precision and efficiency. By enabling and leveraging these tools, developers gain valuable insights into the structure, behavior, and performance of web pages, ultimately enhancing the user experience and functionality of their web projects.
From inspecting and modifying web page elements to debugging JavaScript, analyzing network activity, and optimizing performance, Safari's Developer Tools provide a comprehensive toolkit for addressing the diverse challenges of web development. The seamless integration of real-time editing, debugging, and performance analysis within the browser environment streamlines the development process, allowing developers to iterate on design and functionality with agility and precision.
Furthermore, the ability to simulate network conditions and assess the impact of resource sizes on web page performance equips developers with the tools needed to create fast, efficient, and responsive web experiences across various devices and network environments. This capability is instrumental in ensuring a consistent and reliable user experience, regardless of the user's location or network conditions.
By harnessing the power of Safari's Developer Tools, developers can elevate their skills, optimize their workflows, and deliver exceptional web experiences to users. Whether it's refining the visual presentation of a website, debugging complex JavaScript interactions, or optimizing the performance of a web application, Safari's Developer Tools are indispensable companions in the journey of web development.
In essence, Safari's Developer Tools not only provide a window into the inner workings of web pages but also empower developers to craft immersive, performant, and visually compelling web experiences. As the web continues to evolve, Safari's Developer Tools stand as a testament to Apple's commitment to providing developers with the resources and capabilities needed to thrive in the dynamic landscape of web development.
In the ever-expanding digital ecosystem, Safari's Developer Tools remain a steadfast ally for developers, offering a robust platform for innovation, creativity, and excellence in web development. Whether you're a seasoned developer or an aspiring enthusiast, Safari's Developer Tools invite you to embark on a journey of discovery and mastery, shaping the future of the web one line of code at a time.
Leave a Reply Cancel reply
Your email address will not be published. Required fields are marked *
Save my name, email, and website in this browser for the next time I comment.
- Crowdfunding
- Cryptocurrency
- Digital Banking
- Digital Payments
- Investments
- Console Gaming
- Mobile Gaming
- VR/AR Gaming
- Gadget Usage
- Gaming Tips
- Online Safety
- Software Tutorials
- Tech Setup & Troubleshooting
- Buyer’s Guides
- Comparative Analysis
- Gadget Reviews
- Service Reviews
- Software Reviews
- Mobile Devices
- PCs & Laptops
- Smart Home Gadgets
- Content Creation Tools
- Digital Photography
- Video & Music Streaming
- Online Security
- Online Services
- Web Hosting
- WiFi & Ethernet
- Browsers & Extensions
- Communication Platforms
- Operating Systems
- Productivity Tools
- AI & Machine Learning
- Cybersecurity
- Emerging Tech
- IoT & Smart Devices
- Virtual & Augmented Reality
- Latest News
- AI Developments
- Fintech Updates
- Gaming News
- New Product Launches
How to Use Email Blasts Marketing To Take Control of Your Market
Learn to convert scanned documents into editable text with ocr, related post, how to make stairs planet coaster, how to rotate camera in planet coaster, how to make a good roller coaster in planet coaster, where is the minecraft folder, how to update minecraft windows, how to update minecraft education edition, related posts.

How To Inspect On IPhone Safari

How To Install Safari On Apple TV 4

How To Download Video On Safari

How To Inspect Page On Safari

How To Debug In Safari

How To Get Safari Back To Normal

How To Reset Safari 9.0

How To Change Location In Safari
Recent stories.

Top Mini Split Air Conditioner For Summer

Comfortable and Luxurious Family Life | Zero Gravity Massage Chair

Fintechs and Traditional Banks: Navigating the Future of Financial Services

AI Writing: How It’s Changing the Way We Create Content

How to Find the Best Midjourney Alternative in 2024: A Guide to AI Anime Generators

How to Know When it’s the Right Time to Buy Bitcoin
- Privacy Overview
- Strictly Necessary Cookies
This website uses cookies so that we can provide you with the best user experience possible. Cookie information is stored in your browser and performs functions such as recognising you when you return to our website and helping our team to understand which sections of the website you find most interesting and useful.
Strictly Necessary Cookie should be enabled at all times so that we can save your preferences for cookie settings.
If you disable this cookie, we will not be able to save your preferences. This means that every time you visit this website you will need to enable or disable cookies again.
Download Free
How to Use Developer Tools on Safari
It's free and super easy to set up
If you're a web developer or designer working on Mac, Safari is a browser that you cannot ignore. It's the most used browser on Mac, and it is fully featured with all the necessary tools to help developers design and debug their web pages. Most importantly, Safari has a built-in set of developer tools that are available from the moment you install it, making it convenient and efficient for developers to find, inspect, and modify elements of their webpage. In this article, we'll look at how to use developer tools on Safari, step by step.
Enabling Developer Tools in Safari
Developing websites and applications requires the use of developer tools, which allow you to inspect and modify code, debug errors, and optimize performance. If you're using Safari as your browser, you'll need to enable developer tools before you can start using them. Here's how:
Accessing Safari Preferences
To access Safari Preferences, you have two options. You can either click on Safari from the top menu bar and then click Preferences, or you can use the keyboard shortcut Command + , (comma). Either way, you'll end up in the same place.
Once you're in Safari Preferences, you'll see a variety of tabs at the top of the window. Click on the one that says "Advanced".
Activating the Develop Menu
In the Advanced tab, you'll see a checkbox that says "Show Develop menu in the menu bar". Check this box to enable the Develop menu.
Now that you've enabled the Develop menu, you'll see it in the top menu bar, between Bookmarks and Window. Click on it to see the various options available to you.
Some of the most commonly used options in the Develop menu include:
Inspect Element: This allows you to view and modify the HTML and CSS of a page.
Console: This displays any error messages or other output from the JavaScript console.
Network: This shows you the resources that are being loaded by the page, including images, scripts, and stylesheets.
Debugger: This lets you step through JavaScript code and set breakpoints to help you find and fix errors.
By using these developer tools, you'll be able to create more efficient and effective websites and applications. Happy developing!
Navigating the Developer Tools Interface
Once you have enabled developer tools, you can access them by clicking on the Develop menu and selecting Show Web Inspector. This will open the developer tool interface with several panels:
Elements Panel
The Elements panel is a powerful tool for web developers. It allows you to see the HTML and CSS for the currently selected element on the page. You can use this panel to select and inspect individual elements, modify page elements, and edit styles. You can even add new HTML elements and see how they affect the page layout. The Elements panel is an essential tool for anyone who wants to understand how a web page is constructed.
Network Panel
The Network panel is another important tool for web developers. It shows information about any requests made by the page, including the URL, status, size, and timing. This is useful for debugging performance issues and checking how a page loads. You can use the Network panel to identify slow-loading resources, optimize page speed, and troubleshoot network issues.
Sources Panel
The Sources panel shows you the JavaScript files associated with the page and allows you to debug them. You can set breakpoints, step through code, and inspect variables. This is useful for troubleshooting JavaScript errors and optimizing code performance. You can also use the Sources panel to edit JavaScript code and see how it affects the page behavior.
Timeline Panel
The Timeline panel shows you a timeline of how the page loads performance-wise. It can be used to identify slow-loading resources or laggy scripts. You can see exactly when each resource is loaded and how long it takes. The Timeline panel is a great tool for optimizing page speed and improving user experience.
Console Panel
The Console panel is where you can access the browser's JavaScript console. You can execute JavaScript code in the context of the page and view debug messages and errors. This is useful for troubleshooting JavaScript issues, testing code snippets, and experimenting with new features. You can also use the Console panel to log messages and interact with the page in real-time.
Storage Panel
The Storage panel shows you the various types of storage present on a page, such as cookies, local storage, and session storage. It can be used to debug issues related to handling client-side storage. You can view, edit, and delete storage data, as well as monitor storage usage. The Storage panel is a great tool for understanding how client-side storage works and how to optimize it.
Overall, the developer tools interface is a powerful set of tools that can help you understand and optimize your web pages. Whether you're a beginner or an experienced developer, these tools are essential for building high-quality web applications.
Inspecting and Modifying HTML and CSS
Selecting elements.
Using the Elements panel, you can select an HTML element by clicking on it in the panel or directly on the page. When you select an element, you'll see its HTML and CSS properties on the right-hand side of the panel.
Editing HTML
You can easily edit the HTML of an element, either by double-clicking on the HTML code you want to change or by right-clicking on the HTML code and choosing "Edit as HTML". Then, you can make the necessary changes and save them.
Modifying CSS Styles
Similarly, you can modify CSS styles of an element in the Styles section of the panel. To add a new style, click the "+ New Style Rule" button. To modify an existing style, simply click on it and make the necessary changes.
Adding and Removing Classes
You can also add or remove classes from an element in the Elements panel. To add a class, select the element and add the class name in the "class" field. To remove a class, simply delete its name from the "class" field.
In conclusion, Safari's developer tools are an essential toolset for designers and web developers. They offer a wide range of features that make debugging and designing a webpage accessible and efficient. With this article, you should have a basic understanding of how to use developer tools on Safari. Experiment with the tools and explore their full potential to make your web development experience more productive and enjoyable.
Let's set you up !
Working on the web!
Student Tips
Startup Tools
Browser Glossary
Browser Tips
- Editor's Choice: Tech Gifts for Mom
- Amazon Prime Tech Deals!
How to Activate the iPhone Debug Console or Web Inspector
Use Safari's web developer tools to study problematic websites
:max_bytes(150000):strip_icc():format(webp)/ScottOrgera-f7aca23cc84a4ea9a3f9e2ebd93bd690.jpg "safari enable developer tools")
- Saint Mary-of-the-Woods College
- Switching from Android
What to Know
- Activate Web Inspector on iOS: Go to Settings > Safari > Advanced and move the Web Inspector toggle switch to the On position.
- Use Web Inspector on macOS: Connect your iOS device to a Mac and choose the URL to inspect from the Develop menu.
If you run into a bug or another issue with a website on Safari mobile, use the Web Inspector tool to investigate. This article explains how to use the Safari console for iPhone to debug errors with the help of your Mac computer. Instructions apply to iPhones with iOS 14, iOS 12, or iOS 11, and well as Macs with macOS Big Sur (11.0), macOS Catalina (10.15), or macOS Mojave (10.14).
Activate Web Inspector on Your iPhone or Other iOS Device
The Web Inspector is disabled by default since most iPhone users have no use for it. However, if you're a developer or you're curious, you can activate it in a few short steps. Here's how:
Open the iPhone Settings menu.
On an iPhone with an early version of iOS, access the Debug Console through Settings > Safari > Developer > Debug Console . When Safari on the iPhone detects CSS, HTML, and JavaScript errors, details of each display in the debugger.
Scroll down and tap Safari to open the screen that contains everything related to the Safari web browser on your iPhone, iPad, or iPod touch.
Scroll to the bottom of the page and select Advanced .
Move the Web Inspector toggle switch to the On position.
Connect Your iOS Device to Safari on a Mac
To use the Web Inspector, connect your iPhone or another iOS device to a Mac that has the Safari web browser and enable the Develop menu .
With Safari open, select Safari from the menu bar and choose Preferences .
Select the Advanced tab.
Select the Show Develop menu in menu bar check box and close the settings window.
From the Safari menu bar, select Develop and choose the name of your attached iOS device, then select the URL that appears under Safari to open the debug console for that site.
After you connect your device, use your Mac to inspect the website you want to debug and have it open in the Safari mobile browser.
What Is Web Inspector?
Web developers use Web Inspector to modify, debug, and optimize websites on Macs and iOS devices. With Web Inspector open, developers can inspect the resources on a web page. The Web Inspector window contains editable HTML and notes regarding the styles and layers of the web page in a separate panel.
Before iOS 6, the iPhone Safari web browser had a built-in Debug Console that developers used to find web page defects. Recent versions of iOS use Web Inspector instead.
With Safari 9 and OS X Mavericks (10.9), Apple introduced Responsive Design Mode in Web Inspector. Developers use this built-in simulator to preview how web pages scale to different screen sizes, resolutions, and orientations.
To set up Web Inspector on your iPad, open your iPad's Settings and select Safari > Advanced , then turn Web Inspector On . Connect the iPad to a Mac computer, then open Safari on the Mac and select Safari > Preferences > Advanced , then turn on Show Develop menu in menu bar .
You cannot just connect your iPhone to a Windows PC and start using Web Inspector through Chrome like you can with a Mac. Installing package manager software can provide you a sort of workaround, but it's not recommended unless you're familiar with the package management app you intend to use.
Get the Latest Tech News Delivered Every Day
- Add More Features by Turning on Safari's Develop Menu
- 4 Ways to Play Fortnite on iPhone
- How to Activate and Use Responsive Design Mode in Safari
- How to Change the Default Search Engine in Chrome for iOS
- What Is Safari?
- How to Inspect an Element on a Mac
- How to Use Web Browser Developer Tools
- How to Disable JavaScript in Safari for iPhone
- How to Clear Search History on iPhone
- 10 Hidden Features in macOS Sonoma
- How to View HTML Source in Safari
- How to Manage History and Browsing Data on iPhone
- How to Change Your Homepage in Safari
- How to Manage Cookies in the Safari Browser
- How to Reset Safari to Default Settings
- How to Clear Private Data, Caches, and Cookies on Mac
How to Open Safari Developer Tools & Enable Mobile View Mode

John on May 12, 2021

In this tutorial, we will learn how to open the Safari developer console and enable mobile view for responsive web development.
How to Enable Safari Developer Tools
If you don't have developer tools enabled in Safari, you will need to do this before the console can be opened by using the following steps:
- From the main menu go to Safari > Preferences (or use the CMD + , keyboard shortcut.)
- Go to the Advanced tab.
- Check "Show Developer menu in menu bar"
Open the Safari Developer Console
Now open the developer console in responsive mode by going to the menu and selecting Develop > Enter Responsive Design Mode :

Alternatively, use the keyboard shortcut CTRL + CMD + R to enter responsive developer mode.
Now you can work on your website in a variety of different mobile device screen sizes by selecting them at the top of the page:

Related Tutorials

How to Stop DDOS Attacks & Prevent Future Downtime
-1589655824.jpg "safari enable developer tools")
How to Enable Night Light Mode on Windows 10

How to View Desktop Site on iPhone with Safari

How to Use Grep Command to Search Files in Linux

How to Find Words on a Page using Safari on iPhone

How to Clear & Save Disk Storage Space on a Mac

Dive into the Summer ’24 Release
As an admin, you can help your organization succeed by staying up to date with the latest Salesforce releases and getting familiar with product enhancements.
Check out the Summer ’24 release notes for a list of new features and available updates.
Did you find this helpful?
Help us enhance your experience.

Product Area
Feature impact.

- How It Works
- Requirements for Mobile Publisher for Experience Cloud
- LWR Platform (Beta) Limitations
- Prepare Your App’s Information for Android
- Prepare Your App’s Information for iOS
- Create a Mobile Publisher Project
- Get Started with the Playground App
- Enable Cross-Website Tracking for the Publisher Playground App (iOS)
- Show or Hide Login Bar
- Playground App for Android
- Preview Your Experience Site on iOS (Simulator)
- Preview Your Experience Site on Android (Emulator)
Enable Safari Developer Tools
- Debug a Mobile Component (Safari)
- Enable Developer Mode on Your Emulated Device
- Debug a Mobile Component (Chrome)
- Test How URLs Open in the Playground Publisher App
- How to Check Your Experience Cloud Site URL
- Advantages of Binary Upload Distribution Method
- App Distribution Type Considerations
- Choose Distribution Type
- Create a Placeholder App
- Mobile Publisher Best Practices for App Content Declarations
- Update Test User Credentials
- Create Service Account User and Find Your Google Play Developer ID
- Grant Permission to Distribute Your Branded App
- Register Your Firebase App to Enable Mobile Publisher Android Push...
- Enter Your Information into Your Mobile Publisher Project for Android
- Register Salesforce Bundle ID
- Invite Salesforce to Your App Store Connect Account
- Record Your Apple Developer Team Account Info
- Enter Your Apple Developer Information into Your Mobile Publisher...
- Find Your Managed Google Play Organization Info
- Find Your Apple Deployment Programs Account Info
- Unlisted Option for iOS App Distribution
- Change Distribution Type for iOS
- Change Distribution Types for Android
- Change Distribution Account for iOS
- Change Distribution Account for Android
- Urge or Require Users to Update to the Latest Mobile Publisher App...
- Allow Experience Cloud App Users to Initiate Deletion of Their Data
- Configure App Navigation
- Set Up the Navigation Tab Bar
- Manage How URLs Open from Your App
- Creating a Custom Login Flow
- Set Up Your Android App for Google’s Privacy Policy Requirements
- Create a Privacy Policy Page in Experience Builder
- Create a Custom User Profile Menu Item for Your App’s Privacy Policy
- Add a Privacy Policy for Binary Uploads
- iPad Support Opt In
- Create a Certificate Signing Request
- Create Developer ID Certificate
- Find Your Certificate ID
- Configure Your Branded App with Apple
- Create an Apple Auth. Provider in Salesforce
- Update the Apple Configuration with the Callback URL
- Test the SSO Connection
- Create a Registration Handler
- Enable Advanced Authentication for a Mobile Publisher App
- Create a Support Case to Use Advanced Authentication for a Mobile...
- Test Your Mobile Publisher App’s Single Sign-On with Apple ID
- User Opt-In Biometric Login (Beta)
- Enable User Opt-In Biometric Login (Beta)
- Enable Mandatory Biometric ID App Unlock for iOS and Android
- Set Time Value for Biometric Login
- Pre-Authorize User App Access Through Connected App Policies
- Create Custom Notifications for Your App
- Test Marketing Cloud Push Notifications
- Enable Marketing Cloud Push Notifications for Mobile Publisher Apps
- Mobile Publisher Fields for Enabling Marketing Cloud Push...
- Create a Permission Set and Grant API Enabled Access (Optional)
- Enable Full Content Push Notifications for Experience Cloud App
- Enable App Permissions for Device Capabilities
- App Permissions on Android Devices
- Scan Barcodes with a Mobile Device Camera
- Implement and Use Location-Based Features
- Implement a Contact Import Feature
- Access the Mobile Device Calendar
- Best Practices and Guidelines for App Rating and Feedback Requests
- Identify a User with a Mobile Device’s Biometrics Capabilities
- Set Up URL Schemes
- Use App Links with Mobile Publisher for Experience Cloud (Android)
- Use Universal Links with Mobile Publisher for Experience Cloud (iOS)
- Override Android App Links to Your Mobile Publisher App
- Override iOS Universal Links to Your Mobile Publisher App
- Enable Cross-Website Tracking (iOS)
- App Tracking Transparency (iOS)
- Add a Smart App Banner
- Add a Pass to Apple Wallet (iOS Only)
- Supported Objects for Download
- About Managed Packages
- Request a Managed Package
- Install a Managed Package
- Request a Beta Version of Your App
- Test with the UI Test Automation Model (UTAM) for Your App
- Switch Between Testing Modes in the Experience Cloud App
- Submit the App for Approval
- Types of Maintenance
- Create a New Version of Your Mobile Publisher for Experience Cloud App
- Managed Package Maintenance
- Considerations Before Changing Your Experience Cloud Site URL
- Authentication
- Temporarily Remove Mobile Publisher Apps from Sale
- Decommission a Mobile Publisher App
- Suggestions to Prevent App Store and Play Store Rejections
- Identify the Version of Your Experience Cloud App
- Mobile Publisher for Experience Cloud FAQ
- Known Issues and Limitations for Mobile Publisher
Start the debugging process for your iOS app.
Required Editions
- On your desktop development machine, open Safari.
- Select Safari | Preferences .
- Select Advanced .
- Check the Show Develop menu in menu bar box. The Safari developer tools are now available from the Develop menu in the menu bar.
Cookie Consent Manager
General information, required cookies, functional cookies, advertising cookies.
We use three kinds of cookies on our websites: required, functional, and advertising. You can choose whether functional and advertising cookies apply. Click on the different cookie categories to find out more about each category and to change the default settings. Privacy Statement
Required cookies are necessary for basic website functionality. Some examples include: session cookies needed to transmit the website, authentication cookies, and security cookies.
Functional cookies enhance functions, performance, and services on the website. Some examples include: cookies used to analyze site traffic, cookies used for market research, and cookies used to display advertising that is not directed to a particular individual.
Advertising cookies track activity across websites in order to understand a viewer’s interests, and direct them specific marketing. Some examples include: cookies used for remarketing, or interest-based advertising.
Cookie List
- Chrome for Developers
Full accessibility tree in Chrome DevTools

Chrome DevTools is launching a full accessibility tree making it easier for developers to get an overview of the whole tree. In this post find out how this tree is created and how to use it in your work.
What is the accessibility tree?
Assistive technology such as screen readers use Chromium’s accessibility API to interact with web content. The underlying model of this API is the accessibility tree: a tree of accessibility objects that assistive technology can query for attributes and properties and perform actions on . Web developers shape and manipulate the accessibility tree primarily through DOM properties such as ARIA attributes for HTML .
In Chrome DevTools , we provide the accessibility pane to help developers understand how their content is exposed to assistive technology. Concretely, when a node is selected in the DOM tree viewer, the properties of the corresponding accessibility node displays in the pane together with a view of the node's ancestors and its immediate children.

How is the tree created?
Before we get to what this new full tree view looks like in DevTools, let us briefly go over what the accessibility tree is in more tangible terms. The accessibility tree is a derivative of the DOM tree. Its structure is roughly the same, but simplified to remove nodes with no semantic content such as a <div> element purely used for styling. Each node in the tree has a role such as Button or Heading , and often a name that can be either from ARIA attributes or derived from the node’s contents. If we look at an HTML document:
The renderer in Chromium, named Blink, derives an internal accessibility tree roughly as follows.
Note that this representation contains multiple superfluous nodes with role genericContainer , which seemingly contradicts the statement above that the accessibility tree is a simplified derivative of the DOM tree. Still, most of these nodes only occur in the internal tree and would not be exposed to assistive technology. Since DevTools collects its accessibility information directly from the renderer process, this is the tree representation that DevTools handles.
Full accessibility tree in DevTools
The new, full accessibility tree synchronized with the DOM tree so developers can switch back and forth between the two trees. We hope that the new tree will prove more explorable, useful, and easier to use.
Now that you know how the accessibility tree works, you can use DevTools to see how the new tree view looks. The following HTML document with a title, heading, and two buttons is used to show the tree.
The previous tree view would only enable you to explore a single node and its ancestors.

Now, when you toggle the new tree, it replaces the DOM tree view and allows you to see the full accessibility tree for the page:

Lazy tree construction
To make the tree performant even for larger sites, the tree is lazily constructed on the frontend as it is explored. Once a node is expanded in the tree, the children for the nodes are fetched through Chrome DevTools Protocol (CDP) and the tree is rebuilt.

The new tree view is live and dynamically updates if the accessibility tree changes in the renderer. It hooks into the same mechanics that would notify assistive technology of changes to the tree, and uses that to emit events to the DevTools frontend with updated nodes. In practice, the CDP backend listens for updates to the tree, keeps track of which nodes have been requested before, and sends events to the DevTools frontend if any of these nodes changes.
The tale of many trees
In the description of what the accessibility tree is you learned how Blink constructs an accessibility tree for the DOM it is rendering, and DevTools fetches this tree through CDP. While this is true, we left out some complications in this description. In reality, there are quite a lot of different ways to experience the accessibility tree in Chromium. When designing the new tree view for DevTools, we have made some choices along the way about what part of Chromium’s accessibility internals we wanted to surface.
Every platform has a different accessibility API and while the shape of the tree is the same across all platforms, the API for interacting with the tree is different, and the names of attributes can differ. DevTools shows Chromium’s internal tree where roles and attributes tend to match those defined in the ARIA specification.
Multiple frames and site isolation
Since Chromium not only puts the content of every tab in different renderer processes but also isolates cross-site documents in different renderer processes , we have to connect to each out-of-process child document separately over CDP and fetch its accessibility tree. We then stitch these subtrees together on the frontend to give the illusion of one coherent tree, although they live in different renderer processes in Chromium.
Ignored and uninteresting nodes
We hide some nodes per default: ignored nodes, and nodes with role “generic” with no name. These nodes carry no semantic meaning and, in the case of ignored nodes, are not exposed to assistive technology. We hide these nodes to avoid cluttering the tree view. If we did not, the accessibility tree for most web pages would instead look something like this:

The caveat here is that this essentially means that we need to construct yet another tree than what is available on the backend. Say, for example, that we have nodes A, B, C, and X where A has child X and B, and X has child C. If X is an ignored node, we prune X from the tree and instead create a tree where C is a child to A.

On the frontend, we construct the full tree including ignored nodes and only prune them just before rendering the nodes. We do this for two reasons:
- It makes it much simpler to handle node updates from the backend , since we have the same tree structure on both endpoints. For example, if the node B is removed in the example, we would receive an update for node X (since its children have changed), but if we had pruned that node we would struggle to figure out what to update.
- It ensures that all DOM nodes have a corresponding accessibility node. When the tree is toggled, we select the node corresponding to the node currently selected in the DOM tree. So for the previous example, if the user toggles the tree while the DOM node corresponding to X is selected, we inject X between the nodes A and B and select X in the tree. This allows the user to inspect the accessibility node for all DOM nodes and help determine why the node is ignored.
Future ideas
Launching the new accessibility tree is just the start. We have a few ideas for future projects we could build on top of the new view, but we are also eager to hear your feedback !
Alternative filterings
As explained above, we currently filter out nodes that are deemed uninteresting. We could provide a way to disable this behavior and show all nodes, or provide alternative filterings such as Show landmark nodes or Show headings .
Highlight a11y issues
We could incorporate an “accessibility best practice” analysis with the tree and highlight accessibility issues directly on the offending nodes.
Surface accessibility actions in DevTools
The tree we currently show is purely one-way: It allows us to get an idea of what information would be fed to assistive technology when browsing a specific webpage. Accessibility actions represent the communication in the other direction: They allow assistive technology to act on the presented UI. We could surface such actions in DevTools to allow actions such as “clicking”, scrolling, or changing values on the page using the API available to assistive technology.
Except as otherwise noted, the content of this page is licensed under the Creative Commons Attribution 4.0 License , and code samples are licensed under the Apache 2.0 License . For details, see the Google Developers Site Policies . Java is a registered trademark of Oracle and/or its affiliates.
Last updated 2021-12-13 UTC.
View in English
visionOS Pathway

Start your path
Pathways are simple and easy-to-navigate collections of the videos, documentation, and resources you'll need to start building great apps and games.
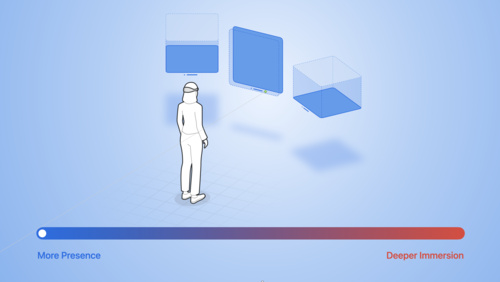
Apple Vision Pro offers an infinite canvas to explore, experiment, and play, giving you the freedom to completely rethink your experience for spatial computing. People can interact with your app while staying connected to their surroundings, or immerse themselves completely in a world of your creation. Best of all, familiar frameworks like SwiftUI, UIKit, RealityKit, and ARKit can help you build apps for visionOS — no matter your prior experience developing for Apple platforms.
What you’ll learn
- How to plan and create a visionOS app for Apple Vision Pro
- Where to download Apple design tools and resources
- How to benefit from the Human Interface Guidelines
What you’ll need
- Xcode to build, test, and distribute
New to Apple?
Get started as an apple developer, have a visionos question, check out the apple developer forums, learn the building blocks of spatial computing.
Discover the fundamentals that make up spatial computing, like windows, volumes, and spaces. Then, find out how familiar frameworks can help you use these elements to build engaging and immersive experiences.
- Adding 3D content to your app
- Creating your first visionOS app
- Creating fully immersive experiences in your app
Get started with building apps for spatial computing

Develop your first immersive app
Create accessible spatial experiences
Meet SwiftUI for spatial computing
Meet UIKit for spatial computing
Design for visionos.
Find out how you can design great apps, games, and experiences for spatial computing. Discover brand-new inputs and components. Dive into depth and scale. Add moments of immersion. Create spatial audio soundscapes. Find opportunities for collaboration and connection. And help people stay grounded to their surroundings while they explore entirely new worlds. Whether this is your first time designing spatial experiences or you’ve been building fully immersive apps for years, learn how you can create magical hero moments, enchanting soundscapes, human-centric UI, and more — all with visionOS.

Principles of spatial design
Design for spatial user interfaces

Design for spatial input

Design spatial SharePlay experiences

Explore immersive sound design

Design considerations for vision and motion
Related documentation.
- Designing for visionOS
- Designing for spatial layout
- Designing immersive experiences
- Designing for eyes
- Designing for gestures
Create for visionOS
When you build apps for visionOS, you can mix and match windows, volumes, and spaces at any time in your app to create the right moments for your content.
Note: People can also run your existing iPadOS or iOS app as a compatible app in visionOS. Your app appears as a single, scalable window in the person’s surroundings.
Get the proper tools
Start the software development process by downloading Xcode — Apple’s integrated development environment. Xcode offers a complete set of tools to develop software, including project management support, code editors, visual editors for your UI, debugging tools, simulators for different devices, tools for assessing performance, and much more. Xcode also includes a complete set of system code modules — called frameworks — for developing your software.
- Download Xcode

To create a new project in Xcode, choose File > New > Project and follow the prompts to create a visionOS app. All new projects use SwiftUI, which offers a modern declarative programming model to create your app’s core functionality.
SwiftUI works seamlessly with Apple’s data management technologies to support the creation of your content. The Swift standard library and Foundation framework provide structural types such as arrays and dictionaries, and value types for strings, numbers, dates, and other common data values. For any custom types you define, adopt Swift’s Codable support to persist those types to disk. If your app manages larger amounts of structured data, SwiftData, Core Data, and CloudKit offer object-oriented models to manage and persist your data.
You can also use Unity’s robust, familiar authoring tools to create new apps and games. Get access to all the benefits of visionOS, like passthrough and Dynamically Foveated Rendering, in addition to familiar Unity features like AR Foundation.
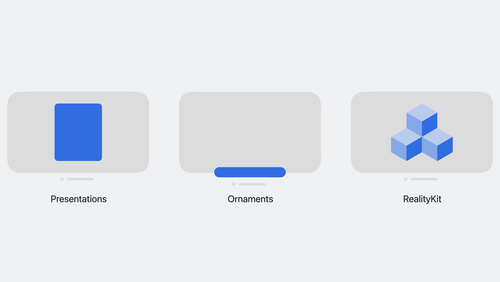
Add a new dimension to your interface
When building your app, start with a window and add elements as appropriate to help immerse people in your content. Add a volume to showcase 3D content, or increase the level of immersion using a Full Space. The mixed style configures the space to display passthrough, but you can apply the progressive or full style to increase immersion and minimize distractions.
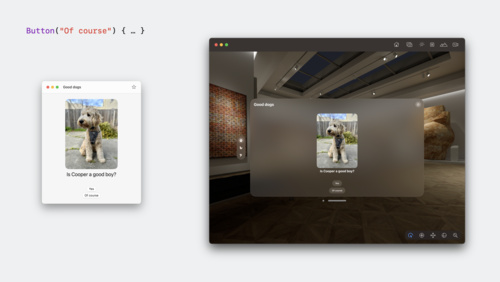
- Add depth to your windows: Apply depth-based offsets to views to emphasize parts of your window, or to indicate a change in modality. Incorporate 3D objects directly into your view layouts to place them side by side with your 2D views.
- Add hover effects to custom views: Highlight custom elements when someone looks at them using hover effects. Customize the behavior of your hover effects to achieve the look you want.
- Implement menus and toolbars using ornaments: Place frequently used tools and commands on the outside edge of your windows using ornaments .
RealityKit plays an important role in visionOS apps, and you use it to manage the creation and animation of 3D objects in your apps. Create RealityKit content programmatically, or use Reality Composer Pro to build entire scenes that contain all the objects, animations, sounds, and visual effects you need. Include those scenes in your windows, volumes, or spaces using a RealityView. In addition, take advantage of other 3D features in your apps:
- Adopt MaterialX shaders for dynamic effects: MaterialX is an open standard supported by leading film, visual effects, entertainment, and gaming companies. Use existing tools to create MaterialX shaders, and integrate them into your RealityKit scenes using Reality Composer Pro .
- Store 3D content in USDZ files: Build complex 3D objects and meshes using your favorite tools and store them as USDZ assets in your project. Make nondestructive changes to your assets in Reality Composer Pro and combine them into larger scenes.
- Create previews of your 3D content in Xcode: Preview SwiftUI views with 3D content directly from your project window. Specify multiple camera positions for your Xcode previews to see your content from different angles.
Devise straightforward interactions
In visionOS, people interact with apps primarily using their eyes and hands. With an indirect gesture, a person looks at an object, and then selects it by tapping a finger to their thumb. With a direct gesture, the person’s finger interacts with the object in 3D space. When handling input in your app:
- Adopt the standard system gestures: Rely on tap, swipe, drag, touch and hold, double-tap, zoom, and rotate gestures for the majority of interactions with your app. SwiftUI and UIKit provide built-in support for handling these gestures across platforms.
- Add support for external game controllers: Game controllers offer an alternative form of input to your app. The system automatically directs input from connected wireless keyboards, trackpads, and accessibility hardware to your app’s event-handler code. For game controllers, add support explicitly using the Game Controller framework .
- Create custom gestures with ARKit: The system uses ARKit to facilitate interactions with the person’s surroundings. When your app moves to a Full Space, you can request permission to retrieve the position of the person’s hands and fingers and use that information to create custom gestures.
In a Full Space, ARKit provides additional services to support content-related interactions. Detect surfaces and known images in the person’s surroundings and attach anchors to them. Obtain a mesh of the surroundings and add it to your RealityKit scene to enable interactions between your app’s content and real-world objects. Determine the position and orientation of Apple Vision Pro relative to its surroundings and add world anchors to place content.
Create next-level audio and video
Apple Vision Pro supports stereoscopic video to help movies and other entertainment leap off the screen and into the person’s surroundings. Spatial Audio is the default experience in visionOS, so think about how you want to take advantage of that experience.
- Update video assets for 3D: Take movie night to the next level by playing 3D movies in an immersive 3D environment. The QuickTime file format supports the inclusion of content that appears to jump right off the screen. Play your movies using AVKit and AVFoundation . Include atoms for stereoscopic content in your movie files.
- Incorporate support for Spatial Audio: Build your app’s music player using AVFAudio , which contains the audio-specific types from the AVFoundation framework. Take your audio into another dimension using PHASE , which supports the creation of complex, dynamic Spatial Audio experiences in your games and apps.
- Stream live or recorded content: Learn how to create streamed content and deploy it to your server using HTTP Live Streaming . Play back that streamed content from your app using AVFoundation .
Embrace inclusion
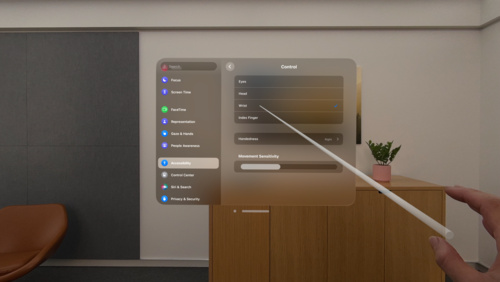
Creating an inclusive app ensures that everyone can access your content. Apple technologies support inclusivity in many different ways. Make sure to support these technologies throughout your app. Find out more about ensuring inclusion across all platforms in the HIG .
- Update accessibility labels and navigation: Apple builds accessibility support right into its technologies, but screen readers and other accessibility features rely on the information you provide to create the accessible experience. Review accessibility labels and other descriptions to make sure they provide helpful information, and make sure focus-based navigation is simple and intuitive. See Accessibility .
- Support alternative ways to access features: Give people alternative ways to select and act on your content, such as menu commands or game controllers . Add accessibility components to RealityKit entities so people can navigate and select them using assistive technologies.
- Add VoiceOver announcements: When VoiceOver is active in visionOS, people navigate their apps using hand gestures. If they enable Direct Gesture mode to interact with your app instead, announcements make sure they can still follow interactions with your content.
- Include captions for audio content: Captions are a necessity for some, but are practical for everyone in certain situations. For example, they’re useful to someone watching a video in a noisy environment. Include captions not just for text and dialogue, but also for music and sound effects in your app. Make sure captions you present in a custom video engine adopt the system appearance .
- Consider the impacts of vision and motion: Motion effects can be jarring, even for people who aren’t sensitive to motion. Limit the use of effects that incorporate rapid movement, bouncing or wave-like motion, zooming animations, multi-axis movement, spinning, or rotations. When the system accessibility settings indicate reduced motion is preferred, provide suitable alternatives. See Human Interface Guidelines > Motion .
For additional information about making apps accessible in visionOS, see Improving accessibility support in your visionOS app .
Test and tune
There are multiple ways you can test your app during development and make sure it runs well on Apple Vision Pro.
- Test and debug your app thoroughly: During development, debug problems as they arise using the built-in Xcode debugger . Build automated test suites using XCTest and run them during every build to validate that new code works as expected. Run those tests under different system loads to determine how your app behaves.
- Be mindful of how much work you do: Make sure the work your app performs offers a tangible benefit. Optimize algorithms to minimize your app’s consumption of CPU and GPU resources. Identify bottlenecks and other performance issues in your code using the Instruments app that comes with Xcode. See Creating a performance plan for your visionOS app .
- Adopt a continuous integration (CI) workflow: Adopt a CI mindset by making sure every commit maintains the quality and stability of your code base. Run performance-related tests as part of your test suite. Use the continuous integration system of Xcode Cloud to automate builds, test cycles, and the distribution of your apps to your QA teams.
Dive deeper into SwiftUI and RealityKit
For more on SwiftUI and RealityKit, explore a dedicated series of sessions focusing on SwiftUI scene types to help you build great experiences across windows, volumes, and spaces. Get to know the Model 3D API, learn how you can add depth and dimension to your app, and find out how to render 3D content with RealityView. And we’ll help you get ready to launch into ImmersiveSpace — a new SwiftUI scene type that lets you make great immersive experiences for visionOS. Learn best practices for managing your scene types, increasing immersion, and building an "out of this world" experience.
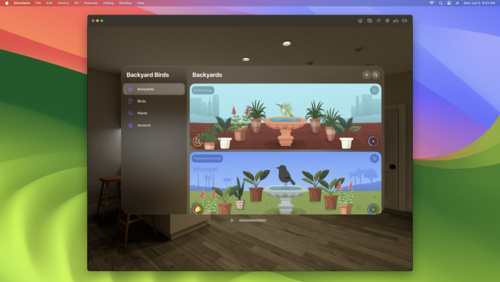
Elevate your windowed app for spatial computing

Take SwiftUI to the next dimension

Go beyond the window with SwiftUI
- Hello World
- Presenting windows and spaces
- Positioning and sizing windows
From there, learn how you can bring engaging and immersive content to your app with RealityKit. Get started with RealityKit entities, components, and systems, and find out how to add 3D models and effects to your project. We’ll show you how you can embed your content into an entity hierarchy, blend virtual content and the real world using anchors, bring particle effects into your apps, add video content, and create more immersive experiences with portals.

Enhance your spatial computing app with RealityKit

Build spatial experiences with RealityKit
- Understanding RealityKit’s modular architecture
Rediscover ARKit
visionOS uses ARKit algorithms to handle features like persistence, world mapping, segmentation, matting, and environment lighting. These algorithms are always running, allowing apps and games to automatically benefit from ARKit while in the Shared Space. Once your app opens a dedicated Full Space, it can take advantage of ARKit APIs and blend virtual content with the real world.
We’ll share how this framework has been completely reimagined to let you build interactive experiences — all while preserving privacy. Discover how you can make 3D content that interacts with someone’s room — whether you want to bounce a virtual ball off the floor or throw virtual paint on a wall. Explore the latest updates to the ARKit API and follow along as we demonstrate how to take advantage of hand tracking and scene geometry in your apps.
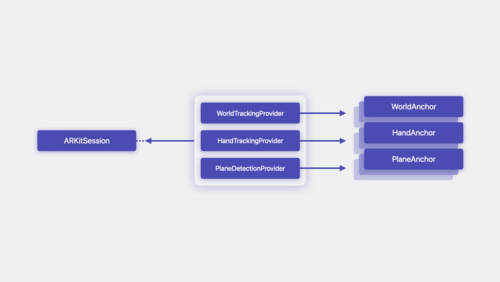
Meet ARKit for spatial computing
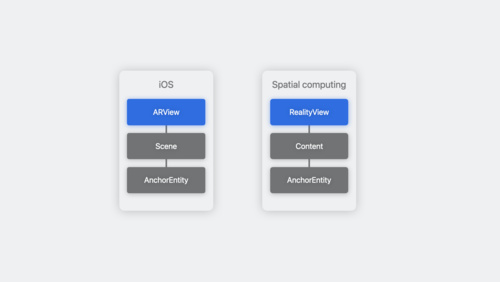
Evolve your ARKit app for spatial experiences
- Setting up access to ARKit data
- Placing content on detected planes
- Incorporating real-world surroundings in an immersive experience
- Tracking specific points in world space
- Tracking preregistered images in 3D space
Explore more developer tools for visionOS
Apple offers a comprehensive suite of tools to help you build great apps, games, and experiences for visionOS. You’ve already explored Xcode above — now find out how to take advantage of Reality Composer Pro in your 3D development workflow, and discover how you’ll be able use Unity’s authoring tools to create great experiences for spatial computing.
Meet Reality Composer Pro
Discover a new way to preview and prepare 3D content for your visionOS apps. Available later this month, Reality Composer Pro leverages the power of USD to help you compose, edit and preview assets, such as 3D models, materials, and sounds. We’ll show you how to take advantage of this tool to create immersive content for your apps, add materials to objects, and bring your Reality Composer Pro content to life in Xcode. We’ll also take you through the latest updates to Universal Scene Description (USD) on Apple platforms.

Explore materials in Reality Composer Pro

Work with Reality Composer Pro content in Xcode

Explore the USD ecosystem
- Designing RealityKit content with Reality Composer Pro
Get started with Unity
Learn how you can build visionOS experiences directly in Unity. Discover how Unity developers can use their existing 3D scenes and assets to build an app or game for visionOS. Thanks to deep integration between Unity and Apple frameworks, you can create an experience anywhere you can use RealityKit — whether you’re building 3D content for a window, volume, or the Shared Space. You also get all the benefits of building for Apple platforms, including access to native inputs, passthrough, and more. And we’ll also show you how you can use Unity to create fully immersive experiences.
- Learn more about building apps in Unity

Create immersive Unity apps

Bring your Unity VR app to a fully immersive space
Learn about testflight and app store connect.
App Store Connect will provide the tools you need to manage, test, and deploy your visionOS apps on the App Store. We’ll share basics and best practices for deploying your first spatial computing app, adding support for visionOS to an existing app, and managing compatibility. We’ll also show you how TestFlight for visionOS lets you test your apps and collect valuable feedback as you iterate.

Explore App Store Connect for spatial computing
Dive deeper into creating for visionos, build for collaboration, sharing, and productivity.
Sharing and collaboration make up a central part of visionOS by offering experiences in apps and games that make people feel present as if they were in the same space. By default, people can share any app window with others on a FaceTime call, just like they can on Mac. But when you adopt the GroupActivities framework, you can create next-generation collaborative experiences.
Get started designing and building for SharePlay on Apple Vision Pro by learning about the types of shared activities you can create in your app. Discover how you can establish shared context between participants in your experiences and find out how you can support even more meaningful interactions in your app by supporting spatial Personas.

Build spatial SharePlay experiences
Build games and media experiences.
Discover how you can create truly immersive moments in your games and media experiences with visionOS. Games and media can take advantage of the full spectrum of immersion to tell incredible stories and connect with people in a new way. We’ll show you the pathways available for you to get started with game and narrative development for visionOS. Learn ways to render 3D content effectively with RealityKit, explore design considerations for vision and motion, and find out how you can create fully immersive experiences that transport people to a new world with Metal or Unity.

Build great games for spatial computing

Explore rendering for spatial computing

Discover Metal for immersive apps
Sound can also dramatically enhance the experience of your visionOS apps and games — whether you add an effect to a button press or create an entirely immersive soundscape. Learn how Apple designers select sounds and build soundscapes to create textural, immersive experiences in windows, volumes, and spaces. We’ll share how you can enrich basic interactions in your app with sound when you place audio cues spatially, vary repetitive sounds, and build moments of sonic delight into your app.
If your app or game features media content, we’ve got a series of sessions designed to help you update your video pipeline and build a great playback experience for visionOS. Learn how you can expand your delivery pipeline to support 3D content, and get tips and techniques for spatial media streaming in your app. We’ll also show you how to create engaging and immersive playback experiences with the frameworks and APIs that power video playback for visionOS.

Deliver video content for spatial experiences

Create a great spatial playback experience
- Destination Video
- Configuring your app for media playback
- Adopting the system player interface in visionOS
- Controlling the transport behavior of a player
- Monitoring playback progress in your app
- Trimming and exporting media in visionOS
Run your iPad and iPhone apps in visionOS
Discover how you can run your existing iPadOS and iOS apps in visionOS. Explore how iPadOS and iOS apps operate on this platform, learn about framework dependencies, and find out about the Designed for iPad app interaction. When you’re ready to take your existing apps to the next level, we’ll show you how to optimize your iPad and iPhone app experience for the Shared Space and help you improve your visual treatment.

Run your iPad and iPhone apps in the Shared Space

Enhance your iPad and iPhone apps for the Shared Space
- Take your iPad and iPhone apps even further on Apple Vision Pro
- Bringing your existing apps to visionOS
- Bringing your ARKit app to visionOS
- Checking whether your existing app is compatible with visionOS
- Making your existing app compatible with visionOS
Once you have an app up and running, look for additional ways to improve the experience.
Build web experiences
Discover the web for visionOS and learn how people can experience your web content in a whole new way. Explore the input model for this platform and learn how you can optimize your website for spatial computing. We’ll also share how emerging standards are helping shape 3D experiences for the web, dig into the latest updates to Safari extensions, and help you use the developer features in Safari to prototype and test your experiences for Apple Vision Pro.

Meet Safari for spatial computing
What’s new in Safari extensions
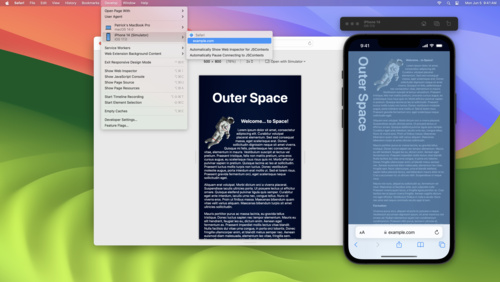
Rediscover Safari developer features
Whether you use Quick Look on the web or in your app, learn how you can add powerful previews for 3D content, spatial images and videos, and much more. We’ll share the different ways that the system presents these experiences, demonstrate how someone can drag and drop this content to create a new window in the Shared Space, and explore how you can access Quick Look directly within an app. We’ll also go over best practices when creating 3D content for Quick Look in visionOS, including important considerations for 3D quality and performance.
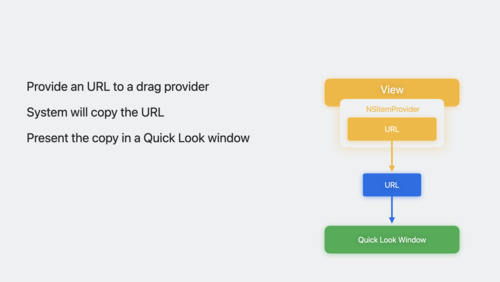
Discover Quick Look for spatial computing

Create 3D models for Quick Look spatial experiences
Discover more.
Discover the tools that can help students express themselves and prepare for the future.
Join us for sessions, workshops, labs, and consultations — tailored for you.
The home for in-person events and activities around the world.
Take part in a one-on-one technology lab for underrepresented founders and developers with app-driven businesses.
Get help with tools and technologies.
Join us online for the biggest developer event of the year.
COMMENTS
If you're a web developer, the Safari Develop menu provides tools you can use to make sure your website works well with all standards-based web browsers. If you don't see the Develop menu in the menu bar, choose Safari > Settings, click Advanced, then select "Show features for web developers.". See also Change Advanced settings in ...
How to Enable the Develop Menu in Safari on Mac. You can easily turn on the Develop menu in Safari by following a couple of steps. Open Safari on your Mac and click the "Safari" button in the menu bar. Next, select "Preferences." Alternatively, you can use the keyboard shortcut Command+, (comma).
Display the Develop Menu in Safari . Before you can use the Develop menu, you must first make the hidden menu visible. This is an easy task, much easier than revealing the Debug menu that—prior to Safari 4—contained all the commands that are now in the Develop menu. However, don't think that the older Debug menu is no longer relevant; it still exists and contains many useful tools.
To enable Safari Developer Tools, open Safari, click Safari in your menu bar, and then select Preferences. You can also use Command-Comma keyboard shortcut to open Safari's Preferences dialog. Locate and select the Advanced menu. At the bottom of this menu you should see a checkbox that is labeled "Show Develop menu in menu bar".
To debug your website using the Responsive Design mode on Safari, follow the steps mentioned below: Enable the Developer Menu. To do that, launch the Safari Browser on your Mac computer. Go to Preferences > Advanced and check the Show Develop menu in the menu bar. Navigate to the website you want to debug.
To access developer tools in Safari, enable the Show Develop menu in menu bar option by going to Preferences > Advanced. Then, use the Develop menu in the menu bar to open the developer tools. Salman Khan. Salman works as a Content Manager at LambdaTest. He is a Computer science engineer by degree and an experienced Tech writer who loves to ...
These built-in tools provide web developers with capabilities for debugging JavaScript, inspecting CSS, monitoring network requests, analyzing performance, auditing accessibility, and more. Safari's developer tools are especially useful for testing and debugging web apps specifically within the Safari browser on macOS and iOS.
Access the "Develop" Menu: Click on the "Develop" option in the menu bar. If you don't see the "Develop" menu, you may need to enable it first. To do this, go to "Safari" > "Preferences" > "Advanced" and check the box next to "Show Develop menu in menu bar." Open Developer Tools: Once you have accessed the "Develop" menu, you will find a list ...
To initiate the process of opening Developer Tools in Safari on a Mac, you can follow these simple steps: Using the Menu Bar: Launch Safari on your Mac and navigate to the menu bar located at the top of the screen. Click on "Safari" in the menu bar to reveal a dropdown menu. From the dropdown menu, select "Preferences" to access Safari's settings.
If you're a web developer, the Safari Develop menu provides tools you can use to make sure your website works well with all standards-based web browsers. If you don't see the Develop menu in the menu bar, choose Safari > Preferences, click Advanced, then select "Show Develop menu in menu bar.". See also Safari for Developers. In Safari ...
To enable Developer Tools in Safari, follow these simple steps: Open Safari Preferences: Launch Safari and navigate to the "Safari" menu located in the top-left corner of the screen. From the drop-down menu, select "Preferences." Access Advanced Settings: In the Preferences window, click on the "Advanced" tab.
Activating the Develop Menu. In the Advanced tab, you'll see a checkbox that says "Show Develop menu in the menu bar". Check this box to enable the Develop menu. Now that you've enabled the Develop menu, you'll see it in the top menu bar, between Bookmarks and Window. Click on it to see the various options available to you.
How to Activate the iPhone Debug Console or Web Inspector. Use Safari's web developer tools to study problematic websites. Activate Web Inspector on iOS: Go to Settings > Safari > Advanced and move the Web Inspector toggle switch to the On position. Use Web Inspector on macOS: Connect your iOS device to a Mac and choose the URL to inspect from ...
How to Enable Safari Developer Tools. If you don't have developer tools enabled in Safari, you will need to do this before the console can be opened by using the following steps: From the main menu go to Safari > Preferences (or use the CMD + , keyboard shortcut.) Go to the Advanced tab. Check "Show Developer menu in menu bar".
To access the Responsive Design Mode, enable the Safari Develop menu. Follow the steps below to enable the Develop menu: Launch Safari browser. Click on Safari -> Settings -> Advanced. Select the checkbox -> Show Develop menu in menu bar. Once the Develop menu is enabled, it'll show up in the menu bar as shown in the image below: Note ...
On the ipad go to Settings > Safari > Advanced and activate the Web Inspector. Connect your ipad with your computer. On your computer open Safari, enable the developer tools in the settings. check the above menu for the tab Developer and find your iPad there. Full control via console from your desktop machine over the iOS Safari and you're done ...
Available in: all editions except Starter. On your desktop development machine, open Safari. Select Safari | Preferences. Select Advanced. Check the Show Develop menu in menu bar box. The Safari developer tools are now available from the Develop menu in the menu bar. Let us know so we can improve!
Disable site-specific hacks. On rare occasions, when a particular website does not work correctly in Safari, modifications are made in browser code to get that site to work. This setting disables such modifications to make it possible for the site's developers to debug their problem. If there are no site-specific hacks, this setting has no ...
Safari for developers. Safari is the best way to experience the internet on iPhone, iPad, and Mac. Thanks to blazing-fast performance and industry-leading energy efficiency, millions of users enjoy exploring the web with Safari. Take advantage of powerful new features, advanced developer tools, and cutting-edge technologies in Safari to deliver ...
In Chrome DevTools, we provide the accessibility pane to help developers understand how their content is exposed to assistive technology. Concretely, when a node is selected in the DOM tree viewer, the properties of the corresponding accessibility node displays in the pane together with a view of the node's ancestors and its immediate children.
If they enable Direct Gesture mode to interact with your app instead, ... Explore more developer tools for visionOS. Apple offers a comprehensive suite of tools to help you build great apps, games, and experiences for visionOS. ... dig into the latest updates to Safari extensions, and help you use the developer features in Safari to prototype ...