Borg Armadas
Borg cubes and mega cubes (group).
Run these in your vidar. 5/6/Khan or Sisko/Miles/6 for dps. One person run Sisko/Miles/Gorkon or Lorca for Hullbreach

Borg Spheres (Solo)
Solo Borg armadas are run with Three of your own Ships. The fights are short and you get a huge damage boost from research in the combat tree, so ramping damage and burning add very little to your total damage. Focus on mitigation, extra shots, and critical damage. Hull breach provides a huge damage boost and should always be run with either Lorca or Gorkon on one ship.
There is research in the combat tree at the far end of it to buff damage for Federation, Romulan, Klingon, and the ISS Jellyfish. Grab every one that's relevant to any ship you want to run at your solo armada.
Get an officer running mitigation on all your ships. There are quite a few ways to do this

This is the highest damage output of the three mitigation crews discussed here. Dont bother with changeling kira, she's not very effective. Six of Eleven also can't overcome borg sphere mitigation. Use the extra spot for hull breach. This crew works very well with Gorkon, because mile's extra shots gives more rolls to activate, and Sisko's crit ramp will essentially guarantee 100% up time on hull breach after only a few rounds.

This is a good middle ground between damage and loot yield. The last slot can go to either khan for dps, or to utility. Seven or borg queen provide more value than 6 because borg mitigation is so high.

Kind of a niche pick, it's interesting because picard's captain maneuver will add a 120% boost to all officer maneuvers. So an officer ability with a value of let's say 10, would have 12 added to it for a total of 22. this means putting either Georgiou or Lorca side car would give them over 100% chance to activate every round.

These crewes do essentially the same thing; regen shields and raise mitigation. Spock's ability to regen shields is largely based on how much defense you can stack lower decks, as well as the tier of your spock. Once you progress beyond 35 uncommon solo armadas, Spock probably wont be regenerating enough shields to make this crew worthwhile. if your morale ship's shields are depleted in your combat log, it might be time to stop crewing Spock and just use another mitigation crew. The choice between Beverly and Zhou is based on their teir, and you should choose whichever has the higher value of defense to mitigation.
On The Enterprise

Smilar to running kirk and Spock on another ship, The Enterprise's ship ability regens shields with no need for Spock. This leaves you with a free officer slot to use for utility or damage.
Important single officers
These go in your empty crew slots
Other officers (I don't have them to test)
The fights are short, so front loading damage with Jadzia Dax's captain maneuver and Julian's officer maneuver might be effective if you can find another way to mitigate damage (cloaking research, cerritos boost, 34 epic mitigation ship skins, other mitigation research)
Memory Beta, non-canon Star Trek Wiki
A friendly reminder regarding spoilers ! At present the expanded Trek universe is in a period of major upheaval with the continuations of Discovery and Prodigy , the advent of new eras in gaming with the Star Trek Adventures RPG , Star Trek: Infinite and Star Trek Online , as well as other post-57th Anniversary publications such as the ongoing IDW Star Trek comic and spin-off Star Trek: Defiant . Therefore, please be courteous to other users who may not be aware of current developments by using the {{ spoiler }}, {{ spoilers }} OR {{ majorspoiler }} tags when adding new information from sources less than six months old (even if it is minor info). Also, please do not include details in the summary bar when editing pages and do not anticipate making additions relating to sources not yet in release. THANK YOU
- Memory Beta articles sourced from episodes and movies
- Borg starship classes
- Borg assimilators
- 24th century Borg starship classes
Borg assimilator
- View history
During the incident with Species 8472 , the original assimilator was replaced with a vastly different type of vessel acquired from the Liberated , which utilized decentralized technology that was more resistant to 8472's bioweapons. This decentralized technology was later utilized in other Borg vessels, including cubes and spheres . ( TNG video game : Armada II , TNG novel : Greater Than the Sum )
Known assimilators [ ]
- 1 Ferengi Rules of Acquisition
- 2 The Chase
- 3 ISS Enterprise (NCC-1701)

TREKCORE > GAMING > ARMADA II > SHIPS AND STATIONS > Borg
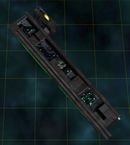
- Special Weapon: Transwarp Drive The interceptor can be adapted with a transwarp drive. This modification allows the interceptor to instantaneously move to a location currently within line-of-sight of the collective or its allies, regardless of the distance.
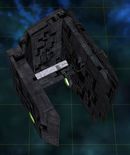
- Special Weapon: Tachyon Detection Grid The Detector can be adapted to use a Tachyon Detection Grid., allowing it to locate cloaked ships within its sensor range.
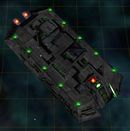
- Note: Borg boarding parties can only be transported onto a ship whose shields are down. Transport attack will direct the ship to fire at an enemy vessel until the shields are down, and then drones will begin transporting aboard. In addition, the Wedge must also lower its own shields during the transport process, leaving it vulnerable to enemy fire.
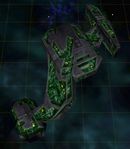
- Special Weapon: Auto-Assimilator The Assimilator can be adapted with an Auto-Assimilator. This beam transfers the crew of an enemy ship from its target and incorporates them into the Collective on board the Assimilator.

- Special Weapon: Regeneration The Sphere can be adapted to engage its regenerative systems. Regenerating the Sphere temporarily increases its repair rate and shield recharge rate.
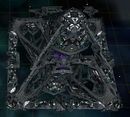
Special Weapons:
- Shield Remodulation The Diamond can be adapted to modify the shields of an allied vessel, making them temporarily impervious to attack.
- Computer Override The Diamond can be adapted to emit an override frequency to an enemy vessel, allowing the Collective to temporarily take control of it.
- Nanites The Diamond can be adapted to inject Borg Nanites into an enemy�s communications system. Infecting an opponent with Nanites results in a scrambling of the enemy�s computer interface.
- Ultrium Burst The Diamond can be adapted to fire an Ultrium Burst at multiple enemy targets it has determined as unsuitable for assimilation. The Ultrium Burst severely damages all vessels it targets.
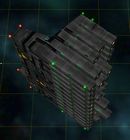
- Special Weapon: Special Energy Recharger Will recharge the special weapons energy of any friendly ships within a specified distance.
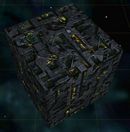
- Holding Beam The Cube can be adapted to use a Holding Beam on an enemy vessel. The Holding Beam restricts movement of an enemy vessel and transfers drones directly onto the enemy ship.
- Technology Assimilation Beam This beam is available on all Cube-class ships once you posses a Technology Assimilator. The beam immobilizes the target vessel and assimilates a special weapon from the target vessel (assuming one is present), giving that Cube-class ship the ability to use that special weapon. If more than one special weapon is present on the target vessel, then a special weapon is assimilated at random. Assimilating a special weapon and then bringing that Cube to a technology assimilator station can equip all Cube-class ships in your fleet with that special weapon.
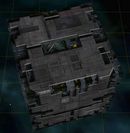
- Holding Beam (see Cube for description)
- Technology Assimilation Beam (see Cube for description)
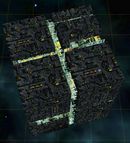
- Tachyon Detection Grid -- Detector
- Transwarp Drive -- Interceptor
- Auto-Assimilator -- Assimilator
- Regeneration -- Sphere
- Holding Beam -- Cube
- Special Energy Recharger -- Harmonic Defender
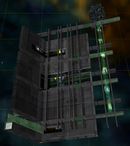
Researched at the Technology Assimilator, the Collective Hub is the Technology that is necessary to assemble Fusion Cubes and Tactical Fusion Cubes out of groupings of eight Cubes or Tactical Cubes.
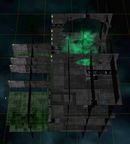
- Shield Remodulation -- Diamond
- Computer Overdrive -- Diamond
- Nanites -- Diamond
- Ultrium Burst -- Diamond

- PlayStation 3
- PlayStation 4
- PlayStation 5
- Xbox Series
- More Systems
Star Trek: Armada II – Guide and Walkthrough

Guide and Walkthrough (PC) by SimonWiles
Version: 1.0a | Updated: 11/05/2003
View in: Text Mode

- View history
The Borg cube was a type of starship used by the Borg Collective in the 24th century . Along with the Borg sphere , cubes were among the primary types of vessel for its fleet . ( TNG : " Q Who ", " The Best of Both Worlds "; Star Trek: First Contact )
Described as mighty and omnipotent, Borg cubes were considered one of the most destructive weapons ever known. ( PIC : " Maps and Legends ")
- 1 Encounters
- 2.2 Interior
- 2.3 Propulsion systems
- 2.4 Maintenance and repair
- 2.5 Support vehicles
- 2.6 Tactical systems and Combat performance
- 3 Known vessels
- 4.1 Appearances
- 4.2 Background information
- 4.3 Studio models
- 4.4 Apocrypha
- 4.5 External link
Encounters [ ]
The USS Enterprise -D came into contact with a single cube in System J-25 in 2365 , marking the first official Federation contact with a Borg cube. However, civilian researchers on board the USS Raven had previously tracked a Borg cube in 2347 , twelve years earlier. ( TNG : " Q Who "; VOY : " The Raven ", " Dark Frontier ")
Every Starfleet encounter with a single cube resulted in heavy casualties. At the Battle of Wolf 359 in 2367 , an armada of forty Starfleet ships were assembled to stop a cube; thirty-nine of those ships were lost in a matter of minutes. Dozens more were destroyed stopping another cube in the incursion of 2373 . ( TNG : " The Drumhead "; Star Trek: First Contact ) Normally a single Borg cube was capable of assimilating all elements of civilization from an entire planet . ( TNG : " The Best of Both Worlds, Part II "; VOY : " Unity ", " Dark Frontier ", " Child's Play ")
When the Enterprise -D experienced malfunctions due to Wesley Crusher's nanites in 2366 , sensors erroneously detected an approaching cube. ( TNG : " Evolution ")
Millions of cubes were estimated to exist in Borg space in the Delta Quadrant ; ( VOY : " Dragon's Teeth ", " Dark Frontier ", " Unimatrix Zero ", " Unimatrix Zero, Part II ") the largest single grouping of cubes directly observed by Starfleet was fifteen, by the crew of the USS Voyager in late 2373 . ( VOY : " Scorpion ") When describing the assimilation of his world, Arturis said that hundreds of cubes surrounded his homeworld before its destruction. ( VOY : " Hope and Fear ") Seven of Nine stated to Captain Janeway that the nebula concealing the transwarp hub contained at least 47 Borg vessels. ( VOY : " Endgame ")
At some point around 2380 , eleven Romulan D'deridex -class warbirds battled six Borg cubes. The USS Cerritos was present for this conflict, but fled the scene. The Cerritos also fled a similar battle between four Borg cubes, eight D'deridex -class warbirds, two Pakled Clumpships , and several Klingon Birds-of-Prey . ( Star Trek: Lower Decks opening credits )
In 2384 , the USS Protostar encountered a dormant Borg cube in the Beta Quadrant . ( PRO : " Let Sleeping Borg Lie ")
In 2401 , the Borg Queen arrived in the Alpha Quadrant in a unique Borg cube to meet Jack Crusher and begin the assimilation of Starfleet and the Federation. ( PIC : " Võx ") The cube hid in the Great Red Spot of Jupiter where it was found by the Enterprise -D broadcasting the Borg's command signal. The cube was quickly determined to only be 36% operational as most of its resources were being used to broadcast the signal. After detecting the Enterprise -D, the cube lowered its shields and redirected its weapons in an invitation. Deducing that there was a beacon transmitting the signal across the solar system, Picard, Riker and Worf beamed aboard to find Jack and the coordinates for the beacon so that the Enterprise could target it while La Forge, Beverly Crusher , Deanna Troi and Data remained on the ship to help guide them. On the cube, they found only a handful of drones still alive with the rest having been cannibalized by the Borg Queen to survive following the decimation of the Collective by Kathyrn Janeway's neurolytic pathogen . As Picard worked to free Jack from the Queen's control, Riker and Worf located the beacon and transmitted the coordinates to the Enterprise , fighting off a few surviving drones. Dodging the cube's defenses, Data flew the Enterprise through the superstructure to the beacon. On La Forge's orders, Crusher destroyed the beacon with the Enterprise 's phasers and photon torpedoes, setting off a cataclysmic chain reaction that destroyed the Borg cube, the Borg Queen and the last of the Borg Collective, finally ending its threat for good. The Enterprise managed to beam out the away team and Jack and escape from the cube's destruction just in time. The destruction of the Borg cube broke the Borg's control over Starfleet, saving the Federation. ( PIC : " The Last Generation ")
Technical data [ ]
Borg cubes were described as massive in size, measuring over three kilometers along an edge and possessing an internal volume of 28 cubic kilometers . ( VOY : " Dark Frontier ")
The Borg cube was constructed of tritanium , an alloy known for its extreme hardness. ( VOY : " Endgame ")
In 2366 , Commander Elizabeth Shelby estimated that a cube could remain functional even if 78% of it was rendered inoperable due to the decentralized and redundant nature of its key systems. ( TNG : " The Best of Both Worlds ")
Interior [ ]
Borg cubes were highly decentralized in structure with no specific bridge , living quarters or engineering sections. All vital systems were spread throughout the ship, which, along with the presence of a regenerative hull, made it highly resistant to damage and system failures. ( TNG : " Q Who ")
They were typically manned by "thousands of drones," and could vary in complement anywhere from 5,000 to 64,000 to 129,000 drones. ( VOY : " Collective ", " Unimatrix Zero ", " Dark Frontier ")
Information and Collective communication were routed through power waveguide conduits and distribution nodes . Its exterior design consisted of perpendicular and diagonal grids, struts, and weaponry, allowing a characteristic green light to emanate from within. ( TNG : " Q Who ", " The Best of Both Worlds ", " The Best of Both Worlds, Part II ")
Some vessels were equipped with maturation chambers . ( TNG : " Q Who "; VOY : " Collective ")
The internal pressure aboard a Borg cube was two kilopascals above what would be normal on a Federation starship . The humidity was on average 92%, and the temperature was at 39.1 °C . ( Star Trek: First Contact ) The atmosphere contained traces of tetryon particles. ( VOY : " Infinite Regress ")

Propulsion systems [ ]

Depiction of cube entering a transwarp conduit
Borg cubes were capable of both warp and transwarp velocities, thanks partly to the Borg Collective's network of transwarp corridors and hubs . When a Borg cube enters a transwarp conduit , it projects a structural integrity field ahead of itself to compensate for the extreme gravimetric shear . ( VOY : " Inside Man ") To compensate for the extreme temporal stress while traveling through these corridors, and remain in temporal sync, a chroniton field was also projected through specially designed conduits. ( VOY : " Shattered ") Borg cubes did not present with the twin warp nacelle configuration utilized by nearly all warp-capable species, and the technology by which a Borg cube achieves warp speed is unknown. A Borg cube's maximum warp factor appeared to be greater than that of a Galaxy -class starship, as the Enterprise -D, during its first encounter with a Borg cube, was not able to maintain its distance from one such vessel when it attempted to flee. ( TNG : " Q Who ")
Maintenance and repair [ ]

Drones repair damage to a Borg cube
The drones on board a Borg ship, through means not fully understood by the Federation, could essentially will it to repair itself. During the Enterprise -D's first encounter with a Borg cube, it inflicted damage to approximately 20% of the Borg vessel, only for the ship to repair virtually all of that damage within 20 minutes. This process could occur even while the ship was at warp speed or while it was engaged in combat. ( TNG : " Q Who ") In 2399 , the cube known as the Artifact used small, automated robots to repair its hull and internal systems upon activation by Fenris Ranger Seven of Nine . ( PIC : " Broken Pieces ")
Support vehicles [ ]

Borg Sphere emerges from a cube
Ships up to the size of a Borg sphere were able to be docked inside a Borg cube for assimilation, supplies or escape purposes.
At least one Borg cube, and possibly others of its class, contained a Borg sphere . The only known recorded purpose of a sphere disengaged from a Borg cube was for escape. The sphere was the only documented support vehicle a Borg cube possessed. ( Star Trek: First Contact )
Tactical systems and Combat performance [ ]
Though Borg cubes possess a multitude of energy weapon emitters and projectile launchers, initial scans of a Borg cube performed by the Enterprise -D were unable to identify any weapons systems of any design known to the Federation. ( TNG : " Q Who ")
The primary tactic employed by Borg cubes when engaging another vessel was to seize it with a tractor beam that would also drain its shields . Once locked on, the tractor beam of a cube could drain the shields of a Galaxy -class starship within seconds and hold it immobile against the full force of its warp drive . ( TNG : " Q Who ") Once the target ship was defenseless, the cube could perform any action ranging from destruction to assimilation. ( TNG : " The Best of Both Worlds "; DS9 : " Emissary ") The Borg could also use the tractor beam to destroy unshielded enemy vessels without the use of any additional weaponry. ( Star Trek: First Contact ) The standard deflector shields of Starfleet vessels could resist the tractor beam if the crew of the ship in question cycled the shields through different energy frequencies, but only for a short time. ( TNG : " The Best of Both Worlds ")
Following the failure of enemy shields, the cube could engage a high-energy laser cutting beam to slice sections of the ship for assimilation. ( TNG : " Q Who ")
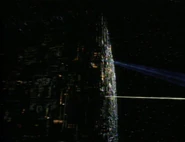
If assimilation was unwarranted, the cutting beam could also be used as a weapon to destroy resisting vessels. During the Battle of Wolf 359 , the Excelsior -class USS Melbourne and the Miranda -class USS Saratoga were annihilated by cutting beams. The cutting beam could either slice into a ship with pinpoint precision, or it could be used to disintegrate large portions of an enemy vessel. Additionally, it could be fired with the tractor beam as a single attack, with the cutting beam manifesting inside the area of effect of the tractor beam. As demonstrated on the USS Melbourne at Wolf 359, combining the weapons in this fashion could destroy even a shielded enemy vessel within seconds. ( DS9 : " Emissary ")
Another tactic that could be used to disable enemy ships was to fire a type of missile weapon, the primary function of which appeared to be to drain a target's shields. These missiles appeared to be reserved for situations in which using the tractor beam was not feasible, such as an enemy vessel being out of range. Three such missiles were capable of disabling a Galaxy -class class vessel's shields. A hit from the weapon at an unshielded target could disable its warp drive without otherwise damaging it. ( TNG : " Q Who ")
The cubes could also use dispersal fields to disrupt the sensor and transporter function of enemy vessels. ( VOY : " Collective ") The Borg were capable of transporting through the active shields of both Galaxy and Intrepid -class starships. ( TNG : " Q Who "; VOY : " Scorpion ")
In addition, a Borg cube's weaponry also included other destructive beam and projectile weapons. During the 2366-2367 incursion, a cube obliterated three ships of the Mars Defense Perimeter with projectiles. ( TNG : " The Best of Both Worlds, Part II ") Similar projectiles were used to destroy a Steamrunner -class and a Saber -class starship during the Battle of Sector 001 . ( Star Trek: First Contact ) The concentrated fire of three beam weapons was able to reduce USS Voyager 's ablative generator -deployed armor hull integrity, a highly advanced future Starfleet defense technology, to 40%. ( VOY : " Endgame ")
Borg cubes did not appear to utilize traditional energy shields. Instead, they seemed to employ a subspace electromagnetic field that could be altered to adapt to enemy weaponry. This made destroying Borg vessels exceedingly difficult, as most weapons employed against them tended to either not work at all, or to become completely useless after a few shots. ( TNG : " Q Who ") This problem could be overcome to a degree by varying the frequency and modulation of the energy of the weapons in question, but even this tended to fail after a short time. ( TNG : " The Best of Both Worlds ")
Borg could also adapt to explosives, such as photon torpedoes, with ease. The Borg could similarly adapt their weapons to the technology of their opponent's defenses. During their second encounter with a Borg cube, the crew of the Enterprise -D was able to prevent a Borg tractor beam from locking onto them by rapidly modulating the energy frequency of their shields. However, less than half a minute later, the Borg adapted the energy of the tractor beam to compensate for the rapidly shifting energy of the shields, and all further attempts to use this tactic failed within seconds. ( TNG : " The Best of Both Worlds ")
Starfleet's two engagements with Borg cubes were extremely costly. In the first case, at the Battle of Wolf 359 , the Borg had assimilated Jean-Luc Picard mere hours before and had gained access to his vast knowledge of Starfleet tactics and operations. As such, the battle saw 39 out of 40 ships destroyed with virtually negligible damage to a Borg vessel. The Borg vessel then continued nearly unimpeded to Earth and was stopped only by the ingenuity of the Enterprise -D's crew. ( TNG : " The Best of Both Worlds, Part II ")
However, a similar engagement several years later saw a similarly large Federation fleet perform considerably better against another Borg cube. Though it suffered heavy casualties, the fleet managed to inflict heavy damage to the cube's outer hull and cause the vessel's power grid to begin fluctuating. The vessel was eventually destroyed primarily due the intervention of Captain Picard, whose residual telepathic link to the Collective furbished him with knowledge of a (presumably) battle-induced weak spot on the Borg vessel, which was subsequently targeted by the entire fleet. ( Star Trek: First Contact )
Due to the adaptive qualities of the Borg electromagnetic field, the only quasi-reliable way of destroying a Borg cube was to use a weapon so powerful that just one or two shots would destroy it. Such weapons included the modified deflector weapon of a Galaxy -class starship, transphasic torpedoes, and the energy beam weapons of Species 8472 . ( VOY : " Endgame ") However even weapons such as these could be adapted to. Another tactic that appeared to have at least some measure of success in combatting the Borg was to utilize unfamiliar evasive maneuvering sequences in order to keep the Borg tractor beams in particular from draining a ship's shields. ( TNG : " The Best of Both Worlds, Part II "; Star Trek: First Contact )
Known vessels [ ]
- Cube 858779
- The Artifact
- Borg Queen's cube (unique, larger variant)
- First's cube
- Locutus' cube
Appendices [ ]
Appearances [ ].
- " The Best of Both Worlds "
- " The Best of Both Worlds, Part II "
- Star Trek: First Contact
- DS9 : " Emissary "
- " Scorpion "
- " Scorpion, Part II "
- " Hope and Fear "
- " Drone " (on astrometrics screen)
- " Dark Frontier "
- " The Voyager Conspiracy " (on astrometrics screen)
- " Collective "
- " Child's Play " (on astrometrics screen)
- " Unimatrix Zero "
- " Unimatrix Zero, Part II "
- " Inside Man " (on astrometrics screen)
- " Endgame "
- " Remembrance "
- " Maps and Legends "
- " The End is the Beginning "
- " Absolute Candor "
- " The Impossible Box "
- " Nepenthe "
- " Broken Pieces "
- " Et in Arcadia Ego, Part 1 "
- " Et in Arcadia Ego, Part 2 "
- " The Last Generation "
- Opening credits
- " I, Excretus " (holographic recreation)
- " wej Duj "
- PRO : " Let Sleeping Borg Lie "
Background information [ ]
Ronald D. Moore suggested that the vulnerable spots on the Borg cube in Star Trek: First Contact were waste extraction . ( AOL chat , 1998 )
Although no Borg cubes appear in ENT : " Regeneration ", the cube design of Borg vessel was referred to in the final draft script of that episode, which commented that a corridor aboard the transport Arctic One was to be "almost indistinguishable from one on a Borg cube."
Studio models [ ]
Apocrypha [ ].
Borg cubes make appearances in the Star Trek: Armada and Star Trek: Armada II games. In the second game, a "fusion cube" and "tactical fusion cube" are seen, and used by those playing as the Borg. The first consists of eight regular cubes connected to each other and is the size of a planetoid, such as Pluto . The second is composed of eight tactical cubes connected to each other and is the size of a planet, such as Mars . Both are designated battleships and hold the assimilator beam device and three "captured" special weapons taken from an enemy race.
In Star Trek: Starfleet Command III , Borg cubes are the Borg's battleship-type vessel and the most powerful playable Borg ship.
External link [ ]
- Borg cube at Memory Beta , the wiki for licensed Star Trek works
- 3 ISS Enterprise (NCC-1701)
- View history
To write a new article, just enter the article title in the box below.
Registering
- Feel free to register and join our user base by clicking here .
Not sure where to start?
- Find out more about the wiki on the Help page.
Adding content
- If you are unsure of what to do or how to create a page, search for a few articles on the same topic and see what they look like. You can always view the source code in a wiki and learn from what others have done.
- 1 Klingon Empire
- 2 Romulan Star Empire
- 3 Excalibur-class
Borg Solo Armadas
The Borg Solo Armadas closely resemble the Dominion Solo Armadas, although, to date, the uncommon ones appear slightly less formidable. By using comparable crew setups, you should achieve favorable outcomes. Assemble three proficient armada crews with ships of an appropriate level, and you’ll be able to steadily navigate through these encounters.
Sourcing Borg Solo Armada Directives
To obtain Directives, head to the Borg refinery. If you possess a tier 9 Vi’dar, you can purchase 100 Regular Directives daily (lower tiers are limited to 9 directives per day and should refrain from buying). Once you defeat these armadas, you can exchange the loot for a chest containing 100 Rare Directives. Subsequently, by defeating rare armadas, you can exchange the loot for a chest containing 200 Epic Directives. Assuming the loot quantity is similar to that of Dominion Solo Armadas, you should be able to acquire a regular chest approximately every other day, a rare chest approximately every sixth day, and an epic chest approximately every eighteenth day.
Moreover, these chests will reward you with the Commander XP required to upgrade your admirals—Kirk, Spock, Locutus—and Borg Officer Shards.
Crews for Borg Solo Armadas
- Five of Eleven (captain), Six of Eleven , and Khan Below desk focus on attack & health.
Location of Borg Solo Armadas
Borg solo armada stats by level, borg sphere (35 - u).
Collective Thinking
The Borg’s strength lies in their singlemindedness. Research the Translink Disruptor in the Combat Research Tree to bring down Borg communications and increase your combat power against Borg Solo Armadas.
But watch out! If not defeated, the Borg Sphere fully regenerates hull health.
*Ship Abilities are always active.
- Borg Solo Armada Credit Uncommon 0 – 9,562
- Foreknowledge buff for Vi’dar Talios 0 – 1
- Megnomis (35) > Warp 35
- Atraxi (35) > Warp 35
Power: 91,631,505
Attack (3,665,259)
DPR: 2,382,418 Armor Piercing: 175,932.6 Accuracy: 146,610.6 Shield Piercing: 190,593.4 Critical Chance: 10% Critical Damage: 150%
Defense (12,828,410)
Armor: 795,361 Shield Deflection: 1,026,273 Dodge: 744,048
Health (75,137,836)
Shield Health: 75,137,836 Hull Health: 75,137,836
Type: Energy Shot: 1 Warmup: 1 Cooldown: 1 Accuracy: 142,485 Penetration: 170,982 Modulation: 185,230 Min Dmg: 323,848 Max Dmg: 481,501 Crit Chance: 10% Crit Dmg: 150%
Type: Kinetic Shot: 1 Warmup: 1 Cooldown: 2 Accuracy: 149,361 Penetration: 179,233 Modulation: 194,169 Min Dmg: 759,793 Max Dmg: 928,632 Crit Chance: 10% Crit Dmg: 150%
Borg Sphere (41 - U)
- Borg Solo Armada Credit Uncommon 0 – 17,863
- Petoran (42) > Warp 40
Power: 113,695,919
Attack (4,547,836)
DPR: 3,025,918 Armor Piercing: 166,397 Accuracy: 151,594.5 Shield Piercing: 189,314.5 Critical Chance: 10% Critical Damage: 150%
Defense (15,917,430)
Armor: 986,881 Shield Deflection: 1,273,394 Dodge: 923,211
Health (93,230,653)
Shield Health: 93,230,653 Hull Health: 93,230,653
Type: Energy Shot: 1 Warmup: 1 Cooldown: 1 Accuracy: 148,023 Penetration: 177,628 Modulation: 192,430 Min Dmg: 336,436 Max Dmg: 500,216 Crit Chance: 10% Crit Dmg: 150%
Type: Kinetic Shot: 1 Warmup: 1 Cooldown: 2 Accuracy: 155,166 Penetration: 155,166 Modulation: 186,199 Min Dmg: 825,755 Max Dmg: 1,009,252 Crit Chance: 10% Crit Dmg: 150%
Borg Sphere (42 - R)
- Borg Solo Armada Credit Rare 0 – 14,864
Power: 247,050,887
Attack (9,882,036)
DPR: 6,575,046 Armor Piercing: 361,565.5 Accuracy: 329,401 Shield Piercing: 411,363.5 Critical Chance: 10% Critical Damage: 150%
Defense (34,587,125)
Armor: 2,144,402 Shield Deflection: 2,766,970 Dodge: 2,006,053
Health (202,581,726)
Shield Health: 202,581,726 Hull Health: 202,581,726
Type: Energy Shot: 1 Warmup: 1 Cooldown: 1 Accuracy: 321,640 Penetration: 385,969 Modulation: 418,133 Min Dmg: 731,044 Max Dmg: 1,086,924 Crit Chance: 10% Crit Dmg: 150%
Type: Kinetic Shot: 1 Warmup: 1 Cooldown: 2 Accuracy: 337,162 Penetration: 337,162 Modulation: 404,594 Min Dmg: 1,794,291 Max Dmg: 2,193,015 Crit Chance: 10% Crit Dmg: 150%
Borg Sphere (43 - E)
- Borg Solo Armada Credit Epic 0 – 22,153
Power: 279,167,504
Attack (11,166,702)
DPR: 7,429,803 Armor Piercing: 408,569 Accuracy: 372,223.5 Shield Piercing: 464,840.5 Critical Chance: 10% Critical Damage: 150%
Defense (39,083,450)
Armor: 2,423,174 Shield Deflection: 3,126,676 Dodge: 2,266,840
Health (228,917,352)
Shield Health: 228,917,352 Hull Health: 228,917,352
Type: Energy Shot: 1 Warmup: 1 Cooldown: 1 Accuracy: 363,454 Penetration: 436,145 Modulation: 472,490 Min Dmg: 826,080 Max Dmg: 1,228,224 Crit Chance: 10% Crit Dmg: 150%
Type: Kinetic Shot: 1 Warmup: 1 Cooldown: 2 Accuracy: 380,993 Penetration: 380,993 Modulation: 457,191 Min Dmg: 2,027,549 Max Dmg: 2,478,107 Crit Chance: 10% Crit Dmg: 150%
Borg Sphere (45 - U)
- Borg Solo Armada Credit Uncommon 0 – 37,077
- Efros (46) > Warp 80
Power: 406,021,214
Attack (16,240,849)
DPR: 10,805,905 Armor Piercing: 594,222.5 Accuracy: 541,361.5 Shield Piercing: 676,064 Critical Chance: 10% Critical Damage: 150%
Defense (56,842,970)
Armor: 3,524,264 Shield Deflection: 4,547,438 Dodge: 3,296,892
Health (332,937,395)
Shield Health: 332,937,395 Hull Health: 332,937,395
Type: Energy Shot: 1 Warmup: 1 Cooldown: 1 Accuracy: 528,607 Penetration: 634,329 Modulation: 687,189 Min Dmg: 1,201,451 Max Dmg: 1,786,330 Crit Chance: 10% Crit Dmg: 150%
Type: Kinetic Shot: 1 Warmup: 1 Cooldown: 2 Accuracy: 554,116 Penetration: 554,116 Modulation: 664,939 Min Dmg: 2,948,867 Max Dmg: 3,604,157 Crit Chance: 10% Crit Dmg: 150%
Borg Sphere (46 - R)
- Borg Solo Armada Credit Rare 0 – 31,788
Power: 418,201,850
Attack (16,728,072)
DPR: 11,130,080 Armor Piercing: 612,049 Accuracy: 557,602.5 Shield Piercing: 696,346 Critical Chance: 10% Critical Damage: 150%
Defense (58,548,260)
Armor: 3,629,992 Shield Deflection: 4,683,861 Dodge: 3,395,799
Health (342,925,518)
Shield Health: 342,925,518 Hull Health: 342,925,518
Type: Energy Shot: 1 Warmup: 1 Cooldown: 1 Accuracy: 544,466 Penetration: 653,359 Modulation: 707,805 Min Dmg: 1,237,494 Max Dmg: 1,839,919 Crit Chance: 10% Crit Dmg: 150%
Type: Kinetic Shot: 1 Warmup: 1 Cooldown: 2 Accuracy: 570,739 Penetration: 570,739 Modulation: 684,887 Min Dmg: 3,037,333 Max Dmg: 3,712,281 Crit Chance: 10% Crit Dmg: 150%
Borg Sphere (47 - E)
- Borg Solo Armada Credit Epic 0 – 44,295
Power: 447,475,982
Attack (17,899,039)
DPR: 11,909,186 Armor Piercing: 654,892.5 Accuracy: 596,634.5 Shield Piercing: 745,090.5 Critical Chance: 10% Critical Damage: 150%
Defense (62,646,640)
Armor: 3,884,092 Shield Deflection: 5,011,731 Dodge: 3,633,505
Health (366,930,303)
Shield Health: 366,930,303 Hull Health: 366,930,303
Type: Energy Shot: 1 Warmup: 1 Cooldown: 1 Accuracy: 582,578 Penetration: 699,094 Modulation: 757,352 Min Dmg: 1,324,119 Max Dmg: 1,968,714 Crit Chance: 10% Crit Dmg: 150%
Type: Kinetic Shot: 1 Warmup: 1 Cooldown: 2 Accuracy: 610,691 Penetration: 610,691 Modulation: 732,829 Min Dmg: 3,249,946 Max Dmg: 3,972,140 Crit Chance: 10% Crit Dmg: 150%

Borg Sphere (48 - U)
- Borg Solo Armada Credit Uncommon 0 – 81,520
- Torovin (49) > Warp 80
Power: 503,499,981
Attack (20,140,000)
DPR: 13,400,218 Armor Piercing: 736,885 Accuracy: 671,333.5 Shield Piercing: 838,375.5 Critical Chance: 10% Critical Damage: 150%
Defense (70,490,000)
Armor: 4,370,380 Shield Deflection: 5,639,200 Dodge: 4,088,420
Health (412,869,981)
Shield Health: 412,869,981 Hull Health: 412,869,981
Type: Energy Shot: 1 Warmup: 1 Cooldown: 1 Accuracy: 655,517 Penetration: 786,620 Modulation: 852,172 Min Dmg: 1,489,899 Max Dmg: 2,215,198 Crit Chance: 10% Crit Dmg: 150%
Type: Kinetic Shot: 1 Warmup: 1 Cooldown: 2 Accuracy: 687,150 Penetration: 687,150 Modulation: 824,579 Min Dmg: 3,656,839 Max Dmg: 4,469,452 Crit Chance: 10% Crit Dmg: 150%
Borg Sphere (49 - R)
- Borg Solo Armada Credit Rare 0 – 71,568
Power: 519,072,141
Attack (20,762,887)
DPR: 13,814,656 Armor Piercing: 759,675.5 Accuracy: 692,096.5 Shield Piercing: 864,305 Critical Chance: 10% Critical Damage: 150%
Defense (72,670,100)
Armor: 4,505,546 Shield Deflection: 5,813,608 Dodge: 4,214,866
Health (425,639,154)
Shield Health: 425,639,154 Hull Health: 425,639,154
Type: Energy Shot: 1 Warmup: 1 Cooldown: 1 Accuracy: 675,791 Penetration: 810,949 Modulation: 878,528 Min Dmg: 1,535,978 Max Dmg: 2,283,709 Crit Chance: 10% Crit Dmg: 150%
Type: Kinetic Shot: 1 Warmup: 1 Cooldown: 2 Accuracy: 708,402 Penetration: 708,402 Modulation: 850,082 Min Dmg: 3,769,937 Max Dmg: 4,607,682 Crit Chance: 10% Crit Dmg: 150%
Borg Sphere (50 - E)
- Borg Solo Armada Credit Epic 0 – 99,513
Power: 639,050,476
Attack (25,562,021)
DPR: 17,007,776 Armor Piercing: 935,267 Accuracy: 852,067.5 Shield Piercing: 1,064,080.5 Critical Chance: 10% Critical Damage: 150%
Defense (89,467,065)
Armor: 5,546,958 Shield Deflection: 7,157,365 Dodge: 5,189,090
Health (524,021,390)
Shield Health: 524,021,390 Hull Health: 524,021,390
Type: Energy Shot: 1 Warmup: 1 Cooldown: 1 Accuracy: 831,993 Penetration: 998,392 Modulation: 1,081,591 Min Dmg: 1,891,004 Max Dmg: 2,811,565 Crit Chance: 10% Crit Dmg: 150%
Type: Kinetic Shot: 1 Warmup: 1 Cooldown: 2 Accuracy: 872,142 Penetration: 872,142 Modulation: 1,046,570 Min Dmg: 4,641,321 Max Dmg: 5,672,702 Crit Chance: 10% Crit Dmg: 150%
Borg Sphere (52 - U)
- Borg Solo Armada Credit Uncommon 0 – 176,776
- Thora-Beta-6 (53) > Warp 185
Power: 798,437,182
Attack (31,937,488)
DPR: 21,249,717 Armor Piercing: 1,168,533 Accuracy: 1,064,583 Shield Piercing: 1,329,474.5 Critical Chance: 10% Critical Damage: 150%
Defense (111,781,205)
Armor: 6,930,435 Shield Deflection: 8,942,496 Dodge: 6,483,310
Health (654,718,489)
Shield Health: 654,718,489 Hull Health: 654,718,489
Type: Energy Shot: 1 Warmup: 1 Cooldown: 1 Accuracy: 1,039,502 Penetration: 1,247,402 Modulation: 1,351,352 Min Dmg: 2,362,643 Max Dmg: 3,512,803 Crit Chance: 10% Crit Dmg: 150%
Type: Kinetic Shot: 1 Warmup: 1 Cooldown: 2 Accuracy: 1,089,664 Penetration: 1,089,664 Modulation: 1,307,597 Min Dmg: 5,798,921 Max Dmg: 7,087,540 Crit Chance: 10% Crit Dmg: 150%
Borg Sphere (53 - R)
- Borg Solo Armada Credit Rare 0 – 175,429
Power: 1,117,812,060
Attack (44,712,484)
DPR: 29,749,603 Armor Piercing: 1,635,946.5 Accuracy: 1,490,416.5 Shield Piercing: 1,861,264 Critical Chance: 10% Critical Damage: 150%
Defense (156,493,690)
Armor: 9,702,609 Shield Deflection: 12,519,495 Dodge: 9,076,634
Health (916,605,886)
Shield Health: 916,605,886 Hull Health: 916,605,886
Type: Energy Shot: 1 Warmup: 1 Cooldown: 1 Accuracy: 1,455,303 Penetration: 1,746,363 Modulation: 1,891,893 Min Dmg: 3,307,700 Max Dmg: 4,917,924 Crit Chance: 10% Crit Dmg: 150%
Type: Kinetic Shot: 1 Warmup: 1 Cooldown: 2 Accuracy: 1,525,530 Penetration: 1,525,530 Modulation: 1,830,635 Min Dmg: 8,118,489 Max Dmg: 9,922,556 Crit Chance: 10% Crit Dmg: 150%
Borg Sphere (54 - E)
- Borg Solo Armada Credit Epic 0 – 235,156
Power: 1,500,766,180
Attack (60,030,648)
DPR: 39,941,595 Armor Piercing: 2,196,409.5 Accuracy: 2,001,021.5 Shield Piercing: 2,498,920 Critical Chance: 10% Critical Damage: 150%
Defense (210,107,260)
Armor: 13,026,650 Shield Deflection: 16,808,581 Dodge: 12,186,221
Health (1,230,628,272)
Shield Health: 1,230,628,272 Hull Health: 1,230,628,272
Type: Energy Shot: 1 Warmup: 1 Cooldown: 1 Accuracy: 1,953,878 Penetration: 2,344,654 Modulation: 2,540,042 Min Dmg: 4,440,893 Max Dmg: 6,602,768 Crit Chance: 10% Crit Dmg: 150%
Type: Kinetic Shot: 1 Warmup: 1 Cooldown: 2 Accuracy: 2,048,165 Penetration: 2,048,165 Modulation: 2,457,798 Min Dmg: 10,899,824 Max Dmg: 13,321,950 Crit Chance: 10% Crit Dmg: 150%
Borg Sphere (56 - U)
- Borg Solo Armada Credit Uncommon 0 – 418,084
- Thora-Omega-2 (57) > Warp 205
Power: 2,101,072,659
Attack (84,042,909)
DPR: 55,918,233 Armor Piercing: 3,074,973.5 Accuracy: 2,801,430.5 Shield Piercing: 3,498,488 Critical Chance: 10% Critical Damage: 150%
Defense (294,150,175)
Armor: 18,237,311 Shield Deflection: 23,532,014 Dodge: 17,060,710
Health (1,722,879,575)
Shield Health: 1,722,879,575 Hull Health: 1,722,879,575
Type: Energy Shot: 1 Warmup: 1 Cooldown: 1 Accuracy: 2,735,430 Penetration: 3,282,516 Modulation: 3,556,059 Min Dmg: 6,217,250 Max Dmg: 9,243,875 Crit Chance: 10% Crit Dmg: 150%
Type: Kinetic Shot: 1 Warmup: 1 Cooldown: 2 Accuracy: 2,867,431 Penetration: 2,867,431 Modulation: 3,440,917 Min Dmg: 15,259,754 Max Dmg: 18,650,730 Crit Chance: 10% Crit Dmg: 150%
Borg Sphere (57 - R)
- Borg Solo Armada Credit Rare 0 – 477,642
Power: 2,269,158,474
Attack (90,766,337)
DPR: 60,391,691 Armor Piercing: 3,320,971 Accuracy: 3,025,544.5 Shield Piercing: 3,778,366.5 Critical Chance: 10% Critical Damage: 150%
Defense (317,682,190)
Armor: 19,696,296 Shield Deflection: 25,414,575 Dodge: 18,425,567
Health (1,860,709,947)
Shield Health: 1,860,709,947 Hull Health: 1,860,709,947
Type: Energy Shot: 1 Warmup: 1 Cooldown: 1 Accuracy: 2,954,264 Penetration: 3,545,117 Modulation: 3,840,543 Min Dmg: 6,714,630 Max Dmg: 9,983,385 Crit Chance: 10% Crit Dmg: 150%
Type: Kinetic Shot: 1 Warmup: 1 Cooldown: 2 Accuracy: 3,096,825 Penetration: 3,096,825 Modulation: 3,716,190 Min Dmg: 16,480,534 Max Dmg: 20,142,788 Crit Chance: 10% Crit Dmg: 150%
Borg Sphere (58 - E)
- Borg Solo Armada Credit Epic 0 – 641,866
Power: 2,496,074,319
Attack (99,842,975)
DPR: 66,430,860 Armor Piercing: 3,653,068.5 Accuracy: 3,328,099.5 Shield Piercing: 4,156,203.5 Critical Chance: 10% Critical Damage: 150%
Defense (349,450,400)
Armor: 21,665,925 Shield Deflection: 27,956,032 Dodge: 20,268,123
Health (2,046,780,944)
Shield Health: 2,046,780,944 Hull Health: 2,046,780,944
Type: Energy Shot: 1 Warmup: 1 Cooldown: 1 Accuracy: 3,249,691 Penetration: 3,899,629 Modulation: 4,224,598 Min Dmg: 7,386,093 Max Dmg: 10,981,723 Crit Chance: 10% Crit Dmg: 150%
Type: Kinetic Shot: 1 Warmup: 1 Cooldown: 2 Accuracy: 3,406,508 Penetration: 3,406,508 Modulation: 4,087,809 Min Dmg: 18,128,588 Max Dmg: 22,157,067 Crit Chance: 10% Crit Dmg: 150%
Borg Sphere (59 - U)
- Borg Solo Armada Credit Uncommon 0 – 967,723
- Orin-Theta-12 (59) > Warp 205
Power: 4,025,144,207
Attack (161,005,768)
DPR: 107,125,734 Armor Piercing: 5,890,901 Accuracy: 5,366,859 Shield Piercing: 6,702,251.5 Critical Chance: 10% Critical Damage: 150%
Defense (563,520,190)
Armor: 34,938,252 Shield Deflection: 45,081,615 Dodge: 32,684,171
Health (3,300,618,249)
Shield Health: 3,300,618,249 Hull Health: 3,300,618,249
Type: Energy Shot: 1 Warmup: 1 Cooldown: 1 Accuracy: 5,240,418 Penetration: 6,288,502 Modulation: 6,812,543 Min Dmg: 11,910,739 Max Dmg: 17,709,015 Crit Chance: 10% Crit Dmg: 150%
Type: Kinetic Shot: 1 Warmup: 1 Cooldown: 2 Accuracy: 5,493,300 Penetration: 5,493,300 Modulation: 6,591,960 Min Dmg: 29,233,978 Max Dmg: 35,730,263 Crit Chance: 10% Crit Dmg: 150%
Borg Sphere (60 - R)
- Borg Solo Armada Credit Rare 0 – 1,438,849
Power: 5,232,687,470
Attack (209,307,500)
DPR: 139,263,456 Armor Piercing: 7,658,171 Accuracy: 6,976,916.5 Shield Piercing: 8,712,927 Critical Chance: 10% Critical Damage: 150%
Defense (732,576,245)
Armor: 45,419,727 Shield Deflection: 58,606,100 Dodge: 42,489,422
Health (4,290,803,725)
Shield Health: 4,290,803,725 Hull Health: 4,290,803,725
Type: Energy Shot: 1 Warmup: 1 Cooldown: 1 Accuracy: 6,812,543 Penetration: 8,175,052 Modulation: 8,856,306 Min Dmg: 15,483,961 Max Dmg: 23,021,720 Crit Chance: 10% Crit Dmg: 150%
Type: Kinetic Shot: 1 Warmup: 1 Cooldown: 2 Accuracy: 7,141,290 Penetration: 7,141,290 Modulation: 8,569,548 Min Dmg: 38,004,172 Max Dmg: 46,449,343 Crit Chance: 10% Crit Dmg: 150%
Borg Sphere (60 - E)
- Borg Solo Armada Credit Epic 0 – 1,905,400
Power: 5,999,999,999
Attack (239,999,999)
DPR: 159,684,814 Armor Piercing: 8,781,152.5 Accuracy: 8,000,000 Shield Piercing: 9,990,576 Critical Chance: 10% Critical Damage: 150%
Defense (840,000,000)
Armor: 52,080,000 Shield Deflection: 67,200,000 Dodge: 48,720,000
Health (4,920,000,000)
Shield Health: 4,920,000,000 Hull Health: 4,920,000,000
Type: Energy Shot: 1 Warmup: 1 Cooldown: 1 Accuracy: 7,811,523 Penetration: 9,373,828 Modulation: 10,154,980 Min Dmg: 17,754,503 Max Dmg: 26,397,585 Crit Chance: 10% Crit Dmg: 150%
Type: Kinetic Shot: 1 Warmup: 1 Cooldown: 2 Accuracy: 8,188,477 Penetration: 8,188,477 Modulation: 9,826,172 Min Dmg: 43,577,040 Max Dmg: 53,260,597 Crit Chance: 10% Crit Dmg: 150%
Borg Recon Sphere (60 - U)
- Borg Solo Armada Credit Uncommon 0 – 2,784,111
- Orin-Sigma-9 (60) > Warp 430
Power: 6,700,503,210
Attack (268,020,131)
DPR: 178,328,102 Armor Piercing: 9,806,357 Accuracy: 8,934,004.5 Shield Piercing: 11,156,981.5 Critical Chance: 10% Critical Damage: 150%
Defense (938,070,450)
Armor: 58,160,368 Shield Deflection: 75,045,636 Dodge: 54,408,086
Health (5,494,412,629)
Shield Health: 5,494,412,629 Hull Health: 5,494,412,629
Type: Energy Shot: 1 Warmup: 1 Cooldown: 1 Accuracy: 8,723,523 Penetration: 10,468,228 Modulation: 11,340,580 Min Dmg: 19,827,351 Max Dmg: 29,479,518 Crit Chance: 10% Crit Dmg: 150%
Type: Kinetic Shot: 1 Warmup: 1 Cooldown: 2 Accuracy: 9,144,486 Penetration: 9,144,486 Modulation: 10,973,383 Min Dmg: 48,664,682 Max Dmg: 59,478,800 Crit Chance: 10% Crit Dmg: 150%
Borg Recon Sphere (60 - R)
- Borg Solo Armada Credit Rare 0 – 4,129,553
Power: 7,370,553,536
Attack (294,822,140)
DPR: 196,160,912 Armor Piercing: 10,786,992 Accuracy: 9,827,404.5 Shield Piercing: 12,272,679.5 Critical Chance: 10% Critical Damage: 150%
Defense (1,031,877,500)
Armor: 63,976,405 Shield Deflection: 82,550,200 Dodge: 59,848,895
Health (6,043,853,896)
Shield Health: 6,043,853,896 Hull Health: 6,043,853,896
Type: Energy Shot: 1 Warmup: 1 Cooldown: 1 Accuracy: 9,595,875 Penetration: 11,515,050 Modulation: 12,474,638 Min Dmg: 21,810,086 Max Dmg: 32,427,470 Crit Chance: 10% Crit Dmg: 150%
Type: Kinetic Shot: 1 Warmup: 1 Cooldown: 2 Accuracy: 10,058,934 Penetration: 10,058,934 Modulation: 12,070,721 Min Dmg: 53,531,150 Max Dmg: 65,426,680 Crit Chance: 10% Crit Dmg: 150%
Borg Recon Sphere (60 - E)
- Borg Solo Armada Credit Epic 0 – 5,647,345
Power: 7,705,578,689
Attack (308,223,147)
DPR: 205,077,318 Armor Piercing: 11,277,310 Accuracy: 10,274,104.5 Shield Piercing: 12,830,528.5 Critical Chance: 10% Critical Damage: 150%
Defense (1,078,781,015)
Armor: 66,884,423 Shield Deflection: 86,302,481 Dodge: 62,569,299
Health (6,318,574,527)
Shield Health: 6,318,574,527 Hull Health: 6,318,574,527
Type: Energy Shot: 1 Warmup: 1 Cooldown: 1 Accuracy: 10,032,051 Penetration: 12,038,462 Modulation: 13,041,667 Min Dmg: 22,801,454 Max Dmg: 33,901,446 Crit Chance: 10% Crit Dmg: 150%
Type: Kinetic Shot: 1 Warmup: 1 Cooldown: 2 Accuracy: 10,516,158 Penetration: 10,516,158 Modulation: 12,619,390 Min Dmg: 55,964,384 Max Dmg: 68,400,620 Crit Chance: 10% Crit Dmg: 150%
Borg Solo Armada Video
#ezw_tco-2 .ez-toc-title{ font-size: 120%; font-weight: 500; color: #000; } #ezw_tco-2 .ez-toc-widget-container ul.ez-toc-list li.active{ background-color: #c1d3ff; } In This Article
Previous Post Borg Armadas
Next post swarm armadas, recommended for you.
All items (2)

Borg ship pack
This folder contains the bcruise1, bcruise2 and bcruise3. Important Note: Make a backup of your existing files, because most files in this folder will overwrite the stock files! Credits: As allways, thanks to Wrath of Achilles for his Texture Tutorial and Major A Payne for his SodTutorial. All meshes, etc are by me. In some textures I used, stockmaterial, that was edited by me. The ODF files are edited stock files. I upgraded firepower and defenses of the Borg ships. Now they are more a match against Federation ships. Please note: I cannot be hold responsible for any damage or problems otherwise regarding this model. You may use this ship in your mod, just give credit where its do. THIS MATERIAL IS NOT MADE OR SUPPORTED BY ACTIVISION. Thank you for downloading.
This folder contains the bcruise1, bcruise2 and bcruise3. Important Note: Make a backup of your existing files, because most files in this folder will overwrite the stock files! Credits: As allways, thanks to Wrath of Achilles for his Texture Tutorial and Major A Payne for his SodTutorial. All meshes, etc are by me. In some textures I used, stockmaterial, that was edited by me. The ODF files are edited stock files. I upgraded firepower and defenses of the Borg ships. Now they are more a match against Federation ships. Please note: I cannot be hold responsible for any damage or problems otherwise regarding this model. You may use this ship in your mod, just give credit where its do. THIS MATERIAL IS NOT MADE OR SUPPORTED BY ACTIVISION. Thank you for downloading. ++++++++++++++++++++++++++++++++++++++++++++++++++++++++++++++++++++++++++++++++++++++++++++ Installation instructions Open the SOD folder --> Copy the sod files into the sod folder of Armada II. When prompted to overwrite, click 'yes'. Open the ODF folder --> Copy the photonfiles ---> Open te weapons ODF folder --> open the Photons folder and put the bc1phot and bc1photono files here. When prompted to overwrite, click 'yes'. Copy the phaserfiles ---> Open te weapons ODF folder --> open the Phasers folder and put the bc2phas and bc2phaso files here. When prompted to overwrite, click 'yes'. Copy the shipfiles ---> Open te ships ODF folder and put the bcruise1, bcruise2 and bcruise3 files here. When prompted to overwrite, click 'yes'. Open the Texturefolder --> put the tga into the texture RGB folder of Armada II. When prompted to overwrite, click 'yes'. ( I include the MS3D files for those who are interested.) Open the Bitmaps folder --> copy the files --> Open the Bitmaps folder of Armada II --> open Admiralslog --> open ShipImages and put the images there. When prompted to overwrite, click 'yes'. **************************************** Open Sprites --> open gui_global find the lines: # Borg wireframes @reference=256 delete the following lines: bcruise1w1 borgwireframe01 0 96 48 48 bcruise1w2 borgwireframe01 48 96 48 48 bcruise1w3 borgwireframe01 96 96 48 48 bcruise1w4 borgwireframe01 144 96 48 48 bcruise1w5 borgwireframe01 192 96 48 48 bcruise2w1 borgwireframe01 0 144 48 48 bcruise2w2 borgwireframe01 48 144 48 48 bcruise2w3 borgwireframe01 96 144 48 48 bcruise2w4 borgwireframe01 144 144 48 48 bcruise2w5 borgwireframe01 192 144 48 48 bcruise3w1 borgwireframe01 0 192 48 48 bcruise3w2 borgwireframe01 48 192 48 48 bcruise3w3 borgwireframe01 96 192 48 48 bcruise3w4 borgwireframe01 144 192 48 48 bcruise3w5 borgwireframe01 192 192 48 48 next: find the lines: @reference=128 (if not present, just add the reference) add below that list: bcruise1 wfbcruise1 0 0 128 128 bcruise2 wfbcruise2 0 0 128 128 bcruise3 wfbcruise3 0 0 128 128 ******************************************************************** That should do it.
Comments
Commenting is currently disabled.
Borg Group Armadas
Borg armadas, borg armada crews.
Borg armadas from level 25-35 are fought exactly the same way as regular armadas, and you can use regular armada crews to defeat them (on a Vi'dar though, always on a Vi'dar here). Once you get to the epic mega cubes however, you will need to start having a strategy and much stronger Vi'dars.
These armadas all give pretty much nothing for rewards, so should never be done outside of the borg events.
During the borg events, you'll have an opportunity to get mega cube directives. These should be saved for the event, because during it there will be a SMS for starting a borg mega cube. During this SMS, if you spend the directives and start a mega cube armada, it gives you all the directives back. So once you've managed to acquire those first 100 directives, it's basically a free armada, that will count towards the ALB for damaging and killing cubes.
If you're just encountering them for the first time and your alliance doesn't have many strong Vi'dars, it is unlikely that you'll be able to kill one of these. It's still worth doing as the directives are free and they count towards the other events (even failing to kill it contributes a lot of points to you). However, if you have enough strong Vi'dars, you can start to make real attempts on these. However, they're still not easy, so proper crewing matters more than any other armada.
If you want the strongest set of crews, you're going to have to set it up clearly with the people participating:
- Depending on your strength, you want Five of Eleven (c) for mitigation and Six of Eleven on the side for damage on all ships but one.
- You should have one person with a hull breach officer, preferably Lorca, but Gorkon is okay.
- The others should use Khan to increase critical hit chance, as it will maximize damage with the hull breach.
- The weakest Vi'dar should crew Nine of Eleven as Captain, with Seven and Eight of Eleven on the side. The mega cubes have a 30% crit chance with a huge 400% critical damage bonus, and with synergy these officers entirely remove critical chances. (This is an overall damage reduction of
You should only be targetting Photon Cannons in this way, as they are considered battleships by the triangle, and since your Vi'dar is an interceptor it'll have the bonuses on its side.
An example armada would have crews like this:
- Nine of Eleven (c), Seven of Eleven, Eight of Eleven
- Five of Eleven (c), Six of Eleven, Lorca
- Five of Eleven (c), Six of Eleven, Khan
The players with the highest tier Khans should be the ones running it, and if everyone has equal tier Khan, the highest tier Vi'dars should have him. The weaker players have the support officers as they'll deal less damage.

Formation Armadas - Species 8472 & Rare Formation Armadas

A formidable new enemy emerged in the Delta Quadrant. Species 8472 was able to travel through the fluidic space through quantum singularities and brought the fight to our dimension.
Formation Armadas found in selected systems of the Delta Quadrant contain several simulations of Starfleet Headquarters used for reconnaissance and gathering intelligence on Starfleet’s capabilities.
Like all strongholds, Formation Armadas have their weaknesses. Each armada has three targets that, if destroyed simultaneously, will ensure the total annihilation of the armada.
Commanders above Operations level 26 can participate in attacks against Formation Armadas. To initiate an attack, you’ll need 100 Formation Armada Directives, which can be gained through Daily Goal completion. Additional directives can be found in the Offers tab.
Open a secure comms channel
Communication and coordination are critical to taking Formation Armadas down. Three teams, which can be from different Alliances, must select their top four Commanders to participate in the attack (twelve Commanders in total).
When a Formation Armada has started its timer on one of the targets, subsequent Armada starts against the rest of the target will inherit the timer of the already active Armada; this way, they are automatically synchronized.
When a Formation Armada is destroyed, Commanders will receive Artifact and Premium Artifact tokens in their rewards. These tokens are crucial in discovering Artifacts in the Artifact Gallery. Artifacts are unique and powerful items that will grant a wide range of highly potent buffs to the ones who acquire them. To learn more about them, check here . ________________________________ M57 Update: The Delta Quadrant is expanding its boundaries as a new enemy lurks around: the Borg Unicomplex, the evil represented by the new Rare Formation Armadas .
Brave Commanders of Operations 38 and above can join forces and rally against the Rare Formation Armadas. Follow the mission chain inviting you to explore the new sector in order to go through your very first Rare Formation Armada fight (level 31).
Beware! The following new systems are harboring the new enemy:
Samarklew (35)
Larrios (38)
Ronkel (41)
Michfort (46)
Johlan (51)
Andracona (56)
Gareilly (60)
The Rare Formation Armadas require Rare Directives ; these will be available through the 7-day chest, as well as other places, such as offers in the store.
Once the enemy is taken down, Commanders will receive rewards such as:
Artifact tokens
Artifact shards
Complex nanotech, a new currency that can be used for claiming chests containing a variety of items, such as new officer shards, rare skill points, isolytic artifacts and tokens.
Important note : The Armada Control Centre size bonus does not apply to Formation Armadas.
Related articles
Star Trek: Every* Starbase Ranked Worst To Best
10. sol station.
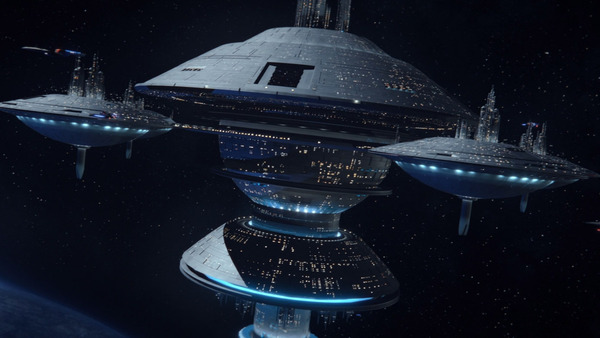
Sol Station appears in the third season of Star Trek: Picard , replacing the long-lived Spacedock One. This upgraded station bore a strong resemblance to its predecessor, though featured additional structures and platforms. It was also far larger, evidenced by the ships it could accommodate.
When the Frontier Day celebrations began in full earnest, the Enterprise-F exited Sol Station via the doors on its mushroom-shaped head. These were similar in design to those made famous by the theft of the Enterprise some hundred years earlier, though the Odyssey-class ship dwarfed her earlier namesake.
Sol Station was equipped with a vast array of weapons and defenses, allowing it to hold off the entire fleet for a short period. This allowed several key Federation representatives to escape the Borg Armada in orbit, though even this mighty station fell to the combined strength of the captured ships. It would suffer catastrophic, though not total, damage. It was saved by the timely intervention of the Enterprise-D.
It would take almost a full year for the station to return to its former glory, though it was ready to host the launch of the newly rechristened Enterprise-G.
Writer. Reader. Host. I'm Seán, I live in Ireland and I'm the poster child for dangerous obsessions with Star Trek. Check me out on Twitter @seanferrick
Infamous Star Trek Ship Recreated in Starfield
A player adds their name to the already extensive list of impressive Starfield creations by crafting an infamous Star Trek ship within the game.
- A Starfield player showcased their creativity by recreating the iconic Borg cube from Star Trek in-game.
- Bethesda's Starfield offers a vast galactic open world with diverse landscapes and customizable spaceships.
- Players continue to be captivated by Starfield's immersive gameplay and potential for creative designs.
A creative Starfield player has recreated the infamous Borg cube from Star Trek within the game. Since its official release, numerous Starfield players have been crafting their ship designs and sharing them with the community of fans. These designs range from original creations to reimaginings of different shows, characters, and more, showcasing the game's myriad creative possibilities.
Starfield is an action RPG from Bethesda Game Studios , marking its first new IP in 25 years. Set in a vast open world within the galaxy, players explore planets and moons, interacting with NPCs, and forming crews. The game blends handcrafted content with procedural generation, offering diverse landscapes and experiences. Players manage resources, build outposts, and customize spaceships for exploration, trade, and combat.
Starfield Player Finds Hilarious Konami Easter Egg
In a display of creativity, a Starfield player known as nathantravis2377 has recreated the Borg cube from Star Trek within Starfield 's vast universe . This remarkable feat was shared on Reddit, where the player showcased their ship, complete with functional systems. When asked about the firepower of the Borg cube, nathantravis2377 mentioned that it features four particle beams and four ballistic auto turrets along with four shields, staying true to the Borg's emphasis on redundancy and defensive capabilities. Additionally, the player clarified that the interior of the cube is hollow, with access points to the landing bay, companionway, and cockpit.
Players were also intrigued by the details of the Borg cube recreation, asking questions about its class, mobility, engines, and internal layout. Nathantravis2377 provided insights into the ship's design, revealing that it houses a C-class reactor with a single SAL 6000 engine, resulting in low mobility due to its massive size and structural complexity. These kinds of recreations highlight Starfield ’s robust ship customization tools , allowing players to unleash their creativity and design spacecraft of various shapes and functionalities.
What Is Star Trek's Borg Cube?
The Borg cube, a massive and imposing spacecraft from the Star Trek franchise , is instantly recognizable for its cubic shape adorned with intricate geometric patterns. The Borg, a cybernetic species with a collective consciousness, utilize these cubes as formidable vessels capable of assimilating other species and technologies into their collective. The player's Borg cube faithfully captures the essence of this iconic Star Trek vessel.
After over seven months since its release, Starfield continues to captivate players with its immersive gameplay. Nathantravis2377's recreation of the Borg cube stands as a testament to the game's potential for creative players.
Developed by Bethesda Game Studios, Starfield is a sci-fi action role-playing game where players interact with multiple factions, engage in combat, customize their main character and ship, as well as explore a universe that features over 100 systems and 1,000 planets.
Screen Rant
Starfield player shares intimidating ship build inspired by a nefarious star trek race.
A talented Starfield player shows off their gigantic recreation of one of the most sinister ships ever seen in the sprawling Star Trek universe.
- A Borg Cube ship build in Starfield impressively replicates the terrifying alien race from Star Trek .
- Starfield 's lack of extraterrestrial factions makes the Borg Cube stand out as an imposing vehicle.
- The ship editor in Starfield allows for impressive customization.
While Starfield and Star Trek may share some similarities in terms of their tone and content, one player managed to make the connection even more authentic with an impressive ship build that evokes the terror of one of the most fearsome alien races in all of fiction. Bethesda's latest sci-fi RPG may feature a handful of alien creatures for players to battle but when it comes to intelligent life, Starfield 's take on the galaxy is somewhat lonely, especially when exploring the surface of a planet. Still, having no extraterrestrial factions is certainly more desirable than coming face-to-face with the Borg.
Shared to Reddit by user nathantravis2377 , the Starfield fan showed off their ship designed to replicate the appearance of a terrifying Borg Cube , the vessel that transports the Star Trek villains throughout the cosmos.
The creator notes that they used around 240 different modules to create the imposing vehicle , revealing that it's largely hollow to keep the overall mass low enough to fly. In terms of weaponry, while a Borg Cube is usually stuffed full of weapons, this ship only sports four Particle Beams, four Ballistic Auto Turrets, and four shield generators.
A Massive Starfield Missed Opportunity May Set The Stage For Shattered Space DLC
The borg are terrifying in star trek, they would fit perfectly into starfield.
Despite the incredible size and scale of nathantravis2377's Borg Cube, the creator insists that it was actually a rather simple ship to design. While the shape is no doubt basic, actually fitting together all the necessary parts to make the vessel airborne without exceeding mass restrictions must have been an incredibly challenging task . How it fairs in combat remains unknown but one has to imagine that the amount of armor packed into every corner will ensure it's protected even in the most deadly of dogfights.
Starfield certainly has plenty of hostile alien forces for players to fight when they opt to settle down and establish an outpost but the addition of a hyper-intelligent force like the Borg would be a real game-changer . Unmatched in terms of their brutal efficiency and technology, the Borg are a race of cyborgs that travel through the galaxy collecting data and knowledge from every species in encounters , feeding it all into its hive mind through a process known as "assimilation." Terrormorphs may be extremely scary when they're discovered infesting a planet, but they have nothing on the Borg .
While Starfield may have received mixed reviews at launch for its lackluster writing and gameplay, one aspect that pleased both players and critics was the ship editor . The in-depth nature of the system which includes hundreds of different modules and parts allows for some fantastic customization that's only really limited by the amount of resources needed to piece it all together. One can only hope that Bethesda leans into this aspect of the game in any upcoming updates to expand upon it even further.
Source: nathantravis2377/Reddit

IMAGES
VIDEO
COMMENTS
Borg Solo Armadas. These are basically the same as Dominion Solo Armadas, though so far at least the uncommons seem somewhat weaker. Using similar crew setups should provide good results for you. Three good armada crews on three ships of an appropriate level and you should be able to make your way through these pretty steadily.
Borg Spheres (Solo) Solo Borg armadas are run with Three of your own Ships. The fights are short and you get a huge damage boost from research in the combat tree, so ramping damage and burning add very little to your total damage. Focus on mitigation, extra shots, and critical damage. Hull breach provides a huge damage boost and should always ...
When you send ships through it, use the temporal stasis field. and the energy/torpedo platforms in the area. Concentrate all fire on the. facility and destroy it to end the campaign, and the game. Congratulations, you have beaten Star Trek: Armada! _060.
The Borg have the unique ability to assimilate other ships, which you can then decommission for a Dilithium payoff. This is the way most Borg missions will start out. Use your Assimilator you grab ...
Star Trek: Armada is a real-time strategy video game for Microsoft Windows developed and published in 2000 by Activision.The game's look and feel is based primarily on Star Trek: The Next Generation, and features a few of its main characters and ships.Playable factions include the United Federation of Planets, the Klingon Empire, the Romulan Star Empire and the Borg.
Preorder the E7 Pro StandingDesk - https://bit.ly/465T0XwFlexiSpot Black FridaySale up to £300 off13th Nov - 27th NovBlack Friday Deals - https://bit.ly/3RWG...
The assimilator is a type of Borg starship used by the collective as a quick means of eliminating resistance on an enemy ship or station via use of a tractor beam which locks on to the target vessel and rapidly transports its crew aboard, where they are immediately assimilated into the Collective. (TNG video game: Armada) During the incident with Species 8472, the original assimilator was ...
The Borg Detection Array is an unmanned, small satellite that provides a player with line-of-sight in a radius around it. The Sensor array can be modified to use a Tachyon Detection Grid to locate cloaked ships if developed at the Technology Node. A player must possess a Nexus in order to build a Detection Array.
Star Trek Armada II: Ships and Stations: Borg. TREKCORE > GAMING > ARMADA II > SHIPS AND STATIONS > Borg. INTERCEPTOR: The interceptor's function in the collective is to identify unassimilated vessels and stations, determine their potential value, and assimilate or eliminate them based on its evaluation. ...
Star Trek: Armada is a real-time strategy (RTS) video game published by Activision in 2000.The game can be played either in a single-player campaign, or in a multi-player internet combat mode. In either mode, the player(s) build and maintain fleets and stations of one of four factions: Federation, Klingon, Romulan, and Borg.The single-player mode is story-driven: the player has a series of ...
The Borg Cube is one of the most iconic Star Trek ships of all time, but there have been a handful of other notable Borg ships in franchise history. Introduced in Star Trek: The Next Generation season 2, episode 16, "Q Who", the Borg Collective became huge antagonists that struck fear into the hearts of the Federation for decades.Both the assimilation of Captain Jean-Luc Picard (Patrick ...
The huge Borg colony ships are the ultimate planet assimilation weapon. The planetary assault beam fired from the tip of the colony ship is used to eliminate cities and planetary defenses, and then a swarm of drones is beamed onto the planet surface. Origin [] The Borg Colony Ships are original Star Trek Armada 2 ships
The mission can be relatively simple if you keep Spocks ship away from battle as often as possible.Also, try to keep the Borg Assimilators and Cubes (if any) away from the ship at all costs.
Star Trek Armada 2 Walkthrough/FAQ by Simon Version 1.0a This FAQ is only being shown on www.gamefaqs.com. Feel free to email and ask questions. My email is [email protected]. ... classes from your base that have been built and move them to your 2 planets because they may get attacked by the Borg if any ships escaped. You will need about ...
The Borg cube was a type of starship used by the Borg Collective in the 24th century. Along with the Borg sphere, cubes were among the primary types of vessel for its fleet. (TNG: "Q Who", "The Best of Both Worlds"; Star Trek: First Contact) Described as mighty and omnipotent, Borg cubes were considered one of the most destructive weapons ever known. (PIC: "Maps and Legends") The USS ...
The Borg Assimilator, originally from Star Trek: Armada, and beautifully reborn by STO's Ship Artists, is coming to the Infinity Lock Box! By Ambassador Kael December 04, 2023, 09:00 AM. Borg Assimilator Dreadnought Carriers are commonly tasked with establishing Collective control over planets, but their true specialization is in technology ...
About Star Trek: Armada III. Star Trek: Armada III (also rendered as Star Trek: Armada 3 or simply STA3) is an extensive mod for Ironclad 's popular 4X strategy game Sins Of A Solar Empire: Rebellion. Set in the prime Star Trek universe around the time of the Dominion War, Star Trek: Armada III is designed to be the spiritual successor to the ...
It's time for more armada discussion @everyone and today's focus is Borg Solo Armadas! The spheres have come in with a MASSIVE advantage in defense stats tha...
Borg Solo Armadas. Hostiles. The Borg Solo Armadas closely resemble the Dominion Solo Armadas, although, to date, the uncommon ones appear slightly less formidable. By using comparable crew setups, you should achieve favorable outcomes. Assemble three proficient armada crews with ships of an appropriate level, and you'll be able to steadily ...
Borg Colony Ship; D Diamond; Categories Categories: Starship classes by faction; Add category; Cancel Save. Community content is available under CC-BY-SA unless otherwise noted. Advertisement. Explore properties. Fandom ... Star Trek Armada II Wiki is a FANDOM Games Community.
When prompted to overwrite, click 'yes'. Copy the shipfiles ---> Open te ships ODF folder and put the bcruise1, bcruise2 and bcruise3 files here. When prompted. to overwrite, click 'yes'. Open the Texturefolder -->. put the tga into the texture RGB folder of Armada II. When prompted to overwrite, click 'yes'.
Borg Armadas. Borg armadas from level 25-35 are fought exactly the same way as regular armadas, and you can use regular armada crews to defeat them (on a Vi'dar though, always on a Vi'dar here). Once you get to the epic mega cubes however, you will need to start having a strategy and much stronger Vi'dars. These armadas all give pretty much ...
A formidable new enemy emerged in the Delta Quadrant. Species 8472 was able to travel through the fluidic space through quantum singularities and brought the fight to our dimension. Formation Armadas found in selected systems of the Delta Quadrant contain several simulations of Starfleet Headquarters used for reconnaissance and gathering ...
Warning: contains spoilers for Star Trek: Defiant #14!. In the Star Trek universe, the chances of coming back from assimilation by the Borg are slim, and even when people are freed, they still retain terrible knowledge of their times as drones. The ex-drone, Hugh, has joined Worf's crew in Star Trek: Defiant, and in issue 14, with the team's back against the wall, Hugh saves the day using ...
This allowed several key Federation representatives to escape the Borg Armada in orbit, though even this mighty station fell to the combined strength of the captured ships. It would suffer ...
Warning: contains spoilers for Star Trek #19!. Throughout Star Trek history, Scotty distinguished himself as one of Starfleet's best engineers, and his reputation is so sterling that even the gods come to him for advice. A Star Trek icon, Scotty has joined Captain Sisko and the Theseus on a mission to save reality itself. As the crew prepares for the mission ahead, one god-like being comes ...
The player's Borg cube faithfully captures the essence of this iconic Star Trek vessel. After over seven months since its release, Starfield continues to captivate players with its immersive ...
A Borg Cube ship build in Starfield impressively replicates the terrifying alien race from Star Trek . Starfield 's lack of extraterrestrial factions makes the Borg Cube stand out as an imposing vehicle. The ship editor in Starfield allows for impressive customization. While Starfield and Star Trek may share some similarities in terms of their ...