

21 Safari Photography Tips for Capturing Stunning Safari Photos
As a passionate ethical wildlife photographer and qualified safari guide, I've gathered some valuable safari photography tips to help you elevate your safari experience. Even if you've never held a professional camera, you can still capture the raw beauty of the wild with just a few tips and tricks.

Embarking on a safari in Africa is a magical journey, and capturing these moments through photography allows you to relive the excitement and share the beauty of the African wilderness with others. Photography on safari also encourages you to pay attention to other things that might have gone unnoticed. By actively seeking unique angles and observing moments to capture, you become more attuned to the intricate details of the wildlife and the breathtaking landscapes surrounding you. It helps you notice small details and appreciate nature even more.
Read my 21 safari photography tips for capturing stunning safari photos :
1. Immerse Yourself in the Experience

Each day on safari brings unique moments. Photography not only preserves memories but also encourages you to notice intricate details and appreciate nature. Seek unique angles and moments to capture, and let the beauty of the wild inspire you.
2. Be mindful of the Environment and Respect Wildlife

Patience is key to capturing natural behavior. Maintain a respectful distance, observe quietly, and avoid disrupting the animals' natural rhythm. Remember, you are a guest in their home and therefore this is one of the most important wildlife photography tips . Always respect local regulations, cultures, and environments. Your patience will be reflected in the authenticity of your safari photos.
If you approach an animal sighting, always be careful to not disturb the animal and minimize noise. How to show respect for the animals during wildlife photography?
- Maintain a respectful distance
- Approach animals indirectly
- Avoid positioning yourself upwind from the animal
- Keep your voice extremely low
- Switch your camera to silent mode to avoid startling wildlife
- Don’t use your flash
Whether you're a beginner or an experienced photographer, adhering to a code of conduct ensures the well-being of wildlife, contributes to conservation efforts, and ensures a more authentic safari experience.
3. Utilize Your Guide's Knowledge

Collaborate with your local field guide who possesses invaluable knowledge of animal habits, territories, and behavior. Communicate your photography preferences, and leverage their expertise to position yourself for the perfect shot. Guides can anticipate lighting conditions and animal movements, enhancing your photography experience. For example, positioning the vehicle in a way that the sun is in your back instead of in your lens to have nice lighting on the animal or landscape you want to capture. However, on some occasions, it’s also great to photograph towards the sun to create a nice rim light around the animal.
As a nature and wildlife enthusiast, I encourage you to ask your safari guide lots of questions to learn more about the behavior and habitats of the wildlife you encounter. This knowledge helps you anticipate movements and position yourself for the perfect shot.
4. Pay Attention to Composition

Crafting attractive compositions on safari is key to impactful photography. Be creative. Explore angles, perspectives, and framing techniques to create visually appealing images.
Rule of Thirds

Apply the rule of thirds by placing your subject off-center for dynamic images. Utilize paths, tracks, or natural elements like bushes, rocks or trees for depth and scale. These composition tips elevate your photos without requiring advanced technical skills. Most cameras also have a grid that helps you to better frame your subject. Also, always think of leaving an empty space in the direction the wildlife is heading or the direction the animal is looking. In some occasions, it's also a good idea to put your subject in the middle.
Shoot from a low angle

Shooting from a low angle (on the ground) can also make your composition more attractive. Safari in a game drive vehicle mostly doesn’t allow you to get out of the car to photograph wildlife, but on some occasions it might be possible. Another occasion could be if you’re on a walking safari . The advantage of getting low on the ground is that you are able to change the background in your scene. Being on eye-level with your animal also establishes a better connection.
Please consider the ethics of your framing – prioritize the well-being of the wildlife you encounter.
5. Show animals in their natural environment

Capturing close-ups of the Big Five is often popular among safari tourists, and wildlife photographers, but don’t forget the beautiful environment these animals live in.
Their natural environment is equally important as they form that bigger picture together. And it’s those areas that we need to protect to save wildlife from extinction.

Every part of the ecosystem is dependent on each other. That’s the beauty of nature, and it allows the viewer to understand where the animal lives and flourishes. As a conservation photographer, I also love to showcase the wildlife’s home that we need to protect.
6. Master the Exposure Triangle

Light is a fundamental element in photography, and understanding the exposure triangle is a fundamental part to master the art of safari photography. Understanding aperture , shutter speed , and ISO allows you to adapt to various lighting conditions. These three factors work together to determine how bright or dark your photos will turn out, as well as the level of sharpness and graininess.

Adjust aperture for light control and depth of field , use shutter speed to freeze or create motion of animals, and set ISO for sensitivity (lower during the day, higher when it’s getting darker).
7. Use Shutter Priority Mode for moving wildlife

If you’re used to photographing in automatic mode, it can feel like a puzzle if you want to photograph wildlife manually. Therefore, my best photography tip is to set your camera on shutter priority mode (S). It means that you only have to think about the shutter speed and the camera does the rest like your ISO and Aperture (semi)automatically.

This technique ensures sharp and clear images, especially when photographing animals in motion on your safari. Use a fast shutter speed to freeze fast-moving wildlife action, and try to practice with various settings between 1/250th of a second up to 1/2500s. Additionally, fast shutter speeds can help prevent camera shake, particularly when shooting handheld.

A rule of thumb: choose a minimum shutter speed based on the focal length you are shooting. An example: I often capture wildlife with a focal length of 400 mm, meaning my minimum shutter is 1/400s. If you are in a moving safari vehicle, boat or hot air balloon, and/or the animal you want to photograph is moving fast, then use a minimum of 2 times the focal length. So, shooting at 400 mm would mean a shutter speed of 1/800s. To capture moving birds in flight , you might want to practice choosing shutter speeds to up to 1/2000s.
8. Choose AI Servo (AF Continuous) Mode for moving wildlife

AI Servo is the best mode to capture wildlife that is moving, to automatically keep track of and stay focussed on the moving animal.
9. Practice with Aperture Priority Mode for a ‘blurry’ background

Aperture Priority in safari photography allows you to set the desired aperture, controlling the depth of field in your wildlife shots. In situations where you want a blurred background to emphasize the subject, or conversely, a broader depth of field to capture more details.

Aperture Priority mode gives you this creative control. For example, when you want a close-up of a lion or a colorful bird with a blurred background effect, like the Lilac-breasted Roller in the above image. The more zoom and the lower the aperture number, the more you are able to eliminate the background in your image and create that nice compression.

On the other hand, if you want to photograph a group of animals like a herd of elephants, I recommend choosing an aperture of f/8 to get the whole group of animals in focus (and not only one).
10. Try Burst Shooting Mode in Safari Photography

Shooting in burst mode is an important wildlife photography tip for safari enthusiasts, catering to both beginners and advanced photographers. Wildlife is unpredictable, and animals often move swiftly. Burst mode allows you to capture a series of rapid shots, increasing the chances of freezing dynamic moments, ensuring you don't miss critical actions or spontaneous behaviors.
Beginners benefit by having a safety net, capturing shots even if timing is a challenge. For advanced photographers, burst mode offers creative opportunities to select the perfect frame from a sequence.
11. Focus on the eyes of an animal

Always focus on the eyes of the animals ; that’s the cardinal rule of wildlife photography! This golden tip elevates your shots, creating a connection between the viewer and the wildlife subject. Instead of hastily snapping numerous wildlife images, wait for the moment when the animal turns its gaze towards you.
Focusing on the eyes provides viewers with a unique perspective. It creates a visual connection, as if the animals are looking directly through the photograph at the audience. This transformative approach adds depth and emotion, making your wildlife images more memorable and resonant, especially when capturing close-up shots of animals. This technique enhances the details in the eyes, showcasing the intricacies and expressions that might be missed in broader shots.
Aim for a shutter speed between 1/250s to 1/2500s, depending on the animal's movement, and an aperture between f/2 to f/6, depending on your lens. These settings ensure both eyes are in focus, capturing the essence of the wildlife subject.
Remember, the eyes are the windows to the soul , even in the animal kingdom. So when focusing on the animal’s eyes, you can create truly remarkable and memorable wildlife photographs.
12. Shoot in RAW if you can

Shooting in RAW format on a safari offers several advantages.
RAW images provide a higher dynamic range compared to JPEG, capturing more details in both shadows and highlights. This is crucial in the diverse and often challenging lighting conditions encountered during a safari.
RAW files contain more image data , allowing for extensive post-processing without compromising quality. This flexibility is valuable when adjusting exposure, contrast, color balance, and other elements during the editing process (I usually edit my wildlife images in Lightroom).
Shooting in RAW preserves the original quality and detail captured by the camera's sensor. This is especially important in wildlife photography, where preserving the authenticity of the scene is crucial.
13. Timing is Everything: The Golden Hour and Beyond

The golden hours of sunrise and sunset conveniently align with the typical timing of game drives during a safari when the animals are most active. The warm, soft light enhances the colors and textures of the African landscape, creating a captivating backdrop for your photos.
The advantage of photographing during the Golden Hour , sometimes called ‘Magical Hour’, is that the soft golden light reduces harsh shadows and creates a golden glow. Patience during these hours rewards you with captivating glimpses into the animals' daily lives.
14. Equip Yourself Wisely with the right camera gear

Ensure you have the right camera equipment for safari photography.
Bring a DSLR (Digital Single Lens Reflex) camera and zoom lenses with 200-600 mm range or a quality compact camera for versatile quality wildlife photos. Safari photography on a smartphone is not the best option to photograph wildlife, but it is, of course, a great option to create short videos, stories, and reels.
Zoom lenses for safari photography
I highly recommend a long lens with a minimum of 200 mm zoom to capture distant wildlife. A zoom lens allows you to effortlessly switch between photographing animals from a distance without disturbing them and capturing intricate details of flora and fauna up close.
More ideally, a zoom lens with a focal length of 300 mm+ is great for capturing wild animals or birds. If you’re using a full-frame camera, I would suggest a 400 mm zoom lens and if you are a keen birder a 600 mm long lens is perfect for bird photography on safari.
Wide-angle lens
Apart from zoom lenses, I always carry a wide-angle lens (for example 16-35 mm), great for capturing the beautiful African landscapes and its animals or magical sunsets.
Essential accessories
Don't forget essential accessories, such as memory cards, extra batteries, cleaning wipes, a charger, a camera bag, and a rain cover. Consider a beanbag for stability.
Hire photography gear for safari
Not having the right camera gear ? Nowadays, the quality of compact cameras is pretty good as well, and it’s also possible to hire photography gear .
15. Consider bringing a tripod and/or beanbag
Bringing a tripod and/or beanbag on safari is a crucial photography tip for the following reasons:
- Stability for Clear Shots: A tripod or beanbag provides stability, reducing camera shake and ensuring clear shots, especially when using longer lenses.
- Flexibility in Composition: Both tripods and beanbags allow photographers to compose shots with precision. A tripod is ideal for setting up shots in a fixed position, while a beanbag provides a more flexible option, allowing quick adjustments and movements.
- Support for Heavy Equipment: Professional camera gear, including telephoto lenses, can be heavy. A tripod and/or beanbag offers robust support for heavier equipment, preventing fatigue during extended periods of shooting.
- Long Exposure and Low Light Conditions: In low light or during sunrise/sunset safaris, a tripod is essential for capturing long-exposure shots without introducing motion blur. A tripod is also great to practice with star photography and photographing the milky way when you're back at the safari lodge .
- Silent Shooting with Beanbags: Beanbags are preferred for wildlife photography as they provide a stable base without the noise associated with adjusting tripod legs. This is especially important to avoid disturbing animals in their natural habitat.
- Versatility in Safari Vehicles: Safari vehicles often have limited space, and tripods may be cumbersome. Beanbags are more versatile, easily adapting to the contours of the vehicle and providing a stable platform for photography.
16. Make a back-up of your images on safari

I always back up my images while traveling. When my memory card is full, I back up my images onto an external hard drive. That is mostly enough, but for people who want to travel longer, I highly recommend backing up to a second external hard drive (kept in different locations). Hard drives I use are Lacie Rugged, Samsung, and Seagate.
If you are using your phone only, I also recommend backing up your images in the cloud, for example iCloud, Dropbox, Google Drive, Google Photos, you name it.
17. Keep it Simple and Be Patient

Wildlife photography requires patience . Allow yourself time to observe and wait for the right moment, focusing on mastering basic techniques. Don't be overwhelmed by settings; simplicity often reveals the raw beauty of wildlife.
18. Edit your photos

Editing your safari photos is not essential, but if you want to step up your safari photography game, I highly recommend learning how to edit your wildlife images in, for example Adobe Lightroom (for both desktop and smartphone) and Photoshop . Especially if you are planning to print your photos, post-processing is an important step.
Get in touch for a private workshop on how to edit your safari photos or join me on a photo safari where I will share editing tips to improve your wildlife photography.
19. Know Your Camera

If you're a beginner photographer, all the settings on your camera can be a bit overwhelming. When I first started photography, my camera was a puzzle to me. I kept using the automatic mode until I learned the basics of photography during a volunteer program in South Africa . Having two game drives per day in Thanda Game Reserve in KwaZulu-Natal was the perfect way to start practicing shooting in manual mode and learn more about the best settings for safari. I highly recommend to start learning more about your camera and camera settings before you go on safari. Go through your camera manual to find the buttons and settings of some of the technical photography tips I mentioned in this article.
20. Embrace Learning and Growth

Whether you're a beginner or experienced photographer, nurture your interest in learning photography. Books about photography, online photography courses, workshops and guided photo safari tours with photography experts offer opportunities to enhance your safari photography skills; including my small group photo safaris . To master a new skill, learning by doing is often the most effective approach to get to know your camera better. So please remember, anyone can learn photography, and the wonders of a safari in Africa can ignite your passion for capturing the mesmerizing beauty of our planet's wildlife.
21. Join me on a photo safari to Africa

Do you want to improve your photography skills on safari and travel with like-minded travelers? Join me on a small group safari to Africa . As a professional wildlife photographer, I can help to improve your photography skills on safari by sharing hands-on experience and valuable tips. Instead of rushing to tick off the Big Five, we will spend our time carefully during the beautiful golden hours around sunrise (morning game drive) and sunset (afternoon game drive).
It doesn't matter if you're a beginner, intermediate, or professional photographer. Having an interest in photography and and being prepared to learn are the most important aspects.
Safari Photography Tips to take the best photos on safari
These tips, coupled with the expertise on my photographic safari trip to Africa , will undoubtedly enhance your safari photography journey. Capture the essence of Africa's breathtaking wildlife and create lasting memories with every click of your camera (or even your smartphone).

Finding the Universe
Travel tales, photography and a dash of humor

Safari Photography Tips – How to Get Great Photos on Safari
Last updated: May 7, 2024 . Written by Laurence Norah - 4 Comments
A safari is a fantastic way to see a wide range of wildlife in its natural habitat. It’s also an opportunity to take lovely photos of that wildlife! However, there are some unique challenges to taking photos on safari. In this post, I’m going to share some safari photography tips to help ensure you get the best photos when you go on safari.
As a professional travel photographer, I’ve been lucky enough to take photos in a wide range of scenarios, including on a number of safaris in both Africa and Asia. Based on my experiences, I’m going to share with you everything you need to know to get great photos on safari.
Most of my examples used in the post are from taking photos while on safari in Africa; however, these tips will work for most safari destinations. as well as for wildlife photography in general. Many of these tips can help anyone looking to improve their wildlife photography and also for anyone wanting to take photos from a vehicle.
I’ll cover a few things in this post. I’m going to talk about some general tips and things to think about when going on safari from a photography perspective. I’ll also include ideas on suggested cameras and camera accessories for safari so you know what is important to bring along.
A safari is a big investment for many of us, and is often a once in a lifetime trip. So getting great photos to remember our experiences is important. Let’s get started with the tips!
Tips for Taking Better Photos on Safari
Plan where you want to go.
The first thing you are going to have to do is decide where you want to go on safari. It’s likely that you already have an idea as to what you want to see and photograph on your safari, be it specific animals or birds, or maybe you are interested in certain landscapes.
The main thing is that you pick a destination that will give you a good chance of seeing the things you really want to see and photograph. This is particularly the case with animals or birds that are rarer, like rhinos.
On a recent trip across East Africa, we knew that we wanted to see and photograph things like gorillas, chimpanzees, rhinos, and spoonbill storks. We picked the countries we visited as well as the time of year we travelled to ensure that we would have a good chance of seeing these particular animals.
We also wanted to see the Great Wildebeest Migration on that trip. This is always taking place, so it was just a question of researching where it would be at the time of year we would be visiting to ensure we would have the best chance to see and photograph it.
Planning your destination properly is definitely the first step to getting the photos you want to get on your safari.
Research Your Chosen Safari Location
Once you have chosen your safari destination, do some research to better understand your trip itinerary and the wildlife, landscape, and climate of the destination.
All of these things can affect how you will want to prepare for your safari and the type of camera equipment you might need.
For instance, if your main photography goal of the trip is take photos of lions, you will want to try to make sure that you spend a sufficient amount of time in places with healthy populations of lions to increase your chances of seeing and photographing them. Lions are often best seen in savanna areas.
However, if you are interested in malachite kingfishers, you’ll want to make sure that you spend enough time in wetland areas for a good chance to see these birds. These little birds are best spotted and photographed either from a boat or on foot.
This research will also help you decide on the equipment you will need to take with you. For photography of smaller birds for example, you’re likely going to need a longer lens. If you are more interested in landscapes, then a wide-angle lens will be an essential item.
Finally, check out the climate for the country you are visiting and the time of year you plan to visit. Having an idea of what to expect will ensure you bring the right clothing as well as any protective equipment like camera rain covers on your trip.

Choose the Right Camera for Safari
One of the main decisions you’ll have to make when planning your safari trip is what camera to take with you on your trip. This decision will have you weighing various factors, from your budget through to the size and weight of the camera.
When you are deciding how much to spend and how much you are willing to carry with you, consider what sort of images you want to get. If you are looking for amazing wildlife shots of fast action or in low light, then you will want to invest more money in a high-end set-up.
As an example, compare these two shots of a leopard taken in low light at the end of the day. Both are uncropped.

Both images are obviously of a leopard. However, the compact camera struggles to get a close up shot due to the maximum 70mm focal length, and even at ISO 800 the image ends up being quite noisy. The slow shutter speed, even with image stabilization, also means the shot is not too sharp.
The larger and more professional Canon EOS R5 mirrorless camera paired with a 100-400mm lens is still able to get a very usable image, even at 10,000 ISO.
If you are just happy to capture memories of your trip, then a compact camera or smartphone will likely do the job.
A good compromise for many users is a bridge camera , which offers a good balance between a long zoom, affordability, and image quality.
However, if you want the most flexibility and opportunity to get the best shots from your trip, then a higher end mirrorless camera would be my recommendation.
If money and size are no object, my recommended camera for safari would be a high-end mirrorless system. The latest mirrorless models feature excellent auto-tracking autofocus which can recognise and lock onto a subject very quickly, which can really help with fast moving subjects.
In this situation, I’d probably pick a Canon EOS R5, Sony Alpha a7r IV or a Nikon Z9. I’d pair it with a telephoto zoom in the range of 100-500 with stabilization and as wide an aperture as I could afford.
If you want something that offers a good balance between affordability, image quality, and zoom, then my suggestion would be a bridge camera.
I have a whole post on the best camera for safari which I would suggest reading if you don’t already have a camera you want to bring with you. It’s definitely important to choose the right camera for you.
In summary though, here are some recommended cameras that I suggest you take a look at, depending on the type of camera you would like to take on safari:
- Smartphone: either a Pixel 6 Pro or iPhone 13 .
- Compact camera Panasonic Lumix ZS70 or Sony RX100 VII
- Bridge camera: Panasonic Lumix DC-FZ80 / FZ82 or Sony RX10 IV .
- Mirrorless camera: Sony a6100, Sony Alpha 7c , Canon EOS R6 Mark II , Nikon Z7II , Canon EOS R5 , or Sony Alpha a7 IV
- DSLR camera: Nikon D3500 or Canon EOS 6D Mark II
For more on choosing a camera in general, we also have guides to the best travel camera , best compact camera , best bridge camera , best mirrorless camera and best DSLR cameras .
If you have, or plan to buy, a mirrorless camera or DSLR camera, you may be wondering what kind of lens would be best for safari. It depends of course on your photography goals and what you want to photograph, but I would generally recommend a lens with a focal range of 100-400mm. See my safari camera post for lens recommendations.

Learn How to Use Your Camera
Once you have decided on which camera to take with you, it’s important that you learn how to use it properly. This applies to whatever kind of camera you are using, be it a smartphone camera or a high-end DSLR or mirrorless camera.
A camera is ultimately just a tool to help you take great photos, and like any tool, it will only do what you ask of it. Understanding the various features of your camera and how to access and adjust key settings is vital to ensure you don’t miss a shot.
When you are on safari, great photography opportunities can arise very quickly and be gone just as quickly. For example, for the shot of the leopard at the start of this post I had just a couple of seconds to frame the shot and ensure all the settings were correct before he decided to sit up and slink away out of sight.
Had I not been able to nail the focus or adjust ISO, aperture, and shutter speed appropriately in time, I would have missed the shot. I would recommend checking out my guide to the exposure triangle , as well as how to use a mirrorless camera for detailed advice.
Understanding how to adjust the settings and set up your camera properly means you’ll have more control over the final look of your shots. For example, you could learn how to manually change the shutter speed so as to capture movement in different ways.
Here are a couple of examples of different shutter speeds to show the difference.

In the first shot, even though the fighting zebra are moving quickly, the fast shutter speed freezes the action. In the second shot of the wildebeest crossing, they are just walking over the road. But in 1/5th of a second, they cover a small amount of ground, and so they become blurry. The single stationary wildebeest remains sharp as it isn’t moving.
There are many features of a camera which can be used to adjust how the final shot looks, and understanding how to control them will help ensure you get the shots you want.
If you feel you need help with using your camera and would like to improve your photography, there are a lot of photography courses, books, and workshops out there. I run an online photography course that teaches all the basics as well as more advanced skills, and have proudly helped thousands of people improve their photography skills.
Understand the Limitations of Your Camera
Every camera has limitations as to what it can do. These limitations will vary, and even high-end cameras will have some sort of limitation.
Examples of limitations are:
- The zoom isn’t very big, meaning you can’t capture animals which are far away and will have limitations capturing smaller animals like birds
- The camera sensor is small, and so will produce noisier images when there is less light
- The lens is big and heavy, so you need to use a fast shutter speed to avoid getting blurry images due to your hand motion when hand holding it
- Big and heavy equipment is more difficult to pack and travel with
The important thing is to understand the limitations of your camera so you can work around them, or at least, know what to expect before you go on safari.
The most common issue is probably not being able to take photos of animals that are further away. We saw a number of travelers frustrated by this on our recent trip in East Africa. All cameras will have their distance limitations, just be sure to have a good idea of yours so you can have realistic expectations of what kinds of photos you will be able to take. You can simply go outside and take photos of local animals or birds to get a good sense of this.
Another common issue I see from safari photos and wildlife photos in general are images that are not as sharp as they could be.
This is usually because the shutter speed is too low, and the user is hand holding a larger lens. A slow shutter speed means that any movement in your hand is translated into motion blur as you take the picture. You can fix this by increasing the shutter speed and/or resting the lens on a steady surface.
Some limitations can’t be overcome though, and are usually down to the actual hardware inside the camera. For example, the maximum zoom, the sensor size and maximum aperture size will be fixed.
However, if you know what the limitations of your equipment are, then you will be able to either accept them and work around them, or decide on upgrading to a different camera for your trip.
I’d also add at this point that you shouldn’t compare your photos to those you’ve seen on TV, online, and in wildlife magazines. You have no doubt seen some amazing wildlife photos and videos on sites like National Geographic or the BBC , and might wonder why you aren’t able to get the same sorts of shots.
Whilst it is of course possible to get images like those photographers do, they often have a lot of advantages over the average tourist. Not only do they typically travel as a crew with tons of high-end equipment, but they often take photos in locations that are hard to get to with limited public access.
They also often have paid for special press / filming permits to get off-road access or shoot in private areas outside of national parks. They also often spend weeks planning and trying to get the right shots, and only share the best shots with the public.
So don’t be too hard on your gear or yourself. Just be aware of the limitations of your photography equipment and know how to get the most out of it.

Understand What Causes Blurry Wildlife Images
It’s important that your images are sharp. Two things can cause an image not to be sharp. The first is using too slow of a shutter speed for the situation you are shooting. The second is not focusing correctly.
A slow shutter speed can result in blurry images for a number of reasons. If you are hand holding your camera, then any movements in your hands can translate to blurry images. Movement of the subject can also translate to blur, as can movement due to you taking photos from a moving vehicle or boat.
You can resolve the slow shutter speed blur problem by using a faster shutter speed, and ensuring you are as still as possible when shooting. Ideally, you’ll want to rest your camera on something totally stable when shooting. Then all you have to think about is the motion blur that might result from the animal moving.
For focus, the main issue is likely to come about as a result of the camera’s autofocus system picking the wrong part of the scene to focus on, leaving your subject out of focus. I’ll cover that in my next tip.
Master Your Camera’s Focus System
An important aspect of wildlife photography is knowing how to use your camera’s focus system.
It is important to be able to focus on the animal or thing that you want the viewers’ eyes to go to in the image. This means that you will want to be able to use your camera’s manual focus system (if it has one) and/or learn how to change the focus if your cameras autofocus gets it wrong.
A shot can technically be in focus and sharp, but if you have focused on the wrong part of the scene your actual subject will be out of focus and so you won’t end up with the image you want.
Nearly every camera on the market today has an automatic focus, or autofocus system. As the name suggests this system automatically focuses for you when you point the camera at a scene.
There is however quite a difference in the capabilities of these systems. At the more basic end, an autofocus system will allow you to select an area of the scene to focus on, and then focus appropriately.
More advanced autofocus system will be able to identify specific types of subject like animals or people, and track them as they move so you can keep focus.
Many cameras and lenses also feature manual override, so you can manually adjust the focus if you need.
For the main camera I use for wildlife photography, the Canon EOS R5 , this has a very sophisticated autofocus system which is able to recognised and lock onto a wide range of subjects. If it can find an eye, it will lock focus on that. Otherwise it will try to track a torso or head. Additionally, it can continue to track the subject as it moves, switch between subjects, and I can override the focus selection if necessary.
It took me quite a while to get to grips with this system, and also to get used to its quirks and limitations. For example, on some occasions it would prefer to focus on the grass in front of the subject rather than the subject. Other times it might focus on a marking on an animal’s hide, rather than the eye.

Results like this are why it is so important to both understand the various focus modes of your camera, but also understand how to override them.
For example, on my Canon EOS R5 I have a separate button set up for centre spot focus. This allows me to point the centre of the frame at the area I want to focus on, and know I’ll get sharp focus in that area when I press the focus button. I can also entirely override the focus with the manual focus ring on the lens.
Whilst I can rely on the autofocus subject tracking 90% of the time, it also means I don’t miss focus in those edge cases where the camera doesn’t get it right. Technology can be smart, but it can’t read minds quite yet, so it’s usually working off a best guess as to what you want to take a photo of.
Whatever your camera is, my recommendation is to spend some time learning the various focus modes, what they are, and how to quickly override the focus if necessary, either manually or by selecting a different focus area.
Ideally you’ll want the camera to be in a continuous focus mode so it keeps tracking a moving subject. Try to find some subjects like wildlife in your garden or a moving pet that you can practice on before you go on safari to master your camera’s focus features.
Try Shooting in Burst Mode
Most cameras have a range of shooting modes, which may also be called drive modes. The choices normally vary, and will include single shot and burst shot modes. The drive mode menu on your camera is also where you’ll often find the camera’s self-timer mode.
For wildlife photography, a lot can happen in a short sequence of time. For this reason, shooting in burst mode is usually the way to go when you have a moving subject. This means that as you hold down the shutter button the camera will keep taking images.
Alternatively, in single shot mode, you have to keep pressing and depressing the shutter button. This loses you time and you may miss the shot.
Shooting in burst mode will let you take a sequence of images and then pick the best one. For example, here’s a sequence to show a yellow-billed stork landing.

The number of images the burst mode will take will depend on two main factors.
First, the camera’s burst speed, which is the number of images per second your camera can take. For instance, a camera with a burst speed of 10fps (frames per second) can take up to 10 photos per second.
Second, the speed that your camera can write to the memory card inside the camera as it takes pictures.
Most cameras will be able to take a certain number of images at the maximum burst speed for a few seconds, and then as the memory buffer fills up, this rate will slow down or even stop until the images have been written to your memory card. These details should be made clear on the specification sheet for your camera.
When you shoot in burst mode you will definitely also want to have continuous autofocus enabled. This will mean that if your subject moves as you are shooting it will hopefully stay in focus.
The main disadvantage of shooting in burst mode is that you will end up taking a lot more photos and using more memory card space. However, memory cards and memory in general are relatively inexpensive these days, so this shouldn’t be too much of an issue. Just be sure to always have an extra memory card with you.
Try to Shoot at the Best Times of Day
If you’ve ever read a photography guide, it will normally advise you that shooting in the earlier morning and later afternoon will give you better results. This is because the light at the start of the day and in the evening is softer and has that nice warm yellow glow.
In addition, the lower angle of the sun in the morning and evening produces shadows, resulting in images that have better contrast and depth compared to images shot in the overhead midday sun which can produce more flat images.
When it comes to safari, this advice is also true, but there are additional reasons to shoot earlier in the morning and later in the evening.

To start with, the majority of animals are going to be more active earlier in the morning and then towards the evening. The middle of the day tends to be hotter, and is a time when many animals are likely to be resting in a nice shady spot.
You will tend to see fewer animals in the hottest part of the day and those you see will tend to be less active during this time.
If you are looking for nocturnal species like genets, bushbabies, or aardvarks, your best chances to see them are on night drives or night walks, or to try to go as early in the morning as you can for a chance to spot them before they have gone off to sleep.
Just note nocturnal animals can be pretty tricky to see in most national parks given the hours that you are allowed to do a game drive. Getting good photos of them can be very difficult given they are often spotted at night.
We recommend trying to start your game drives as early as the park will allow. This will give you a better chance of seeing more wildlife, and also getting better images of that wildlife.
Another reason to avoid the middle of the day is that as the air heats up it gets more hazy. Think of the heat shimmer you see on a hot day—this is a real issue when shooting during hotter days and can negatively impact your images.
The haze will result in less sharp images, especially of further away subjects. In addition, as the day progresses, there will often be more dust in the air from vehicles driving around, which also reduces the clarity in the air.
Of course, I appreciate that I am talking about ideals. It isn’t always possible to pick the ideal time. Sometimes you will be out in the middle of the day. In these situations. Try to get as close as possible to your subject, which will let you avoid more of the heat haze. Where possible, shoot your subject so the sun is behind you rather than behind your subject.
The below two images are of the same black rhino mother and calf in Kenya. Both were shot in the middle of the day. In the first shot, the pair were quite far away and there was quite a lot of heat haze, meaning the shot ended up not being as sharp as I would have liked.

In the second shot, the pair moved much closer to us and the light was slightly improved, so there is some depth from the light and dark. It’s still not the ideal setup, but it’s definitely improved compared to the flat and slightly hazy look of the first shot.
See more on heat haze in photography here , including more tips for identifying and avoiding it.

This brings me on to my next tip for getting great photos on safari.
Any wildlife photographer will likely tell you that their most useful skill is patience. When doing landscape photography , I am certainly used to waiting for the right light, but wildlife photography definitely takes the need for patience to a new level.
Wild animals tend not to move to our schedules. They go where they want when they want. Being patient and quiet can reap huge rewards when it comes to photographing them in their natural habitat.
An example is of this leopard in a tree. When we arrived, it was asleep in the tree by its kill. However, we waited for around an hour and it decided to get up, eat more of its kill, descend from the tree and wander off. All these moments provided better photography opportunities than the initial one, and just required patience.

Another example would be a group of lion cubs we encountered in Tanzania. There were eight of them playing near the road, and as we watched two of them climbed up a tree. Shortly afterwards, one of their mothers returned, and we were rewarded by the sight of baby lions bounding across the grass to be reunited.

This is a story I could repeat multiple times across many wildlife encounters, but the overall message should be clear. Try to remember that a safari game drive is not an exercise in getting somewhere.
When you find an animal or bird you want to see, you will probably be rewarded if you spend some time just sitting and watching it rather than rushing on to try to find something else.
Prepare Your Equipment
If you already have a camera that you plan to take with you on safari, you want to make sure it’s in great working order before heading on safari. This is especially the case if you have older gear or gear that gets a lot of use.
Before you go, I recommend testing and cleaning the camera yourself to make sure it’s working. You’ll also want to make sure all the gear from your lenses to your camera straps are in good shape before your trip. Your trip is not a good time to learn about a preexisting scratch in your lens, a corrupted memory card, a fraying strap or a battery that doesn’t hold its charge!
You might also consider taking your camera to have a professional clean and check before your safari. Often you can do this at a local authorised dealer or repair shop for your camera brand, as they will have servicing options. Alternatively, your manufacturer might offer mail-in servicing options.
I try to get my cameras serviced every year or two, especially if I know I’ve been hard on them. As well as cleaning the sensor professionally, they check the camera over and make sure things like seals and screws are all in good working order. In my opinion this is well worth the investment, especially on high-end equipment.
Protect your Equipment on Safari
Safaris can be really hard on camera equipment. From dusty conditions to bumpy roads, there are all sorts of hazards that can either damage your equipment or cause it to function less effectively. In this section, I’m going to talk about common issues you can expect to encounter and how to overcome them.
Dust or Sand
When it’s hot and dry, the roads will be dusty. As your vehicle and other vehicles travel on the roads they kick the dust up, and it gets everywhere. If you have the top down or windows open, expect dust to get on your camera equipment.
If you are traveling to a place where sand is a concern, such as a desert or beach, be careful as blowing sand can get into your gear and can also leave scratches on your lens if you accidentally wipe them. Never put your camera down in the sand as it can easily work its way inside.
Cameras contain a lot of sensitive electronics as well as some moving parts, neither of which appreciate dust or sand. In addition, if dust gets onto your camera’s sensor it can cause unsightly spots to appear in your images.
There are a few things you can do to minimize the impact of dust or sand. First, a good camera bag that you can put your camera in between uses will help to prevent general dust getting in. So when you are not using your camera, I’d recommend securing it in a case or bag.
Also be careful about where you set your camera. Don’t place it on the ground or other dirty surfaces, and don’t leave it outside for any longer than it needs to be outside.
Next, remember to use a lens cap if your camera lens supports them as this will help to keep the front element dust free. Just keep the lens cap in your pocket and place it on the camera whenever you are not using it. If your lens supports it, then a lens hood and a UV filter can also provide much needed protection.
If you are using a camera where you can change lenses, try to change the lens in a dust-free location if possible, such as in your hotel or when stopped in a sheltered place. Try not to change your lenses more than you need to when in dusty situations.
In addition, I’d recommend packing a small camera cleaning kit so you can get accumulated dust off your gear as you travel. I’d particularly recommend having a lens cloth, a brush, and a blower with you.
Once you are done with your safari and you have gotten all the amazing photos you wanted, you might consider getting your camera professionally serviced and cleaned to get rid of any errant dust and to ensure it’s back to full working order for your next adventure.
Not all safaris take place whilst in a closed vehicle. Sometimes you might be on foot or trekking, or in an open top vehicle. In these situations, even when visiting a country in the dry season, there’s always a possibility of rain.
Whilst some cameras do offer a level of weather-proofing or rain resistance, the majority are not fully waterproof. So having a camera rain cover to keep your gear dry like this is a good option.
I’d also recommend having a good camera bag or backpack with a rain cover where you can put your camera in between shots.
If you have a smaller camera like a compact camera or smartphone, something like a resealable freezer bag or clear dry bag can also work well to keep it dry.
Bumpy Roads
As well as dust and rain, another issue you will have to contend with will be bumpy roads. Most roads in safari parks are unpaved, and some of them can be very bumpy.
You definitely don’t want your camera equipment flying around the inside of a vehicle as this can damage it, and could even cause injury to the other occupants. I have a few suggestions to help avoid this scenario.
First, I recommend bringing along a good camera bag or case. Camera bags are specially designed to provide padding and protection for your gear, and many of them also come with rain covers. This means that you have somewhere safe, protected, and padded to put your gear in between shoots.
Personally I use Vanguard photography bags and I’ve been an ambassador for Vanguard for many years now. If you see something on their store that works for your equipment, you can save money using our exclusive Vanguard discount code. This will give you 20% off everything in the Vanguard store.
Just use the code FindingTheUniverse for your discount! This code works in the Vanguard USA, UK, Australia, Spain, and Germany stores.
When you are actually using your equipment, I recommend having a strong and comfortable strap to keep it secure around your neck or shoulders. I use the Peak Design strap system which has reliably kept my camera gear comfortably slung at my hip for many years now. You’ll want to find one that is comfortable for you.
I left my DSLR camera on the seat of our Land Cruiser on a trip and it fell on the floor after hitting an unexpected bumpy patch in the road. I was lucky that nothing was damaged but it sure made me more careful about either putting gear away in my bag or keeping it around my neck.
I also recommend that if you are someone like me who enjoys standing up in a safari vehicle, that you sit down or at least put your camera in a camera bag when the roads gets really bumpy. If your guide tells you to hold on or you see that you are going to be crossing a river, it is probably best for both you and your gear to sit down. This way you’ll have a better grip on your gear and avoid banging your gear on something or falling.
Dress Appropriately
Packing appropriate clothing is going to ensure you are comfortable and ready for the weather during your trip. Whilst it might not directly help you get better photos, comfort is a really important factor. When you are comfortable you will be able to focus on getting great photos rather than the temperature or the insects.
When choosing clothes for your trip, consider the climate, weather, and insects of where you are going as well as the activities you plan to do. You are going to pack very differently for a cool weather destination than a tropical one. You also need to pack differently if visiting a country during its rainy season versus its dry season.
In terms of photography specific clothing, you might want to consider having lots of pockets so that you have plenty of places to store things when standing in a vehicle and when hiking. This will give you quick access to things like extra batteries, lens wipes, and your lens caps.
There are a range of different vests you can get, including specialised photography vests . I personally prefer something a bit more versatile that I can use in a variety in situations, and I like the Scottevest products which have a lot of pockets and are great for travel in general. I find them particularly useful for airport travel as they have so many handy pockets.
Generally though, on safari I wear the NosiLife long-sleeve shirts from Craghoppers . These have lots of pockets and also come with built in insect protection and sun protection. They also dry very quickly.
Jess and I mainly wore Craghoppers tops and bottoms throughout the days where we were either in the vehicles on safari or were doing treks. This is the most common brand we’ve seen people wearing for proper safari clothing throughout our travels. You can shop for them on their official store here , as well as on REI in the US here , and on Amazon here .
Depending on where you are going, you will probably also want to consider packing a hat, sunglasses, insect repellent , sunscreen, good practical shoes (we generally wear Scarpa or Merrell ), layers for warmth, and a rain jacket or poncho .
For more tips, check out our detailed guide to what to pack for safari , which has lots more tips and suggestions for your trip.

Pack a Photography Bean Bag
If you are traveling with a longer lens, I’d consider getting a photography bean bag or two for your safari trip.
For wildlife photography on safari, I find that a photography bean bag like this is one of the most useful photography accessories I have packed. Generally, I find I get a lot more use out of a bean bag on safari compared to a tripod or monopod.
This is because on safari you are often shooting from a vehicle, either from the window or via the pop-up top. And in both cases, setting up a tripod or even a monopod isn’t always going to be possible.
On the other hand, a bean bag can rest on the top of the vehicle or over a window, where you can then rest your lens or camera on it. If you are shooting with a larger camera and lens setup, you will definitely be thankful of having somewhere to steady it, as it’s unlikely to be practical to hold it up for prolonged periods of time. It also keeps you from putting your camera or lens directly on the metal edges of windows and roofs which could lead to damage.
Using a bean bag means you’ll be able to use slower shutter speeds for more stationary animals as well, so you don’t have to worry about camera shake so much. This is especially helpful when shooting with very big telephoto lenses from around 400mm and up.
Jess also found the bean bags useful for just using as armrests and for placing her elbows when using binoculars.
Bean bags are very light to travel with, and you can usually find inexpensive materials like dried beans to fill them with at your destination. My only tip is not to fill them with anything obviously edible, as some animals in some parks might sniff out the tasty treats within and decide to give them a nibble! Dried (obviously uncooked!) beans are a good option for this reason.

Be Specific About What You Want with your Guide
If you are doing a safari with a driver and/or guide, then being able to communicate about your goals and what you want to see is really important. It is also important for you to listen to your driver/guide for feedback and understand what is realistic based on their expertise. Doing this as early in the trip as possible is best.
If there’s a certain shot or composition that you want, it’s a good idea to let your guide know so you have a better chance of seeing it. Whilst there’s never a guarantee of seeing any wildlife on safari, if you specify that you want a shot of an elephant bathing for example, then your guide should have an idea of where the best places to get that shot might be on your trip.
If you aren’t clear on your interests, then you’ll be on more of a general safari and taken on the common safari drive circuits within the parks. Guides will almost always drive you to see things like lions or cheetahs if spotted, even without asking you. However, if you’d rather photograph elephants, eagles, or zebras, then you need to speak up so that you guide know what your wildlife sightseeing priorities are for the trip.
Whilst you will still likely get great photo opportunities (your guide is there to take you to see wildlife after all!), it might not be exactly the shot you want. So being specific will definitely help improve your chances of getting the shots you want if you have something specific in mind.
Another thing we discussed with our guide from the beginning was to have signals about stopping and when to leave after stopping for a wildlife sighting. So we asked our guide to just ask to make sure we wanted to leave an animal or we’d tell him, or he’d give us a head’s up if we needed to leave.
This not only helped make sure we felt we had enough time to get the photos we wanted, but it also made sure we were prepared for any sudden jerks from stopping and starting the vehicle.

Communicate with your Fellow Travelers
If you are traveling solo, then you will of course have a lot of autonomy in where you go and what you see on your trip. If you have a driver/guide then the two of you can set times and itineraries each day and be in sync about your wildlife spotting goals.
But, if like most safari goers, you are traveling with a partner, your family, friends, or as part of a group safari with other travelers, then you will likely have to be willing to compromise at times.
Common things you will likely need to decide on together will be what time to leave, how long to spend on game drives, whether to eat a hot lunch or a picnic lunch, and how long to spend watching each animal.
This can also affect your ability to get the photos you may want in terms of timing and views from the vehicle. With just one or two people in a vehicle, it is generally easy to find a good view, but once you have 4 or more people, it often becomes difficult for everyone to have a great view all at the same time, especially if an animal is not in an open area.
Generally, in these circumstances everyone will politely take turns and give everyone a bit of time and space to view the animal and take photos. But this does mean you will need to compromise and will sometimes miss the “best” view.
However, group safaris by far offer better value in terms of money compared to a private safari. But just note that they do come with some compromises.
I definitely recommend traveling with family or friends if that is an option, as sharing these experiences is probably worth more than taking a good photo. But it is worth talking about everyone’s goals and travel style before booking your trip to make sure everyone is likely to have a good trip.

Consider the Composition
As with any kind of photography, composition is key. Composition refers to how you place the various elements in your shot to create the final image.
It can be easy to get caught up in the moment when you see something exciting, and just to start shooting in an effort to get something shot. This excitement is very understandable!
However, if you are able to calm yourself down a bit and spend a fraction of time properly composing your shot, you will likely get better results.
There are a range of general composition rules in this post that you can read about, so I won’t rehash that. The main things I’d suggest just keeping in mind are the following.
- What’s in shot . When framing your shot, glance around the whole frame to see what is and what isn’t in the shot. For example, it can be very easy to frame an animal’s head, but accidentally crop out parts of their body or a tail. Whilst this might be the composition you are after, it might also end up looking a bit odd. Sometimes, zooming out a fraction and ensuring the whole animal is in the frame might be a better composition
- Eye contact . There are many different wildlife poses you can capture, but one of my favourites is when the animal is looking directly into the camera. In this pose, it will appear to be directly staring at the viewer. This is not always easy as animals tend to look all over the place. In these scenarios, burst mode and patience can be your friends.
- Animal Placement . When shooting from a vehicle, especially from the pop-up roof area, we can often end up above the animal. However, often animals look better when shot from eye level. So repositioning yourself to shoot from an open window lower down in the vehicle might give you a better shot, depending on the distance to the subject.
- Background and skyline . When putting your shot together, don’t forget to consider the background. For example, a deer against a brown rock face or tree will not stand out as well as one against a skyline. It’s not always possible to reposition yourself, but if there is the opportunity to wait for a better composition, or move the vehicle to a different location, take it.
Here are a couple of shots to illustrate my points above.

Don’t Forget the Landscapes
One of the main reasons people go on safari is to see the incredible wildlife of an area. However, it’s also very likely that you are going to be passing through some amazing natural landscapes.
Whilst it can be easy to get a bit single-minded about what we’re photographing, it’s important to step back and capture the landscapes as well as the wildlife.
If nothing else, this will serve as a reminder for you in the future as to where you were when you got the shots, and also the lovely scenery you witnessed. Capturing the wildlife with the landscape is also a good option, as it will give some depth and scale to your compositions.

Pack Spare Memory Cards and Batteries
The chances are that you are going to be taking a lot of photos when on safari. If you are shooting with anything other than a smartphone, your camera will likely have a battery you can change and a memory card slot.
It is definitely worth bringing at least one spare battery for your camera, and ideally two. In addition, bringing plenty of memory is also a good idea.
You don’t want to be half way through a busy day and run out of battery or memory card space, and then potentially miss some great shots. Modern mirrorless cameras in particular can eat through batteries, so a spare or two is definitely a must in my opinion.
Consider bringing a USB Powered Battery Charger and Power Pack
Accommodation options on safari can vary greatly, from simple campsites to high end luxury safari lodges. One thing we have found is that not every accommodation, especially the more remote and basic ones, will have AC power outlets. Or at least not one in your room (there is usually at least one public shared power outlet somewhere in a lodge or campsite).
If they have wall outlets, they will likely be 220V-240V, so you will want to check that all your equipment supports this if you are coming from a country like the USA, Japan, or Canada which has 110V-120V power. Many people will also need a travel adaptor to adapt your plugs, depending on where you are coming from and your travel destination.
However, rather than full power outlets, many locations offer USB outlets. These don’t use so much electricity, and are often powered by solar panels.
What this means is that if your camera only has a standard wall outlet charger for its batteries, you might not be able to charge them. Note that some cameras do charge via USB, so do check if that is the case.
So we recommend making sure that you are able to charge your batteries using both the local AC power outlets and via USB so you can take advantage of either charging option. We also recommend considering packing a power pack.
We personally travel with a USB battery charger for our Canon camera batteries. This is better than our standard charger in some respects, as it can charge two batteries at once, and charges over standard USB. There are a number of different models available , the main thing is to find the one that matches your camera battery.
As well as the USB battery charger, we also travel with a USB power pack . We can use this to charge all our USB powered devices, including our phones and the USB camera battery charger. This is helpful when we have periods of time without power.
Ask About Your Safari Vehicle
Before you go on safari, it’s a good idea to check with your safari company about the type of vehicle you will be in. There are a number of different models that companies use in different locations around the world, with Toyota Land Cruisers being the 4X4 vehicle of choice for many companies. However, there are many different models of Land Cruisers used for safaris so knowing the specific model can be very helpful.
The same vehicle model’s features can also be different across companies depending on the specific conversion. Probably the most important thing for most people is the number of seats, luggage space, and the configuration of the top.
We highly recommend a vehicle with a pop top. This means the top of the vehicle will pop up, allowing you to stand up inside the vehicle and get a better view, as well as better photos.
For the majority of these vehicles, the top pops up and remains over your head, providing much needed shade. However, in some vehicles, the tops actually come off completely, so you won’t have any shade.
We highly recommend a vehicle where the top doesn’t come off completely, as otherwise you are going to be in the sun a lot.
It’s also a good idea to check on the height. In some of the vehicles we have found that even when standing up, the lip is a little high for Jess to get a good view. So if you are shorter (or very tall) you should definitely check about this if you really want to be able to stand up for game viewing.
Another thing to check is whether or not the vehicle has charging points (some have standard wall outlets whilst others might have USB outlets). Some of our vehicles have had this, some didn’t, but it is becoming more common.
If you are planning a very photography focused safari, you can also ask if the vehicle has any photography specific features. Some of the vehicles we’ve travelled in came with photography bean bags for our use for example, which was very helpful.
Other special features might include special camera mounts, tripod mounts, the ability to fully open or remove windows, and even the ability to remove a door or two. I wouldn’t expect most of these features unless you are paying extra for a special photography trip.

Consider Doing Boat and Walking Safaris
Whilst most safaris are done from a 4×4 vehicle, there are other options depending on where you are travelling.
For example, in some locations you might be able to do a walking safari or a boat-based safari. These will give you some variety as well as present the opportunity to see different wildlife.
For instance, if you are interested in birds and small creatures (e.g., dung beetles, lizards), then walking safaris are often going to be better for getting close to these animals. Boat safaris are going to obviously be the best way to get closer to aquatic wildlife.
Of course, this isn’t always going to be possible depending on where you travel, but we definitely recommend signing up for at least a couple of these experiences if you have the option.

Shoot in RAW
If your camera supports it, and nearly all do these days, I highly recommend setting it up so it saves your image files in RAW format. Whilst this takes up more memory, and does require you to edit your photos, you will get a lot more latitude when it comes to editing your final image.
I go into a lot more detail in why to shoot in RAW in my guide to RAW in photography . For now, I recommend enabling it. Most cameras have the option to shoot in both RAW and JPG if you need a stepping stone, although this will take up more memory card space.
However, if you want to be able to share your photos instantly online during your trip, then you will probably want to also shoot in JPG/JPEG because you don’t need to edit them prior to uploading them.

Learn to Edit Your Photos
Photography involves a number of skills. The first two are in the field when you’re getting the shot, and require you to know how to compose a great photo and how to use your camera.
The third skill is photo editing. Photo editing is where you can get the most from the images you have captured. This doesn’t have to take a long time, even minor edits can make a big difference to an image.
Judicious cropping, adjustment of shadows and highlights, tweaks to saturation—these can all add up to really improve an image.
Of course, you can go a lot further with photo editing software. But as a starting point, loading up one of our favourite photo editors and learning how to use it can really help you get the most from your shots.

Keep Your Eyes Open
When you are on safari, the chances are that you will have a guide. Your guide will normally know what sort of wildlife you are likely to see in the areas you’re visiting, and they will of course be looking out for it as you drive or walk around.
However, the thing about wildlife is that you never know what you are going to see. And the more eyes that are looking for wildlife, the higher your chance that you will spot something. Your guide can’t look everywhere at once, and if they are driving, they are going to be at least a little distracted by operating the vehicle and keeping you safe.
In our most recent safari experience, we would often maximize what we could all see while on a game drive. So, generally our guide was seated in front in the driver’s seat, Jess would sit on the opposite side of vehicle from the driver, and I would stand at the back and scan for a different viewpoint. This way we were looking in many directions and had a better chance of spotting things. Although our guide was by far much better at spotting wildlife than we were, we still occasionally made some great spots that our driver had missed.
In my opinion, a safari should definitely not be a passive experience where you sit back and wait for something interesting to be pointed out to you. However, I have been surprised by the number of Land Cruises and Land Rovers full of bored-looking people who seemed to be spending more time on their phones or talking to one another than looking outside. They seem to simply wait for their driver to stop and point something out, take a photo, and then go back to their phones.
If you actively participate and spend your time searching for wildlife as well, you’re going to improve the chances of sightings and find more photo opportunities. You are also going to learn a lot more about the natural environment around you. And you are going to enjoy your trip a whole lot more!

Enjoy Yourself!
This might seem a bit counter intuitive in a guide to getting great photos on safari, but it’s important to remember. When on safari, it can be easy to become caught up in the need to capture every moment with our cameras, and not to miss a shot.
Whilst of course I want you to get those amazing shots, don’t forget that you came on safari also to witness wildlife in its natural habitat. So don’t forget to just step back from the camera every now and again and just take it all in. A safari is an incredible experience and you definitely want to try and enjoy it rather than being stressed over getting every shot on your memory card.
On our recent trip, Jess generally only took photos when animals came close, otherwise, she was content just watching them, either with a pair of binoculars (I definitely recommend packing a good pair of binoculars) or her naked eyes. She said she got much more enjoyment just watching them than when she was trying hard to get a good photo as she had in prior trips.
We highly recommend just sitting back and letting some moments go by unrecorded. I find you can often learn a lot more about animals if you just sit and watch them sometimes. Not every moment needs to be photographed!

Further Reading
That’s it for my guide to getting better photos on safari! If you found this useful, you might enjoy some of my other photography content. Here are some articles to get you started.
- We have a guide to the best safari camera , to help you choose the right gear for you and your budget. We also have a guide to photography bean bags for safari you might consider checking out.
- We have a detailed overview of gorilla trekking in Uganda as well as chimpanzee trekking in Uganda , both of which are an incredible experience
- We have a detailed guide to what to pack for safari , to help ensure you bring the right gear for your trip
- I have a guide to my favourite photo editing applications , as well as the best alternatives to Lightroom
- Wildlife photography can often result in noisy images. See my guide to the best noise reduction software for some ideas on how to get the best out of your photos even when they might be a bit noisy
- We have a guide to how to use a compact camera , how to use a DSLR camera , and how to use a mirrorless camera . We also have a guide to how a DSLR works
- Knowing how to compose a great photo is a key photography skill. See our guide to composition in photography for lots of tips on this subject
- We have a guide to what depth of field is and when you would want to use it.
- We are big fans of getting the most out of your digital photo files, and do to that you will need to shoot in RAW. See our guide to RAW in photography to understand what RAW is, and why you should switch to RAW as soon as you can if your camera supports it.
- You’re going to need something to run your photo editing software on. See our guide to the best laptops for photo editing for some tips on what to look for.
- If you’re looking for more advice on specific tips for different scenarios, we also have you covered. See our guide to Northern Lights photography , long exposure photography , fireworks photography , tips for taking photos of stars , and cold weather photography .
- Color accuracy is important for photography – see our guide to monitor calibration to ensure your screen is set up correctly.
- If you’re looking for a great gift for a photography loving friend or family member (or yourself!), take a look at our photography gift guide ,
- If you’re in the market for a new camera, we have a detailed guide to the best travel cameras , as well as specific guides for the best cameras for hiking and backpacking , the best compact camera , best bridge camera , best mirrorless camera and best DSLR camera . We also have a guide to the best camera lenses .
- If you want a camera or lens, but the prices are a bit high, see our guide to where to buy used cameras and camera gear for some budget savings options.
- We have a guide to why you need a tripod , a guide to choosing a travel tripod , and a round-up of our favourite travel tripods
Looking to Improve Your Photography?
If you found this post helpful, and you want to improve your photography overall, you might want to check out my online travel photography course .
Since launching the course in 2016, I’ve already helped over 2,000 students learn how to take better photos. The course covers pretty much everything you need to know, from the basics of how a camera works, through to composition, light, and photo editing.
It also covers more advanced topics, including astrophotography, long exposure photography, flash photography, and HDR photography.
You get feedback from me as you progress, access to webinars, interviews and videos, as well as exclusive membership of a Facebook group where you can get feedback on your work and take part in regular challenges.
It’s available for an amazing one-off price for lifetime access, and I think you should check it out. Which you can do by clicking here .
And that’s it! I’d love to hear about your thoughts on wildlife photography on safari, and am happy to answer any questions you have. Just pop them in the comments below and I’ll get back to you as soon as I can.

Enjoyed this post? Why not share it!
There are 4 comments on this post
Please scroll to the end to leave a comment
Towab Muhammad Yusuf says
2nd April 2022 at 12:27 pm
Zebras is looking awesome, so natural looking
Laurence Norah says
3rd April 2022 at 10:28 am
Thanks Towab!
D. Hernandez says
26th March 2022 at 1:36 am
Hello Laurence,
Thanks for these wonderful photography tips and advice! I am not much of a photographer but found these tips very useful and will be keeping this page bookmarked to read again before my safari. My wife and I have a 2-week trip planned to South Africa in in the fall and about a week of that will be spent on safari.
I was given a Canon EOS Rebel T7 DSLR camera (used but barely used) last year but without any lenses. So my question for you would be what lens would you recommend I invest in if I was to choose to take just one for this trip? I would also of course want to use it around home and for taking photos of family events and future trips, but the main focus for now is getting some decent wildlife photos on our safari in South Africa. Would like to purchase it soon so can start practicing (as you recommend) now!
Thanks for all your time & help! D
26th March 2022 at 9:42 am
I’m glad you found the post helpful and I am sure you will have an amazing trip! So if you are looking at just one lens then you will want a lens that can go from quite wide to quite zoomed in. A lens like this is known as a walk around lens. I would probably recommend either the Tamron 18-400 f/3.5-6.3 or the Tamron 16-300 f/3.5-6.3 . These would both give you the versatility you would want in terms of range, from wide to zoomed in. The 16-300 gives you a slightly lighter lens that can take slightly wider angle shots, whilst the 18-400 is a bit heavier but you get more reach.
It is worth noting that of course if you zoom in at 100% and peer at the images produced by these lenses they won’t compare to a high-end lens costing thousands of dollars. However I think that for standard size prints and general use they are a good option at a reasonable price point.
Let me know if you need any further input, I’m happy to help. Otherwise, have a fantastic trip!
Leave a Reply Cancel reply
Your email address will not be published. Required fields are marked *
Let me know when there's a reply to my comment (just replies to your comment, no other e-mails, we promise!)
Subscribe to our monthly Newsletter where we share our latest travel news and tips. This also makes you eligible to enter our monthly giveaways!
We only ask for your e-mail so we can verify you are human and if requested notify you of a reply. To do this, we store your data as outlined in our privacy policy . Your e-mail will not be published or used for any other reason other than those outlined above.
How To Take The Perfect Safari Photo
The safari photography guide.
Photographing wildlife is always challenging, so we’ve put together our top tips on how to take a steady stream of great wildlife photos whilst on safari to help capture the amazing sights that await on your African adventure.
Photo Prep Before You Go:
– Take the time to familiarise yourself with how your camera works. Practice using the different modes and studying the result. You don’t want to waste a moment of your trip getting frustrated over how to use your camera!
– Think about the environment you’re going to be in – will you want the hassle of carrying around a tripod, extra lenses, and filters? For a safari situation, your extra gear may be a touch too limiting and distracting.
– Study the animals you are hoping to photograph. Being familiar with their movements and features can help you plan how best to capture them when the moment arrives… and end up with a safari animal photo portfolio like this .
– Check your equipment to ensure it is not too noisy or distracting for the animals. See if you can turn off the shutter sound, for example, or choose a camera with a quiet one if you’re buying something new.
Tips Whilst On The Trip:
– Be sure to charge your battery and bring spares if you have them, or invest in a few if you don’t. You could be out all day and are likely to be doing a lot of shooting, so start each day with a fully charged battery to limit the chances of running out and missing a perfect shot.
– Make sure you have extra memory cards for the same reason as above. The general consensus is – however much memory you think you will need, bring more! For many, a safari is a once in a lifetime experience, so don’t limit yourself to the number of memories you can capture.
– When trying to shoot a moving animal, switch your camera mode. Sports or action mode are both good options if you have them, as they increase the shutter speed, meaning you can catch the movement without the result being a blurry mess. Do remember to switch it back to normal afterward, however, as this won’t produce a good result for stationery shots.
– Avoid shooting into the light and try to position yourself on the opposite side of the vehicle to the sun. Ideally, you would like the sun to be behind you, illuminating the subject.
– Turn the flash off! You won’t need it during the day and it can annoy the animals, so be mindful and respect the local environment.
– Don’t put your subject in the middle of the picture. Think about the shot you want and how best to compose it, then spend some time setting it up (even if the animals aren’t yet there). It is all too easy to get caught up in the moment and just start pointing and shooting, but this will not result in the best images.
-Following on from the above point, use the rule of thirds. In a nutshell, this means imagining your screen as a grid cut into 3 x 3 squares, placing the focal point(s) of the scene where the lines intersect.
Technical Talk:
– For capturing animals in motion, you ideally want a camera that shoots at 5x a second, with a shutter speed of 1/125.
– If you are bringing a Digital SLR along, a long lens is crucial. A 300mm lens will work fine, but a 400mm lens is better for shooting from a distance. For landscape shots, use a wide-angle lens.
– If you don’t think a tripod is practical, take a bean bag or a window-mounted tripod instead.
– Blurred backgrounds can look great, particularly on close-up shots.
– For zoom shots, keep the eyes of the creature in focus, which will result in a more engaging photo that embraces the personality and spirit of the animal. Find out more about some great zoom lenses .
And finally, don’t get so caught up in taking the perfect photo to show everyone back home that you forget to take the time to experience the moment! Put your camera down for a while and make some memories that are just for you.
Interested in putting your new-learned photography skills to use on a safari? Read our guide to photography safaris across Africa.
Interested in sharing your photos with the world? Learn more about how to start a photography blog on 9 Mousai .
Top countries for safaris
- Botswana safaris
- Kenya safaris
- Namibia safaris
- South Africa safaris
- Tanzania safaris
- Uganda safaris
Safari basics
- Safari animals
- How to find the right safari company
- When to go on safari
- What to take on safari
- Safari clothing – what to wear
- Safari rules & etiquette
- Wildlife spotting tips
Most read articles
- All about the ‘big five’ animals
- Collective nouns for animals
- Safari movies to watch before you go
- The world’s fastest land animals
- Apex predators
- 10 Fascinating African tribes
- The biggest animals in the world
- 17 Epic hybrid animals
- The world’s ugliest animals
- Why are flamingos pink?
Africa’s best game reserves
- Chobe National Park, Botswana
- Etosha National Park, Namibia
- Kruger National Park, South Africa
- Masai Mara National Reserve, Kenya
- Moremi Game Reserve, Botswana
- Okavango Delta, Botswana
- Serengeti National Park, Tanzania

Session expired
Please log in again. The login page will open in a new tab. After logging in you can close it and return to this page.
Accueil - Travailler avec nous - Pensées de voyage - Voyage famille - Envie d'écrire ? - A propos
Home - Travel resources - Family trip - Contact - About - Media Kit
Inicio - Contacto - Quiénes somos
- DESTINATIONS
- PHOTOGRAPHY
- LEARN PHOTOGRAPHY
- TRAVEL TIPS
- DREAM DESTINATIONS
15 safari photography tips
Last update : 04/19/2024
Our blog continues to grow thanks to you, our readers. This post may contain affiliate links, which means we can earn a small commission if you make a purchase through them, at no extra cost to you. This helps us to continue to bring you more and support our work !
A few years ago, I had the opportunity to go on a photo safari in Tanzania. What an extraordinary experience! I then spent one week visiting the wonderful national parks of Lake Manyara, the very famous Serengeti National Park, the Ngorongoro crater, and finally the Tarangire N.P. I learned many things in photography that I would like to share with you today, the objective being to give you some photography tips to take better pictures on your safari . We’ve also written a full article on our best photography tips for wildlife photography .

Indeed, if you choose to go on a safari photography, chances are you are a passionate photographer. So taking great safari pictures is something you don’t want to miss out on, right?
1 – Choosing the right camera equipment for your safari
2 – Renting photographic equipment for a safari
3 – Changing places in the car
4 – Change your framing
5 – Consider shooting something else than wildlife pictures
6 – Choose your accessories
7 – Buy equipment to clean your camera
8 – Pay attention when changing lenses
9 – Focusing on pictures at the right time of the day
10 – Think about RAW shooting and post-processing your pictures
11 – Observe and be patient
12 – Ask the driver to get in the right place
13 – Choose the right shutter speed
14 – Keep the burst mode activated
15 – Always be ready and wait for the right moment
A successful photo safari in 15 tips
In addition to this page, I invite you to read our detailed article explaining how to do better long lens photography . Indeed, during safaris, you will mostly use a telephoto lens! We give you then all our advice in this article!
1 - Choosing the right camera equipment for your safari
Although it is not the decisive element in enabling you to bring back beautiful pictures from your safari, it is nevertheless a very important point to think about. I have written a complete article on the subject.

So I’m not going to repeat the whole thing, but to sum up:
- First, evaluate your budget and your current and future needs in photography to know which equipment to prioritize,
- Select a rugged, dust- and moisture-resistant camera,
- Start with at least a 300/400 mm equivalent (24×36 format),
- Choose a zoom lens rather than a prime lens,
- Choose a bright lens,
- Remember to include a lens for landscape photography.
In any case, this is one of the main photography tips for a successful safari: identify what you need and choose your equipment accordingly .
Here are some quality telephoto lenses that I recommend for a safari. You have, as always, the choice between native brands (Nikon/Canon) and third party brands which now offer very nice long focal length lenses, at very interesting prices. All these lenses are compatible for APS-C format cameras, as well as full frame bodies.
For your safari, I recommend that you buy a polarizing filter for your telephoto lens, which will allow you to saturate and brighten the colors, especially in the savannah for example. I particularly recommend these filters for the following sizes: 67mm , 77mm and 95mm .
2 - Renting photo equipment for a safari
So why am I talking about renting if I just advised you to choose your equipment carefully? It is possible that some of you may not want to buy all the photography equipment for your safari or may not want to spend 1000€ on a lens that you won’t use again once the safari is over.
This is one of the great photography tips for a successful safari. If you can’t (or don’t want to) buy, then rent.

You can rent a very good Canon 100-400mm vII lens for only 100€ per week whereas buying it will cost you more than 2000€. It’s up to you to see if you can afford it and if you will still use it after the safari?
It is also important to know that it is better to rent a very good lens than to buy a very cheap lens. Your pictures will be 100 times better.
3 - Changing seats in the car
Yes, it may sound silly, but I recommend changing places on the safari several times if you get the chance. If you go with several people, the car will probably be full, which was the case on my safari. We asked with the agreement of the others in the car to change a little bit to be able to change the framing.

You won’t be able to take the same pictures when you’re in the front and the back of the car. One seat is not necessarily better than another, just different. If you’re in the two front seats, you’ll find it difficult to take pictures towards the rear because you’ll often have people in the field of vision. On the other hand, you’re often the first to see the animals.
Conversely, when you are in the back seat, your field of vision in front of the vehicle will be reduced by the people in front of you. In return, you will have a very free field of vision to the rear of the car.
4 - Change your framing
It is also one of the most important photography tips to shoot great pictures on safari. So what do I mean by that? Quite simply that if you take 50 pictures of a zebra in full frame, that’s fine, but frankly, everyone will have the same picture as you. The final objective on a safari is not necessarily to ONLY take pictures of wildlife! You can also take pictures of wildlife in their environment, which is very different!

So my advice would be to vary your framing. Take a few full frame pictures but try to vary the type of picture to integrate the animal in its natural environment: in the savannah, by the lake, etc.

For this, I give you two pieces of advice:
- Take a step back. Just because you have a 400mm doesn’t mean you have to zoom in on every shot. So try to de-zoom and take pictures at 100 or 150 mm to include the animal in its environment,
- Changing lenses: if the animals are close by, you can use your lens for landscape and shoot ambient photos of these animals with a standard wide-angle lens.
5 - Shoot something else than wildlife
I know that many of you will have the unfortunate tendency to put your cameras down when you return to camp in the evening to rest and spend the night. One of the photography tips I can offer to have better pictures in your safari is to think about taking other pictures! Of what? The possibilities are multiple:
Why not take a picture of your camp

Or simply landscape pictures…

So please bear in mind that there are many other possibilities to capture beautiful pictures of your safari. The landscapes are superb (even without animals), and don’t forget to take pictures of them, respecting the basic rules for great photos (composition, and other).
6 - Choose correctly your camera accessories
And yes, because going on a photo safari doesn’t necessarily mean taking only your camera and lenses. In fact, I have written a complete article on the essential accessories to bring on safari. To sum up, in my opinion, these accessories are clearly worth considering:
A polarizing filter, mainly for landscape pictures (to increase the contrast and saturation of your colors) but also for pictures of animals on the lake (to avoid reflections). Be careful though, because the polarizing filter will make you lose a little bit of brightness. The Beanbag: one of the essential accessories to rest your telephoto lens and relieve your arms!
7 - Buying equipment to clean your camera
This also seems to be one of the photography tips for a successful safari. The fact is, you’re going to be eating dust all day long. Believe me, your camera is going to suffer quite a bit, especially with the dust and the little twigs getting stuck everywhere.

An indispensable camera accessory in my opinion for a safari to wipe off dust and remove unwanted elements!
I therefore recommend that you clean your camera equipment (especially the body and lenses) every night in a place sheltered from the wind if possible. I advise you to bring some cloths to clean the lenses and a cleaning pen to remove all the dirt that will have been stuck.
You can refer to the article on the essential accessories to pack for a photo safari.
8 - Be careful when changing lenses
You will spend the week in a dusty place with occasional wind, not to mention your car journeys. As mentioned above, you will surely want to change your lens as to not only stick with a zoom.
I therefore advise you to only change your lenses when you are stopped, even several minutes after you have stopped. The movement of the car brings dust and dirt that will fly away. Therefor take the time to do it calmly and be careful that no car arrives at that moment.
9 - Choose the right time of the day
This advice can be given to improve your travel pictures in general, think about the time of day and the pictures you will be able to take at those times. The most beautiful photos will surely be in the hours after and before sunrise and sunset, the famous “golden hours”.

You will then have access to a magical light in the African savannah to highlight your animals in their environment and even more your landscape pictures that will get those golden and soft colors. Even the tight portraits of animals will be of better quality with a beautiful light compared to the hard lights of the middle of the day.
Of course, you can’t wait for those hours to take your safari pictures because you will be in the car all day, but give special importance to those hours seeing as you can really enhance your pictures.
10 - Think about shooting in RAW and post-processing your photos
It is one of the photography tips for a successful safari, even if I also give it in general to improve oneself and to make a success of one’s travel photos in general.
If you have some experience in photography, you already know why shooting in RAW is important. If you already take some time to edit your JPEG photos, I don’t see why you wouldn’t want to shoot in RAW?

On safari in particular and depending on the season when you are there, the colours can sometimes be a little bland (yellow/light green). Improvements in post-processing can then be appreciated to embellish your photos.
It will require a lot of patience when you come back, in terms of sorting and post-processing, but it’s worth it in any case.
11 - Observe and be patient
It’s one of the key words on safari, so you’re gonna have to be patient. This isn’t a zoo. You’ll probably just drive around for hours, not seeing anything, watching for any movement And then at some point, your guide will stop because he spotted something in the distance. Finally, it’s a beautiful herd of lions playing, and you will be amazed at the sight.

When you’ve finally found the long-awaited show, don’t rush to your camera. This group of lions may be there for hours. Then you’ll have plenty of time to capture the beautiful moments.
Why am I also talking about observation? Because in the end, your guide won’t be able to keep an eye on everything. It’s possible that you’ll be able to spot something in the distance too. Then let your whole group enjoy it. Furthermore, I am also talking about observing the behavior of the animals. Try to anticipate their behavior, ask the guide questions if necessary, to consider the type of photo you are going to take.
12 - Ask the driver to change position
Don’t always wait for your driver to place you in the right place to take pictures. It is possible that your guide may have some knowledge of photography, but this will not always be the case.
It would therefore be wise to discuss this with him at the beginning of the safari, to let him know your “photo expectations”. During the safari, don’t hesitate to ask to move the vehicle to get a better view, a better light, or to take a picture against the light.
13 - Watch your shutter speed
When I talk about watching your shutter speed, this is from a technical point of view and not from the point of view of haste. During your safari, you may have to deal with scenes of hunting, or playing..
In these cases, you will have to pay attention to the shutter speed. If you take pictures with low shutter speed, you will not capture the scene correctly, and the subject will be blurred. This is even truer if you shoot with a long focal length.

A small technical memo to help is to tell yourself never to shoot with a shutter speed lower than the focal length you are shooting at. Example with a 400 mm, at least 1/400. It’s a simple rule. I would even advise you to double this rule, if your camera equipment allows you to do so for safety reasons. At 400 mm, a minimum speed of 1/1000th.
Of course, depending on your lenses and the brightness of the scene, this will be more or less possible. In this case, you can use the beanbag or a monopod to stabilize the camera and avoid blurred movements.
Note that some bodies will allow you to set a low speed limit (example 1/300), which can be interesting in photography, coupled with an automatic ISO.
14 - Keeping the burst mode activated
Here again, this is one of the photo tips I would recommend. Keep the burst mode activated. You’re going to have a lot of rubbish to sort through anyway, but it would be a real shame if you can’t choose a picture of a specific scene because you are only taking one picture a time.
So don’t be afraid to shoot in burst mode, especially for action and scenes with motion. This advice is a bit less true obviously for a lion sleeping in the savannah!

15 - Always be ready and wait for the right moment
The last tips for a successful safari: always be prepared! And yes, in the space of 10 seconds, you can miss the photo of the century. Indeed, it will not take much to miss a moment, a scene, a precise gesture of an animal.
Taking a lion lying down in the savannah is not complicated, but capturing a great scene like a lion roaring or running after a prey will require you to always be ready and wait for the right moment to take your pictures.
I hope that this article on photography tips for a successful safari will give you a better idea of what you need to know to prepare your safari. One of the last tips I can give, one of the most important in the end.
Don’t forget to make the most of these moments!
For you part, have you ever been on a safari? Do you have as good a memory of it as I have? Where was it? Don’t forget one thing on safari, it’s to save your photos .
I hope this article has helped you. And remember, if you enjoyed sharing it with others, don’t forget!

Written by Sylvain PONS
I've been passionate about photography since 2010, learning as I went along. Today, I dedicate myself to guiding others in their choice of camera gear and sharing a variety of tips to improve their photography skills.
Despite our care, a mistake may have slipped into this article. If you find any, please don't hesitate to let us know so we can correct it as soon as possible and keep our information up-to-date!
Did you liked the post? Follow us!
You may also like

Leave a Reply Cancel reply
Your email address will not be published. Required fields are marked *
Post comment
This site uses Akismet to reduce spam. Learn how your comment data is processed .

- A photo Photos 5.7k
- Pen Tool Illustrations 22
- A stack of folders Collections 16k
- A group of people Users 452
Browse premium images on Unsplash+ | Claim your discount now

Make something awesome
4 Ways to Enter Picture in Picture Mode in Safari for Mac
Learn to use Picture in Picture with Safari so you can watch the latest YouTube videos while checking your email.
Picture in Picture is a great way to watch videos on your computer while you're busy working on anything else. It's a feature that multitaskers would love to take advantage of, especially when they only have a single display to work with.
Fortunately, on a Mac, you don't necessarily have to install a third-party extension to use Picture in Picture mode as long as you're using Safari. The feature is built right in, and you can access it in different ways. We'll cover all of them below.
What Is Picture in Picture Mode in Safari?
Picture in Picture (PiP) mode is a feature that lets you watch videos in a small floating window when you're browsing some other page in Safari or performing any other task on your Mac. It stays at the forefront of your screen no matter which new app you open on your machine.
You can use Safari's PiP mode on any website with video content. However, the method you need to follow to enter this mode may vary from site to site because of how differently they work.
Therefore, it's important to know all the possible ways to enter Picture in Picture so that you always have an alternate route when one option isn't available for a particular site.
1. How to Use Safari's Picture in Picture on YouTube
Let's start with the most popular video platform on the web. YouTube's built-in player shows a popout icon in the playback menu, but it's not the Picture in Picture feature that you're looking for. It's basically just a mini player that you can use to watch videos while you're navigating through YouTube.
The moment you leave the site, it disappears.
To enter Safari's PiP mode on YouTube, start playing a video and then right-click or Control-click on the video twice . We stress the word twice because doing it once will bring up YouTube's context menu instead of the following options.
Now, select Enter Picture in Picture from Safari's context menu.
The video will now pop out of Safari and continue playing back in a tiny window at the corner of your screen. You'll still be able to use YouTube's playback menu to control the video playback.
Read More: How to Watch YouTube in Picture in Picture Mode on Desktop and Mobile
2. How to Enter Picture in Picture Mode From the Playback Menu
Some websites, like Dailymotion, will make it easy for you. The PiP option will be available directly from the playback menu. All you need to do is click on it once you start watching a video.
Once you enter Picture in Picture, everything else is similar to the YouTube method. You can control its playback using the site's player.
3. How to Enter Picture in Picture From the Address Bar
At this point, you know how to enter Picture in Picture from YouTube and other sites that give you the direct option in the playback menu. But, what would you do if you have access to neither of those options for a website you often visit?
Well, you use the Address Bar technique instead. Safari's address bar houses a mute button that doubles as a PiP button if you use it correctly.
To access it, start playing a video and right-click or Control-click on the mute button to bring up the context menu. Now, choose Enter Picture in Picture and resume playback in the floating window.
Note that this particular audio control will only show up when a video is being actively played on the webpage. This method is helpful while viewing content on the popular video streaming platform Twitch.
4. How to Enter Picture in Picture Mode Using a Safari Extension
Learning three unique ways to enter the PiP mode in Safari can be overwhelming for some people. This is why we've added a technique that will work across all sites in the same manner.
On the downside, though, you'll need to install a third-party Safari extension despite Picture in Picture being a native feature.
Follow these instructions to install and use the extension:
- Search for PiPifier and install it.
From now on, whether you use YouTube, Twitch, Netflix, or any other platform, entering Picture in Picture in Safari is just a click away.
PiPifier is just one of the many Safari Extensions available on the App Store. You have plenty of alternatives to try if you don't like this one.
Using the Pop-Out Player in Safari
Unlike entering the PiP mode in Safari, using the popout player is a lot more straightforward. However, you don't get a lot of flexibility with this pop-out player. For starters, you can only drag it to one of the four corners on your screen and not anywhere you like.
There's only an option to pause or resume the video. You cannot use it to fast forward, rewind, or even control the volume level.
To increase the size of the floating window, you can simply drag one of its corners. When it comes to exiting the PiP mode, you have two options.
If you click on the X icon, you will close the pop-out player and end the playback. On the other hand, if you click on the Picture-in-Picture icon, you will still exit PiP mode, but the player will reattach to the Safari webpage and resume playback normally.
Multitask Effortlessly With Picture in Picture Mode
Going through your emails in the morning while watching news videos in Picture in Picture mode can be a great way to save time. You don't have to open a separate Safari window and rely on Split View that takes up valuable screen space for multitasking.
Despite all the positives, the feature could certainly use some improvements. Being able to place the floating window anywhere you want would be a good place to start.
Apart from Safari, the Picture in Picture view is also accessible in stock apps like QuickTime and Apple TV. If you own an iPhone running iOS 14 or later, you can even use PiP mode on your phone.
- You are here:
- Photographic Tours
Your Safari
Tour length, rates in usd $ – change currency, starting from.
- Nairobi (0)
- Entebbe (0)
- Johannesburg (0)
- Zanzibar (0)
- Dar es Salaam (0)
- Victoria Falls Town (0)
- Kampala (0)
- Windhoek (0)
- Cape Town (0)
- Addis Ababa (0)
- Mombasa (0)
- Hoedspruit (0)
- Livingstone (0)
- Port Elizabeth (0)
- Antananarivo (0)
- Bujumbura (0)
- Pretoria (0)
- Nelspruit (0)
- Hazyview (0)
- Blantyre (0)
- Diani Beach (0)
- Lilongwe (0)
- Upington (0)
- Skukuza (0)
- Bulawayo (0)
Comfort Level
- Luxury+ (0)
- Mid-range (0)
Private or Shared Tour
- Private tour (0)
- Shared tour (0)
Safari Type
- Lodge, tented camp or hotel (0)
- Camping (0)
Operator Rating
- & up (0)
Specialized Tours
- Fly-in safaris (0)
- Beach time (0)
- Honeymoon (0)
- Gorilla trekking (0)
- Photographic safaris (0)
- Mountain climbing (0)
- Walking safaris (0)
- Self-drive (0)
- Guided self-drive (0)
- Chimp trekking (0)
- Overland tours (0)
- Cycling safaris (0)
- Canoe safaris (0)
- Horseback safaris (0)
- Birding tours (0)
- Accessible safaris (0)
- Golf & Wildlife (0)
Other Tour Features
- Airport transfer is included (0)
- Itinerary can be customized (0)
Filter by Operator
Filter by accommodation, operators from.
- South Africa (0)
- Tanzania (0)
- United Kingdom (0)
- United States (0)
- Australia (0)
- Belgium (0)
- Botswana (0)
- Comoros (0)
- Denmark (0)
- Ethiopia (0)
- Eswatini (0)
- Germany (0)
- Ireland (0)
- Lesotho (0)
- Madagascar (0)
- Mauritius (0)
- Mayotte (0)
- Mozambique (0)
- Namibia (0)
- Netherlands (0)
- New Zealand (0)
- Nigeria (0)
- Portugal (0)
- Reunion (0)
- Seychelles (0)
- Singapore (0)
- Switzerland (0)
- United Arab Emirates (0)
- Zimbabwe (0)
African Photographic Safaris
If you’re a photography enthusiast, you might want to consider booking an African photographic safari. Photography is a hobby shared by many. However, taking great wildlife photos requires dedication. By joining a photographic tour you will avoid ending up with a group of people taking selfies at every sighting. Instead, you'll be with people sharing your passion and dedication. Even if you’re accomplished as a photographer in another field, there’s still much you can learn from an experienced wildlife photographer and the skills of anticipating animal behavior. Wildlife photography on safari is unique in its need for patience and bush etiquette. You should never cross the line where your photography interferes with an animal’s existence.

3-Day Nyerere National Park Tour - Southern Tanzania
$1,130 pp (USD)
Tanzania: Private tour Budget Tented Camp
You Visit: Dar Es Salaam (Start) , Nyerere NP, Dar Es Salaam (End)
Mountain Beauty
Not yet rated

4-Day Serengeti and Ngorongoro Photographic Safari
$1,553 pp (USD)
Tanzania: Private tour Budget Lodge & Guest House
You Visit: Mwanza (Start) , Western Serengeti NP, Central Serengeti NP, Southern Serengeti NP, Ngorongoro Crater, Arusha (End)
Ngao Africa

6-Day Private Custom African Wildlife Safari (Mid-Range)
$5,990 pp (USD)
South Africa: Private tour Mid-range Lodge
You Visit: Johannesburg (Start) , Kruger NP, Timbavati NR (Greater Kruger) , Johannesburg (End)
Ukhozi Tours
5.0 /5 – 5 Reviews

½-Day Hot Air Balloon Maasai Mara Early Morning Safari
$495 pp (USD)
Kenya: ½ Day tour Shared tour (max 60 people per vehicle)
You Visit: Masai Mara National Reserve
African Beast Tours and Safaris
4.4 /5 – 7 Reviews

½-Day Chobe River Cruise Safari
$61 pp (USD)
Botswana: ½ Day tour Shared tour (max 6 people per vehicle)
You Visit: Kasane (Start) , Chobe River, Kasane (End)
Cultural Vibes Travel & Tours
4.8 /5 – 117 Reviews

4-Day Private Custom Tour of Kruger NP (Mid-Range)
$1,652 pp (USD)
South Africa: Private tour Mid-range
You Visit: Johannesburg (Start) , Kruger NP, Johannesburg (End)

7-Day Kenya Photography Hide Tour
$4,641 to $5,698 pp (USD)
Kenya: Private tour Mid-range Lodge & Tented Camp
You Visit: Nairobi (Start) , Shompole Conservancy, Olkiramatian Conservancy, Masai Mara NR, Nairobi (End)
Brighte Maasai Adventures
4.9 /5 – 14 Reviews

7-Day Photographic Safari
$3,784 to $4,257 pp (USD)
Zambia: Private tour Mid-range Chalet
You Visit: Lusaka (Start) , South Luangwa NP, Lusaka (End)
Ntanda Ventures
5.0 /5 – 25 Reviews
Tour Operators Offering Custom Tours
Wayfairer travel, indigo safaris, swahili paradise tours & safaris, related searches.
- Overland Safaris in Africa
- Best Safari Parks
- Birdwatching Safaris in Africa
- Walking Safaris in Africa
- Safari & Beach Combo Tours
- Best Safari Countries
- Self-drive Safaris in Africa
- African Canoe Safaris
- All-inclusive African Safaris
- Best African Safaris
- 14-Day Safari Tours
- 10-Day African Safaris
6 Questions About Photographic Safaris

Answered by
Ariadne van zandbergen.

Why should I choose an African photo safari?
“You would choose a photographic safari because you have a passion for taking great wildlife photos, and you want to develop the necessary skills. Depending on the type of tour, there might be tuition, tips and workshops. Most of all, a photographic tour is designed to facilitate great photos for photographers. This might mean that the choice of location and lodging is mainly based on photographic opportunities. It also means that you’ll be in great locations for photography when the light is at its best. This is usually around sunrise and sunset (you’ll be photographing rather than having sundowner drinks at that crucial time). As well, on a photo safari you’ll be with a group of fellow photographers. They will share your passion and understand the patience required in waiting for the best possible shot at sightings. Whether photography is new for you, or you’re a dedicated amateur, or a professional, it makes sense to book a photographic tour if photography is one of your main interests on safari.”
What level of skills is required?
“You won’t need any prior skills as such. Almost all photographic tours welcome anyone with an interest in photography. However, to make the most of the opportunities and tuition on the safari, familiarize yourself completely with your own photographic equipment before the trip. As well, freshen up on the basics of photography, such as the relationship of aperture and shutter speed. If you don’t have these basic skills, it might make sense to either take a small beginner’s course before the trip or do some reading or online learning to become familiar with the basics yourself. All of which means you can then practice applying these new skills while on tour on the safari.”
Can my non-photographer partner join me?
“Most photographic tours will welcome partners. Often couples don’t share the same interest in photography, yet it is only natural that they would prefer to go on safari together. Some tours offer optional activities for non-photographer partners. Mostly, partners are allowed to join the tour as long as they understand that the tour will be catering for photographers and their specific needs. Most partners of photographers will be used to this in any case, so this rarely creates any conflict. In fact, some partners of photographers make great assistants.”
Is a photo safari led by a photographer?
“Yes, a photo safari is usually led by a photographer. Some African photo safaris are led by high-profile photographers, but that usually comes at a hefty price. There are many photo safaris that are led by unknown photo enthusiasts with lots of experience of wildlife photography. Don’t be dazzled by the photographer’s CV, as the best photographers don’t always make the best guides or tutors. The main job of the photographic tour leader is to facilitate the best photography conditions for the group. A tour leader should never be tempted to put their own photography priorities above the needs of the group. As well as the tour leader’s own photography page or website, check out reviews and tour reports to get a feel for how the tour leader operates.”
Do I need special gear to join a photographic safari?
“When you join a photographic tour, you will be expected to have an SLR (Single Lens Reflex), DSLR (Digital Single Lens Reflex) or mirrorless camera, as opposed to a point-and-shoot. Aside from that, there will be recommendations for equipment, but they are not compulsory. However, it doesn’t make sense to invest in a photo safari without the right gear for taking reasonable wildlife photos. It’s a good idea to have at least two lenses, including a telephoto lens. How big a telephoto lens you need depends a little on where you will go on safari. If off-road driving is allowed, as in many private reserves in southern Africa, you’ll be able to get quite close to animals. In these cases, a 200mm or 300mm lens will be sufficient. Even better is a 400mm or 500mm capacity lens, especially in national parks where off-road driving is not allowed. A convertor can also help to extend your range. It is great if you can avoid having to change lenses by having your lenses permanently set on different cameras. That way, you don’t lose time changing lenses during fast-moving action. Another downside of having to change lenses is that dust gets in and settles on the sensor. An off-camera flash set-up is great for night photography.”
What should I consider when choosing an African photo safari?
“There are many things to consider when choosing a photographic safari. First of all, is a photography safari what you need? Just because you like taking a few photos doesn’t mean you want to sit for hours at a sighting waiting for something to happen. Or that you would like to be up and out every day before breakfast. So, photographic safari packages are really better suited to quite serious photographers, as casual photographers might prefer a more relaxed approach to photography while on tour. However, if you’re a keen photographer, you might opt for a tailor-made private safari. You’ll miss out on any professional expertise, but you can structure the tour as you wish. Discuss your needs with your tour operator. Another factor is the season. The Dry season tends to be most reliable for wildlife photography. However, the lush Wet season, often called the emerald season, is more beautiful and can offer stunning light conditions. Finally, your price and budget are big considerations when choosing any kind of tour.”
- AI Generator
124,155 Safari Pictures Stock Photos & High-Res Pictures
Browse 124,155 safari pictures photos and images available, or start a new search to explore more photos and images.

- // // // //
Safari Video & Photo Gallery
From toothy grins to making bubbles in the pool (and that’s only the hippos) we’re understandably proud of our ever-expanding gallery of great photos from our luxury safaris . Enjoy this selection of inspirational safari photos and videos taken by our guests, our guides, the Pinto Family and more.
Video Gallery
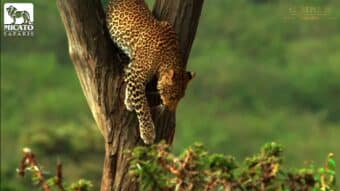
The Spirit of Nature
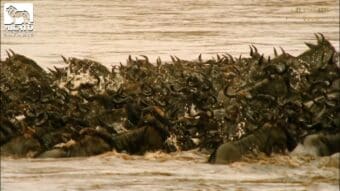
Live from Kenya’s Maasai Mara…
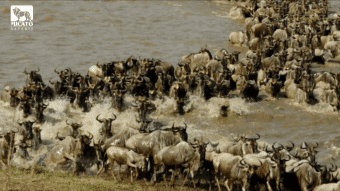
Celebrate the Beauty of a Micato Safari
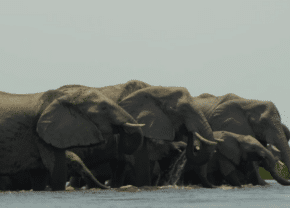
Symphony of Elephants
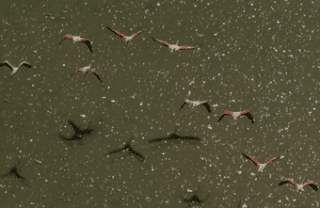
The Plains of Africa
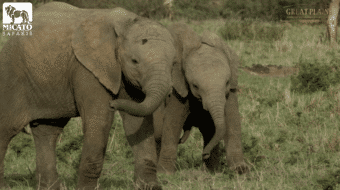
Secrets of the Mara, Part 1
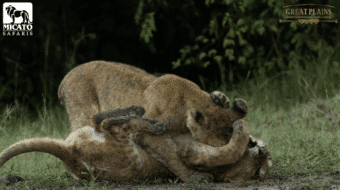
Secrets of the Mara, Part 2

The Big Cats of Micato’s Africa

Africa in Reflection
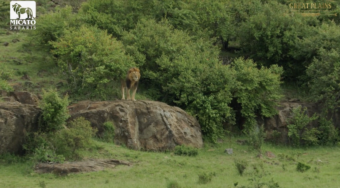
Celebrating Safari Lions

One for One
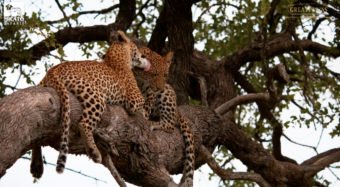
Wild Animals of the Okavango Delta
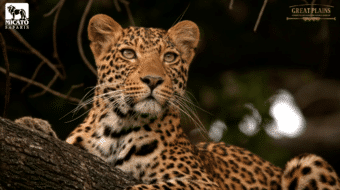
The Ultimate Micato Safari
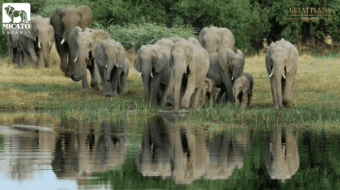
The Wisdom of Elephants

Royal Bengal Tigers

The Art of Nature

AmericaShare Scholarship Programme
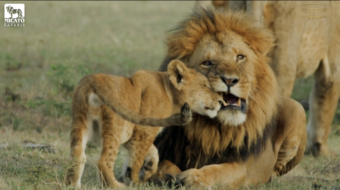
Everything is Connected

Two Wonderfully Wild Minutes

Lioness Leader
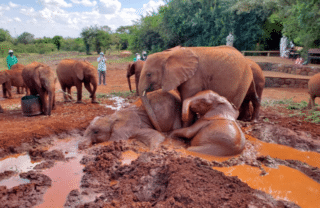
The Comfort of a Greater Family

Safari Animals in Love!
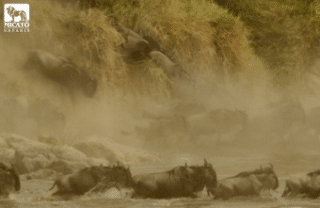
The Great Wildebeest Migration
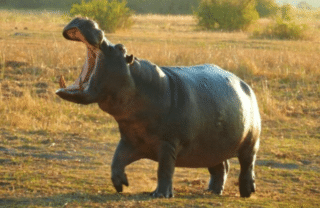
Let Nature Soothe Your Soul
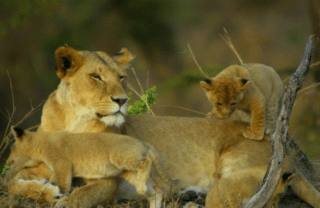
Baby Animals on Safari

Mother Earth

Spring on the African Savannah
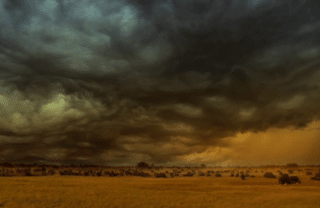
African Rains

Love Letter to Africa

How Micato Safaris Defines Luxury

The Lions of Africa
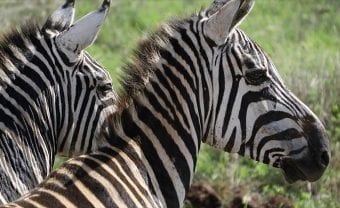
A Dazzle of Zebra

The Evolution of Micato Safaris
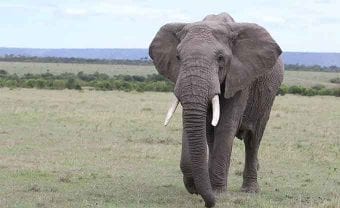
Elephants You’ll Never Forget
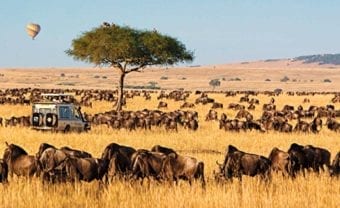
First Time on Safari
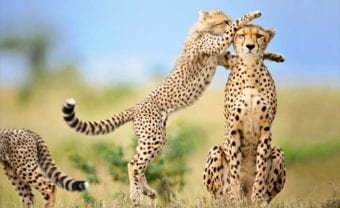
Micato Happy
Follow us on instagram.
We’re delighted to maintain our rapidly-growing Instagram feed and would love to feature guest photos from time to time. If you’ve travelled with Micato and would like us to consider reposting a safari photo, tag it with our handle, @micatosafaris . Thank you!

micatosafaris

Load More…
Follow on Instagram
[button href="https://www.instagram.com/micatosafaris" target="_blank" style="primary" alignment="center"]View More on Instagram[/button] -->

The Micato Photo Contest
Perhaps the next best thing after fond memories are astonishing photos, and we would love to see yours. If you’ve travelled with Micato to Africa or India anytime in the last… well, anytime… you’re invited to send us images that could earn you a very nice prize…
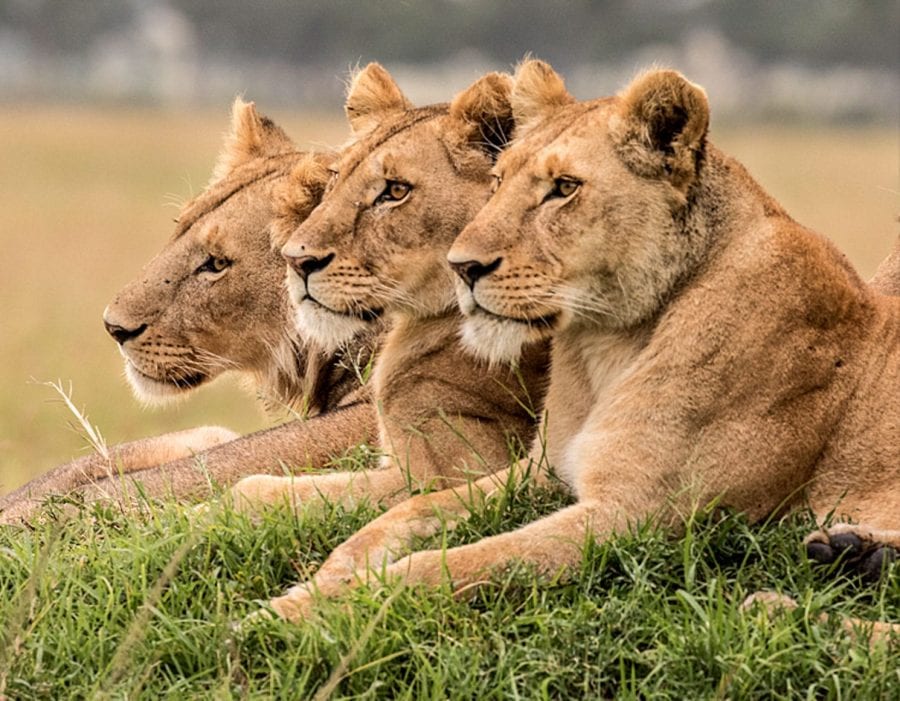
Winners Gallery
Safari is rewarding and snapping super safari photos can be, too! It’s always so difficult to choose, but as the kids say, that’s a good problem to have. Herein, the very best of the best.

iOS 18 AI features: 7 new rumored updates coming to iPhone
iOS 18 and AI are the talk of the town as reports about Apple rolling out new AI-powered features to iPhones heat up. Most recently, in a new report, AppleInsider unveiled that Apple is working on AI-based updates for Messages, Siri, and Notes.
However, this isn't the first time we've heard about Apple's AI plans for iOS 18. As such, let's do a roundup of all the reported AI features coming to the next big iOS update.
AI on iOS 18: 7 new features coming to iPhone
Before we dive into the iOS 18 AI features, let's talk about what will be underpinning these new tools. First up is Ajax , Apple's hush-hush large language model (LLM) that will reportedly power the AI features arriving to the next big update.
According to AppleInsider , Ajax will allow iOS 18 to generate basic responses entirely on-device. In other words, certain perks will not rely on the cloud. Instead, simple requests will utilize the neural engine packed inside iPhones.
The iPhone 16 Pro and iPhone 16 Pro Max models, by the way, are expected to get an upgraded neural engine that can handle more AI processing than its predecessors.
However, more challenging AI processes will need to rely on the cloud. To quell concerns about data exposure, Apple will use a "black box processing" technique that allows the Cupertino-based tech giant to keep users' data totally private, according to The Information.
Curious about the AI features that are reportedly coming to iPhone? Here are seven rumored perks that we're most excited about.
1. Siri gets smarter
Siri can fulfill requests on a broader plane. For example, it can launch music playlists, control smart-home appliances, tell you the weather, and more. However, if you were to ask it to summarize an article, delete a message in your inbox, or other granular tasks, it will balk.
Fortunately, with the new-and-improved AI-powered Siri, the popular assistant will reportedly do the following, according to Bloomberg 's Mark Gurman (a respected Apple analyst and prognosticator):
- send an email
- delete an email
- open a document
- move a note to another folder
- launch a specific newspaper in Apple News
- summarize an article in Safari
- summarize recent texts
- transcribe a voice memo
Although we're expecting to hear about the updated Siri at WWDC 2024 , Gurman says that these features are expected to hit iPhones in 2025.
2. Generate new emojis with AI
One of the most eye-catching rumors we've heard about the AI-powered iOS 18 is that it will get AI-generated emojis . In other words, based on the conversations you're having with friends and loved ones, iOS 18 will be capable of generating new emojis that fit your discussion.
3. Suggested replies in Messages
Also based on AI, the Messages app is expected to offer recommended replies for users, allowing them to fire quicker responses. (The Mail app is expected to get a similar feature, too.)
4. New-and-improved Safari
Safari, based on Ajax, will reportedly have the ability to identify key phrases and topics within a web page. According to Forbes, this feature is reportedly called "Intelligent Search." This will allegedly allow Safari to summarize online articles.
5. AI-powered Photos app
With Samsung unveiling Galaxy AI earlier this year and Google making a splash with its AI-powered editing features on Pixel phones (and Chromebook Plus laptops), some people are looking at Apple and asking, "What about you?"
Well, according to Gurman , Apple will also be rolling out some AI-based editing features to its Photos app this year.
6. Smart recaps
iOS 18 may give you a quick and brief summary of your missed notifications, according to Gurman.
7. Eye tracking
Taking a page out of the Apple Vision Pro 's playbook, Apple recently revealed that it is poised to launch eye tracking for the iPhone (and iPad).
Powered by AI, it will allow users, particularly people with disabilities, to use their eyes as a cursor by utilizing the front-facing camera.
It's also worth noting that Apple is reportedly in talks with OpenAI to add ChatGPT to iOS 18 . Although Gurman has a great track record with rumors, we won't know if any of these will truly come into fruition until we hear it from the horse's mouth at WWDC 2024 on June 10.

Safari User Guide
- Get started
- Go to a website
- Bookmark webpages to revisit
- See your favorite websites
- Use tabs for webpages
- Import bookmarks and passwords
- Pay with Apple Pay
- Autofill credit card info
- View links from friends
- Keep a Reading List
- Hide ads when reading
- Translate a webpage
- Download items from the web
- Add passes to Wallet
- Save part or all of a webpage
- Print or create a PDF of a webpage
- Interact with text in a picture
- Change your homepage
- Customize a start page
- Create a profile
- Block pop-ups
- Make Safari your default web browser
- Hide your email address
- Manage cookies
- Clear your browsing history
- Browse privately
- Prevent cross-site tracking
- See who tried to track you
- Change Safari settings
- Keyboard and other shortcuts
View your Favorites in Safari on Mac
View your Favorites from the Smart Search field: Click in the Smart Search field to see your Favorites in the start page view, then click the icon of the website you want to visit. The start page view goes away if you start typing, and it doesn’t appear if you click the field while you’re viewing the start page.
You can also see your favorite websites when you open new tabs. If you don’t see your Favorites in new tabs, see Change General settings .
Show the Favorites bar: Choose View > Show Favorites Bar. A bar with your favorite websites appears below the toolbar.
Go to a Favorite website: Click in the Smart Search field, then click a website below Favorites, or click a website in the Favorites bar (or use the Touch Bar ).
Apple’s upcoming iOS 18 has a pointed AI focus, and may well be one of the most drastic software upgrades in the iPhone’s history.

In the AI race between Microsoft, Google, and Apple, the house that Steve Jobs built clearly has the late start. While Microsoft and Google have rolled out AI features at a dizzying rate , Apple has taken its time, a test of patience and refusal to trust blindly in beta AI products.
According to Bloomberg , Apple will soon introduce a number of AI-themed upgrades to the iPhone as part of its upcoming iOS 18 software update. There’s still a few weeks to go before CEO Tim Cook’s keynote speech at this year’s Worldwide Developers Conference, where he’s expected to officially announce Apple’s AI strategy. But for now, here’s a batch of potential AI-based upgrades that might be coming to iPhones by the end of the year.
1. AI-generated emojis

Let’s start with the standout. While Apple is mostly playing catch-up with Microsoft’s new Copilot AI capabilities , an idea that is so far uniquely Apple’s is its AI emoji feature. Supposedly, iOS 18 will introduce users to a new way of texting, with custom emojis — beyond Apple’s current catalog — on constant standby. That means an emoji will be generated based on what you text, no matter what you type in.
2. Smart Summaries
This one was leaked a little while back, so by now you might already know that a big part of iOS 18 will be its smart summaries. These are due to be baked into just about every major part of the software experience: Emails, webpages, and messages will be condensed into bite-sized pieces of information, saving you a lot of reading and scrolling time.
3. A Long-Due Safari Upgrade

At this rate, Safari is swiftly reaching Internet Explorer levels of obsolescence. It’s been due for a good renovation for some time now. Well, here it comes. Potentially confirming earlier leaks, Safari will be upgraded with an AI-backed web search, which should mean better results and quick summaries.
4. Photo Retouching
This feature won’t exactly rock the boat, but it should help Apple catch up to Samsung Galaxy’s impressive generative AI editing suite . Among Apple’s new AI photo retouching tools could be the ability to erase or shift objects in the frame, and to enhance colors.
5. A More Helpful and Realistic Siri

Following up on previous reports, Siri is about to get quite a bit more realistic, with a less robotic-sounding voice and better responses overall. Siri has seen relatively little improvement in its 13 years of existence, so this may be one of the most drastic shifts to the virtual assistant. Expect a larger range of expertise and assistance, too, including the ability to summarize emails and messages. Siri’s IQ is set to increase by quite a wide margin.
6. Voice Memo Transcription
Not exactly a new idea here either, but one that will be very welcome on iOS all the same. Google’s Pixel phones have already made good use of AI to help turn voice memos into text, now Apple is working to follow suit. This will probably enhance the Voice Memos experience, allowing users to automatically transcribe speech, making the lives of students and journalists a little easier.
7. Automatic Replies
If you find yourself stuck on something to say, then Apple’s smart AI responses should soon have your back. Handing over your texting responsibilities to an AI could potentially get a little hairy, so Apple will provide suggestions that can be reviewed and edited, rather than simply sending texts to your contact list on the fly.
8. Local On-Device AI > The Cloud
While a substantial amount of AI tech has been powered in the cloud, Apple will soon look to rely on its own large language models so that its upcoming generative AI features can run locally and in the background. This should allow for quicker response times and greater privacy and safety, but it may prove problematic for more robust AI operations that require more processing power.
I took over 200 photos with Pixel 8a and Pixel 6 Pro — here's the winner
Which is the better camera phone, a brand new mid-range device or a 3-year old flagship?

Dynamic Range
If you’re still rocking a Google Pixel 6 Pro like I am, odds are you’re thinking about upgrading at some point soon. While the Pixel 9 and Pixel 9 Pro are expected to arrive in a few months time, you may also be considering the Pixel 8a . Not only is it much cheaper, it also offers a lot more than the Pixel 6 Pro.
Better performance, better battery life and from the looks of things better camera quality. Not only has the camera hardware improved over the past couple of years, the software and image processing hardware has advanced alongside it. The question is, are the photos from the Pixel 8a actually better?
Comparing the two on paper is pretty difficult since the camera specs are all over the place. The Pixel 8a has a higher resolution main camera, but the 6 Pro also has a larger sensor and larger pixels — both of which can give it a boost in low-light photography. The same is true of the 6 Pro’s ultrawide camera, though not to the same extreme, and the telephoto lens should offer a zooming advantage.
Then again, there’s a lot more to mobile photography than hardware. These days the software plays just as big a part in the final image as the hardware. So the fact the Pixel 8a has a more powerful Tensor G3 chipset means it should have more advanced image processing and computational photography abilities. Even if it won’t make it to the top of our list of the best camera phones .
So to put these two cameras to the test, I took over 200 photos with both phones at the same time. I then compared those photos on my laptop so I could see them side-by-side and figure out all the differences. And to decide whether the Pixel 8a or Pixel 6 Pro takes the best photos, I graded them in 10 categories to figure out which one is the winner.
It's immediately apparent that there's a difference in color when comparing the Pixel 8a and Pixel 6 Pro during the day. The contrast is more obvious on the Pixel 8a and the colors look a little more vivid and realistic in the process. There isn't a noticeable difference in quality until you start looking a little closer.
Zoom in even just a little bit and you'll see the Pixel 6 Pro's sharpness dip quite considerably. Whether its the higher resolution, Tensor G3 advancements or some mixture of the two, the Pixel 8a's photos look considerable better — not to mention less washed out.
Sign up to get the BEST of Tom’s Guide direct to your inbox.
Upgrade your life with a daily dose of the biggest tech news, lifestyle hacks and our curated analysis. Be the first to know about cutting-edge gadgets and the hottest deals.
Winner: Pixel 8a
It's a very similar situation with the ultrawide lens. The Pixel 8a offers better contrast and realistic coloring whereas the Pixel 6 Pro seems rather washed out. However, zooming in shows that the actual difference in quality isn't nearly as extreme. In fact, these shots are virtually indistinguishable.
The Pixel 8a's 120-degree field of view also means you can capture more than the 114-degree Pixel 6 Pro. Too bad a number of shots on the A series came out with some serious distortion along the edges. It hasn't happened on every photo, but it was a common enough occurrence that it could prove to be a problem. Let's just hope it can be fixed with a software update somewhere down the line.
Winner: Tie.
The better contrast and coloring on the Pixel 8a means it excels at dynamic range. At least, it does compared to the Pixel 6 Pro. There's a lot of detail to be found and there's a very clear boundary between light and shadow.
But you have to hand it to the Pixel 6 Pro. While the definition is a little blurred between the light and darkened areas, it was able to pick up a lot more detail in areas that otherwise look pitch black on the Pixel 8a. That larger camera sensor comes in handy.
Winner: Pixel 8a.
Color Reproduction
The color reproduction on the Pixel 8a definitely pops a lot more than it does on the Pixel 6 Pro. There's an extra level of realism there that the Pixel 6 Pro wasn't quite able to replicate.
That's not to say The Pixel 6 Pro does a bad job, but the slight lack of visual quality and oversaturated appearance doesn't do it any favors — especially outdoors.
Funnily enough, it's the Pixel 8a that seems to struggle with coloring on the front camera, with photos looking a little washed out in places. It also has a much wider field of view — covering 120 degrees compared to the Pixel 6 Pro's 94 degrees. That means you can pick up a lot more of your surroundings. Including your camera arm, and my good friend Oscar Wilde.
From a quality standpoint there's very little difference between the two phones. They manage to pick up smaller details freckles and sweat pretty well. Even the reflections in my sunglasses are pretty comparable.
Portrait shots from the Pixel 8a and Pixel 6 Pro looked fairly similar, though I give the edge to the Pixel 8a in the above pic. My hair looks sharper and it's a brighter photo. Both camera phones seemed to stumble in the same areas. Apparently the Pixel portrait mode struggled to blur out my living room without taking half my face with it.
It's interesting to see how both phones reacted to my dogs as well. The Pixel 6 Pro blurred the face in the one shot a dog ended up in frame. Meanwhile, the Pixel 8a blurred one dog, but added the bokeh effect around the other. But the principle subject (me) was very clearly defined and popped out against the background — with no complaints from me.
The Pixel 6 Pro has a separate telephoto lens with 4x optical magnification, which gives it a huge advantage in zoomed photography. The Pixel 8a is reliant on digital zoom and features like SuperResZoom to try and mimic that effect. That has led to significantly worse photo quality, even at 4x magnification.
The difference was most apparent on shots of objects in the far distance, even before you try and zoom in further. Objects in the near distance aren't quite as bad through the Pixel 8a, and come out looking reasonably well, but they have more of a fuzzy over-exposed look compared to the Pixel 6 Pro.
Increase the magnification to 8x and that problem gets even worse for the Pixel 8a. The coloring is all overt the place and the smaller details have combined into a blurry mess that only gets worse as distance to the target increases.
Objects in the near still come out looking better, but they are still missing a lot of the clarity the Pixel 6 Pro's photos have to offer. The older phone offers sharper details, more realistic coloring and all round much better photos.
Winner: Pixel 6 Pro.
Visually the panorama shots on the Pixel 6 Pro and Pixel 8a are very hard to distinguish — especially with the sheer amount of visual information available. But the Pixel 8a does cinch it once again by offering overall better quality when you look a little closer, no doubt thanks to that extra resolution.
While you'd expect the Pixel 6 Pro would have the advantage in macro photography, thanks to the telephoto lens, that wasn't exactly the case. In fact, the close-up photography was remarkably inconsistent across both phones — mainly thanks to issues with the focus.
In some cases the Pixel 8a would offer the most detail, but in other shots things would be covered in the fuzz of camera blur. The same is true for the 6 Pro. But practical issues aside, the quality of the photos themselves wasn't all that different.
Winner: Tie
The low light photography on both phones is rather a mixed bag. It seems to be that the Pixel 6 Pro performs better in darker areas where there isn't as much ambient light. The larger camera sensor gets to work drawing in more light and enables us to see more and in sharper detail than the Pixel 8a.
At the same time, that increased light draw has a disadvantage in brighter areas. Light sources end up with an absurd lens flare effect and the environment looks overexposed and often rather blurry. While the images on the Pixel 8a are darker, they're also clearer and a little more true to life.
The Pixel 6 Pro may have a name that suggests a level of superiority, but it is showing its age. The fact is that the Pixel 8a easily grabs the victory in this face-off, performing significantly better in a number of key categories.
There's been a lot of advancement in mobile camera technology over the past few years, especially on the software side of things. Which is how a mid-range A series can trump 2021's Pro model. While the front and ultrawide lenses offer similar quality and performance, the main camera really sets the Pixel 8a apart.
That's not to say that the Pixel 6 Pro has a bad set of cameras. It especially wins on zoom, but that's not a surprise. A telephoto lens or some sort of digital hybrid trumps the pure digital option every single time. But when it comes to color reproduction and especially low-light performance, the Pixel 8a wins.
More from Tom's Guide
- I shot over 200 photos with the Pixel 8a vs iPhone SE — here’s the winner
- I got into astrophotography with phones, but fell in love with the hobby thanks to smart telescopes — here’s how
- Excited for Apple's AI features? You’ll need this iPhone to make the most of them
Tom is the Tom's Guide's UK Phones Editor, tackling the latest smartphone news and vocally expressing his opinions about upcoming features or changes. It's long way from his days as editor of Gizmodo UK, when pretty much everything was on the table. He’s usually found trying to squeeze another giant Lego set onto the shelf, draining very large cups of coffee, or complaining about how terrible his Smart TV is.
Google Pixel 8a vs Pixel 9: Should you buy now or wait?
Google Tensor G5 could debut on Pixel 10 — and it could be the first real Google-made chip
Samsung Galaxy Z Fold 6 leak reveals key missing feature for super expensive flagship
Most Popular
- 2 Start a smart apartment for cheap with these 7 Amazon deals from $7
- 3 Microsoft testing shows Surface Laptop 7 besting the MacBook Air M3 - but what about M4?
- 4 Netflix's next reality TV game show is a battle royale contest with a $1 million jackpot
- 5 Meta accidentally leaks Quest 3S in Meta Store, quickly deletes it
site categories
- ‘Tomb Raider: The Legend Of Lara Croft’ Gets Netflix Premiere Date & Teaser Trailer
‘Pachinko’ Sets Season 2 Premiere Date, Unveils First-Look Photos & Main Title Sequence
By Denise Petski
Denise Petski
Senior Managing Editor
More Stories By Denise
- Robert De Niro’s Invite To NAB Event Rescinded After Speech Outside Trump Trial
- ‘The Sex Lives Of College Girls’ Adds Michael Hsu Rosen For Season 3
We’re getting a first look and premiere date for the second season of Apple TV+ ‘s Pachinko , based on Min Jin Lee’s bestselling multigenerational novel. The eight-episode Season 2 will premiere globally on Apple TV+ on Friday, August 23 with one episode, followed by one episode weekly every Friday through October 11. The streamer unveiled several first-look photos for the upcoming season which you can see below, as well the main title sequence above.
Related Stories

2024 Premiere Dates For New & Returning Series On Broadcast, Cable & Streaming
‘Pachinko’ Creator Soo Hugh Strikes Overall Deal With Apple & Media Res
Pachinko ‘s first season received eleven international awards including a Peabody Award, an American Film Institute Award, a Critics Choice Award and a Gotham Independent Film Award.
Pachinko is created and written by Soo Hugh who serves as executive producer alongside Media Res’ Michael Ellenberg and Lindsey Springer, and Theresa Kang for Blue Marble Pictures. Season two is directed by Leanne Welham, Arvin Chen, and Sang-il Lee.
Must Read Stories
Sony shutters tristar television; jennifer turner & nicole norwood to depart.
‘Garfield’ Has Upper Paw Over ‘Furiosa’ With $12M+ Second Weekend
Studio bosses on death of peak tv, canceled shows, hollywood contraction & more, jennifer lopez axes entire summer tour months after canceling several dates.
Subscribe to Deadline Breaking News Alerts and keep your inbox happy.
IMAGES
VIDEO
COMMENTS
1. Immerse Yourself in the Experience. Each day on safari brings unique moments. Photography not only preserves memories but also encourages you to notice intricate details and appreciate nature. Seek unique angles and moments to capture, and let the beauty of the wild inspire you. 2.
First, the camera's burst speed, which is the number of images per second your camera can take. For instance, a camera with a burst speed of 10fps (frames per second) can take up to 10 photos per second. Second, the speed that your camera can write to the memory card inside the camera as it takes pictures.
Tourists looking at cheetah crossing the road during the safari road trip in Serengeti National Park, Tanzania October 9th, 2020 - tourists have safari road trip tour by 4X4 vehicles in the wild African savannah, and enjoying the bright dramatic sunset above the picturesque landscape from the car, looking at family of cheats crossing the car road Safari stock pictures, royalty-free photos & images
Free Safari Photos. Photos 3.6K Videos 390 Users 744. Filters. Popular. All Orientations. All Sizes. #. Previous123456Next. Download and use 3,000+ Safari stock photos for free. Thousands of new images every day Completely Free to Use High-quality videos and images from Pexels.
Browse 26,246 african safari landscape photos and images available, or start a new search to explore more photos and images. namibia's dunes in namib-naukluft national par - african safari landscape stock pictures, royalty-free photos & images.
For landscape shots, use a wide-angle lens. - If you don't think a tripod is practical, take a bean bag or a window-mounted tripod instead. - Blurred backgrounds can look great, particularly on close-up shots. - For zoom shots, keep the eyes of the creature in focus, which will result in a more engaging photo that embraces the ...
Browse 135,340 authentic safari stock photos, high-res images, and pictures, or explore additional safari background or safari jeep stock images to find the right photo at the right size and resolution for your project.
5 - Consider shooting something else than wildlife pictures. 6 - Choose your accessories. 7 - Buy equipment to clean your camera. 8 - Pay attention when changing lenses. 9 - Focusing on pictures at the right time of the day. 10 - Think about RAW shooting and post-processing your pictures. 11 - Observe and be patient.
Shot in the morning of April 2017 during Fall/Autumn. safari 2 stock pictures, royalty-free photos & images. Tourists viewing lions on morning safari in South Africa. A couple of lions walk up to tourists, who are taking photos of them from safari vehicles. The tourists are staying at the Garden Route Game Lodge, a game reserve located in the ...
10,002 Free images of Safari. Select a safari image to download for free. High resolution picture downloads for your next project. safarihot air balloon. animalantelopemammals. lionsanimalszoo. giraffezebrasetosha. elephantsafricanature. elephantherdanimals.
* Take photos of your epic moments and share them with the world! Set up an amazing photo opportunity and spin the camera around for that perfect shot - all in glorious 3D! For a description of the permissions that Ski Safari 2 uses, please see our website:
Download the perfect safari pictures. Find over 100+ of the best free safari images. Free for commercial use No attribution required Copyright-free
Serengeti National Park. African Acacia trees in the warm light of a late afternoon, Serengeti National Park, Tanzania/East Africa. Search from African Safari stock photos, pictures and royalty-free images from iStock. Find high-quality stock photos that you won't find anywhere else.
To enter Safari's PiP mode on YouTube, start playing a video and then right-click or Control-click on the video twice. We stress the word twice because doing it once will bring up YouTube's context menu instead of the following options. Now, select Enter Picture in Picture from Safari's context menu.
4-Day Serengeti and Ngorongoro Photographic Safari. $1,553 pp (USD) Tanzania: Private tour Budget Lodge & Guest House. You Visit: Mwanza (Start), Western Serengeti NP, Central Serengeti NP, Southern Serengeti NP, Ngorongoro Crater, Arusha (End) Ngao Africa. Not yet rated.
Browse 91,429 authentic african safari stock photos, high-res images, and pictures, or explore additional african safari background or african safari jeep stock images to find the right photo at the right size and resolution for your project. Lion in high grass. African Elephants in the plains of Serengeti, Tanzania.
Common chimpanzee (Pan troglodytes), Kibale Forest National Park, Uganda. of 100. Browse Getty Images' premium collection of high-quality, authentic Safari Pictures stock photos, royalty-free images, and pictures. Safari Pictures stock photos are available in a variety of sizes and formats to fit your needs.
All Sizes. Download and use 70,000+ African Safari stock photos for free. Thousands of new images every day Completely Free to Use High-quality videos and images from Pexels.
Winners Gallery. Safari is rewarding and snapping super safari photos can be, too! It's always so difficult to choose, but as the kids say, that's a good problem to have. Herein, the very best of the best. Enjoy this ever-expanding selection of inspirational photos and videos taken by our guests, our guides, the Pinto Family and more.
2. Generate new emojis with AI. ... New-and-improved Safari. Safari, based on Ajax, will reportedly have the ability to identify key phrases and topics within a web page. ... AI-powered Photos app.
In the Safari app on your Mac, do any of the following: View your Favorites from the Smart Search field: Click in the Smart Search field to see your Favorites in the start page view, then click the icon of the website you want to visit. The start page view goes away if you start typing, and it doesn't appear if you click the field while you ...
Among Apple's new AI photo retouching tools could be the ability to erase or shift objects in the frame, and to enhance colors. 5. A More Helpful and Realistic Siri. Following up on previous ...
View from Camp in Hwange National Park. Vibrant waterhole infant of our camp In Hwange with Giraffe, Zebras and Elephants. Search from 455,217 African Safari Images stock photos, pictures and royalty-free images from iStock. Find high-quality stock photos that you won't find anywhere else.
Select "Request Desktop Website.". Select the camera icon in the Google Search box. Tap "Upload an Image" > "Choose File.". In the pop-up menu, tap "Photo Library" to select a ...
View photos from the Colts rookies on Day 2 of Rookie Minicamp at the Indiana Farm Bureau Football Center. gallery ... Chrome, Edge (v80 and later), Firefox and Safari.
Ultrawide. It's a very similar situation with the ultrawide lens. The Pixel 8a offers better contrast and realistic coloring whereas the Pixel 6 Pro seems rather washed out. However, zooming in ...
Watch on. We're getting a first look and premiere date for the second season of Apple TV+ 's Pachinko, based on Min Jin Lee's bestselling multigenerational novel. The eight-episode Season 2 ...
All Sizes. Sponsored Photos. Get 20% off with code PEXELS20 ». Download and use 10,000+ Safari Pictures stock photos for free. Thousands of new images every day Completely Free to Use High-quality videos and images from Pexels.
Tourists looking at cheetah crossing the road during the safari road trip in Serengeti National Park, Tanzania October 9th, 2020 - tourists have safari road trip tour by 4X4 vehicles in the wild African savannah, and enjoying the bright dramatic sunset above the picturesque landscape from the car, looking at family of cheats crossing the car road safari park stock pictures, royalty-free photos ...
All Sizes. Download and use 50,000+ Wildlife Safari stock photos for free. Thousands of new images every day Completely Free to Use High-quality videos and images from Pexels.