Tips and tricks for using Private Browsing on Mac
Private Browsing is a useful mode on Mac with Safari. It means websites you visit aren’t saved in your history, with iCloud, Smart Search, and more. Follow along for a look at how to use Private Browsing, the keyboard shortcut to quickly open a new private Safari window, setting it as your launch default, and more.

Table of contents
Keyboard shortcut for private browsing on mac, set private browsing as your default safari startup page, going further.
Using a Private Browsing window includes a number of privacy features. In a support document , Apple details how a Private Browsing window works as of macOS Big Sur and Safari 14.
- Browsing initiated in one tab is isolated from browsing initiated in another tab, so websites you visit can’t track your browsing across multiple sessions.
- Webpages you visit and your AutoFill information aren’t saved.
- Your open webpages aren’t stored in iCloud, so they aren’t shown when you view all your open tabs from other devices.
- Your recent searches aren’t included in the results list when you use the Smart Search field.
- Items you download aren’t included in the downloads list. (The items do remain on your computer.)
- If you use Handoff , Private Browsing windows are not passed to your iPhone, iPad, iPod touch, or other Mac computers.
- Changes to your cookies and website data aren’t saved.
Below we’ll look at how to use Private Browsing on Mac but also a few extra tips and tricks to make it faster and easier to use.
- Mac: How to clear the cache, history, and cookies in Safari, Chrome, and Firefox
- Private Browsing on iPhone and iPad here .
How to use Private Browsing on Mac
- To open a new Private window, click Safari in the menu bar > New Private Window
- There’s also an alert near the top that you’ve enabled Private Browsing (disappears when you start browsing)
Here’s how it looks:

- You’re probably used to the command + N shortcut for a new Safari window
- Just add shift to that to get a new Private window – command + shift + N
- If you like to use Private Browsing regularly, you can make it your default when Safari launches
- Click Safari > Preferences in the menu bar
- Select the General tab at the top
- Next to Safari open with click the dropdown and choose A new private window
- If you want to tweak the default settings for normal Safari windows, check out the options at the bottom of the Safari > Preferences > General
- At the bottom of the window, you can adjust the settings for when history and downloads are removed and more
- Also, head to Safari > Preferences > Security or Privacy to tweak your fraudulent website warnings, and settings for cookies, website data, and more.
- To clear your Mac’s cache, history, and cookies head to Safari > Clear History (read more in our full guide on that here )
Read more 9to5Mac tutorials:
- How to make a WhatsApp audio/video call on the Mac
- How to use the Magic Keyboard shortcuts on the iPad Air and iPad Pro
- Mac: webp image downloads frustrating you? Here’s how to convert them to jpg, png, more
- M1 MacBook Air vs MacBook Pro, which should you buy?
FTC: We use income earning auto affiliate links. More.
Check out 9to5Mac on YouTube for more Apple news:

A collection of tutorials, tips, and tricks from…

Michael is an editor for 9to5Mac. Since joining in 2016 he has written more than 3,000 articles including breaking news, reviews, and detailed comparisons and tutorials.
Michael Potuck's favorite gear

Satechi USB-C Charger (4 ports)
Really useful USB-C + USB-A charger for home/work and travel.

Apple Leather MagSafe Wallet
My slim wallet of choice for iPhone 12

Manage push notifications
How to turn on private browsing on a Mac computer in Safari
- You can turn on private browsing on your Mac computer in a Safari browser to use the internet without having your activity catalogued by your browser.
- Private browsing is a good option to keep sensitive information from living in your web history or being saved to your iCloud account.
- Here's how to turn on private browsing on a Mac computer by opening a new private window or using a keyboard shortcut.
- Visit Business Insider's homepage for more stories .
A private browser is a useful way to navigate the internet with minimal tracking, although the exact functions may vary slightly depending on which browser you are using.
On Safari, private browsing means that websites won't be able to track your activity across sites, your visited websites aren't saved or stored on in iCloud, and your recent searches won't appear in the Smart Search field.
You also won't have access to any saved AutoFill information when you visit websites, so keep that in mind if you need to log into a site.
With that in mind, here's how to open a private window on a Mac using the Safari web browser:
Check out the products mentioned in this article:
Macbook pro (from $1,299.99 at best buy), how to turn on private browsing on a mac in safari.
1. Open your Safari browser.
2. In the top toolbar, click "File."
3. Select "New Private Window."
The smart search field will show up with a dark background, which will signal that you are in private browsing mode.
Alternatively, you could use the keyboard shortcut to open a private window in your Safari browser. To do that, you'd open a window in the browser, then press the shift, command and "N" keys.
Related coverage from How To Do Everything: Tech :
How to update the safari browser on your mac computer by installing the latest version of macos, how to enable adobe flash player on a mac computer using safari, how to block pop-ups on a mac computer's safari browser, and avoid fraudulent websites, how to add websites to your favorites list on a mac's safari browser, making them easily accessible at any moment, how to save and delete webpages on the reading list in your mac computer's safari browser.
Insider Inc. receives a commission when you buy through our links.
Watch: Apple just launched a $6,000 Mac Pro, available this fall
- Main content
- GTA 5 Cheats
- Print on a Chromebook
- Nothing Phone 2 Review
- Best YouTube TV Alternatives
- Asus ROG Ally vs. Steam Deck
- Gameshare on Nintendo Switch
How to go incognito in Safari on Mac

There may be times when you want complete privacy while browsing the web. Maybe you don’t want others to know which websites you visit or what items you download, or you may also just want to prevent sites from tracking you across browser tabs. The best way to achieve that is by learning how to go incognito in Safari on a Mac.
How to go incognito on Mac with private browsing in Safari
What happens when you use private browsing, how to exit private browsing in safari, how to always use private browsing in safari, what you need.
Mac computer
Safari browser
When you want to initiate a private browsing session in Safari on Mac, you have a few easy ways to do it.
- Use the Safari menu: With Safari open and active, select File from the menu bar and choose New Private Window .
- Use the Safari icon in the Dock: If you keep the Safari icon in your Dock, right-click it and select New Private Window .
- Use a keyboard shortcut: With Safari open and active, press Shift + Command + N on your keyboard.
Once you open a new private window, you’ll notice the appearance is slightly different. The Smart Search field (URL bar) has a dark background with white text.
You’ll also see a message letting you know that private browsing is enabled. Select the X on the right side to dismiss the message and then visit the websites you want.
Although you can browse the web as you normally would in Safari, there are some differences when you use private browsing.
- Any sites you visit, AutoFill details you use, or changes you make to cookies or website data are not saved.
- Your recent searches are unavailable in the Smart Search field.
- Items you download do not display in the Safari downloads list. However, they are still viewable in your Downloads folder.
- You cannot pass private windows using Handoff to your other devices.
- Any webpages you visit are not stored in iCloud and therefore unavailable when viewing Safari tabs on your other devices.
- Websites cannot track your browsing across tabs in Safari because each private browsing tab is isolated from the next.
When you finish using private browsing, you can simply close the Safari window. You can then select File > New Window or use the keyboard shortcut Command + N to initiate a non-private browsing session.
One additional way to go incognito on Mac is to always use private browsing in Safari. With a simple setting adjustment, you can have Safari open in a private window every single time.
Step 1: Open Safari and select Safari > Preferences from the menu bar.
Step 2: Go to the General tab.
- How to change the login picture on a Mac
- How to change your MAC address on Windows and Mac
- How to create a Memoji on a Mac
Step 3: Pick the drop-down next to Safari opens with and choose A new private window .
Step 4: Close the Preferences using the X on the top left corner.
Once you change this setting, you’ll use private browsing each time you open Safari. If you change your mind later, you can follow the same steps and select a different option in the Safari opens with drop-down list.
It’s easy to go incognito on a Mac, whether you go once in a while or all the time. Will you?
Editors' Recommendations
- How to allow pop-ups on a Mac
- How to change where screenshots are saved on a Mac
- How to check the storage space on your Mac
- How to delete messages on your Mac
- How to customize mouse gestures on Mac
- How-To Guides

The em dash (—) punctuation is a useful stylization in writing and editing that can replace a comma, colon, or parenthesis. Accessing this symbol on a computer can be challenging, depending on the operating system.
The Windows operating system has several built-in and program-associated methods for typing or pulling up the em dash into a word processor or text box. However, macOS is well known for having a system integrated methods of accessing the em dash -- some you may know and some that might not be as obvious. Keyboard Apple has made inserting an em dash into your text very simple with a keyboard shortcut. Press the Shift (⇧) + Option (⌥) + Minus (-) keys on your keyboard, and the em dash will appear in your word processor or text box automatically.
The FLAC file format is a great way to capture the sonic breadth and power of your sprawling CD collection. If you want your digital tunes to sound just as immersive as they do on the album, FLAC allows tracks to be transcoded in a lossless format. But not all devices are compatible with the FLAC format. Luckily, you’ll be able to convert most FLAC files into other audio formats, including MP3.
Forgotten your Wi-Fi password? We've all been there, but you can find your Wi-Fi password on your Mac if you have it to hand. You can just reset your Wi-Fi password if you want, but if you'd rather just take a look at it, here's how to recover your Wi-Fi password in macOS in a few quick steps.
- Editorial Process
- Why Trust Us?
- Affiliate Linking Policy
- Privacy Policy
- Terms of Service
Weekly Must-Reads View All
7 things to do if you spilled water on your macbook.
Quick steps to save your MacBook from water damage
How to Boot Your Mac Into Verbose Mode: 4 Best Ways
Boot your Mac into Verbose Mode with this step-by-step guide
How to Fix Your Mac Shutting Down Randomly: 16 Fixes to Try
Troubleshoot random shutdowns on Mac with effective solutions
How Much Space Does macOS Take On Your Mac?
Understand macOS size and analyze your Mac's storage usage
Popular Topics
- What to Do With Your Old MacBook? 13 Useful Ways to Reuse an Old Mac
- What Is the MacBook Flexgate Issue and How to Fix It
- What Is the MacBook Flexgate Issue
- Uninstall Java
- Safely Transfer Files from Mac to Mac
- Safari Bookmarks Disappeared on Mac: 10 Best Ways to Restore Them
- Repairing disk permissions
- Old MacBook
Trending Now View All

- Mac Security and Privacy
How to Go Incognito in Safari on Mac: 3 Quick Ways
Hashir Ibrahim
Reviewed by
Last updated: October 21, 2023
Expert verified
Online privacy is a growing concern and many of us want to browse the internet without leaving a digital footprint. Whether you’re researching sensitive material, shopping for a surprise gift, or simply prefer not to have your browsing history logged, going incognito is a useful tool for maintaining your privacy.
For Mac users, the Safari browser offers a convenient and robust way to go undercover while you surf the web. In this guide, I’ll walk you through the steps to go incognito in Safari on Mac, ensuring your browsing session remains your business and no one else’s.
Before We Begin
For enhanced online privacy, combine Safari’s private browsing feature with MacKeeper’s Private Connect VPN to conceal your IP address. Additionally, using MacKeeper’s Antivirus offers robust protection against spyware on your Mac.
What Is Safari Private Browsing Mode?
Safari’s Private Browsing Mode is a feature that allows you to browse the internet without saving your browsing history, search history, or form data. When you activate this mode, Safari won’t keep any cookies or temporary files that could be used to trace your online activities.
Private Browsing Mode aims to help you use the internet without leaving a record of your activities on your computer. So, in other words, this is the incognito mode on Safari.
What Happens When You Use Safari Private Browsing?
When you enable Private Browsing Mode in Safari, several changes occur to how the browser manages your data and online activity. Here are some key things that happen:
- 📜 No Browsing History : Safari won’t record the websites you visit, so you won’t see them in your history later.
- 🔍 Search History Cleared : Any search queries you enter will not be saved, so they won’t appear in the search bar’s dropdown suggestions in future sessions.
- 📝 No Form Data : Information entered into forms, like usernames, passwords, or search queries, is not stored.
- 🍪 Cookies and Site Data : Any cookies or site data obtained during your session are not saved, making it more difficult for websites to track you.
- 🗂️ Temporary Files : While temporary internet files like images may be stored to improve page load times during the session, they are deleted once you exit Private Browsing Mode.
- 🖥️ Open Tabs : Tabs opened in Private Browsing Mode won’t be stored in Safari’s Tabs feature for later retrieval.
- ⬇️ Downloads : Files you download will still be saved to your computer, but Safari won’t keep a record of these downloads within the browser.
- 🚫 Autofill Disabled : Features like Autofill for forms and passwords are disabled, meaning Safari won’t suggest information based on previous entries when you’re in Private Browsing Mode.
- 🔗 Extensions Limited : Some browser extensions may not work as expected in Private Browsing Mode to prevent them from tracking your activity.
- 🛡️ Isolated Session : Each Private Browsing window operates in isolation, meaning that if you open a new Private Browsing window, it won’t share cookies, history, or site data with the previous Private Browsing session.
While Safari’s Private Browsing Mode offers a good level of privacy, it is not entirely foolproof. Your Internet Service Provider (ISP), network administrators, and websites can still potentially identify you through your IP address.
How to Open a Private Window in Safari on Your Mac
Opening a private window in Safari on your Mac is a straightforward process that takes just a few seconds. Here are three ways to open a private window and go incognito in Safari on Mac:
Method 1: Using the Menu Bar
The most commonly used method for opening a private window in Safari is the menu bar. Follow these steps to go incognito in Safari on Mac via the menu bar:
- Open the Safari browser on your Mac.
- Click File in the menu bar.
- From the dropdown menu, choose New Private Window .

A new window should open with a dark search field, indicating you’re now in Private Browsing Mode.

Method 2: Using Keyboard Shortcuts
Mac keyboard shortcuts are an excellent way to streamline your browsing experience, especially if you prefer using the keyboard over navigating through menus. So, if you’re looking to swiftly open a private window without taking your hands off the keyboard, follow these steps:
- If you haven’t already, launch the Safari browser.
- Press Shift ⇧ + Command ⌘ + N simultaneously.

This will open a new private browsing window instantly.
Method 3: Right-Click Option
If you’re comfortable using contextual menus that appear with a right-click, this option offers a speedy way to go incognito in Safari on Mac. Follow these steps to right-click on a Mac and go incognito in Safari:
- Launch your Safari browser.
- Right-click (or control-click) the Safari icon in the Dock.
- From the contextual menu that appears, select New Private Window .
A new window with a dark search field should appear, indicating that Private Browsing Mode is enabled.
How to Open a Private Tab in Safari
If you’re already in a regular browsing window in Safari, you can’t add a private tab to that window. Your only option for private browsing in this case is to open a new Private Browsing window. Then, add as many private tabs to that window as you like.
Follow these steps to open a new private tab within an existing private window:
- Open a new Private Browsing window in Safari. You can do this by clicking File in the menu bar and selecting New Private Window , or by using the keyboard shortcut Shift ⇧ + Command ⌘ + N .
- Once you’re in a Private Browsing window, click the plus ( + ) button in Safari’s toolbar at the top of the screen.
- Alternatively, you can press Command ⌘ + T on your keyboard.

- A new tab will open within the existing Private Browsing window, indicated by a dark search field, confirming that it’s also in incognito mode.
You can have a regular browsing window and a private window open side by side. Just make sure you don’t mix them up to maintain the level of privacy you desire.
How to Always Browse Privately in Safari
Now that you know how to go incognito in Safari on Mac, can browse privately whenever you want. But if you want to set up Safari so that it always starts with a Private Browsing window, there’s a simple way to make that happen.
Following these steps will configure Safari to open in Private Browsing mode by default:
- Navigate to Safari in the menu bar at the top, and select Settings .

- In Safari Settings window, click the General tab.

- Locate the Safari opens with option, click the dropdown menu button next to it, and select A new private window .

By following these steps, you’ll set Safari to automatically open a new Private Browsing window each time you launch the application. However, this setting only applies to the initial window at startup, any subsequent windows you open will be regular, non-private windows.
How to Turn Off Private Browsing on a Mac
Turning off Private Browsing in Safari on a Mac is a straightforward process. If you’re using Private Browsing and want to switch back to the standard browsing mode, here’s how you can do it:
- A Private Browsing window in Safari is characterized by a dark search field at the top.
- Simply close the Private Browsing window by clicking the red x button at the top left corner of the window.

- Alternatively, use the keyboard shortcut Command ⌘ + W .

- If you don’t have any other Safari windows open, you’ll need to open a new one. You can do this by clicking File in the menu bar and selecting New Window .

- Alternatively, use the keyboard shortcut Command ⌘ + N .

Once you leave Private Browsing, Safari will retain your browsing history, cookies, and other data unless you delete them manually.
Can You View Private Browsing History in Safari on Mac?
A key feature of Private Browsing in Safari is that it doesn’t retain your browsing history, search queries, or cookies once you close the Private Browsing window. This means that, by design, you can’t view the browsing history of a Private Browsing session once it’s closed.
However, while Safari’s Private Browsing mode doesn’t store your browsing history like a regular browsing session, the Terminal archive on Macs operates independently of Safari’s privacy features.
The Terminal archive contains records of all websites visited, including those accessed through Private Browsing. So, you can view your private browsing history in Safari on Mac through the Terminal archive.
How to Check Private Browsing History in Safari on a Mac
- Open the Console application by going to Finder > Applications > Utilities > Console .

- In the sidebar, click your Mac.

- Type the following into the search box:

- Click the Start button in the toolbar to display console messages.

- Enter your admin username and password and click Continue .

- Head to Utilities and open the Terminal application.

- Type the following command and press Enter :

- You will be prompted to enter your admin password.
- Go back to the Console application as described in Step 1.
- Here, you’ll find entries that correspond to your Private Browsing history.

Note that the website names will be displayed as IP addresses instead of website addresses.
How to Delete Private Browsing History Stored in Terminal Archive
- Navigate to Finder > Applications > Utilities and open the Terminal application.

- You will be asked to provide your administrative password to proceed.
Executing this command will clear the DNS cache, effectively erasing stored private browsing history. Be cautious not to modify other settings in the Terminal.
Is Private Browsing Enough to Hide Your Online Activity?
While Safari’s Private Browsing feature enhances your privacy to some extent, it doesn’t make you completely anonymous online. For instance, it won’t hide your IP address, which means websites and online services can still potentially identify you.
Likewise, Private Browsing Mode won’t prevent external tracking by advertisers or third-party websites. For these reasons, you should pair Private Browsing with additional security measures such as a Virtual Private Network (VPN) and antivirus software to create a more comprehensive privacy solution.
Heres’ how to use MacKeeper’s Private Connect VPN to protect your online privacy:
- Download and install MacKeeper on your Mac.
- Open the MacKeeper app on your Mac and click the Private Connect feature under the Privacy section.

- Select a server location from the VPN server location list. You can choose a server in your country for faster browsing or another country to bypass geo-restrictions.

- Click Turn On to activate Private Connect VPN.

- Once connected, you should see a notification indicating your VPN connection is active. You can also check your IP address online to confirm the change.
- When you’re done browsing, disconnect the VPN by clicking the Turn Off button.
What Else Can MacKeeper Do?
Besides offering a foolproof VPN feature, MacKeeper can help scan your Mac for viruses , remove login items from your Mac , delete duplicate files , and remove cache files from your Mac . Check out my MacKeeper review to learn more about its features.
Go Incognito in Safari on Mac and Start Secure Browsing
Navigating the web securely and privately is important, and understanding how Safari’s Private Browsing feature functions on your Mac is a significant step toward that goal. Private Browsing offers a level of protection, but it is not a replacement for more robust security measures, such as using a VPN or specialized security software.
Here are some more tips to make your browsing experience more secure:
- Make sure you clear your browser cache on Mac regularly to avoid your browser from crashing and lagging.
- If you notice suspicious toolbars in your browser, you should immediately remove unwanted toolbars from your Mac browser to prevent viruses from infecting your system.
- Ads and trackers are also a threat to your online privacy. Learn how to block unwanted ads on your Mac and keep them from affecting your productivity.
Frequently Asked Questions
Are cookies saved in private browsing mode in safari.
Cookies are not saved in Private Browsing mode in Safari once you close the session. While the session is active, cookies may be stored temporarily to enable website functionality. However, these cookies are automatically deleted when you close the Private Browsing window, enhancing your privacy.
Does Safari private browsing hide your IP address?
No, Safari’s Private Browsing mode does not hide your IP address. While it prevents storing your browsing history, cookies, and form data, it doesn’t make you anonymous online. Your IP address is still visible to websites, your Internet Service Provider, and network administrators.
Is Safari the best option for privacy?
While Safari offers strong privacy features like Intelligent Tracking Prevention and built-in encryption, whether it’s the best option for privacy depends on your specific needs. Other browsers like Firefox focus extensively on privacy and offer advanced customization. It’s important to compare features and decide what best suits your privacy goals.
Why can’t I open a private tab on Safari?
You can’t open a private tab on Safari within a regular window due to design choices aimed at enhancing user privacy and ease of use. Instead, Safari segregates private browsing into separate windows to prevent you from mixing up private and regular tabs, reducing the risk of privacy breaches.

I'm Hashir, a tech journalist with a decade of experience. My work has been featured in some of the top tech publications like MakeUseOf and MakeTechEasier. I have a bachelor's degree in IT, a master's in cybersecurity, and extensive knowledge of Apple hardware, specifically MacBooks. As the senior writer at MacBook Journal, I write in depth guides that help you solve any issues you have with your mac and unbiased reviews that help you make the right buying decisions.

Hi there! I'm Ojash, a tech journalist with over a decade of experience in the industry. I've had the privilege of contributing to some of the world's largest tech publications, making my mark as a respected Mac expert. My passion lies in exploring, using, and writing about MacBooks, and I enjoy sharing my expertise to help others make informed decisions and get the most out of their MacBook experience. Join me as we delve into the fascinating world of MacBooks together!
You May Also Like

How to Disable Pop-Ups on Safari: 3 Effective Solutions
Written by Hashir Ibrahim Reviewed by Ojash Last updated: September 6, 2023

iforgot.apple.com Phishing Scam: How to Protect Against It
Written by Hashir Ibrahim Reviewed by Ojash Last updated: October 13, 2023

How to Turn Off iMessage on iMac: 4 Best Ways
Simple steps and alternatives to disable iMessage on iMac

Can Macs Get Viruses? Everything You Need to Know
Written by Hashir Ibrahim Reviewed by Ojash Last updated: October 12, 2023
How-To Geek
How to always start safari in private browsing mode on a mac.
Keep your Safari browsing history private on your Mac by opening a new Private Browsing window every time you launch. Here's how.
Quick Links
What is private browsing in safari, how to always launch safari with a new private browsing window.
If you use Safari on a Mac and would like for your browsing history to stay private but don't want to always think about having to turn it on, there's a way to open a new private browsing window every time you launch Safari. Here's how.
Private Browsing is a mode where Safari doesn't save your browsing history, AutoFill information, changes to cookies, recent searches, and download history between sessions. The mode also inclues Apple-centric privacy features, such as preventing sharing of browsing information through iCloud . And if you have Handoff enabled, browsing windows do not get passed to your other Apple devices.
Even with all those features, you should be aware that Private Browsing mode does not conceal your browsing history from websites on the internet that might use your IP address to track you across sites , hosts of your network (such as a school or business), or your ISP.
Related: The Many Ways Websites Track You Online
First, launch Safari. In the menu bar at the top of the screen, click "Safari" and select "Preferences."
In the Preferences pop-up window, make sure you're on the General tab. Look for the option called "Safari Opens With:" located beside a drop-down menu.
Click on the drop-down menu and select "A New Private Window" from the list of options.
Close the Preferences window, quit Safari, and launch Safari again. You should see a window with a "Private Browsing Enabled" notice along the top.
Now you're free to use the window as you typically would . Just make sure you close it when you're done.
Related: Five Worthwhile Uses for Private Browsing Mode (Besides Porn)
It's worth noting that the option we just set only works when you first open Safari. By default, new windows you open after that will not be private. If you want to open additional Private windows, you'll need to select File > New Private Window from the menu bar, or use the Shift+Command+N shortcut. Good luck, and happy browsing!
- Apple Watch
- Accessories
- Digital Magazine – Subscribe
- Digital Magazine – Info
- Smart Answers
- New iPad Air
- iPad mini 7
- Next Mac Pro
- Best Mac antivirus
- Best Mac VPN
When you purchase through links in our articles, we may earn a small commission. This doesn't affect our editorial independence .
How to use private web browsing on Mac

Many web users prefer to keep their browsing history secret and private – from loved ones, colleagues, even total strangers and advertising companies.
There are a few ways to protect your privacy. You could delete your history at the end of every browsing session, or use a VPN to stay anonymous online (our recommendation is NordVPN but we have a separate roundup of the best Mac VPNs ). But for a simple and free solution, we recommend the use of private browsing mode.
For similar advice relating to phone and tablet, see How to use private browsing on iPhone & iPad .
Why your browsing history is at risk
Many of us share our Macs with other people, and you don’t want to worry about any embarrassing websites you’ve been looking at being discovered by your spouse or flatmate.
The classic excuse is that you’ve been ‘researching an anniversary present’ and don’t want to spoil the surprise, but if you’ve been seeking medical advice or applying for jobs online it would be entirely reasonable to want to keep that information to yourself. And, all joking aside, porn users are entitled to their privacy too, particularly if they have kids and don’t want them to stumble across any adult sites.
If you’re thinking of having one machine for sharing and another for the private stuff, bear in mind that it’s not as simple as you might think. Safari features such as Top Sites, Frequently Visited and the Smart Search Field automatically display your history as you use the browser, and iCloud syncs this information between your Apple devices. If you look at a website on your Mac it could pop up when somebody uses your iPhone or iPad or vice versa.
Even if you trust people not to bother searching through your history, they could still accidentally discover what you’ve been looking at when the browser offers it as an autocomplete suggestion.
iCloud privacy
If you’re looking for more things to worry about, there were reports in 2017 that Apple hadn’t been removing deleted Safari web histories from iCloud. We believe the company has since tackled the issue, but it’s another example of the ways in which browsing histories can leak out unexpectedly.
According to ElcomSoft, the data might have disappeared from the devices, but it was still on iCloud and easily recoverable.
“We discovered that deleting a browsing history record makes that record disappear from synced devices,” said company spokesperson Vladimir Katalov. “However, the record still remains available (but invisible) in iCloud… We were able to pull additional information about Safari history entries including the exact date and time each record was last visited and deleted!”
What is private browsing?
Private browsing is an optional mode available in most web browser software where no record is kept of the sites you visit. If you’re looking at a website and you’d rather keep it to yourself, you should turn on private browsing before entering the URL.
Apple has included private browsing as a feature in macOS and iOS since way back in Safari 5.1 (in Mac OS X Lion) and iOS 5.
Private browsing in Safari
The way private browsing works varies from browser to browser . We cover the four most popular Mac browsers individually, but if you’re using one of the more obscure ones, don’t despair: just check the File > menu and look for mention of a private window or similar. (Shift + Cmd + N often works too.)
The key thing with private browsing mode(s) is that it can be applied to certain windows only, so be careful. The fact that you opened a private window doesn’t mean you’ll still be covered if you go back to an old window you had open before (or a new one you open without private browsing applied).
In Safari, you open a new private window by Choose File > New Private Window (Shift + Cmd + N).

You’ll now be viewing a window in private browsing mode. Safari won’t remember any browsing or search history. Once again, it’s important to know that this only applies to this window that you have opened . You can tell it’s a private window because the Smart Search Field will be a dark grey colour.
If you open a new tab within the private window it will also be private. But if you open another window using the standard File > New Window (Cmd + N), it will not be a private browsing window. So be careful to use just the private window(s) for your browsing session.
Private browsing in Chrome
Chrome’s private browsing mode is called Incognito, but it’s otherwise the same idea. Select File > New Incognito Window, or press Shift + Cmd + N.

You’ll notice that Chrome’s Incognito windows are a totally different colour to its normal ones.
Private browsing in Firefox
Select File > New Private Window, or press Shift + Cmd + P.

Private browsing in Opera
Select File > New Private Window, or press Shift + Cmd + N.

How to browse the web privately in Safari
Use Safari’s private browsing mode to surf the internet without having all of your information tracked and recorded. Private browsing prompts Safari to block websites from tracking your search behavior. The browser won’t remember any webpages you visit and your search history won’t get logged. Follow along with us to learn how to open Safari in private browsing mode on your iPhone, iPad and Mac.

How private browsing mode works
Browsing the internet in Safari’s private-browsing mode strengthens your online privacy. When surfing the web privately, website tracking is limited and none of your browsing history or login information is saved. This prevents others with have access to your device to view a list of websites you visited. Read: How to turn off Safari website tinting
Browsing certain websites privately in Safari ensures that those histories don’t pop up in everyone’s faces. For instance, you may want to perform a web search incognito or browse adult websites privately. As mentioned, private tabs don’t appear in Safari’s history. And to boost your privacy even further, private tabs also won’t show up in the list of synced tabs on your other devices.
- Private browsing : Private browsing won’t remember your search history, show the pages you visit or reveal any automatically filled passwords. Private browsing also blocks some websites from tracking your search behavior.
- Regular browsing : Public browsing isn’t private so it will in fact record your browsing and searching history, as well as your Autofill information like saved passwords.
Of course, Safari allows you to manually clear your browsing history and website data, including cookies, at any time. But with private browsing mode, you don’t need to do that because nothing gets remembered in the first place.
How to use private browsing in Safari for iPhone
To open a new private browsing tab on your iPhone or iPod touch, you must choose the Private tab group from the browser’s New Tab screen.
- Open Safari on your iPhone or iPod touch with iOS 15.0 or later.
- Touch the New Page icon in the bottom-right corner.
- Hit “ ⌄ ” in the center of the tab bar at the bottom of the screen, then choose Private.
- Touch Done to start browsing the web privately.
When in private browsing mode, Safari appears black or dark instead of white or gray. Specifically, the URL field turns gray and uses white text. You will also see a message near the top of the private window saying “Private Browsing Mode”.
When opening multiple private tabs, Safari nests them under a group titled “Private”.

To close a single private tab, hit the New Page icon to get thumbnails of all your private tabs, then swipe left each of the private tabs you wish to close. To exit private browsing mode, first touch the New Page button in the bottom-right corner, then choose Private . Now simply select a different, non-private tab group and then hit Done in order to switch to it.
How to use private browsing in Safari for iPad
Entering private browsing mode in Safari for iPad requires bringing the browser’s sidebar into view. The sidebar includes all the private tab options you need.
- Open Safari on your iPad with iPadOS 15.0 or later.
- Hit the sidebar icon near the top-left corner to open the Safari sidebar.
- From the Safari sidebar on the lefthand side, choose the option labeled Private .
Doing so creates a new tab in a group dubbed “Private”. You can open multiple private tabs in this tab group. Private tabs don’t leave traces in the Safari history nor do they appear in the list of tabs on your other devices.
To hide your private tabs and exit private browsing mode, switch to a different tab group from the Safari sidebar. Don’t worry, any open private tabs you have will reappear the next time you invoke the private browsing mode.
Forcing mobile Safari to always open in private mode
Unfortunately, Apple hasn’t provided a toggle in iOS/iPadOS to force Safari to always open in private browsing mode similar to macOS Monterey. Thankfully, there’s a simple trick that’ll let you do just that.
The trick is in creating a new private tab like you normally would and leaving it intact when you exit Safari. Doing so makes your private tabs persist across sessions, with Safari automatically showing your private tabs the next time you launch the browser.

If you exit private mode though, the next tab you open won’t be private. Safari will default to opening private windows each time you launch it.
How to use private browsing in Safari for Mac
You can open a new private browsing window in Safari on your Mac either by leveraging a dedicated menu option or invoking a special keyboard shortcut.
- Open Safari on your Mac
- Click Safari’s File menu, then choose New Private Window .
Doing so creates a new private window that has dark-colored borders, with the URL field set against the white text to distinguish it from regular Safari windows. You will also see a message near the top of the private window saying “Private Browsing Enabled”.

To open a private window faster, hit Shift (⇧) – Command (⌘) – N on the keyboard.
Forcing desktop Safari to always open with a private window
You can also force Safari for Mac to automatically launch in private browsing mode.
- Open Safari on your Mac.
- Click the Safari menu, then choose Preferences .
- In the Safari preferences window, select the General tab.
- Click the menu next to Safari opens with , then choose A new private window .
Safari will default to opening in private browsing mode each time it’s launched.

A support document on the Apple website instructs people who don’t see this option to tick Close windows when quitting an app in System Preferences → General .
To close the current private window, simply close it. Switching to a non-private Safari window or opening one will also turn off private browsing temporarily until you click the private window again. Apple advises closing all private windows when you’re done using Safari’s private browsing mode in order to prevent other people from clicking Safari’s back and forward buttons to see pages you visited in the private windows.
What private browsing mode in Safari actually does
Wondering what all of the features of Safari’s private browsing mode are? Apple notes in support documents for Safari for iPhone , iPad and Mac that all of the following are true:
- All of your tabbed windows are isolated from one another, so none of the websites that are open in your private window can see what other websites you might have open in the same window.
- All of your login sessions and AutoFill information will be forgotten the next time the web browser is used.
- Any of the webpages that you have open are kept out of iCloud so that other devices won’t have access to any of the webpages you have open in the private browsing window. Also, your recent searches won’t appear as suggestions when typing a search phrase into the URL field.
- All of your search results from searches performed in a private browsing window are hidden and not stored.
- Anything you download while in the private browsing window is not saved in your download history (downloaded items still end up in your Downloads folder or designated download location).
- Private windows are not passed to other devices when Handoff is turned on.
- All websites you visit are asked not to track you and Safari won’t remember cookie information from your current private browsing window when you begin your next browsing session.
- Any plug-ins you have installed will also be limited to tracking your information from the private browsing window.
Use private browsing to surf the web anonymously
Your online privacy is important, and you should never give it up!
Most people won’t want to do all their web surfing privately. Browsing the internet publicly has its advantages, like better website personalization, the ability to view your browsing history and so forth. Read: How to reverse Safari’s polarizing redesign in iOS 15
Browsing certain websites privately in Safari ensures that those histories don’t pop up in everyone’s faces. Private browsing is useful even if you’re the only user of your device because you never know when you’ll be sharing a screen with someone in the future when you go surfing the web. For instance, you may wanna prevent others from knowing what you were looking up in the past such as when you were shopping for the holidays.
So whenever you feel like hiding all traces of your online activity in Safari, remember to switch to the private browsing mode before doing any web surfing.
How to Use Private Browsing in Safari
Private browsing, also known as incognito mode, lets you surf the web without storing your browsing or search history. Here's how to quickly turn private browsing on or off in Safari.
It's worth noting that private browsing won't disguise you from the sites you visit. They could still record your IP address and any information you enter into their sites, such as search terms. Additionally, private browsing won't protect you from web-based malware attacks, so you'll still need to be careful about what you click on whether you're in private or normal browsing mode.

Private browsing mode is helpful when you don't want other users to discover (accidentally or not) the sites you've been looking at. Apple iCloud syncs your browsing history between the Mac and the iPad and iPhone , so if you share devices, you can protect your privacy with private browsing mode. This also comes in handy if you're using a public computer and don't want to leave any AutoFill information behind.
Turn on Private Browsing on the Mac
In OS X, the quickest way to open a new private browsing window is with the keyboard shortcut.
1. Hold down Command+Shift+N. This will open a new window with private browsing enabled. Alternatively, go to File > New Private Window.

2. Search or browse the web as you normally would. The web pages you visit, your search history, and AutoFill information while you use the private browsing window won't be recorded.
3. Close the window when you're done with private browsing.
Stay in the know with Laptop Mag
Get our in-depth reviews, helpful tips, great deals, and the biggest news stories delivered to your inbox.
Note that private browsing is OS X applies only to the private browsing window you have opened. If you open a new window with Command+N or File > New Window, that window will save your search history and other private browsing information.
Turn on Private Browsing in iOS
Safari on the iPad has a private browsing mode as well.
1. Tap the Pages button , which is shaped as two squares in Safari's menu.

2. Tap Private.

3. Tap the Search field to search for a site to visit.
4. Tap Pages then Private again to turn off private browsing mode.
- How to Pin a Tab in Safari
- How to Stop Safari From Crashing
- How to Search for Text Within a Web Page in Safari
Google is finally deleting your Incognito mode browsing history — well, some of it
Traditional search engines are broken — can AI help?
The new FCC net neutrality rules have a gaping loophole
Most Popular
- 2 Xbox is deleting your game screenshots and clips on May 30, so here's how to save them
- 3 This rumored Google Pixel Tablet update could kill our favorite feature
- 4 Don't get hacked! Critical update for iPhone users before upgrading to iOS 17.5 (zero-day threats!)
- 5 Steam closes loophole that allowed players to complete a game within the Advanced Access period and get a refund
[ULTIMATE GUIDE] Everything About Private Browsing in Safari and How to Browse Privately on Mac/iPhone/iPad
Quick Navigation
- Part 1: How to Activate Private Browsing in Safari on Mac
- Part 2: How to Deactivate Private Browsing Mode in Safari Mac?
- Part 3: Clear Safari Private Browsing History in One-Click- Macube Cleaner
- Part 4: How to Enable Private Browsing in Safari on iPhone/iPad
- Part 5: How to Remove Private Browsing Mode in Safari on iPhone/iPad
Whether you are surfing the internet using a friend’s device or not, the private browsing mode on Safari will save you the stress of wiping your browsing data, such as search history, cookies, and caches, all of which slows down browsing speed and also exposes your online privacy. The private browsing mode lets you navigate the internet with minimal tracking.
However, mind you, for you to use this browsing mode, you have to activate it from your Safari browser, since it's not the default browsing mode. There are several ways to go about this depending on the Apple device you are using. We will discuss this here in this post as we look at how to browse privately on Safari. Keep reading.
What Is Private Browsing?
Private browsing is a feature tucked into many browsers, such as Google Chrome, Safari, Firefox, and more, to protect your online privacy. The feature is designed to help you conceal your browsing data so that whatever browser you are using doesn't have anything about your browsing session. It offers a great way to minimize tracking.
Why should you use private browsing in Safari Mac?
Private browsing mode comes in handy when you want to surf the internet using Safari on Mac for the following reasons:
- Privacy Protection
When you activate the private browsing mode on your Safari browser, your browsing data is hidden. No one can track or know which website you visited. Also, your browsing preference is completely safe, since cookies and cached are completely disabled I'm private browsing.
- Improved Browsing Speed
Private browsing improves your browsing speed, thereby enhancing your browsing experience. You might be wondering how possible. Well, browsing search history, caches, and cookies take up little browsing storage which slows down the operations of a web browser.
Part 1. How to Activate Private Browsing in Safari on Mac
Having discussed the importance/reasons for using private browsing, let's explore how to activate the feature in Safari Mac. Check out the detailed guide down here to get this done:
How to start a private browsing session in Safari
Step 1: Go to the bottom of your Mac home screen and click on the Safari icon in the dock panel to launch the corresponding browser screen.
Step 2: At the upper left corner of the page that appears, locate the File button, and click on it. You should get a flyout menu without several options in response to your click. Select New Private Window to proceed.

Alternatively, you can hold down Shift + Command + N on your keyboard to open a private browsing screen.
Step 3: The next screen that appears is the private browsing page. You will notice a dark Smart Search field on the page just as seen below:

This signifies that you are using incognito or private browsing mode on Safari.
How to open a private tab in Safari
If you are looking to browse multiple private browsing screens, you may have to launch several tabs to ease and hasten your activity. A simple way to do this on your Safari browser is given below:
Step 1: Once you get on the private browsing screen, locate and click on the + icon in the toolbar section. Alternatively, you can press down Command + T .
Step 2: Once done, a new private browsing tab will open. Use the step 1 procedure as many times as you like to launch as many private tabs as you like.

- If you are just opening Safari and you haven't activated the private browsing mode, all screens that open when you use the Command + T (or click the + icon in the toolbar section) buttons are in normal browsing mode. Your data will be recorded in this mode.
Steps to always browse privately in Safari
For folks that want to go incognito or private browsing mode permanently, use this instructional guide to achieve this:
Step 1: Run the Safari browser on your Mac computer by clicking on the corresponding button in the dock panel.
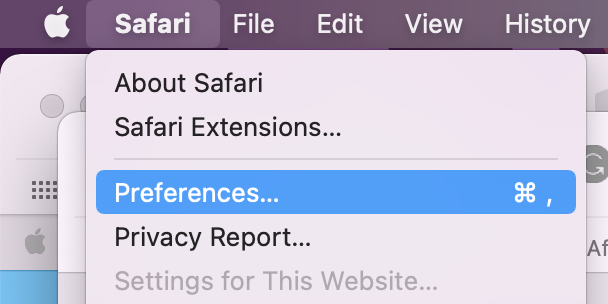
Step 2: Next, click on the Safari button at the topmost left corner of the browser page and select Settings from the options. If you don't want to use this approach, you can hold down the Command + , buttons to open the Preference window. Here's what the Preference window looks like:

Step 2: Click on the General tab, then head to where you have Safari opens with and click the drop-down menu beside it. Select A new private window .
Step 3: Close the window and start using the Safari private browsing mode to surf the internet anytime any day.
Part 2. How to Deactivate Private Browsing Mode in Safari Mac?
No longer interested in the private browsing mode in Safari Mac? You can deactivate private browsing easily and quickly using the steps down here:
Step 1: Close the current private browsing page by tapping the Red icon situated at the upper left corner of the Safari page, or use the Command + W to get the same result.
Step 2: Next, launch the Safari browser again and head to where you have the File icon. Click on the corresponding button, then choose New Window to use the regular window for your internet activities.
- The guide above works best when you haven't configured Safari to browse privately permanently. However, if you’ve done that, kindly follow these instructions down here:
- 1. Run Safari and click on the Safari button at the top left corner of the page that comes up.
- 2. Click Settings and navigate to the General tab.
- 3. Now select A new window from the flyout menu beside Safari opens with .
Part 3. Clear Safari Private Browsing History in One-Click- Macube Cleaner
Safari private browsing isn’t completely safe to use, as the browser still reveals some crucial info about you. The Safari private mode stores your IP address, plus download history in its database. If you want to be completely anonymous (safe), you need to install a privacy protection tool that offers top-notch services.
There are several tools you can count on, but we recommend the Macube Cleaner - a multipurpose software program dedicated to offering five star privacy protection services to end-users. This software protects online privacy by simply clearing your browsing data on web browsers such as Safari, Chrome and Firefox.
Macube Cleaner powers one of the best cleaning algorithms that clears your entire Mac to optimize its operations within the shortest time frame. With the simplified interface layout and impressive features tucked into this software, Mac users can quickly create over 500+ GB of memory space with just a few clicks.
Free Download Free Download
Key Features
- 1-click to clear your Safari private and regular browsing mode without compromising users’ data.
- The fastest Mac cleanup suite with a fast speed to scan and delete unwanted files or data.
- Simplified user interface with easy-to-grasp features you can count on to help you clean up your Mac and optimize the operations.
- Supports over 5+ cleaning modes, such as duplicate finder, uninstaller, large and old files cleaner, file shredder, and many more.
- Macube Cleaner is highly secured, so it's safe to use.
Steps to Clear Safari Private Browsing History
With the simple guide below, you can clear your private browsing history in the Safari browser on your Mac using Macube Cleaner:
Step 1: Download and install Macube on your Mac computer. Load the software, and click on the Privacy icon on the left sidebar. (I revised it)

Once done, tap the blue Scan button to proceed.
Step 2: Next, the Macube Cleaner will run a quick check on your Mac computer, scanning the Safari, Chrome, and Firefox browsers. When the scanning is over, the software will display the browsing data for each web browser on the left sidebar, just as seen below:

Step 3: Select the Safari browser, and the corresponding browsing data, including search history, downloads, cookies, and caches, will come up on the right hand panel. Select the browsing history to delete by ticking the box beside the URL link.
Once this is finished, click Clean and Macube Cleaner will proceed to clear your private browsing history.
Part 4. How to Enable Private Browsing in Safari on iPhone/iPad
If you don't own a Mac computer but have another Apple device like iPhone or iPad, you can also activate the private browsing mode on Safari. The procedure to follow is super easy, and quick.
Once you enable private browsing on Safari, your browsing data is safe and Apple can't track your web activity. Also, no data from your private browsing session will sync to Cloud. This means none of your iCloud-connected devices would have your browsing history.
Choose any of the guides that correspond with your iDevice to enable private browsing on it:
- Click on the Safari browser button on your Home Screen and the page shown below will pop up:

- Next, click the Tabs button located at the bottom right corner of the page. Once done, this page will be displayed on your iPhone screen:

- Click on the [Number] Tabs to launch the window labeled Tab Groups , just as seen below:

- Now click Private and select Done to activate private browsing mode on your Safari browser.
Alternatively,
- You can just hold down the Tabs button at the bottom right corner of your Safari browser page.
- Select Private or New Private Tab and the private browser window will come up.
- Mind you, the private browsing window will display a black or dark search field instead of white.

- On your iPad Home Screen, find the Safari browser icon and click on it.
- Next, hold down the Tabs button, which is situated in the top right corner of the Safari browser page.

- Choose New Private Tab to switch from regular mode to private browsing mode.

- Once done, the search field will turn black as opposed to the white color shown when you are using the regular mode.
Part 5. How to Remove Private Browsing Mode in Safari on iPhone/iPad
You can always exit the private browsing mode in Safari on your iPhone or iPad. Here's how to do this for the different iDevices:
- While you are on the Safari browser page, click on the Tabs button.
- Next, hit the Private drop-down menu at the center of the page to access Tab Groups .
- Now click on the [Numbers] Tab to activate regular browsing mode.

- On the Safari browser page, locate the Tabs button at the top right corner. Click the button to proceed.

- Next, hit the Private drop-down icon and you get the response window down here:

- Now choose the [Number] Tabs and Safari will exit private browsing mode immediately.
Private browsing on Safari a secure way to protect your online privacy while surfing the internet on any Apple device, whether iPhone, iPad or even the Mac computer system. When you activate the function, your browsing data remain hidden. However, mind you, this function doesn’t keep you anonymous completely.
For instance, downloaded files are trackable, as Safari private browsing doesn’t hide them. Also, your IP can be tracked while using the Safari private mode. If you want to remain anonymous, then you need to install the Macube Cleaner to come to your rescue. The software helps you clear your entire browsing session, both in regular and private browsing mode. You should try the software out today!
People Also Read
- [Full version manual] Can My Employer See My Internet History On Phone/Computer?!!
- Clearing Terminal History on Mac: A Comprehensive Guide
- How to Enable Third-Party Cookies in 5 Popular Browsers on Mac/Windows
- How To Delete Recently Closed Tabs On Browsers Chrome/Safari/Firefox [Step by Step]
Macube Cleaner
Speed up and troubleshoot your Mac super easily with a Macube full-featured free trial!
Macube Cleaner is downloading now...
Install -- Scan your Mac -- Clean it up
- Dragon’s Dogma 2
- Genshin Impact
- Honkai Star Rail
- Lego Fortnite
- Stardew Valley
- NYT Strands
- NYT Connections
- Apple Watch
- Crunchyroll
- Prime Video
- Jujutsu Kaisen
- Demon Slayer
- Chainsaw Man
- Solo Leveling
- Beebom Gadgets
How to Go Incognito in Safari on iPhone, iPad & Mac
How to Go Incognito in Safari on iPhone

3. Tap Done or the “+” button to open a new private tab in Safari.

How to Exit Incognito Mode in Safari on iPhone
2. Tap [numbers] Tab to exit private browsing mode in Safari on iPhone.

How to Go Incognito in Safari on iPad
3. You will know that you’re browsing privately in Safari as the address bar will turn dark or black, and the buttons also turn black (instead of blue).

How to Exit Incognito Mode in Safari on iPad

How to Go Incognito in Safari on Mac
1. Open Safari and click on File in the menu bar at the top.

How to Make Incognito the Default Mode in Safari
If you are a privacy-concious user, you can choose to always start Safari in incognito mode for private browsing. When you do this, Safari is going to open a private window by default on your Mac. Here’s what you need to do:

How to Exit Private Browsing in Safari on Mac

Frequently Asked Questions

Beebom Staff
Bringing the latest in technology, gaming, and entertainment is our superhero team of staff writers. They have a keen eye for latest stories, happenings, and even memes for tech enthusiasts.
Privacy Protection: Ensuring the privacy of our online activities is of utmost importance. Opting for Utopia P2P web proxy as a private browsing solution is the best decision due to its advanced features and decentralized network, which provide comprehensive privacy protection.
Add new comment

VPNoverview.com Privacy Anonymous Browsing Everything You Need to Know About Safari Private Browsing
Everything You Need to Know About Safari Private Browsing
Ever wondered what Safari Private Browsing does exactly? Chances are it might not be giving you the level of online privacy you expect. Safari Private Browsing does have some perks, including:
- Stopping Safari from remembering the websites you’ve visited
- Not storing any new usernames, passwords, payments cards, and other information you input into private browsing
- Forgetting any search engine queries you’ve run
- Allowing you to save money by avoiding marketing cookies that might inflate prices
However, this is pretty much all the privacy that you’ll get with Safari Private Browsing. This incognito mode won’t cloak your IP address, encrypt your internet traffic, or make you safe on public Wi-Fi . Private browsing still leaves you pretty exposed to a lot of the risks that come with connecting to the internet.
For true online anonymity, you’ll need to use a VPN to change your IP address . We’re big fans of ExpressVPN, one of the fastest VPNs in the industry.
Below, you’ll find more information on how to use Safari Private Browsing on all your Apple devices, as well as more details on how this incognito mode does and doesn’t protect your privacy.
If you use a Mac, iPhone, or iPad, then chances are you’ve encountered Safari Private Browsing before. Whether you’re shopping for a partner’s gift or want to snoop on a long-lost colleague’s LinkedIn, there are many reasons why you might want to use private mode in Safari.
In this article, we answer the question, what is Safari Private Browsing ? We’ll also tell you what this handy tool can’t do to save you any embarrassment or risk to your online security.
What is Safari Private Browsing?
There’s a little more to this method of browsing than meets the eye, but we’ll go into specifics further down in this article. The point is, for a more private experience, you can use Safari’s incognito mode . You’ll be logged out of all accounts, and Safari won’t autofill user logins, passwords, or payment information. When you turn on private browsing, Safari won’t remember :
- Your search engine history
- Webpages you’ve visited
- Browsing activity or history
You should, however, be aware of a major drawback of this tool on Macs: your browsing activity likely isn’t as hidden as you might think. Websites you visit can still see who you are and what you’re doing . You can read more about this in our general incognito mode article .
With Macs, Private Browsing information is logged in a different place, as well: your Terminal archive.
Beware the Mac Terminal archive
On Macs, there’s something called the Terminal archive , and it’s as scary as it sounds — well, for fans of privacy at least. It’s a treasure trove for snoops. The Terminal archive contains all of the websites you visit , whether you’re using Safari Private Browsing or not. This is because your Mac stores static images and other files when you visit a website for the first time. This makes future visits to these sites and page loading much faster, as your Mac pulls the relevant files from the Terminal archive.
This command-line function also lets you make systemic changes to your Mac . For most users, there’ll never be a need to make any changes in the Terminal archive, and you shouldn’t if you don’t know what you’re doing. You could end up breaking something critical in your computer’s operating system if you tinker with the Terminal.

However, it is good to know that, even when you’re using Safari’s Private Browsing mode, your online activity is logged here.
Make your Safari Private Browsing truly private
By now, you might be asking yourself: how do I clear the cache on my Mac? Well, today’s your lucky day. Below, you’ll find a brief, step-by-step guide to clearing the cache on a Mac . Just make sure not to do anything else while inside the Terminal.
- Open “ Finder ,” then search for “ Terminal ” in the search bar.
- Run the Terminal application.
- Paste the following text into the Terminal and hit enter: sudo killall -HUP mDNSResponder
You may have to enter your Admin password to proceed. This is going to flush the DNS cache.
Remember that you shouldn’t do anything else inside of the Terminal application unless you know what you’re doing. It only takes a short command to nuke files or entire directories in this app forever! So, tread carefully.
Why You Should Use Safari Private Browsing on Macs and iOS
We can hypothesize all we want, but you’ve probably got a good idea of why you use private browsing. According to a 2018 research study , the most common reason people use private browsing is so others that are using a shared device can’t see what they’re doing. This comes down to protecting two things from other users of your device:
- Their personal data
- Their browsing activity
Fortunately, these are two things that Safari Private Mode manages to do wonderfully. Below, you can read more about what else Safari Private Browsing does for you .
Online privacy
- Your browser won’t remember what websites you’ve visited. Anything you browse while you’re in private browsing mode won’t be remembered by Safari. So, if you start shopping online for gifts or a product that you find embarrassing, you won’t usually have to worry about your friends or family coming across your browsing history.
- Safari won’t suggest usernames, passwords, credit card numbers, and so on. You’ve probably noticed that Safari can remember usernames, passwords, credit cards, and other information when you use it for the first time. If you tell your Mac, smartphone, or tablet to remember those details, they’ll be automatically filled in the next time you visit the website. With Safari Private Mode enabled, these kinds of details won’t be stored: you won’t be prompted to save or autofill them at all.
- Your search engine queries won’t be remembered . If you’ve been shopping for gifts or trying to self-diagnose, you probably don’t want other users of the computer to see what you’ve searched for . Normally, you’ll see suggested searches popping up in search engines like Google. Based on your past searches and clicks, some links might be colored purple instead of blue, too. In private browsing mode, these won’t appear, nor will any new searches be stored.
How to pay less with Safari Private Browsing
There’s more to private mode options than just online security. You could also save money with Safari Private Browsing, as you won’t be quoted higher prices for products you’ve already viewed. When you visit a website, cookies (small text files) are stored on your computer by your browser.
These kinds of cookies aren’t delicious or rewarding at all. Instead, they allow the site to track you and figure out that you’re interested in, for example, a particular holiday destination. This can result in you seeing higher airfares, hotel booking fees, and more. Just turn on Safari’s Private Browsing to s top cookies from being stored on your browser and avoid hiked prices.
How to Go Incognito on Safari
Safari Private Browsing on a Mac
Using Safari Private Browsing on a Mac is simple. If you’re reading this on a Mac, you can skip step one in our step-by-step guide below:
- Open Safari on your Mac.
- Click on “ File ” in the menu bar at the top of the screen.
- Select “ New Private Window .” This will open a new private tab, but you can open as many private tabs in your tab bar as you need.

It’s that simple. Now, any new tab you open within this new private browsing window will be a private browsing tab. Give it a whirl by opening some new private tabs and navigating to a website you frequently log into. You’ll notice that your username and password aren’t suggested for autofill as they usually would be .
Also, you’ll know that you’re in private browsing, as the URL bar will have a gray background rather than the usual white. Just remember to ignore or close your existing browser window if you had any open. If in doubt, check the background color of the URL bar.
Finally, to turn off private browsing in Safari , simply click the red cross in the corner of the browser window as you usually would.
Safari Private Browsing on an iPhone
Using Safari’s private browsing mode on an iPhone or iPad is fairly straightforward and could increase your privacy on an iPhone . If you’re running iOS 14 or earlier , simply follow the steps below:
- Open Safari on your phone.
- Tap on the “ Tabs ” button. That’s the two small squares in the bottom-right corner of your Safari window on iPhone.
- A new option called “Private” should appear.
- Tap “ Private ” and you’ll be taken to a blank screen confirming that you’re using Private Browsing Mode . You’ll notice that it’s using the same gray color scheme as Safari for Mac.
- Lastly, click on the small “ + ” (plus) icon to launch a private browsing window.

If you’re using Apple’s latest iPhone update, iOS 15.1.1 , you’ll need to follow a slightly different (and hey, we’ll say it — more confusing) set of steps:
- Tap on the “ Tabs ” button.
- Tap where it says “ X Tab(s) ” – this number will reflect the number of windows you have open.
- Tap “ Private .”
- Now, you’re in Private Browsing mode and can click the small “ + ” (plus) icon to launch a new private window.

Again, turning off private browsing in Safari for iPhones or iPads is simple. Just press the same “ Private ” button that you used to enable the feature. Don’t forget, if you have multiple private tabs open, they won’t close automatically. Swipe each tab closed before you exit private mode if you want to leave no trace.
How to Set Safari Private Browsing as the Default
If you’d rather always browse privately, you can also set Safari Private Browsing as your default, so that it opens automatically whenever you open a new tab or window. Check out the step-by-step instructions below for a Mac :
- Make sure your active application is Safari, then select “ Safari ” from your Mac’s toolbar at the top of your screen. Click on “ Preferences ” next, which can also be accessed using the keyboard shortcut “ Command ” + “ , ” (that’s Command, plus a comma).
- Now, you should see the Privacy window for Safari. Click on the “ General ” tab.
- Next to “Safari opens with”, select “ A new private window ” from the drop-down list.
While you can’t automatically use Safari Private Browsing by default on mobile , there are some options for minimizing what’s remembered, stored, or recommended. Here’s how you get there:
- Open the “ Settings ” application.
- Scroll down until you see “ Safari ” and tap on that option.
Now, you’ll have the choice to use a number of features. You can:
- Disable search engine suggestions
- Disable Safari suggestions specifically
- Turn off autofill for Safari , either for personal information, payment information, or both
- Disable “ Favorites “, which you can save in your Safari app’s home screen
- Turn off “ Frequently Visited Sites “, which appear below your favorites
In this menu, you can also prevent cross-site tracking and block all cookies on the websites that you visit. In the event that you forget to launch Safari Private Browsing, these options should give you at least a little more privacy whenever you go online.
Is Safari Private Browsing Safe?
That last risk is surprisingly common on public Wi-Fi networks too. Bear in mind that private browsing doesn’t protect you against malware (malicious software) either, nor does it protect your payment information or other personal details . For true online anonymity and to improve your online security , you should give serious thought to using a VPN (Virtual Private Network) .
How to use a VPN with Safari Private Browsing
Using a VPN along with Safari Private Browsing should give you the online security you’re looking for. In addition to avoiding any logged browsing history or search history , you’ll be much harder to track and enjoy greater online anonymity. You can check out the many advantages of a VPN for more information. Want to get started right away? The following steps will only take a few minutes of your time:
- Choose a VPN provider and create an account. We recommend checking out our list of the best VPNs if this is new ground for you. Alternatively, ExpressVPN is a market-leading VPN provider that we’re always happy to recommend.
- Download and install the VPN software onto your Mac. You can also download ExpressVPN for mobile on your iPhone. Other premium providers like NordVPN, CyberGhost, and Surfshark all offer really slick mobile apps for iOS, too.
- Log into your account , either in the desktop software or the mobile app.
- Choose a VPN server in a country of your choice. If you’re purely interested in online security, then the location you choose isn’t too important (though some will be faster than others). However, if you want to save money on subscriptions , for example, you should give it some more thought.
- Connect to the VPN server . When you connect, you’ll be changing your IP address to mirror the VPN server’s IP. It’s safe, legal ( in most countries ), and best of all, it’ll give you far greater online security than simply using Safari Private Browsing alone.
Safari Private Browsing is perfect for hiding those Christmas or birthday purchases from your family before the big day. It’s also a great way to save money on flights, hotels , or other purchases. However, it won’t do much for your online security. If you want truly private browsing , then use a VPN along with Safari private mode.
Interested in exploring other private browsers? Check out these articles below:
- How Anonymous Is DuckDuckGo?
- Is Vivaldi Browser Safe?
- How to Set Up Firefox as an Anonymous Browser
Do you want to know how to enable private browsing on Safari? Are you wondering how much privacy Safari Private Browsing actually gives you? You’ll find these answers and more in our frequently asked questions below.
To turn on Private Browsing in Safari for Mac, follow these simple steps:
- Make sure Safari is the active application that you’re using.
- Click on File in the menu bar along the top of the screen.
- Click on New Private Window to switch to private browsing mode.
To turn on Private Browsing in Safari for iPhone or iPad, the process is much the same:
- Open the Safari application.
- Tap on the Tabs icon (the two small squares in the lower-right corner of your screen).
- Tap on Private to switch to private browsing.
- Click on the small + (plus) icon to open a new private browsing tab.
Check out our full article for more information on Safari Private Browsing.
No. Safari Private Browsing, like any browser’s private mode, won’t protect you against a lot of online threats. Your IP address will still be visible to many third-party individuals and organizations. For example, your ISP will know what websites you’ve visited, and hackers could determine your location using your IP (though some private modes do limit location tracking). For true online privacy and anonymity, you’re safer using a VPN like ExpressVPN .
With Private Browsing, it’s more difficult for websites to track you, since cookies are cleared the moment you close the browser — but it’s not impossible. Your ISP (Internet Service Provider), employer, school, or college could still see your internet history . That is, unless you use a VPN along with the incognito mode.
Yes. The owner of an internet connection can absolutely check up on your browsing session if they have the right technical knowledge. Some routers can be set up to remember all URLs a device accesses. So, if you’re trying to fly under your parents’ radar, for example, they could potentially bust you using the family router, even if you’re exclusively using private browsing modes.
For true anonymity , you’ll want to use a VPN. With a VPN connection, all of your internet traffic is encrypted, which gives you far better anonymity and privacy than using private browsing on its own.

Chris Bluvshtein Author
Senior journalist.
Chris is a tech journalist with many years’ experience covering online privacy and cybersecurity. He’s also a published author and works as a Product Manager for some of the most innovative software development companies.
Share this article
More articles from the anonymous browsing section.

Kanary Review (2024): A Cheap and Secure Data Removal Service

OneRep Review (2024): Can OneRep Protect Your Private Data?

The Best Data Removal Services (Personal Information Removal Made Easy)
Hi Chris , I’m finding while using private mode in safari my sound is being cut out and I have not been able to find a way to reconnect it. I use it on a iPad with a vpn and trend anti spam for protection as much as it can in private mode. I have not been able to find any reason as to why this is happening.
Hey Wayne, I've done a bit of digging, and I've found something that might be worth a try. It seems that recent versions of Safari have a built-in feature that can prevent audio from playing when you visit a website; it's enabled by default too. Give this a try and let me know if the issue goes away: 1. Open the Safari menu and click preferences 2. Click on the websites tab 3. Look for the setting: "When visiting other websites", which has a drop-down selection beside it 4. Change this setting so that it allows websites with media to play sound. You can alternatively add individual websites to this list if you'd rather have control over which ones can play sound by default.
Hi Chris Just tried your Terminal Commands, I am running macOS Monterey The Terminal Commands Below are not working dscacheutil -cachedump -entries Host dscacheutil -flushcache
You're right. Thank you for pointing it out to us! There is a new terminal command you'll now need instead: "sudo killall -HUP mDNSResponder". We've adjusted the article to reflect this. Hope this helps!
Looking for a VPN?
Take a look at our overview of the most trustworthy, fast, and safe VPN services. Extensively tested by our experts.

- a. Send us an email
- b. Anonymous form
- Buyer's Guide
- Upcoming Products
- Tips / Contact Us
- Podcast Instagram Facebook Twitter Mastodon YouTube Notifications RSS Newsletter
How to Use Safari's Private Browsing Mode
This article explains how to use Safari's Private Browsing mode, which prevents your browsing history from being logged on your Apple devices. It's a useful feature if you're buying gifts online for friends or family, for instance, and you don't want anyone with access to your devices to find out what you're up to.
Using Safari's Private Browsing Mode
Enabling Private Browsing limits Safari in three important ways: It prevents the browser from creating a history of the pages you visit, it stops AutoFill information like website usernames and passwords from being remembered, and any tabs you open won't be stored in iCloud .
Also, for added peace of mind when you browse privately, Safari automatically prevents cross-site tracking , and requests that sites and third-party content providers don't track you as a rule. Additionally, the privacy mode stops sites from modifying any information stored on your iOS device, and deletes cookies when you close the associated tab.
To enable Private Browsing in Safari, follow these steps.
- Open Safari on your iPhone or iPad , tap the Pages icon (consisting of two squares) to bring up the open tabs view, and then tap the profile icon, centered at the bottom of the screen.

- When you're done browsing, return to the open tabs view, individually swipe any open tabs to close them if you wish.
- Tap the profile icon again, then choose your regular profile at the top. Your private browsing session is now cleared from memory.
Clearing Existing Browsing History
When you clear your browsing history on a device running iOS 11 or higher, the same logs are cleared on any other devices signed into your iCloud account. The following methods also clear all cookies and web data on the device you're currently using, although AutoFill information remains unchanged.
The first method outlined below allows you to either limit the clearing of history, cookies and website data to a specific timeframe, or to delete your existing web history altogether.
- Open Safari and with a tab open, tap the Bookmarks icon (the open book) located at the bottom of the screen.
- Tap the tab at the top of the screen with a clock symbol, and you'll see a history of your browsing activity.
- To remove instances of recorded visits to specific web pages, swipe leftwards across individual logs in the list and tap the red delete button that appears.
- To delete the entire browsing history list, tap Clear .
- Choose the timeframe to clear ( Last hour , Today , Today and yesterday , or All history ), choose the profile or select All Profiles , then tap Clear History .

The second method of wiping your browsing history might be considered the 'nuke' option, since it clears all history, cookies and website data on that device, regardless of when the sites were accessed.
- Open the Settings app and scroll down to Safari in the list.

And that's it. Note that these built-in Safari features only make you safer from discovery by other people in the same household.
If your privacy concerns extend to a desire for enhanced security and anonymity online, consider subscribing to a Virtual Private Network (VPN) service that offers an iOS client or supports OpenVPN ( Private Internet Access and ProtonVPN are two popular options), and using a Tor-powered browser for iOS .
Get weekly top MacRumors stories in your inbox.
Top Rated Comments

This article explains how to use Safari's Private Browsing mode, which prevents your browsing history from being logged on your Apple devices. It's a useful feature if you're buying gifts online for friends or family, for instance, and you don't want anyone with access to your devices to find out what you're up to.

I can really use this info, because I’m always “buying gifts”. ;) :cool:
Popular Stories

Apple Releases Open Source AI Models That Run On-Device

iOS 18 Rumored to Add These 10 New Features to Your iPhone

Apple Announces 'Let Loose' Event on May 7 Amid Rumors of New iPads

Apple Cuts Vision Pro Shipments as Demand Falls 'Sharply Beyond Expectations'

Apple Finally Plans to Release a Calculator App for iPad Later This Year

Best Buy Introduces Record Low Prices on Apple's M3 MacBook Pro for Members
Next article.

Our comprehensive guide highlighting every major new addition in iOS 17, plus how-tos that walk you through using the new features.

App Store changes for the EU, new emoji, Podcasts transcripts, and more.

Get the most out your iPhone 15 with our complete guide to all the new features.
A deep dive into new features in macOS Sonoma, big and small.

Revamped models with OLED displays, M3 chip, and redesigned Magic Keyboard accessory.

Updated 10.9-inch model and new 12.9-inch model, M2 chip expected.

Apple's annual Worldwide Developers Conference will kick off with a keynote on June 10.

Expected to see new AI-focused features and more. Preview coming at WWDC in June with public release in September.
Other Stories

1 day ago by Tim Hardwick

2 days ago by Joe Rossignol

2 days ago by MacRumors Staff

3 days ago by Joe Rossignol

4 days ago by Tim Hardwick
How to Install and Dual Boot Ubuntu With Windows
Setting up a dual boot is less daunting than it sounds, and it’s perfect for trying out Ubuntu.
Quick Links
Before you begin, preparing a bootable ubuntu usb, booting into the usb, setting up and installing ubuntu, key takeaways.
- Dual booting Ubuntu alongside Windows gives you the best of both worlds.
- You'll need a flash drive which is larger than 2GB to make the USB installer.
- Make sure to back up all important files before attempting to install Ubuntu.
If you've ever wanted to make the switch to Linux, but are reluctant to ditch Windows at the same time, dual booting is a great option. Learn how you can install Ubuntu on your PC without completely removing Windows.
Before you get started, you'll need a couple of things ready:
- At least 25GB of free storage on the PC that you are installing Ubuntu on.
- A flash drive or any other form of removable media that's larger than 2GB.
- The latest Ubuntu disk image .
Before you try installing Ubuntu, make sure to back up any important files that you might have. Any mistakes made during the following steps could result in permanent data loss, so exercise caution.
First, you'll need to create a bootable drive from where your PC can boot the Ubuntu disk image from. You can do so by following these steps:
These steps will completely erase your USB drive, so make sure to back up any important files first.
- Download and install the latest version of Rufus .
- Plug-in your USB drive.
- Open Rufus and select your USB drive under the Device drop-down menu.
- Click START to begin the process.
Now that you have created your bootable USB drive, you can boot into Ubuntu.
- Shut down your computer while holding the Shift key.
- You'll now need to access the boot menu. The method to do this varies depending on your computer's manufacturer. Usually, you'll need to press a key like F12 , F10 , Esc , or Del during the startup process. This guide from wikiHow may help.
- When the computer boots from the flash drive, you'll see a menu prompting you to either Try Ubuntu or Install Ubuntu . If you want to get a feel for how Ubuntu works, select the first option, otherwise go for the second.
Your computer should now boot into Ubuntu, and the installer should automatically open on startup.
- Follow the on-screen instructions to choose your language, keyboard layout, and Wi-Fi settings. It is optional to connect to a network, but it is highly recommended to do so.
- You'll see a slider that allows you to allocate disk space between Windows and Ubuntu. Use the slider to adjust the partition sizes according to your preference. As you adjust the slider, you'll see the allocated space for each operating system change.
Once everything is installed, you'll need to restart your computer. When it turns back on, you'll see a boot menu where you can choose to use Windows or Ubuntu. Dual booting might mess up your Windows timezone, but you can fix it by following our guide .
Dual-booting Ubuntu is a smart choice for anyone interested in trying out Linux without giving up their Windows setup entirely. It lets you have both operating systems on your computer, giving you the best of both worlds.
With Ubuntu, you get access to lots of free software and a helpful community. And you can still use Windows for anything you need that's not available on Linux.
Our approach
- Responsibility
- Infrastructure
- Try Meta AI
RECOMMENDED READS
- 5 Steps to Getting Started with Llama 2
- The Llama Ecosystem: Past, Present, and Future
- Introducing Code Llama, a state-of-the-art large language model for coding
- Meta and Microsoft Introduce the Next Generation of Llama
- Today, we’re introducing Meta Llama 3, the next generation of our state-of-the-art open source large language model.
- Llama 3 models will soon be available on AWS, Databricks, Google Cloud, Hugging Face, Kaggle, IBM WatsonX, Microsoft Azure, NVIDIA NIM, and Snowflake, and with support from hardware platforms offered by AMD, AWS, Dell, Intel, NVIDIA, and Qualcomm.
- We’re dedicated to developing Llama 3 in a responsible way, and we’re offering various resources to help others use it responsibly as well. This includes introducing new trust and safety tools with Llama Guard 2, Code Shield, and CyberSec Eval 2.
- In the coming months, we expect to introduce new capabilities, longer context windows, additional model sizes, and enhanced performance, and we’ll share the Llama 3 research paper.
- Meta AI, built with Llama 3 technology, is now one of the world’s leading AI assistants that can boost your intelligence and lighten your load—helping you learn, get things done, create content, and connect to make the most out of every moment. You can try Meta AI here .
Today, we’re excited to share the first two models of the next generation of Llama, Meta Llama 3, available for broad use. This release features pretrained and instruction-fine-tuned language models with 8B and 70B parameters that can support a broad range of use cases. This next generation of Llama demonstrates state-of-the-art performance on a wide range of industry benchmarks and offers new capabilities, including improved reasoning. We believe these are the best open source models of their class, period. In support of our longstanding open approach, we’re putting Llama 3 in the hands of the community. We want to kickstart the next wave of innovation in AI across the stack—from applications to developer tools to evals to inference optimizations and more. We can’t wait to see what you build and look forward to your feedback.
Our goals for Llama 3
With Llama 3, we set out to build the best open models that are on par with the best proprietary models available today. We wanted to address developer feedback to increase the overall helpfulness of Llama 3 and are doing so while continuing to play a leading role on responsible use and deployment of LLMs. We are embracing the open source ethos of releasing early and often to enable the community to get access to these models while they are still in development. The text-based models we are releasing today are the first in the Llama 3 collection of models. Our goal in the near future is to make Llama 3 multilingual and multimodal, have longer context, and continue to improve overall performance across core LLM capabilities such as reasoning and coding.
State-of-the-art performance
Our new 8B and 70B parameter Llama 3 models are a major leap over Llama 2 and establish a new state-of-the-art for LLM models at those scales. Thanks to improvements in pretraining and post-training, our pretrained and instruction-fine-tuned models are the best models existing today at the 8B and 70B parameter scale. Improvements in our post-training procedures substantially reduced false refusal rates, improved alignment, and increased diversity in model responses. We also saw greatly improved capabilities like reasoning, code generation, and instruction following making Llama 3 more steerable.

*Please see evaluation details for setting and parameters with which these evaluations are calculated.
In the development of Llama 3, we looked at model performance on standard benchmarks and also sought to optimize for performance for real-world scenarios. To this end, we developed a new high-quality human evaluation set. This evaluation set contains 1,800 prompts that cover 12 key use cases: asking for advice, brainstorming, classification, closed question answering, coding, creative writing, extraction, inhabiting a character/persona, open question answering, reasoning, rewriting, and summarization. To prevent accidental overfitting of our models on this evaluation set, even our own modeling teams do not have access to it. The chart below shows aggregated results of our human evaluations across of these categories and prompts against Claude Sonnet, Mistral Medium, and GPT-3.5.

Preference rankings by human annotators based on this evaluation set highlight the strong performance of our 70B instruction-following model compared to competing models of comparable size in real-world scenarios.
Our pretrained model also establishes a new state-of-the-art for LLM models at those scales.

To develop a great language model, we believe it’s important to innovate, scale, and optimize for simplicity. We adopted this design philosophy throughout the Llama 3 project with a focus on four key ingredients: the model architecture, the pretraining data, scaling up pretraining, and instruction fine-tuning.
Model architecture
In line with our design philosophy, we opted for a relatively standard decoder-only transformer architecture in Llama 3. Compared to Llama 2, we made several key improvements. Llama 3 uses a tokenizer with a vocabulary of 128K tokens that encodes language much more efficiently, which leads to substantially improved model performance. To improve the inference efficiency of Llama 3 models, we’ve adopted grouped query attention (GQA) across both the 8B and 70B sizes. We trained the models on sequences of 8,192 tokens, using a mask to ensure self-attention does not cross document boundaries.
Training data
To train the best language model, the curation of a large, high-quality training dataset is paramount. In line with our design principles, we invested heavily in pretraining data. Llama 3 is pretrained on over 15T tokens that were all collected from publicly available sources. Our training dataset is seven times larger than that used for Llama 2, and it includes four times more code. To prepare for upcoming multilingual use cases, over 5% of the Llama 3 pretraining dataset consists of high-quality non-English data that covers over 30 languages. However, we do not expect the same level of performance in these languages as in English.
To ensure Llama 3 is trained on data of the highest quality, we developed a series of data-filtering pipelines. These pipelines include using heuristic filters, NSFW filters, semantic deduplication approaches, and text classifiers to predict data quality. We found that previous generations of Llama are surprisingly good at identifying high-quality data, hence we used Llama 2 to generate the training data for the text-quality classifiers that are powering Llama 3.
We also performed extensive experiments to evaluate the best ways of mixing data from different sources in our final pretraining dataset. These experiments enabled us to select a data mix that ensures that Llama 3 performs well across use cases including trivia questions, STEM, coding, historical knowledge, etc.
Scaling up pretraining
To effectively leverage our pretraining data in Llama 3 models, we put substantial effort into scaling up pretraining. Specifically, we have developed a series of detailed scaling laws for downstream benchmark evaluations. These scaling laws enable us to select an optimal data mix and to make informed decisions on how to best use our training compute. Importantly, scaling laws allow us to predict the performance of our largest models on key tasks (for example, code generation as evaluated on the HumanEval benchmark—see above) before we actually train the models. This helps us ensure strong performance of our final models across a variety of use cases and capabilities.
We made several new observations on scaling behavior during the development of Llama 3. For example, while the Chinchilla-optimal amount of training compute for an 8B parameter model corresponds to ~200B tokens, we found that model performance continues to improve even after the model is trained on two orders of magnitude more data. Both our 8B and 70B parameter models continued to improve log-linearly after we trained them on up to 15T tokens. Larger models can match the performance of these smaller models with less training compute, but smaller models are generally preferred because they are much more efficient during inference.
To train our largest Llama 3 models, we combined three types of parallelization: data parallelization, model parallelization, and pipeline parallelization. Our most efficient implementation achieves a compute utilization of over 400 TFLOPS per GPU when trained on 16K GPUs simultaneously. We performed training runs on two custom-built 24K GPU clusters . To maximize GPU uptime, we developed an advanced new training stack that automates error detection, handling, and maintenance. We also greatly improved our hardware reliability and detection mechanisms for silent data corruption, and we developed new scalable storage systems that reduce overheads of checkpointing and rollback. Those improvements resulted in an overall effective training time of more than 95%. Combined, these improvements increased the efficiency of Llama 3 training by ~three times compared to Llama 2.
Instruction fine-tuning
To fully unlock the potential of our pretrained models in chat use cases, we innovated on our approach to instruction-tuning as well. Our approach to post-training is a combination of supervised fine-tuning (SFT), rejection sampling, proximal policy optimization (PPO), and direct preference optimization (DPO). The quality of the prompts that are used in SFT and the preference rankings that are used in PPO and DPO has an outsized influence on the performance of aligned models. Some of our biggest improvements in model quality came from carefully curating this data and performing multiple rounds of quality assurance on annotations provided by human annotators.
Learning from preference rankings via PPO and DPO also greatly improved the performance of Llama 3 on reasoning and coding tasks. We found that if you ask a model a reasoning question that it struggles to answer, the model will sometimes produce the right reasoning trace: The model knows how to produce the right answer, but it does not know how to select it. Training on preference rankings enables the model to learn how to select it.
Building with Llama 3
Our vision is to enable developers to customize Llama 3 to support relevant use cases and to make it easier to adopt best practices and improve the open ecosystem. With this release, we’re providing new trust and safety tools including updated components with both Llama Guard 2 and Cybersec Eval 2, and the introduction of Code Shield—an inference time guardrail for filtering insecure code produced by LLMs.
We’ve also co-developed Llama 3 with torchtune , the new PyTorch-native library for easily authoring, fine-tuning, and experimenting with LLMs. torchtune provides memory efficient and hackable training recipes written entirely in PyTorch. The library is integrated with popular platforms such as Hugging Face, Weights & Biases, and EleutherAI and even supports Executorch for enabling efficient inference to be run on a wide variety of mobile and edge devices. For everything from prompt engineering to using Llama 3 with LangChain we have a comprehensive getting started guide and takes you from downloading Llama 3 all the way to deployment at scale within your generative AI application.
A system-level approach to responsibility
We have designed Llama 3 models to be maximally helpful while ensuring an industry leading approach to responsibly deploying them. To achieve this, we have adopted a new, system-level approach to the responsible development and deployment of Llama. We envision Llama models as part of a broader system that puts the developer in the driver’s seat. Llama models will serve as a foundational piece of a system that developers design with their unique end goals in mind.

Instruction fine-tuning also plays a major role in ensuring the safety of our models. Our instruction-fine-tuned models have been red-teamed (tested) for safety through internal and external efforts. Our red teaming approach leverages human experts and automation methods to generate adversarial prompts that try to elicit problematic responses. For instance, we apply comprehensive testing to assess risks of misuse related to Chemical, Biological, Cyber Security, and other risk areas. All of these efforts are iterative and used to inform safety fine-tuning of the models being released. You can read more about our efforts in the model card .
Llama Guard models are meant to be a foundation for prompt and response safety and can easily be fine-tuned to create a new taxonomy depending on application needs. As a starting point, the new Llama Guard 2 uses the recently announced MLCommons taxonomy, in an effort to support the emergence of industry standards in this important area. Additionally, CyberSecEval 2 expands on its predecessor by adding measures of an LLM’s propensity to allow for abuse of its code interpreter, offensive cybersecurity capabilities, and susceptibility to prompt injection attacks (learn more in our technical paper ). Finally, we’re introducing Code Shield which adds support for inference-time filtering of insecure code produced by LLMs. This offers mitigation of risks around insecure code suggestions, code interpreter abuse prevention, and secure command execution.
With the speed at which the generative AI space is moving, we believe an open approach is an important way to bring the ecosystem together and mitigate these potential harms. As part of that, we’re updating our Responsible Use Guide (RUG) that provides a comprehensive guide to responsible development with LLMs. As we outlined in the RUG, we recommend that all inputs and outputs be checked and filtered in accordance with content guidelines appropriate to the application. Additionally, many cloud service providers offer content moderation APIs and other tools for responsible deployment, and we encourage developers to also consider using these options.
Deploying Llama 3 at scale
Llama 3 will soon be available on all major platforms including cloud providers, model API providers, and much more. Llama 3 will be everywhere .
Our benchmarks show the tokenizer offers improved token efficiency, yielding up to 15% fewer tokens compared to Llama 2. Also, Group Query Attention (GQA) now has been added to Llama 3 8B as well. As a result, we observed that despite the model having 1B more parameters compared to Llama 2 7B, the improved tokenizer efficiency and GQA contribute to maintaining the inference efficiency on par with Llama 2 7B.
For examples of how to leverage all of these capabilities, check out Llama Recipes which contains all of our open source code that can be leveraged for everything from fine-tuning to deployment to model evaluation.
What’s next for Llama 3?
The Llama 3 8B and 70B models mark the beginning of what we plan to release for Llama 3. And there’s a lot more to come.
Our largest models are over 400B parameters and, while these models are still training, our team is excited about how they’re trending. Over the coming months, we’ll release multiple models with new capabilities including multimodality, the ability to converse in multiple languages, a much longer context window, and stronger overall capabilities. We will also publish a detailed research paper once we are done training Llama 3.
To give you a sneak preview for where these models are today as they continue training, we thought we could share some snapshots of how our largest LLM model is trending. Please note that this data is based on an early checkpoint of Llama 3 that is still training and these capabilities are not supported as part of the models released today.

We’re committed to the continued growth and development of an open AI ecosystem for releasing our models responsibly. We have long believed that openness leads to better, safer products, faster innovation, and a healthier overall market. This is good for Meta, and it is good for society. We’re taking a community-first approach with Llama 3, and starting today, these models are available on the leading cloud, hosting, and hardware platforms with many more to come.
Try Meta Llama 3 today
We’ve integrated our latest models into Meta AI, which we believe is the world’s leading AI assistant. It’s now built with Llama 3 technology and it’s available in more countries across our apps.
You can use Meta AI on Facebook, Instagram, WhatsApp, Messenger, and the web to get things done, learn, create, and connect with the things that matter to you. You can read more about the Meta AI experience here .
Visit the Llama 3 website to download the models and reference the Getting Started Guide for the latest list of all available platforms.
You’ll also soon be able to test multimodal Meta AI on our Ray-Ban Meta smart glasses.
As always, we look forward to seeing all the amazing products and experiences you will build with Meta Llama 3.
Our latest updates delivered to your inbox
Subscribe to our newsletter to keep up with Meta AI news, events, research breakthroughs, and more.
Join us in the pursuit of what’s possible with AI.

Product experiences
Foundational models
Latest news
Meta © 2024
iPhone User Guide
- iPhone models compatible with iOS 17
- R ' class='toc-item' data-ss-analytics-link-url='https://support.apple.com/guide/iphone/iphone-xr-iph017302841/ios' data-ajax-endpoint='https://support.apple.com/guide/iphone/iphone-xr-iph017302841/ios' data-ss-analytics-event="acs.link_click" href='https://support.apple.com/guide/iphone/iphone-xr-iph017302841/ios' id='toc-item-IPH017302841' data-tocid='IPH017302841' > iPhone X R
- S ' class='toc-item' data-ss-analytics-link-url='https://support.apple.com/guide/iphone/iphone-xs-iphc00446242/ios' data-ajax-endpoint='https://support.apple.com/guide/iphone/iphone-xs-iphc00446242/ios' data-ss-analytics-event="acs.link_click" href='https://support.apple.com/guide/iphone/iphone-xs-iphc00446242/ios' id='toc-item-IPHC00446242' data-tocid='IPHC00446242' > iPhone X S
- S Max' class='toc-item' data-ss-analytics-link-url='https://support.apple.com/guide/iphone/iphone-xs-max-iphcd2066870/ios' data-ajax-endpoint='https://support.apple.com/guide/iphone/iphone-xs-max-iphcd2066870/ios' data-ss-analytics-event="acs.link_click" href='https://support.apple.com/guide/iphone/iphone-xs-max-iphcd2066870/ios' id='toc-item-IPHCD2066870' data-tocid='IPHCD2066870' > iPhone X S Max
- iPhone 11 Pro
- iPhone 11 Pro Max
- iPhone SE (2nd generation)
- iPhone 12 mini
- iPhone 12 Pro
- iPhone 12 Pro Max
- iPhone 13 mini
- iPhone 13 Pro
- iPhone 13 Pro Max
- iPhone SE (3rd generation)
- iPhone 14 Plus
- iPhone 14 Pro
- iPhone 14 Pro Max
- iPhone 15 Plus
- iPhone 15 Pro
- iPhone 15 Pro Max
- Setup basics
- Make your iPhone your own
- Take great photos and videos
- Keep in touch with friends and family
- Share features with your family
- Use iPhone for your daily routines
- Expert advice from Apple Support
- What’s new in iOS 17
- Turn on and set up iPhone
- Wake and unlock
- Set up cellular service
- Use Dual SIM
- Connect to the internet
- Sign in with Apple ID
- Subscribe to iCloud+
- Find settings
- Set up mail, contacts, and calendar accounts
- Learn the meaning of the status icons
- Charge the battery
- Charge with cleaner energy sources
- Show the battery percentage
- Check battery health and usage
- Use Low Power Mode
- Read and bookmark the user guide
- Learn basic gestures
- Learn gestures for iPhone models with Face ID
- Adjust the volume
- Find your apps in App Library
- Switch between open apps
- Quit and reopen an app
- Multitask with Picture in Picture
- Access features from the Lock Screen
- View Live Activities in the Dynamic Island
- Perform quick actions
- Search on iPhone
- Get information about your iPhone
- View or change cellular data settings
- Travel with iPhone
- Change sounds and vibrations
- Use the Action button on iPhone 15 Pro and iPhone 15 Pro Max
- Create a custom Lock Screen
- Change the wallpaper
- Adjust the screen brightness and color balance
- Keep the iPhone display on longer
- Use StandBy
- Customize the text size and zoom setting
- Change the name of your iPhone
- Change the date and time
- Change the language and region
- Organize your apps in folders
- Add, edit, and remove widgets
- Move apps and widgets on the Home Screen
- Remove apps
- Use and customize Control Center
- Change or lock the screen orientation
- View and respond to notifications
- Change notification settings
- Set up a Focus
- Allow or silence notifications for a Focus
- Turn a Focus on or off
- Stay focused while driving
- Customize sharing options
- Type with the onscreen keyboard
- Dictate text
- Select and edit text
- Use predictive text
- Use text replacements
- Add or change keyboards
- Add emoji and stickers
- Take a screenshot
- Take a screen recording
- Draw in documents
- Add text, shapes, signatures, and more
- Fill out forms and sign documents
- Use Live Text to interact with content in a photo or video
- Use Visual Look Up to identify objects in your photos and videos
- Lift a subject from the photo background
- Subscribe to Apple Arcade
- Play with friends in Game Center
- Connect a game controller
- Use App Clips
- Update apps
- View or cancel subscriptions
- Manage purchases, settings, and restrictions
- Install and manage fonts
- Buy books and audiobooks
- Annotate books
- Access books on other Apple devices
- Listen to audiobooks
- Set reading goals
- Organize books
- Create and edit events in Calendar
- Send invitations
- Reply to invitations
- Change how you view events
- Search for events
- Change calendar and event settings
- Schedule or display events in a different time zone
- Keep track of events
- Use multiple calendars
- Use the Holidays calendar
- Share iCloud calendars
- Camera basics
- Set up your shot
- Apply Photographic Styles
- Take Live Photos
- Take Burst mode shots
- Take a selfie
- Take panoramic photos
- Take macro photos and videos
- Take portraits
- Take Night mode photos
- Take Apple ProRAW photos
- Adjust the shutter volume
- Adjust HDR camera settings
- Record videos
- Record spatial videos for Apple Vision Pro
- Record ProRes videos
- Record videos in Cinematic mode
- Change video recording settings
- Save camera settings
- Customize the Main camera lens
- Change advanced camera settings
- View, share, and print photos
- Use Live Text
- Scan a QR code
- See the world clock
- Set an alarm
- Change the next wake up alarm
- Use the stopwatch
- Use multiple timers
- Add and use contact information
- Edit contacts
- Add your contact info
- Use NameDrop on iPhone to share your contact info
- Use other contact accounts
- Use Contacts from the Phone app
- Merge or hide duplicate contacts
- Export contacts
- Get started with FaceTime
- Make FaceTime calls
- Receive FaceTime calls
- Create a FaceTime link
- Take a Live Photo
- Turn on Live Captions in a FaceTime call
- Use other apps during a call
- Make a Group FaceTime call
- View participants in a grid
- Use SharePlay to watch, listen, and play together
- Share your screen in a FaceTime call
- Collaborate on a document in FaceTime
- Use video conferencing features
- Hand off a FaceTime call to another Apple device
- Change the FaceTime video settings
- Change the FaceTime audio settings
- Change your appearance
- Leave a call or switch to Messages
- Block unwanted callers
- Report a call as spam
- Connect external devices or servers
- Modify files, folders, and downloads
- Search for files and folders
- Organize files and folders
- Set up iCloud Drive
- Share files and folders in iCloud Drive
- Share your location
- Meet up with a friend
- Send your location via satellite
- Add or remove a friend
- Locate a friend
- Get notified when friends change their location
- Notify a friend when your location changes
- Add your iPhone
- Add your iPhone Wallet with MagSafe
- Get notified if you leave a device behind
- Locate a device
- Mark a device as lost
- Erase a device
- Remove a device
- Add an AirTag
- Share an AirTag or other item in Find My on iPhone
- Add a third-party item
- Get notified if you leave an item behind
- Locate an item
- Mark an item as lost
- Remove an item
- Adjust map settings
- Get started with Fitness
- Track daily activity and change your move goal
- See your activity summary
- Sync a third-party workout app
- Change fitness notifications
- Share your activity
- Subscribe to Apple Fitness+
- Find Apple Fitness+ workouts and meditations
- Start an Apple Fitness+ workout or meditation
- Create a Custom Plan in Apple Fitness+
- Work out together using SharePlay
- Change what’s on the screen during an Apple Fitness+ workout or meditation
- Download an Apple Fitness+ workout or meditation
- Get started with Freeform
- Create a Freeform board
- Draw or handwrite
- Apply consistent styles
- Position items on a board
- Search Freeform boards
- Share and collaborate
- Delete and recover boards
- Get started with Health
- Fill out your Health Details
- Intro to Health data
- View your health data
- Share your health data
- View health data shared by others
- Download health records
- View health records
- Monitor your walking steadiness
- Log menstrual cycle information
- View menstrual cycle predictions and history
- Track your medications
- Learn more about your medications
- Log your state of mind
- Take a mental health assessment
- Set up a schedule for a Sleep Focus
- Turn off alarms and delete sleep schedules
- Add or change sleep schedules
- Turn Sleep Focus on or off
- Change your wind down period, sleep goal, and more
- View your sleep history
- Check your headphone levels
- Use audiogram data
- Register as an organ donor
- Back up your Health data
- Intro to Home
- Upgrade to the new Home architecture
- Set up accessories
- Control accessories
- Control your home using Siri
- Use Grid Forecast to plan your energy usage
- Set up HomePod
- Control your home remotely
- Create and use scenes
- Use automations
- Set up security cameras
- Use Face Recognition
- Unlock your door with a home key
- Configure a router
- Invite others to control accessories
- Add more homes
- Get music, movies, and TV shows
- Get ringtones
- Manage purchases and settings
- Get started with Journal
- Write in your journal
- Review your past journal entries
- Change Journal settings
- Magnify nearby objects
- Change settings
- Detect people around you
- Detect doors around you
- Receive image descriptions of your surroundings
- Read aloud text and labels around you
- Set up shortcuts for Detection Mode
- Add and remove email accounts
- Set up a custom email domain
- Check your email
- Unsend email with Undo Send
- Reply to and forward emails
- Save an email draft
- Add email attachments
- Download email attachments
- Annotate email attachments
- Set email notifications
- Search for email
- Organize email in mailboxes
- Flag or block emails
- Filter emails
- Use Hide My Email
- Use Mail Privacy Protection
- Change email settings
- Delete and recover emails
- Add a Mail widget to your Home Screen
- Print emails
- Get travel directions
- Select other route options
- Find stops along your route
- View a route overview or a list of turns
- Change settings for spoken directions
- Get driving directions
- Get directions to your parked car
- Set up electric vehicle routing
- Report traffic incidents
- Get cycling directions
- Get walking directions
- Get transit directions
- Delete recent directions
- Get traffic and weather info
- Estimate travel time and ETA
- Download offline maps
- Search for places
- Find nearby attractions, restaurants, and services
- Get information about places
- Mark places
- Share places
- Rate places
- Save favorite places
- Explore new places with Guides
- Organize places in My Guides
- Delete significant locations
- Look around places
- Take Flyover tours
- Find your Maps settings
- Measure dimensions
- View and save measurements
- Measure a person’s height
- Use the level
- Set up Messages
- About iMessage
- Send and reply to messages
- Unsend and edit messages
- Keep track of messages
- Forward and share messages
- Group conversations
- Watch, listen, or play together using SharePlay
- Collaborate on projects
- Use iMessage apps
- Take and edit photos or videos
- Share photos, links, and more
- Send stickers
- Request, send, and receive payments
- Send and receive audio messages
- Animate messages
- Change notifications
- Block, filter, and report messages
- Delete messages and attachments
- Recover deleted messages
- View albums, playlists, and more
- Show song credits and lyrics
- Queue up your music
- Listen to broadcast radio
- Subscribe to Apple Music
- Play music together in the car with iPhone
- Listen to lossless music
- Listen to Dolby Atmos music
- Apple Music Sing
- Find new music
- Add music and listen offline
- Get personalized recommendations
- Listen to radio
- Search for music
- Create playlists
- See what your friends are listening to
- Use Siri to play music
- Change the way music sounds
- Get started with News
- Use News widgets
- See news stories chosen just for you
- Read stories
- Follow your favorite teams with My Sports
- Listen to Apple News Today
- Subscribe to Apple News+
- Browse and read Apple News+ stories and issues
- Download Apple News+ issues
- Listen to audio stories
- Solve crossword puzzles
- Search for news stories
- Save stories in News for later
- Subscribe to individual news channels
- Get started with Notes
- Add or remove accounts
- Create and format notes
- Draw or write
- Add photos, videos, and more
- Scan text and documents
- Work with PDFs
- Create Quick Notes
- Search notes
- Organize in folders
- Organize with tags
- Use Smart Folders
- Export or print notes
- Change Notes settings
- Make a call
- Answer or decline incoming calls
- While on a call
- Set up voicemail
- Check voicemail
- Change voicemail greeting and settings
- Select ringtones and vibrations
- Make calls using Wi-Fi
- Set up call forwarding and call waiting
- Avoid unwanted calls
- View photos and videos
- Play videos and slideshows
- Delete or hide photos and videos
- Edit photos and videos
- Trim video length and adjust slow motion
- Edit Cinematic mode videos
- Edit Live Photos
- Edit portraits
- Use photo albums
- Edit, share, and organize albums
- Filter and sort photos and videos in albums
- Make stickers from your photos
- Duplicate and copy photos and videos
- Merge duplicate photos and videos
- Search for photos
- Identify people and pets
- Browse photos by location
- Share photos and videos
- Share long videos
- View photos and videos shared with you
- Watch memories
- Personalize your memories
- Manage memories and featured photos
- Use iCloud Photos
- Create shared albums
- Add and remove people in a shared album
- Add and delete photos and videos in a shared album
- Set up or join an iCloud Shared Photo Library
- Add content to an iCloud Shared Photo Library
- Use iCloud Shared Photo Library
- Import and export photos and videos
- Print photos
- Find podcasts
- Listen to podcasts
- Follow your favorite podcasts
- Use the Podcasts widget
- Organize your podcast library
- Download, save, or share podcasts
- Subscribe to podcasts
- Listen to subscriber-only content
- Change download settings
- Make a grocery list
- Add items to a list
- Edit and manage a list
- Search and organize lists
- Work with templates
- Use Smart Lists
- Print reminders
- Use the Reminders widget
- Change Reminders settings
- Browse the web
- Search for websites
- Customize your Safari settings
- Change the layout
- Use Safari profiles
- Open and close tabs
- Organize your tabs
- View your Safari tabs from another Apple device
- Share Tab Groups
- Use Siri to listen to a webpage
- Bookmark favorite webpages
- Save pages to a Reading List
- Find links shared with you
- Annotate and save a webpage as a PDF
- Automatically fill in forms
- Get extensions
- Hide ads and distractions
- Clear your cache
- Browse the web privately
- Use passkeys in Safari
- Check stocks
- Manage multiple watchlists
- Read business news
- Add earnings reports to your calendar
- Use a Stocks widget
- Translate text, voice, and conversations
- Translate text in apps
- Translate with the camera view
- Subscribe to Apple TV+, MLS Season Pass, or an Apple TV channel
- Add your TV provider
- Get shows, movies, and more
- Watch sports
- Watch Major League Soccer with MLS Season Pass
- Control playback
- Manage your library
- Change the settings
- Make a recording
- Play it back
- Edit or delete a recording
- Keep recordings up to date
- Organize recordings
- Search for or rename a recording
- Share a recording
- Duplicate a recording
- Keep cards and passes in Wallet
- Set up Apple Pay
- Use Apple Pay for contactless payments
- Use Apple Pay in apps and on the web
- Track your orders
- Use Apple Cash
- Use Apple Card
- Use Savings
- Pay for transit
- Access your home, hotel room, and vehicle
- Add identity cards
- Use COVID-19 vaccination cards
- Check your Apple Account balance
- Use Express Mode
- Organize your Wallet
- Remove cards or passes
- Check the weather
- Check the weather in other locations
- View weather maps
- Manage weather notifications
- Use Weather widgets
- Learn the weather icons
- Find out what Siri can do
- Tell Siri about yourself
- Have Siri announce calls and notifications
- Add Siri Shortcuts
- About Siri Suggestions
- Use Siri in your car
- Change Siri settings
- Contact emergency services
- Use Emergency SOS via satellite
- Request Roadside Assistance via satellite
- Set up and view your Medical ID
- Use Check In
- Manage Crash Detection
- Reset privacy and security settings in an emergency
- Set up Family Sharing
- Add Family Sharing members
- Remove Family Sharing members
- Share subscriptions
- Share purchases
- Share locations with family and locate lost devices
- Set up Apple Cash Family and Apple Card Family
- Set up parental controls
- Set up a child’s device
- Get started with Screen Time
- Protect your vision health with Screen Distance
- Set up Screen Time
- Set communication and safety limits and block inappropriate content
- Charging cable
- Power adapters
- MagSafe chargers and battery packs
- MagSafe cases and sleeves
- Qi-certified wireless chargers
- Use AirPods
- Use EarPods
- Apple Watch
- Wirelessly stream videos and photos to Apple TV or a smart TV
- Connect to a display with a cable
- HomePod and other wireless speakers
- Pair Magic Keyboard
- Enter characters with diacritical marks
- Switch between keyboards
- Use shortcuts
- Choose an alternative keyboard layout
- Change typing assistance options
- External storage devices
- Bluetooth accessories
- Share your internet connection
- Allow phone calls on your iPad and Mac
- Use iPhone as a webcam
- Hand off tasks between devices
- Cut, copy, and paste between iPhone and other devices
- Stream video or mirror the screen of your iPhone
- Start SharePlay instantly
- Use AirDrop to send items
- Connect iPhone and your computer with a cable
- Transfer files between devices
- Transfer files with email, messages, or AirDrop
- Transfer files or sync content with the Finder or iTunes
- Automatically keep files up to date with iCloud
- Use an external storage device, a file server, or a cloud storage service
- Intro to CarPlay
- Connect to CarPlay
- Use your vehicle’s built-in controls
- Get turn-by-turn directions
- Change the map view
- Make phone calls
- View your calendar
- Send and receive text messages
- Announce incoming text messages
- Play podcasts
- Play audiobooks
- Listen to news stories
- Control your home
- Use other apps with CarPlay
- Rearrange icons on CarPlay Home
- Change settings in CarPlay
- Get started with accessibility features
- Turn on accessibility features for setup
- Change Siri accessibility settings
- Open features with Accessibility Shortcut
- Change color and brightness
- Make text easier to read
- Reduce onscreen motion
- Customize per-app visual settings
- Hear what’s on the screen or typed
- Hear audio descriptions
- Turn on and practice VoiceOver
- Change your VoiceOver settings
- Use VoiceOver gestures
- Operate iPhone when VoiceOver is on
- Control VoiceOver using the rotor
- Use the onscreen keyboard
- Write with your finger
- Use VoiceOver with an Apple external keyboard
- Use a braille display
- Type braille on the screen
- Customize gestures and keyboard shortcuts
- Use VoiceOver with a pointer device
- Use VoiceOver for images and videos
- Use VoiceOver in apps
- Use AssistiveTouch
- Adjust how iPhone responds to your touch
- Use Reachability
- Auto-answer calls
- Turn off vibration
- Change Face ID and attention settings
- Use Voice Control
- Adjust the side or Home button
- Use Apple TV Remote buttons
- Adjust pointer settings
- Adjust keyboard settings
- Adjust AirPods settings
- Turn on Apple Watch Mirroring
- Control a nearby Apple device
- Intro to Switch Control
- Set up and turn on Switch Control
- Select items, perform actions, and more
- Control several devices with one switch
- Use hearing devices
- Use Live Listen
- Use sound recognition
- Set up and use RTT and TTY
- Flash the LED for alerts
- Adjust audio settings
- Play background sounds
- Display subtitles and captions
- Show transcriptions for Intercom messages
- Get Live Captions (beta)
- Type to speak
- Record a Personal Voice
- Use Guided Access
- Use built-in privacy and security protections
- Set a passcode
- Set up Face ID
- Set up Touch ID
- Control access to information on the Lock Screen
- Keep your Apple ID secure
- Use passkeys to sign in to apps and websites
- Sign in with Apple
- Share passwords
- Automatically fill in strong passwords
- Change weak or compromised passwords
- View your passwords and related information
- Share passkeys and passwords securely with AirDrop
- Make your passkeys and passwords available on all your devices
- Automatically fill in verification codes
- Automatically fill in SMS passcodes
- Sign in with fewer CAPTCHA challenges
- Use two-factor authentication
- Use security keys
- Manage information sharing with Safety Check
- Control app tracking permissions
- Control the location information you share
- Control access to information in apps
- Control how Apple delivers advertising to you
- Control access to hardware features
- Create and manage Hide My Email addresses
- Protect your web browsing with iCloud Private Relay
- Use a private network address
- Use Advanced Data Protection
- Use Lockdown Mode
- Use Stolen Device Protection
- Receive warnings about sensitive content
- Use Contact Key Verification
- Turn iPhone on or off
- Force restart iPhone
- Back up iPhone
- Return iPhone settings to their defaults
- Restore all content from a backup
- Restore purchased and deleted items
- Sell, give away, or trade in your iPhone
- Erase iPhone
- Install or remove configuration profiles
- Important safety information
- Important handling information
- Find more resources for software and service
- FCC compliance statement
- ISED Canada compliance statement
- Ultra Wideband information
- Class 1 Laser information
- Apple and the environment
- Disposal and recycling information
- Unauthorized modification of iOS
Browse privately in Safari on iPhone
Visit sites privately
You can use Private Browsing to open private tabs that don’t appear in History on iPhone or in the list of tabs on your other devices. Tabs in Private Browsing aren’t shared with your other Apple devices, even if you’re signed in with the same Apple ID .
If you have a passcode set on your iPhone, Private Browsing locks when it’s not in use. Private Browsing may not lock immediately.
Swipe right on the tab bar at the bottom of the screen until Private Browsing opens, then tap Unlock.

Note: Any Safari extensions you have installed that have access to browsing data are automatically turned off in Private Browsing. To turn on an extension in Private Browsing, see Use extensions .
Choose a search engine for Private Browsing
Tap Private Search Engine, then choose a search engine.
View the Privacy Report
Safari helps prevent trackers from following you across websites and viewing your IP address. You can review the Privacy Report to see a summary of trackers that have been encountered and prevented by Intelligent Tracking Prevention on the current webpage you’re visiting. You can also review and adjust Safari settings to keep your browsing activities private from others who use the same device, and help protect yourself from malicious websites.
Use iCloud Private Relay to browse the web with more privacy
When you subscribe to iCloud+ , you can use iCloud Private Relay to help prevent websites and network providers from creating a detailed profile about you. When iCloud Private Relay is turned on, the traffic leaving your iPhone is encrypted and sent through two separate internet relays. This prevents websites from seeing your IP address and exact location while it prevents network providers from collecting your browsing activity in Safari.
See Protect your web browsing with iCloud Private Relay on iPhone to learn how to:
Turn iCloud Private Relay completely on or off for your iPhone.
Turn iCloud Private Relay on or off for a specific Wi-Fi or cellular network.
Turn iCloud Private Relay off temporarily.
Set the specificity of your IP address location.
Temporarily allow a website to see your IP address
If a website relies on IP filtering, monitoring, or rate-limiting, it might require your IP address to be visible. You can turn off iCloud Private Relay temporarily for that website only.
Note: iCloud Private Relay isn’t available in all countries or regions. See the iOS and iPadOS Feature Availability website .
Tap Show IP Address.
Your IP address remains visible to that website until you leave the website or close its Safari tab. iCloud Private Relay remains on for other websites.
To turn off or pause iCloud Private Relay for all websites, see Protect your web browsing with iCloud Private Relay on iPhone .
Control privacy and security settings for Safari
Prevent Cross-Site Tracking: Safari limits third-party cookies and data by default. Turn this option off to allow cross-site tracking.
Hide IP address: Safari automatically protects your IP address from known trackers. For eligible iCloud+ subscribers, your IP address is protected from trackers and websites as you browse in Safari. If this option is off, your IP address isn’t hidden.
Fraudulent Website Warning: Safari displays a warning if you’re visiting a suspected phishing website. Turn this option off if you don’t want to be warned about fraudulent websites.
Camera: Choose whether Safari websites can use your camera without asking you first. Tap Camera, then choose Ask, Deny, or Allow.
Microphone: Choose whether Safari websites can use your microphone without asking you first. Tap Microphone, then choose Ask, Deny, or Allow.
Location: Choose whether Safari websites can use your location without asking you first. Tap Location, then choose Ask, Deny, or Allow.
IMAGES
VIDEO
COMMENTS
Always browse privately. In the Safari app on your Mac, choose Safari > Preferences, then click General. Click the "Safari opens with" pop-up menu, then choose "A new private window.". If you don't see this option, choose Apple menu > System Preferences, click General, then make sure "Close windows when quitting an app" is selected.
Keyboard shortcut for Private Browsing on Mac. You're probably used to the command + N shortcut for a new Safari window. Just add shift to that to get a new Private window - command + shift + N.
Open your Safari browser. 2. In the top toolbar, click "File." 3. Select "New Private Window." Click on New Private Window to turn on private browsing. Devon Delfino/Business Insider. The smart ...
Step 1: Open Safari and select Safari > Preferences from the menu bar. Step 2: Go to the General tab. Step 3: Pick the drop-down next to Safari opens with and choose A new private window. Step 4 ...
Method 3: Right-Click Option. If you're comfortable using contextual menus that appear with a right-click, this option offers a speedy way to go incognito in Safari on Mac. Follow these steps to right-click on a Mac and go incognito in Safari: Launch your Safari browser. Right-click (or control-click) the Safari icon in the Dock.
On Mac, private windows lock when Safari isn't the active window for a period of time. They also lock when you lock your Mac, when it goes to sleep, or when a screensaver starts. On Mac, you can lock all private windows manually: From the Safari menu bar, choose Window > Lock All Private Windows.
First, launch Safari. In the menu bar at the top of the screen, click "Safari" and select "Preferences." In the Preferences pop-up window, make sure you're on the General tab. Look for the option called "Safari Opens With:" located beside a drop-down menu. Click on the drop-down menu and select "A New Private Window" from the list of options.
Private Browsing in Safari hides browsing history, autofill details, downloads, and locks tabs after inactivity. Safari on Mac groups private and non-private tabs, while on iPhone it shows all tabs regardless of mode. To use Private Browsing in Safari, identify it by a dark address bar, "Private" indicator, or "Private" next to the site URL.
Open the Safari app on your iPhone or iPad, then tap the Tabs button in the bottom-right corner to view your open pages. In the bottom-left corner, tap Private to enable private browsing mode. Then tap the Add ( +) button to open a private browsing window. Tap the Tabs button in the bottom-right corner.
In Safari, you open a new private window by Choose File > New Private Window (Shift + Cmd + N). You'll now be viewing a window in private browsing mode. Safari won't remember any browsing or ...
Open Safari on your iPad with iPadOS 15.0 or later. Hit the sidebar icon near the top-left corner to open the Safari sidebar. From the Safari sidebar on the lefthand side, choose the option labeled Private. Doing so creates a new tab in a group dubbed "Private". You can open multiple private tabs in this tab group.
Safari on the iPad has a private browsing mode as well. 1. Tap the Pages button, which is shaped as two squares in Safari's menu. 2. Tap Private. 3. Tap the Search field to search for a site to ...
Open Safari on your iPhone. Tap and hold the Tabs button. Tap [number] Tabs in the pop-up menu. You may also exit out of incognito mode in Safari on iOS 17 by completing these steps: Open Safari on your iPhone. Tap the Tabs button. Tap [number] Tabs or Start Page to show the Tab Groups list. Tap Private, then tap Done.
Why should you use private browsing in Safari Mac? Private browsing mode comes in handy when you want to surf the internet using Safari on Mac for the following reasons: ... How to start a private browsing session in Safari . Step 1: Go to the bottom of your Mac home screen and click on the Safari icon in the dock panel to launch the ...
1. Open Safari and click on File in the menu bar at the top. 2. Choose New Private Window, and you will get a new window to browse privately in Safari on Mac. 3. Alternatively, you can use the Mac shortcut Command + Shift + N to access incognito mode in Safari. 3.
To turn on Private Browsing in Safari for Mac, follow these simple steps: Make sure Safari is the active application that you're using. Click on File in the menu bar along the top of the screen. Click on New Private Window to switch to private browsing mode. To turn on Private Browsing in Safari for iPhone or iPad, the process is much the same:
This video guides about how to turn on private browsing on safari in your mac.To go incognito mode in safari, simply follow the step-by-step guide.Safari's "...
Open the Safari app and click on File . Click on New Private Window. You can also use a keyboard shortcut: Shift + Command + N. If you want to always have the Private mode turned on, you can try these steps: Open the Safari app and click on Preferences . Click on General . Click on the Safari opens with a pop-up option.
In iOS 17. Open Safari on your iPhone. Tap the Tabs button. Swipe to the Private tab group button, then tap the tab that you want to open. For additional privacy, you can choose to lock Private Browsing when you're not using it. When you lock your device, your private tabs in Safari will also lock. Then, when you unlock your device again, just ...
Open Safari on your iPhone or iPad, tap the Pages icon (consisting of two squares) to bring up the open tabs view, and then tap the profile icon, centered at the bottom of the screen. Tap Private ...
How to turn on Private Browsing. Open Safari on your iPad. Touch and hold the Tabs button. Tap New Private Tab. While Private Browsing is on, the Safari address bar appears black or dark instead of white or gray, and the buttons are black instead of blue.
Download and install the latest version of Rufus . Plug-in your USB drive. Open Rufus and select your USB drive under the Device drop-down menu. Click on SELECT, and then choose the Ubuntu ISO file from its location. Click START to begin the process.
Today, we're introducing Meta Llama 3, the next generation of our state-of-the-art open source large language model. Llama 3 models will soon be available on AWS, Databricks, Google Cloud, Hugging Face, Kaggle, IBM WatsonX, Microsoft Azure, NVIDIA NIM, and Snowflake, and with support from hardware platforms offered by AMD, AWS, Dell, Intel ...
Open the Safari app on your iPhone. Tap . Swipe right on the tab bar at the bottom of the screen until Private Browsing opens, then tap Unlock. To exit Private Browsing, tap , then swipe left to open a Tab Group from the menu at the bottom of your screen. The websites you have open in Private Browsing stay open, and Private Browsing locks.