How To See Safari Private Browsing History

- Software & Applications
- Browsers & Extensions


Introduction
Private browsing has become an essential feature for many internet users seeking to maintain their online privacy. Whether you're using Safari on your Mac, iPhone, or iPad, the ability to browse the web without leaving a trace of your activity can be invaluable. However, there are instances where you may need to access your private browsing history for various reasons, such as revisiting a website you previously viewed or tracking down a lost link. In this comprehensive guide, we'll delve into the intricacies of Safari's private browsing mode and explore the methods for viewing your private browsing history on both Mac and iOS devices.
Understanding the nuances of private browsing in Safari is crucial for effectively managing your browsing history and ensuring that your privacy remains intact. By gaining insight into the functionality of private browsing, you can navigate the digital realm with confidence, knowing that your online activities are shielded from prying eyes. Whether you're a seasoned Safari user or a newcomer to the world of private browsing, this guide will equip you with the knowledge and tools necessary to navigate your private browsing history with ease.
As we embark on this journey through Safari's private browsing landscape, we'll uncover the steps required to access your private browsing history on Mac, iPhone, and iPad. Additionally, we'll provide valuable tips for managing your private browsing history, empowering you to maintain control over your digital footprint while harnessing the full potential of Safari's private browsing mode. Join us as we unravel the mysteries of private browsing history in Safari, empowering you to navigate the digital realm with confidence and privacy.
Understanding Private Browsing in Safari
Private browsing, also known as "Incognito" mode in other browsers, is a feature designed to allow users to browse the internet without leaving a trail of their online activities. When you engage private browsing in Safari, the browser does not store your browsing history, search history, or any information entered in forms. Additionally, any cookies, cache, or temporary files generated during the private browsing session are discarded once the session is closed.
It's important to note that while private browsing prevents the storage of your browsing history on the local device, it does not make you completely anonymous online. Your internet service provider, employer, or the websites you visit can still track your online activities. Private browsing is primarily intended to prevent the storage of browsing data on the local device and to maintain privacy from other users who may have access to the device.
When you open a private browsing window in Safari, it is visually distinguished from a regular browsing window. The browser interface typically adopts a darker theme, and a mask or "privacy" icon may be displayed to indicate that you are in private browsing mode. This visual cue serves as a reminder that your browsing activity during this session will not be saved locally.
One of the key benefits of private browsing in Safari is the ability to conduct research, access sensitive accounts, or explore content without affecting your regular browsing history or stored data. This can be particularly useful when using a shared computer or when you simply want to prevent certain websites from appearing in your browsing history.
It's important to remember that private browsing does not provide complete anonymity or protection from online tracking. If you require a higher level of privacy and security, additional measures such as using a virtual private network ( VPN ) or specialized privacy-focused browsers may be necessary.
By understanding the principles and limitations of private browsing in Safari, you can make informed decisions about when and how to utilize this feature to safeguard your online privacy while navigating the digital landscape.
Viewing Safari Private Browsing History on Mac
Accessing your private browsing history in Safari on a Mac involves navigating through the browser's settings to reveal the hidden records of your private browsing sessions. While private browsing is designed to leave no trace of your online activities, there are methods to uncover the history from these sessions.
Accessing Private Browsing History: To view the private browsing history in Safari on a Mac, you can follow these steps:
- Open Safari on your Mac.
- In the menu bar at the top of the screen, click on "History."
- From the drop-down menu, select "Show History." Alternatively, you can use the keyboard shortcut Command + Y.
Identifying Private Browsing Sessions: Once the history window opens, you can identify the private browsing sessions by looking for entries with the label "Private Browsing" and the date and time of the session. These entries represent the websites visited during private browsing sessions and are distinct from the regular browsing history.
Browsing and Managing Private History: You can scroll through the private browsing history to revisit specific websites or search for particular entries. Additionally, you have the option to clear individual entries or the entire private browsing history by right-clicking on the desired item and selecting "Delete" or "Clear History" from the "History" menu.
Understanding Limitations: It's important to note that the private browsing history in Safari on a Mac is only accessible from the local device and is not synced across your iCloud account or other devices. This means that the private browsing history can only be viewed on the specific Mac where the private browsing sessions occurred.
By following these steps, you can effectively access and manage your private browsing history in Safari on your Mac, providing you with the ability to revisit websites from previous private browsing sessions and maintain control over your browsing records.
Understanding how to view the private browsing history on your Mac empowers you to navigate your digital footprint with confidence, ensuring that you can access the information you need while maintaining control over your browsing history.
Viewing Safari Private Browsing History on iPhone or iPad
Accessing your private browsing history in Safari on an iPhone or iPad requires a slightly different approach compared to viewing it on a Mac. While private browsing is designed to leave no trace of your online activities, there are methods to uncover the history from these sessions on your iOS device.
To view the private browsing history in Safari on your iPhone or iPad, you can follow these steps:
Accessing Private Browsing History:
- Open Safari on your iPhone or iPad.
- Tap the book icon at the bottom of the screen to open the bookmarks menu.
- From the bookmarks menu, tap the clock icon, which represents your browsing history.
Identifying Private Browsing Sessions:
- Once the history window opens, you can identify the private browsing sessions by looking for entries with the label "Private Browsing" and the date and time of the session. These entries represent the websites visited during private browsing sessions and are distinct from the regular browsing history.
Browsing and Managing Private History:
- You can scroll through the private browsing history to revisit specific websites or search for particular entries. Additionally, you have the option to clear individual entries or the entire private browsing history by swiping left on the desired item and tapping "Delete."
Understanding Limitations:
- Similar to the Mac, the private browsing history on your iPhone or iPad is only accessible from the specific device and is not synced across your iCloud account or other devices. This means that the private browsing history can only be viewed on the specific iPhone or iPad where the private browsing sessions occurred.
By following these steps, you can effectively access and manage your private browsing history in Safari on your iPhone or iPad, providing you with the ability to revisit websites from previous private browsing sessions and maintain control over your browsing records.
Understanding how to view the private browsing history on your iPhone or iPad empowers you to navigate your digital footprint with confidence, ensuring that you can access the information you need while maintaining control over your browsing history.
Tips for Managing Private Browsing History in Safari
Managing your private browsing history in Safari is essential for maintaining control over your digital footprint and ensuring that your online activities remain private. While private browsing is designed to leave minimal traces of your browsing history, there are several tips and best practices that can enhance your ability to manage and safeguard your private browsing history effectively.
Regularly Clear Your Private Browsing History : To maintain privacy and prevent the accumulation of private browsing data, consider clearing your private browsing history regularly. This can be done by accessing the history section in Safari and selecting the option to clear your private browsing history. By doing so, you can ensure that no residual data from private browsing sessions is retained on your device.
Use Private Browsing Wisely : While private browsing can be a valuable tool for maintaining privacy, it's important to use it judiciously. Avoid relying solely on private browsing for sensitive activities, especially if you require a higher level of anonymity and security. Consider utilizing additional privacy measures such as VPNs or specialized privacy-focused browsers when engaging in activities that require enhanced privacy.
Be Mindful of Shared Devices : If you share your Mac, iPhone, or iPad with others, be mindful of the potential impact of private browsing on the overall user experience. While private browsing prevents the storage of browsing history on the local device, it does not prevent websites from tracking your activities or your internet service provider from monitoring your online behavior. Exercise caution and consider the implications of private browsing in shared environments.
Educate Yourself on Privacy Features : Familiarize yourself with the privacy features and settings available in Safari. Explore options for managing cookies, preventing cross-site tracking, and enhancing your overall privacy while browsing. By leveraging the built-in privacy features of Safari, you can augment your privacy protection and minimize the need to rely solely on private browsing.
Consider Alternative Privacy Solutions : In addition to private browsing, consider exploring alternative privacy solutions to augment your online privacy. This may include using privacy-focused search engines, employing ad and tracker blockers, and integrating privacy-enhancing browser extensions. By diversifying your privacy toolkit, you can fortify your online privacy beyond the scope of private browsing.
By implementing these tips for managing your private browsing history in Safari, you can navigate the digital landscape with heightened privacy awareness and control. Empower yourself with the knowledge and tools necessary to safeguard your online activities while leveraging the benefits of private browsing in Safari.
Leave a Reply Cancel reply
Your email address will not be published. Required fields are marked *
Save my name, email, and website in this browser for the next time I comment.
- Crowdfunding
- Cryptocurrency
- Digital Banking
- Digital Payments
- Investments
- Console Gaming
- Mobile Gaming
- VR/AR Gaming
- Gadget Usage
- Gaming Tips
- Online Safety
- Software Tutorials
- Tech Setup & Troubleshooting
- Buyer’s Guides
- Comparative Analysis
- Gadget Reviews
- Service Reviews
- Software Reviews
- Mobile Devices
- PCs & Laptops
- Smart Home Gadgets
- Content Creation Tools
- Digital Photography
- Video & Music Streaming
- Online Security
- Online Services
- Web Hosting
- WiFi & Ethernet
- Browsers & Extensions
- Communication Platforms
- Operating Systems
- Productivity Tools
- AI & Machine Learning
- Cybersecurity
- Emerging Tech
- IoT & Smart Devices
- Virtual & Augmented Reality
- Latest News
- AI Developments
- Fintech Updates
- Gaming News
- New Product Launches
5 Ways to Improve IT Automation
- What is Building Information Modelling
Related Post
Sla network: benefits, advantages, satisfaction of both parties to the contract, what is minecraft coded in, how much hp does a diablo tuner add, what is halo-fi, what is halo lock iphone, related posts.

How Do You Turn Off Incognito Mode?

How To View Private Browsing History On Safari IPhone

How To Turn On Incognito Mode Safari

How To Open Private Browser On Safari iPhone

How To See Browser History On iPhone

How Do You Do Incognito Mode

How To Turn Off Incognito Mode On Phone

How To Do Incognito Mode On Iphone
Recent stories.

What is Building Information Modelling?

How to Use Email Blasts Marketing To Take Control of Your Market

Learn To Convert Scanned Documents Into Editable Text With OCR

Top Mini Split Air Conditioner For Summer

Comfortable and Luxurious Family Life | Zero Gravity Massage Chair

Fintechs and Traditional Banks: Navigating the Future of Financial Services

AI Writing: How It’s Changing the Way We Create Content
- Privacy Overview
- Strictly Necessary Cookies
This website uses cookies so that we can provide you with the best user experience possible. Cookie information is stored in your browser and performs functions such as recognising you when you return to our website and helping our team to understand which sections of the website you find most interesting and useful.
Strictly Necessary Cookie should be enabled at all times so that we can save your preferences for cookie settings.
If you disable this cookie, we will not be able to save your preferences. This means that every time you visit this website you will need to enable or disable cookies again.
How to Check Private Browsing History on iPhone

Apple’s native Safari browser offers a Private Browsing Mode that lets you browse the web without worrying about your activity getting tracked by websites you visit or getting saved on your iPhone. But what happens to your browsing history when you browse the web privately? Can you check your history after a private browsing session on Safari or access your tabs from a private session again? That’s what we’ll explain in this post.
Related: How to Disable Private Browsing Mode in Safari on iPhone
How to Enable Private Browsing on an iPhone
Starting a Private Browsing session on an iPhone is easy.
To lock your private tab again, you can either lock your iPhone’s screen or switch to a regular tab inside Safari.
Can you check your history when browsing privately on Safari?
No. As is the case with any web browser, the purpose of private browsing is not only to protect your identity and activity from malicious websites but to also hide your activity from showing up after you’re done with a private session.
When you check your browsing history by tapping the Bookmark icon at the bottom of the Safari screen, you will only see a list of all the websites that you visited when browsing normally. The tabs that you may have accessed inside Private Browsing won’t show up on this list.
This way, you won’t be able to see your browsing history when you’re using Safari with the Private Browsing Mode active.
Does Safari remove Private tabs after closing?
Safari won’t entirely close your Private tabs like Google Chrome or Brave. When you close the Safari app on your iPhone by swiping it upwards from the Recent Apps screen, all the tabs that were open inside Safari will remain in memory and will reappear when you open Safari in the future. This way, all the tabs that were previously open inside the Private tab group will reappear on your screen when you switch to Private from other tabs.
While this is great to get you back on track with what you may have been browsing in normal (non-private) sessions, things could get pretty embarrassing when you switch to the Private tab group. This can be worrisome for those of you who tend to forget what they were browsing.
To avoid this, you can enable Face ID for Private Browsing for Safari after which the app will ask for Face ID access every time you switch from a regular tab to a private tab or lock your iPhone with private tabs open. You can turn on Face ID for Private Browsing inside Safari by checking out the post linked below.
- How to Enable Face ID for Private Browsing in Safari on iPhone
How to access your Private tabs again after closing Safari
Since all the tabs that were open in a Private tab group on Safari don’t go away when you close Safari, you can access them easily by simply opening the Safari app on your iPhone. This would work if you had force-closed Safari from the Recent Apps screen directly from the Private mode as all the previous open tabs will appear again in the same order.
If you had switched away from the private tab group when closing Safari, you can access them all again by following the same steps as when you enabled the Private Browsing Mode.
If you don’t want (others) to see what tabs were open inside Private mode on Safari, you can check out the post below to disable it inside Safari on your iPhone.
- How to Disable Private Browsing Mode in Safari on iPhone
If you wish to enhance your privacy when browsing online, you can also take advantage of Private Relay within Safari by following our dedicated guide below.
- How To Use Private Relay in iCloud Plus
That’s all we have on how you can check your private browsing history on an iPhone.

Ambivalent, unprecedented, and on the run from everyone's idea of reality. A consonance of love for filter coffee, cold weather, Arsenal, AC/DC, and Sinatra.
You may also like

How to Run Microsoft Phi-3 AI on Windows Locally
How to Instantly Access Android Photos and Screenshots as Notifications on Windows 11
How to Turn Off Blue Alerts on iPhone and Android

You Can Collapse Headings in the Notes App With iOS 18, Here’s How
TechSynchron
Step-By-Step Guide: How To View Private Browsing History On Iphone
Quick Answer: To view private browsing history on an iPhone, you can make use of various methods and tools. This article will guide you through the steps to uncover the secret browsing history on your iPhone device.
Are you curious about what your friends or family members have been secretly browsing on their iPhones? Or maybe you want to keep an eye on your own private browsing activities? Whatever the reason may be, accessing private browsing history on an iPhone might seem like a daunting task. The truth is, it’s not impossible.
In this blog post, we will show you how to view private browsing history on an iPhone. We’ll explain different methods and tools you can use to dig into the hidden browsing data. So let’s dive right in and unveil the secrets of private browsing history on an iPhone.
How to View Private Browsing History on iPhone
Introduction: understanding private browsing on iphone.
Before we dive into discovering how to view private browsing history on an iPhone, let’s first understand what private browsing entails. Private browsing is a feature provided by most web browsers, including Safari on the iPhone, that allows users to browse the internet without leaving any traces of their browsing history, cookies, or other data on the device. This feature can be useful for maintaining privacy, preventing websites from tracking your online activities, and keeping personal information secure. However, there may be instances where you need to access private browsing history for various reasons. In this article, we will explore different methods to view private browsing history on your iPhone.
Method 1: Viewing Private Browsing History using Safari
Safari, the default web browser on iPhones, does not provide a direct option to view private browsing history. However, there is a workaround to retrieve this information from your device’s backup using a third-party tool. Follow these steps:
1. Connect your iPhone to your computer and open iTunes or Finder.
2. Select your device and click on the “Restore Backup” option.
3. Choose a backup that was created before the private browsing session you want to access.
4. Use an iPhone backup viewer tool such as iExplorer or iPhone Backup Extractor to extract the Safari browsing history from the backup file.
5. Search for the specific private browsing history records you are looking for within the extracted data.
Method 2: Checking Domain Names in Safari
Although Safari doesn’t provide a direct way to view private browsing history, you can still check the domain names visited during a private browsing session. Follow these steps:
1. Open Safari on your iPhone.
2. Tap on the address bar at the top of the screen.
3. You will see a list of frequently visited websites. Scroll down to the bottom of the list and tap on “Show All History.”
4. Here, you can see a list of domains visited during both regular and private browsing sessions.
5. Tap on a domain to see the specific webpages visited under that domain.
Method 3: Using Third-Party Apps
If retrieving private browsing history from Safari proves challenging, you can consider using third-party apps specifically designed to track web activities, including private browsing sessions. These apps offer advanced browsing history features and may require installation and configuration on your iPhone. Some popular options include:
- Qustodio: Qustodio is a comprehensive parental control app that provides browsing history tracking among other features. Install the app on your child’s iPhone and set it up to monitor private browsing history.
- FlexiSPY: FlexiSPY is a powerful spy app that enables you to monitor various activities on an iPhone, including browsing history, even during private browsing sessions.
- mSpy: mSpy is another popular monitoring app that allows you to track browsing history, including private sessions, on an iPhone remotely.
Method 4: Checking Router Logs
If the private browsing history you’re trying to access was made on a Wi-Fi network at home or work, you can check the router logs to gather information about the websites visited. Keep in mind that this method requires technical expertise and access to the router’s settings. Here’s an overview:
1. Launch a web browser on a device connected to the same Wi-Fi network as the iPhone.
2. Enter the router’s IP address into the browser’s address bar. Check the router’s documentation or search online to find the default IP address.
3. Enter the router’s username and password to log in to the settings interface.
4. Look for a section related to logs or browsing history. The exact location and naming may vary depending on the router’s manufacturer and model.
5. Once you find the logs, search for entries related to the date and time of the private browsing session you want to investigate.
6. Note down the domain names or URLs visited during that time.
While Safari doesn’t offer a native way to view private browsing history on an iPhone, the methods outlined in this article provide some options to retrieve this information. You can use third-party tools, check domain names, utilize specialized apps, or explore router logs to access details about private browsing sessions. It’s important to note that privacy is a fundamental right, and accessing someone else’s private browsing history without their consent may be considered a breach of privacy. Always ensure that you have the necessary permissions or legal rights before using any of these methods.
Frequently Asked Questions
To further clarify any doubts you may have, here are answers to some commonly asked questions related to viewing private browsing history on an iPhone:
1. Is it possible to view private browsing history on an iPhone without restoring a backup?
No, without restoring a backup, viewing private browsing history directly within Safari is not possible. The backup restoration method outlined in this article is a workaround to access private browsing history.
2. Are there any apps that can track private browsing history without jailbreaking an iPhone?
Tracking private browsing history without jailbreaking an iPhone is challenging. Most tracking apps require jailbreaking to gain access to this information. Always remember that jailbreaking can void the device’s warranty and may introduce security risks.
3. Can I view private browsing history on someone else’s iPhone without their knowledge?
Accessing private browsing history on someone else’s iPhone without their knowledge or consent is a violation of privacy laws. Always respect others’ privacy and obtain proper authorization before attempting to view their browsing history.
4. Can private browsing be completely hidden on an iPhone?
Private browsing itself cannot be hidden on an iPhone. However, it doesn’t leave behind browsing history, cookies, or other data on the device. It’s designed to enhance privacy and minimize the traceability of online activities.
Remember, it’s essential to respect privacy rights and obtain the necessary permissions before attempting to view private browsing history on an iPhone.
How to track private browsing history on iphone 2023#iphone #iphonetips #privatemode
How can I view private browsing history on iPhone?
To view private browsing history on your iPhone, follow these steps:
Can I recover deleted private browsing history on iPhone?
No, it is not possible to recover deleted private browsing history on an iPhone. Private browsing mode is specifically designed to leave no trace of your browsing history on the device.
Is there any way to track someone’s private browsing history on their iPhone?
No, it is not possible to track someone’s private browsing history on their iPhone. Private browsing is designed to keep your browsing activities private and secure. Even if you have physical access to the device, you won’t be able to retrieve private browsing history.
Are there any third-party apps that allow me to view private browsing history on iPhone?
No, there are no legitimate third-party apps that can provide access to private browsing history on an iPhone. Apple strictly restricts access to private browsing data for security and privacy reasons.
Can I view private browsing history on iPhone through iCloud?
No, viewing private browsing history on iPhone through iCloud is not possible. iCloud backups do not include private browsing history as it is intentionally excluded from the backup process.
Final Thoughts
To view private browsing history on your iPhone, follow these simple steps. Firstly, open the Safari browser and tap on the bookmarks icon at the bottom. Next, select the clock icon which represents the History section. Here, you will find a list of all the websites visited, including those in private browsing mode. Remember that this method only works if the browsing history hasn’t been cleared. By using these steps, you can easily view private browsing history on your iPhone and stay informed about the sites visited.
Similar Posts

Easy Guide: Adding Location To Iphone Control Center
Quick Answer: To add location in iPhone Control Center, you can easily customize the settings in a few simple steps. This feature allows you to have quick access to location services directly from the Control Center, making it convenient for various apps and services that require location information. In this blog article, we will guide…

How To Silence Dialing Sound On Iphone 14
Solution: To turn off the dialing sound on your iPhone 14, follow these simple steps. Introduction: Have you ever made a phone call on your iPhone 14 and found the dialing sound to be quite loud and annoying? Well, you’re not alone. Many users have complained about the obtrusive dialing sound on their devices. The…

How To Use Front Flash On Tiktok Iphone: Step-By-Step Guide
Quick Answer: To use the front flash on TikTok for iPhone, simply follow these steps: open the TikTok app on your iPhone, navigate to the camera screen, tap on the “Flash” icon at the top of the screen, select “Front” to enable the front flash, and start recording your TikTok video with the front flash….

Quick Guide: Turn Off Green Light On Iphone
The Short Answer: If you want to turn off the green light on your iPhone, simply go to the Settings app, tap on General, select Accessibility, and then toggle off the LED Flash for Alerts option. This will prevent your iPhone from flashing a green light every time you receive a notification. Introduction: Have you…

How To Check Body Temperature With Iphone: A Comprehensive Guide
Quick Answer: You can check your body temperature using your iPhone by using a thermometer app that utilizes the phone’s infrared sensors. This allows you to get an accurate reading of your body temperature without the need for a separate thermometer. In this article, we will guide you on how to check your body temperature…

Efficiently Block Calls, Allow Texts: Iphone Tips
Quick Answer: To block calls but allow texts on an iPhone, you can use the built-in features of iOS. By creating a contact for the unwanted caller and enabling “Do Not Disturb” mode with Allow Calls From Contacts, you can filter out calls while still receiving text messages. This ensures that important messages can still…
- a. Send us an email
- b. Anonymous form
- Buyer's Guide
- Upcoming Products
- Tips / Contact Us
- Podcast Instagram Facebook Twitter Mastodon YouTube Notifications RSS Newsletter
How to Use Safari's Private Browsing Mode
This article explains how to use Safari's Private Browsing mode, which prevents your browsing history from being logged on your Apple devices. It's a useful feature if you're buying gifts online for friends or family, for instance, and you don't want anyone with access to your devices to find out what you're up to.
Using Safari's Private Browsing Mode
Enabling Private Browsing limits Safari in three important ways: It prevents the browser from creating a history of the pages you visit, it stops AutoFill information like website usernames and passwords from being remembered, and any tabs you open won't be stored in iCloud .
Also, for added peace of mind when you browse privately, Safari automatically prevents cross-site tracking , and requests that sites and third-party content providers don't track you as a rule. Additionally, the privacy mode stops sites from modifying any information stored on your iOS device, and deletes cookies when you close the associated tab.
To enable Private Browsing in Safari, follow these steps.
- Open Safari on your iPhone or iPad , tap the Pages icon (consisting of two squares) to bring up the open tabs view, and then tap the profile icon, centered at the bottom of the screen.

- When you're done browsing, return to the open tabs view, individually swipe any open tabs to close them if you wish.
- Tap the profile icon again, then choose your regular profile at the top. Your private browsing session is now cleared from memory.
Clearing Existing Browsing History
When you clear your browsing history on a device running iOS 11 or higher, the same logs are cleared on any other devices signed into your iCloud account. The following methods also clear all cookies and web data on the device you're currently using, although AutoFill information remains unchanged.
The first method outlined below allows you to either limit the clearing of history, cookies and website data to a specific timeframe, or to delete your existing web history altogether.
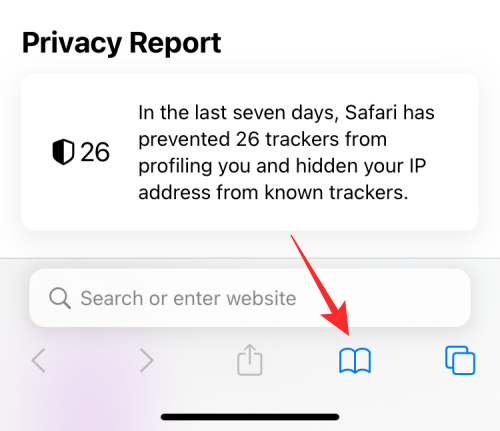
- Open Safari and with a tab open, tap the Bookmarks icon (the open book) located at the bottom of the screen.
- Tap the tab at the top of the screen with a clock symbol, and you'll see a history of your browsing activity.
- To remove instances of recorded visits to specific web pages, swipe leftwards across individual logs in the list and tap the red delete button that appears.
- To delete the entire browsing history list, tap Clear .
- Choose the timeframe to clear ( Last hour , Today , Today and yesterday , or All history ), choose the profile or select All Profiles , then tap Clear History .

The second method of wiping your browsing history might be considered the 'nuke' option, since it clears all history, cookies and website data on that device, regardless of when the sites were accessed.
- Open the Settings app and scroll down to Safari in the list.

And that's it. Note that these built-in Safari features only make you safer from discovery by other people in the same household.
If your privacy concerns extend to a desire for enhanced security and anonymity online, consider subscribing to a Virtual Private Network (VPN) service that offers an iOS client or supports OpenVPN ( Private Internet Access and ProtonVPN are two popular options), and using a Tor-powered browser for iOS .
Get weekly top MacRumors stories in your inbox.
Top Rated Comments

This article explains how to use Safari's Private Browsing mode, which prevents your browsing history from being logged on your Apple devices. It's a useful feature if you're buying gifts online for friends or family, for instance, and you don't want anyone with access to your devices to find out what you're up to.

I can really use this info, because I’m always “buying gifts”. ;) :cool:
Popular Stories

Apple Intelligence Features Not Coming to European Union at Launch Due to DMA

Apple Explains iPhone 15 Pro Requirement for Apple Intelligence

Amazon Could Charge Up to $10/Month for Alexa

Spotify Launches Cheaper $10.99/Month Premium Plan Without Audiobooks

5 Biggest Changes Rumored for iPhone 16 Pro Max
Next article.

Our comprehensive guide highlighting every major new addition in iOS 17, plus how-tos that walk you through using the new features.

Apple News+ improvements, cross-platform tracker alerts, website app downloads for the EU, and more.

Get the most out your iPhone 15 with our complete guide to all the new features.
A deep dive into new features in macOS Sonoma, big and small.

Updates to Mail, Photos, Messages, and more, with Apple Intelligence features throughout.

iPhone Mirroring, Safari improvements, new Passwords app, and Apple Intelligence features throughout.

Action button expands to all models, new Capture button, camera improvements, and more.

Larger displays, new Capture button, camera improvements, and more.
Other Stories

5 days ago by Tim Hardwick

6 days ago by Tim Hardwick

1 week ago by Tim Hardwick
2 weeks ago by Tim Hardwick

Your Guide to Private Browsing in Safari

Your changes have been saved
Email Is sent
Please verify your email address.
You’ve reached your account maximum for followed topics.
Quick Links
What private browsing does in safari, how to use safari private browsing on iphone and ipad, how to use safari private browsing on a mac, how to disable safari private browsing on iphone and ipad, how to disable safari private browsing on a mac, key takeaways.
- Private Browsing in Safari hides browsing history, autofill details, downloads, and locks tabs after inactivity.
- Safari on Mac groups private and non-private tabs, while on iPhone it shows all tabs regardless of mode.
- To use Private Browsing in Safari, identify it by a dark address bar, "Private" indicator, or "Private" next to the site URL.
Most browsers offer a private browsing mode that aims to keep the websites you view off the record. But what exactly does it do in Safari and how do you get the best out of it?
First and foremost, Private Browsing keeps the website pages you visit out of your History . The aim is to prevent someone else from seeing which pages you have visited if they have access to your phone or computer.
In Safari, Private Browsing does a lot more than just hide URLs. It also:
- Prevents recent searches from showing up in your history.
- Stops remembering details you enter in forms for autofill.
- Keeps downloaded items from appearing in your Downloads list.
- Locks private tabs after a period of inactivity.
- Adds tracking and fingerprinting protection.
However, it’s important to note that Private Browsing does not stop you from being tracked altogether. Websites you visit will still be able to use various methods to track you, and will still have access to all data that you send them.
On macOS, iOS, and iPadOS, Safari groups private tabs together, and separates them from non-private tabs. On Mac, each Safari window is either private or non-private, and can have as many tabs as you want.
On iPhone, you can switch between private and non-private modes, each of which shows all tabs belonging to that mode.
You can spot when you’re viewing a private tab with these signs:
- The address bar has a dark background. This may be less noticeable if you’re using Dark Mode .
- On Mac, you’ll see a prominent Private indicator in the title bar.
- On iPhone, you’ll see Private alongside the site URL at the bottom of your screen.
The steps to enter Private Browsing mode are nearly identical on an iPhone and iPad. The only difference is that the tab icon is at the bottom of the screen on iOS and the top on iPadOS.
- Long-press the tab icon (two overlapping pages) on the bottom-right (iPhone) or top-right (iPad) of your screen.
- Tap the New Private Tab menu item.
- If locked, enter your passcode to unlock Private Browsing.
You can enter Private Browsing mode on macOS using either a menu item or a keyboard shortcut:
- Open the File menu and choose New Private Window .
- Alternatively, use the keyboard shortcut Shift + Cmd + n .
- Use the browser as you normally would. Any tabs you open from this window will open in the same window, in private mode.
You may want to prevent users of an iPhone or iPad from using Private Browsing mode at all. To do so:
- Open the Settings app.
- Tap on Screen Time .
- Under RESTRICTIONS , click on Content & Privacy Restrictions .
- If not already enabled, press the toggle next to Content & Privacy Restrictions to enable.
- Tap Content Restrictions .
- Change the Web Content setting to Limit Adult Websites .
The option to enter private mode will now be gone.
On macOS, the wording of certain options differs slightly, but the overall process is near-identical to iOS:
- Open System Settings via the Apple menu.
- Click on Screen Time in the left panel.
- Under the Restrictions section, click on Content & Privacy .
- Click Content Restrictions .
- Change the Access to Web Content setting to Limit Adult Websites .
Private Browsing will now be unavailable in Safari, although any existing private windows will stay open.
Of course, anyone can re-enable Private Browsing using the same process, in reverse. However, you can use Screen Time’s Lock Screen Time Settings option to set a passcode and enforce the setting permanently.
- Private Browsing
How to View Safari Private Browsing History on Mac

In case you’re not aware, Apple’s Safari browser, like other popular browsers, offers a Private Browsing mode . Simply put, when you use this feature while using Safari, the browser won’t log or save any of your activity. Other browsers call this Incognito Mode. The downside is that all your saved preferences for websites you frequently visited are disabled. Still, it won’t hurt to browse websites using the feature from time to time for some private browsing experience. But is there really no way to browse your Private Browsing history? Well, there is, and that’s what I’m going to show you in this guide on how to view Private Browsing history in Safari on your Mac.
How Does Private Browsing Work in Safari
When you opt to browse websites in Safari using Private Browsing, it opens up a new private window in your browser. As previously mentioned, when privately browsing in Safari, your activity will not be logged or saved. Although it’s not a foolproof way of browsing privately, the feature still offers some level of privacy. As such, Private Browsing in Safari won’t record your search engine history, webpages you’ve visited, browsing activity, and most especially passwords you used on different websites.
It should be noted that this feature doesn’t really prevent the websites you visited from knowing who you are and your browsing activity on the website.
How to Browse Privately in Safari on Your Mac
Before I discuss the procedure on how to view your Private Browsing history on Mac, let me walk you through the steps on how to browse privately. You can either do it one time or opt to always browse privately.
To browse privately in Safari one time:
- Open the Safari app on your Mac.

To always browse privately in Safari:
- Click General.

What is the Mac Terminal Archive?
Now that you know how to use Private Browsing in Safari on your Mac, it’s time for you to know that your Mac actually logs that browsing history. This can be found in your Mac’s Terminal archive. You’ll be surprised to know that this Terminal archive contains information about all of the websites you visited. That’s even when you use the Private Browsing feature. So, you can view Private Browsing history via the Terminal archive.
How to View Private Browsing History in Safari on Mac
Time needed: 1 minute

You will notice that the website names have been translated into their corresponding IP addresses. You won’t see the exact name of the websites. That’s because your Mac has consulted a DNS directory to translate the website names into IP addresses.
We think you might also be interested in how to clear browser cache on Mac for Chrome, Firefox and Safari .
Final Words: Is It Really Safe to Browse Privately in Safari?
According to Apple, when you browse privately in Safari :
- The browser won’t save the web pages you visit and your Autofill information.
- Safari won’t store webpages you open in iCloud.
- Safari won’t include your recent searches in the results list when you use the Smart Search field.
- Safari won’t include items you downloaded in the download list.
- Changes to your cookies and website won’t be saved.
Knowing all that, Private Browsing in Safari would seem safe. But then, when you browse privately, are you really browsing anonymously, or does the feature just hide your information from anyone who could access your Mac? However, if somebody gets physical access to your Mac and knows their way around, they can still see the websites you visited, since the information is stored in the DNS cache of your Mac.
Even worse is when you are using a public network. The network administrator can still see the websites you are visiting using your Mac. The bottom line is that advertisers can still track you even if you browse privately on your Mac, and then serve targeted ads. If you don’t mind that at all, then there’s no harm in always browsing privately in Safari on your Mac.
One thought on “ How to View Safari Private Browsing History on Mac ”
When it comes to private browsing, Utopia P2P ecosystem’s web proxy function is the gold standard. Its advanced encryption and anonymity features are unmatched by other solutions like VPNs and incognito modes.
Leave a Reply Cancel reply
You must be logged in to post a comment.
This site uses Akismet to reduce spam. Learn how your comment data is processed .
- Arnold Zafra
How-To Geek
4 ways to open a private safari tab on iphone and ipad.

Your changes have been saved
Email Is sent
Please verify your email address.
You’ve reached your account maximum for followed topics.
Everyone Should Have a Portable Power Station, Here's Why
You need this shortcut on your iphone in case it gets stolen, today's nyt connections hints and answer for june 23 (#378), quick links, use the drop-down on safari's toolbar, use the pages button on safari's toolbar, use 3d touch or haptic touch, say a siri command.
Private Browsing mode in Safari lets you view sites without adding anything to your history on your iPhone and iPad. Here are four different ways to open a private tab in Safari when you need it.
When you use a private tab, Safari doesn't store your browsing history, AutoFill your information, suggest recent searches, or save cookies once you close the tab.
With iOS 15 and iPadOS 15 arrived several changes, including how you can use private browsing mode in Safari . That said, there are easier and lesser-known ways to quickly open a private tab in Safari on your iPhone or iPad.
Related: How Private Browsing Works, and Why It Doesn't Offer Complete Privacy
To get started, open Safari on your iPhone or iPad. On the iPhone, tap the "Pages" button (cascading squares icon) in the bottom-right corner.
You'll see a windows or webpages management screen with the grid of thumbnails representing the open tabs. The toolbar at the bottom will show the "Tab Groups" option with a drop-down button next to it. Tap the drop-down button.
Select the "Private" option from the menu that pops up to switch to the private browsing mode.
Select the "+" icon in the bottom-left to open a new private tab. Or tap "Done" in the bottom-left corner if you're opening a private tab for the first time.
On the iPad, you'll need to tap the "Sidebar" option on the upper-left corner.
When the sidebar panel slides open, choose the "Private" option to turn on the private browsing mode and open a new private tab.
Related: How to Always Start Any Browser in Private Browsing Mode
A quick way to open a private tab in Safari is to use the "Pages" button on the bottom toolbar on your iPhone.
Fire up Safari. Long-press or hard-press the "Pages" button (cascading squares icon).
Select the "New Private Tab" option with a hand icon next to it from the menu that pops up.
You'll need to follow the same method on the iPad by tapping the "Pages" button (four squares) in the top-right corner and then select "New Private Tab."
Related: How to Open Chrome's Incognito Mode with a Keyboard Shortcut
You can open a private tab directly from the Safari app icon using the hard-press or long-press gesture powered by 3D Touch or Haptic Touch feature. The 3D Touch is available only on the older (pre-iPhone 11) modes.
Long-press or hard-press the Safari app icon on the homescreen.
Select "New Private Tab" from the menu that pops up.
Follow the same on the iPad.
The iPhone models from iPhone 6s to iPhone X (including XS) support 3D Touch. All iPhone models from iPhone XR and higher support Haptic Touch.
Another neat method to launch a private tab in Safari is to use Siri commands on your iPhone and iPad. This method works if you have the "Listen For 'Hey Siri'" option enabled from the Settings app.
While your iPhone or iPad is unlocked, say "Hey Siri" and ask it to open a private Safari tab. Here's an example of what you can ask Siri:
- Open a private tab in Safari
That's it! Have fun opening the private tab quickly in Safari on iPhone and iPad.
Related: How to Set Up and Use "Hey Siri" on iPhone and iPad
- iPhone & iPad
How to Turn on Safari Private Browsing on iPhone: A Step-by-Step Guide
Turning on Safari Private Browsing on an iPhone is a simple process. Open the Safari app, tap the tabs button (which looks like two overlapping squares), then tap “Private” to turn on Private Browsing Mode. Now, Safari won’t remember the pages you visit, your search history, or your AutoFill information.
After you complete this action, your browsing activity will not be saved in Safari. This means that websites you visit won’t appear in your history, and information entered in forms won’t be saved for AutoFill.
Introduction
In today’s digital age, privacy is a hot commodity. With every click, tap, and scroll, we leave digital footprints that can tell a story about who we are and what we like to do online. That’s why learning how to turn on Safari Private Browsing on your iPhone is essential. Whether you’re entering sensitive information, researching a surprise gift, or simply want to keep your browsing history to yourself, Private Browsing Mode is your go-to feature.
This function is particularly handy for shared devices or when you want to keep your browsing habits under wraps. So, if you’re an iPhone user looking to browse the web without leaving a trace, you’re in the right place. We’ll show you how to enable this feature in just a few easy steps.
Step by Step Tutorial on How to Turn on Safari Private Browsing on an iPhone
Before we dive into the steps, let’s clarify what we’ll achieve here. By following these simple steps, you’ll enable Private Browsing Mode in Safari, which prevents Safari from keeping track of your browsing history, search records, and AutoFill information.
Step 1: Open the Safari App
Navigate to your iPhone’s home screen and tap on the Safari app to open it.
Opening the Safari app is your gateway to the internet on your iPhone. Make sure you’re connected to the internet before you proceed.
Step 2: Access Your Open Tabs
Look for the tabs button, which resembles two overlapping squares, and tap on it.
This button will show you all your currently open tabs. If you have many tabs open, you may have to swipe left or right to find the “Private” option.
Step 3: Enable Private Browsing
Find the “Private” option at the bottom left of the screen and tap it.
Once you tap “Private,” you’ll notice the color of the browser interface changes, indicating that you’re now in Private Browsing Mode.
Additional Information
Now that you’re all set with Private Browsing Mode on Safari, there are a few things to keep in mind. Firstly, while your browsing activity isn’t saved on your iPhone, your internet service provider or employer can still track it. Also, if you download files while in Private Browsing, they’re saved to your phone and visible in the Downloads folder.
Moreover, not all Safari features are available in this mode; for example, you can’t use Handoff to pass browsing activity between devices. Lastly, remember to close all private tabs before returning to regular browsing to maintain your privacy.
- Open the Safari app on your iPhone.
- Tap the tabs button to view your open tabs.
- Tap “Private” to enter Private Browsing Mode.
Frequently Asked Questions
Does private browsing hide my activity from my employer or internet service provider.
No, Private Browsing only prevents Safari from saving your browsing data on your iPhone. Your activity can still be tracked by your internet service provider or employer.
Will downloads in Private Browsing show up in my regular downloads folder?
Yes, any files you download while in Private Browsing Mode will be saved to your iPhone and visible in the Downloads folder.
Can I use Handoff with Private Browsing?
No, Handoff does not work with Private Browsing tabs, as your browsing activity isn’t saved.
Can websites track me while I’m using Private Browsing?
Some websites may still track your activity using cookies during your Private Browsing session, but they will not be saved once you close the tabs.
How do I turn off Private Browsing?
To exit Private Browsing Mode, open the tabs view, tap “Private” again, and it will switch back to regular browsing.
Turning on Safari Private Browsing on your iPhone is a surefire way to maintain your online privacy. Whether it’s to shop for a surprise, handle sensitive work, or simply because you value your digital privacy, navigating this feature is a breeze. Just remember that while Private Browsing protects your data on your device, it doesn’t make you invisible online. Always exercise caution and use additional privacy tools if needed. Happy private browsing!

Matthew Burleigh has been writing tech tutorials since 2008. His writing has appeared on dozens of different websites and been read over 50 million times.
After receiving his Bachelor’s and Master’s degrees in Computer Science he spent several years working in IT management for small businesses. However, he now works full time writing content online and creating websites.
His main writing topics include iPhones, Microsoft Office, Google Apps, Android, and Photoshop, but he has also written about many other tech topics as well.
Read his full bio here.
Share this:
Join our free newsletter.
Featured guides and deals
You may opt out at any time. Read our Privacy Policy
Related posts:
- Safari History iPhone: How to See It [2023 Guide]
- Why Can’t I Create a Private Browsing Tab in Safari on My iPhone?
- How to Do Private Browsing on iPhone 15: A Step-by-Step Guide
- How to Turn Off Private Browsing Mode on Your iPad: A Step-by-Step Guide
- Can I Quickly Close All of My Private Tabs in Safari on My iPhone?
- iOS 17: How to Close All Private Tabs on iPhone Quickly
- 15 Ways to Fix Safari Not Working on iPhone in 2023
- How to Get Out of Incognito Mode on iPhone 14
- How to Turn On Private Browsing on iPhone 13
- How to Go Incognito in YouTube on an iPhone
- How to Delete Autofill Entry on iPhone: A Step-by-Step Guide
- How to Close All Private Tabs on iPhone 13
- 15 iPhone Settings You Might Want to Change
- How to Delete YouTube History on iPad
- How to Clear History on iPhone 14
- How to Do Private Browsing on iPhone 14
- How to Clear History in Firefox on iPhone: A Simple Guide
- How to Delete History on iPhone 14: A Step-by-Step Guide
- How to Clear Visited Pages From an iPhone: A Step-by-Step Guide
- iPhone 15: How to Clear Safari History Quickly and Easily
Looks like no one’s replied in a while. To start the conversation again, simply ask a new question.
Browsing history on safari private
I searched something up on safari once but it was on private. I was wondering if there is still a way to view all your browsing history again even if it was on private
iPhone 5c, iOS 10
Posted on Feb 17, 2020 4:17 PM

Posted on Feb 17, 2020 4:27 PM
Turn Private Browsing on or off on your iPhone, iPad, or iPod touch - Apple Support
See these first lines in the above link...............
When you use Private Browsing, you can visit websites without creating a search history in Safari.
Private Browsing protects your private information and blocks some websites from tracking your search behavior. Safari won't remember the pages you visit, your search history, or your AutoFill information.
Similar questions
- How to clear my history on Safari? I connot clear my history on safari and i connot in private in safari [Re-Titled by Moderator] 257 3
- How do I check private browsing history How do I check closed or deleted private browsing history 439 1
- How to stop Safari from keeping track of your history? Is there a way to stop Safari from tracking your history without having to clear it every time? 284 1
Loading page content
Page content loaded
Feb 17, 2020 4:27 PM in response to technology1234

Feb 17, 2020 4:24 PM in response to technology1234
No, there is no history kept when using private browsing. That’s pretty much the whole point of private browsing mode.
Technical How-tos, Tips, and Tricks
How to clear history and private browsing on iphone and ipad.
January 9, 2020 Matt Mills Tips and Tricks 0

Clear Safari history on iPhone and iPad
In the past we had to have yes or yes a computer to be able to surf the internet and even perform simple searches on Google. However, the paradigm has changed and now from devices such as an iPhone and an iPad can be done, provided that WiFi or data connection is available. The case is that both devices have Safari, Apple ‘s browser. Although iOS and iPadOS are now two different operating systems, the truth is that they continue to share similarities like those in this browser.
Therefore, to be able to eliminate the browsing history of an iPhone or an iPad, the same steps must be followed, which as you will see are tremendously simple:
- Open Safari on the iPhone or iPad.
- Click on the book-shaped icon.
- You will see that three tabs appear now: bookmarks, reading list and history. Click on the latter.
- Click on “Delete” now .
- You now have the possibility of deleting a certain part of the history or deleting it whole , being able to choose between deleting the last hour, today, today and yesterday or always.
Once you delete the history you will see that your trail has been completely removed from the browser, unless you have chosen to delete a certain part and the search during that time does not appear. In any case, it should be noted that passwords saved in the iCloud keychain will not be deleted , but some preferences such as those of cookies will be deleted .
Browse privately on iOS and iPadOS
A very interesting function that most browsers have is to be able to search and dive into web pages without leaving a trace on your device. That is, your steps are not recorded in the history and you can navigate quietly without having to delete the history later. This function is also extremely useful if you don’t want websites to store your browsing data and offer you personalized advertising based on your searches.

To access private browsing in iPhone or iPad Safari you must click on the window display button (lower right of the iPhone and upper right of the iPad) and click on «Nav. private ». This will open a new tab that, as you will see, is in black and means that you are browsing privately.
It should be noted that private browsing does not mean that web pages are not aware that you have visited them or that Google does not store your searches. As we said before, what it does is turn your session into something private regarding your device and the processing of web data for tracking purposes, although this function already found something similar in Settings> Safari.
Copyright © 2024 ITIGIC | Privacy Policy | Contact Us | Advertise

Hi there! We use cookies to give you the best site experience.
Privacy Preferences Center
We use cookies along with other tools to help the Clario website load faster. Our cookie files never contain personal data. This means information like your location, email, or IP address always remain unknown to us.
Help us improve your website experience by accepting the use of cookies. You can change your privacy settings whenever you like.
Manage consent
All cookies
These cookies are strictly necessary for enabling basic website functionality (including page navigation, form submission, language detection, post commenting), downloading and purchasing software. The website might malfunction without these cookies.
We stand with Ukraine to help keep people safe. Join us
Table of contents
What is incognito mode?
How can you check browsing incognito history, does incognito mode save your private browsing history, how to delete your incognito history, how to hide your incognito browsing history, how to check your incognito history on any device (and how to delete it).
You take the extra precaution of using an incognito window to search the internet for topics that are personal to you. But have you considered just how important it is to clear that activity? After all, why go through the trouble of using incognito mode to browse the internet if the search history doesn't remain private? Get ready to learn how to check and delete your incognito history so that no one gets their nose in your business.
Get it for iOS , Android
Check incognito history on Windows
See private browsing history on a mac, view incognito history with chrome extensions.
- Check incognito history on an Android
How to see incognito history on an iPhone
Delete incognito history on windows, delete private browsing history on a mac.
- Delete incognito history on an Android
Delete private browsing history on an iPhone
Incognito mode is a feature used by browsers, like Chrome, for browsing the internet privately . It has several names, depending on the browser, but they all mean the same thing.
Below are the various terms used by different browsers:
- Chrome: Incognito Mode
- Safari: Private Browsing
- Firefox: Private Browsing
- Opera: Private Mode
- Microsoft Edge: InPrivate Mode
The appeal of using incognito mode is that your device forgets your browsing history, so to speak. That’s why it doesn’t autofill while you type your search terms.
It also doesn’t save data like annoying cookies and website information and leaves no trace of your online activity. This prevents anyone you share your device with from viewing your browsing history.
But just how private is the incognito mode? I hate to be the bearer of bad news, but not as much as you think. Incognito mode doesn’t hide your IP address or encrypt your outcoming traffic.
Security made easy.
Get leading antivirus, fast VPN, real-time safe browsing and instant ad blocking - all in one app.
That means that your data can be found if someone tries hard enough. Your internet service provider (ISP) can certainly find it, and so can others. This is why you should check your incognito history regularly and clear it to be safe.
You can check your incognito history on any device you use to browse the internet in incognito mode, like Android and other mobile phones. You can also check it on Chrome.
Incognito mode doesn’t save or keep a record of your browsing history. However, it does keep a record of your browsing session in the domain name system, a.k.a. DNS.
The DNS is responsible for showing you the website you’re trying to access when you type the domain name in your browser.
It achieves this by communicating with the relevant DNS server and loading the requested website after it receives its IP address.
To speed up the process when you visit the same website in the future, your device will keep a record of the web address in the local storage, which includes domain names and their IP addresses. This is known as DNS cache.
Anyone using your device can access your DNS cache, which compromises the privacy of your incognito history.
In order to view the DNS cache on your Windows computer or Mac, make sure you have administrator privileges.
Follow the guide below to check your incognito history on a Windows PC :
- Type cmd in the search bar and select Run as administrator
- Enter the command “ipconfig /displaydns” in the window and hit the Enter key
- Your device will now show you a list of domains you recently visited on all your browsers, including incognito mode. This is your DNS cache history.
The process of checking your DNS cache is slightly more complex on Mac. But if you follow the steps below carefully, you’ll be fine.
- Go to Finder > Applications > Utilities > Console
- Choose your device and type the command “any:mdnsresponder” in the search bar . It’s in the top-right corner of the window
- Click on Start at the top of the screen

4. Now go back to Utilities and click on Terminal
5. Type the command “sudo killall -INFO mDNSResponder” and hit Enter
6. Enter your password when prompted to do so, and press Enter again

7. Go back to Utilities and click on Console
8. Your incognito history should now be displayed on the screen.
This method is best for viewing your incognito history while using incognito mode.
Say, for instance, you’re working on a work or school project. You can start using a Chrome extension before you begin your searches in incognito mode.
The Chrome extension will save your history until you close the browser after you’ve finished working on the task.
Here’s how to enable Chrome extensions for incognito mode:
- Go to your browser and type “chrome://extensions”
- Find the extension you want to use in incognito mode from the list (note: you can’t enable all extensions at once) and click on Details
- Scroll down and toggle on Allow in Incognito

Check incognito history on an Android
As we’ve previously mentioned, you can’t view DNS cache on a mobile device. But that doesn’t mean you can’t access your incognito history at all.
You can view your incognito history indirectly on Android via a third-party app. It’s common for parental control apps to allow this as they track incognito browsing.
That’s all in an effort to help you keep your child safe by monitoring their browsing activity or habits.
Some data the apps collect, which you can view, include the following:
- The websites your child has searched or visited
- The dates and times those websites were searched or visited
- The number of times those websites were searched or visited
Below is a list of parental control apps that allow you to view your child’s incognito history:
- KidsGuard Pro
- FoneWatcher
These are the more popular apps on the market. Keep in mind that while you can review your child’s incognito history on these apps, you can’t delete it.
As with Android devices, you can’t view incognito history on an iPhone—at least not directly. Perhaps this is to help keep iOS devices secure .
Once again, if you monitor your child’s phone activity through a parental control app, you can use that app to view their incognito browsing history.
Now that we’ve covered how to view incognito history on various devices, let’s move onto the most important part of this process: how to delete it.
The process of deleting your incognito history is called “flushing”, and it is a crucial step in keeping that information private on any device you use.
Below are the steps to flush your incognito history on the relevant device.
The process of deleting your incognito history is similar to that of viewing it.
- Type the command “cmd” in the search bar
- Click on Run as administrator
- Now type “ipconfig/flushdns” in the window and hit Enter
Start by clicking on Finder , then follow the steps below:
- Go to Applications , then click on Utilities , followed by Terminal
- Type the command “sudo killall -HUP mDNSResponder” in the window and press the Enter key
- Now type your password and hit Enter again.

Delete incognito history on an Android
Grab your Android phone and follow the steps below to remove your incognito browser history.
- Head to Google Chrome and type the command “chrome://net-internals/#dns” in the website address bar . This will open up the DNS tab.
- Click on Clear host cache . Doing this will wipe the DNS cache.
Clearing your incognito or private browser history on iPhone is the same as for Android devices (as outlined above). Follow the same steps to delete your incognito history.
But you do have two more options:
- Restart your iPhone
- Turn on airplane mode and leave it on for a few seconds

Both these methods should automatically flush your DNS cache.
We live in a world filled with inquisitive people. There’s no telling what they might do or search for on your mobile phone, including checking your incognito history. Of course, the reasons vary, depending on who is viewing it.
As we mentioned earlier in this article, ISPs can track your private browsing history—but they aren’t the only ones.
Below is a list of parties that would be interested in checking out your incognito browsing history, including the reasons why they would monitor your browser’s DNS requests.
- Governments
Government entities would view your incognito history for censorship purposes and to ensure that you’re complying with the law as a citizen of a country. This is more common in countries where there are ongoing wars and sometimes in dictator-led countries, too.
It’s no secret that companies collect your data when you browse online. Internet service providers make money by selling your browsing data to those companies, like advertisers. That’s why they’d view your incognito mode activity. However, ISPs would also access your incognito history to throttle your internet bandwidth, however unethical that might be.
Websites track your incognito activity only if you visit them again (more than once) using the same IP address.
- Employers and educational institutions
If you’ve ever had a corporate job or used computers at a school, you’ll know that certain websites are banned. These are typically social media sites and websites with inappropriate content, like pornography. Therefore, employers and schools would monitor your activity in incognito mode to check if you’re visiting any websites you have no business using.
If you want to hide your incognito mode history, be pedantic about deleting it. In fact, delete it at least after every browsing session, using the guide we provided above.
Over and above that, use a virtual private network (VPN). But don’t just use any old VPN—a trusted VPN is the only way.
Clario’s VPN is a safe and reliable VPN service that allows you to browse the internet anonymously, even in incognito mode.
It achieves this by masking your IP address, making it virtually impossible to identify your IP while you browse the internet. This, in turn, protects your data and privacy , which should be your utmost priority if you use the internet.
Start protecting your data and incognito history with Clario’s VPN today:
- Download the Clario app on your mobile phone or computer
- Select Browsing , then enable Browsing protection
- Now select Allow
- Clario will choose a location that has the fastest server. If you want to choose a different one, simply tap the country and choose from the list

That’s it! Now you can have the peace of mind knowing that your privacy is protected anytime you browse the internet—even in incognito mode.
By Kateryna Hanko
A tech-inspired writer and content manager with a wide experience in IT and genuine admiration for Apple products.
Keep reading

Digital Wellness

Data Protection
Browse the internet anonymously with Clario’s VPN.
- Helldivers 2
- Dragon’s Dogma 2
- Wuthering Waves
- Genshin Impact
- Counter Strike 2
- Honkai Star Rail
- Lego Fortnite
- Stardew Valley
- NYT Strands
- NYT Connections
- Apple Watch
- Crunchyroll
- Prime Video
- Jujutsu Kaisen
- Demon Slayer
- Chainsaw Man
- Solo Leveling
- Beebom Gadgets
How to Turn off Incognito Mode (2024 Guide)
Method 1: Disable Incognito Mode on Google Chrome
- Firstly, summon Windows Search via the dedicated button on your keyboard or manually click on the Windows icon.
- Next, type in “CMD” and right-click on the top result that shows up.
- Select Run as administrator and then Yes in the User Control Window.

- Then, just type in the following command in the CMD window: REG ADD HKLM\SOFTWARE\Policies\Google\Chrome /v IncognitoModeAvailability /t REG_DWORD /d 1 .
- Hit the Enter key, and that’s it. You see a message that reads “The operation completed successfully” signifying that the deed is done!

It will take some time to reflect on your Google Chrome. Once it does, the Incognito Mode will be greyed out and un-clickable for you. If it still doesn’t work, a quick restart of the browser will.
- Head over to Finder > Go > Utilities and open the Terminal app from here.

- When in Terminal, type in the following command: defaults write com.google.chrome IncognitoModeAvailability -integer 1 and hit the Enter key.

Method 2: Disable InPrivate Browsing on Microsoft Edge (Windows)
- Summon the Start menu to search for “Registry Editor” and select it.

- In the next User Account Control panel, hit Yes , and from the left panel, double right-click on HKEY_LOCAL_MACHINE .
- Then, head over to SOFTWARE > Policies > Microsoft .

- Now, right-click on Microsoft and select New > Key and name this key “MicrosoftEdge”.

- Next, right-click on the new MicrosoftEdge key and select New > Key again. This time, name this key “Main”.
- Then, right-click on Main > Key > DWORD (32-bit) > name the sub-key “AllowInPrivate”.

- Finally, just double-click on AllowInPrivate and set the value to “1”.

All you have to do now is simply restart your PC and that’s it. Your Microsoft Edge’s InPrivate Browsing Mode will now be locked and greyed out much like the Chrome trick. To undo this, simply set the value back to “0” or delete the created keys and sub-keys and restart your PC to unlock it.
Method 3: Disable Private Browsing Mode on Firefox (Windows and Mac)
- On Firefox, click on the hamburger icon at the top right and select Add-ons and themes . Or, you can use the Ctrl + Shift + A keyboard shortcut to summon this menu.

- Next, type in “private begone” in the search panel and hit the Enter key.
- You will be taken to Firefox’s add-ons page. Here, select Private Begone from the search results and click on Add to Firefox > Add .

- When adding it to Firefox, check the Allow this extension to run in Private Windows box. Else, it won’t work as intended. You can also allow it later by heading over to Add-ons and theme > Private Begone .

Method 4: Disable Private Browsing on Safari
- Summon Spotlight Search with the Command + Spacebar shortcut and search for Settings . Hit the Enter key.
- When in Settings, from the left panel, select Screen Time > Content & Privacy .

- Next, select Store, Web, Siri & Game Center Content or Content Restrictions .

- At the top, click on the Access to Web Content dropdown and select Limit Adult Websites .

That will completely disable your Safari’s incognito mode, and even the shift + command + N shortcut won’t work.
- Navigate to the Settings app > Screen Time > Content & Privacy Restrictions .
- Turn on the Content & Privacy Restrictions toggle if it’s not turned on already and select Store, Web, Siri & Game Center Content from the list of options.

- Next, tap on Web Content and select Limit Adult Websites .

Sagnik Das Gupta
Sagnik is a tech aficionado who can never say "no" to dipping his toes into unknown waters of tech or reviewing the latest gadgets. He is also a hardcore gamer, having played everything from Snake Xenzia to Dead Space Remake.
Add new comment


What Is the Difference Between Incognito Mode and a VPN?
A ll of the major browsers (Chrome, Safari, Firefox, etc.) have some version of an incognito mode, whether it’s called Private Window, InPrivate, or what have you. However, incognito mode isn’t as effective at granting you internet privacy as a VPN. In this article, we’ll compare and contrast incognito mode and VPNs so you can make sure you’re as private as possible when surfing the web.
While incognito mode is ideal for hiding from other users of your device, VPNs hide your web traffic from everyone in the world.
Differences
- What it hides: In other words, incognito mode hides your browsing history on the actual device you’re using, so if your mom is going to use your laptop after you, she’ll have no idea that you’ve spent the last five hours reading “Glee” fanfic. However, your internet service provider (ISP) will still be able to see this information and your device’s IP address. VPNs, on the other hand, hide your web traffic and IP addresses from everyone, including your ISP, so they are much more private than incognito mode.
- Pricing: Incognito mode is a free feature of all browsers, while VPNs typically cost money (although there are free VPNs as well as VPNs with free trials available).
- Limitations: Aside from general privacy reasons, people use VPNs to bypass government, school, or work internet censorship ; to stream on other countries’ servers; and to torrent files without getting in trouble. As incognito mode only hides your history on the device itself, you can’t change your region on Netflix , go on restricted websites, or torrent off the record. Read more reasons why people use VPNs in our research on VPN usage .
Similarities
- Hidden browsing on the device: Both VPNs and incognito mode will not keep your search history on the device itself, granted that you close your web browser when you’re done.
Pro Tip: Youtube tailors search results based on your watch history. Learn how to clear your Youtube history .
What Is Incognito Mode / Private Browsing?
Let’s take a step back and talk about what incognito mode (otherwise known as private browsing) is and does.
Incognito mode is a method of browsing online that hides browsing history on the physical device itself. When you surf the web in incognito mode, your history and cache will be deleted whenever you end your session.
How It Works
Incognito mode doesn’t actually encrypt any web activity; it simply deletes it when you close the browser.
What It Protects
Incognito mode hides your browsing history and cache from the next user of your device, but not from ISPs or any hackers looking to steal your PII (personally identifiable information).
- Public device protection: Incognito mode is useful when you’re using a public device, or when you’re using someone else’s device and want to hide your web activity from them.
- Free: As all major browsers have some form of incognito mode, you won’t have to pay extra to use it.
- Easy: You can turn on incognito mode in a couple of steps, and it doesn’t require you to install additional apps or browser extensions.
- Doesn’t hide from ISP: If you want truly private browsing, incognito mode doesn’t cut it beyond your physical device.
- Can’t bypass restrictions: Many people use VPNs to get around school, work, or country restrictions on the internet. Since incognito mode doesn’t change your IP address , firewalls will remain effective.
- Can’t stream in other countries: Want a VPN for streaming libraries of foreign countries? With incognito mode, you’ll be stuck with the IP address of the country you’re in, which for us is a U.S. IP address . That means you can kiss those international libraries goodbye.
What Is a VPN?
If you’re thinking, “What is a VPN in the first place?”, we’ve got you covered.
A VPN is a virtual private network that creates an encrypted tunnel between your device and its network.
VPNs route your device IP address and web traffic through their encrypted tunnels.
Since your web activity and IP address will be encrypted, using a VPN hides your browsing history .
- Full coverage: Aside from other users on your device, your ISP and any hackers won’t be able to see your browsing history.
- Foreign streaming: By using a VPN for Japan , for example, you can access hundreds of Japanese movies and TV shows even from the U.S. That’s because VPNs hide your IP address , making you seem like you’re in a different location.
- Bypass restrictions: The legality of VPNs depends on what country you’re located in; for example, China bans VPNs completely. Or maybe you work in a place that restricts you from watching Netflix on the job (hey, we’ve all been there). Whatever the block, VPNs can help you get around them by bypassing firewalls. Hello, binge-a-thon!
- Often paid: Free VPNs exist, but they usually restrict the number of devices you can connect to, the length of time you can use them for, the amount of data you can use while connected, and more. For the most part, you’ll need to pay for VPNs. Learn more about how much VPNs cost .
- Requires app or browser extension: Unless you connect to a VPN manually (which is even more complicated), installing a VPN will require an app or browser extension, as they aren’t built into browsers like incognito mode is.
- Slowdowns: Extra encryption means decreased speeds, while incognito mode shouldn’t slow down your browsing at all.
The more you know: By changing your IP address, you can trick streaming services into thinking you’re in other countries, unlocking thousands of hours of new content. However, some streaming services block certain VPN IP addresses, so make sure to get the right VPN for Netflix , VPN for Hulu , VPN for Prime Video , etc.
How To Use VPNs
The easiest way to set up a VPN is through an app. While each VPN has its own setup process, it will generally adhere to the following steps:
- Download the app either from the official app store or from the company’s website.
- Create an account on the app or the website.
- Sign in to the VPN app.
- Choose a server.
- Click Connect.
How To Use Incognito Mode
If incognito mode suits your needs more than a VPN, here’s how to get it started.
Note: Although different browsers have different names for incognito mode, they all work the same way — by clearing your history and cache as soon as you end your session.
Chrome (Mac/Windows)
- New Incognito Window
Chrome (Android)
- New Incognito Tab
Chrome (iOS)
- New Incognito Tab 1
- New Private Window 2
- New Private Window 3
- Settings And More
- New InPrivate Window 4
- New Private Window 5
How To Use VPNs and Incognito Mode Together
To use a VPN and incognito mode, simply follow the above steps for each; there’s nothing special you have to do when you set up a VPN and incognito mode at the same time.
How To Stay Private Online
Aside from using VPNs and incognito mode, here are a few other ways you can stay as private as possible online.
Delete Incognito History on Windows?
If you want your history deleted before your Windows session ends, follow this sequence of clicks:
- Microsoft Edge / Internet Explorer
- Privacy, Search and Services
- Clear Browsing Data For Internet Explorer
- Choose What To Clear
- Choose the types of data you want to delete.
Delete Incognito History on Android
The same goes for Androids, macOS and iOS devices.
- Clear Browsing Data
- Choose a time range.
- Check Browsing History
- Clear Data 7
Delete Incognito History on Mac
- Clear History
- Choose a time length 8
Delete Incognito History on iOS
- Clear History And Website Data
Use an Encrypted Browser
Browsers like Tor and Vivaldi will encrypt your web activity automatically; however, they won’t encrypt other web apps aside from the browser itself, so a VPN is a more comprehensive option.
Use a Proxy Server
Comparing VPNs to proxy servers, VPNs come out on top again, as proxies only encrypt web activity on a single application versus the entire operating system. However, in the never-ending battle of proxy vs. VPN , proxy servers have the advantage of being free (although they might sell your data in exchange for this freeware).
Read Privacy Policies
Given the GDPR, which affects any websites that European Union residents use, most company websites need to include clear and easily accessible privacy policies that state the following:
- What data they collect
- How they collect this data
- How they share or sell this data
- How they protect this data to prevent data breaches
Although it may be tedious, read the privacy policy before you download an app and make an account so you can maintain control of your PII.
Have you ever heard the expression “give them an inch and they’ll take a mile”? This definitely applies to app permissions. Many apps will try to get you to share as much data as possible, including cookies, which track you online. Opt out whenever you can, unless it’s necessary to use the app or website.
Use Fake Information on Forms
Government or medical forms aside, don’t be afraid to use throwaway names or email addresses on forms. Those marketing emails have to go somewhere, and it might as well not be your inbox.
Block Trackers
These are some of the many browser extensions that block ads and trackers:
- HTTPS Everywhere
- uBlock Origin
- Privacy Badger
Learn more about how to remove adware from your devices for a smoother browsing experience.
Opt Out of Data Sharing
Once websites and apps collect your data, they share it with and sell it to each other to create (you guessed it) even more targeted advertising. Unfortunately, there’s no way to stop this practice completely, barring federal legislation. However, the website Simple Opt Out can greatly reduce the sharing that goes on, opting you out of sharing from 50 companies, including Amazon and 10 Mastercard 9 .
Limit iOS Mobile Device Identifiers
Aside from information like your email and name, apps can collect your device identifiers like your model, make, operating system, and browser type. If you have an iOS device, you can block device identifiers by clicking:
- Advertising
- Limit Ad Tracking
Limit Android Mobile Device Identifiers
Similarly, on an Android, head over to:
- Google Settings
- Toggle on Opt Out Of Our Internet-Based Ads.
Turn Location Off on iOS
Only apps like Uber need to know your location. Otherwise, turn off location on your iOS device by clicking:
- Location Services
- Toggle on Don’t Allow.
Turn Location Off on Android
Pull out your Android phone and hit:
- Turn off User Location.
Incognito mode is great for privacy from the other users of your devices, while VPNs provide more comprehensive protection. But which VPN is right for you? Read our guide to the best VPN services to learn more.

iPad User Guide
- iPad models compatible with iPadOS 17
- iPad mini (5th generation)
- iPad mini (6th generation)
- iPad (6th generation)
- iPad (7th generation)
- iPad (8th generation)
- iPad (9th generation)
- iPad (10th generation)
- iPad Air (3rd generation)
- iPad Air (4th generation)
- iPad Air (5th generation)
- iPad Air 11-inch (M2)
- iPad Air 13-inch (M2)
- iPad Pro 10.5-inch
- iPad Pro 11-inch (1st generation)
- iPad Pro 11-inch (2nd generation)
- iPad Pro 11-inch (3rd generation)
- iPad Pro 11-inch (4th generation)
- iPad Pro 11-inch (M4)
- iPad Pro 12.9-inch (2nd generation)
- iPad Pro 12.9-inch (3rd generation)
- iPad Pro 12.9-inch (4th generation)
- iPad Pro 12.9-inch (5th generation)
- iPad Pro 12.9-inch (6th generation)
- iPad Pro 13-inch (M4)
- Setup basics
- Make your iPad your own
- Keep in touch with friends and family
- Customize your workspace
- Do more with Apple Pencil
- Customize iPad for your child
- What’s new in iPadOS 17
- Turn on and set up iPad
- Wake, unlock, and lock
- Set up cellular service
- Connect to the internet
- Sign in with Apple ID
- Subscribe to iCloud+
- Find settings
- Set up mail, contacts, and calendar accounts
- Learn the meaning of the status icons
- Charge the battery
- Show the battery percentage
- Check battery usage
- Use Low Power Mode to save battery life
- Read and bookmark the user guide
- Adjust the volume
- Learn basic gestures
- Learn advanced gestures
- Find your apps in App Library
- Switch between apps
- Zoom an app to fill the screen
- Quit and reopen an app
- Drag and drop
- Open two items in Split View
- Switch an app window to Slide Over
- View an app’s windows and workspaces
- Multitask with Picture in Picture
- Move, resize, and organize windows
- Access features from the Lock Screen
- Perform quick actions
- Search on iPad
- Get information about your iPad
- View or change cellular data settings
- Travel with iPad
- Change or turn off sounds
- Create a custom Lock Screen
- Change the wallpaper
- Adjust the screen brightness and color balance
- Customize the text size and zoom setting
- Change the name of your iPad
- Change the date and time
- Change the language and region
- Organize your apps in folders
- Add, edit, and remove widgets
- Move apps and widgets on the Home Screen
- Remove or delete apps
- Use and customize Control Center
- Change or lock the screen orientation
- View and respond to notifications
- Change notification settings
- Set up a focus
- Allow or silence notifications for a Focus
- Turn a Focus on or off
- Customize sharing options
- Type with the onscreen keyboard
- Dictate text
- Move the onscreen keyboard
- Select and edit text
- Use predictive text
- Use text replacements
- Add or change keyboards
- Add emoji and stickers
- Take a screenshot
- Take a screen recording
- Write and draw in documents
- Add text, shapes, signatures, and more
- Fill out forms and sign documents
- Use Live Text to interact with content in a photo or video
- Use Visual Look Up to identify objects in your photos and videos
- Lift a subject from the photo background
- Subscribe to Apple Arcade
- Play with friends in Game Center
- Connect a game controller
- Use App Clips
- Update apps
- View or cancel subscriptions
- Manage purchases, settings, and restrictions
- Install and manage fonts
- Buy books and audiobooks
- Annotate books
- Access books on other Apple devices
- Listen to audiobooks
- Set reading goals
- Organize books
- Create and edit events in Calendar
- Send invitations
- Reply to invitations
- Change how you view events
- Search for events
- Change calendar and event settings
- Schedule or display events in a different time zone
- Keep track of events
- Use multiple calendars
- Use the Holidays calendar
- Share iCloud calendars
- Take photos
- Take Live Photos
- Take a selfie
- Take a Portrait mode selfie
- Take videos
- Change advanced camera settings
- Adjust HDR camera settings
- View, share, and print photos
- Use Live Text
- Scan a QR code
- Scan documents
- See the world clock
- Set an alarm
- Use the stopwatch
- Use multiple timers
- Add and use contact information
- Edit contacts
- Add your contact info
- Send Contacts on iPad
- Use other contact accounts
- Hide duplicate contacts
- Export contacts
- Get started with FaceTime
- Make FaceTime calls
- Receive FaceTime calls
- Create a FaceTime link
- Take a Live Photo
- Turn on Live Captions
- Use other apps during a call
- Make a Group FaceTime call
- View participants in a grid
- Use SharePlay to watch, listen, and play together
- Share your screen in a FaceTime call
- Collaborate on a document in a FaceTime call
- Use video conferencing features
- Hand off a FaceTime call to another Apple device
- Change the FaceTime video settings
- Change the FaceTime audio settings
- Change your appearance
- Leave a call or switch to Messages
- Block unwanted callers
- Report a call as spam
- Connect external devices or servers
- Modify files, folders, and downloads
- Search for files and folders
- Organize files and folders
- Set up iCloud Drive
- Share files and folders in iCloud Drive
- Use an external storage device, a file server, or a cloud storage service
- Share your location
- Add or remove a friend
- Locate a friend
- Get notified when friends change their location
- Notify a friend when your location changes
- Turn off Find My
- Add your iPad
- Get notified if you leave a device behind
- Locate a device
- Mark a device as lost
- Erase a device
- Remove a device
- Add an AirTag
- Share an AirTag or other item in Find My on iPad
- Add a third-party item
- Get notified if you leave an item behind
- Locate an item
- Mark an item as lost
- Remove an item
- Adjust map settings
- Get started with Freeform
- Create a Freeform board
- Draw or handwrite
- Apply consistent styles
- Position items on a board
- Search Freeform boards
- Share and collaborate
- Delete and recover boards
- Get started with Health
- Fill out your Health Details
- Intro to Health data
- View your health data
- Share your health data
- View health data shared by others
- Download health records
- View health records
- Log menstrual cycle information
- View menstrual cycle predictions and history
- Track your medications
- Learn more about your medications
- Log your state of mind
- Take a mental health assessment
- Customize your Sleep Focus
- Turn Sleep Focus on or off
- View your sleep history
- Check your headphone audio levels
- Use audiogram data
- Back up your Health data
- Intro to Home
- Upgrade to the new Home architecture
- Set up accessories
- Control accessories
- Control your home using Siri
- Use Grid Forecast to plan your energy usage
- Set up HomePod
- Control your home remotely
- Create and use scenes
- Use automations
- Set up security cameras
- Use Face Recognition
- Configure a router
- Invite others to control accessories
- Add more homes
- Get music, movies, and TV shows
- Get ringtones
- Manage purchases and settings
- Magnify nearby objects
- Change settings
- Detect people around you
- Detect doors around you
- Receive image descriptions of your surroundings
- Read aloud text and labels around you
- Set up shortcuts for Detection Mode
- Add and remove email accounts
- Set up a custom email domain
- Check your email
- Unsend email with Undo send
- Reply to and forward emails
- Save an email draft
- Add email attachments
- Download email attachments
- Annotate email attachments
- Set email notifications
- Search for email
- Organize your email in mailboxes
- Flag or block emails
- Filter emails
- Use Hide My Email
- Use Mail Privacy Protection
- Change email settings
- Delete and recover emails
- Add a Mail widget to your Home Screen
- Print emails
- Use keyboard shortcuts
- Get travel directions
- Select other route options
- Find stops along your route
- View a route overview or a list of turns
- Change settings for spoken directions
- Get driving directions
- Report traffic incidents
- Get cycling directions
- Get walking directions
- Get transit directions
- Delete recent directions
- Get traffic and weather info
- Predict travel time and ETA
- Download offline maps
- Search for places
- Find nearby attractions, restaurants, and services
- Get information about places
- Mark places
- Share places
- Rate places
- Save favorite places
- Explore new places with Guides
- Organize places in My Guides
- Clear location history
- Look around places
- Take Flyover tours
- Find your Maps settings
- Measure dimensions
- View and save measurements
- Measure a person’s height
- Set up Messages
- About iMessage
- Send and reply to messages
- Unsend and edit messages
- Keep track of messages
- Forward and share messages
- Group conversations
- Watch, listen, or play together using SharePlay
- Collaborate on projects
- Use iMessage apps
- Take and edit photos or videos
- Share photos, links, and more
- Send stickers
- Request, send, and receive payments
- Send and receive audio messages
- Animate messages
- Send and save GIFs
- Turn read receipts on or off
- Change notifications
- Block, filter, and report messages
- Delete messages and attachments
- Recover deleted messages
- View albums, playlists, and more
- Show song credits and lyrics
- Queue up your music
- Listen to broadcast radio
- Subscribe to Apple Music
- Listen to lossless music
- Listen to Dolby Atmos music
- Apple Music Sing
- Find new music
- Add music and listen offline
- Get personalized recommendations
- Listen to radio
- Search for music
- Create playlists
- See what your friends are listening to
- Use Siri to play music
- Change the way music sounds
- Get started with News
- Use News widgets
- See news stories chosen just for you
- Read stories
- Follow your favorite teams with My Sports
- Subscribe to Apple News+
- Browse and read Apple News+ stories and issues
- Use Offline Mode to read downloaded stories
- Manually download Apple News+ issues
- Solve puzzles in Apple News
- Solve crossword and crossword mini puzzles on iPad
- Solve Quartiles puzzles
- Search for news stories
- Save stories in News for later
- Subscribe to individual news channels
- Get started with Notes
- Add or remove accounts
- Create and format notes
- Draw or write
- Add photos, videos, and more
- Scan text and documents
- Work with PDFs
- Create Quick Notes
- Search notes
- Organize in folders
- Organize with tags
- Use Smart Folders
- Export or print notes
- Change Notes settings
- Delete, share, or copy a photo
- View and edit Photo Booth photos in the Photos app
- View photos and videos
- Play videos and slideshows
- Delete or hide photos and videos
- Edit photos and videos
- Trim video length and adjust slow motion
- Edit Live Photos
- Edit Cinematic videos
- Edit portraits
- Use photo albums
- Edit, share, and organize albums
- Filter and sort photos and videos in albums
- Make stickers from your photos
- Duplicate and copy photos and videos
- Merge duplicate photos
- Search for photos
- Identify people and pets
- Browse photos by location
- Share photos and videos
- Share long videos
- View photos and videos shared with you
- Watch memories
- Personalize your memories
- Manage memories and featured photos
- Use iCloud Photos
- Create shared albums
- Add and remove people in a shared album
- Add and delete photos and videos in a shared album
- Set up or join an iCloud Shared Photo Library
- Add content to an iCloud Shared Photo Library
- Use iCloud Shared Photo Library
- Import and export photos and videos
- Print photos
- Find podcasts
- Listen to podcasts
- Follow your favorite podcasts
- Use the Podcasts widget
- Organize your podcast library
- Download, save, and share podcasts
- Subscribe to podcasts
- Listen to subscriber-only content
- Change download settings
- Make a grocery list
- Add items to a list
- Edit and manage a list
- Search and organize lists
- Work with templates
- Use Smart Lists
- Print reminders
- Use the Reminders widget
- Change Reminders settings
- Browse the web
- Search for websites
- Customize your Safari settings
- Change the layout
- Use Safari profiles
- Open and close tabs
- Organize your tabs with Tab Groups
- View your tabs from another device
- Share Tab Groups
- Use Siri to listen to a webpage
- Bookmark a website
- Bookmark a website as a favorite
- Save pages to a Reading List
- Find links shared with you
- Annotate and save a webpage as a PDF
- Automatically fill in forms
- Get extensions
- Hide ads and distractions
- Clear your cache and cookies
- Browse the web privately
- Use passkeys in Safari
- Check stocks
- Manage multiple watchlists
- Read business news
- Add earnings reports to your calendar
- Use a Stocks widget
- Translate text, voice, and conversations
- Translate text in apps
- Translate with the camera view
- Subscribe to Apple TV+, MLS Season Pass, or an Apple TV channel
- Add your TV provider
- Get shows, movies, and more
- Watch sports
- Watch Major League Soccer with MLS Season Pass
- Watch multiple live sports streams
- Control playback
- Manage your library
- Change the settings
- Make a recording
- Play it back
- Edit or delete a recording
- Keep recordings up to date
- Organize recordings
- Search for or rename a recording
- Share a recording
- Duplicate a recording
- Check the weather
- Check the weather in other locations
- View weather maps
- Manage weather notifications
- Use Weather widgets
- Learn the weather icons
- Find out what Siri can do
- Tell Siri about yourself
- Have Siri announce calls and notifications
- Add Siri Shortcuts
- About Siri Suggestions
- Change Siri settings
- Set up Family Sharing
- Add Family Sharing members
- Remove Family Sharing members
- Share subscriptions
- Share purchases
- Share locations with family and locate lost devices
- Set up Apple Cash Family and Apple Card Family
- Set up parental controls
- Set up a child’s device
- Get started with Screen Time
- Protect your vision health with Screen Distance
- Set up Screen Time
- Set communication and safety limits and block inappropriate content
- Set up Screen Time for a family member
- Set up Apple Pay
- Use Apple Pay in apps and on the web
- Track your orders
- Use Apple Cash
- Use Apple Card
- Use Savings
- Manage payment cards and activity
- Power adapter and charge cable
- Use AirPods
- Use EarPods
- Use headphone audio-level features
- Apple Pencil compatibility
- Pair and charge Apple Pencil (1st generation)
- Pair and charge Apple Pencil (2nd generation)
- Pair and charge Apple Pencil (USB-C)
- Pair and charge Apple Pencil Pro
- Enter text with Scribble
- Draw with Apple Pencil
- Take and mark up a screenshot with Apple Pencil
- Quickly write notes
- Wirelessly stream videos and photos to Apple TV or a smart TV
- Connect to a display with a cable
- HomePod and other wireless speakers
- iPad keyboards
- Switch between keyboards
- Enter characters with diacritical marks
- Use shortcuts
- Choose an alternative keyboard layout
- Change typing assistance options
- Connect Magic Trackpad
- Trackpad gestures
- Change trackpad settings
- Connect a mouse
- Mouse actions and gestures
- Change mouse settings
- External storage devices
- Bluetooth accessories
- Apple Watch with Fitness+
- Polishing cloth
- Share your internet connection
- Make and receive phone calls
- Use iPad as a second display for Mac
- Use iPad as a webcam
- Use a keyboard and mouse or trackpad across your Mac and iPad
- Hand off tasks between devices
- Cut, copy, and paste between iPad and other devices
- Stream video or mirror the screen of your iPad
- Use AirDrop to send items
- Connect iPad and your computer with a cable
- Transfer files between devices
- Transfer files with email, messages, or AirDrop
- Transfer files or sync content with the Finder or iTunes
- Automatically keep files up to date with iCloud
- Get started with accessibility features
- Turn on accessibility features for setup
- Change Siri accessibility settings
- Open features with Accessibility Shortcut
- Enlarge text by hovering
- Change color and brightness
- Make text easier to read
- Reduce onscreen motion
- Customize per-app visual settings
- Hear what’s on the screen or typed
- Hear audio descriptions
- Turn on and practice VoiceOver
- Change your VoiceOver settings
- Use VoiceOver gestures
- Operate iPad when VoiceOver is on
- Control VoiceOver using the rotor
- Use the onscreen keyboard
- Write with your finger
- Keep the screen off
- Use VoiceOver with an Apple external keyboard
- Use a braille display
- Type braille on the screen
- Customize gestures and keyboard shortcuts
- Use VoiceOver with a pointer device
- Use VoiceOver for images and videos
- Use VoiceOver in apps
- Use AssistiveTouch
- Use an eye-tracking device
- Adjust how iPad responds to your touch
- Auto-answer calls
- Change Face ID and attention settings
- Use Voice Control
- Adjust the top or Home button
- Use Apple TV Remote buttons
- Adjust pointer settings
- Adjust keyboard settings
- Control iPad with an external keyboard
- Adjust AirPods settings
- Adjust double tap and squeeze settings for Apple Pencil
- Intro to Switch Control
- Set up and turn on Switch Control
- Select items, perform actions, and more
- Control several devices with one switch
- Use hearing devices
- Use Live Listen
- Use sound recognition
- Set up and use RTT
- Flash the indicator light for notifications
- Adjust audio settings
- Play background sounds
- Display subtitles and captions
- Show transcriptions for Intercom messages
- Get live captions of spoken audio
- Type to speak
- Record a Personal Voice
- Lock iPad to one app with Guided Access
- Use built-in privacy and security protections
- Set a passcode
- Set up Face ID
- Set up Touch ID
- Control access to information on the Lock Screen
- Keep your Apple ID secure
- Use passkeys to sign in to apps and websites
- Sign in with Apple
- Share passwords
- Automatically fill in strong passwords
- Change weak or compromised passwords
- View your passwords and related information
- Share passkeys and passwords securely with AirDrop
- Make your passkeys and passwords available on all your devices
- Automatically fill in verification codes
- Sign in with fewer CAPTCHA challenges
- Two-factor authentication
- Use security keys
- Control app tracking permissions
- Control the location information you share
- Control access to information in apps
- Control how Apple delivers advertising to you
- Control access to hardware features
- Create and manage Hide My Email addresses
- Protect your web browsing with iCloud Private Relay
- Use a private network address
- Use Advanced Data Protection
- Use Lockdown Mode
- Receive warnings about sensitive content
- Use Contact Key Verification
- Turn iPad on or off
- Force restart iPad
- Update iPadOS
- Back up iPad
- Reset iPad settings
- Restore all content from a backup
- Restore purchased and deleted items
- Sell, give away, or trade in your iPad
- Install or remove configuration profiles
- Important safety information
- Important handling information
- Find more resources for software and service
- FCC compliance statement
- ISED Canada compliance statement
- Apple and the environment
- Class 1 Laser information
- Disposal and recycling information
- Unauthorized modification of iPadOS
- ENERGY STAR compliance statement
Browse the web privately in Safari on iPad
Visit sites privately
You can use Private Browsing to open tabs that don’t appear in History on iPad or in the list of tabs on your other devices. Tabs in Private Browsing aren’t shared with your other Apple devices, even if you’re signed in with the same Apple ID .
If you have a passcode set on your iPad, Private Browsing locks when it’s not in use. Private Browsing may not lock immediately.
Follow the directions onscreen to unlock Private Browsing.
Note: Any Safari extensions you have installed that have access to browsing data are automatically turned off in Private Browsing. To turn on an extension in Private Browsing, see Use extensions .
Choose a search engine for Private Browsing
Tap Private Search Engine, then choose a search engine.
View the Privacy Report
Safari helps prevent trackers from following you across websites and from seeing your IP address. You can review the Privacy Report to see a summary of trackers that have been encountered and prevented by Intelligent Tracking Prevention on the current webpage you’re visiting. You can also review and adjust Safari settings to keep your browsing activities private from others who use the same device, and help protect yourself from malicious websites.
Use iCloud Private Relay to browse the web with more privacy
When you subscribe to iCloud+ on iPad , you can use iCloud Private Relay to help prevent websites and network providers from creating a detailed profile about you. When iCloud Private Relay is turned on, the traffic leaving your iPad is encrypted and sent through two separate internet relays. This prevents websites from seeing your IP address and exact location while it prevents network providers from collecting your browsing activity in Safari. See Protect your web browsing with iCloud Private Relay on iPad .
See Protect your web browsing with iCloud Private Relay on iPad to learn how to:
Turn iCloud Private Relay completely on or off for your iPad.
Turn iCloud Private Relay on or off for a specific Wi-Fi or cellular network.
Turn iCloud Private Relay off temporarily.
Set the specificity of your IP address location.
Temporarily allow a website to see your IP address
If a website relies on IP filtering, monitoring, or rate-limiting, it might require your IP address to be visible. You can turn off iCloud Private Relay temporarily for that website only.
Note: iCloud Private Relay isn’t available in all countries or regions. See the iOS and iPadOS Feature Availability website .
Tap Show IP Address (if available).
Your IP address remains visible to that website until you leave the website or close its Safari tab. iCloud Private Relay remains on for other websites.
To turn off or pause iCloud Private Relay for all websites, see Protect your web browsing with iCloud Private Relay on iPad .
Control privacy and security settings for Safari
Prevent Cross-Site Tracking: Safari limits third-party cookies and data by default. Turn this option off to allow cross-site tracking.
Hide IP address: Safari automatically protects your IP address from known trackers. For eligible iCloud+ subscribers, your IP address is protected from trackers and websites as you browse in Safari. If this option is off, your IP address isn’t hidden.
Fraudulent Website Warning: Safari displays a warning if you’re visiting a suspected phishing website. Turn this option off if you don’t want to be warned about fraudulent websites.
Camera: Choose whether Safari websites can use your camera without asking you first. Tap Camera, then choose Ask, Deny, or Allow.
Microphone: Choose whether Safari websites can use your microphone without asking you first. Tap Microphone, then choose Ask, Deny, or Allow.
Location: Choose whether Safari websites can use your location without asking you first. Tap Location, then choose Ask, Deny, or Allow.
IMAGES
VIDEO
COMMENTS
In iOS 17. Open Safari on your iPhone. Tap the Tabs button. Swipe to the Private tab group button, then tap the tab that you want to open. For additional privacy, you can choose to lock Private Browsing when you're not using it. When you lock your device, your private tabs in Safari will also lock. Then, when you unlock your device again, just ...
Accessing Private Browsing History: To view the private browsing history in Safari on a Mac, you can follow these steps: Open Safari on your Mac. In the menu bar at the top of the screen, click on "History." From the drop-down menu, select "Show History." Alternatively, you can use the keyboard shortcut Command + Y.
When you check your browsing history by tapping the Bookmark icon at the bottom of the Safari screen, you will only see a list of all the websites that you visited when browsing normally. The tabs that you may have accessed inside Private Browsing won't show up on this list. This way, you won't be able to see your browsing history when you're using Safari with the Private Browsing Mode ...
To hide the sites and exit Private Browsing Mode, tap the Tabs button , then tap the Tab Groups button to open a different Tab Group from the menu at the bottom of your screen. The private sites reappear the next time you use Private Browsing Mode. To close private tabs, tap the Tabs button , then swipe left each of the tabs you want to close.
Open the Safari app on your iPhone. Tap . Swipe right on the tab bar at the bottom of the screen until Private Browsing opens, then tap Unlock. To exit Private Browsing, tap , then swipe left to open a Tab Group from the menu at the bottom of your screen. The websites you have open in Private Browsing stay open, and Private Browsing locks.
Open Safari on your iPhone. 2. Tap on the address bar at the top of the screen. 3. You will see a list of frequently visited websites. Scroll down to the bottom of the list and tap on "Show All History.". 4. Here, you can see a list of domains visited during both regular and private browsing sessions.
To enable Private Browsing in Safari, follow these steps. Open Safari on your iPhone or iPad, tap the Pages icon (consisting of two squares) to bring up the open tabs view, and then tap the ...
To activate Private Browsing, first launch Safari. If you don't see the toolbar at the top of the screen, tap anywhere once to reveal it. Then tap on the "New Window" button in the upper-right corner. On Safari's window management screen, tap the "Private" button in the upper-right corner. After Private Mode is enabled, tap the plus (+) button ...
Private Browsing in Safari hides browsing history, autofill details, downloads, and locks tabs after inactivity. Safari on Mac groups private and non-private tabs, while on iPhone it shows all tabs regardless of mode. To use Private Browsing in Safari, identify it by a dark address bar, "Private" indicator, or "Private" next to the site URL.
When you use Private Browsing, Safari won't remember your search history, the pages you visit, or your AutoFill information. Private Browsing also blocks som...
Open Safari on your iPhone. Tap and hold the Tabs button. Tap [number] Tabs in the pop-up menu. You may also exit out of incognito mode in Safari on iOS 17 by completing these steps: Open Safari on your iPhone. Tap the Tabs button. Tap [number] Tabs or Start Page to show the Tab Groups list. Tap Private, then tap Done.
Open the Safari app on your Mac. Click File > New Private Window. Browse as you normally would. Note that Private Browsing mode in Safari will have a dark search field as compared with the light ...
Alternatively, tap and hold the Tabs button in the bottom-right corner and tap New Private Tab from the popup menu that appears.. A private browsing window in Safari on your iPhone or iPad says Private Browsing Mode at the top of the start page.The Smart Search Bar also appears with a dark gray background instead of white.
In the Safari app on your Mac, choose Safari > Settings, then click General. Click the "Safari opens with" pop-up menu, then choose "A new private window.". If you don't see this option, choose Apple menu > System Settings, click Desktop & Dock in the sidebar, then turn on "Close windows when quitting an application" on the right.
For Mac users of Safari: Open Finder. Click the "Go" menu. Hold the option key and click "Library" when it appears. Open the Safari folder. Inside the folder, find the "WebpageIcons.db ...
Safari won't remember the pages you visit, your search history, or your AutoFill information. How to turn on Private Browsing. Open Safari on your iPad. Touch and hold the Tabs button. Tap New Private Tab. While Private Browsing is on, the Safari address bar appears black or dark instead of white or gray, and the buttons are black instead of blue.
First, launch Safari. In the menu bar at the top of the screen, click "Safari" and select "Preferences." In the Preferences pop-up window, make sure you're on the General tab. Look for the option called "Safari Opens With:" located beside a drop-down menu. Click on the drop-down menu and select "A New Private Window" from the list of options.
Select the "Private" option from the menu that pops up to switch to the private browsing mode. Select the "+" icon in the bottom-left to open a new private tab. Or tap "Done" in the bottom-left corner if you're opening a private tab for the first time. On the iPad, you'll need to tap the "Sidebar" option on the upper-left corner.
Open the Safari app, tap the tabs button (which looks like two overlapping squares), then tap "Private" to turn on Private Browsing Mode. Now, Safari won't remember the pages you visit, your search history, or your AutoFill information. After you complete this action, your browsing activity will not be saved in Safari.
When you use Private Browsing, you can visit websites without creating a search history in Safari. Private Browsing protects your private information and blocks some websites from tracking your search behavior. Safari won't remember the pages you visit, your search history, or your AutoFill information. View in context. 2 replies.
Open Safari on the iPhone or iPad. Click on the book-shaped icon. You will see that three tabs appear now: bookmarks, reading list and history. Click on the latter. Click on "Delete" now . You now have the possibility of deleting a certain part of the history or deleting it whole , being able to choose between deleting the last hour, today ...
Delete private browsing history on an iPhone. Clearing your incognito or private browser history on iPhone is the same as for Android devices (as outlined above). Follow the same steps to delete your incognito history. But you do have two more options: Restart your iPhone; Turn on airplane mode and leave it on for a few seconds
Since incognito mode doesn't record history and the like, you will not be able to see any record of anything that the kid has searched for on the web. That's where this cool trick comes in. ... Method 4: Disable Private Browsing on Safari. Safari lets you disable private browsing fairly easily using your Mac or iPhone's Screen Time ...
A ll of the major browsers (Chrome, Safari, Firefox, etc.) have some version of an incognito mode, whether it's called Private Window, InPrivate, or what have you. However, incognito mode isn ...
Open the Safari app on your iPad. Tap , then tap Private. Follow the directions onscreen to unlock Private Browsing. To exit Private Browsing, tap , then tap a Tab Group. The websites you have open in Private Browsing stay open, and Private Browsing locks. To prevent Private Browsing from locking, go to Settings > Safari, then turn off Require ...