
- Privacy Policy
- Puerto Rico
- Travel Tips

Hiking the W Trek in Patagonia Self-Guided: The Complete Details

When you think of Patagonia, it’s hard not to imagine the picture of its most famous pristine peaks. Many avid hikers and outdoor enthusiasts dream of one day visiting Chile and Argentina to explore the Patagonia region. One of the most famous hikes in Patagonia is the W Trek.
This is the smaller version of the O-trek, but even though it’s shorter, it still offers the adventure of a lifetime. These hikes are located in the Torres del Paine National Park in Chile.
My dream finally came true in December 2024 when I visited Patagonia for the first time. There were beautiful landscapes everywhere, and I couldn’t stop staring at them.
In this guide, I’ll go over everything you need to know (and there’s a lot) about hiking the W Trek in Patagonia self-guided.

What is the W Trek in Patagonia and Why You Should Hike it
What makes this hike unique is how well the trails are maintained, the excellent refugios, the people, and, of course, the views.
When traveling throughout Patagonia, it’s funny and cool to notice the same people repeatedly. Most people stick to a very similar itinerary.
There are options for individuals who want to camp and have gear, don’t have gear, or want to go all out and sleep in beds.
Where is the W Trek in Patagonia?
The W Trek is a four- to five-day hike in Torres del Paine National Park. Patagonia is located in Chile and Argentina , offering something different.
Most people who plan to visit Torres del Paine National Park stay in Puerto Natales . This town is easily accessible by bus if you’re coming from Calafate, where the famous Minitrekking on Perito Moreno Glacier is done.
We stopped by here shortly on our way south, where we decided to see Penguins in Punta Arenas before returning for the trek!

How to Get to Torres del Paines National Park
Getting to Torres del Paines National Park is relatively easy. We were one group of the many individuals who got to this park to do the W Trek alone, self-guided.
What does this mean? It means there’s a lot of bus options. I liked using Busbud to find bus times while traveling in Chile and Argentina.
This website didn’t have all the buses possible for every town, but it gave me a good idea of the times.
Bus From Puerto Natales to Torres del Paine National Park
Depending on your path, either East to West or West to East, will determine which bus ticket you need to buy.
No matter what, you’ll stop and get off the bus at Laguna Amarga . This is the Entrance to the park and you’ll have to show your entrance ticket. More on that later.
After finding the bus ticket on Busbud, I always visit the bus company’s website. In this case, it’s Bus Sur .
If you’re starting from West to East like us, you’ll first need a bus ticket from Puerto Natales to Puedeto . When we got to the entrance, we showed our tickets, grabbed our bags, and switched buses.
Our bus driver took a break before taking us another 25 minutes up the road to the Pudeto dock. Keep asking the drivers as everyone seemed confused about what was happening.
If you’re going from East to West, the first ticket you’ll need is one to Laguna Amarga . To find these tickets, go to Bus Sur’s website and type in the destination of Torres del Paine.
In the description will be either Laguna Amarga or Pudeto. You’ll need one of each, but you will determine which you need first and last, depending on where you start.
A side note : YOU MUST PRINT OR SCREENSHOT YOUR TICKETS
Wi-fi is scarce or non-existent inside the park.
Bus Schedule
This might be confusing at first but it’ll all become clear soon. I suggest starting a notes page on your phone with your itinerary and all the needed documents in there.
Below is the bus schedule for Torres del Paine National Park in Patagonia.
Puerto Natales to Laguna Amarga & Pudeto
Current Prices (one-way): ~12,000 Chilean Pesos
Laguna Amarga to Puerto Natales
Pudeto to puerto natales.
I get it if you don’t want to take a bus and would rather drive yourself! I suggest renting a car outside of Puerto Natales as the prices will be more expensive there.
I’m unsure about driving inside the park and to which miradors are possible, but there’s a parking lot behind the Welcome Center. This is next to Refugio Torre Norte.

Things to Know When Planning the W Trek in Patagonia
The W Trek in Patagonia is a long hike and Torres del Paine doesn’t make the information easy to find.
Below will be a plethora of extra details you need to complete the self-guided hike of the W Trek!
Overview: My Itinerary (West to East)
- Take the bus from Puerto Natales to the Park Entrance (Laguna Amarga)
- Switch buses to go to Puedeto
- Take the ferry to Paine Grande ($25,000)
- Hike to Grey (11km) and hike back to Paine Grande (11km)
- Hike from Paine Grande to Mirador Britanico (13km)
- From Mirador Britanico, hike to Cuernos (10km)
- Hike from Cuernos to Chileno
- Wake up early hike from Chileno to Mirador Torres del Paine
- After spending time at the mirador, hike down to Torres Central and the Welcome Center
- Purchase a ticket back to the park entrance ($5,000)
- Take the bus back to Puerto Natales

Things to Bring
Patagonia is known for its huge mood swings of weather, and I wouldn’t change that for the world. It’s what makes this area unique. But it’s a good idea to come prepared.
During the peak season, between December and February, there will be warm, cold, and rainy weather. Here are some things I suggest bringing.
- Hiking Boots
- Grayl Water Filter
- Insect Rep ellent
- Patagonia Down Sweater
Do I have to Purchase a Camping Spot in Torres Del Paine?
Unfortunately, you can’t simply show up in Torres del Paine and expect to camp for free if you have your own gear. I’ve heard many stories of other travelers not doing their research and showing up with no purchased camping spot.
A few companies own these camping spots on the W Trek in Patagonia.
- For tents/camping spots/beds at Paine Grande, you must book a spot through Vertice Travel .
- If you’re looking to stay the night at Cuernos, Torres Central/Norte, or Chileno, you must book through Las Torres .
How Far in Advance to Book?
Hiking in Torres del Paine National Park is one of Chile’s most popular activities. This might seem obvious to some but what isn’t so obvious is how early you must book your reservation.
From experience, my girlfriend and I tried booking in early October for late November. There were spots, but many were limited, and not everything was available in three straight days.
We ended up booking our reservations for the park for the middle of December. I’d suggest booking your reservations for Torres del Paine at least two months in advance, if not further.
You don’t need to purchase the ferry ticket in advance as this can only be bought in person with cash.

Entrance Fee
Unlike when doing hikes like Laguna de los Tres in El Chalten , there is an entrance fee for Torres del Paine National Park.
You can purchase the entrance tickets here . They are currently $12,000 for a 3-day or more pass.
You must download the QR code before getting on the bus, as there will be no signal once you get to the park.
How Many Days Does it Take to Hike the W Trek in Patagonia?
The days it takes to hike the W Trek in Patagonia will depend on your fitness level and if you want to take your time.
We did this trek in 3 nights and 4 days. This is the shortest time I’d ever suggest, even if you’re a fantastic hiker.
My suggestion would be to do 4 nights and 5 days. This will give you ample time to relax at the beautiful refugios and take it all in without feeling rushed.

Camping vs. Refugios
The amazing thing about this trek is that you have multiple options for your sleeping arrangements, depending on your budget.
We rented a tent and slept in the Refugio. On night one, we rented a tent with a mat, and it was honestly more comfortable than I thought it’d be!
For night two, we slept in a dorm room at the Refugio. This wasn’t too bad, but the price was almost triple that of renting a tent the previous night.
We were exhausted and wanted a good night’s sleep. We got that.
For the third night, we slept in another tent but it was large and elevated. I loved these! These were at Chileno Refuge next to Mirador Torres.
The main pros & cons for renting a tent or sleeping in the Refugio are money and if you can’t sleep well in a tent.
I’ll go over the prices of everything next.

How Much Does the W Trek Cost?
Hiking the W Trek in Torres del Paine is expensive. Especially when compared to other places in Patagonia like Bariloche and El Chalten .
But there’s ways to make this experience cheaper like bringing our own food and camping gear.
Overview (per person) : Our Costs
- This price includes mats & sleeping pads for both nights we camped.
- This price is mainly from buying dinner on nights 2 & 3. We packed our food for every breakfast and lunch.
- Tickets (Bus + Ferry + Entrance) : 61,000 Chilean Pesos or $62 USD
- Total Cost Per Person : $537 USD
Food Costs :
- Breakfast = $25
- Lunch/Box Lunch = $25
- Dinner = $40
- Full Board = $80
- Breakfast = $28
- Box Lunch = $30
- Lunch = $50
- Dinner = $50
- Full Board (Breakfast/Box Lunch/Dinner) = $100
- Half Board (Breakfast & Dinner) = $70
- Same price as Cuernos because they are the same company.
Campsite/Refugio
- Campsite (with own equipment) = $13
- Simple Bed = $65
- Bed w/ Bedding = $100
- Premium Campsite w/ Everything = $190 single/$220 double
- Single Bed = $144
- Premium Tent = $200 single/$288 double

Which Direction is the Best for the W Trek?
This is one of the most asked questions about the W Trek in Patagonia. For me, it was quite simple.
I wanted to end this amazing adventure at the best view in the park, Mirador Torres.
Going from East to West might make more sense if you want to explore Lago Grey and do activities such as kayaking and ice trekking.
I personally loved going from West to East, and I’ll tell everyone to do this same route every time.
W Trek Patagonia Map

Credit goes to the Torres del Paine Website . There’s a lot of maps out there if you want something better.
How to Make Campsite/Refugio Bookings in Torres del Paine
I mentioned this earlier, but there are two separate websites you must book your accommodation through before arriving.
If you plan on taking the same route we did and going from West to East, you’ll stay at Paine Grande, Cuernos, and finally, Chileno.
Below are the websites to book each night’s stay.
- Paine Gr a nde
W Trek vs O-Trek in Patagonia
You will hear many people humbly bragging about completing the O-trek, and as they should. It’s definitely difficult, even compared to the W Trek!
The O-trek is much longer and less commercialized in the upper sections. You create a strong bond with everyone who completes it with you.
We did the W Trek because we were short on time and didn’t have our own gear. This meant the trip would be more expensive than we could budget.

Is the W Trek Difficult?
Some might not agree, but the W Trek is difficult. You should only attempt it if you’re in decent hiking shape.
If you’re flying into Santiago first before completing this, there’s a hike called Cerro Manquehue . It’s one of the best views in all of Santiago!
W Trek in Patagonia Hiking Details
- Distance: This hike is a 45.5-mile point-to-point.
- Duration: On average, it will take people 4 days to go up and back down. This depends on your fitness level and which route you take.
- Difficulty: I’d rank this hike as hard because of the amount of time it takes and the elevation gain.
- Incline : The elevation for this hike is around 9,917 feet or 3022 meters.
- Hiking Guide: A guide is not needed for this hike and is easily accessible by the public
Best Places to Stay in Puerto Natales
- Yogan House : This is the hostel we stayed at but it felt more like a really nice B&B. The rooms were amazing and it was by far the best breakfast I’ve ever had in South America.
- Vinnhaus : If you’re looking for a stunning, centrally located hotel, this is it. There’s nothing bad I can say about this place. It honestly should cost more.
- Hostal Boutique Factoria Patagonia : Looking for a cabin like experience in Puerto Natales? Then look no further than this spectacular Boutique hotel!

My Experience Hiking the W Trek in Patagonia
Hiking the W Trek was unlike anything I’ve ever experienced. I met new people and made new friends, all while taking in some of the most beautiful scenery in the world. It was priceless.
The first day was honestly one of the longest, if not the longest. We started by waking up at 6 a.m. and getting a ride to the bus station.
We took the earliest bus because we knew the day would be long. It was quite relaxing, actually, and most of the people on the bus slept.
Things started getting confusing when we arrived at the entrance two hours later. We were told to switch buses but different people kept telling us different buses.
Eventually, we found the right bus, and we were headed another 30 minutes to Pudeto.
We arrived at the dock, bought a cafe late, and waited for the ferry to arrive. You’ll pay the ferry in cash (25,000 CLP).
Once we arrived at Paine Grande, we unpacked, ate lunch and headed to see Lago Grey! We should have stayed the night here and then hiked in the morning because it was already late and we’ve been moving for quite some time now.
You can stop in different spots; you don’t have to go the entire way.
When we finally returned to Paine Grande, we cooked our dinner and immediately went to sleep.

The next day was another long one. All of these days were going to be quite long but the first two were the longest.
We woke up, ate breakfast and hit the trail. Our first goal was to reach Mirador Britanico and then end at Cuernos.
The hike up to this mirador is steep and adds on a lot of mileage. I don’t think going all the way to the top is worth it. Instead, you can go halfway where the views are better and go back down. It’s stunning.
There’s a refugio here, and you can leave your bags at the bottom to hike up since you’ll be coming back down.
From here, we headed to Cuernos, where we then enjoyed a nice salmon meal and a couple of beers and relaxed.
Along this trail to Cuernos, you’ll go along a beach with black and white pebbles. It was raining and the feeling was surreal.

This was the shorter day and I was excited for that. We woke up, ate breakfast, and once again got on the trail early.
The trail was relatively flat for the early section until you met back up with the trail to Chileno from Torres Central.
This part became very steep but once we reached the top, you could see the refugio. We arrived early enough to have a couple beers, take a nap, shower, all before dinner.
After dinner, we washed up and went to bed early because the next day was going to be the best of them all.

Day 4: The Final Day
This was it. This is what we’ve been waiting for. We woke up around 6am, ate a quick breakfast, and got on the trail.
We were actually late to the party as a lot of people who stay at Chileno end up going there for sunrise. I think there was more people there for sunrise then when we arrived around 9am.
The trail was easy at first but became steep and sometimes hard to follow. But once you make it, you’ll know.
I couldn’t stop staring at her. Torres was something from a storytale, and I didn’t want to leave.
We spent around an hour here taking photos and eating snacks before we headed down. As we started to descend, large groups were going up.
After resting at Chileno, we headed back towards Torres Central and the Welcome Center. We bought a shuttle ticket back to the entrance and that was it.
Just like that, it was over.

Final Thoughts
I’ll be back. I told myself I needed to complete the O-trek, and I will. This hike wasn’t only about reaching Torres but everything in between, from making new friends to exploring a totally different part of the world. Patagonia is magical, and everyone should be able to explore this area one day.
Previous post

Minitrekking on Perito Moreno Glacier Review: Complete Guide

How Many Days in El Chalten: My Complete Itinerary
Related posts.

Cerro Manquehue Hike: The Best Viewpoint in Santiago, Chile
Leave a reply cancel reply.
Save my name, email, and website in this browser for the next time I comment.

Recent Posts

The Subway Cave Hike in Sedona: Everything You Need to Know

The Schnebly Hill Windows Hike in Sedona: The Complete Guide

Hiking The W Trek In Patagonia: A Self-Guided Itinerary [2024]
01 apr 2024 11 nov 2023 | dan.
You can choose your own adventure when it comes to trekking in Chile, but if you like to plan ahead, here’s our tried-and-tested 5 day/4 night, east-to-west, self-guided itinerary for hiking the W Trek Patagonia .
Last updated on 26 March 2024 by Dan
Torres del Paine National Park is a place so epic and otherworldly, its name is often spoken with a kind of hushed reverence. This vast and dramatic stretch of Chilean Patagonia is home to some of the most mind-blowingly beautiful scenery on Earth, and hiking the W trek is one of the greatest ways to immerse in it.
This is Patagonian hiking at its very best, but how you trek the W trail is entirely up to you .
You can go with a guide, or do the W trek self guided (in the warmer months anyway). You can stay in lodges and enjoy a cooked meal and a warm bed. You can carry your own gear and pitch your tent in one of the designated campsites along the way, or carry no gear and book a tent at each site. You can carry all your food, or add a half or full board meal package to your booking, or do a bit of both.
We opted to camp but rather than carry all the gear, we arranged for a pitched tent to be waiting for us each day. We packed food for most of the trek and booked a full board meal package (dinner, breakfast and packed lunch) at one of our overnight camping stays.
The direction you hike and the time you take to do the trek is also your call. As occasional hikers with temperamental knees, we opted for the typical self guided W trek itinerary of 5 days and 4 nights .
Many argue that hiking west to east, and saving the striking granite peaks of Las Torres for the last day is a fitting finale to this incredible hike. We took the opposite view though, starting with the awe-inspiring torres and hiking the W trek east to west so that we could tackle the toughest legs of the trail in the first couple of days, while we still had plenty of energy.
At the end of the day, no matter how you take on the W hike, you’re still trekking one of the most spectacular trails on the planet. And you’ll still get to enjoy the jaw-dropping vista of Las Torres. Twice even, if you’re keen.

Hiking the W Trek Snapshot Location: Torres del Paine National Park, Chile Nearest town: Puerto Natales, Chile Getting to and from the park: Torres del Paine is easily accessible by bus from Puerto Natales. Park entry: Park entry tickets and overnight stays in the park (campsites and lodges) must be arranged before visiting the park. Start and finish: The W Trek traverses a roughly w-shaped route through Torres del Paine National Park between Refugio Las Torres in the east and Refugio Paine Grande in the west. For this itinerary, we start in the east and hike west. Distance: appx. 74 kilometres (46 miles) one-way Time: This itinerary is 5 days and 4 nights Difficulty: Moderately difficult, with some challenging stretches and steep climbs, plus highly changeable weather. We’re occasional hikers but with some preparation and a reasonable level of fitness, we found the W Trek very do-able (even if all our muscles were screaming for days afterwards!).
What’s in this post?
Preparing for hiking the W Trek Patagonia What time of year is best for hiking the W? Where to stay before and after the trek Entry to Torres del Paine National Park Booking Camping and Accommodation on the W Trail Bus tickets to and from Torres del Paine Packing for the W Trek Our Self-guided itinerary for hiking the W Trail Day 1 – Puerto Natales to Chileno via Las Torres Day 2 – Chileno to Francés Day 3 – Francés to Paine Grande via Francés Valley Day 4 – Paine Grande to Grey Day 5 – Grey to Paine Grande (and return to Puerto Natales)
This post contains affiliate links. If you find these links useful and you choose to purchase through these links we may receive a small commission, at no extra cost to you, which helps us to keep this website running. Your support is much appreciated!
Preparing for hiking the W Trek Patagonia
We aim to fully check and refresh this post for each trekking high season (October to April). Things can change without notice though, so we recommend also visiting the links below for information while you’re planning and before you go:
- For the latest updates on requirements for travel to Chile, visit the official Chile tourism website .
- Torres del Paine National Park is managed by the park agency CONAF. Visit the official national park website for park reports, park entry information and more.
- When you check-in at the park for your trek, you’ll receive an information guide with a map showing the park’s trails, services and accommodations. The current brochure can be found here .
What time of year is best for hiking the W?
Patagonian weather will keep you on your toes no matter when you visit Torres del Paine National Park. Be ready for everything. However, there are two distinct periods to be aware of when planning your trip.
High Season – October to April
These are the warmer months in the southern hemisphere, and December to March is the busiest time of year to trek in the park, with visitation peaking over January and February. During this period, you can choose to do a self-guided hike or go with a guide .
If you’re travelling in high season, and particularly if you’re planning to visit during the peak months, be sure to reserve your place in the lodges or campgrounds as far in advance as possible . Torres del Paine is now one of the most popular places to trek in Chile and overnight places book up very quickly.
We hiked the W trail towards the end of March, and while sections were busy, like the path to Las Torres, there were stretches where we wouldn’t see more than a handful of people in hours.
That said, despite making our campsite reservations months prior to our visit, we initially struggled to find availability and had to change our trekking dates to suit what we were able to book.
Low Season – May to September
Many people say winter is even more magical in Torres del Paine.
The park entry fee drops during the low season and you’ll find far fewer people in the park. But temps will also be lower, daylight hours are shorter, rain is frequent and there can be snow and ice. Many of the mountain trails are closed, as are a number of the mountain lodges and services. Trails that are open can also close suddenly due to weather (though that can happen at any time of the year).
Most importantly, to do the W Trek or hike to the base of Las Torres during the low season, you must have a qualified guide . This period typically runs from 1 May to the end of August, but check the official Torres del Paine website for more information if you’re planning to visit over this time.
The bottom line: No matter what time of year you visit Torres del Paine, given the changeability of the weather there, you should check in with park agency CONAF for latest updates and closures.
Where to stay before and after the trek
The nearest major population centre, and the main jump-off point for a Torres del Paine trek is Puerto Natales , a low-key Patagonian town hugging the shores of the picturesque Última Esperanza Sound.
The drawcard of Torres del Paine’s trails has seen Puerto Natales develop a buzzing trekker scene.
We suggest giving yourself a couple of days in Puerto Natales before your trek to get organised, shop, hire any gear you need, and sort out transport to and from Torres del Paine if you haven’t already (see our section on sorting out bus tickets further on).
Just about everyone staying in Puerto Natales is out and about doing the same thing, so having extra time in town means you can stress less if you don’t find what you’re looking for in the first place you visit.
Spending a couple of days here after your trek is also worthwhile – you can rest your weary bones and enjoy this charming little town.

Accommodation in Puerto Natales
Puerto Natales isn’t a big place, but you’ll find everything from budget hostels through to five-star luxury in and around the town.
We stayed at the charming, centrally-located Hotel Aquaterra both before and after our trek. This is a great mid-range option and we really enjoyed our time here. They also stored our luggage for us while we were on the trail.
For more accommodation options like this in Puerto Natales, take a look at Booking.com . Or, if you’re after something more in the budget range, you’ll find various hostel options here .
One place we’ve definitely got our eye on for a future stay is this unique domed apartment . It’s about eight kilometres (five miles) out of town, but with the views this place has, we wouldn’t be moving from the window seats anyway. Perfect for a post-trek, legs-up retreat!
Entry to Torres del Paine National Park
Entry to Torres del Paine National Park is ticketed and there are capacity limits in the mountain lodges and campgrounds. This is for the long-term care and protection of this wild and remote place, and for the safety of visitors to the park. So whether you’re planning to hike the W, trek the O circuit or visit for the day, you will need a ticket to get into the park.
You must now buy your entrance ticket for Torres del Paine National Park at least 24 hours in advance of your visit to the park. You can no longer buy an entry ticket at the park itself. Visit the CONAF website to buy your park entry ticket .
Entry fees vary depending on whether you are Chilean or international, as well as your age, and whether you intend to stay in the park up to, or more than, three days. At last check, international adults 18 and over will pay CLP$31,200 (CLP is Chilean pesos) for up to three days in the park, and CLP$44,500 for more than three days.
Download your ticket to your phone before you head to the park (you won’t have reception there) and carry a printed copy just in case. You should also carry a copy of your passport as you may be asked to show your ID/nationality.
Booking Camping and Accommodation on the W Trail
There are various ways to stay overnight on the W trek in Torres del Paine National Park, but whether you’re planning a lodge stay, hiring camping equipment, or camping with all your own gear, you’ll need advance reservations to do so.
Overnight reservations are mandatory for Torres del Paine and, like park entry tickets, need to be made in advance . You cannot book camping or accommodation once you’re at the park, or camp outside the designated bookable camping zones.
You’ll also need to carry evidence of your overnight reservations as you may be asked to show proof at any time by a park ranger or when passing through checkpoints. We printed our reservation confirmations and carried these with us.
With trekking in Torres del Paine becoming ever more popular, limited accommodation spots and advance booking necessary, sorting out campsites or lodge accommodation is – in our experience – probably the trickiest part of planning a self guided W trek itinerary.
For this reason, we recommend booking your overnight stays as far in advance as possible , preferably as soon as bookings open for the season.
It also pays to be flexible about where you stay, as you may find you need to rework your trekking dates and approach based on what’s available.
Our final W trail hiking itinerary was the direct result of where and when we could get an overnight booking.
How to book your overnight stays in the park
There are a number of mountain lodges (refuges) and campsites in Torres del Paine, and you can only stay overnight in these designated zones.
Broadly speaking, the zones in the east are managed by Las Torres Patagonia (formerly Fantástico Sur) and those in the west are managed by Vertice Travel .
There are also a couple of free campgrounds in the park which are managed by the Chilean park agency CONAF. However, these campgrounds are closed for the 2023-24 season – visit the CONAF website for updates.
You can book direct via the Las Torres Patagonia and Vertice Travel websites, however we know from experience that trying to align availability and book spots for a workable W circuit itinerary across different websites can be complicated and time-consuming. Another reason to plan well ahead.
We’re now aware of a new website called Booking Patagonia , which offers an integrated booking system for travel, tickets and accommodation for Torres del Paine. Tours can also be booked through this site. We haven’t used it yet so we can’t personally vouch for it, but if you do use it, we’d love to know how you go (one of our readers has recently provided some feedback about their experience in the comments at the end of this post).
Bus tickets to and from Torres del Paine National Park
We based ourselves in Puerto Natales, the nearest town to Torres del Paine, before and after our trek and most travellers do the same. From Puerto Natales, it’s an easy bus trip to and from the park.
If you’re travelling by bus, we recommend organising your bus tickets to and from Torres del Paine well in advance . Don’t leave this until the day you head to the park or you may find the buses already full.
If you plan to buy your tickets when you arrive in Puerto Natales, aim to do so as soon as you arrive in town. You can buy bus tickets at the main bus station (Terminal Rodoviario), or through your hotel or hostel. We travelled to Puerto Natales by bus so we bought our tickets to Torres del Paine at the bus station the day we arrived. You can also search bus services and buy tickets online here .
It’s important to note that your bus drop-off/pick-up points at the park may vary depending on your final W trail itinerary, so keep this in mind when booking your bus ticket.
If you follow this itinerary and trek from east to west, you’ll start with the bus from Puerto Natales to Laguna Armaga . After your trek, you will board the bus at Pudeto for the return journey to Puerto Natales (this follows a catamaran ride across Lake Pehoe to Pudeto from Paine Grande). Vice versa if you’re hiking the W from west to east.
To ensure you’re on the trail in good time (and in line with this itinerary), we recommend booking one of the earliest buses out of Puerto Natales on Day 1.
Packing for the W Trek
Any hike, but especially a multi-day hike, can quickly lose its appeal if you’re carrying too much weight in your pack; something we can personally attest to. So we strongly recommend packing light and only carrying the clothes, gear and food you need for the trek.
If you’re travelling longer term and have more stuff with you – which was our situation – leave it in storage at your hotel. Your back will thank you for it.
You can find most of what you need to buy or rent in Puerto Natales for hiking into the surrounding landscapes, from sleeping bags, camping stoves and hiking poles to dried fruit and nuts for your trail mix.
That said, this is a small and relatively remote town and the local prices reflect it. We’re told there’s more choice and better prices at the supermarkets and shops in Punta Arenas, so if you’re coming from or via Punta Arenas, you might consider doing your trek shopping while in that town.
We’ve also read recent reports that it hasn’t been so easy to find dehydrated meals lately in Puerto Natales. If you’re planning your menu around these, you might think about sourcing them elsewhere.
It’s important to know that Chile has stringent rules around what foods you can and can’t bring into the country (fresh foods, fruits, honey, etc are a no-no). Be sure to declare any foodstuffs you do bring in and plan on buying most of what you need for trek meals and snacks once you’re in the country.
We had a tight meal plan for our spin on the W, but with hindsight, we would swap out some of the bulkier food stuffs we packed for lighter, more compact foods. Next visit, we’ll be looking to pack some dehydrated camping meals and light-weight but filling carbs like cous cous and oats.
The night before the trek, organise any food you’re carrying into daily packages of brekkie, lunch and dinner. Pre-bundling your meals saves scrabbling around in your pack for particular items on the trail). Then pack all the gear you’ll be taking with you in waterproof bags inside your backpack.
Cash, pesos or credit card? One question we get asked is whether to carry US dollars or Chilean pesos into the park, and whether the refuges accept credit cards. We carried all three. We paid for some things in pesos, like snacks and the shuttle to the trail head, and other things in USD, like the catamaran from Paine Grande to Pudeto. We also used our credit card at one of the refuges to buy beers. It’s our understanding that all of the refuges accept credit cards.

Our self-guided itinerary for hiking the W Trail
Day 1 – puerto natales to chileno via las torres, total distance: appx. 13.8 km (8.5 miles) total time: appx. 8 hours overnight: camping chileno.
Let’s get trekking! Hopefully you’ve secured your seat on one of the earliest buses out of Puerto Natales this morning (see above regarding buying your bus tickets in advance).
Buses making the run to Torres del Paine National Park generally depart from Terminal Rodoviario in town. Find your bus and load your pack, then kick back until it’s time to go. It’s around two hours to Laguna Amarga, the gateway to Torres del Paine National Park, so settle in, this is a perfect excuse to grab some extra sleep before starting the hike.
When you arrive at the Laguna Amarga Ranger Station, have your pre-purchased park entry ticket ready on your mobile phone or bring a printout. Here, you’ll check in and receive information about visiting the park, and its rules and regulations.
Don’t forget to buy your entrance ticket for Torres del Paine in advance, and at least 24 hours before you head to the park . It’s no longer possible to buy entry tickets on arrival at at the park. Head to the CONAF website for more information .
At Laguna Amarga, hikers split into two groups: those starting their journey here at the eastern end of the park, and those heading to the western starting point at Paine Grande, which involves a further bus trip to Pudeto and a catamaran ride across Lake Pehoé (even if you’re hiking west to east, you’ll get off the bus here to check-in before reboarding the bus for Pudeto).
If, like us, you’re hiking the W from east to west , your next step after check-in is to jump aboard the Hotel Las Torres public shuttle bus from Laguna Amarga to the Welcome Centre and the eastern starting point of the trek. This costs around US$5 per person and is paid in cash as you board (we paid this in pesos).
Alternatively, you can start your hike here from Laguna Amarga. The shuttle will just spare you a dusty 7 kilometre walk along the gravel road.
There’s a toilet at Laguna Amarga, and another at the Welcome Centre. This is a good chance to go before setting off into the mountains.
Trekking tip: We booked our first night’s accommodation at Camping Chileno, which is en route to today’s main destination – the towering granite peaks of Las Torres. We’ll be checking in at Chileno on the way and dropping off our packs ahead of the steep and challenging climb to the Las Torres mirador. If, however, you’ve booked your first night at Hotel Las Torres or Central Refuge and Camping, then we’d suggest dropping off your packs there first, and setting out on today’s hike to Las Torres with a lighter load.

1st Leg: Hotel Las Torres to Chileno ( appx. 5 km / 3.1 miles, around 2 hours)
We’re officially underway on the W trail around 10.30am and from the word go, the views are eye-popping. After a flat kilometre or so, the path starts to climb: get used to it, it’s pretty much uphill from here.
The hike is moderately steep in some spots, until about a kilometre (0.6 miles) or so from Camping Chileno, where the trail flattens out a little before descending into the campground.
Despite feeling like our hearts might explode for much of this first stretch, we cover the distance in around two muscle-busting hours, with frequent stops to take in the views, rehydrate, and give our racing pulses a break.

Drinking water There’s no need to lug extra water with you on the Torres del Paine circuit. You’ll pass pristine mountain streams regularly throughout your journey. Bring a water bottle, fill up at nature’s tap and enjoy some of the purest water you’ll ever drink. Just remember to top up well away from the camps and upstream of the trails.
We haul our packs into Chileno around 12.30pm . This campground is operated by Las Torres Patagonia (formerly Fantástico Sur), and is the closest camp you can stay at to the famous Las Torres hike and mirador (the CONAF-managed campground near the base of the Las Torres climb has been closed for some time).
The riverside setting at Chileno is truly stunning and the sheer peaks of the three granite towers – our ultimate goal today – rise tantalisingly above the forested mountains ahead.
The campground itself is a nice set-up of tiered camping platforms among the trees. There are shared bathrooms with hot showers, and a restaurant and bar with big windows, plus an outdoor terrace for soaking up the epic views.
Our tent is ready for us when we arrive at Chileno, so we check in, drop our bags in our tent, grab a smaller pack with snacks, water bottles and cameras, eat the lunch we prepared last night, and set out for Las Torres around 1.30pm . Timings here may vary depending on your check-in.
2nd Leg: Chileno to Las Torres (appx. 4.4 km / 2.7 miles, around 2 hours)
This is without doubt today’s toughest leg, so there’s a huge bonus in not having to tote your full pack up the mountain.
From Chileno, you’ll hike for around 3 kilometres (1.9 miles) or so along a meandering path through pretty woodland, across rushing rivers, and through a wonderfully moody stretch of fallen forest that we dub the ‘tree cemetery’. It’s a lovely, moderate walk, and we have no sense of what’s ahead when we reach the sign that tells us ’45 minutes to Mirador Las Torres’.
My notes from this point in our trek simply state: ‘hiking hell starteth here’. A touch dramatic maybe, but as irregular hikers, this was probably the hardest section of the entire W for us. Maybe you’ll breeze through it, just be ready for it.
Shortly after the sign, the climb to Las Torres begins in earnest. It’s a gritty, rocky terrain of steep, gravelly inclines and large boulders. The panoramas as you climb are absolutely breathtaking, but so is the hike itself. There are moments while we’re in the throes of it, looking up and spotting the tiny trekkers far above, that this stretch feels like it will never end.
It does end though, about an hour later, and the scene that awaits as we round a final boulder and face the towering granite pillars of Las Torres makes every single breath-wrenching step worth it.

It’s buzzing at the top: hikers drape the rocks surrounding the glacier lake; a bushy-tailed Patagonian fox weaves its way between the boulders; there’s even a guy getting his hair cut at the water’s edge (one hairdresser’s quirky approach to memorialising his travels while promoting his business).
We spend some time taking pics before settling onto a boulder of our own to simply take in this awe-inspiring scene. Aim to spend around an hour at Las Torres .

3rd Leg: Las Torres to Chileno (appx. 4.4 km /2.7 miles, around 2 hours)
The journey back down from Las Torres is in some respects even more challenging than the climb up. The constant down is tough on knees and the gravel makes the going slippery. We’re beyond grateful for our hiking poles, though we both still manage to pull off some memorable butt slides.
Trekking tip: Hiking poles made all the difference for us when we were trekking in Patagonia. We carried one each, which was ideal as it left us both with a hand free to grab branches and rocks, haul each other up and down, and catch our fall when we slipped. Which was often.
It takes us around two hours to get back to Chileno; we have time to shower, buy a couple of well-earned beers and watch the sunset burn the tips of Las Torres molten gold.
It was cloudy the entire time we were up at the base of the towers, so watching them all beautifully backlit now is a bit of a kicker, but if there’s one thing you’ll learn quickly hiking the W Patagonia, it’s that the weather doesn’t give a rats what you think.

Preparing for Patagonian weather If there’s one constant about the weather in Patagonia, it’s that there’s nothing constant about it. We were particularly lucky on our five days in Torres del Paine, but you should be ready for four seasons in a day. Layer up, have a rain jacket handy, and wear quick-dry clothes. Skip a rain cover for your bag though. While we never experienced the legendary winds that tear through the park from time to time, we heard plenty of stories of pack covers being whipped off suddenly and disappearing into the wilds. Expect to get rained on, and pack your gear in bag liners or waterproof bags inside your backpack instead.
Cooking stoves are not allowed to be used in the Chileno zone, so we opted for the full board food package here, which includes dinner tonight, breakfast tomorrow and a packed lunch to take with us.
Later in the evening, we join a host of other hikers in the restaurant for a surprisingly tasty and filling three-course meal full of protein and carbs.
We’re absolutely wrecked by the end of dinner, and we’re tucked up in our sleeping bags by 9.30pm.
Sunrise at Las Torres When we originally planned our itinerary for hiking the W, we had every intention of doing a second trek to Las Torres for sunrise on Day 2. In late March, this would have entailed getting back on the track up the mountain by 5.30am . As we climbed into our sleeping bags that first night though, we decided to pull the pin: we were just too tired, and we were also a little wary of making the tricky climb in the poor dawn light.* It was a tough call at the time, and it didn’t help when we poked our heads out of our tent the next morning to see the torres erupting with golden light above the silhouetted foreground. As we watched though, the clouds rolled in and soon enough the peaks were shrouded in mist. There’s no accounting for Patagonian weather, or how your body may feel after a long day of hiking. The best you can do is plan, and be flexible on the day. *PS. For safety reasons, hiking in the dark isn’t actually allowed in Torres del Paine. Trail sections have opening and closing times, check the park brochure for more info.
Day 2 – Chileno to Francés
Total distance: appx. 18 km / 11.2 miles total time: appx. 6 hours 45 minutes overnight: camping francés.
Sunrise is around 8am when we do the W trek in late March, and as we haven’t made the dawn hike to Las Torres, we enjoy a more leisurely start to the morning on Day 2.
If you do decide to do the dawn hike up to Las Torres for sunrise, factor in around five hours this morning and adjust the following timings for today’s next legs accordingly.
As breakfast is part of our full board package at Camping Chileno, we pack up our gear and head to the dining room at 8.30am for a hearty kickstart to the day.
1st Leg: Chileno to Los Cuernos (appx. 15 km / 9.3 miles, around 4.5 hours)
We’re on the trail by 9.15am , heading back towards Hotel Las Torres. We won’t be going all the way to the hotel though as there’s a shortcut off to the right around half-an-hour after leaving Chileno. The shortcut is signposted and takes you along a mostly downward sloping path surrounded by undulating hills and lake views.

We reach the end of the shortcut and rejoin the main W route around 11am . At some point after this though, we suddenly find ourselves in what can only be described as the Patagonian Swamps of Mordor and we start to wonder whether we’ve veered off on to a secondary trail by mistake.
We can still glimpse the Nordernskjöld Lake off to left, and we know the official trail travels alongside it. To this day, we’re unsure if we did actually go off piste (though the number of bootprints in the mud suggests not).
Eventually, we seem to be back on track according to the map, just a little muddier for the experience (and even more grateful for our depth guage hiking poles).

The next stretch travels up and down through very pretty lakeside country, with the occasional steep section, before passing down into the valley at Los Cuernos. We arrive at the Los Cuernos shelter and camping area around 1.45pm .
You could stop at any point along the stretch to Los Cuernos for a lunch break; we stop just past the shelter and find a nice rock with a view. We opted for the full board meal package with Camping Chileno so we’ve been provided with a packed lunch today as part of this.
We chill for around 45 minutes and then set off around 2.30pm for Camping Francés , where we’ll be staying tonight.

2nd Leg: Los Cuernos to Francés (appx. 3 km / 1.9 miles, around 1.5 hours)
The trail to the Francés campground is up and down and rubbly, with some steep sections, and a pretty pebbly beach crossing. Today’s walk has been positively sedate compared to yesterday’s heart-starter climbs, but never fear, a leg-burning rise awaits just before the descent into the camp.
We arrive at Camping Francés around 4.00pm . The campground here is run by Las Torres Patagonia (formerly Fantástico Sur).
The tent platforms are clustered between the trees and there’s a good shower and toilet block a short walk from the campsite. There’s also a small shop with basic amenities.
By 5.15pm we’re checked in and set up on our platform. We’ve arranged for a tent at Camping Frances but we’re cooking our own food tonight.
Sunset is close to 8pm in late March, and having made it through our second day on the W trail, we’re zipped up in our sleeping bags soon after.

Day 3: Francés to Paine Grande via Francés Valley
Total distance: appx. 20.3 km / 12.6 miles t otal time: appx. 9 hours overnight: camping paine grande.
Despite our fatigue, neither of us sleeps particularly well on our second night and we’re both groggy when the alarm goes off at 7am.
Our restlessness is partly due to the strange soundtrack that has accompanied us throughout the night: sharp cracking sounds like distant shot gun blasts and deep, thunderous rumbles. It’s not until we set out on the trail through the Francés Valley today though, that the source of the unnerving noises becomes obvious.
On this itinerary, today is the longest day hiking the W, and based on our experience, we recommend getting on the trail by 8am at the latest to maximise your time in the Frances Valley. We departed later when we trekked, so we’ve adjusted the timings below to suit an earlier start.
1st Leg: Francés to Italiano Ranger Station (appx. 2 km / 1.2 miles, around 30 minutes)
The first leg this morning is a rejuvenating, 30-minute leg-stretcher to Italiano Ranger Station. Aim to pack up and set out from camp by 8am.
There’s a ranger at the Italiano Ranger Station when we arrive. He points to some racks opposite the office building; this is where we opt to leave our backpacks ahead of the challenging hike into Francés Valley.
We sort our valuables and lunch into a smaller daypack, lock up the big packs, and get going again. Look to be back on the trail by 8.45am .
2nd Leg: Italiano Ranger Station to Británico Lookout (appx. 5.4 km / 3.4 miles, around 3 hours)
The first kilometre (0.6 miles) out of Italiano is a flat trail through pleasant forest, after which the track starts to climb steeply through a rocky, rubbly stretch.
The scenery is seriously beautiful, serving up views of the ironically named Paine Grande Hill – 3,050 metres above sea level – and the Francés glacier that clings to it. This is the source of the crackshots and grumbles we’ve been hearing as the hanging ice shifts, melts and avalanches down the mountain.
Soon enough, you’ll reach the Francés mirador, a lookout offering spectacular panoramas over the ‘hill’ and its glacier; this is the perfect spot for a short break and a snack, as the next stretch is tough.

From here, the trail to Británico Lookout is a challenging, rubble-strewn boulder dash with lots of climbing.
A flat, rocky clearance scattered with the parched white trunks of dead trees and overshadowed by the jaw-dropping Cuernos massif, marks the final stretch before a steep, 10-minute climb to the mirador itself.

Summitting the boulders of the Británico Lookout around three hours after setting out , we cast our eyes over what will become our favourite panorama of this epic journey: the vast and spectacular Francés Valley. Find a rock to perch on and settle in for lunch with this glorious scene at your feet.

We’ve come a long way, but there’s still a huge day of hiking the W ahead. To our eternal regret, we were only able to linger here for half an hour as we left camp too late on this morning. That’s why we recommend getting on the trail no later than 8am today – trust us, you’ll want as much time at Britanico as possible and by arriving around 11.45am, you’ll have close to an hour here.
We’ve promised ourselves that next time, we’ll spend an extra day or two in this valley so we can take in this view at our leisure. For us, this remains one of the most magnificent vistas we’ve come across in all our world travels.
Trekking tip: Get on the trail by 8am at latest this morning so you can hang out for at least an hour at Britanico, or better yet, stay an extra day in the Francés Valley.
3rd Leg: Británico Lookout to Italiano Ranger Station (appx. 5.4 km / 3.4 miles, around 2 hours)
Aim to set off back down the trail to Italiano around 12.45pm . We find this a knee-buckling downward journey and our legs are screaming by the time we reach our packs back at the Italiano Ranger Station just over two hours later.
Once we’ve retrieved our packs (now four-deep in a giant bag pile), re-sorted them, and stopped for a quick breather, we set out for the Paine Grande refuge and camping area, starting with a bridge crossing out of Italiano. It’s around 3pm by this stage .

4th Leg: Italiano Ranger Station to Paine Grande (appx. 7.5 km / 4.6 miles, around 2.5 hours)
The final stretch of the W trail today is a journey of around 7.5 kilometres (4.6 miles) and it’s mostly flat with some sloping ups and downs.
Travelling out of the valley and along the raised walkway as you head towards Sköttsberg Lake, remember to turn around and take in the mountain scene back the other way: it is immense.

After some more steady rises, we make our final descent into Paine Grande Refuge and Camping around 5.30pm . By this stage, we’re seriously sore and tired and very ready for a beer from the lodge bar, which is the first thing we do once we’ve checked in and dropped our packs at our tent.
The campground at Paine Grande, which is managed by Vertice Travel, is large and separated into sections for campers carrying their own gear, and those like us who have booked a tent. A wooden walkway links the campgrounds with the lodge, the campers’ kitchen and bathrooms.

As Paine Grande is the western starting point for hiking the W and a transit point for O circuit trekkers, as well as for day trippers and short stay visitors, this is the largest and busiest lodge and campground in the park.
There’s a good-sized kitchen building, which is heaving with trekkers when we make our way in there to cook dinner around 7pm.
The camp shower and toilet facilities here are basic. We recommend getting your ablutions out of the way while everyone else is cooking dinner and before the post-meal rush. Paine Grande also has dorms, a restaurant and bar, and a mini-market.
We’re tucked up in our tent just as a light rain begins to fall around 8.30pm.
Day 4 – Paine Grande to Grey
Total distance: appx. 11 km / 6.8 miles total time: appx. 3 hours 45 minutes overnight: camping grey.
Today is our shortest day so far on the W trail, so we decide to set out a little later as we’re definitely starting to feel the past three days’ hiking, and a strange kind of exhilarated fatigue.
We’re up at 8am with plans to be on the trail by 9am. However the banshee-like screeches of a fox followed by the thrilling appearance of a large, tawny-coloured puma on the hill behind the camp has us – and everyone else – lingering for a while in hushed awe, until the sleek big cat disappears around a bend into the next valley. Which happens to be the same valley we’re about to trek into.
After checking in at the ranger station for advice on what to do if we see the puma again, we set off through the narrow, pretty dell at around 10am . We’re both relieved (and maybe a touch disappointed) to find no further sign of our feline friend.
The big cats of Patagonia Don’t let the thought of pumas roaming the forests of Torres del Paine put you off trekking there. The fact is, these magnificent creatures are extremely shy and actively avoid humans. Seeing a puma is incredibly rare. Spotting one near camp as we did is apparently almost unheard of. However, it’s important to be across what to do and how to act if you do encounter a puma; you’ll find advice on this in the guide that you receive when you register for your Torres del Paine trek.
The valley walk is flat at first but soon begins to climb, and continues to serve up steady inclines followed by some steep descents into the Grey refuge and camping area.
The scenery on this leg is still epic, but maybe a touch more serene than the high drama mountainscapes of the last couple of days. Grey Lake is flat and still on the day we hike the trail, and dotted with blueish lumps of ice from the vast Grey Glacier at its head.
About halfway along the trail, a rocky lookout reveals the first glimpses of this immense glacier, a sea of ice six kilometres (3.7 miles) wide and 30 metres (98 feet) high in places.

We arrive at the Grey Camping area around 1.45pm , a journey of 3 hours and 45 minutes, with plenty of photo and snack stops along the way.
Grey Refuge and Camping is also operated by Vertice Travel. The lodge has a lovely bar and lounge area in addition to its dorms, and the campground out front is overlooked by the stunning peaks of the Cordon Olguín. By the time we arrive, the clouds have cleared and the mountains burn golden as the sun drops.

If you’ve got the energy, check in (or leave your pack with the office if check-in hasn’t opened yet), and then head back out to hike past the western tip of the W trail and on to the first leg of the O circuit towards Paso Ranger Station. This will bring you much closer to the glacier, but bear in mind, it’s a five hour, one-way hike to Paso itself.
Trekking tip: Leaving Paine Grande at 10am worked well for us, but if you do want to hike a stretch of the trail from Grey towards Paso and back to Grey today, consider starting out from Paine Grande earlier in the morning so you have more time to do this.
We opt to stop and enjoy our lunch with mountain views, then roll out our mats and nap in the sun until check-in opens.
After getting our tent sorted, we hike to a rocky outcrop on the lake just 15 minutes from camp. The views from here towards the glacier’s terminus are gorgeous and we spend time here just soaking up the scene.

On our return to camp, we head to the lodge for a drink at the bar before making dinner on one of the picnic benches outside the buzzing campers’ cooking area.
In addition to the bar, there’s a restaurant at Grey, and a small shop selling grocery basics. There’s an equally small toilet and shower block for campers (the showers only have certain hours of operation but the water is hot).
We’re in bed by 9pm and prepped for a very early departure in the morning.
Day 5 – Grey to Paine Grande (and return to Puerto Natales)
Total distance: appx. 11 km / 6.8 miles total time: 3 hours 15 minutes.
It’s our last day on the W hike! We’re on the trail early so we can get back to Paine Grande in time for the late morning catamaran across Lake Pehoe to Pudeto, where we’ll pick up the bus back to Puerto Natales.
It shouldn’t take more than four hours to get back to Paine Grande from the Grey campground, but we’re feeling pretty exhausted by this stage and John has nurtured some nasty blisters, so we’re up and on the trail before sunrise .
It’s freezing when we set out at dawn but as the day lightens, we’re treated to a stunning peach-tinted sky reflecting off the lake, and we stop often to snap pics.

Despite John’s sore feet, we make good time on the return journey and while we’re climbing for much of the first half, it feels easier than the trek up from Paine Grande yesterday. Maybe it’s because we’re on the home run, even though the thought makes us sad.
Our journey back to Paine Grande takes us 3 hours and 15 minutes , 30 minutes less than yesterday’s hike in the opposite direction.
We haven’t eaten breakfast and we’re starving by the time we arrive. We were planning to grab something to eat at the restaurant at Paine Grande, but we discover it’s closed between breakfast and lunch.
We make do with our leftover trail mix instead, which is a bigger deal than you might think: we packed way too much of the bitty hiker’s snack and after five days we have a serious love/hate relationship with it.
Fortunately, there’s now a mini market at Paine Grande, which is apparently open from 7am. But if you’re setting out really early like us, perhaps have something you can eat on the go for this final morning.
Tickets and times for the ferry between Paine Grande and Pudeto Ferry departure times from Paine Grande and Pudeto change throughout the year so be sure to check the schedule when you’re planning your w trek itinerary, and adjust your final day hiking start time to ensure you arrive back at Paine Grande at least 30 minutes before the ferry departs. You don’t need to reserve a place on the boat, just hop aboard and buy your ticket with cash (at last check, it’s US$30 for internationals). The journey to Pudeto takes around 30 minutes.
We board the late morning catamaran for our return to the eastern side of the park. The boat trip across Lake Pehoé offers spectacular views of the entire mountainscape we’ve spent the last five days traversing. It’s an epic perspective of the W panorama and a mesmerising finale to our W trek itinerary.
If the weather is nice, we totally recommend taking a seat outside on the catamaran so you can properly admire the breathtaking scenery.

Disembarking the ferry at Pudeto, we grab a coffee from the lakeside café (open from October throughout the trekking season), take a seat in the sun, and enjoy our last moments in Torres del Paine while we wait for our bus.
Pudeto ferry and bus connections In addition to checking ferry times for the catamaran between Paine Grande and Pudeto when you’re organising your trek, it’s also worth checking the bus connections to and from Pudeto, so you can work out the best approach for your final day on the trail.
From Pudeto, the bus makes its way back to the Laguna Amarga Ranger Station to collect hikers finishing their trek at the eastern end of the park. From there, we settle in for the return two hour bus journey to Puerto Natales .
Tonight, back in Puerto Natales, after a good hot shower and a lamentation on the ridiculous amount of trail mix we’ve got left over, we head out for a celebratory drink.
Our legs might be seizing, our knees protesting and we’re beyond exhausted, but we’re buzzing with the sheer thrill of having completed this epic trek. We’re already talking about when we might come back and hike the W trail again, or better yet, take on the longer O circuit.
However we do it, trekking in Torres del Paine is one nature experience we’re keeping firmly on our bucket list.

Got any questions? Have you trekked in Torres del Paine recently? We’d love to hear from you, drop us a message below.
For more exciting experiences and things to do in this incomparable part of the world, head to our Chile page or our South America section.
49 thoughts on “Hiking The W Trek In Patagonia: A Self-Guided Itinerary [2024]”
Great website! We’re hoping to do this February/March 2025, and are wondering how best to spend our time on either side of this hike. Did you travel to El Calafate and El Chalten while you were in the area? Or do you recommend other areas down there? Any advice greatly appreciated!
Hi Lisa, thanks for your message! Fantastic to hear you’re planning a trip to Patagonia! Besides the W Trek, there are various activities you can do in and around Puerto Natales and Torres del Paine, like boat trips on Grey Lake to Grey Glacier or horseback riding.
We most definitely did travel to El Calafate and El Chalten after our trek and absolutely recommend, especially if you’re keen to get out on some further hikes. We bussed from Puerto Natales to El Calafate and the next day did a day trip to the Perito Moreno Glacier, which is an absolute must. From El Calafate, we travelled by bus to El Chalten (the panoramas on the bus ride in are wow – try and get the front seats!) and spent a good couple of days exploring this gorgeous area and just hanging out. There are a range of hikes you can do out of El Chalten – the day hikes to Laguna de Los Tres and Cerro Torre are epic.
If you head south from Puerto Natales to Punta Arenas, you can do day trips to see King penguins, Magellan penguins, whales and dolphins, so that’s another option.
Have a wonderful time and happy trip planning! Cheers, Danielle
Thank you for sharing your Patagonia insights! I found it very thorough and incredibly helpful. I we are planning our trip for October 2024. I have a question. How did you book your meal plan? Thanks! Kim
Hi Kim, thanks for your feedback, we’re glad you’ve found our post helpful! When you go through the booking process for each accommodation (including camping) along the trail, you’ll have the opportunity to add meals as part of those bookings. Links to the accommodation providers are in the post. Good luck with your planning and happy trekking in October! Cheers, Danielle & John
Hi thank you so much for this detailed blog. It appears that one would have to stay at Frances camp if going east to west in order to shave hiking time on day 3. Is there a bus company through which we have to pre-book a bus ticket from Pudeto ferry to Las Amargo? Or is it a shuttle service? Do you have any idea if booking a guided tour via Las Torres means that they carry your heavy rucksacks?? Is the last day at Grey really worth it ? Or would you rather end the trek on day 4? Thank you!
Hi SK, thanks for your message. Until the CONAF Italiano camp reopens, Frances camp is the closest camp to the Frances Valley so yes, it is the best bet timing-wise for getting in and out of the Frances Valley and on to Paine Grande on Day 3 if travelling from east to west. You could also stay at Los Cuernos, but that would add around 1.5 hours to Day 3.
The buses running from Puerto Natales to Torres del Paine drop off and pick-up from Laguna Amarga and Pudeto. When you buy your bus ticket to Torres del Paine, you’ll note where you’ll be getting off and on again (it will depend on your itinerary, but for us, travelling from east to west, we got off at Laguna Amarga and boarded at Pudeto on our return. Check out the section in our post on bus tickets to and from the park for more info. There’s a shuttle that runs between the Laguna Amarga ranger station and Hotel Las Torres for a fee.
We would suggest contacting the tour company you’re interested in for advice about whether porter services are available on their guided tours. We left most of our luggage in one of our backpacks at our hotel in Puerto Natales and carried only what we needed for the trek to keep the weight down.
We personally feel that every leg of the W is absolutely worth it – the scenery is superb throughout. Five days gave us just the right amount of time to enjoy the whole trail without pushing too hard. To do the trek in four days, you’d likely need to compromise on either the full hike into Frances Valley or the Grey leg in order to reach camps before dark, and we wouldn’t want to skip either. But that’s us. If four days was all we had to trek, we would possibly leave Grey but we’d have to make sure we did a boat tour out to the glacier instead! 🙂
All the best with your planning! Cheers, Danielle & John
This is seriously one of the best breakdowns I’ve read. Patagonia is one of three “Someday” treks I have on my list to head off on once my son is a little bigger and can carry more of his own gear. We’re building up now with longer and longer trips around Central/Eastern Europe
Love this site!
Thanks for your message Brian, we really appreciate your feedback. So cool that you and your son are already hiking together, and what an awesome bucket list adventure to look forward to with him! Happy trekking and thanks again! Danielle & John
Do you have a map with the accommodations you booked or where you rented out tents/gears? Planning on doing this solo in June!
Hi Erika, thanks for your message! There’s a trail map available at the official Torres del Paine website: https://parquetorresdelpaine.cl/mapa-2023-2024/ – it shows all the accommodations/campsites along the trail. You can also find links in our post to the accommodation providers we booked our campsites and camping gear through.
As you’re considering a June trip, we’d also encourage you to check out the official Torres del Paine website for information about winter hiking regulations – https://parquetorresdelpaine.cl/permisos-especiales/ . Many of the accommodations and trails close over winter and while you can visit the park, we understand it’s mandatory to have a guide for the W Trek and the trek to the base of Las Torres between 1 May and 30 August (though the timeframes can change depending on weather). All the best with your planning! ~ Danielle
Hello Dan, What a great find this was. Thank you so much for writing it. I’m looking to mimic your trek with some modifications. I will very likely have a car rental when I arrive into Punta Arenas. My plan is to drive myself and 2 others into the park and leave the vehicle parked at the welcome center or hotel (unsure if this is allowed). At the end you mention that you ferry to Pudeto- then catch a bus that swings by Laguna Amarga into Puerto Natales. Is there a bus that goes directly back to the welcome center or hotel from Pudeto so we can get back in my rental? It looks like the Laguna Amarga ranger station is about 8.5 km from the welcome center. Or is it best to just shuttle from Puerto Natales for the whole thing and leave the rental somewhere in town?
Hi Bruce, thanks so much for your message and feedback! Very good question re. parking – based on our limited research into this, our understanding is that you can leave your car at Hotel Las Torres while you trek if you’re a guest there, otherwise, cars can be parked at the nearby Welcome Centre. We’ve also seen reference online to a small car parking area at Pudeto, so in theory you could arrange bus tickets from Pudeto to Laguna Amarga, and from there get the hotel shuttle to Hotel Las Torres/the Welcome Centre. I would suggest posting your question on Tripadvisor and hopefully someone has done something similar recently and can provide latest info. It might also be worth contacting Hotel Las Torres and asking their advice; no doubt they get questions like this frequently. All the very best for your trip planning and the trek itself – it’s an unforgettable experience! Cheers, Danielle & John
Thank you so much for the great information. I’m a long term planner and we’re looking to book for our family of four, Christmas 2024. I found this blog really really helpful in hiking cost effectively. Thanks Again!
Hi Melissa, thank you so much for your message, we’re really happy you’ve found our post helpful in your planning. Also very excited for you and your family – what a fantastic Christmas experience! We hope you have a really wonderful time hiking the W, it’s just such an incredible place! All the best and happy hiking! Danielle & John
Thanks for the article, I find it very useful. I have just booked the circuit trail for this April. About that: I looked into using Booking Patagonia for the reservations, and it works really well. Though, there is a downside: they charge an extra $90. You’ll notice this at the very and of the booking process, which I found quite frustrating. For me that was a reason to book directly at Vertice and Las Torres Patagonia, which works fine.
Hi Valentijn, thanks so much for this update, that’s really helpful to know! Thanks also for your feedback on our post, we’re pleased you’ve found it useful. All the best for your upcoming trip in April, have a sensational time and happy hiking! Cheers, Danielle & John
Thanks for the great write up. The details are useful and your descriptions are inspiring. I’m leaving for Chile in a couple days and your post just added to my excitement.
Hey Mike, thanks so much for your feedback, we hope you have a really fantastic trip. Chile is an incredible country, one of our faves!
Cheers, Danielle & John
Thank you for that informativ Blog! I have a question: are there any possibilities to heat up some water in the Refugiés without a stove?
All the best Sophie
Hi Sophie, thanks for your message!
As we had a cooking stove (and booked meals at Chileno where stoves can’t be used), we can’t personally say for sure whether hot water is currently available at all of the stops on the route. That said, we did find a trekker’s report online from late 2023 noting that they were able to access hot water (not boiling) through the coffee/tea dispensers at each of the refugios they stayed at, which they used for their dehydrated meals. Would suggest seeing if there are other trip reports from this season, or posting on a forum for latest updates. Or perhaps hire a stove in Puerto Natales and buy a gas canister just to be on the safe side! We’d love to know what you find out!
Have a magic time trekking the W!
Cheers, Dan & John
Hi guys. Thanks for all the detailed info. Just wondering if you could give an estimate of how much it cost for the W trek. I am being quoted $1180 per person for 4 nights and five days starting 12th February with this included:
• camping accommodation with all the equipment • all the meals • transportation from/to natales-park • park entrance • catamaran • welcome kit
Not sure if this price is really high or if it would work out as that much if I book everything myself separately anyway.
Many thanks
Thanks for your message and feedback – we’re really excited for your trek in Torres del Paine.
We were travelling long-term when we did the W Trek so we went out of our way to keep costs down by booking the campsites directly, carrying some of our own camping gear and bringing most of our own food. Travelling as a pair also helped as the single supplements can add quite a bit. We’d also note that, like everything, prices have hiked post-Covid.
We’ve included some costings in our post but not many as we’re conscious things can change quickly (plus there are so many potential cost combos for accommodation/food, it’s tricky to provide a general estimate). As the bulk of your costs will be in the camping, gear and food components, you might consider checking out the latest price lists for camping and food package options on the Vertice and Las Torres Patagonia websites; that would give you a sense of costs in the context of your quote. Given how quickly accomm/campsites book up for the season and the challenge of trying to coordinate an itinerary across multiple websites, having a third party making the arrangements, while costing more, would take the hassle out of that.
All the best with your planning and we hope you have a sensational time trekking!
Cheers Danielle & John
Your hikes sounded amazing. We are going in Feb and I wasn’t sure what to expect. Sounds like I should do some training! Do you recommend stiff hiking boots to navigate the big rocks or are light hikers enough support?
Thanks for sharing, Karen. Canada
Hi Karen, many thanks for your feedback! To be honest, if you’re a regular walker/hiker, you may find the W Trek a breeze – we met plenty of people who barely cracked a sweat, lol. As irregular hikers, we found some of the steeper sections a little more ‘breath-taking’ but still very do-able. We both wore regular lightweight hiking shoes and they were fine (apart from John developing blisters towards the end), but we also saw people in solid boots. I guess it depends on your preference. We did find having a hiking pole each was useful on some of the more uneven terrain like the rocky climb to Las Torres. We’d love to hear about your trek when you get back – have a fantastic time! Danielle
Going in February, cant wait. Did you know how anyone who did the kayak at Grey and talked about there experience?
Hi Efren, that’s so exciting! We don’t personally know anyone who has kayaked at Grey but we wish we’d had time for it – what an amazing experience! The lake is beautiful and the glacier is epic! If you do kayak, we’d love to hear about it! Have a fantastic time, Cheers, Danielle & John
Awesome Post!
I’m looking at doing this the same direction as you guys did around the same time in 2025.
You mentioned availibilty determined your campgrounds; that being said would you change any of your stays if you could in retrospect? Maybe saw some better campgrounds/lodges along the way that you wish you could have booked had there been availibilty?
Hi Chris, thanks for your message and good question! We were on a long travel stint when we did the W Trek so we opted for camping to keep our costs down, plus the campsites we ended up with proved to be very well located for a five-day itinerary. That said, all of the lodges and refuges looked quite nice so if we were to do it again (and we hope to!), we would consider adding some lodge/refuge stays, following the same itinerary. Location-wise, the Cuernos and French refuges would be good alternatives to camping (though these are beds in dorms, which is less appealing to us). We would definitely consider the Cuernos Cabins (2-3 people per cabin), especially if we were planning a longer stay in the French Valley! We’d also consider staying at the lodge at Grey next time as, of all the campgrounds, this was probably our least favourite (plus we were very ready for a bed by that stage!). Overall, the quality of the campgrounds/refuges throughout the park is very good and we were really happy with our camping experience and itinerary. Best of luck with your planning and we’d love to know how you go! Happy travels!
Wonderful description. We are going in Jan 2024! Looking forward to it.
Hi Kishore Joshi, thank you so much for your feedback, we hope you’ve found it helpful! Wishing you a fantastic W Trek, it really is the most incredible place! Happy travels!
Hi! How much cash would we need, knowing that the bus and entrance are paid for and also full board meal plan at the refugios is booked? So for snacks, water or other costs etc? Do they accept USD or should we have it exchanged? Thanks!
PS, did you also really use ‘poop bags’ for your used toilet paper along the way? 😅
Thanks for your message. We carried both USD and Chilean pesos with us just in case, and we were able to use credit cards at the refuges. We paid for the shuttle from Laguna Amarga and the catamaran from Paine Grande in pesos, though we have read that the catamaran operators may take USD in high season. It’s handy to have pesos for smaller purchases like snacks. We carried a refillable bottle and filled up in streams and at the refugios, so we didn’t purchase water.
We have packed degradable doggy bags for carrying out toilet paper on past hikes! 🙂 On the W Trek though, we carried a loo roll and some trusty Ziploc bags, but we mostly just made strategic use of the campground facilities!
Happy trekking!
Hi John and Dan Thanks for such good info. Is it safe doing it self guided ? Thanks
Hey Iris, thanks so much for your message, we hope you found the post helpful. We found going self-guided very easy – the trails are well trodden and during the peak season, there are plenty of other people hiking too (guides are mandatory in winter). Plus all trekkers have to stay in the designated camping and accomm areas so there are others around and you can stay in dorms if you’re not keen on camping. Conditions can vary dramatically though and it is the great outdoors, so having appropriate gear is essential and hiking with friends is good idea though we hear lots of people do it solo. Everyone we met en route were friendly, encouraging and helpful too. We absolutely loved the hiking the W and hope you get to experience it too! Happy travels! Dan & John
This is really helpful thank you so much. Did you have much hiking experience before you took this on? Would you recommend any training prior to going? What size backpack would you recommend taking?
Thank you so much
Hi Jo, thanks for your kind words, we’re glad you found the post useful! We’re casual hikers and while we’d done a bit of hiking before the W, it was certainly one of the ‘biggest’ hikes we’d done. We definitely tried to up our walking/hiking game before the W in preparation and glad we did as we personally found some of the steeper, sustained-climbing parts of the trek relatively tough – we just took our time and had lots of breaks; necessary anyway to take in the gorgeous views! I carried a 30L daypack and John carried a 50L backpack – between us we carried everything we needed for the five day hike, but I would note that we didn’t have to carry tents, sleeping bags or mats as we hired these. We hope you have the chance to hike the W trek, it remains at the very top of our hiking list! Happy travels!
Thank you all for this awesome breakdown and information! We followed it exactly to book our accommodations and plan to do the trek end of March. Thanks again!
Hi Kristen, thanks so much for your feedback! We’re stoked you found our post helpful and we’re very excited for your upcoming trip. Torres del Paine is sooooo spectacular, wishing you a fantastic trek – let us know how you go! ~ Danielle & John
Thanks Dan for the great details and info.
Hi Kristen. I am doing the trek around of march with a friend. We are travelling from Perth, Australia. Would be great to collaborate in planning.
Thanks Bikash
Hello! This page is fantastic, thank you so much. We are looking at November and can be flexible in terms of dates. Did you book your accommodation first? Are there any other considerations i.e. tickets or entry to the park? Or should we just arrange accommodation and go from there? Do you mind sharing how much you paid approximately for your camping accommodation? No worries if not. Thanks 🙂 Amie
Hi Amie, many thanks! We booked our accommodation first and a couple of months in advance. Site availability ended up driving our approach to the trek – so it’s good that you have flexibility! Would definitely get in as early as possible to book. Tickets for the park itself are arranged at the park entry office, but you will need to have the accomm bookings in place (and evidence of them) when you get to that point. So it’s important to book the accommodation and bus tickets to the park in advance. Bus tix you can buy when you get to Puerto Natales, but try and do that as soon as you arrive rather than on the day you intend to travel to the park. Prices for camping and cabins may have changed since we trekked, but if you head to the accomm links in our post, you’ll be able to find out the current prices as it’s all bookable online. Hope that helps and have a fantastic trek! Cheers, Dan & John
Thank you for the detailed information. We are trekking this exact route this March 2020!
Hi Jackie, thanks for your message, we’re really happy you’ve found it helpful for planning. Hope you have a sensational trek!
Thank you so much for the detailed guide! This is really helpful 🙂
Hi Katherine, thanks for getting in touch! We’re really pleased you found the guide useful – happy hiking!
How did you book the campsite ? I unable to locate the source to book just the campsite
Hey Rajesh, thanks for the message.
The Camping areas are run by three different operators in the park, and you can find links to all three operators in our post.
All three operators’ websites have information about their camp sites, and how to book.
Hope this helps.
John & Dan
Exactly what I’m looking for, thanks! Chileno and Los Torres always been there on my bucket list, now I know where and how to start.
Awesome, thanks Rika, we’re really pleased you’ve found it helpful. It is the most spectacular walk – even if you just did the one leg to Las Torres, you’d have photography opps galore! Happy travels!
Leave a comment Cancel reply
Save my name, email, and website in this browser for the next time I comment.
Travel Bugg
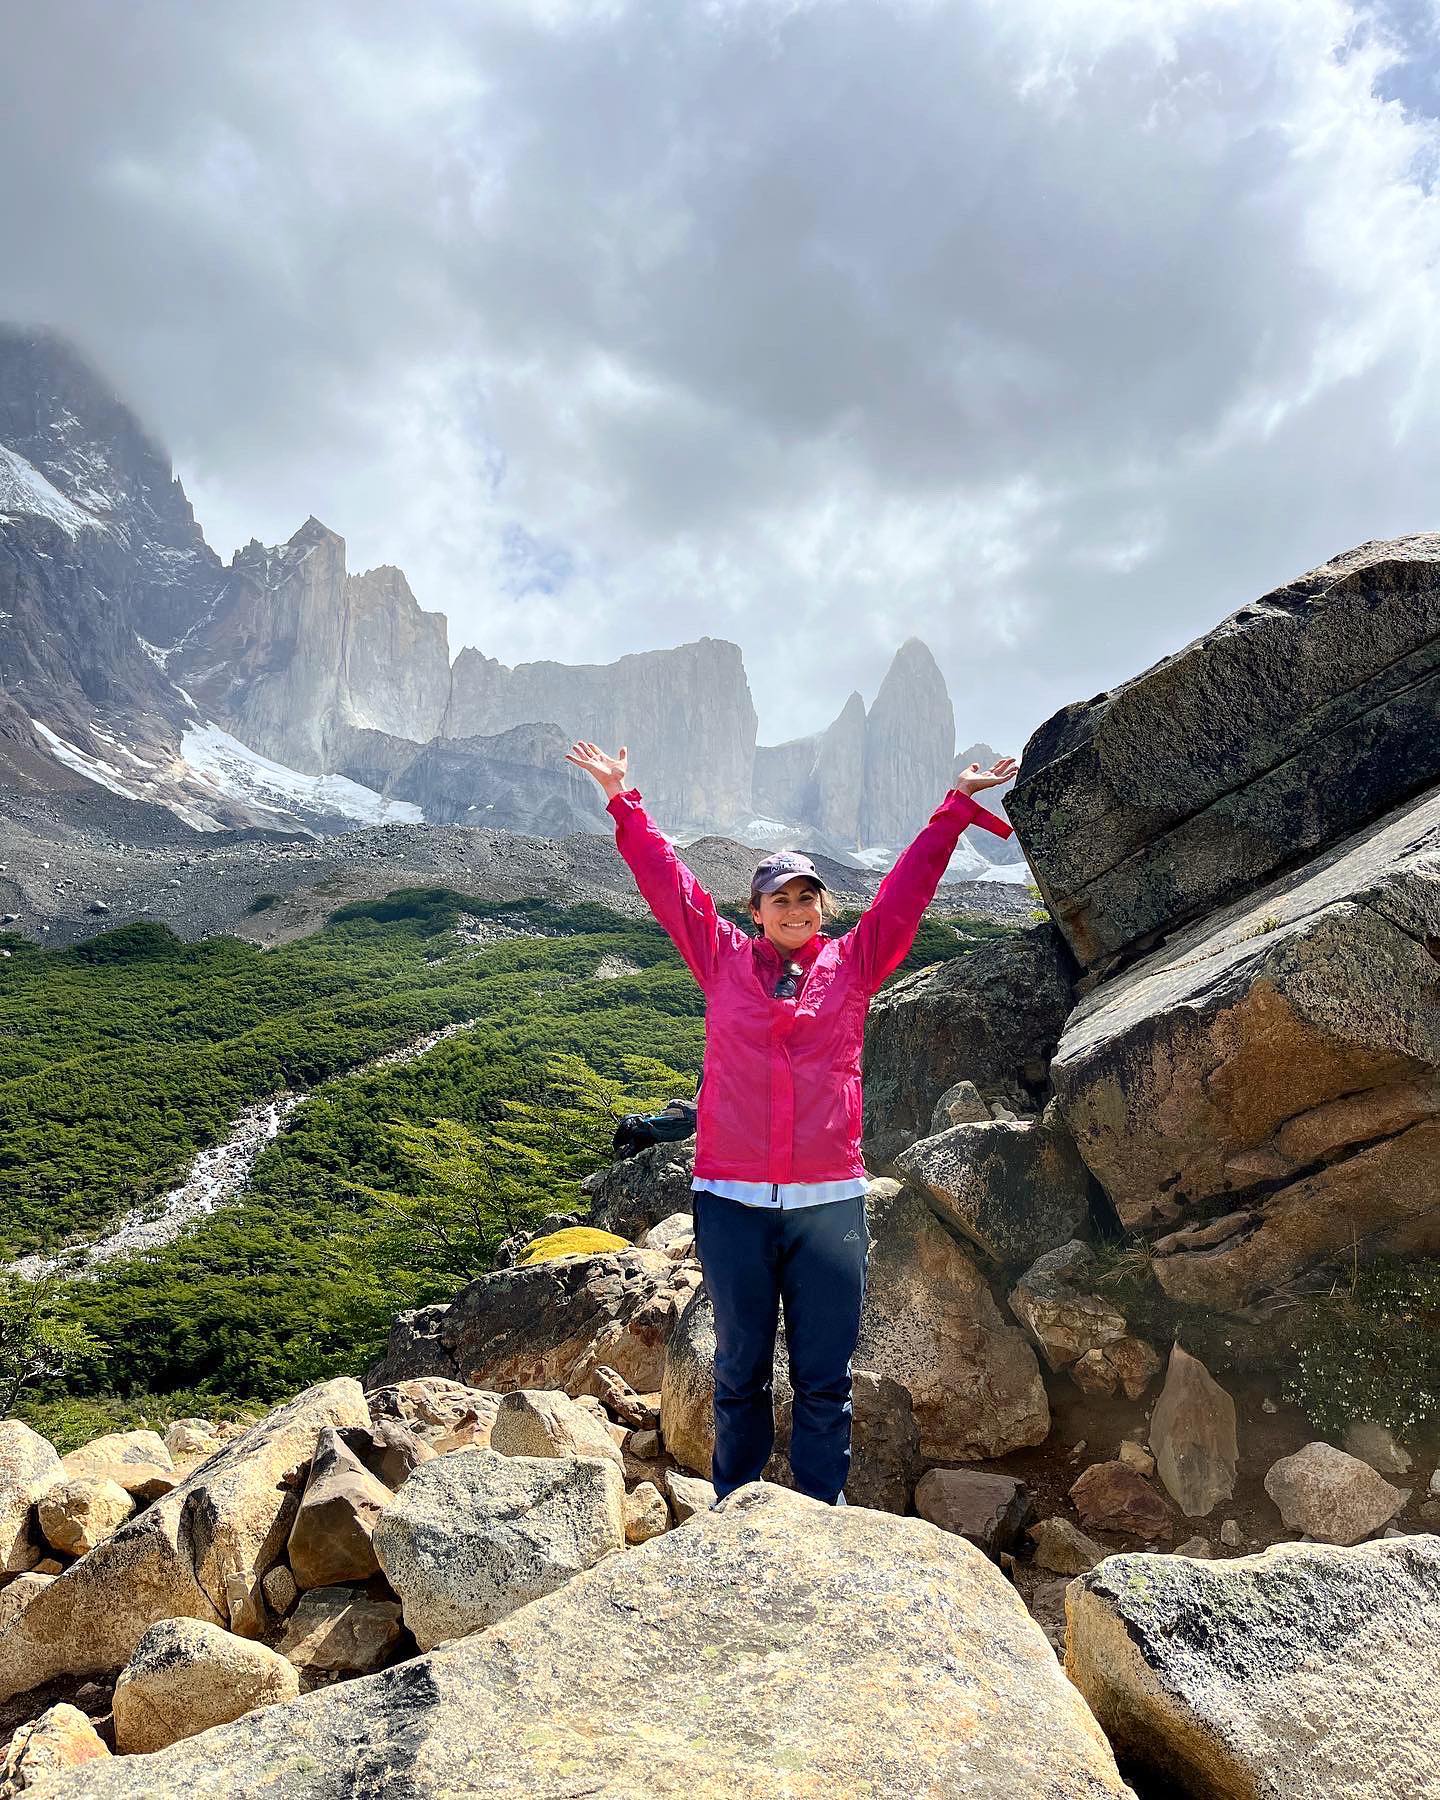
Chile’s W Trek: 4-Day Itinerary from West to East
In February 2023, my Swedish hiking partner Kim and I completed Chile’s W Trek in Torres del Paine, National Park— a lifelong dream. In this post, you’ll find a quick overview of the route we took, including how many steps/ miles/ kilometers we logged each day and where we stayed. You can learn more about the logistics of the trip here.

W Trek: Day 1
- Paine Grande to Mirador Lago Grey
- Steps logged: 24,345
- Roughly 11 miles, 18 km
We started our trek early by catching the 7 a.m. bus from Puerto Natales, Chile, to Torres del Paine National Park. The three-hour bus ride was smooth, and we saw guanacos, flamingos and emus along the way.
The bus dropped us off at Pudeto where we hopped on a catamaran that took us to our campsites at Paine Grande. We checked in, left our bags, and headed up to the lookout over Glacier Grey.
The hike was about four hours round trip, not including rest stops and photos ops. We headed back down after nearly getting blown off from the wind and hung out in our campsite with an exceptional view of the mountains.
A group of kind Chilean hikers gave us some hot water for our dinner of noodles since we hadn’t rented a cookstove. We prepped our wraps for the next day and shimmied to classic rock in the communal kitchen with the other hikers. It was a good entry hike before the harder days of Chile’s W Trek.

W Trek: Day 2
- Paine Grande to Camping Francés
- Steps logged: 42,950
- Roughly 20 miles, 32 km
We started the day around 8 a.m. and headed toward Camping Italiano, one of the free camp sites run by the government that’s currently closed.
The hike took around three hours, and we made a new friend (Stine from Denmark) along the way. At Camping Italiano, we ate lunch, left our bags, and then prepared to head up to see Mirador Francés and Mirador Británico.
The hike up to Mirador Francés was a bit more technical than Mirador Lago Grey. When we got there, we debated if we should add on an extra two to three hours by going to Mirador Británico since we still needed hike to our campsite. After talking with some Chilean park workers, we realized we may never be here again, and decided to suck it up and continue.
It was the best decision we could’ve made. We had the Mirador practically to ourselves, stunning 365 views, and perfect weather with zero rain and minimal wind. Going down was another story, and we were both feeling it when we got back to Camping Italiano. (I fell directly on my face, Kim was startled by an overzealous trail runner, but we made it down alive).
We grabbed our larger backpacks and walked the remaining 2 km to our campsite at Camping Francés.

W Trek: Day 3
- Camping Francés to Camping Chileno
- Steps logged: 37,129
- Roughly 17.5 miles, 28 km
I barely took any photos this day because I was becoming too tired to function. Day 3 was sunny and hot, which after all the wind, was a welcome change, although we did get sunburnt.
We passed by Lake Nordenskjöld, and I dipped my toes in the freezing glacial water. On a lookout near the lake, we met a pair of Israeli friends with the same name who were vibing to Tame Impala.
We parted ways at a crossroads, and I got separated from Kim (who is a much faster hiker than me). I ended up hiking alone on an old horse trail for the next hour, fell twice, got covered in mud, dodged a horse carrying supplies up the mountain, started questioning my life choices again, and finally made it to Camping Chileno.
Kim was arriving too (she’d accidentally added an hour and half to her hike by taking the wrong trail), and we checked in, made some wraps, and then went to bed immediately.
We were ready for our last day which would begin with a sunrise hike to see the highlight of the park: Los Torres del Paine.

W Trek: Day 4
- Chileno to Mirador Los Torres to Camping Central
- Steps logged: 35,405
- Roughly 16.5 miles, 26.5 km
I’d been looking forward to this hike for six years, when I first started researching Patagonia. We were lucky to grab a spot at Camping Chileno, which guaranteed us the chance to catch the towers at sunrise. We got up at 3:40 am, strapped on our headlamps and headed up for the final stretch. This route is incredibly steep and it seemed like we would never stop going up.
It’s also rocky and sandy in a lot of places, making it tricky to navigate in the dark. I followed the dim headlamps of the hikers in front of us and the red lighted markers along the trail. In some places, there were no markers, and the path became more of a rock scramble.
I kept checking my watch to see if we would make it before sunrise. I’d given myself two hours (30 minutes more than recommended) but with my fatigue from yesterday and the darkness of the trail, I was cutting it close. Just when I’d given up hope of ever making it up the mountain, I saw the outline of the towers in the distance. I made my way around the final curve and heard Kim calling my name.
We made it just in time to see the first rays of sunlight hitting the stone above a glacial blue lake. Kim and I watched the sunrise, elated that we had finally fulfilled the dream we’d held for so long. We took photos and walked near the lake then began our descent.

On the way down, we ran into Steve, a Dutch-American we had met in Puerto Natales, who was bike-packing his way across the Americas. We made plans to meet up later at Camping Central and headed back to camp.
After breakfast at Camping Chileno and saying hi to Stine who was headed up to Los Torres, we made our way to the last part of the route: Chileno to Central. The end of the W Trek (West to East) was blessedly downhill.
Although I was still practically crawling at the end, we made it to the Welcome Center to wait for our bus which wouldn’t come for another five hours. Steve joined us at the cafe, and we chatted about our lives and had a victory beer and Patagonia coffee. Later, Stine met up with us, and we ate a dinner of empanadas.
Afterward, Kim, Stine, and I grabbed the shuttle bus and then a larger bus back to Puerto Natales. We had completed the W Trek, sore and exhausted, but thrilled to have accomplished our dream.

Leave a Reply Cancel reply
Your email address will not be published. Required fields are marked *
Notify me of follow-up comments by email.
Notify me of new posts by email.
Lonely Plan-it: how to organize a hike on Chile’s famous W Trek in 2023

Jan 14, 2023 • 8 min read

Tackling the W Trek in Chile’s Parque Nacional Torres del Paine is a challenge and a thrill © sharptoyou / Shutterstock
In this series, we take you step by step through how we planned some of the most complicated travel adventures, so you can recreate them yourself with ease. Here, writer Sarah Reid takes you through how she planned her hike on Chile’s famous W Trek.
Tracing the foothills of the snow-capped Paine Massif in southern Chile ’s famous Parque Nacional Torres del Paine , the W Trek one of the world’s most epic multi-day tramps. Named for the shape sketched by the 80km (50-mile) trail, the W Trek immerses you in some of Patagonia’s most mesmerizing scenery, with turquoise lakes, oozing glaciers, gnarled subpolar forests and wildlife spotting opportunities aplenty (you might even spot a puma).
While it’s easy to follow the well-trodden if not always well-marked trail, planning the expedition is complicated by the numerous ways to access the route and the multiple reservations required before you set out. Having recently experienced the trail in two different ways, I’ve figured out all the tricks you’ll need to plan one of the most memorable hikes of your life. Here’s what I learned.
Step 1: Time it right
Find the best mix of good weather and accommodation availability.
Hiking the W Trek hinges on the availability of the half-dozen currently operational refugios (hostels with limited dorm beds, a restaurant, hot showers and campsites) dotted along the route, which can book out months in advance during the November-to-February peak season. This is the warmest time of the year comes with the added bonus of long daylight hours – but it can also be very windy. The less-busy shoulder seasons (March to April and September to October) offer increased camping availability and more agreeable weather (potentially; this is Patagonia, after all). A guide is required for a wintertime hike (May to August, when refugios are closed). Wildlife, including pumas, can be spotted year-round.
To get to Torres del Paine, you’ll need to travel to the small, beautifully situated gateway city of Puerto Natales . You can fly here (or to nearby Punta Arenas ) from Santiago , take a four-day ferry trip from Puerto Montt or travel overland from Argentina (a 5.5-hour bus ride from El Calafate to Puerto Natales). From Puerto Natales, expect a two-hour bus ride to the eastern end of the W Trek, and a three-hour bus ride followed by a 45-minute ferry to the western end.

Step 2: Decide which direction to hike in
You can start or finish your trek with one of the hike’s most epic views.
The W Trek can be hiked from east to west or vice versa, independently or guided, and you can take as many days as you like (pending refugio availability). Hikers with a good level of fitness will find it’s an achievable four-day independent hike. Factor in an extra day to add a glacier kayaking or ice-trekking excursion departing from Refugio Grey (arrange in advance; more on this below).
The benefits of hiking east to west include frequent daily bus services from Puerto Natales (from 7am) to the trailhead. You’ll also knock off the challenging hike to Mirador las Torres , at the base of the three granite towers that give the national park its name, on the first day. Hiking in this direction also means you don’t have to worry about securing a spot on the first ferry of the day across Lago Pehoé to access the western end of the W (critical for a four-day itinerary), as ferry tickets can’t be booked in advance. The early ferry (9am) only operates from November to March.
The beauty of hiking west to east is the opportunity to spend your last night at Refugio Chileno, making it easier to catch the sunrise at Mirador Las Torres on your final day and be back in Puerto Natales by dinnertime (finishing at Paine Grande gets you back to town closer to 10pm). With Patagonia known for its strong westerlies, hiking eastward also keeps the wind at your back for most of the journey.
Step 3: Consider your booking options
Reserve your accommodation, transit and park pass in advance to simplify your life.
This is where it gets tricky. The two refugios at the trail’s western end (Paine Grande and Grey) are operated by Vertice Patagonia , which also runs glacier trekking and kayaking tours. The other four refugios (Francés, Cuernos, Chileno and Central; there’s an additional bunkhouse near Central called Torre Norte) are operated by Las Torres Patagonia . You can book preferred campsites and dorm beds (some refugios also have rooms) separately through their websites, or make reservations at camps run by both operators in a single booking via Booking Patagonia .
Meals, pre-pitched tents, sleeping bags and mats can be prebooked for additional fees, pushing the cost of a four-day hike from as little as $62 (camping costs only; wild camping is forbidden) to around $400 if you book all the extras (and it’s worth doing so if you’re not keen on carrying all your supplies, including cooking equipment). Booking bus tickets to and from Puerto Natales in advance is also recommended; Bus Sur services both ends of the trail.
An easier if more expensive option is to book an all-inclusive package. These come in all shapes and sizes, ranging from classic unguided through-hikes, to hikes along sections of the trail each day with a guide then shuttling back to an off-trail camp or lodge each night. (Note that it’s difficult to complete all legs of the W Trek as day hikes given the volume of backtracking required to the two exit points.) Local operators offering good-value unguided through-hike packages with an east-west itinerary (about $1000) include Chile Nativo and ChileTour Patagonia . Las Torres Patagonia and Vertice Patagonia also offer packages with accommodation at their own properties (a through-hike is only possible with the former). International operators including G Adventures and World Expeditions also offer through-hike packages.
You’ll also need to book a multi-day national park pass via the CONAF website ($35), which will be checked at the entrance to the park.

Step 4: Prep for the adventure
Find the perfect gear for your adventure.
With the entire trail located between 100-900m (330-2600ft) above sea level, there’s no altitude to factor in on the W Trek. But it’s the ever-changing Patagonian weather, along with the uneven, often-exposed trail, that will likely test you. Layers are key, and a waterproof jacket, rain pants and pack cover are essential year-round.
Expect to have next-to-no cellular reception throughout the journey. Wi-fi coupons are available for sale at refugios (provided the router is working) but it’s more fun to stay disconnected and mingle with fellow hikers at the bar instead; every refugio has one. Be mindful when packing that everything you carry into the national park must come out with you – the only rubbish bins at refugios are designed for toilet paper. With a limited number of power points in refugios for charging devices, packing spare batteries is a good idea.
Step 5: Nail the trail
Be adaptable to conditions to get the most out of your journey.
Days on the trail can be long on a four-day hike; set out by 8am in autumn and spring to arrive in camp well before nightfall. If you’ve booked meals, most refugios have two sittings; book the first sitting when you arrive in camp each day to ensure an early night, and early start the next morning.
On foggy days, reconsider rising early to hike to Mirador las Torres for sunrise. You might also wish to reassess the mostly uphill return hike from Mirador Francés to Mirador Británico (the middle arm of the “W”) in poor weather, though I hiked the latter in average conditions and enjoyed it, particularly as I spotted a pair of endangered huemul deer right below Mirador Británico. Consider leaving non-essentials in a dry bag at Italiano (a CONAF-run camp not currently open for overnight stays) on your way up, as you’ll pass this camp again on your way back down.
If you’re making good time between Paine Grande and Valle Francés (French Valley), consider veering off the main path to hike the lesser-tramped alternative trail around the slightly more scenic eastern side of Lago Skottsberg, which adds about 30 minutes to the trip. Turn left at the first bridge after Italiano if you’re coming from the east, and head right at the fork after the first bridge you cross if you’re coming from Paine Grande.

If I could do it all again…
I booked a last-minute four-day through-hike package on my first W Trek experience. I hiked east to west in March 2022, and camped at Central, Cuernos and Paine Grande, and this itinerary was perfect for me. I’ve since hiked sections of the trail on a guided multi-day, multi-sport tour with Chile Nativo, with superb perspectives on Torres del Paine that complemented my first experience.
If I were to do the W Trek again, I’d aim to tackle the extended version of the trail called the O Circuit, ideally in late September, as I found the weather superb and the crowds thin when I visited then. I’d cut costs by making independent bookings, and I’d book my meals again (though extra comforts are not available at all refugios on the O Circuit).
Since my feet were soaking from the second day onward, I’d also wear waterproof boots; pack fewer snacks, as the boxed lunches were sufficient; and go easier on the Carménère (Chilean red wine) at the refugio bars. Did I mention you can order pisco sours, too?
Explore related stories

Jan 8, 2024 • 11 min read
From Andean treks to whale watching off Patagonia, here are the top things to do in Argentina.

Feb 8, 2023 • 4 min read

Feb 7, 2023 • 5 min read

Dec 6, 2022 • 10 min read

Oct 5, 2022 • 6 min read

Jul 29, 2022 • 15 min read

Jan 25, 2022 • 8 min read

Jan 7, 2022 • 9 min read

Jan 5, 2022 • 6 min read

Dec 13, 2021 • 11 min read
- Torres del Paine National Park Tourism
- Torres del Paine National Park Hotels
- Torres del Paine National Park Bed and Breakfast
- Flights to Torres del Paine National Park
- Torres del Paine National Park Restaurants
- Things to Do in Torres del Paine National Park
- Torres del Paine National Park Travel Forum
- Torres del Paine National Park Photos
- Torres del Paine National Park Map
- All Torres del Paine National Park Hotels
- Torres del Paine National Park Hotel Deals
- Torres del Paine National Park
- Things to Do
- Restaurants
- Vacation Rentals
- Travel Stories
- Rental Cars
- Add a Place
- Travel Forum
- Travelers' Choice
- Help Center
W circuit - West to East or East to West? - Torres del Paine National Park Forum
- South America
- Chile
- Magallanes Region
- Torres del Paine National Park
W circuit - West to East or East to West?
- United States Forums
- Europe Forums
- Canada Forums
- Asia Forums
- Central America Forums
- Africa Forums
- Caribbean Forums
- Mexico Forums
- South Pacific Forums
- South America Forums
- Middle East Forums
- Honeymoons and Romance
- Business Travel
- Train Travel
- Traveling With Disabilities
- Tripadvisor Support
- Solo Travel
- Bargain Travel
- Timeshares / Vacation Rentals
- Magallanes Region forums
- Torres del Paine National Park forum

I'm planning to visit Torres Del Paine in late November. The W circuit plans from most travel companies go from East to West, but I've noticed a few people going the other direction. Can I ask if one direction is easier than the other?
I'm thinking it would be better to go with the one that gets easier (more descending) towards the end.
Thanks for your advice

I think the east start is easier to get to....
True, starting east involves a walk or shuttle to Las Torres versus a catamaran if starting west.

We thought the hike up to the Torres was the hardest day, otherwise there's a lot of gradual up's and down's, but I think that's the most vertical you do in any day. If you want to start with the hardest first, start on the east. The downside to that is your packs are the heaviest (if you're carrying food). If you have an extra night to spend in the park, I'd recommend considering an alternate approach that minimizes trekking with a heavy pack ( http://www.stephandben.com/2012/04/map-how-to-hike-w-in-torres-del-paine.html ). It's what we would have done if we had known.
Thanks for your advice. Funny enough I did read your report (very useful!) beforehand while Googling about Torres Del Paine.
One other advantage by starting with the hardest is that the body (particularly legs and energy wise) will be fresh. Based on my previous experience in El Chalten, the body tires a bit after consecutive days of hiking and camping.
Here's my draft plan for going from East to West for the first two days:
Catch the morning bus from Puerto Natales.
Catch the shuttle bus from Laguna Amarga to Hotel Las Torres.
Hike from Hotel Las Torres to Campamento Torres
Camp overnight at Campamento Torres
Hike to Mirador Torres at sunrise. The heavy gear will be back at Camp
Pack up camp at Campamento Torres
Hike from Campamento Torres to Campamento Los Cuernos
That's exactly what was suggested to us, and what we planned to do until we ran into gear problems. Good luck!
I'm interested to hear more about your thoughts on the hike from Hotel Las Torres to Campamento Torres.
Is it dangerous in certain areas? For example, narrow path, steep slope, strong winds, etc. A few other posts have mentioned this.
I enjoyed hiking in El Chalten a few years ago. In terms of difficulty or steepness, how would you compare this hike (Hotel Las Torres - Campamento Torres) to say the El Chalten hike (Camp Poincenot - Laguna De Los Tres)?
Thanks again for your feedback
This topic has been closed to new posts due to inactivity.
- Guide from Rio Serrano to French Valley (Mirador Britanico) Apr 16, 2024
- Guide needed for Tdp hikes (not W trek) late May? Apr 16, 2024
- Entrance Tickets to Torres Del Paine Apr 15, 2024
- Car Rental Company in El Calafate Apr 09, 2024
- Staying outside the park, when can I enter? Apr 08, 2024
- TDP National Park Tickets Apr 07, 2024
- Everything I learnt about the O / W trek! Apr 06, 2024
- When to book Vertice sites in Torres del Paine Apr 02, 2024
- Need clarification on Y-150 closure Mar 31, 2024
- Mandatory guide for Torres del Paine winter hikes? Mar 28, 2024
- Torres del Paine Help Mar 21, 2024
- Information re TdP. Is it still accurate? Mar 16, 2024
- Day hikes in TdP Mar 07, 2024
- 2100 per person at Eco camp all inclusive for 4 nights Mar 06, 2024
- self drive/Punta Arenas to Torres del Paine? 10 replies
- Which is best place to Stay? 7 replies
- Cascada Travel & Eco Camp Suite Domes? 6 replies
- Solo Hiking in TDP - Not allowed?? 8 replies
- April or November 5 replies
- Hiking boots or shoes for W trek in Summer? 3 replies
- Torres del Paine - Explora Lodge 7 replies
- W Circuit and El Calafate questions 10 replies
- Torres Del Paine day excursion from El Calafate 10 replies
- Wangulen Odyssey 39 replies
Torres del Paine National Park Hotels and Places to Stay
- Saving Money & Budgeting
- Packing & Travel Gear
- Accommodations
- Transportation
- Safety Tips
- Long Term Travel
- South Africa
- Philippines
- Puerto Rico
- Czech Republic
- Israel and Palestine
- Mississippi
- North Carolina
- South Carolina
- New Zealand
- Travel Resources
- Must-Have Items
- Travel Inspo Books
- Why The Cure for Curiosity?

Hiking the W Trek East to West in Torres del Paine National Park
Julia December 26, 2020 Chile 15 Comments
If you’re an outdoor enthusiast, you’ve probably dreamed of trekking in Torres del Paine National Park. I know I had. Due to the amount of planning and preparation it took to book everything, it took me a couple of years to make it happen. But let’s make it less painful for you. Here’s everything you need to know for hiking the W Trek east to west in Torres del Paine National Park.
Disclosure: Some of the links below may be affiliate links. At no additional cost to you, I may earn a small commission if you make a purchase.
Table of Contents
About Torres del Paine National Park
Located in southern Chile in the Patagonia region, Torres del Paine National Park is best known for its soaring jagged mountain peaks, bright blue glacial fed lakes, and a quantity of glaciers and icebergs. In fact, it was rated as the fifth most beautiful place in the world by National Geographic in 2013 and the 8th Wonder of the World by TripAdvisor in 2017.
Visiting Torres del Paine should be on every outdoor adventurer’s bucket list. It is stunning. Unfortunately though, it is one trip that can be incredibly difficult to plan. The lack of information combined with the difficulty of booking campsites are real deterrents. But, if Torres del Paine is worth it to you – stalk the campsites and make it happen! There’s a whole section below on that to help guide you through it, step by step.
View a map of Torres del Paine National Park.
The Best Time to Visit Torres del Paine National Park
Torres del Paine can be visited year round, but because it is located so far south, the best times to visit are between September and April. This coincides with the southern spring, summer, and early autumn where daylight hours are longer and the summer weather is more agreeable. The average day temperature is 54 degrees Fahrenheit (12 Celsius) with highs around 75 F (23.5 C) and lows of 33 F (0.5 C) at night.
In the winter, the weather can become extreme and the daylight can dwindle to just 8 hours per day. This does mean less crowds, but it also can mean snow, and some of the refugios close during this season.
The Cost of Visiting Torres del Paine National Park
The overall cost of your trip will vary greatly in how you plan to visit and where you stay. However, one cost will remain the same, the entrance fee. Currently for international visitors, this is:
- Kids under 12: Free
- Teens 12 – 17: 12.500 CLP
- Adults: 25.000 CLP
- 3+ Day Ticket: 35.000 CLP
Find the latest on the Torres del Paine National Park website .
Hiking in Torres del Paine
Torres del Paine National Park offers world-class hiking. Whether you are looking for some steep climbs, stunning views, or a multi-day trek, you will not be disappointed. The two most popular treks are the W Trek or the O Trek.
The W Trek in Torres del Paine National Park
The most popular of the multi-day treks in Torres del Paine National Park, the W Trek, takes an average of 5 days to hike. It can be hiked in either direction and there are a number of campsites and refugios along the way with varying amounts of amenities. This could mean renting a tent and sleeping bag at each site as well as purchasing meals. While this would increase your cost, it would mean that you only have to carry your own belongings.
The O Trek in Torres del Pain National Park
The other alternative is the O Trek. The O Trek is a similar hike to the W Trek as it covers much of the same terrain, but it also goes around the back side of Torres del Paine National Park. This makes it a bit longer, averaging 9 days of hiking, and it can only be hiked from West to East.
The biggest difference between the W Trek and the O Trek, other than of course the length of time, is that on the O Trek you proceed around the backside of the National Park where amenities are limited. You will need to carry all of your camping gear and food. You’ll also of course encounter a lot less people on that portion.

Find other awesome Patagonian destinations in this 2 Week Patagonia Itinerary .
Why Hike the W Trek East to West
The W Trek can be hiked in either direction, from east to west or west to east, and it will take about 5 days. Remember the O Trek can ONLY be hiked West to East and will take closer to 9 days. So why did I decide to go east to west? Well, mostly because of the days the campsites were available.
However, there are some benefits to it. For one, when hiking the W Trek from east to west, you get the hardest hiking day – going up to Las Torres – done on the first day when your legs are fresh. For another, you are going against traffic meaning you aren’t as likely to get stuck behind anyone on the trails.
In any case, if you decide to hike the W Trek east to west – here are some pointers to help you plan out your trip. If you decide to go West to East, reverse it. I have faith in you. Now on to the good stuff.

Overview of the 5 Days Hiking Torres del Paine
If you’re thinking of hiking the W Trek from east to west, this is what your five days in Torres del Paine will look like. For more information, continue reading for in-depth breakdowns by day.
Day 1 Overview
- Travel from Puerto Natales to Torres del Paine by bus early in the morning
- At the entrance, get off and pay the entrance fees + pick up a map
- Board the bus toward Las Torres
- Hike from the bus to Central Campsite
- Drop off your main pack at Central Campsite
- Hike up to Las Torres and back to Central Campsite with your day pack
- Stay overnight at Central Campsite
Day 2 Overview
- Hike from Central Campsite to Frances Campsite with your pack
- Stay overnight at Frances Campsite
Day 3 Overview
- Hike from Frances Campsite to the Italiano Ranger Station
- Drop off your main pack at the Italiano Ranger Station
- Hike up to Britanico Lookout and back to Italiano Ranger Station with your day pack
- Pick up your main pack and continue on to Paine Grande Campsite
- Stay overnight at Paine Grande Campsite
Day 4 Overview
- Hike from Paine Grande Campsite to Grey Campsite with your main pack
- Drop off your main pack at Grey Campsite
- Hike past Grey Campsite up to the Hanging Bridges and back with your day pack
- Stay overnight at Grey Campsite
Day 5 Overview
- Hike from Grey Campsite to Paine Grande with your pack
- Catch the Pudeto Catamaran across Lake Pehoe – Busses will be waiting for you there
- Take the bus back to Puerto Natales
Learn how to book campsites for Torres del Pain National Park.
Getting from Puerto Natales to Torres del Paine National Park
As soon as you arrive in Puerto Natales, or even before you arrive, book a bus to Torres del Paine National Park. You’ll want to arrive at the Laguna Amarga Entrance of the park early in the morning, so I recommend taking a bus around 7am. This bus ride is only about 2 hours and offers some great mountain views.
There are a number of bus companies that run this route and whether you book ahead online (I’ve used Bus Bud for this) or you book in person in Puerto Natales, the tickets will be about the same cost. Also, before taking off to Torres del Paine, book your return bus ticket!
Arriving at Torres del Paine National Park
When you arrive at the Laguna Amarga Entrance of Torres del Pain National Park, everyone will get off the bus to pay the National Park fee at the front gate. It does not matter which direction you are headed to or how long you will stay in the park, everyone has a fee to pay. For the 3 day or more pass it is 35.000 CLP due in cash. Credit cards are not accepted.
If you are hiking the W Trek from east to west, you’ll want to take the minibus from the front gate towards Las Torres Hotel, Lodge, and Camping Zone. This costs 4.000, also due in cash.
If you are hiking the W Trek from West to East, you’ll re-board the buses and continue to Pudeto where you will take the catamaran over to Paine Grande.
Check-in Tips for Torres del Paine National Park
Arriving at Torres del Pain National Park is exciting, and has a number of things to remember.
- Take an early bus. Beat the crowds to the entrance and onto the trails.
- Pack plenty of cash. Credit card is not always able to be used within the park.
- You need your passport. Take a sealed plastic baggy to stick it in to protect it from the elements.
- Keep your National Park entrance ticket. You may be asked for it at any time.
- Print off your camping reservations or have them accessible on your phone. You may also be asked for these.
- Pick up a map at Laguna Amarga. Their maps offer insight into the distance between each campsite and major scenic point. These are labeled by hours, not by distance. It’s also available onli n e .

Day 1: Hiking from Central Campsite to Las Torres and Back
Total Distance: 16.7 miles with 307 floors of elevation gain
Total Hiking Time: About 8.5 hours (~0 hours with full pack)
Biggest Attraction: Las Torres
Upon arrival at Central Campsite, check-in and leave your bag behind to make your hike up to Las Torres a little bit lighter. Depending on the time, you may want to set up your tent and all first, or you may want to hit the trail immediately.
When hiking the W Trek from east to west, the first leg of your hike goes uphill for 2 hours to Chileno Campsite. From there it’s another 1.5 hours to Camp Torres and then 45 minutes uphill through a boulder field. The boulder field is the bottleneck as people go at varying paces, and it is a difficult area for passing.
At the top of your uphill climb you will be graced with the beauty of Las Torres. Las Torres are 3 towering peaks – one of the classic views in Torres del Paine National Park. It is a wonderful way to kick off the W Trek. Once you’ve had your fill of the stunning scenery, it will take about 4 hours to get back down to Central Campsite, but it is almost all downhill.

Recommended Day 1 Campsite: Central
If you’re hiking the W Trek from east to west, Central Campsite will be your first night’s stop. It is a really nice campsite. They don’t have a cooking area, and the bathrooms were extremely dirty, but the land is flat, the wind is low, and the scenery is amazing.
If you have pre-purchased meals, you can head across a small stream via a little wooden bridge, to the Central Refugio for dinner. The Refugio is clean and has family style seating for meals with a nice plated dinner and a mixture of plated and buffet breakfast.
If you did not pre-purchase your food, no worries. There is a small cafe onsite for purchasing basic food, like pizza, and of course alcohol. In fact, almost every Refugio offered a small cafe with a limited menu, so do not worry if you don’t pre-purchase meals, you will not starve.
2nd Choice Campsite for Day 1: Chileno
The main disadvantage of Chileno Campsite is you have to hike uphill with your bag for 2 hours, whereas at Central Campsite, you can leave it at the base of the hill. It also helps balance out your hiking distance on day one and day two a bit better.

Day 1 Hiking and Camping Tips
Just a few tips to help you get acquainted with what to expect on day one:
- The bathrooms get really busy and dirty at Central Campsite. Expect quick showers. Make sure you have shower flip flops. Hot water is only on at certain times.
- If you have trekking poles, take them. Particularly for the boulder field – your knees will thank you.
Day 2: Hiking from Central Campsite to Frances Campsite
Total Distance : 13.2 miles with 158 floors of elevation gain
Total Hiking Time: 6 – 7 hours (Carrying full pack all day)
Biggest Attraction: Nordernskjold Lake and surrounding scenery
Today’s hike takes you around Nordernskjold Lake. It does not have too much elevation gain, and it offers amazing views of the turquoise lake. You’ll even pass some lakeside beaches if you need a quick rest. It is the least strenuous of the days, but you will be carrying your pack the whole way.
Recommended Day 2 Campsite: Frances
Frances Campsite is on a hill in a wooded area. As such, all of the tents are on platforms and the bathrooms are a ways of a walk down the hill. But, Frances does have the best showers, hands down. They must have just built them. The hot water hours are also limited, but they were clean and spacious.
For meals, Frances has a very small dining area. Therefore it is harder to pre-order meals here, but they do have a small cafe in their dining area that you can eat in outside of the key dining hours. We went with a 20.000 CLP pizza and 6.000 CLP quesadilla.
2nd Choice Campsite for Day 2: Los Cuernos
The reason Los Cuernos Campsite is second choice is it would make day 3 even longer than the 17.4 miles of hiking it will be. That or you would need to cut out hiking to Britanico Lookout to make it a more reasonable day. Neither of which are great options, so I recommend Frances if it is available.
Day 2 Hiking and Camping Tips
Another day, a few more challenges. Here are tips for your second day of hiking.
- Secure your tent in some way to the platform at Frances. The wind can reach all sides of the tent which can make it more susceptible to flying away.
- Take a flashlight or your phone with you to the bathrooms at night. The path can be a bit tricky with tree roots and tiny wooden bridges throughout the campsite.

Day 3: Hiking from Frances to Paine Grande
Total Distance: 17.4 miles with 187 floors of elevation gain
Total Hiking Time: 8.5 hours (Only 2.5 hours with your full pack)
Biggest Attractions: The mountains at Britanico Lookout and the glacier at Frances Lookout
This hike will take you from Frances Campsite to the Italiano Ranger Station where you can leave your backpack before progressing up to Frances Lookout and then Britanico Lookout. Whether you are hiking the W Trek from east to west or west to east, this part of the trek will be the same as it is an out and back hike. (This is the center of the W.)
From Frances to Italiano is a pretty easy 30 minute hike. Then from Italiano up to Frances Lookout is 1.5 hours, mostly uphill. Frances Lookout offers stunning views, and if its warm enough, you can listen and watch for Frances Glacier calving on the mountain side. From there, it’s another 1.5 hours through Frances Valley to Britanico Lookout. The mountains surrounding Britanico lookout are simply stunning.
Then it is back down from Britanico Lookout to the Italian Ranger station, which took us about 3 hours, and another 2 hours easy hike to get to Paine Grande.

Recommended Day 3 Campsite: Paine Grande
Paine Grande Campsite is extremely windy. Make sure to fasten your tent down well so that it does not fly into the lake, apparently that is not uncommon. We actually stayed in the Refugio here, which was pretty nice. The room had 3 sets of bunk beds with small lockers for each bed. And perhaps more importantly, an inside bathroom!
The dining area is large and all meals are served as a buffet. There are a number of indoor and outdoor areas to hang out in, including a large bar area above the dining space.
2nd Choice Campsite for Day 3: None
There really isn’t a great second choice. Fortunately, Paine Grande is pretty large which makes it less likely to sell out.
Day 3 Hiking and Camping Tips
Congratulations on making it through a long day of hiking! Here are some things you might want to know ahead of time.
- There are multiple places that might seem like Britanico Lookout before you truly reach it. It is marked, so just keep going!
- Find a sheltered place from the wind to pitch your tent at Paine Grande.
- Paine Grande is a great place to take advantage of “happy hour”.

Day 4: Hiking from Paine Grande to Grey Glacier and the Hanging Bridges
Total Distance: 14.7 miles with 243 floors of elevation gain
Total Hiking Time: 7 hours of hiking (4 hours with your full pack)
Biggest Attractions: Grey Glacier and the views from the hanging bridges
From Paine Grande to Grey Lodge is only about 2 hours of uphill hiking and then 2 hours of downhill hiking. If you wanted, you could make it from Paine Grande to Grey Glacier and back again in a day, no problem. OR, you can continue past Grey Glacier onto the O Trek path to the 3 hanging bridges. This was the route we took. It is another 1.5 – 2 hours to get to the first couple of hanging bridges, and they are stunning!
For us, this was the first day we hit “weather”. Surely you’ve heard about the wind and the rain in Torres del Paine, well, this was when it finally hit us.
Hiking from Paine Grande to Grey Glacier was a wind tunnel, like aggressive, struggling to stand upright in the wind. And then there was some mist and a little rain… and to add to the challenge, the downhill portion of the hike getting to Grey Glacier was through a small downhill stream/waterfall. This was also a time that trekking poles would have been invaluable.

Recommended Day 4 Campsite: Grey
Grey Campsite sits in a valley, fairly protected from the wind, and it is very close to the Grey Glacier lookout points. The showers are small and not super clean, and the line formed really early for them due to the shorter hiking day. However, if you wait a little while, the line dies down quickly.
Grey Campsite also offers a small kitchen area to prepare food and a giant lodge style dining area for the pre-purchased meals and café food. It is very beautiful and not too terribly expensive. It was 12.000 CLP for a pizza or burger.
2nd Choice Campsite for Day 4: Return to Paine Grande or the Ferry and back to Puerto Natales
The hiking on day 4 is much more flexible. If you are tight on time, or money, it may be the best option to make it to Grey Glacier and then turn around and hike back to Paine Grande. From there you can spend a 2nd night at Paine Grande or you can take the ferry and bus back to Puerto Natales.
Day 4 Hiking and Camping Tips
This day of hiking is much less defined. Therefore, there are more options and tips than normal!
- If you have the time, definitely hike up to at least the 2nd hanging bridge. Each bridge gets you closer to Grey Glacier and the 2nd one is very long and beautiful.
- There are additional activities you can take part in at Grey Campsite, like kayaking near Grey Glacier for 63.000 CLP.
- There is NOT a ferry or catamaran from Grey. You have to go back to Paine Grande. This seemed to be a point of confusion for many people.
- You can make it from Paine Grande to Grey Glacier, and back, in under 8 hours.

Day 5: Hiking from Grey to Paine Grande and Returning to Puerto Natales
Total Distance: 8.3 miles with 161 floors of elevation gain
Total Hiking Time: 2 hours and 40 minutes (All carrying your full pack)
Biggest Attraction: The catamaran ride across Pehoe Lake
Admittedly, we hiked FAST for this portion. Mostly because we wanted to make sure to make the 11:30am catamaran but also, the wind was once again brutal for part of the hike. That being said, we made it back in somewhat record time and sat on the catamaran pier in the sun while we waited for the 11:30am catamaran to arrive. If you hike “normal pace” it will likely take 3 to 4 hours to make the trek.
The Paine Grande to Pudeto Catamaran
Check the catamaran times at least 1 day before you’re headed back so you can target one appropriately. They are few and far between so you won’t want to miss them. During our time there, they were running 9:30am, 11:30am, and 6:30pm. The catamaran ride is 23.000 CLP, and you purchase the ticket on the boat. Everyone who was at the pier when the catamaran loaded was able to get onto the boat.
The boat ride takes 45 minutes to arrive at Pudeto where the buses will be waiting to take you back to Puerto Natales. On the catamaran you will likely encounter others who just finished hiking the W Trek from east to west and a number of people at the end of their O Trek.
Take the Bus Back to Puerto Natales
Before leaving Puerto Natales, buy a return bus ticket. It does not really matter which bus provider you purchase from, they are all very similar.
Upon return to Pudeto, the process of finding and getting on a bus is pure chaos. There are many people pointing you in the right direction and all of the buses seem to be returning to Puerto Natales, so just make sure you make it on one of them! The bus ride back will be about 2.5 hours total.

Reflections on Hiking the W Trek East to West
Total Hiking Distance: 70.3 miles with 1056 floors of elevation gain
OMG, does that cover it? But seriously, this hike takes you through some of the most beautiful scenery in the world. It also forces you to push yourself, perhaps even out of your comfort zone. 100% worth it. And I highly recommend hiking the W Trek from east to west to avoid too many crowds on the trails ahead of you.
Things I Would Have Done Differently
No matter how much planning you do and how smooth the hiking is, there will always be things you would have done differently. Here are the things I would have revised and things you might want to know in advance:
- I did not take trekking poles. This was a mistake. There are multiple steep uphill and downhill areas where they would be useful. Learn from my mistake. Take trekking poles.
- I booked many meals in advance so that we did not have to carry as much food. Had I known there were cafes at most of the refugios, I would not have booked so many meals in advance. They are expensive and sometimes a little underwhelming.
- I hiked the W Trek the first week of December. Due to this, I packed a number of warm clothes. I did not need all of them. It was way warmer than expected.
Additional Details to Help Prepare You for the W Trek
Visiting Torres del Paine and doing the W Trek require a lot of planning and preparation. Here are a few more details to get you ready to go!
- In Puerto Natales, the 3pm Erratic Rock talk about the W Trek was useful and worth the hour – two hours it took. However, take it with a grain of salt. They made the hike sound like a horror story!
- Stop at Frutos Secos in Puerto Natales for bulk dried fruit and nuts. It’s a real lifesaver!
- Each Refugio has small cafes and bars featuring happy hours. To give you an idea of cost: Beer tends to be 4.000 CLP, Wine 6.000 CLP for a glass, and 2.000 – 3.000 CLP for a coffee.
Travel Tip: Always travel with travel insurance, especially on epic adventures like the W Trek! I recommend and travel with World Nomad’s. Check them out.

Alternatives to Planning and Hiking the W Trek
Maybe hiking the W Trek just isn’t in the cards for you. Whether you can’t get the campsites necessary, you don’t want to hike that far, or maybe you want to hike further. Have no fear, there are lots of alternatives!
1. Book a Tour for the W Trek
If planning is not your strong suit, but you still want to hike the W Trek in Torres del Paine National Park, book a tour! They’ll take care of the planning and details, and you’ll get to enjoy the hike stress free. Check out this budget W Trek tour or the many options that Fantastico Sur and Vertice offer.
2. Hike Further with the O Trek in Torres del Paine
Of course the first alternative to call out is the O Trek. It covers much of the same terrain as the W Trek, but goes around the back side of Torres del Paine National Park as well. It takes about 9 days on average and can only be hiked from West to East.
If you’re interested in the O Trek, I highly encourage you to read more about it. The back side of the park is less traveled, for better and worse. You will find less people but there are also less amenities available. You must carry your own camping gear and food for one. If that sounds awesome to you – do it!
3. Day Trips into Torres del Paine National Park
Maybe you didn’t book reservations in advance or you’re not a long distance hiker or camper. Whatever the reason is, there are other ways to explore Torres del Paine National Park.
Day hikes offer you the opportunity to explore Torres del Paine and see some of the highlights while taking out the stress of a long distance hiking and camping trip. You can either stay in the park – you are most likely to find space at the campsites near the beginning and end of the W Trek, or if you can’t find space there, you can make the commute from Puerto Natales daily. This sounds terrible to me, but we did encounter a few people doing this.
Of course, the other option to minimize the logistics, is to book day trip tours into the park. This will make your trip run smoothly without the extra planning on your part. Here are some great options.

Looking for Other Epic Hiking Adventures?
I’ve gotten really into hiking around the world: Mount Everest Base Camp in Nepal, the Inca Trail in Peru, the Lost City in Colombia… My number one recommendation for those who enjoy the W Trek is without a doubt the Mount Everest Base Camp Trek.
Mount Everest Base Camp Trek
The Mount Everest Base Camp Trek in Nepal is generally a 12 day hike and features more breathtaking views, like Patagonia. I’d go so far as to say it is a “must” bucket list item for any hiker. Here’s some posts to get you started:
- Planning for the Mount Everest Base Camp Trek
- Packing List for the Mount Everest Base Camp Trek
- Hiking to Mount Everest Base Camp
Further Hiking Inspiration
If the Mount Everest Base Camp Trek is not your speed, check out some other unique hiking destinations around the world for day trips or longer treks:
- Mount Hua and the Infamous Plank Walk in China
- The 3 Day Hike from Kalaw to Inle Lake in Myanmar
- Hiking Up Mount Sinai in Egypt
Get to Know More of Patagonia
Besides hiking the W Trek, you will want to explore more amazing parts of Patagonia. Here are some other must-visit places:
- Epic 2 Week Patagonia Itinerary: Travel Guide to an Outdoor Paradise
- The Complete Guide to El Chalten, Argentina
- 9 Best Things to Do in El Chalten, Argentina: A Hiker’s Paradise
- 18 Best Things to Do in El Calafate, Argentina
- Where to Stay in El Calafate: Hotels for All Budgets
- Ultimate Guide to Visiting the Penguins of Isla Magdalena from Punta Arenas
- Best Time of Year to Visit Patagonia: Season by Season Breakdown
- And of course…. How to Book Campsites in Torres del Paine National Park
Plan your trip to Patagonia with this detailed 2 week itinerary!
Like this post? Pin it.

Other posts you might like
Comments 15.

Your photos are amazing! Definitely makes me want to travel here once restrictions lighten up!!!

Torres del Paine is one of the most beautiful places I’ve ever seen. You will not regret going!

What a stunning hike! The views look breath-taking! I love the blue skies and crystal blue waters! Those hanging bridges look incredible too! I’d love to experience the hike in person! Thanks for the great guide!
You’re welcome! I hope you get to experience it one day – it is well worth the journey!

Wow, this looks seriously incredible. A few days of incredible views! And these are great tips.
Thanks – All of Patagonia is really incredible but Torres del Paine definitely takes the cake!

This looks incredible! Both the W and O treks look like hiking heaven with those stunning vistas and bright blue glacial lakes. I was planning to try this right now (January 2021) before covid-19 madness started…I still hope I can go one day!
I’m so sorry you had to postpone! I’d definitely give it a shot after Covid winds down – it really is as beautiful as it looks!
Squeeee we’ll get there at some point! 😀

Torres del Paine has always been a place I want to go. Both to hike and to sea kayak. I’m surprised that you got so much clear weather by your photos. great resource for future planning.
I have to say, we carried so much warm weather and rain gear that we barely needed – we really hit the jackpot on weather! I hope you have the same luck when you make it to Torres del Paine.

I would love to do this hike one day. Whilst I have been to Chile, I didn’t go to the South of Patagonia because I told myself that I will return and combine it with a trip to Antarctica. The scenery on this hike is so amazing and the places you passed by are so serene. Takes me back to my memories from Chiloe Island.
Patagonia would be a great trip to add on to Antarctica! It was almost a tease to be so close and unable to go, but Patagonia is definitely worth the trek to get there. The scenery all over is so untouched and it’s not crowded which does make it super serene. I hope you make it there soon!

Hello, Thank you for you blog. Im just wondering how long is the hike from camp central? Ive read that it closes at 3pm? What time did you leave puerto natales and start hiking? Thank you
Hi April – I recommend leaving Puerto Natales early in the morning. Try to catch a 7 or 7:30am bus if possible. You’ll have 2 hours on the bus to nap if needed but you’ll then get to the front gates before many other buses arrive and have all day to hike! From the front gate, you’ll take a shuttle bus towards Camp Central. You can leave your bag at Camp Central to hike to Las Torres – although you won’t be able to formally check in that early. The hike to Las Torres from Camp Central will take between 7 – 9 hours depending on fitness levels and how much time you spend admiring the views! Upon return to Camp Central, you can do the official check in.
There is a stretch of the path after Chileno Camp leading to the Torres that closes after 2pm. Sometimes there is a park ranger making sure people don’t continue, sometimes there isn’t and people can walk past it. My understanding is that this is to help ensure hiking safety. Similarly, people should not leave the lake at the base of Las Torres after 4:30pm to avoid hiking in the dark. Sometimes park rangers will be emptying out this area at that time too. Start early and you won’t have to worry about it!
Join the conversation Cancel reply
The Ultimate Guide to Hiking the ‘W’ Trek in Torres del Paine Without A Tour
By Author Steph Dyson
Posted on Last updated: 12th December 2023
Hiking the W in Chilean Patagonia’s Torres del Paine National Park is one of the absolute highlights of a visit to Patagonia – I should know, I’ve done it twice!
Back in March 2016, I walked the Torres del Paine W trek as part of a tour around Patagonia and was so struck by the park that I returned in March 2017 to hike the Full O Circuit .
In September 2022, I returned on a third occasion, this time to explore the other attractions of Torres del Paine National Park beyond these two, multi-day hikes.
It’s fair to say that on all occasions I have fallen head over heels in love with this part of Chilean Patagonia.
The problem is, the first time I hiked the W trek in Patagonia, I did so as part of a guided tour. We were dropped off at the Pudeto ferry port on Lake Pehoé and from that point onwards barely even had to think for ourselves.
We hiked the W during the day led along the one path by our guides and arrived at night to pre-pitched tents and pre-paid food.
However, it didn’t take more than five minutes of being in the park to realize that a tour was utterly unnecessary and that trekking in Torres del Paine solo and self-guided is easy and will also save you a whole stash of money.
Click to navigate this article:

Know-before-you-go facts about the Torres del Paine W Trek
- How long is the W trek in Torres del Paine? It’s an 80-kilometer (50-mile) hike that most do over four or five days.
- When can you hike the W trek? The park is open year-round, however, for self-guided trekking, you can only hike between October and the end of April. If you want to hike during the winter months (May through September), you’ll need to arrange a guide. Our local partner, Chile Nativo, lead winter tours of the W trek and offer a 5% discount to Worldly Adventurer readers (use “Worldly Adventurer” in the referral discount box when you book!).
- Do you need to reserve camping spots/dormitory accommodation in advance of hiking the W? Yes, you must have reservations at each of the campgrounds or dormitories in which you plan to stay during the hike. You might be required to show your reservations when you enter the park, too.
- What about food? You can reserve full board at the campgrounds, which will include an evening meal, breakfast the day after your stay, and a packed lunch for you to take to the next campground. This typically needs to be booked in advance, although if you get to the campground early enough, you can sometimes do it on the day. Some campgrounds offer buffet dining (Grey and Paine Grande), so can be a good place to stock up on some snacks for the following day.
- Are reservations open for the campgrounds and dormitories along the W trek for the 2023/2024 season? Yes, reservations opened in July.
- How fit do you need to be to hike the W trek? While previous backpacking experience is not necessary, you do need a reasonable level of fitness to be able to climb up into the Frances Valley and up to the towers themselves. It’s helpful to have done a couple of practice walks, with a backpack weighing around 10 kilograms (22 pounds), in preparation for the trail.
- Do you need to book your park entrance ticket in advance? You must book online as they are no longer accept payments at the park entrance. Book your ticket online here . You need to download the QR code in Puerto Natales while you have internet (there is no signal in the park) and may need to show a copy of your passport to prove you do not live in Chile.
- How much does it cost to enter Torres del Paine National Park? The cost of entering the park varies according to how long you plan on staying. For up to three days in the national park, it costs $31,200 CLP ($34 USD) for adults and $16,000 CLP ($17 USD) for children aged 12 to 17. For over three days in the park, the cost is $44,500 CLP ($48 USD) for both adults and children.
- What is the altitude of Torres del Paine National Park? The highest point in the park is the John Gardner Pass at an altitude of 1,200 meters (3,900 feet) above sea level. However, only those trekking the O Circuit are required to reach this height; all of the W trek is at altitudes below this.
Firstly though, what actually is the W? The W is a four- or five-day hike in Chilean Patagonia’s Torres del Paine National Park. It’s named the W because it follows a W-shaped route and can be hiked either from west to east (my preferred route) or from east to west.
Along the way, you stay overnight in official campgrounds, which also have indoor dormitories, covered cooking areas for campers, and restaurants where you can eat pre-ordered meals.
Is the W worth it, though? It’s one of Patagonia’s easiest multi-day hikes and, while hiking for five days might not be at the top of everyone’s to-do list, the scenery in Torres del Paine National Park makes up for the hard work! Every day has spellbinding views: whether of Grey Glacier on day one, the French Valley on day two or three, or the eponymous towers on the final day of the hike.
You’ll finish tired but truly fulfilled by the experience – and proud of yourself for having completed it! Bear in mind that the W trek is a moderately challenging hike. If you’re able to walk up to 18 kilometers (11 miles) per day (and feel like you would be able to do that over multiple days), then you will find this hike perfectly doable.
That said, the hike up to the towers on the final day of the W (or the first, if you’re hiking east to west), is classed as a difficult hike due to the elevation gain of 900 meters (2,956 ft).
Bear in mind that you will be trekking with a backpack; the contents will depend on whether you’re carrying your tent and meals or planning on renting camping equipment and paying for meals at the campgrounds en route. Before hiking up the French Valley and up to the towers, you can also leave your backpacks at the rangers’ station or campsite, which means you won’t have to carry them up much elevation.
I highly recommend that, before heading to Patagonia, you go on a couple of hikes of around 18 kilometers (11 miles) with a backpack that will mimic the weight you’ll be carrying in the park – this will also help you to break in any hiking boots you might have bought for the trek and find out if they give you blisters!
How much does it cost to hike the W?
I’ve hiked the W twice: once as part of a tour and another time independently as part of hiking the O Circuit (which is a nine- or ten-day hike circumnavigating the national park and whose final five days are the W).
On my second visit to the national park, it became clear that I really didn’t need to hike the trails using a tour company. Not only is it expensive (it costs from $1,500 USD per person), but it’s unnecessary; all of the trails are clearly marked and busy with people and it’s easy enough to make camping reservations yourself.

Hiking the W independently costs $157,000 CLP per person ($173 USD – check here for the most up-to-date conversion), plus the cost of food .
Camping and Transport cost breakdown*
- Return bus from Puerto Natales to Torres del Paine National Park: $13.323 CLP ($15 USD)
- Adult entrance fee into the park: $44,000 CLP ($49 USD)
- One-way ferry from Pudeto de Paine Grande Ranger Station: $30,000 CLP ($40 USD)
- Grey Campsite: $11,000 CLP (per person) ($12 USD)
- Paine Grande Campsite: $11,000 CLP (per person) ($12 USD)
- Francés Campsite: $31,000 CLP (per person) ($35 USD)**
- El Chileno Campsite: $31,000 CLP (per person) ($35 USD)***
* these figures are all updated for the 2023/2024 season.
**based on two people sharing a tent
***Torres Ranger Station (the free camping closest to the towers) is closed for the foreseeable future.
Food breakdown
- When we hiked the Full Circuit, we paid $68,620 CLP ($95 USD) between four people for all of our food. That’s $17,155 CLP ($20,5 USD) per person. No kidding.
- So for your food budget, expect to spend no more than $10,000 CLP ($12 USD) (read this full outline of exactly what we took with us in terms of food when we walked the Circuit)
If you want to save time, the website Torres Hike can show you the availability of accommodation and allows you to book it directly through them , rather than having to go via the Vertice Patagonia and Las Torres (previously known as Fantastico Sur) websites. All you need to do is plug in your dates and it’ll show you which campgrounds and refugios are available – saving you LOTS of time. You can then book directly with them, rather than having to try and book through the other websites!
How do you make campsite and refugio bookings for Torres del Paine?
The system for making refugio and camping reservations has changed dramatically over the past couple of years and a lot of the information you find online about the subject is out of date.
I also put together this epic, 5,000-word post about securing camping reservations in Torres del Paine that literally walks you through the process. However, I highly recommend just using Torres Hike . Yes, they charge you a small fee, but it honestly saves you so much time.
The reason it’s so challenging to make reservations independently is because there are two different companies who offer campgrounds and dorms in the park and you will have to reserve some campgrounds with one on their website and some with another on their website; trust me, it’s a painful process. Save yourself the stress and hassle of doing this by using Torres Hike instead.
Reservations are now open for the 2023/2024 season. If you’re struggling to find spots for the coming season, you should also read my article about alternative ways to hike the W if you can’t get camping reservations .
You can also check out this ultimate guide to Torres del Paine National Park , covering everything from the best time to visit, to where to stay and what to do beyond the W trek.
If you’re completely baffled by the process and just want someone else to deal with it, you can book with my partner in the region, Chile Nativo , who organise, guided, self-guided and fast-track (three-day) W treks. They give a 5% discount to Worldly Adventurer readers (use “Worldly Adventurer” in the referral discount box when you book!).
What equipment do you need to hike the W without a tour?
To pay as little as possible trekking Torres del Paine solo, it does require that you have the following pieces of equipment:
- A tent: I strongly recommend the lightweight Big Agnes Copper Spur HV UL2 tent ( REI | Backcountry | Amazon ), the North Face Stormbreak 2 (buy it on REI | Amazon ), or, for more room, the North Face Stormbreak 3 (buy it on ( REI ).
- A sleeping bag: I recommend the Nemo Disco 15 for women (buy it on REI ) and for men (buy it on REI ).
- A sleeping pad: Get a cheap foam pad ( REI | Backcountry | Amazon ) or a more comfortable Therm-a-rest Prolite (buy it on REI | Backcountry | Amazon ).
- A headlamp : Useful for midnight toilet visits and the hike up to the towers (buy one on REI | Black Diamond | Backcountry ).
- A cooking stove and gas: The affordable MSR PocketRocket 2 (buy it on REI | Backcountry | Amazon ) is great value for those on more of a budget, and is super lightweight.
- Cooking pots: I recommend the MSR pots set (buy them on Backcountry | Amazon ) as they’re good quality and food will stick less, which will make them easier to clean.
- Plates, a mug, and cutlery : A collapsible bowl is a great space saver (check out Sea to Summit on REI | Backcountry | Amazon ); I recommend a reasonably cheap, plastic mug (buy it on REI | Backcountry | Amazon ) and for cutlery, a multipurpose spork is a good choice (check them out on REI | Backcountry | Amazon ).

I’ve detailed exactly the items that I packed for the O Circuit in Torres del Paine (and which are still relevant to the W trek) and also what I pack in my rucksack on a trip to Patagonia in this packing checklist . Both have a free packing checklist download, too.
I recommend you take a look if you’re thinking of investing in camping equipment before you head over to Patagonia (something I would strongly advise if you plan on doing any other hikes or wild camping or if you’re looking at exploring the Carretera Austral ).
Planning Your Trip to Patagonia?
Save time, stress & money with a customized travel itinerary planned for you by a Patagonia expert
What previous clients have said:
Steph’s help laying out an itinerary for Chile was huge toward us having a great trip. She listened to our interests and compiled a framework that we could follow to make our plans. She included many practical tips as well as numerous options. She truly saved us many, many hours of research.
If you’re already traveling around Patagonia, what can you do to get your hands on this camping equipment for Torres del Paine?
You have three options:
Buy equipment in Punta Arenas or Puerto Natales
There is a wide range of hiking and camping equipment shops in these two towns. Punta Arenas is a tax-free zone so prices here are cheaper than you will find in Puerto Natales, although Calle Manuel Bulnes in the latter has some gear shops.
I actually found a pair of waterproof trousers for only $15,000 CLP ($18 USD) in one of the shops there, which is a lot cheaper than I thought they would be.
If you’re looking to buy equipment for camping and hiking in Torres del Paine National Park, you should be able to find everything that you need in these shops, but you will pay an elevated price for good-quality gear.
Estimated additional cost: $360,000 CLP+ ($400 USD+) per person
Rent equipment from Puerto Natales
Your second option is to rent all of your camping and cooking equipment from Rental Natales (you can book online) in Puerto Natales. However, they are very expensive.
There are other places in Puerto Natales to rent equipment too, so I suggest having a wander around and looking out for signs for rental equipment. Yaghan House (O’Higgins 584) and Lili Patagonico’s (Arturo Prat 479) have much cheaper, good-quality rental gear.
Remember to check the equipment thoroughly before committing as it does get a lot of wear and tear on the trail and you want something without holes and with zips that close to keep you warm and dry!
Estimated additional cost: $147,000 CLP ($162 USD) per person (based on two sharing) for five days’ rental
Rent equipment at each campsite in Torres del Paine National Park
Your final option is by far the most expensive. Each of the main camping grounds in Torres del Paine rents out tents, sleeping bags, and sleeping mats – but at a very high cost.
For example, in Grey campground, you can hire a two-man tent for $29,000 CLP ($32 USD), a sleeping bag for $21,000 CLP ($23 USD), and a sleeping mat for $8,000 CLP ($9 USD), bringing up your overnight cost (including the cost of the camping site) to $53,000 CLP ($58 USD) per person per night (based on two sharing).
Bear in mind, this doesn’t include the cost of hiring cooking equipment (which you can’t do at the campsites), so you will also need to pay for meals at each – an additional cost of between $55,000 CLP ($61 USD) and $80,000 CLP ($88 USD).
Estimated additional cost: $232,000 CLP ($256 USD) per person for equipment and $256,000 CLP ($282 USD) per person for full board for five days hiking the W circuit (based on two sharing).
How do you get from Torres del Paine National Park to Puerto Natales ?
It’s easy enough to get to Torres del Paine National Park with public transport.
Four companies travel from Puerto Natales to Torres del Paine each morning and all cost around $22,000 CLP ($25 USD) for a return ticket (which can be used on any of the company’s buses back from the park).
You can buy tickets online for Bus Sur (who have lots of departures); other companies do run this route, however you need to buy tickets from their offices, which are inside the Terminal Rodoviario (Av. España 1455) in Puerto Natales.
If there are a few of you, consider negotiating a group price like we did, which got us a few thousand pesos off per ticket.
It’s advisable to book your bus ticket at least a week in advance when visiting the park in high season (December through February).
Timetables for buses from Puerto Natales to Torres del Paine (east to south: Laguna Amarga, Pudeto and Administración)*
Conventionally, buses have departed from Puerto Natales and entered the park via the northeastern entrance at Laguna Amarga (for the minibus to the eastern starting point for the W), before continuing to Pudeto (for the catamaran to the western starting point for the W) and finally to Administración (not a destination along the W trek).
These now continue along to Hotel Lago Grey and stop at Camping Pehoé en route, too.
These bus timetables are below and can be booked online in advance via Bus Sur’s website:
Pre-pandemic, the following companies also offered services. However, their websites are no longer active and I can’t find them on any local booking sites.
That doesn’t mean they don’t have buses, however; if you can’t get a reservation with Bus Sur then it’s still worth going to the bus terminal in Puerto Natales as some will likely still be in operation and with similar departure times:
- Transport Maria José (tel. 61/2410 951)
- Buses Gómez (tel. 61/2415700)
- JB Buses Patagonia (tel. 61/2410 242)
- Buses Juan Ojeda (tel. 9/8943 7808)
*Service available November through April
Timetables for buses from Torres del Paine to Puerto Natales (Administración, Pudeto, Laguna Amarga)*
The following timetables are when buses can return you to Puerto Natales from the four different stops in the park. They can also be booked online and in advance via Bus Sur’s website.
Note that you have to return with the same bus company you entered the park with – you won’t be allowed on a different company’s buses. You don’t have to book a particular bus time; you will be able to turn up and get onto whichever bus you choose.
As above, there should be other companies offering buses to and from Puerto Natales into the park; visit the Terminal Rodovario in Puerto Natales to find out if you can’t make a reservation with Bus Sur.
Where do you buy your Torres del Paine entrance ticket?
The cost of entering the park varies according to how long you plan on staying. For up to three days in the park, it costs $31,200 CLP ($34 USD) for adults and $16,000 CLP ($17 USD) for children aged 12 to 17. For over three days in the park, the cost is $44,500 CLP ($48 USD) for both adults and children.
It’s no longer possible to buy your ticket at the Laguna Amarga entrance to the national park (the first stop on the bus if entering via that entrance) or at the Administración entrance (if entering via that entrance).

You must buy it in advance online here . You must download the QR code to your phone before you enter the park (as you won’t have signal when you get there!) and bring your passport to show that you’re not a Chilean resident.
Torres del Paine W trek itineraries
Hiking in Torres del Paine National Park is significantly cheaper if you go self-guided.
There is also absolutely no chance that you’ll get lost. Believe me, the W trek is now so busy that (unfortunately) you see people all the time.
If you want to trek Torres del Paine solo, you can either hike from west to east (my preference, as I’ll go into below) or east to west.
When you enter the park and pay your fee, you will be provided with a Torres del Paine W trek map to be used when you’re walking.
Unfortunately, the map that you get from CONAF doesn’t include distances. I would strongly recommend you download Maps.me, a free app that has all the trails marked and you can use it to work out distances if required.
Itinerary one: W trek in five days with sunrise at Mirador Las Torres (west to east route)
Why hike this route:
- This trail builds up to the most exciting part of the trek, the Mirador Las Torres viewpoint on the final day.
- It also starts with a short first day, giving you time to get into your stride.
Want to know how to book the campsites mentioned in this itinerary? Head over to this comprehensive article about booking Torres del Paine camping or hostel accommodation .

Day One: Puerto Natales to Grey
- Distance: 11 kilometers (6.8 miles)
- Duration: 3-4 hours hiking
6:50am Take a bus from Puerto Natales to the Pudeto (the catamaran ferry stop). You will stop at the park entrance when you first get into Torres del Paine to show your entrance ticket.
You must have bought this in advance online here and downloaded the QR code to your phone (there isn’t internet cell service at Laguna Amarga!).
9:50am Arrive at Pudeto. Queue up for the catamaran ferry across the lake.
10:30am Take the ferry across to Paine Grande*. This service is operated by Hielos Patagonicos ($25,000 ($30 USD) single, cash only). Tickets cannot be reserved in advance; you buy them at the ferry port.
Ferry schedules do sometimes change; you can check up-to-date ones here .
11:40am Arrive at Paine Grande and trek to Grey. The trail starts to go uphill but soon levels off and has great views of Lago Grey to keep your spirits up!
16:00pm The hike from Paine Grande takes between three and four hours so expect to arrive late afternoon at Grey to pitch your tent, meet some other hikers, and cook dinner.
Day Two: Grey to Paine Grande
- Distance: 18 kilometers (11 miles)
- Duration: 6-7 hours hiking
8:00am Wake up and have breakfast.
9:00am Leave your stuff at the campsite and return a few hours later to pack everything up. From the campsite, an additional one kilometre north through the forest brings you go two viewpoints lying over a kilometre from the glacier’s snout. From here, look out for enormous chunks of ice in the water.
Continue a further 2.5 kilometres (around a one-hour hike) along the path along the edge of the glacier to reach a series of two rope bridges hanging over ravines.
From here you get the best views of the glacier and, if you’re lucky and it’s a clear day, the Southern Patagonian Ice Field beyond.
Return to Grey along the same path and back to Paine Grande.
16:00pm You’ll arrive at Paine Grande at around 4pm, which is where you’ll spend the night. The facilities are great here, with a covered dining area for campers.

Day Three: Paine Grande to Francés
- Distance: 11.5 kilometers (6.8 miles) plus 9 kilometers (5.6 miles) for the extension to Mirador Británico)
- Duration: 4 hours hiking (7.5 hours with extension to Mirador Británico)
8:00am Get up, have breakfast and pack up your tent.
9:00am Today begins with a flattish trek around Lake Nordernskjold to Guardería Italiano. You can leave your bags here with the ranger before hiking up into the Francés Valley.
Note that there’s a new trail that begins about one km (15 mins) after you leave Paine Grande. It’s a little longer – 9 km (5.6 miles) rather than 7 km (4.3 miles) – and so takes around 30 minutes longer, but it has fewer hikers on it and is really pretty.
11:00am The hike up the Francés Valley may be long or painfully short – all depending on the weather. Both times I’ve walked Torres del Paine W hike I’ve experienced dreadful weather in the Francés Valley.
This part of the hike marks the central section of the W and it’s all uphill. After an hour’s steep gradient up a rocky, slippery trail to Mirador Francés, look for Glaciar Francés as it clings to the mountainside in the west.
If you’re feeling energetic, and the weather’s playing fair, you can continue climbing to Mirador Británico (an additional 3.5 km (2 miles) each way; around three hours’ return), where you’ll view a ring of toothy granite peaks, including the park’s second most famous landmark, the three-horned Cuernos del Paine.
It’s one of the park’s most stunning viewpoints—when the sky is clear. You may even see an endangered Southern Andean huemul (a type of deer) around here.
Luckily, the hike back is downhill to return to Campamento Italiano, where you pick up your rucksack and hike the 30 minutes to reach Francés.
13:00pm-16:00pm Arrive at Francés*, pitch up and enjoy the views across the lake.
*If there is no availability at Francés when you go to make your refugio or campsite reservations , you can instead book to stay at Los Cuernos, which is a further 3.5 kilometers (one hour) from Francés.
Day Four: Francés to El Chileno*
- Distance: 17 kilometers (10.5 miles)
- Duration: 4-5 hours hiking
9:00am Leave the campsite and begin the trek to El Chileno, situated about two hours from the bottom of the towers.
This trek meanders alongside the lake, gaining and losing altitude as it goes, until you reach the start of the valley where it becomes all uphill. The views are incredible but if it’s sunny, it will be hot!
16:00pm Arrive at El Chileno* and pitch your tent. Get everything organised for the morning as you’ll be leaving early. Check with the staff what time sunrise will be the next morning.
*For the 2023-2024 season, and for the foreseeable future, Torres Ranger Station is not open to the public. It’s no longer as easy to get to the towers for dawn as the distance is now around four kilometres, rather than one kilometre; however, it is still possible to do it.
If you can’t get a pitch at Chileno, it is possible to hike from Torres Central/Norte ($25 USD camping pitch per person). Although you’re not officially supposed to hike from here up to the towers, you can: leave four hours ahead of sunrise. It’s an additional one-hour 45 minutes if starting from Torres Central/Norte to reach the towers.

Day Five: El Chileno* to Laguna Amarga and Puerto Natales
- Distance: 13 kilometers (8 miles) plus 8 kilometers (5 miles) for the hike from the Centro de Bienvenida to Laguna Amarga)
- Duration: 6 hours hiking (add an extra 1.5-2 hours for the hike to Laguna Amarga)
4:30am Wake up and take a small bag (including warm clothes and a snack) to see the torres at dawn. Don’t forget your torch as the route is over rocks and can be treacherous.
4:45am Start hiking up to the torres . For us at the very start of March, dawn was at about 7:15am.
8:00am Leave the torres and return to the campsite. Pack up, have breakfast start the long walk down.
12.30pm When you get to Las Torres Hotel car park, there is a shop selling ice creams. To get the shuttle minibus to take you to Laguna Amarga, you need to hike one kilometre down the road towards Torres Central/Norte to reach the Centro de Bienvenida /Welcome Centre.
Shuttles ($4,000 CLP ($6 USD) – you must pay in cash at the shuttle) leave throughout the day to take you to Laguna Amarga. Departures leave the Welcome Centre at 8am, 2pm, 4pm and 7pm daily , and take about 30 mins.
If you can face the walk, it’s about another one and a half hours to the Laguna Amarga Ranger Station where buses are waiting to pick you up.
Hiking there, you can get good views of the towers as they rise out of the Cordillera Paine if the weather is clear.
14:30pm Take the bus from Laguna Amarga back to Puerto Natales.
17:00pm Arrive in Puerto Natales bus station and go and enjoy a pint at Cerveza Baguales on the Plaza de Armas to celebrate!
If time allows, consider spending a night in Puerto Natales to explore all the town has to offer before your onward journey. Our guide to the best hotels in Puerto Natales caters for all budgets, styles and preferences.
*If you can’t get a pitch at Chileno, it is possible to hike from Torres Central/Norte ($21 USD camping pitch per person). Although you’re not officially supposed to hike from here up to the towers, you can: leave four hours ahead of sunrise. It’s an additional one-hour 45 minutes if starting from Torres Central/Norte to reach the towers.
Make sure you bring a headtorch for climbing in the dark (it will get lighter as you reach the more difficult stretch of hiking just below the towers), plus warm clothing (even including a sleeping bag) to use at the top and keep you cozy as you enjoy the sunrise.
Itinerary two: Torres del Paine W trek in four days with sunrise at Mirador Las Torres (west to east route)
Why hike this route?
- It’s a good option if you don’t have much time

Day Zero – Puerto Natales to Paine Grande
- Distance: nil
- Duration: nil
2.30pm Catch the Bus Sur bus from Puerto Natales.
You will stop at the park entrance at Laguna Amarga when you first get into Torres del Paine to pay your entrance fee.
You must have paid for your ticket in advance online here AND downloaded the QR code; you will not find cell service or WIFI at the entrance.

5.15pm Arrive at Pudeto take the ferry across to Paine Grande at 6pm. This service is operated by Hielos Patagonicos ($25,000 ($30 USD) single, cash only).
Tickets cannot be reserved in advance; you buy them at the ferry port. Ferry schedules and prices do sometimes change; you can check up-to-date ones here and the 9am ferry only runs November through the end of March.
6.30pm Pitch up at Paine Grande, have some dinner and then have an early night in preparation for a long day’s hiking tomorrow.
Day One – Paine Grande to Paine Grande
- Distance: 22 kilometers (14 miles) plus 7 kilometers (4.3 miles) if you hike to the last viewpoint)
- Duration: 7-9 hours hiking
7:00am Get up, have breakfast, and pack up your tent.
08:00am Take the trail towards Grey; it starts uphill but soon levels off and has great views of Lago Grey to keep your spirits up!
If you’re fit, you can hike an additional one kilometre north through the forest brings you go two viewpoints lying over a kilometre from the glacier’s snout. From here, look out for enormous chunks of ice in the water.
Turn back and return the way you came, past Grey and then back to Paine Grande.
17:00pm Arrive late afternoon back at Paine Grande to meet some other hikers and cook dinner.
Day Two – Paine Grande to Frances
9:00am Hike to the ranger station, Guardaria Italiano (around two hours), where you leave your rucksack with the ranger. You’ll pick it up on your way back down from the Francés Valley.
The hike up the Francés Valley may be long or painfully short – all depending on the weather. Both times I’ve walked Torres del Paine W hike I’ve experienced dreadful weather in the Francés Valley.
If you’re feeling energetic, and the weather’s playing fair, you can continue climbing to Mirador Británico (an additional 3.5 km each way; around three hours’ return), where you’ll view a ring of toothy granite peaks, including the park’s second most famous landmark, the three-horned Cuernos del Paine.
Luckily, the hike back is downhill to return to Italiano, where you pick up your rucksack and hike the 30 minutes to reach Francés.
*If there is no availability at Francés when you go to make your refugio or campsite reservations , you can instead book to stay at Los Cuernos, which is a further 3.5 kilometres (one hour) from Francés.

Day Three: Francés to El Chileno*
9:00am Leave the campsite and begin the trek to El Chileno, situated about two hours from the bottom of the towers. This trek meanders alongside the lake, gaining and losing altitude as it goes, until you reach the start of the valley where it becomes all uphill.
The views are incredible but if it’s sunny, it will be hot!
*For the 2023-2024 season and for the foreseeable future, Campamento Torres, the campground just below the towers, is not open to the public. It’s no longer as easy to get to the towers for dawn as the distance is now around four kilometres, rather than one kilometre; however, it is still possible to do it.
Day Four: El Chileno* to Laguna Amarga and Puerto Natales
Shuttles ($4,000 CLP ($6 USD) – you must pay with cash in the shuttle) leave throughout the day to take you to Laguna Amarga. Departures are at 8am, 2pm, 4pm, 7pm and takes about 30 minutes.

*If you can’t get a pitch at El Chileno, it is possible to hike from Torres Central/Norte ($25 USD camping pitch per person). Although you’re not officially supposed to hike from here up to the towers, you can: leave four hours ahead of sunrise.
Make sure you bring a headtorch for climbing in the dark (it will get lighter as you reach the more difficult stretch of hiking just below the towers), plus warm clothing (even including a sleeping bag) to use at the top and keep you cosy as you enjoy the sunrise.
Itinerary three: Torres del Paine W hike in five days (east to west route)
Why hike this route:
- Not only do you get to complete the W, it gives you time for a bonus extra hike to the Los Cuernos or Salto Grande viewpoints.
Want to know how to book the campsites mentioned in this itinerary? Head over to this comprehensive article about booking Torres del Paine camping or hostel accommodation .

Day One: Puerto Natales to Mirador Las Torres & Torres Central/Norte
- Distance: 18.4 kilometers (11.4 miles)
- Duration: 6-7 hours hiking
6:45am Take a bus from Puerto Natales to Laguna Amarga. You can book tickets online with Bus Sur or go to the bus station in Puerto Natales the day before you start hiking and book with them or one of the other companies there.
8:45am Arrive at Laguna Amarga. Show your entrance ticket at the ranger’s station.
9:00am To get to the start of the W, you need to take a shuttle bus ($4,000 CLP ($6 USD) – you must pay in cash at the shuttle) to the Centro de Bienvenida (Welcome Centre).
Departures theoretically leave from Laguna Amarga at 9am, 3pm, 5pm and 8pm daily , and take about 30 mins. However, Las Torres (who run the shuttle service) have assured me that the shuttle bus awaits the arrival of the bus from Puerto Natales and will take all passengers that are waiting to board – sending for a second shuttle if there are more passengers than seats.
9.30am You’ll be staying overnight at the Torres Central/Norte campground, so check in and leave your big bags and take warm layers, food, and plenty of water for the hike up to the towers.
Start hiking up to the torres . It’s all uphill and it can be quite steep at points, but it’s worth the effort! All in all, you gain around 800m (2,620 feet).

Take your time, drink plenty of water, and relax when you get to the top.
13:30pm Arrive at Mirador Las Torres and enjoy the views.
15.00pm Start hiking back to the campsite; you’re trekking back the way you came.
17.00pm Pitch your tent, have dinner, and relax!
Day Two: Torres Central/Norte to Francés
- Distance: 14.5 kilometers (9 miles)
- Duration: 5.5 hours hiking
9:00am Get up, have breakfast and pack up your tent.
10:00am You leave Torres Central heading west and reach Lago Nordernskjold. The trail meanders alongside the lake, gaining and losing altitude as it goes. The views are incredible but if it’s sunny, it will be hot!
15:30pm Reach Francés campground, where you’ll stay tonight. Pitch up and enjoy views across the lake. Bear in mind that check-in at Francés doesn’t start until 2.30pm and hot showers aren’t available until 5pm, so take your time on the hike.
Day Three: Francés to Mirador Británico & Paine Grande
- Distance: 14 kilometers (8.6 miles) from Francés to Mirador Británico and 7 kilometers (4.3 miles) from Guardería Italiano to Paine Grande
- Duration: 5.5 hours hiking from Francés to Mirador Británico and 2.5 hours from Guardería Italiano to Paine Grande
9:00am If the weather is good, today is going to be a long day as you climb up into the Francés Valley. Both times I’ve walked Torres del Paine W hike I’ve experienced dreadful weather in the Francés Valley.
From Francés, head west along the path beside the lake to reach Guardería Italiano, a rangers’ station and former (now defunct) campground. Here, you can drop your big rucksacks; just take warm clothing and food for the hike up to the Mirador Británico* (British Viewpoint). This part of the hike marks the central section of the W and it’s all uphill. After an hour’s steep gradient up a rocky, slippery trail to Mirador Francés, look for Glaciar Francés as it clings to the mountainside in the west.

Luckily, the hike back is downhill to return to Guardería Italiano. Pick up your bags and take the new trail that begins just after the rangers’ station; take the lefthand fork that follows closer along the lake. It’s a little longer – 9 kilometers (5.6 miles) rather than 7 kilometers (4.3 miles) – and so takes around 30 minutes longer, but it has fewer hikers on it and is really pretty.
18:30pm Arrive at Paine Grande, pitch your tent and enjoy a hot shower!
*You’re only allowed to start hiking up to the viewpoint until midday, so don’t delay getting to the rangers’ station – although this rule isn’t always enforced!
Day Four: Paine Grande to Grey & Puerto Natales
- Distance: 11 kilometers (6.8 miles) plus six kilometers (3.7 miles) to reach rope bridges
- Duration: 4 hours hiking plus 1.5 hours to reach rope bridges
10:00am Take the trail heading north to Grey. It starts by going uphill but soon levels off and has great views of Lago Grey to keep your spirits up! It takes between three and four hours.
14:00pm Arrive at Grey, where you can leave your big bags. From the campsite, an additional one kilometre north through the forest brings you to two viewpoints lying over a kilometre from the glacier’s snout. From here, look out for enormous chunks of ice in the water.

From here you get the best views of the glacier and, if you’re lucky and it’s a clear day, the Southern Patagonian Ice Field beyond. Return back to Grey.
16:00pm Arrive at Grey, pitch up and relax – you’ve almost finished the hike!
Day Five: Grey to Paine Grande and Puerto Natales
- Distance: 11 kilometers (6.8 miles) plus 2.3 kilometers (1.4 miles) to the Cuernos Viewpoint
- Duration: 4 hours hiking
7:00am Get up, pack up your tent, and have breakfast. Return to Paine Grande along the same path.
10:30am Join the queue for the ferry to Pudeto.
11:00am Take the ferry to Pudeto. This service is operated by Hielos Patagonicos ($25,000 ($30 USD) single, cash only). Tickets cannot be reserved in advance; you buy them at the ferry port.
11:30am Arrive at Pudeto. From here, you can either have lunch in the tiny cafeteria at the ferry dock or you can hike from Pudeto to the Cuernos Viewpoint, a 2.3-kilometer (1.4-mile) one-way hike from the ferry dock; it should take you around an hour each way and grants you incredible views west and east along the Paine Massif range.
A shorter option is the 600-meter (0.3-mile) trail to the Salto Grande Waterfall, which has stunning views of Los Cuernos behind it.,
2:30pm Take the bus from Pudeto back to Puerto Natales. You should arrive around 5.05pm.
Itinerary four: W trek in five days with sunrise at Mirador Las Torres (east to west route)
- You get to see the sunrise at Mirador Las Torres and hiking to it on your first day means your legs won’t be as tired.

Day Zero: Puerto Natales to El Chileno
- Distance: 5 kilometers (3miles)
- Duration: 2 hours hiking
12:00pm Take a bus from Puerto Natales to Laguna Amarga.
2.00pm Arrive at Laguna Amarga. Show your entrance ticket at the ranger’s station.
2.30pm To get to the start of the W, you need to take the shuttle bus ($4,000 CLP ($6 USD) – you must pay in cash at the shuttle) to the Centro de Bienvenida (Welcome Centre).

3pm Start hiking up to El Chileno, the closest campground to Mirador Las Torres, the famed viewpoint of the towers. This is the smallest campground, so sells out fast.
If you can’t get a spot here, you’ll need to camp at Torres Norte/Central and hike four hours tomorrow to reach the viewpoint.
5pm Arrive at El Chileno. Set up your tent, have dinner and relax.
Day One: El Chileno to Mirador Las Torres and then Los Cuernos
- Distance: 19.4 kilometers (12 miles)
- Duration: 6.5 hours hiking
4:30am Wake up and take a small bag (including warm clothes, a sleeping bag, and a snack) to see the torres at dawn. Don’t forget your torch as the route is over rocks and can be treacherous.
8:00am Leave the mirador and return to the campsite. Pack up, have breakfast start the walk down. When the trail splits, you’ll need to take the righthand path that goes alongside Lago Nordenskjöld.

This trek meanders alongside the lake, gaining and losing altitude as it goes. The views are incredible but if it’s sunny, it will be hot!
3:00pm Arrive at Los Cuernos*, pitch up and relax.
*If there is no availability at Los Cuernos, when you go to make your refugio or campsite reservations , you can instead book to stay at Francés, which is a further 3.5 kilometers (one hour) beyond Los Cuernos.
Day Two: Los Cuernos to Paine Grande
- Distance: 17.5 kilometers (10.8 miles) from Los Cuernos to Mirador Británico and 7 kilometers (4.3 miles) from Guardería Italiano to Paine Grande
- Duration: 6.5 hours hiking from Francés to Mirador Británico and 2.5 hours from Guardería Italiano to Paine Grande
7:00am Get up, have breakfast and pack up your tent.
8:00am Today begins with the path alongside Lake Nordernskjold to Guardería Italiano. You can leave your bags here with the ranger before hiking up into the Francés Valley to Mirador Británico*.
10:30am The hike up the Francés Valley may be long or painfully short – all depending on the weather. Both times I’ve walked Torres del Paine W hike I’ve experienced dreadful weather in the Francés Valley.

Luckily, the hike back is downhill to return to Campamento Italiano. From there, pick up your rucksack and hike the two remaining hours to reach Paine Grande.
Note that there’s a new trail that begins just after Campamento Italiano; take the lefthand fork that follows closer along the lake. It’s a little longer – 9 km (5.6 miles) rather than 7 km (4.3 miles) – and so takes around 30 minutes longer, but it has fewer hikers on it and is really pretty.
17:00pm-18:00pm Arrive at Paine Grande, pitch up and enjoy the views across the lake.
Day Three: Paine Grande to Grey and back to Paine Grande
9:00am Hike from Paine Grande to Grey; you can leave everything in your tent, except the items you need for today. The trail starts to go uphill but soon levels off and has great views of Lago Grey to keep your spirits up!
13:00pm Arrive at Grey. From the campsite, an additional one kilometre north through the forest brings you to two viewpoints lying over a kilometre from the glacier’s snout. From here, look out for enormous chunks of ice in the water.
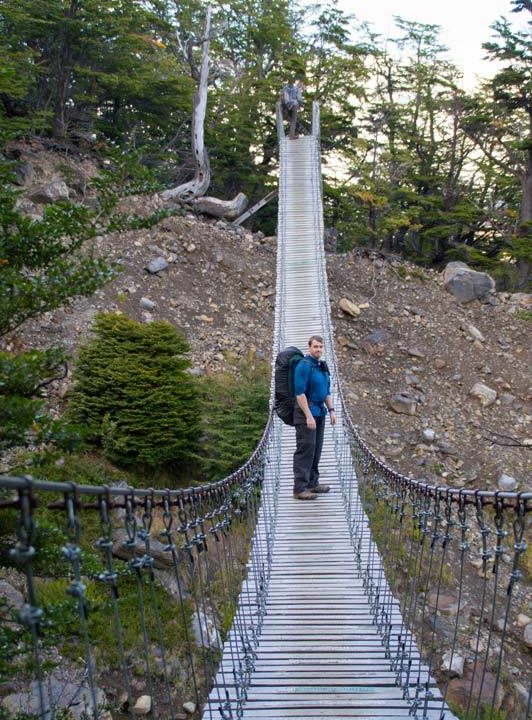
15:00pm Return to Grey along the same path and back to Paine Grande.
19:00pm Arrive at the campground, relax, have dinner and enjoy the feeling of finishing the trek!
Day Four: Paine Grande to Puerto Natales
- Distance: N/A
- Duration: N/A
9.00am Join the queue for the ferry to Pudeto.
9:30am Take the ferry to Pudeto. This service is operated by Hielos Patagonicos ($25,000 ($30 USD) single, cash only). Tickets cannot be reserved in advance; you buy them at the ferry port.
10:00am Arrive at Pudeto.
10.30am Take the bus from Pudeto to Puerto Natales and celebrate your successful completion of the W!
Top tips for hiking the Torres del Paine W Trek self-guided

Having now been hiking in Torres del Paine National Park twice, I’ve learned a few important tips that have kept me happy, sane and comfortable en route :
Top equipment tips
- Camping in Torres del Paine at Francés, Los Cuernos, and El Chileno is on wooden platforms. If you plan to stay at any of these campsites, you will need extra cord or string to help you attach your tent without using pegs.
- Bring a range of warm and wet weather clothing. Check out my packing list for hiking the Circuit in Torres del Paine for the full guide to the clothing that I packed for the trip (and which is also a good guide to what to pack for the W). It also includes a free, downloadable checklist.
- Bring a book or some cards for the evenings as you tend to finish hiking quite early and if it’s cold and wet, you’ll want to retire to the shelters with something to do.
- Having a lightweight tent really does make a difference camping on this trek. Have a look at my review of the Big Agnes HVUL2 , the really lightweight backpacking tent that we used for the O Circuit.
- If you’re carrying all of your own equipment, a 60-litre rucksack should be big enough.
- Pack all of your clothes into dry bags (better than a bin bag which can easily rip). The weather changes rapidly and on days when it’s pissing it down, you’ll welcome the fact that your sleeping bag and clothes are dry. I recommend the Sea to Summit dry bags (buy them on REI | Amazon ).
- Bring a rucksack cover. I’ve heard mixed advice on this one, but a rucksack cover kept our bags dry (and so lighter) when we were hiking in Torres del Paine National Park and no, they didn’t blow away in the wind. If your rucksack doesn’t come with its own, you can find them in various sizes on | Osprey | Amazon (make sure it’s the correct size for your bag – otherwise it will blow away!).
Top food tips
- There is a much wider (and cheaper) selection of food in the supermarkets in Punta Arenas than in the one Unimarc supermarket in Puerto Natales. I recommend doing your food shop there before you take the bus to Puerto Natales. We left the stuff we didn’t need in our hostel in Punta Arenas.
- You can also buy trekking food and bring it with you , but it’s heavier and far more expensive than organising your food when you get to Puerto Natales.
- Pack everything into zip-lock plastic bags and bin all the original packaging that you can to save on carrying any extra weight. Also, don’t bring the full pack of rice if you’re only going to eat half of it – every bit of weight counts!
- You can buy basic staples (pasta, biscuits, tomato puree etc.) from the shops at Paine Grande, Grey, Francés and El Chileno to stock up on supplies. It’s pretty expensive, but totally worth it. They also all stock beer – an additional expense that I didn’t include in the costings for the W trek!
- You don’t need to bring water with you as it’s available from all the glacier meltwater streams that you’ll run into along the W and is drinkable from the taps at each of the campsites. If you’re nervous about drinking the water, you can also bring a Steripen (read my review of the Steripen Adventurer or buy one from Amazon or buy a newer Steripen UV Ultra from REI ) to zap anything that might be nasty or a Grayl ( REI | Backcountry | Amazon ) – find out why I recommend these water filters for South American travel .
- My dad is a pro at packing food for multi-day treks. Read what food we took with us for the O Circuit (and which you can use as a guide for the W too).
- You will need Chilean pesos on you for the park as nowhere accepts cards. You’ll need $25,000 CLP ($35 USD) for the catamaran ferry and then extras for additional food, beer, and anything else you want to buy.

Camping in Torres del Paine
The following summarises some of the main points about booking campsites and refugios in Torres del Paine for the W trek, but you can get a full overview of how to book campsites in Torres del Paine with this article updated for the 2023/2024 season.
Reservations with Las Torres and Vertice Patagonia
You will need to book your campsites in Torres del Paine in advance. For example, in August 2022, many of the campsites and refugios were fully booked for December through February 2023, which just shows how far in advance it gets booked up.
Before you start panicking, what happens each year is that reservations free up again in September/October, probably due to the fact that tour agencies in Puerto Natales make mass reservations for the high season, and then cancel them when they don’t fill the bookings.
If you need anything planned well in advance, then this isn’t going to suit your plans. If your plans are a little more open and you can wait until closer until the time (and keep checking back to see if any spots have opened up), then you should still be able to hike the W during these months.
My recommendation would be to hike outside of these months anyway (November or March) to avoid the crowds as much as possible, but either way, you still MUST SECURE YOUR RESERVATIONS with Las Torres (Francés, Los Cuernos, El Chileno) and Vertice Patagonia (Paine Grande and Grey).
If you’re trying to get a space last-minute, you can always pop into either of their offices in Puerto Natales and see if they can book you in. I’ve heard of people having success with this with only a day or two’s notice.
Reservations with CONAF
For the 2023/2024 season, and for the foreseeable future, all of the CONAF campsites remain closed.
Upgrade your solo Torres del Paine W trek, Patagonia with these changes
If you’re not so bothered about hiking the W in Torres del Paine National Park on a complete budget, consider making the following small tweaks to your itinerary.

Stay overnight at Los Cuernos ($80,000 CLP ($88 USD) per person full board) instead of Francés
Again, this is only really possible if you stay overnight on Day Two in Paine Grande. When we hiked the Full Circuit, we decided to treat ourselves to an all-inclusive night at Los Cuernos.
This meant we still pitched our own tent on a wooden platform, but we had a three-course dinner, breakfast, and packed lunch for the next morning, which reduced the amount we had to pack in our rucksacks for the hike.
The food from Las Torres (previously known as Fantastico Sur) is much better than Vertigo Patagonia too, so I would recommend this instead of eating in the big canteen at Paine Grande.
Los Cuernos now offers camping sites without full board (previously you had to pay for full board at this campsite).
This means that for $25 USD per person you can pitch up your own tent here. They also offer half-board options priced at $62 USD per person, which include dinner and breakfast.
Book full board and a tent or bed at each campsite
You can rent gear and get food at all campgrounds, so if you don’t want to carry anything, then you can also book this way!
Bear in mind that full board at Los Cuernos comes in at $158 USD per person for a fully-equipped tent and full board – so it certainly won’t come cheap!
Did you find this guide to the Torres del Paine W hike useful? Pin it!

Helen Turner
Sunday 4th of February 2024
Excellent article. Plenty of food for thought. Thankyou
Steph Dyson
Friday 9th of February 2024
Thanks Helen! Steph
Sunday 26th of November 2023
We were hoping to hike to Refugio Grey, then take the Navigation boat toward Hotel Grey, then take a shuttle to our car at Pudeto. But I'm not sure how the timing works out. If we take the 14:00 navigation from Refugio Grey, is there time to make the last shuttle from Hotel Grey?
Tuesday 28th of November 2023
Hi Karen, I'm not sure. You would need to go off the timings on the Hotel Grey website or reach out to them directly. Steph
Jonny Collins
Tuesday 24th of October 2023
Thank you for your brilliant blog posts on all things South America - they're perfect for someone like me that loves knowing the logistics of our upcoming trips! My wife and I were meant to visit Patagonia for the first time in 2020 as part of a wider trip that was cut short due to COVID - we read your blog posts at the time whilst planning. We're finally planning to visit in 2024!
Unfortunately due to work commitments we are not able to take more than two weeks off and it is making our itinerary from the UK quite tight (we want to get to El Calafete and El Chalten in the same trip).
Whilst I appreciate you recommend doing the W Trek in 4 or 5 days, we are considering doing it in 3 days (we are experienced hikers and have done multi day hikes before). We had always planned hiking West to East. For the most even split on distance it seems that staying at Paine Grande and Los Cuernos would work best. We're really keen to see the towers at sunrise but appreciate that staying at Paine Grande and Torre Norte to do this would result in a very big second day. We have thought of two alternatives:
Option 1 (West to East): Night 1: Campo Italiano Night 2: Torre Norte
Option 2 (East to West): Night 1: Refugio Chileno Night 2: Campo Italiano
We've not considered yet if these options work with bus and ferry timetables. Do you think either of the above options are feasible to do the hike in 3 days and get to see the towers at sunrise? If not is there an alternative that might work, or if we do the trek in 3 days do we need to accept that we would not be able to see the towers at sunrise?
Any advice on the 'best' way to do the W trek in 3 days would be much appreciated. Apologies if anyone has asked this before! Thanks in advance :)
Sunday 28th of January 2024
Hi Steph, Thank you for your reply. In the end we decided to find an extra day from elsewhere in the trip so that we could do the W Trek and not miss out on anything! Thanks again for your help and for keeping this brilliant blog post up to date!
Thursday 23rd of November 2023
Hi Jonny, Italiano isn't open any more unfortunately. I would recommend just doing day hikes rather than the W. That way, you can actually enjoy your day hikes and not worrying about trying to cover the ground quickly. Steph
Tuesday 10th of October 2023
Great post, thank you! A group of five of us is heading to TDP to do the W-trek in January 2024. Very excited! We're flying from Santiago (SCL); is Puerto Natales a great option to fly into? I heard the drive to TDP from P. Natales is shorter than when coming from P. Arenas? It seems SKY airline has some flights during our time frame. Any great spot to hang out or visit at in P. Natales?
Hi LuAnn, yes you can fly directly into Puerto Natales. Steph
Wednesday 22nd of March 2023
Hi Steph! Can you please provide link where it is stated that a guide is required for hiking in May in Torres del Paine? I had not come across this requirement yet. Thank you!
Thursday 23rd of March 2023
Hi Megan, it's something I was told in a conversation with CONAF, the national parks office. You can reach out to them https://www.conaf.cl/parques/parque-nacional-torres-del-paine/ Steph

Everything You Need to Know for Hiking the W Trek in Torres Del Paine National Park
- Last Updated March 17, 2024
- South-America , Chile
Rising almost 2000m from the Patagonian steppe, the jagged granite spires of Torres Del Paine dominate this region of Chile and make for one of the most jaw-dropping sights in South America. This Unesco Biosphere reserve is one of the finest national parks in the world, covering 181,000 hectares of turquoise lagoons, glacier-fed waterfalls and verdant forest.
However, It’s Torres Del Paines rocky peaks that draw most visitors to the park. The three sheer peaks of Los Torres and the unmistakable outline of Los Cuernos are almost a pilgrimage site for hikers from around the world who flock here to walk the famous ‘W’.

Getting to Torres Del Paine from Puerto Natales
During the high season from October to April, 5 different bus companies provide daily trips from Puerto Natales to Torres del Paine, stopping first at Laguna Amargh (2hr journey) where you will have to hop of the bus to pay your park entry fee (CH$25,000 for foreigners or CH$35,000 if staying for more than 3 days as of Jan 1 2020; note that this can also be paid at the bus station in Puerto Natales), then onwards to Pudeto (3hrs) where you will leave the bus if you are catching the catamaran to Paine Grande, before finally reaching the administration building (4hrs 15).
Return tickets between the park and Puerto Natales cost CH$15,000. During the high season between September and April, the buses leave Puerto Natales at 7am, 7.30am and 2.30pm, getting to Laguna Amarga at 9am, 9:30am. and 4.45pm respectively and Pudeto at 10:00am, 10.30am and 5.30pm. For the return leg of the journey, buses pick up from Pudeto at 1pm, 1.30pm and 7pm and from Laguna Amarga at 2pm, 2.30pm, 7.45pm each day.
Check Bus prices and availability to Torres Del Paine
It is worth noting that between the park’s busiest months, Bus Sur also run a 6.40am service that reaches Pudeto at 8.45am, in time for the first catamaran of the day.
What is the W Trek?
Although there are myriad hiking routes in Torres Del Paine National Park, the most famous and most popular is the W, a 4 to 5-day hike that takes in the park’s most spectacular sights: from the iconic spires of Mirador Las Torres and the enormous Grey Glacier to the steep trail along Valle Francis and the contorted, multicoloured horns of Los Cuernos. It runs up three valleys, creating the W shape that gives it its name. In each of those valleys lies one of the iconic sights of the park
With a route of 80km (50 miles) the W is moderately difficult, mostly on gentle terrain but with the occasional climb up to 800m. With that in mind, you don’t necessarily have to be an experienced hiker, but it helps to be reasonably fit, especially as you will be hiking with a backpack, sometimes for up to 8 hours in a day.

When is the Best Time to Hike the W?
Accommodation on the w trek.
You have two options of where to stay while hiking the W: In a refugio or on a campsite. Deciding which is best for you is generally a toss-up between ease and cost. While refugios offer an extra level of comfort, they can be much more expensive than camping.
A refugio is basically rustic hostel-meets-hotel and they are dotted around all the major stopping points on the trek. They’re open year-round and have dorm-style rooms, shared bathroom facilities with hot showers and a basic, on-site restaurant/canteen and bar. The rooms are generally warm and clean with comfortable beds and the refugios themselves often have open and sociable communal areas where you can relax in front of a roaring fire after a hard day of hiking.
There is also the added bonus of not having to haul camping equipment, bedding (although I recommend bringing your own sleeping bag to avoid the extra rental cost at the refugios), and food with you throughout your trek. All refugios provide meals on a full-board (breakfast, dinner, & a packed lunch), half-board (breakfast and dinner) or meal-by-meal basis. The food is expensive, even by Patagonian standards, so there is the option of using the refugios kitchen to cook your own food if you wish.
Most refugios also have campsites with separate facilities if you would prefer to camp out of the main building.

If you prefer a wilder experience in which you get to sleep under the stars and stare at the park’s incredible views through your doorway, you can camp at certain points along the W Trek’s trail. At refugio campsites you have the option of sleeping in pre-erected tents, meaning you don’t need to carry your own equipment. Sleeping mats and warm sleeping bags are available to rent (although I would recommend bringing your own as they don’t add much extra weight) to keep you cosy. As these campsites are often on the grounds of nearby refugios, you have access to toilets, warm showers, and the communal spaces of the refugios where you can enjoy a hot meal or cook your own dinner.
There is also a free campsite at Italiano, run by the National Park authority (CONAF). You will need to bring your own tent and facilities are a little basic, but they do have on-site toilets, running water and a cooking shelter. Note: You still have to book this free campsite in advance.
BOOKING YOUR ACCOMODATION
With Torres Del Paine being one of Chile’s most popular attractions and the W-trek being the most desirable hiking routes on the South American continent, it’s safe to say that booking your accommodation in advance – even up to 2 months in advance during the high season – is essential. All refugios and campsites can be booked online but to complicate matters slightly, there are 3 different companies that you will potentially have to use, depending which camping spots you choose: CONAF, Vertice Patagonia, and Fantastico Sur.
To check which campsites you will need to book, check out my hiking itinerary lower down this page.
Fantastic Sur run Chileno, Frances, Los Cuernos and Las Torres and their booking site can be found here . The booking system is fairly simple. You just select your dates and then choose whether you would like to camp or stay in a dorm room using the drop-down boxes. After this, you can add additional extras such as sleeping bags and mats, full-board, half-board, or sperate meals. If you have any issues with the booking, you can email them at [email protected] or drop into their office in Puerto Natales.
Vertice Patagonia run both Paine Grande and Grey. Their booking site can be found here . The process for booking with Vertice is slightly different from the one for booking with Fantastico Sur. First, you will need to select the number of people, set your nationality to ‘another’ if you are not Chilean, and the currency to US dollars. On the next page, you will select the W-trek option and then on the following page, you can choose which accommodation you would like to book. If you follow my itinerary below, you will need to select the Grey and Paine Grande option, however, there are multiple combinations as well as the ability to book each one separately. If you have any issues, you can contact them at [email protected] .
The only free campsite on the trek route is Italiano, managed and maintained by the National Park authority (CONAF). Although the site is free, you still need to make a booking in advance via the CONAF booking site . Make sure to print out your reservation and bring it with you.
What Equipment do you need?
If you plan on spending as little money as possible when hiking the W, you will need to bring plenty of camping equipment to avoid having to rent it at the refugio campsites. However, if you choose to stay in the dorm rooms or pre-erected tents, you will obviously avoid having to bring your own tent. I still recommend carrying a sleeping mat and sleeping bag as otherwise, you will have to pay to rent these each night despite forking out for a pre-erected camping spot.
Please remember that whatever you pack you will have to carry with you on your back for up to 7 hours a day so try to pack as lightly as possible.
Camping Essentials : Tent, sleeping bag, sleeping mat, small camping stove and gas canisters, a lightweight set of pans and cutlery, a bowl and a mug.
The weather is incredibly changeable in Patagonia, meaning that you can encounter almost every possible combination of sun, rain and snow that nature can throw at you over the course of just one day. I’m not joking: on one day of my hike, I went from hiking in shorts and a t-shirt in glorious sunshine to having to navigate my way through a blizzard wearing as many layers as possible. Even on a bright clear day, the winds can reach up to 100km/h.
The key to surviving Torres Del Paine’s climate it layering. Try to pack a mix of thin under-layers and warmer, insulated outer layers.
Clothing Essentials : Zip-off convertible hiking trousers x 2, t shirts x 5, warm jumper, fleece jacket, waterproof jacket, hiking socks x 5, underwear x 5, hiking leggings or long johns, gloves, a warm hat, scarf and a lightweight travel towel.
Hiking Essentials : Good quality walking boots, hiking poles, a 50 – 60 litre rucksack for your main gear, a 15 litre daypack, headlamp or torch, and a water bottle.
Additional Items : Sunglasses, suncream, phone, phone charger and universal adapter, padlocks, compact first aid kit, toiletries, and a good camera.
If you are spending an extended length of time travelling around Patagonia or the South American continent, it’s understandable that you may not want to carry a full range of camping equipment with you for your entire trip and will have to get some when you reach Torres Del Paine. If this is the case, you have 3 options: Buy equipment; Rent equipment in Puerto Natales; Or rent equipment at each campsite in the park.
As Puerto Natales is heavily tourist-focused and you should have no problem finding all of the equipment that you need in the myriad hiking and camping shops. However, for high-ticket items such as tents and sleeping bags, you may be better off purchasing them in Punta Arenas (if you have come from southern Patagonia) as the city’s duty-free status reduces the prices significantly.
I chose to rent all of the equipment that I needed from Erratic Rock in Puerto Natales. Not only is this a fantastic hostel, but they also host a daily seminar, nicknamed the 3 o’clock talk. You can join their expert guides each day at 3pm for a cup of coffee and seminar that covers everything you need to know about Torres Del Paine. This includes current weather conditions, accommodation, equipment, trail routes and transportation.
Erratic rock don’t allow reservations on gear and so operate on a first-come-first-serve basis, so you may just have to hope that they have everything you need. Their prices are below and listed as Chilean pesos per day.
Sleeping bag – CH$3000; Sleeping mat – CH$1500; Trekking poles x 2 – CH$3500; Waterproof jacket – CH$3000; Backpacks – CH$4000; Down Jackets – CH$2500; Gloves – CH$1500; Headlamp – CH$1500; Cooking kits for 3 people (Stove, bowls, cups, cooking pot, & water bottle) – CH$4000

Food on the Trek
Although a hot meal at the end of a hard day of hiking may sound tempting, food in refugios can be incredibly expensive, even by Patagonian standards. They are generally set menus and can be pre-booked online when booking accommodation. Many of the refugios do have shops where you can buy basic food supplies such as rice, pasta and sauces as well as snacks but the prices of these are also inflated.
I recommend bringing enough food for the entire trek, packing plenty of non-perishable items that are easy to carry and cook such as rice, pasta and cans/jars of sauces. Noodles, powdered soups and pasta pots will go a long way to keep you fed and energised throughout the hike. Cured meats or sausages also make a great addition to liven up the meal slightly.
For breakfast, bring some sachets of quick-cook porridge and instant coffee. You will not need to bring any bottles of water with you as you can re-fill bottles in the park’s rivers and streams or at the refugios.
Note: You are only able to use stoves at certain spots within camp sites. If you think you will need a warm coffee or tea while hiking, boil water in a morning and take an insulated flask with you.
Meal Costs at Refugios and Campsites

What Route Should You Take?
The W Trek can be walked in two directions; from east to west, starting at Refugio Las Torres and ending at Refugio Paine Grande; or from west to east, starting with the catamaran ride across lago Pehoe and ending with a spectacular view of the morning light bouncing off the spires of Las Torres at sunrise.
The hike from west to east is the most popular as it offers superior views and ends at the park’s most iconic viewpoint.
ITINERARY OVERVIEW
5 days / 4 night itinerary for the w trek in torres del paine.
Day 1 : Puerto Natales to Grey Day 2 : Grey to Paine Grande Day 3 : Paine Grande to Frances/Los Cuernos Day 4 : Frances to Chileno Day 5 : Chileno, La Torres and back to Puerto Natales
DAY 1 ITINERARY
Puerto natales to grey.
Distance : 11km/6.8 miles Time : 3 – 4 hours
7am : Take the bus from Puerto Natales to Torres Del Paine National Park. You will have to hop off the bus at the park entrance to pay the entry fee (CH$35,000) but try to hop off quickly to get to the front of the queue and pay quicky as you will need to re-board the bus in order to get to the next stop.
10am : You should arrive at Pudeto sometime between 10am and 10.30am giving you enough time to head to the ferry office and buy a ticket for the boat ride over to Paine Grande. The ferry is operated by Hielos Patagonicos and costs CH$18,000 one-way. If you have enough time before departure, you may be able to visit Salto Chico waterfall but if not, the boat ride in itself offers spectacular views of the Cuernos del Paine’s horn-shaped peaks. The usually leaves around 11am but timetables can change depending on the weather conditions.
You should arrive at Paine Grande between 11.30am and 11.40am and from here you will begin your first day of trekking.
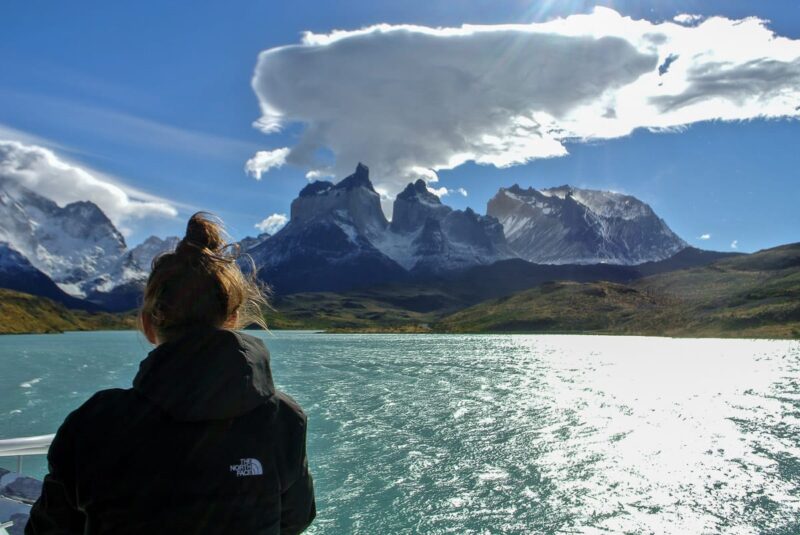
If you want to Hike the W in 4 Days / 3 Nights...
It is possible to do the hike in one day less by hiking from Paine Grande up to Glacier Grey and back in one day, but this will mean a long day trekking 22km. You will be able to set up camp in Paine Grande before beginning your hike and just take your daypacks with you – just be sure to take any valuables. Upon reaching the Grey Campsite, you will be continuing along a short trail path to the first rocky outcrop with a spectacular view across Lago Grey to the glacier. This viewpoint is only around 1km from the campsite but as the path between Grey and Paine Grande closes at 4pm (you are not allowed to begin your hike after this time), you won’t really have time to hike further north to any of the other viewpoints.
The entire hike will take around 6 hours and with the time spent admiring the glacier, you will probably arrive back at Paine Grande between 6pm and 7pm, ready for the next day of hiking (day 3 in this itinerary).
From the pier at Paine Grande, the clearly marked path initially leads north through scrubland before meandering into Quebrada de Los Vientos, the windy gorge, after an hour or so (I can confirm that it was very windy when I hiked this path). From here you will catch your first glimpse of Lago Grey with enormous chunks of pale blue ice bobbing in its water with the glacier itself peeking out behind the almost black shape of La Isla Nunatak.
Continuing the walk alongside the lake, you will enter an eerily silent lenga wood. Part of this area was badly damaged by the forest fire that sadly ran rampant through the park on 27th December 2011. The devastating fire only affected 7% (about 40,000 acres) of the park’s area but went on for nine days before it was finally extinguished by the fire brigade. Unfortunately, some of the affected vegetation will take 200 years to reach maturity again, but the charred, contorted remains of the trees do add a haunting, melancholic beauty to the area.
You should arrive at Refugio y Camping Grey around 3 or 4pm, giving you chance to set up your tent before cooking dinner if you have opted to camp, or relax with a well-earned coffee or glass of wine if you have pre-booked a dorm room and dinner. While it is still light, you may want to take the small trail that forks off from the main path and head over to the glacier viewpoint on the shore of Lago Grey (1km walk).
DAY 2 ITINERARY
Grey to paine grande.
Distance : 19km/11.8 miles Time : 7 hours
Starting your hike at 8am, you will head north from Grey, towards the viewpoints that overlook Glacier Grey. You can leave the majority of your equipment and gear at the campsite or refugio as and just take your daypack and valuables as you will be looping back to Grey again on your way towards Paine Grande.
Walking alongside Lago Grey, you will eventually reach a series of rope bridges suspended over gorges that offer spectacular views of the Glacier and, on a clear day, the entire ice field. The icy ramparts tower as high as 100m in some places and the glacier stretched the entire 6-mile breadth of the lagoon, grey in both name and colour, only brightened by the shimmering turquoise of the glacier and the bobbing icebergs that navigate its waters.
This section of the hike is around 3.5km each way, meaning that you should arrive back at Grey before lunch, just in time to retrace your steps from the previous day and walk the 11km trail back to Paine Grande.

DAY 3 ITINERARY
Paine grande to frances or los cuernos.
Distance : 20.5km/12.7 miles Time : 7.5 hours
Leaving Paine Grande at around 8am, you will begin a 2-hour walk eastbound along the scrubland bordering Lago Pehoe, before catching a glimpse of the blue waters of Lago Skottsberg with the towering 3000m peak of the Paine Grande massif on your left-hand side. After around 2.5 hours and crossing a wobbly bridge, you will reach Italiano, a free campsite where you can leave your bags with the ranger before continuing the hike.
The steep path leading up Valle Frances, the middle section of the W, can either be a breeze of a slog, depending on the weather conditions but the 1-hour section leading to Mirador Frances isn’t too challenging no matter the weather. Here you will find spectacular views of Glacier Frances and Glacier Los Perros and it is the perfect point to stop for a quick lunch beside the turbulent Rio del Frances. On my W-Trek, this is the point I had to stop my journey up Valle Frances: blizzard-like conditions had left me freezing cold and the trail had become dangerous so I had to turn around.
Terrible weather isn’t uncommon in this section of the park, but if you have a clear day, continue onwards through the woods towards Mirador Britanico. It is an additional 3.5km/1.5 hours each way but the lookout is one of the best in Torres del Paine, giving you a close-up view of Los Cuernos. Ensure you have hiking poles as the steep walk down can be a little treacherous.
If you are staying at Campamento Italiano, you can set up for the eveing and relax, otherwise, it is another 30-minute walk along the shore of Lago Nordenskjold to Frances. If you feel like you will have the energy to do it, you can book to stay in Refugio y Camping Los Cuernos, a further 2-hour hike along Lago Nordenskjold. This will make your walk on day 4 significantly shorter and they even have double cabins available if you fancy a quiet night away from a dorm.
DAY 4 ITINERARY
Frances to chileno.
Distance : 17km/10.6 miles Time : 5 hours
If you are staying at Italianos or Frances, you will need to start your penultimate day of hiking at 8am. If you have opted to stay at Los Cuernos, you can treat yourself to a well-deserved lie-in, leaving the refugio at 10am to begin your walk.
The hike begings with a long, meandering walk along the lake through hilly scrubland and across small glacial streams before you turn northwards into Valle y Rio Ascencio for the uphill, 2-hour slog to Chileno. You will have an early start the next morning in order to see the towers of Mirador Las Torres at sunrise, so ensure that you get an early night
DAY 5 ITINERARY
Chileno to las torres & back to puerto natales.
Distance : 13km/8 miles Time : 6 hours
To see the sunrise at the famous Mirador Las Torres, you will have to wake up well before dawn at around 4.30 to begin your walk pre-5am. Just take a small bag of warm clothes and food, as well as a headtorch, for the steep 2-and-a-half-hour ascent to the towers alongside the Rio Ascendio. The final part of the climb is a 1-hour long scramble across boulders and rocks, emerging in front of the magnificent Torres, their peaks reflecting in in the still waters of Laguna Torres. When I visited in March, sunrise was at 7.30am.

If you feel up to it, you can hike further north through the aptly named Valle de Silenco (1 hour each way) to the little-visited Mirador Japones, otherwise, the hike back to Chileno to collect your backpacks and equipment is a little easier than the morning’s ascent, taking just 1.5 to 2 hours.
The W Trek ends with the walk back down Valle Ascencio to Hotel Las Torres (2 hours; 5.5km). From here, you can either catch 2pm shuttlebus (CH$5000) to Laguna Armarga in order to board the 2.30pm bus back to Puerto Natales or walk the extra 1.5 hours to Laguna Amarga Ranger Station yourself just make sure you arrive in time to get one of the buses.
Alternatives to Hiking the W
For more experienced hikers, the O-Circuit is a challenging seven to ten-day hike that includes the entirety of the W, with the addition of a trail that leads walkers further north, around the back-side of the Torres. This allows you to catch glimpses of the park’s much-quieter outer reaches as well as have bragging rights over anyone that has hiked the W.
While the circuit starts and ends at Paine Grande, some people decide to stay on the shuttle bus past Lake Pehoe until it reaches the Park Administration building, adding a scenic 5-hour walk onto the circuit, which is called doing a Q.
If a multiday trek isn’t for you, each of the W’s sections can be split into day hikes while staying over night at some of Torres Del Paine’s luxury lodges or eco accommodation spots.

Dave McClane

David McClane is a photographer and travel writer based in Leeds, UK. Since first picking up a camera on a yearlong journey through Central and South America in 2014/2015, He has carefully documented his travels through almost 50 countries.

A Guide to San Pedro de Atacama, Chile

Patagonia Itinerary: 3 Weeks in Argentina and Chile

10 Beautiful Day Hikes in Torres Del Paine National Park
Patagonia Packing List: Hiking the W Trek in Torres Del Paine
2 responses.
Hello David, thanks a lot for posting about your Patagonia W Trek trip. I found it very helpful as my wife and me are preparing to visit the trek in October this year. I have one question on the routing: Is it possible to start the hike at the “left top” of the W near Refugio Grey? On your map it looks like there is a boat trip available to get there. It would enable us to not walk the same way twice between Grey and Paine Grande. Thanks a lot in advance, Best Nils
Hi Nils. I’m glad that you found the post helpful! As far as I am aware, you can only take the boat across to Paine Grande, meaning you will have to hike the section between there and Refugio Grey in both directions (at least this is what I had to do). I think the boat trip shown on the map doesn’t actually stop near Glacier Grey.
Leave a Reply Cancel reply
Your email address will not be published. Required fields are marked *
Subscribe to my Newsletter
Sign up for my newsletter to get a monthly dose of beautiful photography and travel stories that are bound to fuel your next adventure.
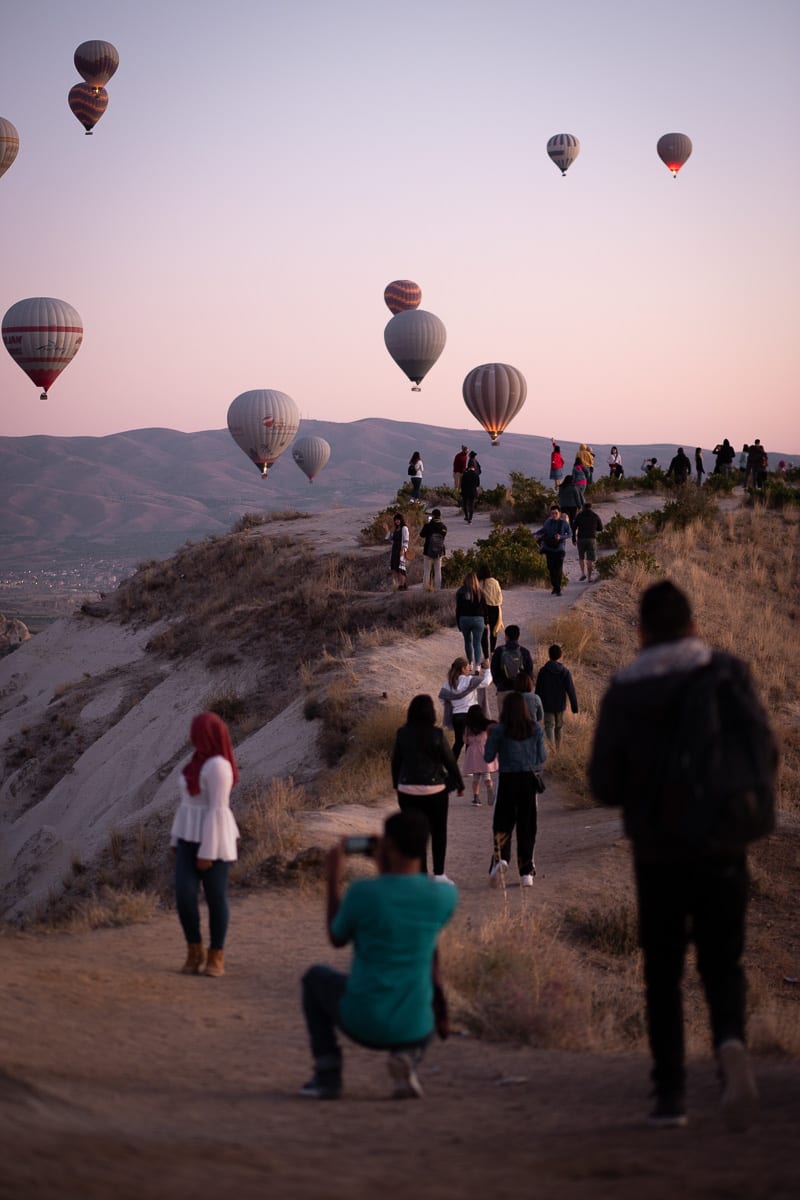
Copyright © 2024 Man Vs Globe
- Testimonials
- T’s & C’s
Torres Del Paine W Trek West to East
Torres del paine w trek west to east, torres del paine w trek west to east introduction.
When hiking the Torres del Paine W Trek West to East, it means that you are walking from where Refugio Grey is located, which is close to the Glacier Grey, down the arm that runs parallel to Grey Lake and to Refugio Paine Grande. In addition, Refugio Paine Grande is where the catamaran arrives and departs from for the ferry trip to Pudeto. Moreover, some people do a shorter W Trek and start or end at Refugio Paine Grande.
Following Refugio Paine Grande the trail heads east towards the entrance to the French Valley. This is the central part of the entire W Trek. Most importantly, there is accommodation one hour past the French Valley entrance at Domos Frances, and another hour along the trail is Refugio, Cabins and Serviced Camping Cuernos.
Once past Cuernos the path continues to head East, leading up to Refugio Chileno (or along to Hotel Las Torres). In particular, Refugio and Serviced Camping Chileno is the place from where to trek 2hrs up to the Torres Base.
Advantages to Trekking the Torres del Paine W Trek West to East
Many people ask which the best direction is to hike the W Trek. Frankly, our view is that it really does not matter. The views are the same, when you stop and look around. The only factor that CAN affect your enjoyment is if the prevailing wind is blowing, and if it is, the wind will be coming from the west. Therefore, trekking West to East means that the wind will be on your back.
Having created thousands of Torres del Paine W Trek itineraries, the essential thing is to get your reservations nailed in the refugios and go with whatever is possible. You may “have” to trek in the direction you do not want, but that is better than not trekking at all. Also, your available, confirmed reservations will determine you other travel logistics in and around Patagonia, and maybe elsewhere. For these reasons, if we handle all your requirements in this part of the world, you will have a lot of hassle taken off your mind!
What follows is a complete W Trek West to East trail description of each sector, along with maps and pictures.
If you’d like us to suggest or create an itinerary for you, please EMAIL US.
Direct W Trek Request Email: [email protected]
W Trek Trail Map West to East

Operated: Between September to end of April
Start: Refugio Grey
End : Refugio Paine Grande
Trek Time: 4hrs
Distance: 11km
Difficulty: Medium.
Experience Required: None, but you need to be reasonably fit and accustomed to long walks.
Altitude Gain: 485m
Description
From Refugio Grey the path is reasonably flat for the first 1hr or so, passing through a wood, crossing over some small streams and then it will start to go up a little. There will be various opportunities to see Grey Lake on the right. The hike will undulate a little until it starts to go up in order to reach a flat plateau area in the woods at an altitude or 485m. On the ascending stretch you can stop and look back to where you have come from and see a marvellous view of the Glacier Grey in the distance.
Once in the wooded area and walking the flat sector it will not be long before you reach the path that is downhill and takes you all the way to Refugio Paine Grande. The entire trek from Refugio Grey is marked as 3.5hrs, but some people take 4hrs and some do it quicker than 3.5hrs.
Paine Grande to Cuernos (via the French Valley)
Paine grande to refugio cuernos via the french valley.

Start : Refugio Paine Grande
End: Refugio or Cabañas Cuernos, or Domos Frances
Trek Time: Allow 5hrs if trekking direct to Refugio and Cabañas Cuernos and 10hrs if trekking into and out of the French Valley. If staying at Domos Frances take one hour of these times.
Distance: 24km if going via the French Valley and 13km if going direct to Refugio and Cabañas Cuernos. If staying at Domos Frances these distances will be about 2.5km less.
Difficulty : Medium to high. Involves up-hill sectors, and scrambling up and over boulders.
Altitude Gain: 1,100m
From Refugio Paine Grande the well-trodden path leads towards the Cuernos of Paine in the far distance. The path is level, going up a little in parts, passing through woods and over small streams. The view to the right is of the Nordenskjold Lake and later on the amazing sight of contorted layers of ancient sedimentary rock in the hills the other side. After about 2.5hrs you will arrive to a rickty-looking pedestrian hanging bridge, like something out of an “Indiana Jones” movie. The other side of the bridge is the non-serviced camp ground called Italiano, but if you turn left after crossing the bridge you will be on the path into the French Valley. To get to the end of the French Valley and back will take 5hrs, but you can, of course, not go all the way to end and cut it short.
The French Valley part is a steady up-hill trail reaching an altitude of around 900m at the non-serviced Camp Britanico located about 1hr before at the “end” of the valley. However, if the weather is clear the views in the French Valley are spectacular, especially around Camp Britanico. Here, after traversing rivers and passing a beech-tree (lenga) wood, the skyline is dwarfed by granite spires and the “Paine Grande” – the highest mountain peak in the Park at 3,050m above sea level. The return trek will involve back-tracking until your reach the non-serviced camp ground of Camp Italiano again. From here you will continue towards Domos Frances – about 1hr trek from Camp Italiano, and a further 1hr or so is Refugio and Cabañas Cuernos. The path from Camp Italiano is a little up and down, but nothing too strenuous and it follows beside Nordenskjold Lake.
Cuernos to Chileno

Start : Domos Frances or Refugio and Cabañas Cuernos
End : Refugio Chileno
Trek Time: Allow 5hrs one way.
Distance: 11km to Refugio Chileno, and 13.5km if from Domos Frances.
Altitude Gain: 500m
This trek passes through a beech-tree wood and continues along the northern shore of the Nordenskjold Lake on the right, with its amazing dark-bluish water and on the left hand side the breathtaking granite spires of Los Cuernos. The hike is along medium-difficulty terrain, with some hills, but every time you reach the top of a hill there is an amazing view.
After about 2hrs 30mins the path will start to veer up. At one point you will come across a fork where you will have an option to forgo the destination of Refugio Chileno and head, instead, to the beginning of the trail head at Hotel Las Torres. However, considering you will be heading to Refugio Chileno, you will walk up hill for about 1hr 30min or so until you get to a point where the path narrows and bends quite sharply to the left. This is the entrance to the Ascensio Valley. Here it is OFTEN VERY WINDY and you need to be CAREFUL. To the right is an acute decent down to the valley floor and river – people HAVE ended up down there and not survived. Once you are past this bend the path starts to go down and after about 1hr you will arrive to the Refugio Chileno.
nos. The path from Camp Italiano is a little up and down, but nothing too strenuous and it follows beside Nordenskjold Lake.
Chileno to the torres base.

Operated: Between end of September to end of April
Start : Refugio Chileno
End : Hotel Las Torres, Refugio Torre Central, Refugio Torre Norte, ECO Camp or Refugio Chileno. And, of course from the Torres del Paine Welcome Centre, which is located in this area.
Trek Time: Allow 2hrs up from Chileno, 2hrs back to Chileno and then 2hrs down to Hotel Las Torres or 2.5hrs down to Refugio Torre Central, Refugio Torre Norte, the TDP Welcome Centre and 3hrs if heading to ECO Camp.
Distance: Refugio Chileno to Torres Base and back down: 11km approx
Difficulty: Medium to high. Involves up-hill sectors, and scrambling up and over boulders.
Altitude Gain: 866m.
Refugio Chileno to the Glacial Moraine Sector This takes about 1hr along an undulating trail, steep in short sections. There are two river crossings, with bridges, and a dense lenga (beech tree) forest (older than 100 years) to walk through.
The Moraine Sector
This takes 1hr approx, uphill, over and between large boulders of glacial moraine, which is the most difficult part and walking poles are very helpful. Since this part of the trek heads north, towards the Mirador, the wind is usually head-on and this makes it more strenuous and difficult than it would normally be.
The Torres Base
Once you turn the final “bend” you will see the imposing spectacle of the vertically-sided giant towers and blue-milky coloured lake at the base. Most people take about 30min to relax, have a sandwich and enjoy the view. However, this is at altitude, windy and cold and it is easy to get “too cold” if you are standing still for too long. At the right time for you, you will turn around and head back the way you came up, maybe stopping off at Refugio Chileno. Once past Refugi
about 1hr 30min or so until you get to a point where the path narrows and bends quite sharply to the left. This is the entrance to the Ascensio Valley. Here it is OFTEN VERY WINDY and you need to be CAREFUL. To the right is an acute decent down to the valley floor and river – people HAVE ended up down there and not survived. Once you are past this bend the path starts to go down and after about 1hr you will arrive to the Refugio Chileno.
Click on images below to enlarge.

Send Us Your Enquiry
P lease supply us with as much information as you can about where you want to go, what you want to do, what you want to experience and how much money you want to spend (or do not want to spend!). How many people, what type of beds (matrimonial, twin, single etc.)
VIP – if you are a VIP in any of the fields such as celebrity and/or political and/or business, and you need “special attention” such as privacy and/or security for your trip please use an alias in the enquiry, but mention that you are VIP and one of the directors will handle your request and keep your real name and details confidential.
Remember, our speciality is to create a travel itinerary custom-built to your needs.
Please fill out form below:
First Name:
Mobile Number (Country Code & #):
Email Address:
Number of People:
Date and Time of Arrival:
Date and Time of Departure:
Select Max. Budget (PER PERSON): Select Max. Budget (PER PERSON): $800-1500 $1500-2000 $2000-5000 $5000-10000 $10000-15000 $15000-20000 $20000-50000
Custom Itinerary - Write your request here and inform us of any health and food dietary requirements:
Patagonia Destinations
Torres del Paine
- Puerto Natales
- Punta Arenas
- El Calafate
Patagonia Cruises
PUNTA ARENAS
- King Rey Penguins
Penguins S. Magdalena
Whale Watching:
Stay on Island
EL CALAFATE
- Ice Climb Perito Moreno
- Regular Perito Moreno
- Ice Hike Perito Moreno
- Los Balcones
TORRES DEL PAINE
- Ice Hike Glacier Grey
Navegation Grey
Torres del Paine Info
Welcome Centre
Entering Torres del Paine
Flora & Fauna
ACCOMMODATION
Luxury Lodges
Accommodation Locations & Descriptions
Emergency Rescue
Distances & Fuel
Torres del Paine Itineraries
Classic Sef-Guided W Trek with Puerto Natales
Classic Self-Guided W Trek with El Calafate
Torres del Paine Tierra Patagonia Hotel
Torres del Paine Explora Salto Chico Hotel
Full Circuit Trek:
East to west (Anticlockwise)
W Trekking Route:
- East to West
- West to East
W Trek & Circuit Treks:
Info & Advice
Featured Hotels
Explora Patagonia Salto Chico
Tierra Patagonia Hotel
- Before TDP Was Known
- Torres del Paine Tour Operator
- View All Other Destinations
- View All W Trek
- W Trek Stuff You Should Know
- W Trek Trail Description
- Arranging the W Trek
- About the W Trek Trail
- W Trek Refugios
- W Trek Map & Elevation
- Catamaran Pudeto to Paine Grande
- TDP Circuit Trek Info
- Accommodation Location Map
- Hotels Within the TDP
- Hotel Las Torres
- Hotel Rio Serrano
- Hotel del Paine
- Hotel Lago Grey
- Hosteria Pehoe
- Explora Salto Chico Lodge
- Hotel Tierra Patagonia
- Awasi Patagonia Lodge
- Hotel Singular Patagonia
- Estancia Cerro Guido
- Patagonia Camp (Yurts)
- W Trek Premium Accommodation
- View All Refugios
- Refugio Torre Central
- Refugio Chileno
- Refugio Los Cuernos
- Cabins Cuernos
- Domos Frances
- Refugio Paine Grande
- Refugio Grey
- Refugio Dickson
- Refugio Torre Norte
- Circuit Trek Accommodation
- Hotel Remota Patagonia
- View All Itineraries
- Tierra Patagonia 4 Nights
- Explora Salto Chico 4 Nights
- Awasi Patagonia 4 Nights
- W Trek Premium Itinerary
- Premium W Trek from Puerto Natales 6 Nights
- From or to Puerto Natales
- From Puerto Natales
- From or to El Calafate
- From El Calafate
- Mount Fitzroy
- El Chalten from El Calafate
- Mirador de Las Aguilas
- Mirador de Los Condores
- Chorrillo del Salto
- View All Antarctica Expeditions
- Classic Antarctica
- Classic South Georgia
- Polar Circle Quest
- Weddell Sea Quest
- Polar Circle Air Cruise
- Antarctic Express Air-Cruise
- Classic Antarctica Air Cruise
- Antarctica & South Georgia Air Cruise
- Antarctic Peninsula
- Journey To Antarctica
- Antarctica, South Georgia & Falklands
- View All Activities
- Penguins Santa Magdalena
- Whale Watching (On Island)
- Whale Watching (Full Day)
- Navigation Grey
- Zodiac One Way to Natales
- Zodiac Natales to TDP
- Zodiac TDP to Natales
- Serrano Glacier
- Beagle Channel
- View All Patagonia Cruises
- Glaciers at the Edge of the World
- Chonos Route
- Puerto Montt – Natales
- Natales – Puerto Montt
Groovy Mashed Potatoes - Travel Blog
Unique travel experiences, fun itineraries & offbeat places to help you plan your dream trip
Self Guided W Trek - The Best W Trek Route and W Trek Itinerary

Hiking the Torres Del Paine W Trek in Patagonia is a bucket list item for many. Doing the W Trek without a guide is the most cost efficient way to trek through the park and it feels very rewarding to do it yourself.
However, sorting out the W Trek was one of the most challenging bookings we have made to this day. Non English websites, sparse accredited blog coverage on routes, and limited availability due to popularity, made for a difficult journey before we even got to the park.
We have put together a clear and concise way to plan and book your self-guided W trek , including the best W Trek route with a map and W Trek itinerary with hiking distances.
Best time to visit Torres Del Paine

You want to have the best chance possible of seeing the towers in clear light. The weather can be treacherous in these mountains, so the best time to hike the W Trek is in the summer months from November to March. During the months outside of summer, most of the services at main lodging companies are closed and the days will also be shorter and cloudier.
How to book refugios and campsites in Torres Del Paine

Torres Del Paine National Park has been split up so you must book your sites with at least two of three companies operating campsites there. The first two companies, Fantasticosur and Vertice , have paid refugios (lodges and campsites) where you can either reserve a spot to pitch your tent, rent a tent, or stay in the lodge.
CONAF on the other hand, is a non-profit organization that offers free camping. The CONAF site at Italiano is extremely basic with no lodge, but hey it's free! Whichever you choose, you'll need to book your accommodation through their online booking systems.
Beautiful and strategic sites like Glacier Grey and Chileno book up fast. Book the refugios as far in advance as you can to ensure you get the sites you want.
Top booking tip:
Bookings for the following year's season open around the middle of May. For example, bookings open in May 2020 for the November 2020 - April 2021 season. Message the companies, Vertice and Fantasticosur, directly in advance and ask if they can email you once reservations open up. We got our emails and booked right away!
Should you travel the W Trek east to west or west to east?
This question left us scratching our heads until we finished our trek. There are pros and cons of each. We hiked the 'W' from the left to the right which starts at Paine Grande and ends at Torres Central, but would actually recommend hiking from east to west , since its pros outweigh the cons and the itinerary works out a bit better.
W Trek Map with our Refugio & Campsite ratings

What we did and why it wasn't as great:
We hiked the W Trek from left to right and stayed 5 nights. We stayed in Glacier Grey, Paine Grande, Cuernos, and Toores Central (2 nights).
Ultimately, the views are better and the itinerary works more nicely hiking the W Trek from right to left.
The drawbacks of our original route:
- On the way to the start of our trek, we almost didn't make the catamaran from Pudeto to Paine Grande due to the long line up of people (it's first come, first served). If we missed it we would have had to either wait 3 hours for the next ferry or hike an additional five hours to the start of our trek at Paine Grande.
- Staying at Torres Central rather than Chileno added an extra 5 km total to our whole trek . It is a 1 km hike from the campsite to the main trail on a gravel road, which is included in the 5km total.
- Torres Central feels as if you are not actually on the trek. The camp and refugio is located on a road with tour busses and other vehicles driving by. The service was also the worst we experienced out of all refugios.
- We had to spend an additional night in Torres Central so we could avoid rushing our hike up to the towers and back in order to catch the bus.
- The view from Cuernos to Chileno wasn't as nice as the other way around since the sun wasn't in our favour.
The benefits of our original route:
- Saving the crown jewel, the three Torres Del Paine, for last. After the multi-day trek it was satisfying to finish with the a view of the famous centrepiece of the park.
- The first two days of the trek covering the Paine Grande to Glacier Grey then back the next day to Paine Grande are the easiest of the trek. It was nice to warm our muscles up and get used to our packs before the harder hiking days.
Will all of these factors in mind, we came up with the ideal itinerary we would use next time!
The Best W Trek Route
- Day 1: Arrive at Torres Central, hike up to the three Towers and back down to Chileno (13.8km)
- Day 2: Chileno to Cuernos (13km)
- Day 3: Cuernos to Frances Valley and back down to Paine Grande (21.5km)
- Day 4: Paine Grande to Grey (11km)
- Day 5: Grey to Pudeto where you catch your bus back to Puerto Natales (11km)
W Trek Map with Recommended Route

W Trek Itinerary Breakdown
Day 1: puerto natales - las torres hotel - towers lookout - chileno (7 hour hike, 13.8km, 750m ascent, 400m descent).

Highlight: Today you will see the crown jewel of the park, the granite towers!
Your first task is getting to the park entrance (Amarga) from Puerto Natales. After your 2 hour bus ride, pay the park fee (cash only) and then take a shuttle to Los Torres Hotel.
- 🚌 Buy your bus ticket to the park entrance (Amarga) through Busbud .
- 💳 If you want to buy your park pass by credit card, you have to purchase it online at least 24 hours in advance through aspticket.cl .
Congratulations, you made it. Time to start hiking! From Las Torres Hotel to Chileno it's a 5 km hike with a total ascent of 325 m. Careful on your way, there are very high winds as you enter the valley, so hike slowly and crouch down if a gust catches you off step. Drop off your bags/tent in Chileno where you will be staying the night and take some water. It's much easier hiking with just a day pack up to the spectacular granite peaks. From Chileno, the roundtrip distance to the Towers Lookout is 7.8 km.
Read our article on a ll you need to know about the Chileno refugio.
The weather is crazy in this area. We had two snow storms on our way mixed with sunny blue skies. The last half of the hike to the towers is tough and includes scrambling up large rocks. The 90 km/hour winds didn't help! When we reached the top we were sad to see the towers completely covered by cloud and yet another snow storm. However, we waited patiently beside a large rock for 45 minutes and the weather cleared up to perfect sunny blue skies! Seeing Torres Del Paine in real life was breathtaking.
Top Tip: There are weather reports posted at Chileno, so consider staying a bit or heading off right away depending on the hourly cloud cover forecast.
Day 2: Chileno to Cuernos (4 hours, 13km, 125m ascent, 406m descent)

Highlight: Passing the multi coloured lakes and relaxing at the lovely Cuernos camp.
Today you will have spectacular views of the lake as you walk through otherworldly landscapes. The hike is relatively easy with a total descent of 406 meters and a small 125 m ascent in the middle of your hike.
Cuernos was our favourite refugio we stayed at. It didn't feel too busy and we got to pitch our tent on a wooden tent pad overlooking the beautiful lake! It's the perfect place to relax after your long first day.
Read our article on what to know about the Cuernos refugio .
Day 3: Cuernos to Britanico to Paine Grande (10 hours, 21.5 km, 550m ascent, 600m descent)

Highlight: Seeing the very much alive Frances Glacier drop massive chunks of ice with a thunderous roar.
Today will be your longest hiking day. Once you reach the Italiano campsite, drop your bags off to lessen your load for the return hike to Frances Lookout and Britanico. It was partly cloudy when we hiked, but we were lucky to see Frances Glacier and even see and hear the thunderous roar of ice breaking and falling!
Since the clouds were rolling in we decided to stop at Frances lookout and forgo hiking to Britanico further up the mountain. We heard mixed reviews about Britanico and that it wasn't any more spectacular than the view at Frances Lookout. To shorten your hike, you could opt to stop at Frances Lookout and forgo Britanico. This would take about 5 km and 2.75 hours off your total journey that day. Shortcut!
After picking up your bags from Italiano, it is a 2.5 hour easy hike to Paine Grande with small ups and downs on the way.
Read our article on what to know about the Paine Grande refugio .
Day 4: Paine Grande to Grey Lodge (3.5 hours, 11 km, 200m ascent, 185m descent)

Highlight: You will see views of Grey Lake and small icebergs before the grand finale views of the massive Grey Glacier.
Watch out for the huge gusts of wind coming at you from the front. Once you reach Refugio Grey it's about a 10 minute walk from there to the Grey Glacier lookout point. You don't want to miss it!
Read our article on what to know about the Grey refugio .
Day 5: Grey to Paine Grande (3 hours, 11 km, 185 ascent, 200 m descent) & back to Puerto Natales

Highlight: Today is an easy hiking day with the wind at your back and your last of the trip, so enjoy the views!
It's only 11 km to Paine Grande where you'll catch the catamaran to Pudeto and a bus back to Puerto Natales (30 minute catamaran & 2 hour bus ride). Hiking this direction is a lot faster and less effort so it's a nice way to end off the trip.
The catamaran is first-come-first-serve so arrive early to ensure you get a seat. The ferry times change depending on the time of year but the last ferry from Paine Grande to Pudeto will take multiple trips to ensure everyone waiting gets across. No stress and you can get yourself a victory cocktail at the Paine Grande refugio while you wait. The catamaran costs 25,000 CLP ($30 USD) one way and you pay for your ticket with cash inside the boat. Once at Pudeto, you'll catch your bus back to Puerto Natales.
Meal options at the refugios and campsites

There are a few options for eating while you're on the trek. You can cook, or you can have the cooking done for you. We found it really nice to come into the big lodges and have a seat out of the rain and wind to a nice warm prepared meal.
Full-board/half-board
At Fantastico and Vertice refugios, there are full-board and half-board options. Full board includes breakfast, dinner and a boxed lunch. There was always enough food to keep us full at every meal.
The lunch bag typically consists of a sandwich, Nature Valley bar, juice box, nuts with dried fruit, chocolate bar and a piece of fruit. Dinners are hearty and come with a big piece of meat. Breakfasts are served with eggs and toast. Make sure to state if you are vegetarian.
Get all the info from our article: W Trek Patagonia Camps Ranked and Rated

You can also buy a la carte meals during lunch and dinner at some refugios. At our favourite Refugio, Los Cuernos, they had lasagna, burgers and even a charcuterie board, so we wished we had just ordered breakfast and lunch from there!
Cook your own food
Most refugios have a kitchen where campers can prepare and cook their own food. The downside is that you'll have to carry the weight of your food on the trek. Most refugios also have a small convenience store where you can purchase extra items along the way, such as soup, Ichiban noodles, cookies, alcoholic beverages, water, crackers, pasta, coffee etc.
If you're going to cook your own food, ensure the refugio you're staying at has a kitchen. Chileno for example does not have a kitchen.
Most lodges take credit card for snacks, food and drinks, however sometimes the credit machine is down so it is better to have a some Chilean Pesos with you.
Bring snacks!
Even if you're not cooking your own food, grab some snacks at the grocery store before your hike while it's cheap. We brought almonds, dried fruit, dark chocolate, and gummy worms. Check out Supermercado Unimarc in Puerto Natales. There is a dried goods stand at the front door. Full board won't leave you hungry, but it's nice to have a few snacks of choice to lift your spirits during a hard hiking day.
W Trek Packing List

Here is our list of what to pack for the W Trek. This is what we brought with us on our multi-day hike. Each item that is linked, is what we own and highly recommend. We have used them over the years for numerous hikes and camping trips around the world (Nepal, Peru etc.).
Note: we ate half board/full board at the lodges, so this packing list does not include gear to make your own food.
Top Tip: You won't need a pack cover we were told and saw first hand these things just act like parachutes on the windy sections of the trail. Garbage bag your goods or use dry bags instead.
What you can rent for the W Trek

You can rent a one or two person tent, sleeping mattress, hiking poles, sleeping bag, and hiking shoes (although we recommend bringing your own shoes to avoid blisters!).
Erratic Rock doesn't take advanced reservations and has become very popular, so don't count on getting your gear the night before your trek like we did. We ran over to Rental Natales and luckily found a two-person tent that had just arrived. Rentals Natales has online reservations and they wash their sleeping bags after every use.
Pre-trek prep in Puerto Natales

Where to stay in Puerto Natales before your trek
Pre-trek preparation checklist.
- Grab your rentals the day before you leave on your trek
- Purchase your bus ticket in advance to ensure you get an early departure time. You can reserve your ticket online through Busbud .
- Grab snacks beforehand at a grocery store, such as almonds, dried fruit, dark chocolate, candies, and a roll of toilet paper.
- Pull out cash for catamaran, Torres Del Paine Park fee, and any extra goodies you wish to buy at the camping lodges. There are reliable ATMs in Puerto Natales to pull out cash. Most lodges take credit card for snacks, food, and drinks, but cash is needed for the catamaran and park fee.
Getting to Torres Del Paine National Park

Getting from the Puerto Natales airport to Puerto Natales
A taxi from Puerto Natales airport to Puerto Natales is a flat rate of 7000 CLP for the whole car, not per person. The drive is about 10 minutes.
Taking the bus from Puerto Natales to Torres Del Paine National Park
Arrive at least 15 minutes early for your bus at 7 AM from Puerto Natales to Torres Del Paine. Some people didn't get on and had to wait for the 11 AM bus. It's better to get to the park early and is a must for this itinerary.
The bus first stops at Amarga where everyone gets off to purchase their park pass (cash only). Those going further to Pudeto to catch the catamaran to Paine Grande will need to get back on the same bus. The drive is 30 more minutes to Pudeto. Those headed to Las Torres Hotel catch another 15 minute shuttle bus.
Top Tip: Sit on the front left side of bus from Puerto Natales to Amarga for the best views. Sitting at the front also ensures you're first in line to get your park pass and you can quickly hop on the shuttle.
Start planning your trip to Torres Del Paine National Park
- 💡 Travel tips: see our top 17 tips for the W Trek
- ⛺ Refugios/Campsites: see how we ranked and rated the W Trek refugios & campsites
- 🌃 Book your stay in Puerto Natales: Booking.com is our go-to for finding places to stay. Sort by top reviewed.
- 🥾 Rent your gear: we rented our camping gear from Rental Natales
- 🚌 Buy your bus ticket to the park: book in advance through Busbud .
- 🛫 Book your flight to Puerto Natales: use Skyscanner to compare flights across different airlines (we recommend booking direct with the airline however).
Check out what the W Trek was like in our Chile vlog
Save and pin this self-guided W Trek itinerary for later:

Looking for more travel inspiration? Check out our list of fun adventure ideas for your next trip .
Featured Posts
11 fun things to do in whistler in winter for non-skiers.

Whistler is absolutely worth visiting in winter if you're not skiing, with its exciting snow excursions, spas in nature, top-notch restaurants and apres-ski scene. We list 11 things to do in Whistler in winter for non skiers, from unique solo activities to fun experiences with your friends.
4 Day Nanaimo to Tofino Road Trip for Relaxation & Adventure

Our 4 Day Nanaimo to Tofino road trip offers a blend of relaxation and adventure with fun experiences, stunning natural sights and delicious coastal eats on beautiful Vancouver Island.
26 Best Restaurants on Salt Spring Island, British Columbia

Salt Spring Island is known for its sustainable farming and locally grown food. Fresh and organic ingredients combined with the island's creative flair make for some delicious spots. We list the 26 best restaurants on Salt Spring Island, each for a unique reason.
Search Groovy Mashed Potatoes - Travel Blog

The Ultimate Guide to Hiking the W Trek in Patagonia: Full Itinerary, How to Self Book, Cost Breakdown & More!
March 28, 2023.
Hiking the W Trek in Torres Del Paine National Park is an incredible experience that will reward you with endless views and memories that will last a lifetime. You will see jagged mountain peaks, aqua blue lakes, waterfalls, glaciers and more as you take the journey. If you’re lucky, you’ll also see giant condor birds and make new friends as you stay at the inns along the way.
I found the W Trek to be incredibly rewarding and definitely worth the effort, planning and costs. The trek is also perfect for those who are newer to backpacking but are experienced day hikers. Trekking during the day with inns to stay overnight is the perfect combination!
This blog includes a W Trek itinerary and covers everything you need to know to book the W Trek self guided, pack for the W Trek and be prepared. This is based on my experience visiting over New Year’s in December 2022 and January 2023.
Table of Contents
Overview of the w trek, when to hike the w trek, hiking the w trek self guided vs with a guide, how to book the lodging for the w trek, booking an entry ticket to torres del paine national park, booking transportation between puerto natales and torres del paine national park, w trek planning checklist (for self booking), tips and important things to know before hiking the w trek, day one of the w trek, day two of the w trek, day three of the w trek, day four of the w trek, how should you end the w trek, ways to save money on the w trek, what to pack for the w trek, other ways to see torres del paine national park, faqs about the w trek, final thoughts.
- Located in Torres Del Paine National Park, Chile
- 50 miles/80 km
- Typically done in 4 Nights, 5 Days
- The highest elevation is at the Base of Towers, 2,788 feet above sea level
The W Trek refers to a multi-day hike that is shaped like the letter W. This area is unique because there are several inns along the trek where you can spend the night. You can choose between hostel-style lodging, have them provide you a tent at the campgrounds or bring your own tent. Each inn serves food, has restrooms and showers and even offers wifi for an additional fee.
The W Trek is about 50 miles and is typically done in 5 days and 4 nights. There are very few technically challenging sections of the trail, but there are long days with steep climbs. If you have experience hiking 10+ miles in a day in mountainous areas and feel that you can do that for a few days in a row, then you will be set up for success.
Because of the amenities offered, this is a great trip to do if you’re new to backpacking or if you just prefer to stay in a bed instead of a tent. If you stay in the refugios and purchase their full room and board package, you will not have to carry all of your food, water and sleeping equipment. The lighter you can pack for the trek, the more comfortable you’ll be.
While the hike itself is not overly difficult, dealing with the unpredictable weather is the toughest part. I experienced really high winds during my trek. Bad wind is common and it’s not uncommon to experience heavy rain, fog or even snow. You’ll want to make sure you’re prepared with the good layers and keep your expectations low in case it’s too foggy to see some of the best views along the trail.

For a shorter version of this blog, check out my top 30 tips for hiking the W trek!
You will most likely hike the W Trek in the summertime for the Southern Hemisphere (winter in the Northern Hemisphere). The W Trek is typically open to hiking self-guided from October to the end of April, and you’ll likely have the best weather from November to March. I hiked the trek over New Years (December and January), which was really special!
If you would like to hike in the park during the winter months, you can do so with a guide.
There are several companies that offer guides if you’re not comfortable hiking the W Trek on your own. This can be a great option for some!
However, I think a guide is unnecessary, as the trail is well marked and easy to follow. It all depends on your comfort level, abilities and budget.
If you are looking for a guide, some companies that offer services include Swoop Patagonia, Tangol Tours, Chile Nativo and many more.
How to Self Book the W Trek
Many people assume you have to go through a third party company to book the W Trek. A third party would certainly be a little bit easier, but if you prefer to do it all yourself, I’m going to tell you exactly how!
Two separate companies own the various lodges in Torres Del Paine National Park: Vertice Travel and Las Torres Patagonia (previously called Fantastico Sur).
For this itinerary, you will book with Las Torres Patagonia for the first two nights at Los Cuernos and El Chileno, and Vertice Travel for the second two nights at Paine Grande and Refugio Grey.
You can book directly with each company on their websites.

To book El Chileno and Los Cuernos, start on the Las Torres website . Choose to book the ‘shelters’ and then make reservations at the Central Refuge and the Chilean Refuge. Upon booking, you can select to add on full room and board (breakfast, packed lunch and dinner) or any combination of only dinners, only breakfast, etc.
To book Paine Grande and Refuio Gray, start on the Vertice Travel website. Under accommodations, make reservations at ‘Refuge & Camping Paine Grande’ and ‘Shelter & Camping Gray.’ When you book, you will select that you’re doing the W Circuit and be able to book both lodges at once, along with the full room and board.
If you have any dietary restrictions, be sure to request that when booking. If you don’t see the option, send an email to their customer service to confirm. I am a vegetarian and all of the inns were very accommodating!
I booked my trip for December/January in May and June. In 2022, the reservations for Las Torres went on sale well before the reservations for Vertice Travel. So, I booked half of the trek and then waited until the Vertice released their openings. Keep an eye on their social media platforms and/or send an email to their customer service to stay up to date.
After your lodging and transportation is squared away, it is very important to book an entry ticket into the national park. I did this a week or two ahead of time.
To buy your ticket, go to aspticket.cl and select ‘buy or reserve.’ You will then select the correct park, which is listed as ‘Parque Nacional Torres del Paine (Venta)’ in Spanish. From there, you will input your entry and exit dates in and out of the park.
You will then need to fill out a variety of information, such as your birthdate and passport number, where you are staying each night of the trek, if you are traveling with a guide and more.
When you complete the form, you will pay the fee ($49 USD per person at this writing) and receive an email with a QR code. Make sure you have this QR code saved offline (and/or printed) for when you arrive at the park! The rangers will scan it upon arrival and there is not reliable cell reception.
The cheapest and easiest way to get between Puerto Natales and Torres Del Paine National Park is by bus! There are a few different bus companies that run multiple daily trips between the city and the park.
I booked my tickets a week or two in advance with Bus-Sur, and I used busbud.com for easy booking. For the beginning of the trek, I recommend leaving Puerto Natales as early as you can (mine left at 6:45AM).
Keep in mind that you will be starting and ending at different places inside the national park.
For the beginning of the W Trek, book a ticket from Puerto Natales (Rodoviario) to Terminal Laguna Amarga . For the ending of the W Trek, book a ticket from Pudeto (Catamaran Paine Grande) to Puerto Natales (Rodoviario). I recommend an afternoon or evening time for the end of the trek, my bus left Pudeto at 2PM.
The bus rides will take about two hours and there are some great views along the way. Be sure to print out your bus tickets ahead of time and arrive a little early.
If you’re booking everything yourself, here is a quick checklist to make sure you have everything you need before setting out!
- Los Cuernos
- Paine Grande
- Refugio Grey
- National Park Entrance Ticket
- A morning ride from Puerto Natales to Laguna Amarga to start the trek
- An afternoon or evening ride from Pudeto to Puerto Natales to end the trek
- (Optional) A glacier trek or glacier kayaking from Refugio Grey (book with Bigfoot Patagonia)
- (Optional) The catamaran ride on Grey Lake

- Expect all kinds of weather, especially high winds. Wind is very common in the area and can be really intense. Also know that it’s possible fog will sock in some of the most epic views. Keep your expectations low just in case.
- You can drop off your heaviest gear at parts of the trail! Bring a day pack and drop your packs at El Chileno and Camp Italiano before ascending up the most difficult parts of the trail.
- The towers will be crowded but the rest of the trails won't be. But overall, the W trek is not the best for solitude and you will often see other people around. It’s a good social hike because you can meet people every night at the inns.
- The elevation of this region is relatively low (2,788 feet is the highest point on the W Trek), so you shouldn’t have an issue adjusting to the altitude.
- Each inn on the trek has drinking water, food and alcohol for sale, plus wifi for purchase and more. You will not exactly be roughing it on this journey! That being said, you should bring a water filter just in case you’re sensitive to the water or want to make sure you can fill up at streams on the way.
- Download the map of the trail on All Trails to follow along with your progress throughout the trail.
For a full list of tips for hiking the W Trek, check out my top 30 W Trek tips !
W Trek Itinerary: East to West
I hiked the W Trek from East to West. You can also hike it in the opposite direction, but hiking it east to west tends to be more common. I liked hiking it from east to west because I got the most difficult portions out of the way early. It was also fun to end the trek with a gorgeous catamaran ride across Lake Pehoe!
Below is my full itinerary for hiking the W Circuit! I hiked 50 miles over 4 nights and 5 days total.
- Take the bus from Puerto Natales, hike to the Base of the Towers, stay at El Chileno
- 9.9 miles, 3,000 feet of elevation gain
The best way to get to Torres Del Paine National Park is by taking a bus from Puerto Natales. The bus ride will take about 2 hours to reach the main entrance of the park (Laguna Amarga), which is where you’ll be exiting the bus for this itinerary.
When you arrive, you will need to exit the bus and have a ranger scan your entry ticket. You should have your ticket saved offline ahead of time and ready to show from your phone.
There was a bit of a language barrier for us here, as none of the instructions were given in English. How it worked was that everyone got off to get their ticket scanned here, whether you were getting off here or not. After they scanned our tickets, we went back to the bus to collect our backpacks.
From there, you will take a smaller shuttle bus to get to the start of the W Trek. This bus costs an extra fee of 4000 Chilean pesos per person in cash. It was a quick, 10 minute bus ride to reach the Torres Del Paine Welcome Center, where you will officially begin your trek! The welcome center has packed lunches, hiking poles and other items if you have forgotten something.
I calculated the day one milage to be 9.9 miles with just over 3000 feet of elevation gain. In terms of steepness, it was definitely the hardest day of the trek for me.

As you begin the trail, you’ll start with a short and flat walk back to Hotel Las Torres Patagonia. This is where most people stay to do a day hike up the Towers, and some people stay here for the first night of the W trek. It’s an option, but I definitely recommend staying in El Chileno instead if possible!
The trail is flat at first but you will quickly begin to gain elevation. A little under 2 miles from Hotel Las Torres, you’ll come to the first fork in the trail. Stay to the right as you continue up into the Windy Pass.
This portion of the trail gets a bit steep and there is a chance you’ll experience high winds. Luckily, there are some amazing views whenever you stop to take a break. Two miles from the hotel, you’ll reach a high point and then need to descend to reach El Chileno. El Chileno is located right next to the river and the perfect place to stop for lunch.
You can use the cubbies inside of El Chileno to drop off your heaviest gear before continuing up to the Towers. Depending on the time of day, I don’t recommend spending too long on a break at El Chileno. At some point in the afternoon, the park rangers will stop letting anyone hike up to the Towers, so be sure to stay on schedule.

Since you will be staying at El Chileno tonight, go ahead and check in when you pass through. Your room will probably not be ready, but you can let them know you're there and be assigned a time for dinner.
The hike to the Towers gets quite steep for the last 0.7 miles. There is a bit of rock scrambling and a lot of dusty areas if conditions are dry. Be sure to watch your step and take your time. This is also a popular day hike so you’ll likely encounter crowds and need to spend a lot of time stepping aside for other hikers.
But the crowds and steep scrambling are worth it. At the top, you’ll be rewarded with an incredible view face to face with Lago Torres and the three Towers. The towers; Torres d'Agostini, Torres Central and Torres Monzino, are the most iconic sight in Torres Del Paine National Park, and certainly could be considered among the best views in the world. On a clear day, the towers stand tall as a backdrop to the bright turquoise lake below.

After enjoying the towers, make your way down to El Chileno for your first dinner of the trek. While El Chileno had my least favorite food of the W trek inns, I loved the atmosphere. Before or after dinner, you can hang out outside where there are picnic tables overlooking the river. Dinner at El Chileno is served at long tables and offers a great chance to get to know fellow hikers.
The rooms inside El Chileno were pretty basic. My room slept 6 people over 3 bunk beds (but there were only 4 of us for this night). There were shared bathrooms divided by gender down the hall. Overall, El Chileno is nothing fancy but I had no complaints.
- Hike from El Chileno to Los Cuernos
- 8.2 miles, 1,174 feet of elevation gain
On day two of the W trek, you’ll hike from El Chileno to Los Cuernos. In this itinerary, this day is tied for the easiest. The day will begin uphill as you hike out of the valley where El Chileno sits, but then it will be mostly downhill the rest of the day.
This trail includes many fantastic views of Nordenskjöld Lake. The lake is a brilliant aqua green color and there are some beautiful viewpoints.

This is the day where I saw a large hoard of condor birds flying up above and sitting on nearby cliffs. Condor birds are the largest flying birds in the world and they’re fascinating to watch!
Los Cuernos is owned by the same company as El Chileno and has a similar vibe. I actually was here on New Year’s Eve, so we were served a special meal. They also threw a NYE party for the staff (that we were invited to as well). I’m not sure what it’s like on other nights, but the atmosphere was lively and celebratory. This meant it was loud and hard to sleep, so you may want to bring along ear plugs.
Los Cuernos also offers private cabins that sleep 2 people, so try to book one of these if you prefer things a bit quieter.
- Hike from Los Cuernos to Paine Grande and into the French Valley on the way
- 16.4 miles, 3,102 feet of elevation gain
Day three is the longest day of the W Trek. You will hike up into the French Valley, the center of the ‘W,’ to reach Mirador Britannica. Then you will continue onto the third inn of the trip, Paine Grande.
If you do the entire trail, it will be about 16.4 miles and 3,102 feet of elevation gain. I turned back early due to high winds and fog on this day, so I only went about 13 miles.
The trail starts out relatively flat and easy until you reach Camp Italiano. If you have a very windy day like I did, watch out for the beach areas. The beaches are very exposed and the wind almost knocked us over at one point.

When you reach Camp Italiano, there are some outdoor shelves where you can drop off your heaviest gear. There was also a whiteboard here that had information on what time the viewpoints would close for the day and a warning about the high winds.
The hike up into the French Valley is steep at times, but felt more gradual than the hike to the Towers. You will go in and out of forest areas and viewpoints. Even if you just go part of the way, there are some fantastic views where you can admire the surrounding mountains and look for waterfalls, avalanches and glaciers in the distance.
There are four main viewpoints along the way. When I reached the second one, Mirador Valle de Frances, the wind was extremely strong, so many people turned around here. We went a little bit further, but decided to turn around before making it to the third.

After returning to Camp Italiano to pick up your gear, it will be about 5 more miles to reach your inn for the night. It’s mostly downhill and relatively easy. However, the wind was very intense for me and made the miles feel quite long.
There was one suspension bridge crossing that felt particularly daunting, as the wind was shaking the bridge all over the place while we crossed over a river canyon.
You will also pass an area of wildfire damage. Unfortunately, there have been multiple cases of fires started from the mistake of tourists in the park, so please make sure to follow the rules. Open fires are strictly prohibited and camp stoves are only allowed to be used in designated areas.
After this long day, it’s a great feeling to reach Paine Grande. This inn feels nicer than the first two inns, as it’s newer and larger. However, what you gain in newness means that there is less of the great community feeling you get from the smaller inns.
The rooms here are equipped with two bunk beds and more comfortable bedding than Los Cuernos and El Chileno. They also have real lockers if you want to lock up any valuables. Dinner is served buffet style and there is a bar upstairs as well.
- Hike from Paine Grande to Refugio Grey. Optionally, hike up to the suspension bridges and a view of Grey Glacier.
- 6.9 miles, 1,319 feet of elevation gain
- Second hike is 5 miles with 1,014 feet of elevation gain
On day four, you’ll hike to the final inn of the trip, Refugio Grey. You also have the option to hike an additional few miles to see some suspension bridges and close up views of the Grey Glacier, which I highly recommend doing.
The first trail between the two inns is 6.9 miles with 1,319 feet of elevation gain. While it isn’t difficult, this was the windiest area of my trek. The wind made it difficult to move forward at times and definitely slowed us down.

However, the trail has some fantastic views of Grey Lake and about halfway through you’ll start to see the Grey Glacier in the distance. The trail has multiple ups and downs, so you’ll have a nice variety.
At one point about 2 miles from the inn, there is a short portion of the trail where you’ll have to climb down a rock scramble that can be slick. It’s very doable if you have some hiking experience, but I found this to be one of the most technical portions of the entire W Trek.

When you reach the Refugio Grey, there are a few excursions and additional trails you can choose from if you’re up to it. First, you have the option to kayak next to the glacier or go on a guided glacier trek. These activities cost extra and you should reserve them in advance if possible. We reserved the kayaking excursion, but unfortunately it was too windy for us to go out. It had been too windy to kayak for a couple weeks, so keep in mind that this cancellation is very common.
Additionally, you can take a hike up to see some incredible suspension bridges and a view of the Gray Glacier. This trail is about 5 miles with a little over 1,000 feet of elevation gain. It is part of the O Circuit, so you’ll likely see hikers on the O coming the other way.

There are three suspension bridges you can hike to, but I only went to the first two.
The second bridge is especially magnificent. It is quite long and dangles 100’s of feet in the air over a large valley. On one side, you get a fantastic view of the glacier. On the opposite side, you can see a tall waterfall coming down from the mountains. I don’t recommend this if you’re afraid of heights, but it’s a really neat experience if heights don’t bother you.
If you aren’t up for the longer trail, there is also a viewpoint very close to the Grey Inn (a half mile) where you can get a nice view of the glacier.
After an additional hike, an excursion or some rest, enjoy your final dinner of the W Trek. I thought that Refugio Gray had some of the best food for dinner on the trip!
Day Five of the W Trek
- Hike from Refugio Grey to Paine Grande, take the catamaran across Pehoe Lake, take a bus back to Puerto Natales.
- 6.9 miles, 1,208 feet of elevation gain
On your final day on the W Circuit, hike back to Paine Grande to catch the Grande Catamaran. This is the same trail that you did on day four in the opposite direction, but you’ll have about 100 less feet of elevation gain. When you reach Paine Grande, line up to take the catamaran to Peduto.
There are actually catamarans from both Refugio Grey and Paine Grande, and they go different places. I was confused about this, so I’m going to explain the difference and the pros and cons of each.

For the least amount of hiking, you can end your trek from Refugio Gray and take the catamaran across Lago Grey. This journey will take about an hour and costs $75 one way. It will take you to Hotel Lago Grey.
Pros of the Lago Grey Catamaran
- Less hiking! You get to leave from your final lodge via a beautiful boat ride.
Cons of the Lago Grey Catamaran
- It’s about 3 times the cost of the Lake Pehoe Catamaran.
- We were told that this boat is much more susceptible to delays and cancellations due to wind.
- It will bring you to the Lago Grey Hotel, which has fewer transportation options to get you back to Puerto Natales. You may need to stay at the hotel and arrange private transportation.
- This boat is not first come first serve like the Lake Pehoe Catamaran. You should make a reservation before your trek because it is likely to sell out.
For the reasons listed above, most hikers return from the trek via the Lake Pehoe Catamaran. The boat ride takes about 25 minutes and runs a few times a day. Check for the most up to date schedule at Paine Grande.

You cannot make a reservation for the Lake Pehoe boat. You’ll need to wait in line by the dock and board first come, first served. You also need to make sure you have cash - the boat requires $30 USD or $25 Chilean pesos per person, each way. During peak season, they take cash in US dollars or Euros as an alternative to Chilean Pesos.
The boat is quite large so you shouldn’t worry if there is a long line to board. Also note that even though there is a schedule, the boats do not always run on time.
The boat also has stunning views! If it’s a clear day, you’ll get a new perspective of the park and see incredible mountain peaks as you ride through turquoise colored water.
When you reach Pudeto, take a bus ride back to Puerto Natales to end your time in Torres Del Paine National park. There is a small cafe to wait in before your bus ride. You should make sure that you have reserved a bus ticket ahead of time.
I took the second ferry of the day back from Paine Grande (it was scheduled for 11 but ended up being closer to 12) and then waited about 2 hours in the cafe for my 2 PM bus ride. The cafe sold lunch items, coffee, beer and more. There is also a one mile waterfall trail you can enjoy if you have the energy!
When you reach Puerto Natales, celebrate your hard work with a delicious meal, a pisco sour and a nice hotel stay. I loved eating at Cafe Artimana, Cafe Kaiken and La Guanaca Pizza.
How Much Does it Cost to Hike the W Trek?
In December/January 2022/2023, we paid $872 per person to hike the W Trek. This included 4 nights of lodging, full room and board, the bus tickets to and from the park, the ferry at the end and the entry ticket into the national park. We had to pay about $37 extra for a special New Year’s Eve Dinner, so you can subtract that if you’re not going over Christmas or New Years!
Here is the cost breakdown:
Night 1: El Chileno - $125 per person for the bed with sheets, $88 per person for the food
Night 2: Los Cuernos - $125 per person for the bed with sheets, $124 per person for the food (This was New Years Eve so the food cost extra - they did something special!)
Night 3: Paine Grande - $92 per person for the bed with sheets, $61 per person for the food
Night 4: Gray - $92 per person for the bed with sheets, $61 per person for the food
Ferry to return from Paine Grande and end the trek: $30 per person (cash only)
Bus Tickets on Bus Sur between Puerto Natales and the national park: $10 per person each way. There is also a shuttle between the entry to the park to the actual start of the trek that cost $5 per person (chilean pesos only)
Entry ticket into Torres Del Paine National Park: $49 per person
You also have the option to pay extra for wifi, alcohol or extra food at all of the inns. They all take credit cards.
Prices are subject to change, these were the prices for the 2022 - 2023 season.
This does not include flights into Puerto Natales to start and end your trip. This can vary a lot based on where you’re flying from! Note that it is very likely to need to connect through Santiago first.
There are definitely ways to cut out some of the costs!
- You can camp instead of staying inside the inns. The inns all offer options to rent out tents so you don’t have to carry your own. Or you will pay the least if you carry your own.
- You can bring your own food instead of paying for full room and board. I would recommend bringing your own breakfast and lunch items and only paying for dinner if this is something you’re considering. I did not love the breakfast service because on some days, I wanted to leave earlier than breakfast was being offered.

- A backpack that will fit your needs for carrying your things for 5 days and 4 nights. I carried a 40L backpack and thought it was the perfect size.
- A small day pack to carry the essentials for the times you can leave your bigger pack behind.
- A water bladder or water bottle.
- A water filter (We only filled up on water from the inns, which have drinkable water. But it’s good to have a water filter just in case. It depends on your comfort level and sensitivity.)
- Snacks! I did not need any extra food than what was provided from the full room and board, but it’s always good to have some options if there are items in the packed lunches that you don’t like.
- Hiking essentials including a first aid kit , knife, emergency shelter, headlamp and sun protection.
- Your passport, printed out tickets and confirmations, cash and credit card.
- Rain gear. Rain is common on the trek, make sure you have a good rain coat and a rain cover for your backpack.
- Layers. It might get cold, so I recommend bringing a warm hat and gloves.
- Sturdy hiking boots .
- Hiking socks and the clothing you’ll need for 5 days and 4 nights. Avoid cotton and bring items that are moisture wicking.
- Small towel for showering .
- Toiletries such as soap, moisturizer, toothbrush and whatever else you need.
- A second, lightweight pair of shoes to wear around the inns.
- A phone charger and portable battery.
- A buff to help protect against the dust on windy days.
- Insect repellent . I did not encounter mosquitoes, but I’ve heard during certain times of year they can be bad.
- A kula cloth to use instead of toilet paper.
- Trekking poles .
- Ear plugs if noise would bother you in the inns.
For a more detailed packing list for the W Trek, check out my W Trek packing guide !

There are certainly many other things to do in Torres Del Paine National Park besides the W Trek!
If you’re up for a more challenging adventure, consider the O-Trek, which is approximately 68 miles and takes 6-10 days.
If hiking for 5 or more days isn’t your thing (or you have less time) but you want to see some of the park, consider some day hikes.
Day Hike Options Include:
- Mirador Las Torres, the most iconic view in the park, is often done as a day hike. Stay at the Hotel Las Torres and the trail will be about 12.5 miles.
- Take the catamaran from Hotel Grey and hike up to the suspension bridges for a view of Glacier Gray. The hike from Refugio Grey is about 5 miles.
- Hike to the Salto Grande from Pudeto, the trail is 0.9 miles.
- Hike to the Rio Pingo waterfall from Hotel Grey, the trail is 5.3 miles.
There are many more day hike options, these are just a few! You can also go horseback riding, fly fishing or biking or a variety of other activities.

How difficult is the W Trek?
The trail itself is not difficult on the W Trek. It is well marked and there are just a couple areas of rock scrambling. However, the difficult part is hiking a long distance every day and carrying heavy packs. You should be used to hiking 10+ miles on a day hike and carrying a heavy bag.
Can you hike the W Trek solo?
While I did not hike the W Trek solo, I would be very comfortable doing so. I thought that the trail was well marked and felt very safe. With the shared dorms and communal dinners, it’s really easy to meet other hikers and make friends along the way.
Would you recommend the W Trek or doing day hikes?
My experience on the W Trek was one I will never forget and I think it is very much worth doing! If you have the time, I highly recommend doing the entire W trek instead of just day hikes.
Is the water safe to drink in Torres Del Paine National Park?
The water tends to be safe to drink from the water sources at the inns. Some hikers also drink water directly from streams, but I’ve heard mixed reviews and that is not something I would recommend. I recommend bringing a water filter just in case, but it all depends on your comfort level and sensitivity.
Are there mosquitoes on the W Trek?
I did not encounter mosquitoes on the W trek, but I’ve heard that others have during certain months when it is rainy and warm. Bring insect repellent just in case.
What is the hardest part of the W Trek?
I thought the hike to the Base of the Towers was the hardest part of the trek. It’s a long day with a steep climb.
What kind of wildlife will you see on the W Trek?
I saw very little wildlife on the trek, but I did see several condor birds! There are gauchos (llamas) in Torres Del Paine National Park, but it’s rare to see them on this trail. You will likely see them along the roads driving in and out of the parks instead.
Other animals that live in the park but are rare to see are pumas, huemul deer and foxes. There are no bears in Torres Del Paine, so there is no need to carry bear spray.
If you have dreamed about a trip to Patagonia, I hope this guide will help you make it a reality! The W trek and a visit to Torres Del Paine National Park a bucket list experience that you’ll remember for years to come.
If you’re flying all the way to Patagonia, I recommend more adventures than just the W Trek. After the trek, I drove into Argentina to continue my trip. Check out my 2 week Patagonia itinerary and my guide to renting a car in Patagonia to continue planning!
For more Patagonia guides, check out these blogs:
- The Ultimate 2 Week Itinerary for a Patagonia Road Trip
- A Guide to Renting a Car and Driving in Patagonia
- 30 Tips for Hiking the W Trek
- A Detailed Packing List for the W Trek
Thanks for Reading!
Save to Pinterest!

The Best Things To Do in the White Mountains, NH in the Fall
Where to Stay in Yellowstone (Comparing 3 Lodges in the Park)
Let's stay in touch!
Join the Lost with Lydia email list to get monthly travel guides and tips!
You also may like

30 Tips for Hiking the W Trek in Patagonia (Self-Guided)

A Detailed W Trek Packing List: The Ultimate Patagonia Hike
IMAGES
VIDEO
COMMENTS
Just back from doing West to East in mid January! We took the boat from Hotel Lago Grey got dropped off at Grey for kayaking & hiked down to Paine Grande & did the rest of the W from there. Stayed at Chileno the final night and did a 3am hike up to Mirador Base Las Torres (there were 20-30 other people doing it, highly recommend!!).
Thats great to hear you were able to do this only a month out. Im trying to plan for a 5 day / 4 night trek in mid/late January. I was able to find accommodations along the route going either direction - in your opinion would you recommend going West to East, or East to West?
W-Trek / East to West confusion about first day ... The Reddit of Waterloo includes news from throughout the Region of Waterloo in Ontario, Canada. Posts of interest to residents of Cambridge, Kitchener, Waterloo, and the surrounding townships are welcome, as well as occasional discussions about the Battle of Waterloo.
Things to Know When Planning the W Trek in Patagonia. The W Trek in Patagonia is a long hike and Torres del Paine doesn't make the information easy to find. Below will be a plethora of extra details you need to complete the self-guided hike of the W Trek! Overview: My Itinerary (West to East) Day 1:
Booking Camping and Accommodation on the W Trail. Bus tickets to and from Torres del Paine. Packing for the W Trek. Our Self-guided itinerary for hiking the W Trail. Day 1 - Puerto Natales to Chileno via Las Torres. Day 2 - Chileno to Francés. Day 3 - Francés to Paine Grande via Francés Valley. Day 4 - Paine Grande to Grey.
W Trek: Day 1. Paine Grande to Mirador Lago Grey. Steps logged: 24,345. Roughly 11 miles, 18 km. We started our trek early by catching the 7 a.m. bus from Puerto Natales, Chile, to Torres del Paine National Park. The three-hour bus ride was smooth, and we saw guanacos, flamingos and emus along the way. The bus dropped us off at Pudeto where we ...
The W Trek can be hiked from east to west or vice versa, independently or guided, and you can take as many days as you like (pending refugio availability). Hikers with a good level of fitness will find it's an achievable four-day independent hike. Factor in an extra day to add a glacier kayaking or ice-trekking excursion departing from ...
Based on my previous experience in El Chalten, the body tires a bit after consecutive days of hiking and camping. Here's my draft plan for going from East to West for the first two days: Day 1: Catch the morning bus from Puerto Natales. Catch the shuttle bus from Laguna Amarga to Hotel Las Torres. Hike from Hotel Las Torres to Campamento Torres.
For the 3 day or more pass it is 35.000 CLP due in cash. Credit cards are not accepted. If you are hiking the W Trek from east to west, you'll want to take the minibus from the front gate towards Las Torres Hotel, Lodge, and Camping Zone. This costs 4.000, also due in cash.
Distance: 13 kilometers (8 miles) plus 8 kilometers (5 miles) for the hike from the Centro de Bienvenida to Laguna Amarga) Duration: 6 hours hiking (add an extra 1.5-2 hours for the hike to Laguna Amarga) 4:30am Wake up and take a small bag (including warm clothes and a snack) to see the torres at dawn.
W trek in Torres del Paine - a 4-day itinerary. If for some reason your time in Torres del Paine is limited you can walk the W trek in 4 days. Day 1. Paine Grande campsite - Grey campsite - Paine Grande campsite, 22 km/13,6 mi. Bus Puerto Natales Torres del Paine (Pudeto); ferry Pudeto - Paine Grande, 3-4 hours.
The W Trek can be walked in two directions; from east to west, starting at Refugio Las Torres and ending at Refugio Paine Grande; or from west to east, starting with the catamaran ride across lago Pehoe and ending with a spectacular view of the morning light bouncing off the spires of Las Torres at sunrise. ... On my W-Trek, this is the point I ...
When hiking the Torres del Paine W Trek West to East, it means that you are walking from where Refugio Grey is located, which is close to the Glacier Grey, down the arm that runs parallel to Grey Lake and to Refugio Paine Grande. In addition, Refugio Paine Grande is where the catamaran arrives and departs from for the ferry trip to Pudeto.
The Best W Trek Route. Day 1: Arrive at Torres Central, hike up to the three Towers and back down to Chileno (13.8km) Day 2: Chileno to Cuernos (13km) Day 3: Cuernos to Frances Valley and back down to Paine Grande (21.5km) Day 4: Paine Grande to Grey (11km)
W Trek Itinerary: East to West. I hiked the W Trek from East to West. You can also hike it in the opposite direction, but hiking it east to west tends to be more common. I liked hiking it from east to west because I got the most difficult portions out of the way early. It was also fun to end the trek with a gorgeous catamaran ride across Lake ...
The very specific gated community they are mentioning is otherwise surrounded by a sea of green. So it's not just that it's on the east side. It's either because it's a wealthier neighborhood and targeted (with ineffective gate security) or it's a fusilier neighborhood where they are more likely to report minor crimes.
rosszimm36. ADMIN MOD. Moving to Santa Clarita. Our family of 3 (me, wife, daughter + dog) is considering a move to Santa Clarita, and I was hoping to get some advice: Normally I'd peruse an area before moving there, try the local restaurants, talk to people, etc. but the pandemic has made this difficult to say the least, so I figured there ...
The examiner asked me to demonstrate left/right/stopping signals with my arm, and point out where various controls were (but not actually use them): the parking brake, defroster, windshield wipers, hazard lights, and headlights. Then the examiner asked me to turn on the car's electrical system without turning on the engine (a partial turn for a ...
View community ranking In the Top 10% of largest communities on Reddit. What to do in Santa Clara on 3 day business trip? Didn't have much luck searching this Reddit so sorry if this has been asked. ... Since you sound like a fit person, start hiking Mission Peak an hour before sunset--best views in the south / east bay. Santa Clara is a nice ...
The secretary general of the United Nations said it was "time to step back from the brink" after Iran's first direct attack on Israel.