Travelling is ultimately a tool for growth. If you want to venture further, click this banner and take the leap 😉
- Meet the Team
- Work with Us
- Czech Republic
- Netherlands
- Switzerland
- Scandinavia
- Philippines
- South Korea
- New Zealand
- South Africa
- Budget Travel
- Work & Travel
- The Broke Backpacker Manifesto
- Travel Resources
- How to Travel on $10/day
Home » Gear » backpacking packing list

The ULTIMATE Backpacking Packing List: Everything You Need To Travel (2024)
Deciding what to take on a backpacking trip and what to leave behind can be quite the challenge. You have one bag and so much stuff you could bring. How do you decide exactly what are the backpacking essentials, and what is excessive?
One of the most common questions that we consistently get from folks about to hit the road is – what gear should I take backpacking? What are the essential items I need? Well, read on cos we will show you exactly what to pack while backpacking by giving you my top-secret lightweight backpacking checklist.
This is the definitive backpacking checklist. We’ve put together this epic guide filled the backpacking essentials – just the things you do need, and some bold claims about the things you don’t need to take backpacking.

The Broke Backpacker is supported by you . Clicking through our links may earn us a small affiliate commission, and that's what allows us to keep producing free content 🙂 Learn more .
Backpacking Checklist
Choosing what to pack, what to bring backpacking – 10 essential backpacking items, best backpacking clothes checklist, backpacking necessities – technology checklist, backpacking packing list – adventure checklist, backpacking supply list – hiking gear checklist, backpacking packing list – toiletries packing list, backpacking packing list – medical checklist, backpacking packing list – documents checklist, faq about the best backpacking packing list, final thoughts on our definitive backpacking checklist.

Nomatic Travel Bag
- Capacity > 30L
- Price > $289.99

Nomatic Navigator Carry On
- Capacity > 37L
- Price > $549.99

GoPro Hero 11
- Resolution > 5k
- Price > $349.99

Arc’teryx Beta AR Jacket
- Price > $600

Insurance From World Nomads
- Price > Click For a Quote
Our Top Tips and Packing Hacks…
Before we get into the details of this, let us start by sharing our absolute tip-top tip for travel packing – pack light.
Whether you are camping or hiking, travelling to Europe or Asia as a baller or on a budget, it doesn’t matter what sort of backpacking trip you’re planning. You need to travel as light as possible. This is why we’ll only be talking about the backpacking necessities .
Note that This is a purposely lightweight backpacking checklist to help you achieve this. We’ve only included things to take backpacking that you really need!

This is the most important backpacking packing tip I can give you. Travel light! And here are some of the reasons why packing light is so damn important;
- By travelling lighter you are saving yourself the strain and the stress of a weighted pack. Heavy bags suck, and more shit = more weight.
- Travelling lighter will enable you to have spare space, meaning you can fit more stuff in your bag if need be. See a nice souvenir for mum? Want to pick up some camping gear? If you pack light, you’ll have the space to add more gear to your pack…
You might be thinking, ‘But there are over 100 items recommended on your backpacking essentials checklist! I’ll need 4 backpacks to fit them all!’
This is true! We make a ton of backpacking travel gear recommendations in this guide, and it would be silly to try and bring all of them along with you on your backpacking trip.
We’ve done our best to break this backpacking checklist down into several sections so you can pick what to take backpacking based on the kind of trip you’re doing. Not everyone is going to need a sleeping bag and hiking boots, some will reserve more room for specialist camera gear and extra batteries. Others will rightly prioritise room for emergency toilet paper!
One thing that everyone should prioritize though is respecting mother nature and not leaving anything behind. The less you pack, the less you can leave behind. Packing eco-friendly products is an extra bonus of course 😉
So keep this in mind as you peruse this list – only pack the gear that best fits your travel style and itinerary. Doing so will turn this epic checklist into your perfectly tailored minimalist backpacking list.
Another great tip is to always pack appropriately for your destination and for the kind of trip you intend to have. For example, keep a firm eye on climate – if you are backpacking Europe in July then you won’t need too much in the way of warm clothes (except a jacket for the UK!). Likewise, if you’re just going to be hitting the beach or exploring cities then hiking shoes are probably not all that essential! And if you aren’t a Digital Nomad or aspiring entrepreneur, then you can probably take that laptop off your backpacking list.
By keeping note of the travel style and itinerary of your backpacking trip, you’ll be able to quickly and easily identify which gear on this backpacking checklist is right for you to bring along on your travels…
Looking for a backpacking clothes list, hold your horse a little because that comes later, first you need to check off these backpacker essentials.
Looking to find your tribe?
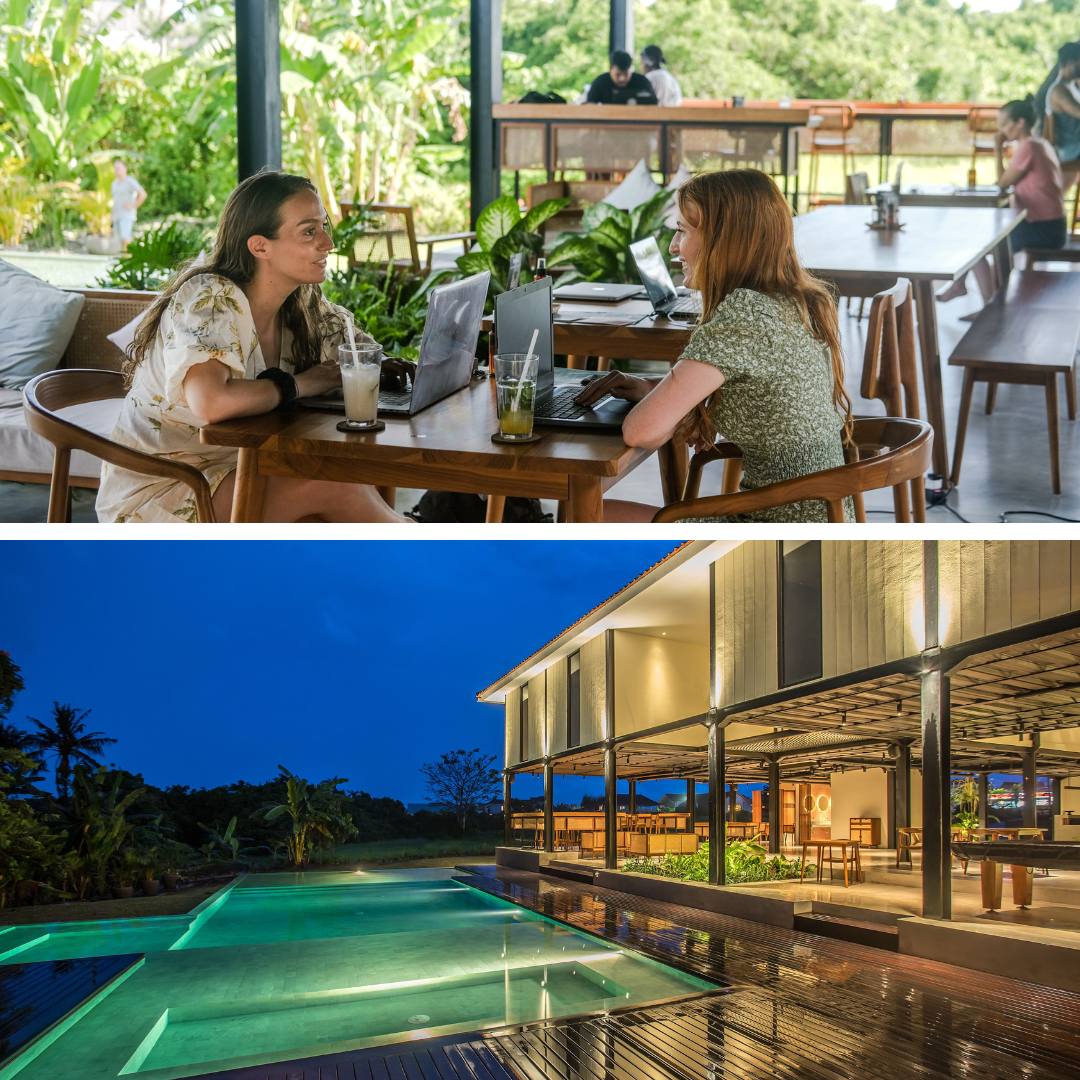
Introducing the best Coworking Hostel in the World – Tribal Bali !
A unique coworking and co-living hostel for those that want to travel the world while working from their laptops. Make use of the massive open-air coworking spaces and sip on delicious coffee. If you need a quick screen break, just take a refreshing dip in the infinity pool or grab a drink at the bar.
Need more work inspiration? Staying at a digital nomad-friendly hostel is a really smart way to get more done whilst still enjoying the social life of travelling… Mingle, share ideas, brainstorm, make connections and find your tribe at Tribal Bali!
Out of all the things you could bring on your backpacking adventure, these are my 10 highest recommendations. This is the backpacking gear that we have been using for over a decade as we travel around the world.
There’s a lot of gear out there that you don’t need but in my opinion, every traveller should have these ten backpacking essentials on their checklist…
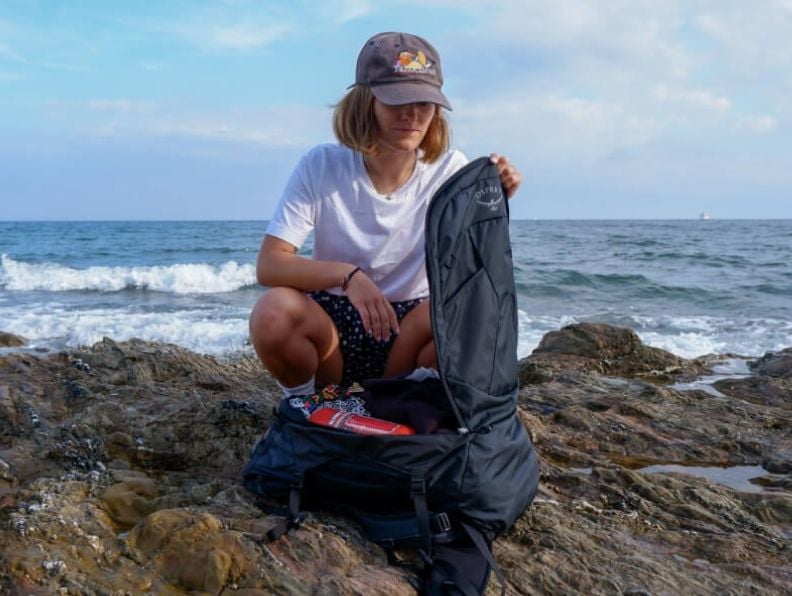
#1 Travel Backpack! (Like the Osprey Aether Plus 70 Pack)

The most important item on this backpacking gear list is a good backpacking backpack! After all, you can’t be a backpacker without a backpack and picking the right backpack is key! I mean, it wouldn’t be a backpacking trip packing list without something to pack it all in!
I myself am a big fan of Osprey packs They are really bloody comfortable, well designed, ergonomic, hard wearing and they come with a lifetime warranty. Backpacks come in all kind of shapes and sizes but we suggest picking a backpack in the forty- to the sixty-litre (40l – 60l) range.
Lots of us here at TBB use the Osprey Aether backpack (read the full review here ) but there are lots of great options out there.
Picking the right travel backpack is very important; you are, after all, going to be pretty much living out of your pack.
You can’t compile your ultimate backpacking gear list without the right backpack! Remember to throw in some good packing cubes too so you can keep everything organised, they’re another must have for backpacking.

REI is one of America’s biggest and most-loved outdoor gear retailers.
Now, for just $30, get a lifetime membership that entitles you to 10% OFF on most items, access to their trade-in scheme and discount rentals .
#2 Daypack – (Like the Osprey Daylite Pack)

Most of us here at TBB travel with a big backpack which we use for keeping most of our stuff and traveling and then a smaller pack which we use for day trips and stuff.
We recommend looking at the Osprey Daylite ; it’s super comfy and of great quality. It’s versatile as hell so can be used for beach days, going shopping, day hikes, overnight camping trips or simply for carrying your backpack to the coffee shop.
Want a few more options? Have a look at our guide to the best travel backpacks to see which suits you best.
If you don’t like the look of the Exos then go and check out our detailed post on how to choose the best daypack for travel.
#3 A Proper Travel Towel (Gotta stay dry!)
Towels are essential backpacking gear as a lot of hostels don’t provide them or if they do, they may not really be all that clean. However don’t bring a ‘normal’ towel on your backpacking journeys, they are big and take up loads of room in your pack and they take ages to dry.
Travel pros like use micro-fibre dry towels series that roll up into tiny, space saving proportions AND they dry unbelievably quick. Granted, they are not quite as comforting as a cotton towel but its a trade of that travellers need to make. A good micro-fibre travel towers is essential travel gear on any ultimate backpacking gear list.
The Matador micro-fibre towel range are made by travellers for travellers. They are super light, and most importantly dry very quickly and are perfect for all types of backpacking trips.
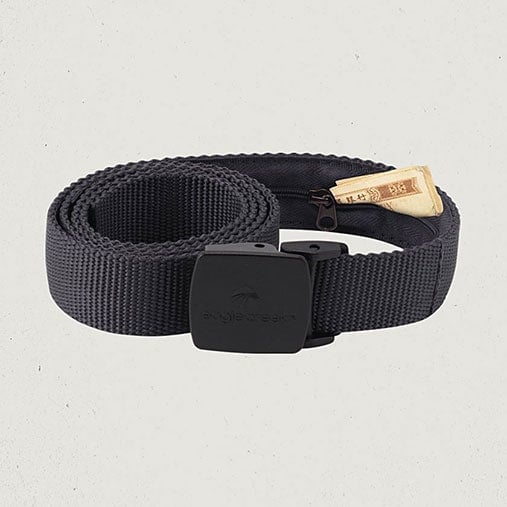
#4 Travel Security Belt (hide your cash!)
I take travel security very seriously, so I never travel without this incredible product.
To keep your money hidden on the road, I strongly recommend picking up one of these beauties – it has a hidden inner pocket in which you can hide up to twenty notes or some marijuana…
I never travel without a security belt and it’s helped me keep my money hidden and on my body whilst travelling through more dodgy countries but it’s useful for all types of backpacking trips. Travelling with a money belt is a small investment that helps keep your money safe.

#5 Combination Padlock (For your backpack and hostel lockers!)
Travel Padlocks are very important for a few reasons.
First, you can lock your bag up when you need to. Connect the lock between the two zippers and BOOM! Your bag is safe from any intruders. This will help keep you at ease when you have to be apart from your bag.
Padlocks are also VERY handy when staying in hostels. Most hostels provide some sort of lockers, but not all of them provide locks for those lockers (or even worse – they charge for them!). However, I don’t always trust hostel padlocks for security reasons and of course, little padlock keys are all too easy to lose.
Always pack a few good quality, combination padlocks. They slot easily into the little pockets and compartments of your backpack and are so very useful. Just remember to remember the combination…

#6 World Travel Adapter (a MUST have)
Travellers all hope for the same thing, that one day the world will unite, and all decide upon a universal size for power adapters…
Well until that happens, you’re going to need a travel adapter and they’re useful for all types of backpacking trips.
There are currently 15 different types of power adapter sizes in use around the world! The best way to ensure your beloved electronics get charged regardless of the country you are in is by using a universal adapter.
It’s worth splashing out a bit here and getting one that can charge a laptop and two USB devices at once.

#7 Wandrd Packing Cubes
In case you have never used them, packing cubes are little compression cubes that allow you to neatly pack clothes in in order to help facilitate better packing. They allow you to pack more stuff, and to keep it all better organised.
For the longest time, I thought that packing cubes were a superfluous indulgence, but boy was I wrong. Now I never travel without a few and they are the perfect way to organise yourself when you’re packing for a backpacking trip.
These ones from WANDRD are great quality and excellent value for money.
#8 A travel-friendly laptop!
We only really recommend bringing a laptop traveling for a few reasons. 1) You make money or need to work online, or 2) you really really love your laptop. Otherwise, backpacking is a great opportunity to unplug and get offline for a while.

For the Digital Nomads and laptop enthusiasts out there, you’ll want a high-quality piece of technology – and we’ve got just the thing for you.
One of the best investments we ever made was our MacBook Pros. It’s got a great UI, it’s very durable, and it helped us take The Broke Backpacker to the next level.
If you looking to start a blog, or make money online, it’s our highest recommendation. Check out this post for a full breakdown of travel-friendly laptops.
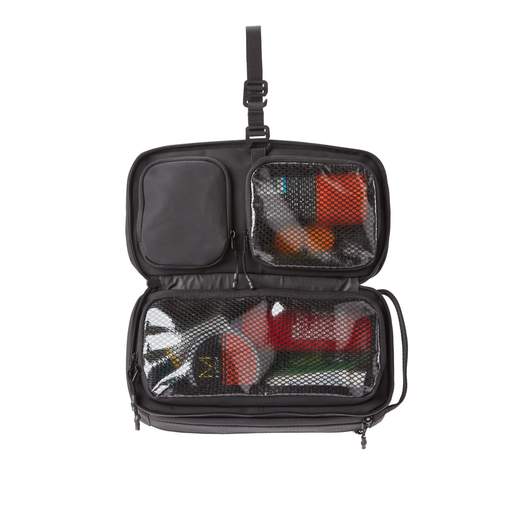
#9 Nomatic Toiletry Bag (Convenience in ways you never thought possible)
Hygiene, haircare and skin care all need to be maintained during a backpacking trip and so you will need to bring along some toiletries.
The best way to do this is to invest a dedicated toiletry bag.
This one by Nomatic is possibly the best toiletry bag on the market. It is made from water resistant, wipe cleanable material that guarantees longevity and it offers excellent organisational capabilities. It is also comes with a hang-up-hook so you can hang it over the shower head or your hostel bed.
We like to say that we’ve never really feel like I’ve moved into a place until we hang up our toiletry bags. Backpacking travel toiletry bags rock!

#10 GoPro Hero9 Black
Every traveller needs a camera, right?
The performance of action cameras has increased significantly, whilst the overall price has come down – making them more affordable. GoPro is the leading action cam brand for a reason: the image quality and stabilization technology of their cameras are unmatched. What’s great is that you get a decent piece of camera gear in such a small package.
Of course, not everybody needs a camera as many of us are quite content to use our smart phones. Still, investing in one of these means you can take some awesome videos and capture those special treasured travel memories.

#11 – eSim by Onesim
The good news about Planet Earth is that there is excellent 4g and 5g Internet coverage, taxi apps and food delivery apps in pretty much all cities and towns (but it does get patchy once you venture out into the wilds and wilderness). The bad news is that your native SIM card will probably not work once your leave your native country and so you will not be able to access any of this online goodness until you rectify that particular situation.
You can waste time hanging around phone shops queuing to get a plastic sim or you can is,ply install a eSim onto your phone before you leave home. You just access the OneSim site, choose the package for whatever country you wish to visit, download it and off you go – you are online the moment you land at the airport.
eSims are easier to set up and better than the environment than plastic sims. The downside is that not all phones are eSim ready.
#12 – GPS Luggage Tracker
You may know this, but right now airlines are losing record amounts of bags and suitcases some of which are never to be seen again. To help to find your bag in the event it does go missing, just pop a GPS luggage tracker inside it and you will be able to identify exactly where on earth it is.
A good, reliable GPS luggage tracker has emerged as an essential piece of travel packing.
Psst! Wanna know what I also always travel with? A travel chess set , because I’m mad for it!

Do You Want to Travel FOREVER??
Pop your email in below to get a FREE copy of ‘How to Travel the World on $10 a Day!’.
Whilst we were all born naked, and have some of our best times naked, clothes are nevertheless a part and parcel of life pretty much anywhere on earth. Whilst dressing for day-to-day life at home is presumably second nature to you by now, dressing for travel can be a bit more complicated.

As such picking the right clothes when backpacking is super important. Here are a few tips to get you all started when compiling your backpacking clothes checklist…
- Pack light clothes – Hot or cold weather, pack clothes that fold up small and don’t weigh too much – avoid denim jeans and pack hiking pants instead! Even if you are heading to freezing weather, it’s better to bring clothes that you can layer up with rather than bringing a big heavy jacket. Cotton is light and breathes. Splurge on the more sweat-resistant stuff if you can and always pack some rain gear!
- Dress dark – Unleash your inner goth and dress dark! Darker clothes hide annoying stains and can be worn for longer. This is extra important because you can expect your backpacking clothes to be on a quicker rotation than your normal wardrobe.
- Bring fewer clothes – Clothes can be found for pretty cheap in most parts of the world, so rather than overpack, bring slightly less than what you need and pick up anything else you might need on the road. This is especially true for places like India and Thailand where you can find amazing, local made clothes for amazing prices.
These are my top recommendations for the best clothes to wear while travelling/backpacking. This travel packing list will see you through heaps of different scenarios.
- Underwear (x5) : It can be surprisingly hard to find underwear that fits in Asia… Pack enough before you go backpacking!
- Thin hiking trousers (x1) : Craghoppers for both men and women make the best stuff and their NosiLife range is impregnated with mosquito repellent. I’ve been wearing Columbia hiking pants for years and swear by them – it’s tough, light, good value and keeps mosquitoes at bay.
- Long-sleeved mosquito repellent shirt : A long sleeve sun shirt is a backpacking necessity when travelling to certain areas, mosquito repellent shirts are a lifesaver when trekking or hanging out in tropical climates.

- T-shirts / Tank tops (x4) : Easy to find on the road, don’t stress too much about these.
- Base Layer (x1) : Crucial for keeping warm, I swear by my Helley Hansen . Many can also double as a long sleeve sun shirt.
- Lightweight technical fleece : Essential when you’re on buses or trains that have the AC turned to ‘freezing’.
- Evening wear (x1) While not quite backpacking necessities, it’s nice to have for a night on the town! Again, I tend to stick to Craghoppers; they have some smart shirts which are also tough and practical.

- Sunhat (x1) : If you’re heading to the scorched plains of Backpackistan, you need to keep your head covered. My Barmah bush-hat has accompanied me on many adventures.
- Buff (x1) : One of my favourite travel accessories on this backpacking checklist, I wear one on my wrist at all times; it’s great for keeping the sun off or covering your mouth and nose to keep dust out. I also use it as an eye mask on long haul transport and in dorm rooms.

- Indestructible sunglasses : I have probably destroyed over one hundred pairs of sunglasses… For a backpacking adventure, it’s worth investing in a decent pair of sunnies and I recommend Abaco; these are specifically built for travellers and are pretty much impossible to break.
- Warm Gear : If you’re heading into the mountains this is the most important section of the backpacking gear list. Do yourself a favour and pick up a pair of water-resistant gloves , a hat with ear-flaps , a down jacket, good quality rain gear and some lightweight hiking shoes.
I’ve been using my RAB Neutrino for years and it was a great investment. I never travel without my RAB, I know that if I have to sleep rough I can survive a night as long as I have my trusty down jacket. It weighs just 650grams, folds down super small and will keep you very warm indeed.

- Trekking trainers : Don’t go travelling around the world without decent shoes! I personally swear by North Face Hedgehogs and have been wearing them for nearly a decade. They are a good lighter option to hiking boots.
- Technical sandals : If you’re going to be spending a lot of time trekking in the jungle, hanging out on the beach or sailing then it’s worth bringing a pair of good quality technical sandals; Teva make the best hiking sandals in my opinion. Alternatively, you could pick up some lightweight hiking shoes.
- Flip Flops : Not all backpacking clothes has to be techy. You can make yourself comfy by packing a pair of these along. They’re essential on any backpacking clothing list!

Camera: If you want to take a camera and you’re new to photography I suggest getting something by Lumix , they offer great bang for your buck and is ideal for taking quality travel photos. Check out this incredibly detailed post for a breakdown of the best travel cameras, or best travel tripods if you’re really interested in travel photography.

Laptop : Since I make a living online, I travel with some top-notch tech. Buying a MacBook Pro was the single best investment I ever made. Whilst a laptop might not be on every backpacking trip list, if you’re blogger or photographer then you’ll be needing one.
Check out this incredibly detailed post for a breakdown of the best travel laptops for digital nomads and backpackers.

USB flash drive : Endlessly helpful.
USB card reader : Essential if you’re into your photography.
World Travel Adapter : This could easily top the list of backpacking essentials. It’s worth splashing out a bit here and getting one that can charge a laptop and two USB devices at once.

Smartphone : If you have a good smartphone, you might not need a camera – it totally depends on how much you care about your photos.
Portable battery : Extremely useful for keeping your phone and camera charged whilst adventuring. I travel with two as I’m often trekking and away from power.
If you’re a keen hiker or adventurer, you know that you’ll need to carry more gear… It’s great to pack light but if you’re spending a lot of time camping out or hiking through the mountains, it’s important to be prepared. This camping gear checklist has got you covered on everything you’ll need for your epic hikes and camping delights.

Head-torch : One of the most useful items on this backpacking checklist! Head torches are useful for caving, hiking and bathroom trips when the power’s gone out.
Check out my post on the best headlamps for travel.
Pocket Blanket: Lightweight, waterproof, super compact pocket blanket is a great addition to your backpacking checklist. Doubling up as an emergency poncho, a picnic blanket is worth its weight in gold when chilling, or camping, on the beach. This is a great item to have, even for someone looking for a minimalist backpacking list and if you want to roll around with your significant other, a picnic blanket is well worth packing.
Camping Hammock : Lighter and more portable than a tent. Plus, chicks dig hammocks… I always travel with a parachute hammock. Not an absolutely essential item, but one of my favourite items on this backpacking packing list.
Mosquito Net : Put a box-shaped net on your backpacking list if you’re headed to the Tropics.
Cable ties : Always worth packing a couple, especially if you’re off on a motorbiking adventure.

Carabiners : I always pack a couple of these. Simply clip them to your pack and use them when you need to attach stuff to the outside of your pack, fix things, hang up mosquito nets… They’re super useful on any backpacking trip checklist.
Sleeping bag liner : Useful when the sheets are not so clean or you want to sleep under a blanket but it’s damn hot. Check out all our favourite sleeping bag liners . If you’re serious about camping you might also want to look at some lightweight sleeping pads too.
Small sewing kit : Fix your own shit, you’ll save some money. In fact, whether you’re camping or not we reckon this should be on any backpacking packing list.
Pens and notebook : Don’t go travelling without them!
Travel workout equipment: You may want to throw a jump rope, a light yoga mat, and stretching strap to stay on top of your travel fitness game.

You may not need a lot of the gear below, but if you’re planning an epic expedition and will be away from civilization a lot it does make sense to invest in some of this must-have hiking gear. Some of us at TBB always travel with a tent as it has saved a ton of money on accommodation over the years. This is our hiking/camping gear checklist…
Multi-tool : We’ve been using our ultra-lightweight Leatherman Skeletool for years, it’s the perfect companion for any backpacking adventure. Check out our guide to the best multitools here for some more options.
Portable Stove : If you are hiking/camping, then this obviously needs to be on your backpacking equipment list. I have a pocket rocket which serves me well – check out my post on the top backpacking stoves to find out if you really need a stove for your travels.

Tent : If you’re camping, you’ll need a tent… Check out my detailed post on the best tents to take backpacking.
Hammock: Even if you’re not sleeping on the beach, a camping hammock always comes in handy when backpacking and most hammocks take up next to no room in your pack. Check out my article on the best camping hammocks for travelling!
Sleeping pad and sleeping bag : Klymit makes the best value sleeping pads. Check out my post on the best sleeping pads to take backpacking. If you are hiking and camping a lot, this is obviously a must when it comes to your backpacking equipment list – without a sleeping pad, you will get seriously cold. You can also pick up a top-quality travel pillow too if you want to get extra comfy – we suggest one from the good people at TRTL .

Water bottle : Every backpacker should hit the road with a water bottle – it’ll save you money and help reduce your plastic footprint on our amazing planet.
Grayl Geopress: The best option for purifying water. – Once upon a time I lost my original Grayl… and soon after contracted a parasite from some questionable water. Since replacing it with the Geopress, I’ve been able to stay parasite-free at multiple high-altitude campsites and other escapades. It’s revolutionized my travels, and by buying one, you’ll also be helping out the planet by not adding to the plastic problem.
Water purification tabs : A much cheaper option for purifying water.

In our wash bags, my backpacking essentials are…
- Microfiber trav e l towel -super lightweight and fast-drying
- Toothbrush and toothpaste
- Cotton buds
- Pack of tissues
- Decent sunscreen (often expensive to buy abroad)
- Razor with replacement blades
- Shaving gel
- Lau ndry bag
This travel toiletries list has all the essentials. Ladies – pack more as you may need.
It’s always worth packing a small first-aid kit. On our travels, we’ve been hospitalized multiple times between us, been in a couple of motorbike accidents and had more hangovers than you can count. They’re essential on any backpacking packing guide and our first aid kits saved my ass on more than one occasion…
I recommend picking up a pre-assembled first-aid kit and then pimping it out with all of the below.
- Personal medicines such as inhalers
- Paracetamol, ibuprofen, and aspirin
- Disinfectant spray
- Disinfectant wipes
- Mosquito repellent (at least 40% DEET)
- Antihistamines
- Bandages and gauze
- Plasters in various sizes
- Steri-strips
- Throat lozenges
- Ciprofloxacin (the best thing to take for traveller’s diarrhoea. Prescription only in the UK so please take medical advice before taking)
- Malaria pills if applicable
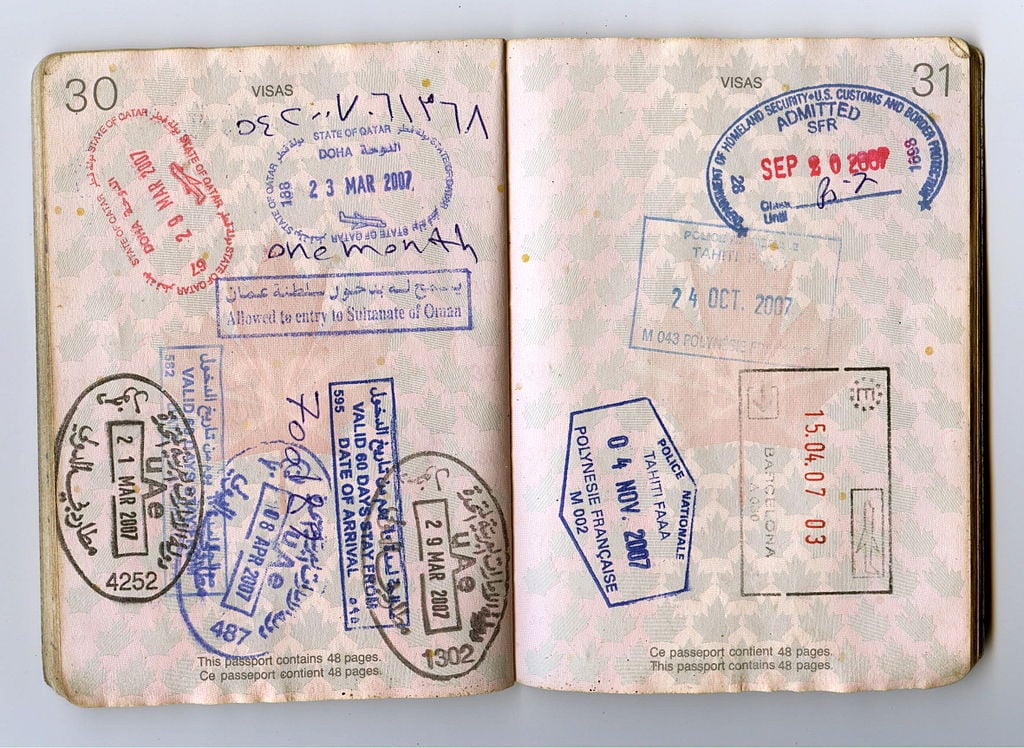
It helps to be organized before you hit the road; we travel with all of the below in a plastic wallet, it may sound nerdy but when you’re at a politically charged border crossing you will get across a lot faster if you are organized.
- Flight, train, and bus tickets
- Travel Security Belt: The best way to keep your money hidden.
- Address of your first hostel (even if it’s fake).
- Valid Passport
- A laminated copy of your passport
- Debit Cards x 2
- Credit Card
- Dollars or Euros
- Some, one-dollar bills for tips
- Driver’s license
- half a dozen passport photos for visas on arrival (you normally need two per visa).
- Insurance information, home contact details, and health information as part of a laminated card.
Backpacking Essentials – Travel Insurance!
Do you need Travel Insurance for your trip? Even if you’re only going for a few days, that’s more than enough time to get smote by wrathful angels. Have fun, but take it from us, overseas medical care and cancelled flights can be seriously expensive – insurance can, therefore, be a life-saver.
Travel mishaps can and do happen and it is well worth thinking about insurance before you leave home. This is a backpacker’s essential item that many either forget about or ignore and we don’t want you to regret that!
We use World Nomads which specialises in covering digital nomads and backpackers. Why not get a quote from them yourself?
Do be sure to read the terms and conditions to make sure that the policy covers your needs.
ALWAYS sort out your backpacker insurance before your trip. There’s plenty to choose from in that department, but a good place to start is Safety Wing .
They offer month-to-month payments, no lock-in contracts, and require absolutely no itineraries: that’s the exact kind of insurance long-term travellers and digital nomads need.

SafetyWing is cheap, easy, and admin-free: just sign up lickety-split so you can get back to it!
Click the button below to learn more about SafetyWing’s setup or read our insider review for the full tasty scoop.
Still, have some questions about our backpacking travel essentials guide? No problem! We’ve listed and answered the most commonly asked questions below. Here’s what people usually want to know:
What are the essential items for backpackers?
Every backpacker needs a good backpack ! After that pick up a good water bottle, some hiking boots and a compass.
What to pack for 3 months of backpacking?
Make sure you have a good travel backpack . Then bring a rain jacket, good shoes, 10 sets of underwear, and always remember a headtorch!
How much weight should you carry in a backpack?
Don’t pack more weight than you can carry and don’t put too much pressure on your backpack. As a general rule, don’t try to carry more than 20% of your own body weight.
What size backpack do I need for 3 months?
It depends on your travel style and what activities you hage planed. However typically we would suggest you bring a size between 50-65L.
We’ve been around the world a handful of times. My backpacking list comes with ten years of travel blood, sweat, and tears so have a proper read over this backpacking checklist and heed my advice, pack light but be sure to pack the things you need for your own travel style…
With the help of these packing lists, you’ll be able to figure out exactly what to pack for your trip so you can gallivant around the world knowing you’ve got everything you need for your adventure…
For more travel gear inspiration, check out my buddy Gianni’s ultralight packing list and for the ladies, this excellent travel packing list for women by Two Scots Abroad.
My friend Gemma has put together this detailed post on how to choose high-quality hiking pants for men.
Have we missed anything off our backpacker checklist? Are there any backpacking must-haves that you swear by that we’ve forgotten? Let us know below.

Joe Middlehurst

Share or save this post

73 Comments
Great post.
I’ve searching for exact items that need on my backpack journey. I’m still gathering the list and getting the items. Somethings I’ve found are a real necessity as emergency blanket, disposable rain coat and powerful power bank.
Be aware that some airports have restriction on the mAp of the powerback you can travel with. After years of travelling with a power bank that had a high mAp count, it was finally confiscated on an internal flight in Thailand, May 24.
Hi all !!! I’ve been going through your website for days now as I am planning my FIRST 6-months solo backpacking trip in southeast Asia (a way to end my student years on a high note ?).
Being a big nature addict, I will be traveling off the beaten paths as much as I can… (ex : planning several five-day-ish hikes in the mountains) BUT I also plan on enjoying some touristy, beach, chill activities + working from my laptop!!!
Therefore, I’ve been wondering how much of all this camping gear I should take with me… For instance, it’s great to have a portable stove when you need one, but is it necessary to carry it around for six months ? Is it realistic to carry a tent+a laptop+all the backpacking necessities+all the camping gear ? In short, how would you recommend combining adventure, working nomad and tourist modes in my backpack ? + Where do you leave your unnecessary stuff (ex: laptop…) when you go camping in the mountains for a week ?
Thanks a lot for taking the time to answer me, and for your amazing website !!!
Generally you can pay to have your stuff stored either at hostels or guesthouses in most SEA countries. If you are really going off grid you will need to be self sufficient and have the items you need with you, including a way to cook.
Some things you will be able to get in SEA but quality camping gear can be harder to come by and expensive. It’s certainly feasible to carrying all the gear you need plus laptop etc and store other things while camping.
Really good post you have there. One thing I would like to add is this Cocoon Grid It Organiser my boyfriend got for his Christmas present. It keeps all your techy electrical things together in one place and they never fall out. We have the one which stores his MacBook air, his kindle, charging cables, adaptor plugs, spare batteries and pens. You can mix and match. You should have a look as you have quite a bit of gadgets there.
great tips for backpackers and checklist. Must give suggestions about hygiene during such adventurous trips.
Long time fan, first time caller. Thanks for this excellent packing guide, and for all the other useful content on the site. I’m off to India & South America so this resource has proved super useful!
My question was, do you have any “best practice” tips on how best to store your passport + other small valuables? I’m guessing keeping them on you is your best bet, but was specifically wondering if there was anything similar to the cash storage wallet that you’d recommend?
Many thanks in advance!
Hey Will! So personally, I always keep emergency cash and a photocopy of my passport rolled up and hidden in a zipper in my security belt – it’s basically a normal looking belt but on the inside there’s a zip and you can hide stuff in there – really helpful! For my passport, personally I hide it as deep in my backpack as possible, it isn’t practical to take it out on nights out or when exploring so it stays, hidden, with my main backpack.
The broke backpacker promoting links to a towel that costs 45-50 quid. You think you might have lost touch with your target audience from getting so much sponsorship you’ve forgotten what it’s like to be an actual broke backpacker?!
Hi Kayleigh,
I think you may have happened upon a listing on amazon.co.uk for one of our Active Roots towels. This is not being sold by us, nor does that company act as a reseller for us.We would not recommend buying from them. We only sell on amazon.com, the towel is around 19.99usd. Hope that helps clarify.
Hi, the link for the Backpacker Bible isn’t working! Is there another link I can try? I’d like to check it out and possibly purchase! Preparing for a huge RTW trip, and this site has been a literal lifesaver!
Hey, the link is now working! It looks like there was a temporary error, but NO FEARS!!! Now you get your free reading material for your adventure! 🙂
I just want to say thanks for this entire site. Everything about it is super useful and you’ve made it easy to read and navigate. I’m very grateful for you! Best wishes in your future travels xx
Thanks as always for visiting! Good luck on your next backpacking adventure!
Such a complete list. I will keep it in my mind and remember this before my next trip. Thanks for the sharing such an informative article.
Glad you found it useful.
thanks for the post
Thanks for the information
Nice list…except for the 70Lts backpack. as much space you have, you always tend to fill it up. I wont go for more than 40Lts
At the last minute, I chucked a small roll of duct tape into my pack. This tape patched a ripped daypack, stopped a cracked glass bottle from leaking, made a makeshift handle for heavy bags after the handles broke, and covered the open ports on my phone/camera when I went to the beach. Genius product which made other travellers extremely jealous 🙂
Antibiotics (ciprofloxacin) should only be used in special cases of traveller’s diarrhoea, and at least not self-diagnosed! You shouldn’t be advising people bringing it on their trip.
Trust me buddy, when you are in the middle of the mountains with no clinic or hospital for several days walk, it’s worth having a well packed medi-kit.
Being a 46 year old backpacker myself this was still extremely informative! I’m heading out next month for what may be my last year solo. Doing All of South America! Would you happen to have this list in a printable format?
Hi! Great tips – great list, thank you.
I have backpacked a lot – and am now dragging my husband and kids around the globe as much as I can. Sadly, I have discovered that I am getting more sqeamish about sleep. Really prefer to avoid other people’s grime and itchy blankets (argh the thoughts of wet, dirty, woolly blankets in a hostel i Nainitaal)… So, am thinking of investing in some ultra-thin sleeping bags for us – or travel sheets. Do you have any thoughts or recommendations? I realise something ultra-thin and backpack friendly won’t be warm, but it is just so we can sleep in our own dirt – dirty, wet woolly blankets can go on top…
Wow, I do sound like an old, prissy lady!
Thanks in advance
– where are you now? we are going to Iran next month 🙂
I traveled with a silk sleeping bag liner for this exact reason – they are really great! 🙂
that’s what i thought, thanks 🙂
there are items on this list that cannot be in a carry on backpack (like the leatherman multitool), how do you solve that issue?
thanks in advance.
Valid point about the leatherman skeletool… normally however I travel overland or with hold luggage as I DO have a fair bit of stuff – camping equipment mostly 😉
Hi Will!!! Big fan of your blog as your writing is captivating and has inspired me to do more with the years left on my clock! and for that my friend I thank you! Now I was really curious how you keep your stuff save from petty theft when camping out with your hammock? Vietnam in particular.
Hey Josh! Personally, most or all of my valuables usually stay in my daypack which never leaves my side unless I’ve been able to lock it up somewhere… petty theft can be a problem for sure, for a longtime though I had nothing worth stealing 😛
Great list. After reading this I realized my packing suit needs to be upgraded. And first of all, I need to replace the heaviest items with lighter ones. And it’s high time that I obtained a dry bag. Have no idea how I could do without it. Thank you for sharing this.
Hi question about the day pack you recommend, the zomake small pack… some of the reviews I ve read say it s not waterproof as advertised. what is your experience with it in the rain? We are traveling to Colombia at the end of their rainy season and I would like a day pack that is waterproof. By the way I love your website, Thank you.
Hey Michelle, it certainly isn’t super waterproof but it can take some rain… just not being dumped in a river! 🙂
Wow what a tremendous checklist. I just love your list. I love travelling. And i have been thinking about my next travelling. Many time i love to pack my backpacking. This time i will must follow your checklist and hope so it will be more comfortable for me. From here i know some new items which is essential for bring with me when i am packing my backpack. If you had more insight i will greatly appreciate it. Thanks for the sharing such a informative also helpful article.
Thank you so much for sharing your tips and experience. I always bring my travel towel and my hammock – it can be a lifesaver.
Awesome checklist, man! I have to say that the most important thing I’ve ever brought with me on my backpacking trips—especially to South Sudan—has been a hammock. Having a hammock is like having a heaven bed and a partner at the same time. I’ve laughed with, cried with, and disclosed my innermost secrets to my hammock, whom I consider to be my best friend and potential marriage partner.
Well, I don’t want to be rushing about from place to place, going everywhere and not really getting to see much if you know what I mean, so SE Asia?
Hi, I really like your list, my boyfriend and I have just started to plan our travels. We are going for a year, I’d love to go for longer but I’m a nurse and the longer I go without working the harder it is to get back into nursing. Is there anywhere in particular you would recommend? So far we are thinking a month of interrailing in Europe then getting the Trans-siberian railway to Beijing and winging it from there so any adivce would be appreciated!
A year of backpacking sounds like an epic trip! As for advise – can you be a bit more specific about what you’re looking for? There’s so many epic places in the world to visit…
So very hard to know what to pack in that small bag, but your guidance and tips certainly help with the selection.
Great work.
Cheers Sharon…
Great article! I love reading about what other travelers bring with them. A few of those I wished I realized before I started my travels (eg first-aid kit and ear plugs). I also love that you included condoms twice…you can never be too careful.
I read one of the comments above that discussed how bringing as many electronics as you suggest makes it “too comfortable.” I disagree, I believe that travel is different for everybody and you should be as comfortable as you want to. I have no plans on going on any vision quests or anything, so making sure I have my laptop and chargers on me is a necessity.
My trip might be a bit less intense than yours (less camping), so if you’re ever curious on what a city-dwelling traveler brings in his bag you can check out my new “what’s in my bag” post:
http://www.citizensofeverywhere.cc/2018/02/09/round-the-world-packing-list/
Look forward to reading the rest of your posts, looks like I have a lot to catch up on!
Adam http://www.citizensofeverywhere.com
Hi Will, Love the packing list and your blog in general! Despite having travelled for years I have just started in the travel blogging world. I’m developing my website at the moment and would love it if you have the time to take a look and give me your feedback. Apologies if you get requests all the time but if you are game then I would appreciate it! Kind Regards Charlie
Great packing list!! Most of the time i over pack my backpack. This will help me a lot. Which size backpack do you prefer for travel?
You have shared a great list. And I must say that a simple and light weight camera is a must. Who would not want to capture the great moments while on a trek
I think this is a great list.Your Article is Wonderful! A lot of Great Tips and Very nicely written. I have learned a lot from your article Thank you for sharing with us.
Great list and images alongside 🙂 Think we need to upgrade some of our gear before our next trip after reading this! Cheers.
After reading your list I tend to leave the laptop at home and just stick with my phone, I try to reduce the whole electronics and leave what I can behind.
But I agree you have to pack for the kind of trip your taking. I tend to find that backpacking is a great way with getting to know yourself more and you do meet a lot of people from all walks of life. The amount of friends I have made over my time backpacking its nice.
But I do try and stick to the essentials when I backpack. 🙂
Great Read and great list 😉
Cheers dude and yeah I totally hear you – there are advantages to leaving the electronics behind; harder when you’re going for years at a time though!
Hi there,Im heading to south east asia for about 5 months end of november, i was just wondering the vaccinations you recommend which I should get done as hospitals try hook you up with things that are not really needed.
Tetnus and the Heps are usually worth getting… 🙂
Will, great list of gear…but how much does your kit generally weigh? Seems like it could be damn heavy!!!
I agree that toiletries is the most important things we should carry with us whenever we plan to travel somewhere. If you’re going on a short trip and you don’t have any check-in baggage, you need to make sure that any toiletries you bring don’t fall foul of the 100 ml/3 oz limit.
This is especially relevant for women (who tend generally to carry more cosmetics type stuff) and first time travellers. The number of newly bought toiletries I have seen confiscated at airport security, by now, would number in the high hundreds of litres. Check it in or keep it under 100ml for hand luggage. I can only imagine where all that product ends up.
Hello Will,It’s a good list for easy living.I have just done a 4 month motorcycle trip around most of S/East Asia and as far as electronics go,all I took was a $15 cell phone.My total pack weight was 18kg and did trip in the wet season.Lots of fun.I feel that too much gear and all the electronics you suggest,makes the trip to easy,(comforts of home)might as well stay home.It is fun getting lost,you do finish up in some cool places,you might never have,discovered.
I love your bio. I from Venezuela
very nice post. thanks for sharing! will definitively check it before I travel next time.
All this goes in one bag that you have on you all the time? it all fits?
Nah, I tailor what I take based on what kind of trip it is…
But i dont get it, what do you do to all the stuff, i mean, you are backpacking, if you have sleeping bags to go hiking and then you go to a city and you dont need it, you throw it away?
sorry my english sucks haha love your blog, i click on every sponsor you have 😉
Epic list Will! I wish we bought a GSP device when we started travelling. I thought it was a bit overkill but it would have saved the day a few times in India!
A valid point!! It’s not often I miss something like that… my hat off to you Sir!
for the more adventurous ones, hammocks and a good tent. travelled 4 months in SEA, and quite possibly spent a month in the tent to reduce accommodation expenses.
A hammock or a tent are a great way to save money but they do weigh you down, you need to work out what kind of trip you want and plan accordingly – whenever I hitchhike, I take camping gear 🙂
Excuse me, when you sleep outside in a tent how do you go to the bathroom?
Dig a hole my friend, dig a hole.
Bandanas (2), shemagh scarf, Paracord, pharaoh rod (metal match). What does your pack weigh? Mine is currently 35lbs. Id prefer 30 but doesn’t seem possible to lose anything.
You can never have enough Bandanas….. Mine is around the 30 mark 🙂
You can do almost anything with a shemaugh and paracord!
Thanks, Serena
I haven’t heard of this but it sounds pretty awesome; going to check it out now! 🙂
Digital copies of your preferred travel guides can be loaded onto your tablet. Save the weight, don’t take the book!
Leave a Reply Cancel reply
Your email address will not be published. Required fields are marked *
Save my name, email, and website in this browser for the next time I comment.
Notify me of followup comments via e-mail.
How to Plan a Backpacking Trip in 12 Simple Steps
Learn how to plan a backpacking trip! From how to pick a trail to what gear to pack, this guide covers all the important planning steps.

Whether you are a beginner backpacker or have been tramping around the woods for years, there are a number of questions to ask when you are planning an overnight backpacking trip. Where should I go? Do I need a permit? What should I eat? What do I need to pack? I’ve been there. When I first started hiking and spending time outdoors, I had no idea how to plan a backpacking trip. Now, years later, planning a backpacking trip is one of my favorite parts of the whole process. If you’re new to it though, it can feel a little overwhelming, but we’ve got you covered.
In this blog post, we break down how to plan a backpacking trip into 12 simple steps so you can feel more organized and confident (and less overwhelmed) as you get ready for your adventure. By following this step-by-step backpacking guide, you will be able to easily plan your backpacking trip from start to finish, knowing that you aren’t forgetting any important details.
Ready to plan your next adventure? Here’s our guide to planning a backpacking trip so you can get out and enjoy the great outdoors with confidence
1) Pick dates for your backpacking trip
Figuring out when you want to go on your overnight adventure is the first step in how to plan a backpacking trip. Your dates will dictate where you can go due to the weather (unless you want to snow camp). If you want to go in January, then you’ll be limited to warmer places like Southern California, Arizona, and Florida for example. If it’s summer, then you’ll want to hit the mountains where the temperatures are cooler.
If you are a newbie, 1-2 nights is a good length of time for you to get a trip under your belt. You’ll be able to answer a lot of questions after that first hike. What gear worked, what gear didn’t. What you really need to bring vs what you can leave at home to shave off some weight. Whether you brought the right amount of food. What pace you like to hike at, etc. If you are more seasoned and have the time off, then consider going for a longer trip. The longer you’re out there, the more time you have to decompress and reap all the benefits of being in the wilderness.
Save this post!
Enter your email & I'll send this post to your inbox! You'll also receive my weekly newsletter full of helpful advice for planning your adventures.
2) Pick a trail for your backpacking trip
When you plan a backpacking trip, picking a trail can be a little challenging with so many awesome trails and destinations to choose from. Ask yourself:
- How far do you want to hike? If you are new to backpacking, 5-7 miles a day is a good target. Remember, if you aren’t used to carrying a lot of weight, then backpacking will be more challenging than a regular day hike. The average confident backpacker can usually cover somewhere in the range of 8-12 miles or more depending on how much elevation gain there is.
- How difficult of a trail do you want?
- What major features are you looking for? Big mountain landscapes? A lake? Hiking along a river? Waterfalls?
- Is solitude a must? If you’re looking to get out into the Wilderness, be sure to read through our Backpacking 101 Guide for Planning a Wilderness Trip .
Get an idea in your head of what kind of experience you want to have. Then start checking out trail descriptions and plan a backpacking trip that aligns with your requirements.
Not sure where to start? Here are a few good beginner backpacking trips:
- West Rim Trail in Zion National Park
- Havasu Falls in Arizona
- Red Pine Lake in Salt Lake City
- Cutler Coast Trail in Maine
- San Jacinto Peak in California
- Trans Catalina Trail

3) Check permit requirements & get a permit if you need one
So you found a trail that looks awesome for the time of year you want to hike. Before you get too excited and start making plans, check to see if a permit is required. Many trails, especially popular trails in National Parks, require wilderness permits that need to be reserved months in advance. Many of the more popular backpacking trails (like in the Grand Canyon or Yosemite) are allocated by lottery up to 4 or 5 months in advance. If you google the trail, you can usually find permit requirements on the federal or state agency’s website.
Depending on where you are backpacking, your permit may have additional requirements. For instance, if you are traveling in bear country such as the Eastern Sierras, Montana, or Wyoming, it’s likely that you’ll be required to carry your food and scented items in a bear-proof container or bag .
4) Invite your friends (or commit to going solo)
If you want company, try to round-up a few friends who want to join you. Give them a call or put a note out on Facebook. If that doesn’t work and you are unable to find anyone you know to go with, you have a couple of options.
Check to see if there are any Facebook groups in your area for hikers or outdoor enthusiasts. In Utah, there is a Utah Outdoor Women’s Alliance group and there are always folks looking to link up for a hike. MeetUp can also be a great website as well for finding like-minded friends who love outdoor adventures and trips. Are you part of a yoga studio or climbing gym? Those are also great places to meet active people and maybe you can make a new friend who might be interested in your trip.
If you can’t find anyone, don’t let that discourage you. Backpacking alone is an empowering experience and is worth trying at least once. Check out my tips for hiking alone here .

5) Make your transportation plan
The next step in how to plan a backpacking trip is to make plans for getting to and from the trailhead. If your trail is a loop, you can typically leave your car at the trailhead parking area (check to see if there is an overnight fee or parking permit required). If you’re doing a one-way hike, you have a few options. If you’re hiking with friends, you can set up your own shuttle by leaving a car at the end and driving a second car to the start. If two cars aren’t an option, you can ask a friend or family member to drop you off or reserve transportation with a taxi service or shuttle company. Many hotels and outfitters in popular hiking destinations will offer shuttle services, so do a quick google search to see what’s available if you go this route.
6) Get the necessary gear for your first backpacking trip
Maybe you already have your backpacking gear dialed. If so, great! If not, a good place to start is with my 3-day backpacking checklist . In addition to that detailed post, we’ve also got several more outdoor gear guides here on Bearfoot Theory including:
- What to Wear Hiking
- The Best Backpacking Packs
- The Best Tents for Ba ckpacking
- The Best Sle eping Pads for Backpacking
- The Be st Sleeping Bags for Backpacking
- The Best Water Filters for Backpacking
- The Best Lightweight Bear Canisters
- The Best Backpacking Stoves
- The Best Cheap Backpacking Gear
Ok, so what if this gear is way too expensive? Don’t let that deter you from planning a backpacking trip. Ask your friends if anyone has gear you can borrow. But be sure to check that a borrowed backpacking pack fits comfortably before you set out and that the gear you’re bringing along isn’t super heavy or else you may not enjoy your trip.
REI offers gear rentals, and if you’re an REI member you get a discounted rate. If there’s not an REI in your area, check your local university recreation center and local outdoor stores to see if they rent backpacking gear. If you want to buy your own gear, but are looking for discounted prices, check out our post on the Best Places To Buy Discounted Outdoor Gear . Buying gently used outdoor gear is another great way to save money, and it’s better for the planet too!

7) Test your gear
Not testing your gear is a common beginner backpacking mistake that’s easy to avoid. Make sure you know how to use all of your gear before you set out.
Set up your tent in your living room and take your backpack and hiking boots for a spin up your local hill before setting out on an overnight trip. If something doesn’t feel right, it’s probably not and you want to catch it before heading out into the wilderness.
If your pack is the right size but it is still giving you trouble (it’s weighing down on your shoulders or seriously hurting your back), you probably need to make some simple adjustments to the straps. Or perhaps you need to make some adjustments to the way you pack it. Check out this guide on how to pack a backpacking pack for more on this topic.
As far as your hiking boots , unless you choose a heavy-duty leather pair that are suited for mountaineering, most standard trail hiking boots should be fairly comfortable right out of the box, but you still want to take them on a few hikes before your backpacking trip to make sure. If you take them for a short hike and come home with blisters, they might not be a good fit. The point of testing your gear all out beforehand is to get everything dialed so faulty gear doesn’t ruin the epic backpacking trip you’ve been planning.
Testing your gear beforehand also offers the opportunity to train before the big hike .

8) Shop for Food
Planning food is a big part of planning a successful backpacking trip. You want to eat well, but you also want it to be easy and lightweight. I’ve written a detailed post on some of my favorite lightweight backpacking food options and I also especially love Good To-Go’s backpacking meals . Their Mexican Quinoa Bowl is one of the best dehydrated backpacking meals I’ve ever tried! It’s filling, yet vegan and gluten-free, and it has half the sodium of most backpacker food brands.
Also, be sure to check the requirements for food storage for the trail. If you are in bear country, you’ll need to pack your food in a bear-proof canister.

9) Brush up on Leave No Trace Principles
Leave No Trace is a set of guiding principles to help you reduce your impact when you are spending time outdoors. It covers everything from pooping outdoors to how to safely enjoy campfires and even where to set up your tent . If you are not familiar with Leave No Trace, make sure you brush up on how to be a good camper before you hit the trail so we can all do our part to keep the places we recreate in as pristine as possible.

10) Get a Map & Check Water Availability
Don’t want to get lost? ALWAYS bring a paper map with you and check out these navigation tips while you’re at it . Even if you think the trail is going to be straightforward and well-marked, a paper map should be non-negotiable. While you can download hiking and navigation apps you always want a backup in case your phone dies. I am a huge fan of the National Geographic Maps which exist for most National Parks and other popular hiking areas. If you can’t find a map to purchase online or at your local REI, stop by the nearest rangers station on the way to the trail and see if they have a map.
11) Tell a friend or your family your plans
It’s important for safety to share your plans with a friend or family member. Ensure they know the date and general time you plan to check in with them at the end of your trip and make sure they know the details of the trail you will be hiking.
I also like to carry some sort of backcountry communication device if I’m hiking solo or going somewhere really remote. The SPOT Gen4 and the Garmin InReach Mini are the top satellite communication devices for sending texts to family back home and calling emergency responders if you get into trouble.
12) Check the weather
It’s important to always check the weather starting at least a few days before your start state. Bearfoot Theory community member Kim once drove 10 hours to hike the Lost Coast only to learn there was a large storm front rolling in that closed the trail. Checking the weather ahead of time will help you adjust your plans as needed and prepare by packing the correct clothing and gear like a rain jacket and even rain pants. In case there’s the possibility of wet weather in the forecast, here are some of our tips for hiking in the rain .

AND FINALLY, GO!
The last and final step is to hit the road and have a good time! Know that most people experience a couple of minor mishaps on their first backpacking trip. On my first backpacking trip, I forgot my hiking boots and ended up hiking 20 miles in Chacos (with a lot of blisters to boot) and I didn’t pack nearly enough food. It also made me realize I was a little more out of shape than I thought.
But watching the sunset over that lake where I camped was a turning point in my life. That first backpacking trip changed my whole relationship with the outdoors….so get ready 😉

Where was your first backpacking trip? What other advice do you have on how to plan a backpacking trip? Share your comments, questions, and experiences below!

With two decades of hiking and seven years of van life under her belt, Kristen has dedicated her life to helping people experience the positive effects of nature. As a pioneer in the outdoor blogging space, she founded Bearfoot Theory in 2014 and has since authored more than 350 blog posts about outdoor travel, hiking, camping, and van life. Her work has been featured in National Geographic, Outside Magazine, and Backpacker, and when she’s not on the road, she lives in Park City, Utah with her partner Ryan, their son, and two adventure pups.
Leave a Reply Cancel reply
Your email address will not be published. Required fields are marked *
Save my name, email, and website in this browser for the next time I comment.
Tip #11 is clutch, and so easy to forget. Thanks for the reminder. Great post!
Thanks for this awesome guide! I’ve always wanted to go on a camping trip but it always feels intimidating, so I’ve only done short hiking trips. This list somehow makes proper camping trips feel much more manageable with some simple steps, saving it and hoping to be able to use it soon!
Awesome Aaron! Good luck on your first backpacking trip and come back and tell us how it goes!
Hi! I love your site, so many great articles and pieces of advice. I have one question I have searched for an answer on your site and elsewhere and can’t seem to find… when you plan for an overnight backpacking trip 4+ days, what is you advice on parking? Where and safety. Thank you!
Hi Ally – it really depends on what trail you’re doing. Some trailheads are safe and secure enough to leave your car for a few days (just make sure you take out all valuables). If you don’t feel comfortable leaving your car, you could ask a friend to drop you off or take public transportation to the trailhead if available. Many cities will have short or long-term parking lots that you can leave your car at for a fee. For Kristen’s 22-day JMT hike, she left her car at the Ranger Station in Tuolumne Meadows.
Thank you. Even though this will not be my first time hiking, you advice just made me double check my check/packing list.
This is very empowering! I’ve wanted to go backpacking for years and have felt intimidated and didn’t know where to start. We just completed our first backpacking adventure last weekend and had a blast. You break things down and help me feel like I can do this!!!!
That’s awesome Dana, congrats!
Backpacking Essentials for Your Overnight Hike
Share this:.
- Click to share on Facebook (Opens in new window)
- Click to email a link to a friend (Opens in new window)

What do you need for a backpacking trip? This checklist of backpacking essentials will help you remember every important item.
The essential gear items that you bring on any backpacking trip will almost always be the same. Beginner backpackers and seasoned vets will agree that your exact backpacking essentials kit will change over time, and most of us are still refining our gear list each time we go. Yet our essentials seem to always make the list despite our unique needs and climates.
No matter your experience level, using a list can help you remember all the vital equipment. Along with the packing list we provided, we’ll break down how to choose appropriate gear for your overnight camping adventure.
Download Printable Checklist

This backpacking essentials checklist is meant to be a general guideline to give you a baseline of necessary gear. Item types and amounts will vary depending on the backpacker.
This isn’t an ultralight backpacking list, but it ensures you have all the items you need for an overnight trip in the backcountry.
Backpacking Essentials: Camping Gear
For an overnight trip, you should be able to get by with a backpack that holds 30-50 L. If you’re backpacking for an extended trip (3-5 days), then you will need a larger pack (50-70 L).
Other than the length of your trip, backpack size is determined by how bulky your gear is. Remember, all the additional layers for a winter trip will add more bulk to your bag than a standard summer outing.

Even if there’s no rain in the forecast, plan to bring something to cover your pack. A simple rain cover is fine, or you can bring a large trash bag.
Sleeping Setup
The first part of your sleeping setup to decide on is if you want to use a backpacking tent , tarp, bivy sack, or hammock. All of these sleeping shelters have their pros and cons and are very personal choices.
If you’re just busting out your tent for the season, make sure it’s in tip-top shape before your trip with our waterproofing, patching, and spring cleaning guide.

The sleeping bag you need depends on the climate and weather conditions. Be well-prepared for the night ahead by determining the appropriate bag temperature/comfort rating. Seek out a bag rated at least 10 degrees colder than the anticipated low temperature.
So if you expect the low for the night to be 30 degrees, pack a 20-degree bag or lower. Mummy bags are recommended for backpacking because they provide more warmth and are easier to pack down.
The next consideration should be if your bag is insulated with down or synthetic materials. Both have pros and cons, but the main difference is that down tends to be lighter and easy to pack down small with a higher price tag. Synthetics are bulkier, but they still insulate when wet and dry much faster.
For most skilled backpackers, keeping a bag dry isn’t too tough, so the light weight, compressibility, and long life of down bags makes them a top choice.

The Best Backpacking Sleeping Bags of 2024
A sleeping bag is one of your most important pieces of camping gear. We've found the best backpacking sleeping bags for every use and budget. Read more…
The final piece of the sleeping setup is a sleeping pad. Don’t forgo packing this item. While it’s tempting to think of a sleeping pad as only a comfort item, it provides much-needed insulation and warmth while you sleep.
No matter the shelter you’ve chosen, a sleeping pad is a must. Classic Therm-a-Rest Z Lite pads are an ideal and affordable sleeping pad choice, as you don’t have to worry about air leaks. Check out our list of the best sleeping pads on the market.
We didn’t include a pillow on the list. You may choose to bring an inflatable pillow for your sleeping arrangement. But for most backpackers, a great tip is to stuff some clothing into a stuff sack for a sufficient pillow for the trail.
Notice that we recommend a headlamp, not a flashlight. If a flashlight is all you have at the moment, it’s certainly usable. And some experienced campers love the power and versatility of a small flashlight.
However, for most people, a headlamp makes your life much easier during backpacking trips. It frees up your hands if you have to set up or cook in the dark. Plus, it makes hiking in early mornings or late at night much safer.
Even if you’re only out for one night, bring fresh batteries along. You can opt to change the batteries right before you go, but having a backup set should become a habit.
If you’re shopping for a new headlamp, pay careful attention to the battery life in the product specs. While extra lumens can be nice, you don’t need a ton of light for most backpacking, as you’re moving slowly or working close to your body. But long battery life is very helpful on multiday excursions.
Opt for a headlamp with a rechargeable battery versus disposable batteries for a more versatile headlamp. But keep in mind that you’ll likely need to bring a battery pack for recharges in the field when on longer trips.
Camp Kitchen

Stove and Fuel
For overnight trips, there are ways to get around packing a stove. Still, part of the delight of a crisp morning outdoors is a hot cup of coffee and a warm breakfast. You can cook these using old-fashioned fire and coals, but there are fire restrictions in many areas.
Having a camp stove and fuel makes cooking after a long day of hiking quick and easy. There are many options of camp stoves, ranging from very simple and small, like the proven MSR Pocket Rocket , to cooking systems like the Jetboil Mini Mo and multifuel liquid stoves that can function well even in bitterly cold weather. Then you have the more minimalistic stoves like a biofuel stove that burns biomass or alcohol stoves for a lightweight heat source.
Check out our article on the best backpacking stoves to learn more.
Cooking Gear
Beyond your stove, you’ll need a cooking pot, mug, and utensils. To keep things minimal, consider using a compact cookset that packs down together. These will usually have one utensil, one cooking pot with a lid, and a mug that all pack back down into the size of the pot.
The Sea to Summit X-Set 21 Cookset and the Stanley Camp Cookset are both excellent examples of this kind of setup.
For silverware, a spork is a standard option. Try to research the materials and read product reviews. There are many plastic spork options available, but metal or titanium utensils will last you much longer.
Minimalism on the trail may be a learned skill, but it will save you pack weight without compromising necessary creature comforts.
Dishwashing
With minimal cookware, dishwashing becomes a breeze. We recommend bringing some biodegradable soap along and a packable microfiber cloth to dry the dishes. Still, with only a few dishes, you should be able to get by without the use of a dishwashing tub.
If you prefer a dishwashing tub, some innovative and packable designs make doing the dishes easy.
For an overnight trip, it may be possible to pack a bladder of water to last for the length of the trip. However, you don’t want that to be your only available option. Having at least one water bottle ready to drink from at all times is advised, and having a water filtering system on hand will give you the security and flexibility you need to have a safe and enjoyable trek.
If you bring a water bladder along with your water bottle, bring at least a 2L bladder, although a 4L bladder is ideal. MSR makes very durable dromedary bags for backpacking.
Looking for a water filter? Check out our list of the best water filters here .
Disclaimer: Your backpacking food shouldn’t gross you out, and you need to bring enough!
There are so many fantastic backpacking food options available. Some are prepackaged, so all you have to do is add boiling water.
For an overnight trip, it’s easy to plan for food. When planning, make sure to think beyond mealtimes. Bring plenty of snacks to fuel you as you hike. Things like trail mix, power bars, and fruit such as oranges and apples are all great options.
As most of our food is packaged, especially for backpacking, be sure to follow Leave No Trace guidelines. If you pack it in, pack it out!
Depending on the area you’re traveling to, you may need to keep your food away from bears. Be sure to do your research and bring either a bear canister or bear bag when necessary.
Apparel and Footwear
Three important things to remember about backpacking clothing and shoes are as follows:
- Your clothes should be moisture-wicking materials. Avoid cotton, as it absorbs moisture easily.
- Pack and wear layers of clothing. You can pack clothing according to weather forecasts, but layering is the best way to prepare.
- Make sure your shoes are broken in before your hike. No one likes blisters. Ouch!
When you’re backpacking, you don’t need to change your pants and shirt every day. Backpacking life often means you should expect to get a little dirty (and maybe a little smelly).
So if you’re planning a simple overnight trip, you can expect to wear what you had on the first day. Bring an extra pair of underwear and socks, though. It’s nice to have a fresh pair, and you won’t have much other clothing packed, so no worries about space.
The clothing you should bring depends on the climate and current weather conditions. Even if there is no rain in the forecast, it’s better to be safe and pack at least a light waterproof jacket.
Packing layers of clothing also makes things more comfortable because temperatures vary throughout the day. So having to put on or take off one layer is much easier than having to change a complete outfit.
Your clothing and layering system should also include jackets. The type and number of jackets you bring depend on the climate and weather conditions.
Hiking boots or trail shoes should be a priority when planning a backpacking trip. They protect you from rocks and carry you over varying terrain. You need to trust that they will support you the whole way.

Most importantly, know the climate and terrain. If you’re going to be in a cold, wet environment, consider waterproof shoes or gaiters to protect yourself. If it’s hot and dry, maybe trail running shoes will fit the bill. Each trip and each person has different needs for footwear.
You’ll also want to break in your shoes properly if they’re new. This process can be done through various day hikes or just wearing them throughout daily activities.
Personal Hygiene
There are only a few backpacking essentials on the personal hygiene list, so they’re easy to keep in one place. These should include basics like a toothbrush, toothpaste, hand sanitizer, and any prescription medications.
Other than that, also bring items like a trowel for digging catholes or wag bags to pack out your waste. If you use toilet paper or wipes for sanitation, bring a sealable bag so you can pack them out after you’re done.
For female backpackers, menstrual products are essential as well. It’s a good idea to pack some even if you aren’t expecting your cycle to start. If you don’t want to carry around disposable menstrual items, you can use a menstrual cup. If you have never used one before, test it out before your trip.
Emergency Kit and Personal Items
Emergency or survival kit items are the most frequently forgotten items for most backpackers. They’re easy to forget because they won’t necessarily be used each day. Even though you won’t use one often, they play an important role in your backcountry safety. So take emergency gear seriously and add it to your backpacking essentials list.
A simple emergency backpacking kit should include a first-aid kit , whistle, firestarter, waterproof matches, emergency shelter, and a multitool.
Other safety and personal items that can make life easier on the trail include a knife, a gear repair kit, sunscreen, a sun hat, and insect repellent. If there are bears in the area where you’re backpacking, bring bear spray as well.
Having a reliable navigation system should be included on this list. Many hikers now use their smartphones for this. However, smartphones always have the potential to die or break on the trail. Having a laminated map and a compass as backup is a safe way to ensure you know your current location and where you’re going.
Finally, don’t forget other personal items like keys, identification cards, your wallet, permits, and your phone.
Packing Tips
When you’re packing for your overnight backpacking trip, lay out all of the essential backpacking items on the floor before you pack them. This way, you can inspect your gear and make sure you have everything on your list.

If you want to keep your backpacking essentials organized in your pack, using stuff sacks or organizational bags can be very helpful. Separating items in pouches or bags can make gear more accessible, organized, and compact. Using this packing process will ensure that you don’t forget any of your backpacking essentials.
The final tip we will leave you with is to print out two copies of your itinerary the night before you leave on your trip, even if it’s only an overnight adventure. Give one to a friend or family member and leave the other one in your car.
If you can’t hand off a paper copy, at least contact a trusted friend or family member and tell them where you plan to be in as much detail as possible, including when to expect you to return. This way, if something happens to you while you’re gone, someone will be able to alert the authorities right away, and they’ll know where to start looking.
Planning, packing, and embarking on a trip as a beginner can be intimidating. Because this article is focused on your packing list, not specifically how to pack, here are some more backpacking tips and tricks to help you get out there.

The Best Backpacking Tents of 2024
Whether you're looking to spend 100 nights on the trail or stick to a tight budget, we've found the best backpacking tents of 2024. Read more…

The Best Backpacking Water Filters of 2024
We tested the best backpacking water filters and purifiers for your next trip into the great outdoors. Read more…
Follow Us On
Subscribe Now
Get adventure news and gear reviews in your inbox!
Join Our GearJunkie Newsletter
Gear Top Stories Deals
Table of contents
Best Backpacking Meals & Food of 2024
Some of the links on this page are affiliate links

Backpacking Food
Meal planning is one of the most important considerations for any backpacking trip. The food you choose will depend on taste preference, nutritional value, caloric density of each meal, and how easy it is to cook. Some hikers bring dehydrated meals because they’re quick and easy. Others prepare DIY dinner recipes and use a food dehydrator (check out our favorite DIY meals and dehydrator tips ) to make trail snacks. Our approach is usually a mix of both methods, and in this post we’ll outline our general backpacking food strategy and suggest some of our favorite meals.
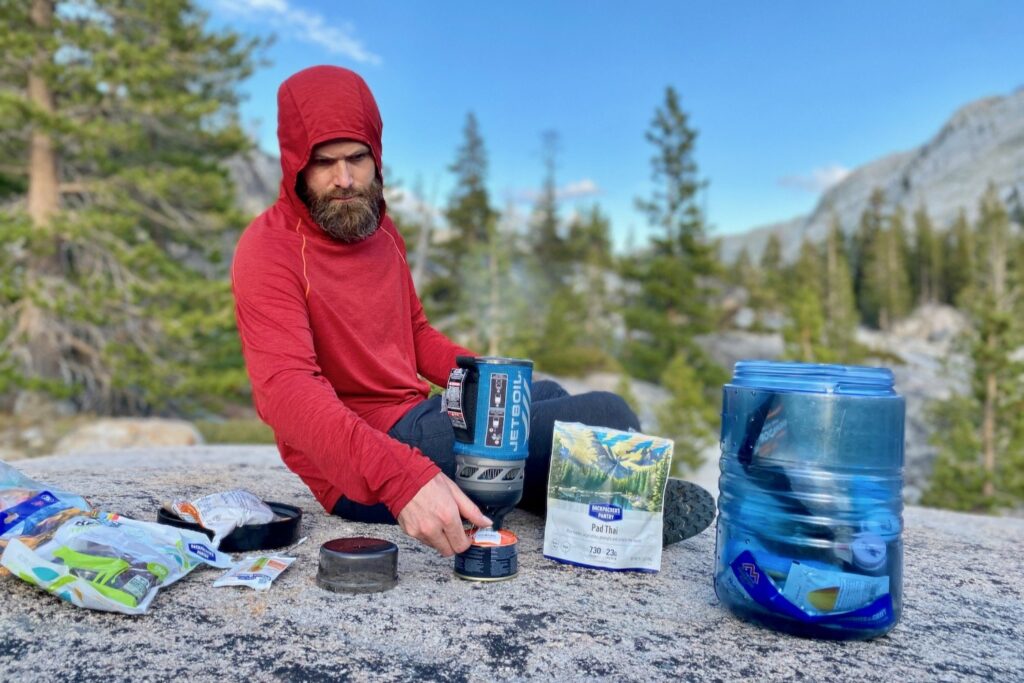
Ultralight Backpacking Food Video
As part of our Lightweight Backpacking Gear Basics video series , we put together the video below on ultralight backpacking food choices. Our specific food preferences have changed over the years, but the basic remain the same.
Backpacking Meal Tips
REPACKAGING FOOD- It’s always a good idea to repackage food in Ziploc bags to reduce bulk and have the ability to reseal containers. If you can’t close a food package securely, chances are it will explode in your pack and make a big mess.
SPICES & CONDIMENTS- Eating too much of the same thing over the course of a 5-day backpacking trip gets old quickly. Small packets of salt, pepper, olive oil, hot sauce, and fast food condiment packets (mayo, mustard, etc) can really elevate your backcountry grub. If you want to get real fancy, you can even get a GSI Spice Missile to carry up to six spices for less than 2 oz.
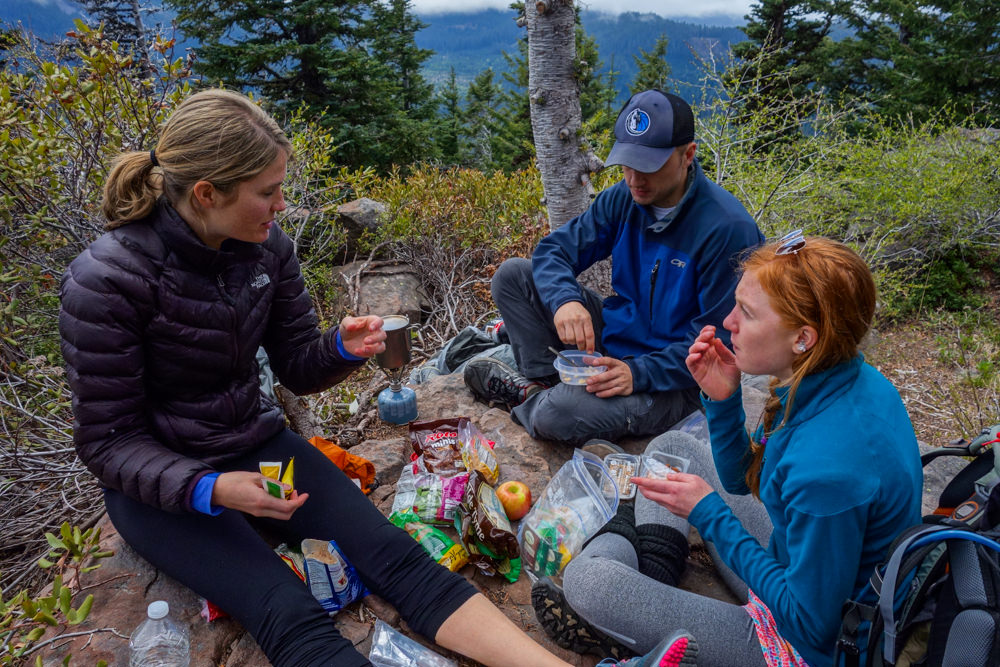
FRESH FOODS – We love bringing a couple pieces of fresh fruit, like apples and oranges, on the trail. Fresh fruits have poor calorie per ounce ratios, but they’re a great treat in the backcountry and we like the added nutritional value. Carrots and snap peas are a nice healthy treat that will last a couple days if temperatures aren’t too hot.
AVOID CANNED FOODS – We always avoid canned foods because they’re way too heavy, don’t have enough calories, and create bulky trash to pack out.
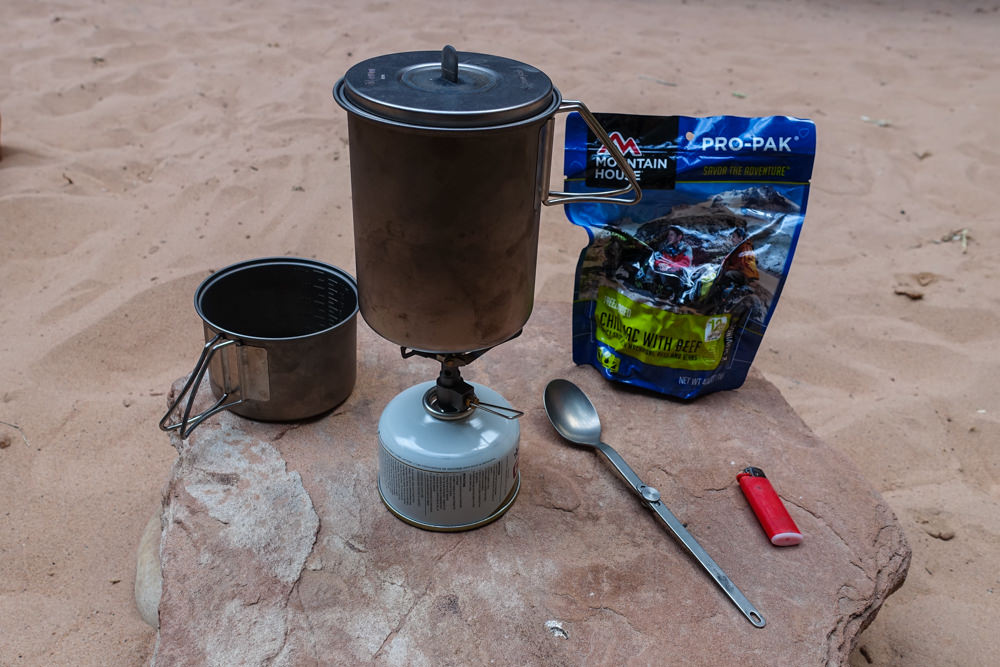
DIY DEHYDRATED MEALS- If you have the time and energy, it can be nice to make your own trail meals and dehydrate your own snacks. A quality food dehydrator will quickly zap the water out of fruits, veggies, and meats for some awesome DIY trail grub.
HOT DRINKS- Warm beverages and soups are a really nice treat in the backcountry, especially on chilly trips where it’s harder to stay hydrated. We like to sip on tea , cider , and hot cocoa around camp when the temperature dips.
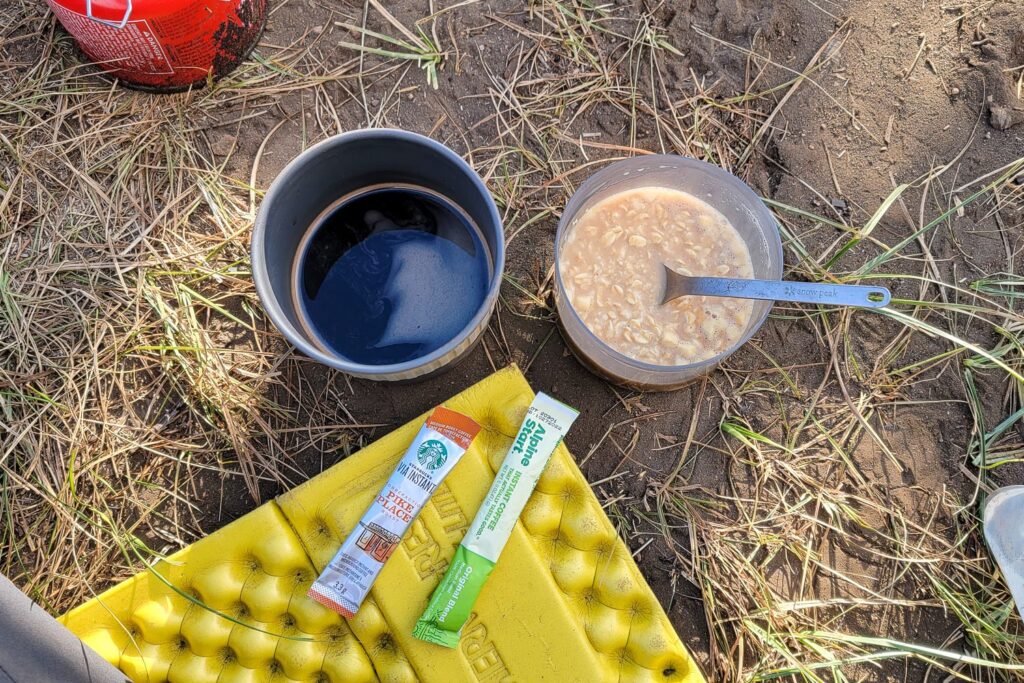
ALCOHOL – Generally speaking, it’s not good to drink alcohol right before going to bed. Not only can it disrupt your sleep cycle, but you may also have to use the bathroom more during the night. That said, whiskey and wine tend to make our pack lists on most trips, especially on casual treks with friends. We carry them in trusty, lightweight containers like the Platypus Wine Bag and Flask2Go .
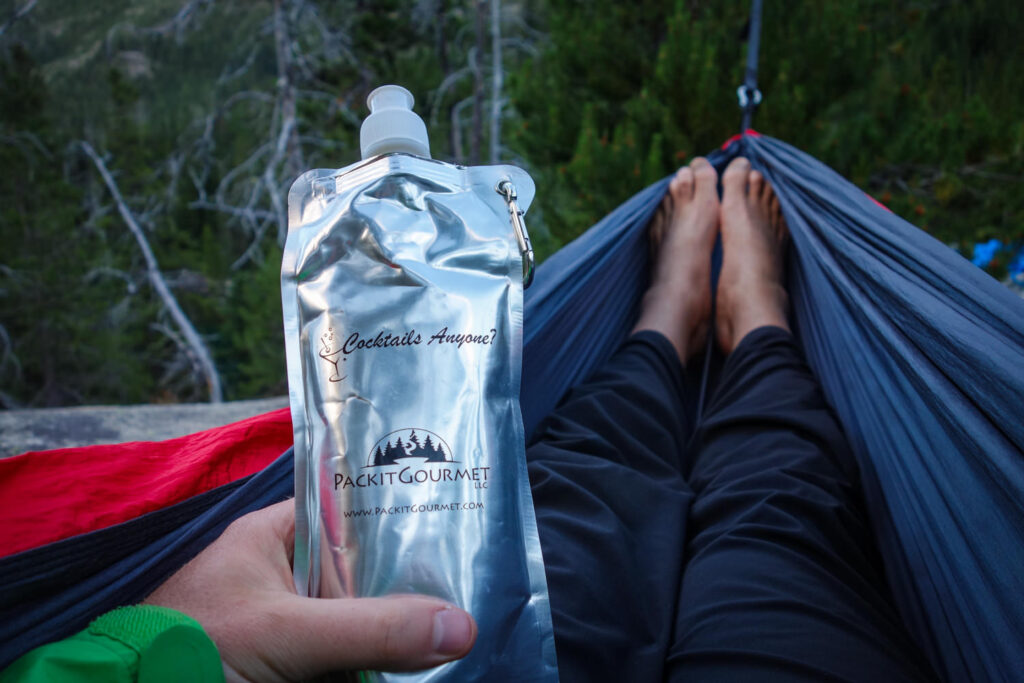
Backpacking Meal Suggestions
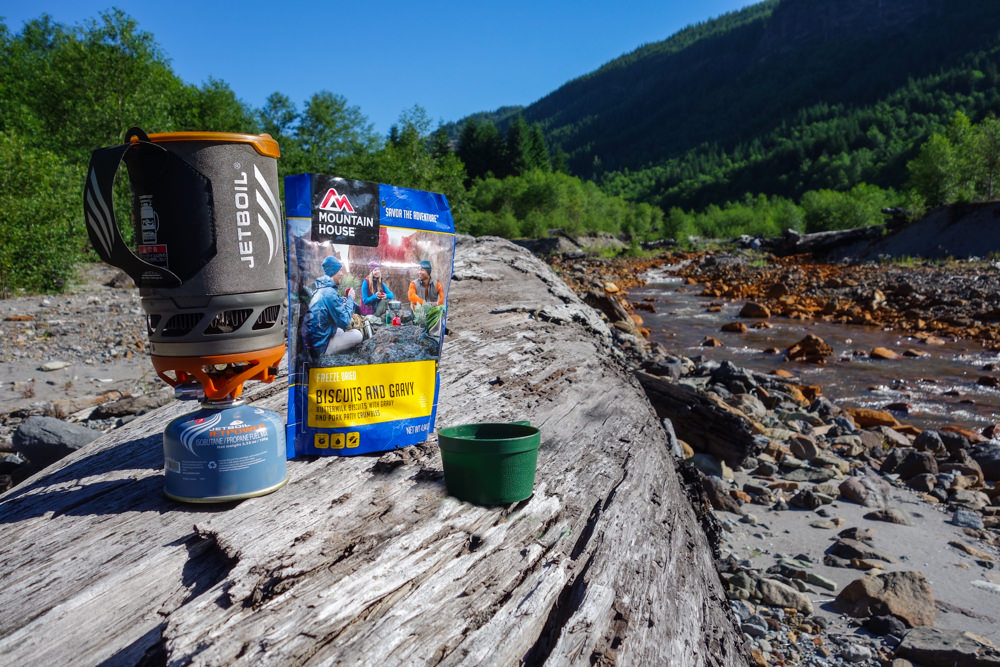
We almost always start our trail mornings off with a warm cup of coffee . After testing many coffee powders, cubes, bags, and brew styles, our favorite option for taste and convenience is Starbucks Via . We usually have a quick, cold breakfast with our coffee and break camp to hit the trail early – mornings in the wilderness are so peaceful. Pairing coffee with a calorically dense bar or two is a good way to get some quick energy in the morning. For additional calories, we may munch on some trail mix or mow a packet of almond butter. On casual, low-mileage trips, we like to enjoy warm breakfasts with friends. We’ll usually pair instant oatmeal with some dried fruits and trail mix. Here’s a list of our go-to breakfast choices with links to our favorites:
- Coffee ( Starbucks Via )
- Tea ( Celestial Seasonings – Bengal Spice )
- Bars ( Larabar , Clif Bar , ProBar , Ivan Bar , Luna , Kind , Bobo’s )
- Granola & Cereal ( Bear Naked )
- Powdered Milk ( Nido or Grace Coconut Milk Powder )
- Breakfast Drink Mix Packets ( Carnation )
- Nuts and Seeds ( Almonds , peanuts , etc.)
- Almond Butter Packets ( Justin’s )
- Peanut Butter Packets ( Justin’s )
- Instant Oatmeal ( Quaker )
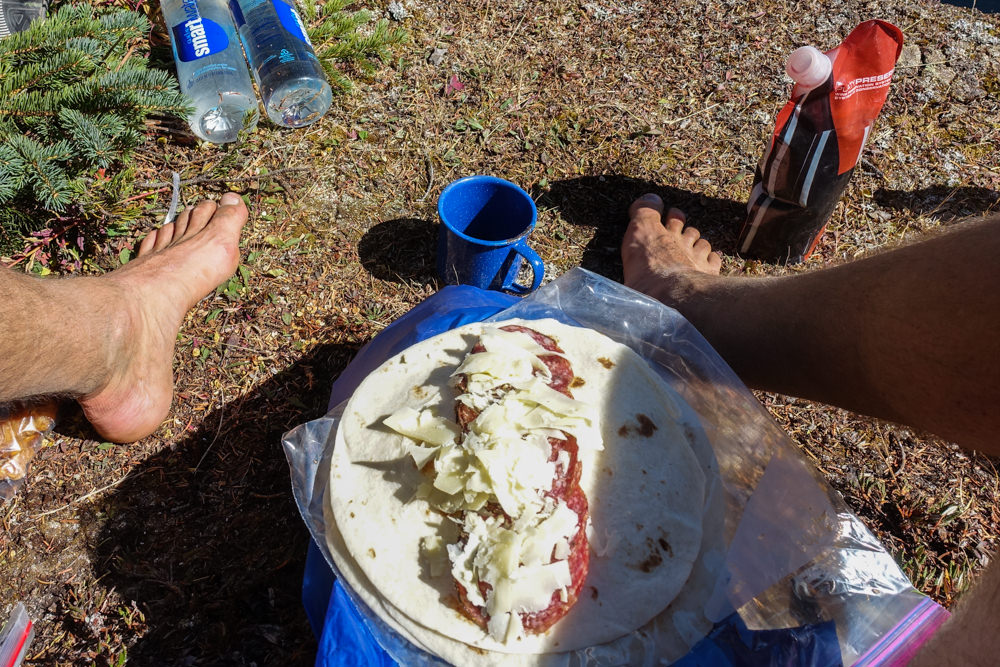
We almost always have a cold lunch on the trail to avoid the time, effort, and fuel required for cooking. We commonly make tortilla or bagel sandwiches with hard meats and cheeses. Bagels and tortillas tend to hold up well on the trail and provide relatively dense calories. Hard meats and cheeses will easily last a few days, though they’re not great choices for hot weather trips. Peanut butter, jelly, honey, and foil packets of tuna or chicken are also good sandwich fillers. With foil packets, we’ll mix up tuna or chicken with fast food condiment packs (mayo, mustard, etc.) and make tuna/chicken salad sandwiches. If we’re still hungry after a sandwich, we munch on some snacks to round out lunch. Here’s a list of our go-to lunch choices with links to our favorites:
- Bagels or Tortillas ( Thomas Bagels , Mission Tortillas )
- Hard Meats – Salami, Summer Sausage, etc. ( Applegate )
- Hard Cheese – Parmesan, Romano, etc.
- Jelly or Honey ( Nature Nate’s )
- Tuna or Chicken in foil packets ( StarKist )
- Dried Pork Packets ( Meat Shredz )
- Small Condiment Packets – Mayo, Mustard, Relish, Hot Sauce, etc.
- Supplement with other snacks (more snack info below)

Freeze dried meal pouches ( Mountain House , MaryJanesFarm , Good To-Go , PackIt Gourmet , PEAK Refuel, etc.) are a convenient, lightweight, and tasty option for backpacking dinners. For some of our favorites, check out our Best Freeze Dried Backpacking Meals list. When we’re on casual trips with friends, we like to pick a few of our favorites for dinner. Most freeze dried meals cost around $7-12 and feed two hikers, though your mileage may vary. The main downside with freeze dried meals is they tend to be much more expensive than DIY options. If you’re on the trail a lot (thru-hiking, etc.), the cost of freeze dried meals will add up quickly. Any supermarket will have other “just add water” options (instant potatoes, ramen, etc.) that cook quickly and cost a fraction of the price . Here’s a list of our go-to dinner choices with links to our favorites:
- Freeze Dried Dinners (Some of our faves: Chicken and Dumplings , Biscuits and Gravy , Beef Stroganoff , Chili Mac , Thai Chicken Coconut Curry )
- Instant Mashed Potatoes ( Idahoan )
- Ramen ( Maruchan )
- Instant Soups
- Instant Mac & Cheese ( Annie’s )
- Pasta and Rice Sides ( Knorr )
- Chicken Packets ( StarKist )
- Tuna Packets ( StarKist )
- Dehydrated Vegetables ( Augason Farms )
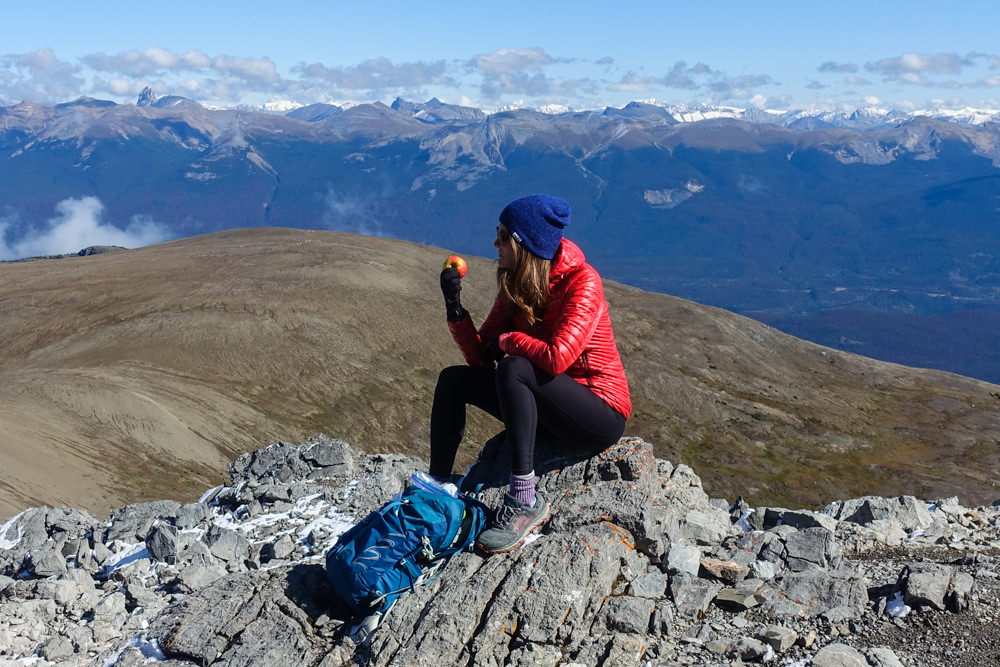
Snacks are a critical part of any good trail diet. You’ll be burning a ton of calories on long hiking days, so eating a small snack every hour or two is a good way to keep your engine running. We always keep a few snacks in our hip belt pockets while we hike for easy access. In hot weather, we try to avoid things that melt, like granola bars with an outer layer of chocolate. Trader Joe’s has some delicious and relatively affordable options for backpacking snacks. Here’s a list of our go-to trail snacks with links to our favorites:
- Dried Fruit ( Mango , Apple , etc.)
- Fruit Leather Strips ( Solely )
- Jerky ( Jack Link’s )
- Crackers ( Triscuits , Goldfish , Ritz , etc.)
- Candy ( Snickers , Peanut Butter M&Ms , Chocolate Almonds , etc.)
- Hydration mixes
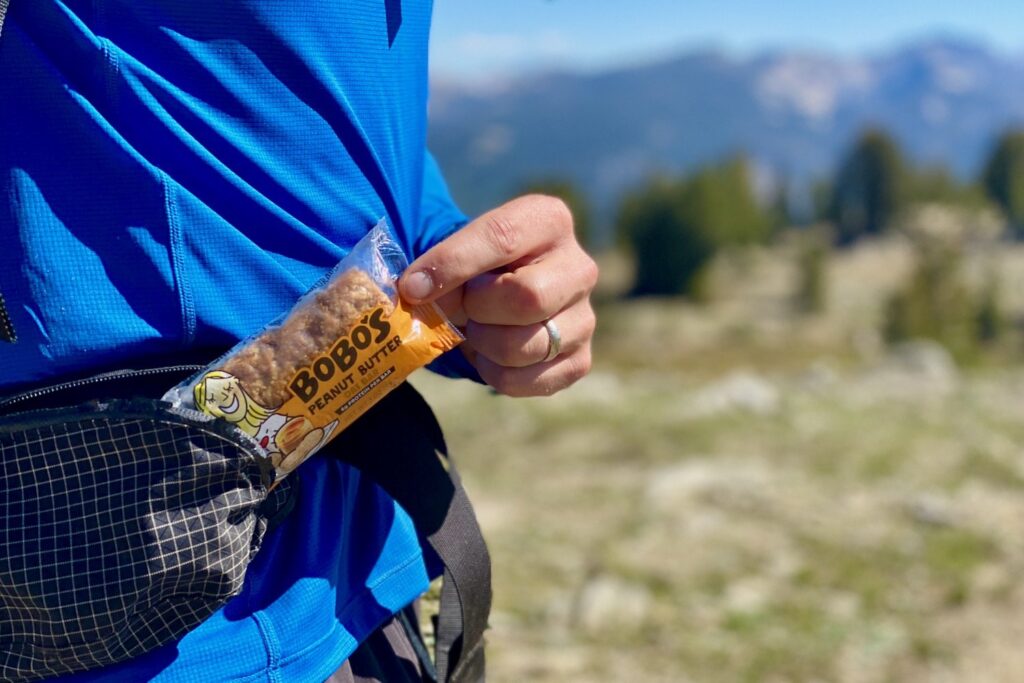
What’s in Our Camp Kitchen?
When we head out on backcountry trips, these are the items usually found in our packs. For more information on our favorite gear, check out the CleverHiker Backpacking Gear Guide and our Best Backpacking Stoves list.
- Stove System: JetBoil MiniMo
- Ultralight Stove: MSR Pocket Rocket 2 & BRS Stove
- 1-2 Person Cookpot: Snow Peak Mini Solo Cookset
- Group Cookpot: MSR Titan Kettle
- Spoon: Sea to Summit Alpha Light Long Spoon
- Cup: Snow Peak Titanium Single 450
- Food Storage: Ursack & BearVault BV500

Critical Food Considerations
LEAVE NO TRACE- You love nature. That’s why you’re out there and that’s why you’re reading this post. So please, always pack out your trash and any food you don’t eat. Yes, truly following LNT rules includes packing out things like spent coffee grounds, orange rinds, and apple cores. Always scan your campsites and lunch spots before hiking on, and if you’re a true LNT rockstar, help pack out trash left behind by other backcountry travelers. Check out our LNT tutorial video for a quick refresher.
FOOD STORAGE- Proper food storage is incredibly important for protecting wildlife . For example, bears that learn to associate humans with food often need to be trapped and killed. So please, always store your food properly in the backcountry. We hesitate to even teach proper bear bagging techniques anymore, because most hikers don’t take the time to do it properly. And even if they do, really smart bears can still bring down a good bear hang. The safest bet for backcountry food storage is an Ursack or Bear Canister .
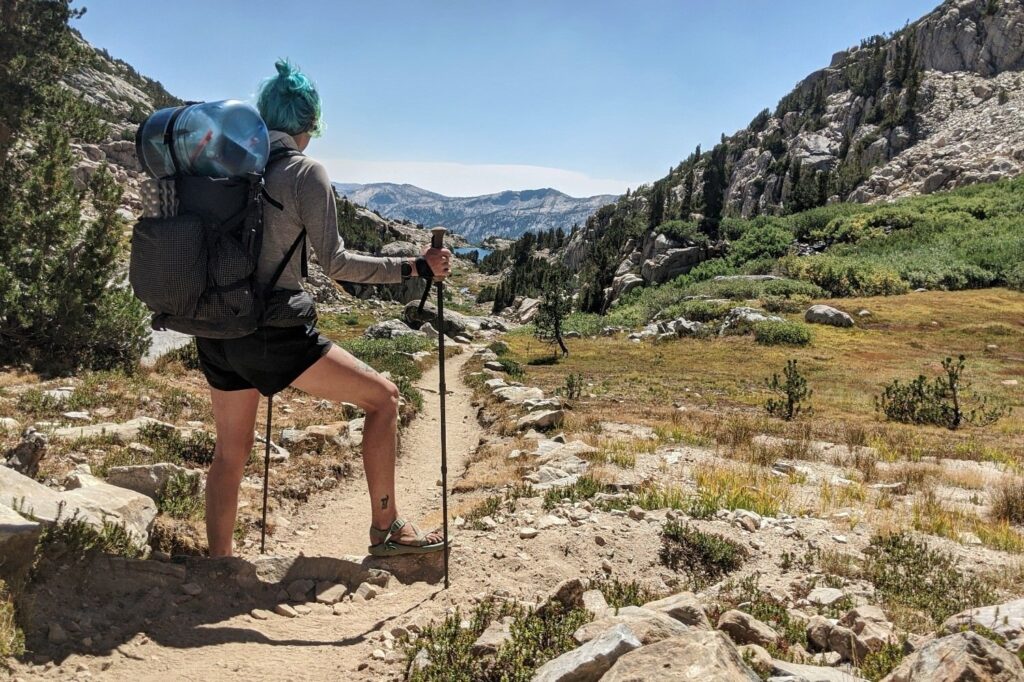
CALORIE INTAKE – Backpackers burn a lot of calories on the trail. On average, hikers usually burn between 3000-4000 calories per day, but thru-hikers hiking 20-30 mile days can easily burn 5000-6000 calories. It’s crucial to pack enough nutrients to give your body the energy it needs. This important calculation will also depend on your size, weight, age, and activity level. WEIGHT – Bringing too much food is one of the most common beginner backpacking mistakes . And that’s understandable, who wants to risk going hungry in the woods? But carrying a bunch of unnecessary weight can quickly dampen spirits on backpacking trips, so a little experience and pre-trip calorie calculation will go a long way.
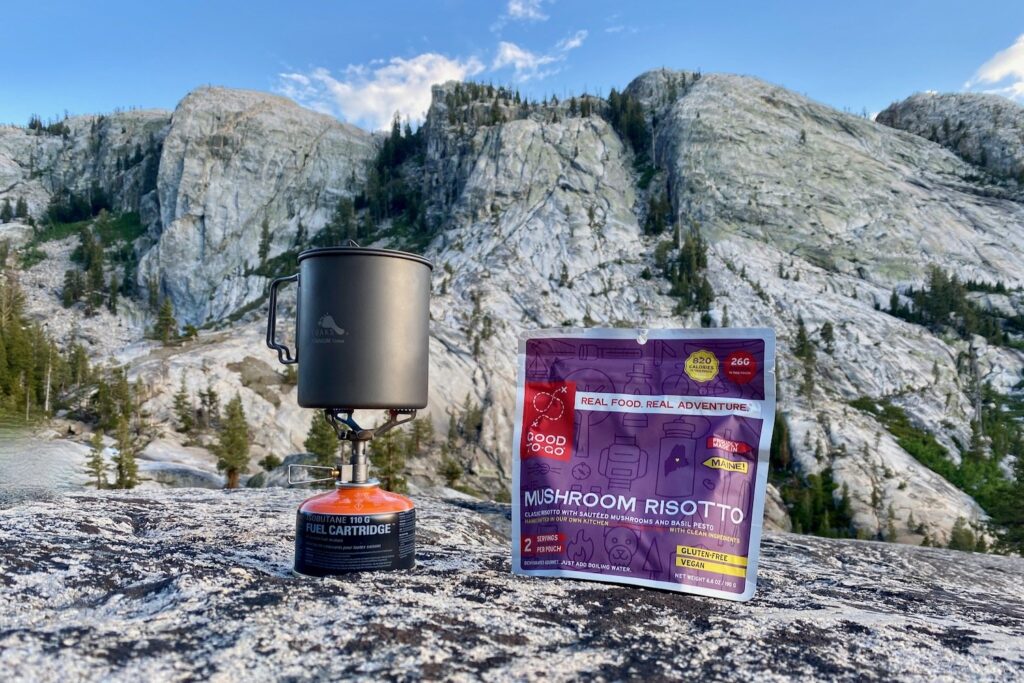
CALORIC DENSITY – It’s important to consider how calorically dense your backpacking food choices are to keep your pack weight down. High-fat foods like olive oil, nuts , peanut butter , and chocolate tend to have high calorie-per-ounce ratios. On the other hand, fresh fruits and vegetables tend to have low calorie-per-ounce ratios. The ideal range is around 120-130 calories-per-ounce total. FOOD VOLUME – Certain foods will take up a lot more space in your pack than other foods containing the same amount of calories (think bagels vs almonds ). This isn’t a big deal on short trips, but on long journeys, and especially when bear canisters are required, you’ll want to pay close attention to how much space your food choices will take up.

NUTRITION – Good nutrition on the trail is just like eating right at home. You’ll want a balance of fats, proteins, and carbohydrates while getting as much fiber, fruits , and vegetables into your diet as possible. It’s hard to eat really healthy on the trail because processed foods tend to be much more convenient, but finding a good balance is key. Also, we always load up on fresh, healthy foods the moment we’re back in town.
CONVENIENCE – After a long day of hiking, chances are you won’t want to prepare an elaborate meal. Nor will you want to clean up a bunch of dirty dishes when you’re done eating. So we recommend keeping it simple. For dinners, this means we almost always eat “just add water” meals, and for breakfast, we usually have hot coffee with bars and snacks.
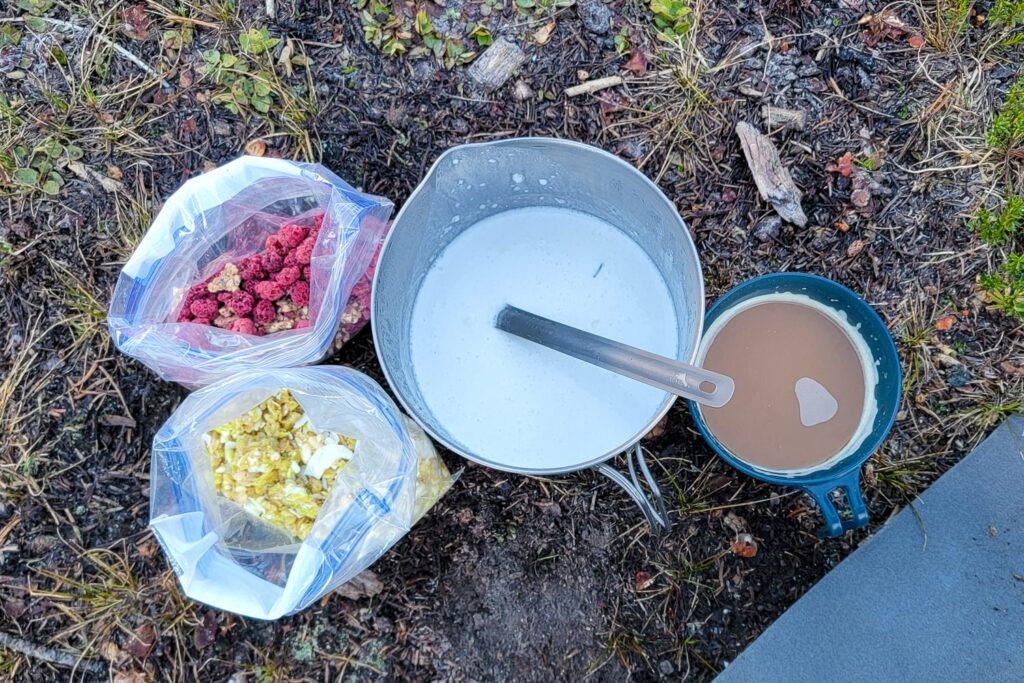
WATER ACCESS – If your dinners require water for cooking, you’ll want to camp near a water source or make sure to pack plenty of water for a dry camp. If you’re backpacking in an area with scarce water, make sure to plan accordingly.
FUEL – Most backcountry meals require a small stove for cooking – check out our Best Backpacking Stoves list to see our favorites. Plan out how many times you’ll need to cook (including coffee and tea ) to calculate how much fuel to bring. Fuel usage rates vary depending on the stove model, pot size, elevation, and temperature, so knowing exactly how much fuel to bring will take some experience. On an average 5-day, two-person backpacking trip, we usually boil water about 10 times (once for morning coffee and once for dinner), and one small 100 g isobutane fuel canister is usually more than enough.
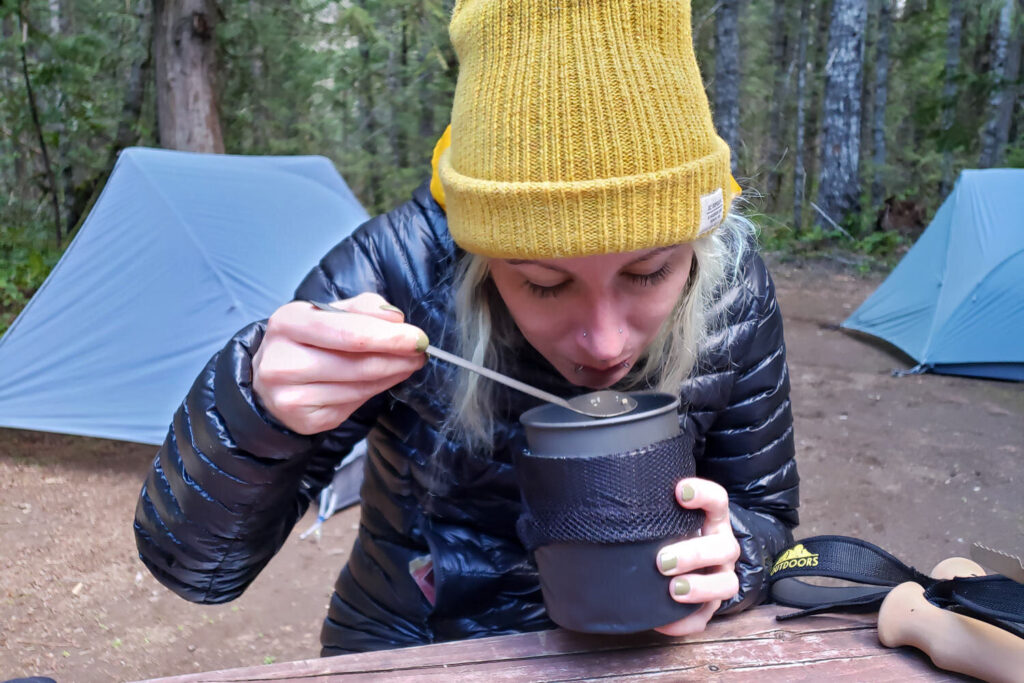
COST – You’ll usually pay for convenience with backpacking food. Freeze dried meals tend to cost around $7-12 each, but they’re also tasty, convenient, and don’t require any cleanup. We enjoy Mountain House , MaryJanesFarm , Packit Gourmet , Backpacker’s Pantry , PEAK Refuel , and Good To-Go when we’re not preparing our own meals.
VEGAN & VEGETARIAN MEALS – If you’re looking to spice up your animal-free backpacking food options, don’t miss our list of the Best Vegan and Vegetarian Backpacking Meals .
Need More Gear Advice?
If you liked this list, you’ll love the CleverHiker Gear Guide where we test and recommend tons of outdoor adventure gear from a variety of categories. here are some links to popular articles:
- 10 Best Hiking Shoes
- 10 Best Backpacking Tents
- 10 Best Sleeping Bags
- 10 Best Sleeping Pads
- 10 Best Backpacking Packs
- 10 Best Backpacking Stoves
- CleverHiker Top Gear Picks

Why trust us?
We understand how tough it is to find trustworthy gear advice, and that’s one of the main reasons we built CleverHiker. We live for outdoor adventure, and we take these guides very seriously.
- Our recommendations are completely independent and based on hands-on experience.
- We test outdoor gear for a living – we’ve logged over 20,000 trail miles and 1,000 nights in the wilderness.
- Our team has thru-hiked some of the most iconic long trails, including the Continental Divide Trail, Pacific Crest Trail, Appalachian Trail, Colorado Trail, Long Trail, Oregon Coast Trail, Arizona Trail, Pinhoti Trail, Superior Hiking Trail, as well as extensive peak bagging, and international treks.
- We field test every product we recommend, which is sadly not the norm.
- We travel to industry trade shows to stay up-to-date on product innovations.
- We continuously update our guides throughout the year and when new products launch.
- We treat recommendations to our readers as if they were for our family and friends.
- We’re lifelong learners and we’re always open to feedback. If you think we’ve missed a worthy product or got something wrong, we’d love to know about it.
Need More Backpacking Advice?
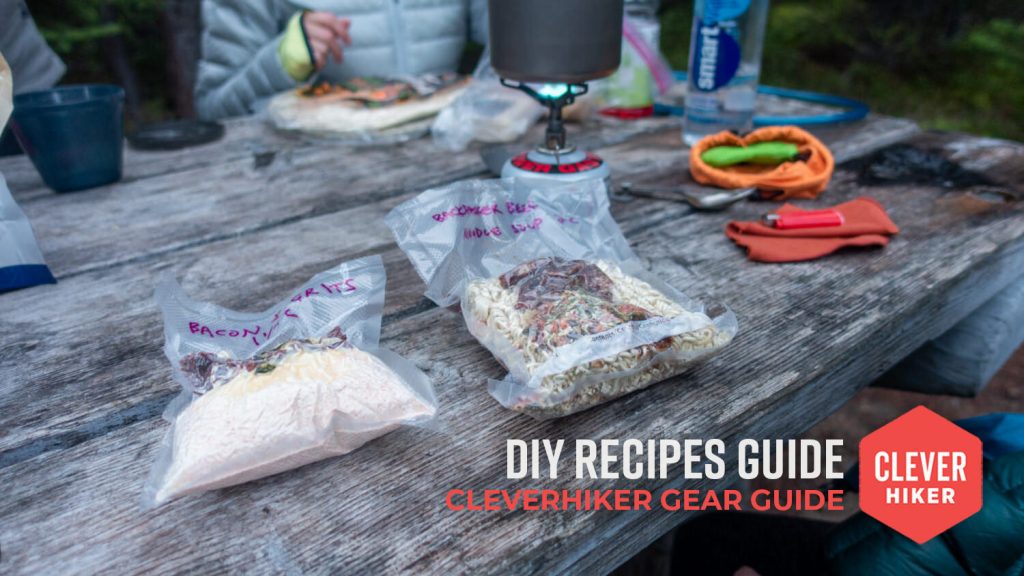
Backpacking Meal Recipes & How to Dehydrate Food for Camping
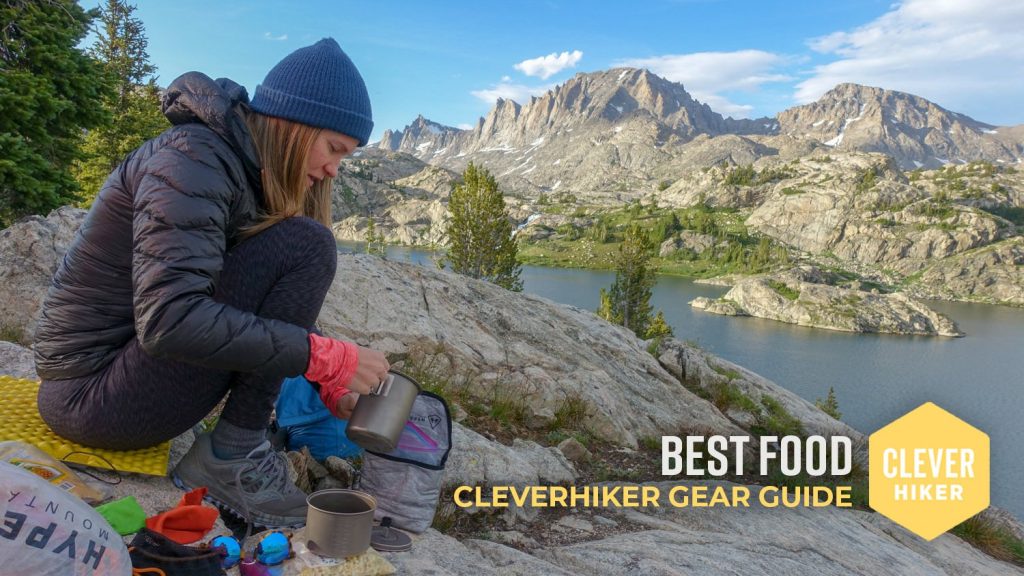
Best Backpacking Food

Best Backpacking Freeze Dried & Dehydrated Meals of 2024

Best Vegan & Vegetarian Backpacking Meals of 2024
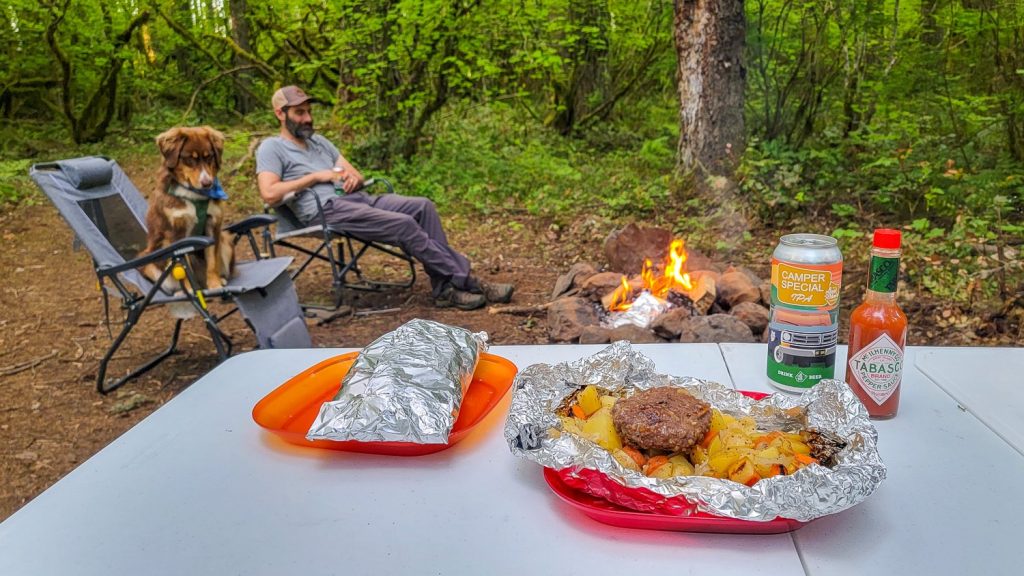
How to Make Tasty Foil Packet Camping Meals – Recipes & Tips
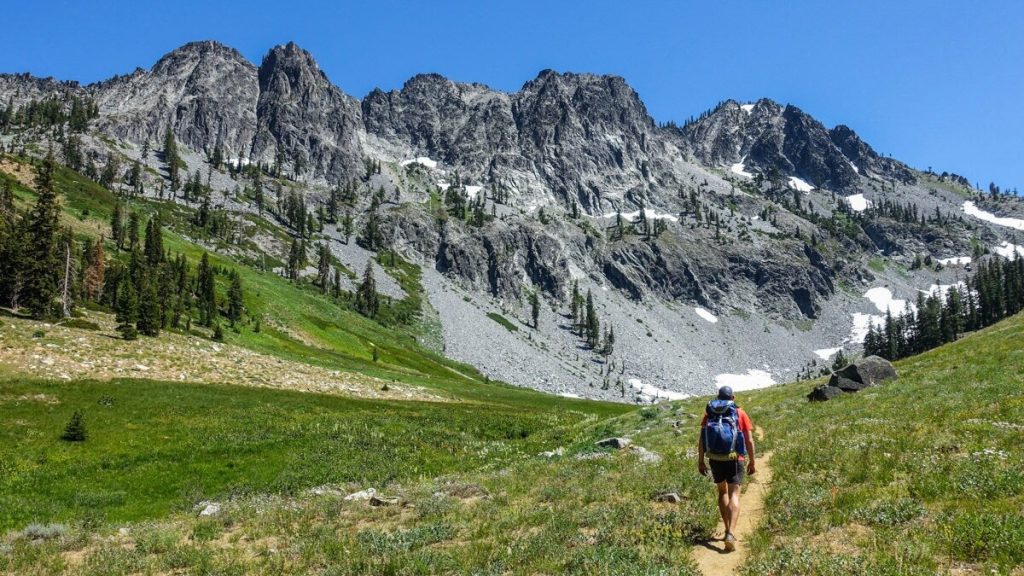
Backpacking Trip Guides
Get the best content from cleverhiker & around the backpacking world.
Social media is great, but our bi-weekly newsletter is a much better way to stay in the know.
Sign up to get our curated emails with the best content from CleverHiker and around the backpacking world. You’ll be turned on to new videos, trip reports, gear reviews, inspiring outdoor stories and much more. So get in the mix!
A Beginner’s Guide to Planning a Backpacking Trip
The question of how to plan a backpacking trip is one you should never be afraid to ask! Even the most seasoned Everest climber started somewhere!

The question of how to plan a backpacking trip is one you should never be afraid to ask! Planning your first backpacking trip can be very overwhelming. From deciding on how much to take with you on your hike, to deciding which route to take, there’s a lot to think about. Before you get too overwhelmed, just remember that even the most experienced backcountry hikers and campers all started somewhere and have likely felt the same way that you do now.
We know how daunting the prospect of planning your first trip can be so we’ve put together this handy guide that will tell you everything you need to know about heading out into the backcountry for the first time so that your backpacking trip will be a success!
Every adventure starts with a plan!
Heading out into the great outdoors can be daunting. But don’t worry, we’ve got your back! Our world-renowned scavenger hunts include more than 400 different activities in hundreds of cities around the globe. Every hunt is hand-crafted and includes trivia and challenging games to entice you along. Whether you’re in the mood for cheeky bar crawls , creepy ghost tours , or classy art walks , our Let’s Roam app has an adventure that will help introduce you to your new location!
How to Plan a Backpacking Trip
Below you’ll find a step-by-step guide to planning a backpacking trip. You can do these in order or jump around a little bit based on what works for you. The most important thing is that you cover all the steps and are adequately prepared for your big adventure. Not bringing the right gear or enough food and water can make even the easiest trail significantly harder and it can even make the trip dangerous.
Decide where you want to go.
This should be your very first step as it can have a big impact on everything else. For example, planning a backpacking trip high into the Rockies where you’ll be staying at rustic campsites is going to be very different from trekking in Patagonia where you have plenty of hostels and refugios to choose from. These will both be different from hiking through waterfalls in the Amazon jungle or going down into the Grand Canyon and the gear that you’ll need will be drastically different for all of these adventures.
If this is your first hike you must do as much research as possible on a destination before deciding that this is where you want to go. We highly recommend starting with an easy destination. Short, two to three-day trips that are close to home are ideal to start with and as you become more comfortable, you can start doing longer trips a bit further away. You may also want to start by doing fewer miles each day than you would normally do on a day hike. It’s very different hiking with a heavy backpack than it’s a light daypack and it’s better to cover shorter distances so that you don’t overdo it
Also, think about how far off the beaten track you want to go. While it may seem dreamy to be completely away from the hustle and bustle of daily life, surrounded by breathtaking nature, and feeling like it’s just you against the elements, this can quickly turn into a nightmare if anything goes wrong. And when you’re backpacking, something can always go wrong. If you truly want to go off-grid, you need to be both mentally and physically prepared for the experience.
Research the logistics.
Once you have decided roughly where you want to go, you now need to figure out the logistics (I.e. how you’ll make it work). Some questions that you should ask yourself at this point include:
- What will the weather be like?
- Is this the right time of year to go to this destination?
- How many hours of daylight can you plan for?
- Are there any dangerous wild animals that I need to be aware of?
- Do you need permits? If so, how long do they take to acquire?
- Is there potable water available?
- What is the terrain like?
- How do you get to the trailhead?
- What will the elevation gain be?
- Are there any mosquito-born diseases prevalent in the area such as malaria or dengue?
- Are you going into bear country?
All of the answers to these questions will have a big impact on how long you can hike, what you need to take with you, and where you can go. You can use guidebooks, backpacking websites, social media, backpacking, and thru-hiking forums, etc to find information as well as navigation websites like Gaia which will help you get more familiar with the terrain of your destination and help you find both free camping spots and established campsites.
When you’re compiling the answers to these questions, make sure that you jot down where you found particular information. During your research, you may run into contradictory information, and knowing where you found things can help you decide which one is more accurate.
During this phase, don’t forget to reach out to your fellow adventurers to ask for their advice. There are also many Facebook groups that you can join where people share general advice on backpacking as well as location-specific information. Read as many trip reports as you can about a particular area and have a list of questions ready that will cover anything that seems questionable. Remember, there are no dumb questions and it’s important to get clarification on anything that you’re confused about or want to get clarification on to have the safest and most enjoyable backpacking trip possible.
Also, do not forget to check the website of the park that you’re going to for weather updates, trail updates, and other useful information. There’s no point in planning an entire trip around a particular section of a national park and then finding out it’s closed.
Invite some friends along.
Once you have a rough idea of where you’re going and how difficult it will be, it’s time to invite some friends to join you! If you know people who love backpacking, they are an obvious first choice. Having a few people with you has many benefits. Not only is it safer and more fun to hike in a group but it can also help you divide the weight of the gear that you’ll be carrying. For example, a two-person tent weighs significantly less than two one-person tents and you can easily divide up things like cooking equipment, food, and so on.
Just a warning, be careful who you invite and consider whether or not they will be able to handle the hike that you’re expecting to do. Having someone with you that is not physically able to do the hike can slow you down and cause some major logistical issues, especially if it’s a multi-day hike. If you do invite someone who is a bit of a newbie, make sure to check with them what their longest hike has been, whether they enjoy camping, etc. Although it may feel a little like you’re vetting your friends, this can save you a huge amount of hassle and stress in the long run. Even better, you can even do a few practice hikes together before you go on your big adventure. This will give you an idea of whether or not you’re compatible and what you need to look out for if you decide to go together.
Choose your gear.
Once you have an idea of where you’re going and what the weather will be like, you can start choosing suitable gear and creating your “gear list”. This includes things like tents, sleeping bags, a sleeping pad, cooking equipment, water bottles and water filters, food and snacks, clothing, jacket, sunhat, shoes, rain gear, headlamps, bear canisters, power banks, first aid kit, hygiene products, etc as well as odds and ends like duct tape, a knife, and medical tape. Don’t ignore the importance of having a headlamp. It may seem like your cell phone flashlight will work just as well when you’re at a campsite but when you’re out on the trail hiking in the dark, you want to have both of your hands-free. This will come in handy (pun intended) in case you stumble and need to catch yourself or if you find yourself on rough terrain and have to rely on walking sticks.
If you’re a beginner backpacker, don’t panic. There are plenty of backpacking checklists and gear guides that you can find online that can serve as useful guides when you’re putting together your gear. Before you go crazy trying to check every item off the packing list, think carefully about what you’ll actually need. It’s easy to go overboard when you’re at home worrying about every possible predicament but keep in mind that you’re likely to be carrying all of this equipment on your back at some point so make every pound of it count.
If you aren’t sure what is “too” heavy, a good rule of thumb is that your pack shouldn’t be more than 20% of your body weight. Anything heavier than that is going to be very challenging even for the strongest of hikers. Don’t forget that most hikes and campsites follow a leave-no-trace policy which means that anything you bring with you, you need to take with you. This includes human waste, used toilet paper, and feminine hygiene products. You’ll need to consider this when it comes to your gear and what you’ll use to carry your trash and waste out with you.
When you have picked out all of your gear, make sure to try packing it all into your backpack. Make sure that there’s plenty of space for water, especially if you may be covering long distances between water sources. Practice walking around with the full pack on your back to make sure that it’s sitting correctly on your back and hips and that it’s comfortable. If you’re unsure of how a backpack is supposed to fit, there are plenty of online guides available. Alternatively, you can take your bag to an outdoor shop like REI and ask one of the staff members to check for you. (if you go this route, try to buy something while you’re there.)
You should also make sure to break in your hiking boots if you bought new ones. Ideally, this would be done through a series of shorter hikes that allow you to identify any trouble spots where blisters are forming and either find a way to fix them (insoles, pads, etc) or buy a new pair of boots that work better for you. Never, ever rely simply on reviews when choosing boots. Everyone’s feet are shaped differently as your height and weight can also play a role in how your boots fit.
Figure out how you’ll get back home.
When it comes to planning your trip, it’s easy to get lost in the details of the hike itself and forget that at some point it will come to an end! This means that you’ll need to figure out a way to get home afterward. If you’re starting and ending at the same spot, this should be relatively easy. However, if you’re hiking from point to point, things are likely to get way more complicated.
This is the time when you need to figure out exactly how you’ll get to the starting point and back to your car or another form of transport that you may be using. Keep in mind that some national parks do not allow private vehicles and offer shuttle services instead as a way to ease traffic congestion. If this is the case, you’ll need to figure out how frequently the shuttles run and what time the last shuttle of the day is. The last thing you want is to finish a long day of hiking and find out that you have no way to get back to your car.
Plan your food.
When it comes to planning your food, it’s very easy to overdo it. Many people are worried about being hungry so they find themselves packing too much food and then regretting it when they are carrying around excess weight in their bag (or their stomach!).
One of the best ways to plan what food to pack is to base it on a certain amount of calories per day. The average consumption level is around 2,250 to 2,750 calories per day depending on the intensity of your hike as well as the size of your body. Sadly, hiking doesn’t burn off nearly as many calories as we often think it does so you probably won’t need as much food as you think you will.
When putting together your “meal plan”, you can choose from either DIY meals and snacks or fancy store-bought backpacking meals . These tend to be very expensive so if you’re looking for ways to cut down costs, this is definitely one of them! This can also be helpful if you’re vegetarian since although it seems like more and more pre-packaged backpacker meals are coming onto the market, very few of them are actually vegetarian-friendly.
Get your mind and body shape.
Hiking is great for our physical and mental health but you certainly don’t want to injure yourself at the beginning of your trip (or anytime during your trip to be fair) or not be able to finish the trip because it’s too tough. It’s important to make sure that you’re up to the task physically and mentally before setting out on your backpacking trip. This can greatly help increase your chances of being able to complete it.
One good way to do this is to go on a few tough day hikes or some overnight weekend trips. You can also try car camping with a few long hikes mixed in. This will give you an idea of what equipment you need and what you may be able to leave behind. If this isn’t possible, try to hit the gym as often as you can and focus on working muscle groups that you would normally use during a hike. This will usually be very different from yoga classes or running on a treadmill. While those are both great for you, they don’t help strengthen the muscles that you need them to.
While you’re building up your strength and stamina physically, it’s just as important to build yourself up mentally. Unless you’re doing a technical hike, you’re probably more likely to run into a mental block than a physical one. To “practice”, try to hike when you’re really tired. Throw in some early morning hikes and a few nighttime hikes to see how it goes. You may be surprised at how much this can help when you set out for your backpacking trip.
Check and recheck everything.
Before you set out on your backpacking adventure, make sure that you check and recheck everything. This includes your backpacking gear list, your food, the weather, and everything and anything else you can think of. Reread trip reports, double-check the website of the park you’re visiting, and log onto their Facebook page for any additional updates. This is your final chance to make sure that you have everything ready and that the weather will cooperate with you. If you learn something that can impact your trip, this is your time to try and resolve it before it becomes a bigger issue. This step is just as important as when you did your initial research so make sure that you tie up any loose ends before they begin to unravel!
Don’t leave anything until the last minute.
There are always jokes about people who pack last minute for a vacation. You know the ones, someone is running around two hours before their flight throwing stuff into a suitcase. This is what you definitely don’t want to do when backpacking. Packing last minute makes it easy to forget something and this can mean the difference between life and death. Instead, try packing everything into your backpack at least a week before the trip. This will give you time to change anything (take stuff out, put stuff in) and still be able to repack in plenty of time for your departure.
Share your itinerary.
Before you head out, make sure that you share your itinerary with someone that you trust. Ideally, this would be someone who has also backpacked before and understands some of the issues that could arise, and, most importantly, knows how to help if anything goes wrong. Leave their contact details and your itinerary stashed somewhere in your car near the trailhead or campsite as well so that in the event you don’t return at your intended time, someone near the trail may be able to help. You can also stop by any ranger station and inform them of your route and how long you expect it to take.
Ready for the world?
We hope that this guide has left you ready to pack your backpack and set off into the wilderness on your next adventure. As always, we would love to have your feedback and please let us know if there’s anything that we may have missed. This will help our readers be as prepared as possible!
If you need any additional information about destinations around the world, don’t forget to check out our travel guides . These were written by our own in-house travel experts who have roamed around the globe from Acadia to Yosemite and everywhere in between! You can also download the Let’s Roam app which is full of great user-generated content for destinations all around the world as well as our fun-filled scavenger hunts. They’re a great way to learn more about a destination and have a wonderful time doing it.
Frequently Asked Questions
The first thing you need to do when planning a backpacking trip is deciding where to go! This will impact the gear you take and how you will start and end the trip.
If this is your first backpacking trip , it is a good idea to do a short trip close to home. Once you feel comfortable, you can start going on longer trips.
If you are looking for more info on towns near your destination, download the Let’s Roam app . This app is full of useful, user-generated content that will help you find the best restaurants and hotels.
Featured Products & Activities

The Hungry Hiker
Tips & Tricks on How to Plan Your Next Outdoor Adventure
How to Plan Your First (Or Next) Overnight Backpacking Trip
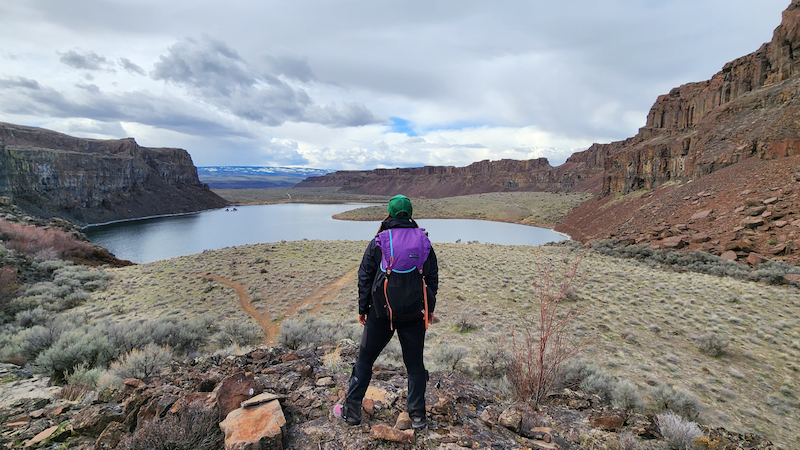
Want to go on an overnight backpacking trip and have no idea where to start with planning a trip like this? Trip planning for an overnight backpacking trip can be overwhelming and intimidating for a lot of people, especially if you’re new to backpacking.
I’m going to share with you some of my favorite tools I use to plan overnight backpacking trips, in hopes of helping you learn how to plan either your first or next overnight backpacking trip of your own.
I recently took a group of my students from my online backpacking program for women, The Confident Solo Female Backpacker System out for an early season overnight backpacking trip to Ancient Lakes , here in Washington State. This turned out to be a very fun, successful and amazing trip!
In this blog post, I’ll walk you through my entire process of how I planned this trip for my students including how I decided where to go, why I chose this specific location and some of my favorite resources I used to plan our trip. Then I’ll share with you a special online tool I created that will help you start planning your first or next overnight backpacking trip.
If you’re feeling a little overwhelmed with the trip planning process, it’s okay. Trip planning for any trip, no matter where you’re going and how long you plan on being out there can be overwhelming for a lot of backpackers, AND not just beginner backpackers, but also experienced backpackers as well.
Here’s how I planned our recent overnight backpacking trip to Ancient Lakes . Starting with how I decided where to go for our group overnight backpacking trip.
How I Decided Where To Go Overnight Backpacking
When planning a group trip for my students, I always start by taking the trip objective and the experience level of my students into consideration when deciding where to go.
My objective for this group trip was to give my students a chance to practice using their gear in a low risk setting while having fun. I knew for most of the students in the group, this would be their first overnight backpacking trip this year. This would also be considered an early season trip, a first for a majority of the group. I wanted to pick a place where they could safely and comfortably ease back into the backpacking season, apply what they’ve been learning in my program out on trail and have fun while they’re out there.
The time of year is another consideration I kept in mind when deciding where to go. We would be going on our overnight backpacking trip in March, which is still considered winter/early season here in Washington. When most places, especially at a higher elevation are still covered in snow, I knew Ancient Lakes over in Eastern Washington would be a good option, terrain and weather-wise. This time of year, the temperatures can be milder than most areas in Western Washington. There’s very little elevation gain and there’s no snow on the ground. Ancient Lakes is also a great option for this time of year because during the warmer months, the snakes and ticks come out, the area is exposed with very little shade and the water sources are extremely limited.
I also wanted to keep the total trip mileage and daily mileage in mind for my students. Since I knew this would be the first overnight backpacking trip of the year for most of the group, I didn’t want to pick a place where we’d have to hike a lot of miles just to get to camp.
Ancient Lakes has a number of different trails with multiple trailheads to access the area. I could make this trip – the hike to camp, water and our day hikes throughout the trip – as long or as short of a hike as I needed to, while keeping my students in mind.
I also didn’t want to have to deal with needing to secure a permit for this trip. There’s no permit needed to camp anywhere at Ancient Lakes. All of the tentsites are first come, first served and free. The only permit required is the Discover Pass at the trailhead.
Something else I wanted to take into consideration when choosing a place to take my students backpacking was picking an area that I was already familiar with. Since I would be leading the group, I wanted to pick a place where I felt comfortable and had been before.
I’ve day hiked the Ancient Lakes area multiple times before. I was familiar with the drive to get to the trailhead, the different trailheads we could start our trip from, the tentsites in the area, the terrain we’d be hiking through, and all of the day hike options we’d have while we were out there. I also knew that this area would be well-traveled and that we wouldn’t be the only group out there.
Part of my research for this trip included previous day hikes I’ve been on out in this area. I was familiar with the drive to get to the trailhead, the different trailheads we could start our trip from, the tentsites in the area, the terrain we’d be hiking through, and all of the day hiking options we’d have while we were out there.
I also read current trip reports for the area on both the WTA website and AllTrails , to get a feel for the current trail conditions.
Then, I looked at a map and created a route using Gaia GPS to determine our total trip and daily mileage, possible places to camp, water sources and day hiking options in the area.
While doing my research, I also learned that there would be limited water sources in the area. Even though there were lakes nearby, they wouldn’t be safe to drink out of, even if we filtered the water because all of the water in the lakes were irrigation runoff.
For this trip, we’d have to carry in a large amount of water on Day 1 and then plan to hike down to the river, which would be a 6-mile hike roundtrip from camp and back, to collect and filter safe drinking water to bring back to camp.
Also, while doing my research, I learned that since it was still considered early season (meaning that the area would be cooler days and even colder nights), local wildlife like ticks and snakes wouldn’t be an issue yet.
Checking The Conditions
Once I’ve completed my research for the Ancient Lakes area, I started checking the trail conditions, road conditions and weather forecast to get an idea of what we could expect while being out there.
Each day up until leaving for trip, I would look for any new trip reports on both the WTA website and AllTrails .
Since I knew I’d have to travel over a mountain pass to get to Eastern Washington, I also kept an eye on the road conditions for Snoqualmie Pass through the Washington State Department of Transportation (WSDOT) website .
And for weather, I checked the current weather forecast through the National Weather Service or NOAA website for the Ancient Lakes area a week prior to leaving for the trip, a couple of days before the trip and then again, the night before and morning of leaving for the trip, just to see if anything had changed.
Planning The Trip
Then for the actual planning for the trip, I used the routes I created on Gaia GPS to note total trip and daily mileage, elevation gain/loss, nearby trailheads and parking lots, possible tentsites, potential water sources and multiple day hiking options in case we wanted to make our hikes during the day shorter or longer.
Once I put together a plan for the whole trip and plotted out a route for each day we’d be out on trail, I put together my meal plan for the trip based on the number of days we were planning on being out on trail. Then I packed up my food and moved on to deciding what backpacking gear to bring for the trip.
Backpacking Gear To Bring
If you’re interested in seeing the backpacking gear I brought with me for this trip, check out my LighterPack.com list for this trip.
Keep in mind when deciding on what backpacking gear to bring for your trip, you’ll need to consider how long you plan on being out there, how many miles you plan on hiking during your trip, both daily mileage and overall trip mileage, the time of year, the forecasted weather for the area, the type of terrain you’ll be traveling through and camping on and nearby water sources..
There’s a lot of information out there about backpacking gear, but how do you sort through all of the information trying to figure out what gear is going to work for you, the type of trip you want to go on and the area and/or climate you’ll be hiking in?
I’ve put together a free Backpacking Gear Packing List you can download and print out to use when planning your trip. This packing list will help give you an idea on what gear you’ll need to bring with you for an overnight backpacking trip.
READY TO START PLANNING YOUR OVERNIGHT BACKPACKING TRIP?
Now that you’ve seen how I planned my recent overnight backpacking trip with my students using some of my favorite trip planning resources, you’re probably excited about planning your own trip, but maybe you’re still feeling overwhelmed about the whole process. This is why I created a special online tool that will help you start planning your first or next overnight backpacking trip.
Introducing The Hungry Hiker Backpacking Trip Planning Masterclass , a step-by-step guide on how to plan your first or next overnight backpacking trip.
The Hungry Hiker Backpacking Trip Planning Masterclass will cover everything (in detail) from how to prepare, research and plan for your trip to the backpacking gear you’ll need.
This masterclass also includes navigation and trip planning video tutorials and digital and printable trip planning resources along with tips and tricks for first time solo backpackers.
This online class is self-paced so you can work through all of the material at your own pace and easily fit it into you own schedule and time zone whenever you’re ready to start planning your trip. Once enrolled, you’ll have lifetime access to the class so you can refer back to it whenever you’re planning future overnight backpacking trips.
If you’re ready to finally start planning your overnight backpacking trip this year, then this masterclass will help you get to the trailhead.
CLICK HERE to learn more and sign up for The Hungry Hiker Backpacking Trip Planning Masterclass.
Disclaimer: The-Hungry-Hiker.com is a participant in the Amazon Affiliate Links and AvantlInks Program, affiliate advertising programs designed to provide a means for sites to earn advertising fees by advertising and linking to Amazon.com and other affiliated sites at no cost to you. Please note, I only link to products and services I personally use and trust.
Inspired? Pin It!

1 Comment on How to Plan Your First (Or Next) Overnight Backpacking Trip
- Pingback: I Got Tired of Waiting for Someone Else to Go Backpacking With Me - The Hungry Hiker
Leave a Reply Cancel reply
Your email address will not be published. Required fields are marked *
Save my name, email, and website in this browser for the next time I comment.
Notify me of follow-up comments by email.
Notify me of new posts by email.
You are using an outdated browser. Please upgrade your browser or activate Google Chrome Frame to improve your experience.

- Trip Styles
- Destinations
15 Best Beginner Backpacking Trips in the U.S.
- All Inspiration and Destinations
- Canadian Rockies
- New Hampshire
- New Zealand
- North Carolina
- Vancouver Island
- Washington State

If you’re new to backpacking, you may have a lot of questions , like what to pack , what to eat , and — most excitingly — where to go. In the US, you have dozens of beginner backpacking trips at your fingertips. Whether you want to plan an epic hiking vacation to your favorite national park or you want to hit the trails closer to home, you’ll have options.
When planning your first backpacking trip, you can either, 1) choose a trip within your comfort zone and go with family, friends, or a partner or 2) join a guided trip so you can learn new skills, develop friendships, and take on a more difficult challenge. Some people try to fit too much into their first backcountry trip and end up ditching the pack for good after their adventure is over. Or, they don’t set their sights high enough and end up underwhelmed, wondering why anyone would willingly lug 30 pounds of gear into the backcountry.
We know that if you’re backpacking, you want to escape the crowds, take in stunning views, and put in some effort. So, we want to help you plan a trip that will make you fall in love with the sport so that every time you dust off your backpack, a smile spreads across your face. If you’re looking for inspiration for your first backpacking trip (or your second, third, or seventieth), we’ve compiled a list of 15 beginner-friendly backpacking trips and trails across the United States that will immerse you in wild environments and challenge you just the right amount.
Explore Your World with Award Winning Guides
how to choose an appropriate trail
While each new backpacker is entering into the sport with a different set of skills and fitness levels, we’ve crafted a list of trips with all beginner backpackers in mind. These trips fit a few criteria:
- You’ll hike relatively low-mileage for the length of the trip.
- The trails don’t have extreme elevation gain for the region.
- They travel on well-maintained trails and avoid tricky terrain like boulder fields.
- You’ll get a lot of bang for your buck, whether in the form of peaks, alpine lakes, or lush meadows.
However, backpacking is never easy (or else we’d never do it!) — so, if you want to maximize your fun, be sure to train for your backpacking trip .
1. Point of Arches, Olympic National Park

Mileage: 8 miles out-and-back | Length: 2 – 3 days | Elevation Gain/Loss: 200 feet
Point of Arches is a perfect beginner backpacking destination on the edge of Olympic National Park, accessed via the Makah Reservation. You can hike this trail as an overnight, but if you have a third day to spare, you won’t be disappointed by the abundance of tidepools to explore and wildlife to observe. The sea-stack studded coastline is complemented by lush forests, which are home to banana slugs, Roosevelt elk, and black bears. Each night, as the sun sets over the Pacific Ocean and you fall asleep to the sound of crashing waves, you’ll start scheming up your next trip.
Why is it great for a beginner?
This relatively-flat trail gives you quick access to a stunning beach environment, without much hard hiking or elevation gain. In fact, we offer this as a family-friendly trip option. You’ll get the pay-off of a bigger backpacking trip, but without all the work. So, pack a chair and relax on the beach as seals play in the coastal waters and eagles fly along the bluffs hunting for fish.
Unlike many beach destinations, the campsite near Point of Arches sits along a creek, so you don’t have to pack in water for your whole trip — just a water filtration device.
logistics and permits
You’ll need to secure two permits to make this trip a reality. First, you’ll need to pick up a Makah Recreation Pass ; it costs $10 and is good for an entire year. You can get one in Neah Bay at the marina, the general store, the mini-mart, and the tribal center, among other areas. Also, as this trail enters into Olympic National Park, you will need a Wilderness Camping Permit for any overnight stays in the park. Make sure you reserve this in advance. However, if you join a guided trip, we take care of all permits and reservations for you!
As of February 2021, this trail is closed due to COVID-19, as are many of the coastal areas of the park because they are on tribal lands. If you’re looking for an alternate route in Olympic National Park, the Seven Lakes Basin backpacking loop is a great — yet more difficult — alternative.
Guided Trip Options
Wildland Trekking offers this trip as a guided backpacking adventure package with expert guides, gear, meals, transportation and more all included! Click here to learn more!
2. Shining Rock Wilderness, North Carolina

Mileage: 22 miles roundtrip | Length: 4 days | Elevation Gain/Loss: 2,300 feet with backpacking packs (plus 1,700 ft with a day pack)
The Shining Rock Wilderness in the Blue Ridge Mountains of North Carolina is one of the most spectacular East Coast backpacking destinations. The name comes from a unique geologic outcropping of quartzite rock that guards the summit of Shining Rock. Not only will these rocks dazzle you with their beauty, but they also provide a great perch to look out across the sweeping views of the surrounding peaks. On your trek, you’ll hike past cascading waterfalls and swimming holes that are perfect for a dip in the right season.
Relatively short-mileage days lead to exciting destinations. And while many beginner-friendly backpacking trails are packed with crowds, you can find mountain solitude in the Shining Rock Wilderness. Plus, a two-night backcountry basecamp lowers the number of miles you need to hike with a full pack. One of the hardest parts of backpacking is fine-tuning your pack packing routine, so you’ll appreciate the layover day when you get to leave your tent set up.
You don’t need to obtain a permit to backpack in Pisgah National Forest. However, due to the prevalence of black bears in the area, you must carry all your food and scented items in bear canisters .
This trail is in a wilderness area , so as with all backpacking trips, please leave no trace and minimize signs of human impact. We recommend first hiking in this area with a guiding company because the trails are not signed or blazed, unlike more popular destinations such as Great Smoky Mountains National Park. However, if you do choose to backpack alone in this region, carry and map and compass so you can navigate the trails.
3. Golden Cathedral, Grand-Staircase, Utah

Mileage: 10 miles roundtrip | Length: 3 – 4 days | Elevation Gain/Loss: 1.100 feet
The Golden Cathedral is a stunning display of geologic processes set in Neon Canyon. On this trip, you set up a basecamp along the Escalante River so you get to enjoy both the lush desert oasis and impressive slickrock features, like the pothole arch pictured above. While camping is not permitted in Golden Cathedral to protect the fragile environment, you’ll enjoy your sandstone surroundings as you explore the labyrinth of canyons during the days. Plus, southern Utah is known for its endlessly dark night skies. So as you peer out of your tent at night, be sure to gaze up between the canyon walls to see a smattering of stars.
This low-mileage trip is doable as a day hike, but spending the night between the narrow canyon walls in red rock country is quite the experience. You’ll carry a pack on the first and last day of your trip, setting up basecamp once you arrive in the canyon. Then, on your layover days, you’ll have time to explore slot canyons and washes without the weight of your pack. Unlike some desert hikes, this destination has plenty of water, so while you’ll need to stay hydrated, you won’t weigh your pack down with a trip’s worth of H20.
While this is a great first beginner backpacking trip with a guiding company, it can be a challenging trail to navigate on your own. However, if you plan to go solo, follow the cairns (piles of rocks) and keep your senses engaged so you don’t get lost. Don’t forget the map and compass!
Stop by a ranger station to obtain a free backcountry permit. Study up on desert leave no trace procedures, as this unique environment requires that you travel mindfully.
Also, check the forecast before you go because flash floods can be an incredible danger in canyon country. During certain times of the year, you may need to wade through thigh-deep water in the canyons. Bring along a pair of hiking sandals and trekking poles to make the journey more fun!
4. Tuolumne Meadows area, Yosemite

Mileage: 20 miles roundtrip | Length: 3 – 4 days | Elevation Gain/Loss: 1,300 feet with a pack ( + 1,700 as a day hike)
The Tuolumne region of Yosemite National Park is defined by expansive green meadows, dome-shaped mountains, and the pinnacle spires of the Cathedral Range. Water flows freely through the Grand Canyon of the Tuolumne, where you can witness cascades tumbling down silver slabs of granite. On our Yosemite Alpine Meadows and Waterfalls Trek , you can see some of the best that it has to offer on a moderate trip.
Unlike the Yosemite Valley, Tuolumne Meadows has high-elevation trailheads with relatively flat relief landscapes and far fewer crowds. Water is plentiful and the views are outstanding. Up in Tuolumne, wildlife is less accustomed to humans, so you’ll have fewer concerns about a hungry bear sneaking into camp.
The campsite along this route (where you’ll stay for two nights) has treated water and solar-powered outhouses for ultimate backcountry comfort. Plus, unlike many areas in Yosemite National Park, you’ll have access to bear boxes at camp, so you won’t have to carry bear canisters which are heavy and inconvenient.
You’ll need to obtain a permit to stay overnight in the backcountry of Yosemite National Park. We recommend you reserve a permit in advance, however, some first-come-first-served permits are available if you visit the ranger station the morning before your intended trip. If you’re traveling during the weekends or holidays, don’t expect to get a last-minute permit.
5. Havasupai Garden, Grand Canyon

Mileage: 15 miles roundtrip | Length: 3 days | Elevation Gain/Loss: 3,000 feet with a pack ( + 1.500 ft as a day hike)
Okay, no backpacking trip in the Grand Canyon is exact beginner-friendly because of the nature of the terrain. However, if you’re set on hiking Arizona ‘s Grand Canyon for your first backpacking trip, the Havasupai Garden backpacking trip is a solid choice. Instead of backpacking to the bottom of the canyon, you’ll hike down the iconic Bright Angel Trail and stay at Havasupai Garden (a lush oasis with plenty of shade). The next day, you’ll hike down to the Colorado River without a big pack on your back. This three-day excursion allows you to experience the canyon beyond the rim — something not a lot of visitors can say. And as you enjoy dinner and panoramic views at Plateau Point, you’ll feel glad you put in the effort.
Havasupai Garden is a bit of an oasis, offering hikers more shade and water than other areas along the canyon. Potable water is available year-round to hikers. These qualities are important because heat and dehydration are two of the most dangerous factors for visitors. Additionally, this trail has less elevation gain and loss than other Grand Canyon trips. You’ll still get the expansive views and magic feelings that come along with an overnight stay in the Grand Canyon , without the knee-pounding descent to the bottom. Plus, this campground has toilets, so you don’t have to worry about properly burying or packing out your waste.
You must reserve and obtain a permit to backpack in Grand Canyon National Park. Because of the popularity of this park, these permits can go quickly! A few permits for Corridor campgrounds (including Havasupai Garden) are available for walk-ups at the Backcountry Information Center in the park.
Just because the Havasupai Garden Campground is more accessible than many backcountry campsites doesn’t mean you shouldn’t take it seriously. Anytime you’re hiking below the canyon rim, you need to carefully consider the conditions, your water capacity, and your fitness level. In the hot seasons, start early to avoid mid-day heat; this is an unforgiving climate and many hikers have died by setting out unprepared. Hiking with a guide can ensure that you have the tools you need to successfully backpack in the Grand Canyon .
6. White Mountain Hut to Hut, New Hampshire

Mileage: 15 miles point-to-point | Length: 3 – 4 days | Elevation Gain/Loss: 3,600 feet
Traversing an alpine ridgeline and staying at high mountain huts — you expect that in Europe, but not in the U.S., right? But in the White Mountains of New Hampshire, you can enjoy the luxury of backcountry accommodations with the adventure of the alpine. Similar to the popular Presidential Peaks Traverse but less daunting, the High Peaks of the Pemigewasset Hut to Hut Trek offers the same appeal for a fraction of the difficulty. Staying along the Appalachian Trail (AT), you’ll bag peaks during the day and settle into cozy mountain huts at night. These trails offer a sense of camaraderie that is often hard to find when backpacking. As travelers from all over the world stay at the mountain huts, you’ll be able to chat about your hike over dinner.
On a hut-t0-hut trek , you’ll get to leave the tent and sleeping pad behind, shedding some of the heavy weight required for backpacking trips. If you’ve always wanted to spend the night in the backcountry, but aren’t ready to give up the luxuries of a bed, toilets, and running water, this will be a great introductory trip.
Also, you’re hiking above treeline for most of your trek, so the views per mile are exceptional. But, the terrain is a bit rougher than some of the other trails on this list.
Because this trek takes place primarily above the treeline, you should check the forecast , have good decision-making skills, and stay aware of thunderstorm conditions. The White Mountains are notorious for their erratic weather, so make sure to be prepared for some wild winds and weather.
You should book your stays in the AMC huts in advance. If you plan a point-to-point traverse, check out the shuttle system to ensure you can get back to your car at the end of your journey. The Appalachian Mountain Club strongly recommends reserving your shuttle; walk-ons are only accepted when space is available.
7. Lake Blanche, Wasatch Range, Salt Lake City

Mileage: 7 miles out-and-back | Length: 2 days | Elevation Gain/Loss: 2,700 feet
Lake Blanche is a popular day hiking destination in Big Cottonwood Canyon outside of Salt Lake City. Those that pack a bag to spend the night near the lakeshore (well, 200 feet from the water’s edge) will be rewarded by dwindling crowds and dazzling alpenglow on Sundial Peak. As you approach the photogenic basin, keep an eye out for moose grazing on aspens. Once you’ve set up camp, hike the spur trail to explore Lake Florence and Lake Lillan.
This backpacking trip can be completed as a quick overnight, as it is incredibly accessible from Salt Lake City, Utah. While the trail has a fair amount of elevation gain, the low mileage (3.5 one-way) makes this trip achievable for most first-time backpackers. Once you set up camp, you’ll have access to water. Also, while solitude can be desirable, you probably won’t be alone if you camp near Lake Blanche. Some first-time backpackers may feel reassured at the presence of other humans.
You do not need any permits for this backpacking trip. Check out the Uinta-Wasatch-Cache National Forest backcountry regulations before you go.
However, no swimming or campfires are allowed. Respect the watershed and don’t wash your dishes in the lake.
All-inclusive Backpacking Adventures
8. Heart Lake and Mount Sheridan, Yellowstone

Mileage: 23 miles roundtrip | Length: 3 days | Elevation Gain/Loss: 900 feet (+ 1,800 as day hike from camp)
This remote region of Yellowstone is teeming with wildlife, rolling meadows, expansive lakes, and geothermal features. So what more could you ask for? Well, when you backpack to the shores of Heart Lake, you won’t want to miss Mount Sheridan. Adding on a summit attempt to an already fantastic hiking trail really elevates this itinerary. This area is so classically Yellowstone that you’ll fall in love with the subtleties, like a pine marten running through the trees, the feeling of the wind as you approach the ridgeline, and the rising steam of the hot springs along Witch Creek.
The Heart Lake Trailhead in Yellowstone National Park is a great jumping-off point for many backpacking trips, including our Heart Lake and Mount Sheridan and Heart Lake/Snake River trips. While they are both great options for a new backpacker, the Heart Lake/Mount Sheridan trip doesn’t require a shuttle, making it easier to execute for non-guided hiking parties.
You’ll set up a basecamp for two days near Heart Lake. There, you’ll get to relax along the lakeshore in the evenings. On your layover day, you’ll hike into the alpine during your summit attempt of Mount Sheridan. If you make it to the top (and even if you don’t), you’ll get sweeping views of the Absaroka Range, the Tetons, and Yellowstone Lake.
The rewards are big for a relatively flat 8-mile hike in to camp. This itinerary gives you plenty of downtime to enjoy the leisurely pleasures of backpacking, while also ensuring you work hard to get a well-rounded experience in Yellowstone.
When it comes to the Greater Yellowstone Ecosystem (Yellowstone, into the Tetons and beyond), you’ll have one big safety consideration when backpacking. Grizzly bears. This not-so-small detail is one of the only reasons this isn’t an ideal beginner trip. However, the elevation gain and mileage are very achievable by most beginners. So, if you like the idea of this trip but aren’t keen on hiking in grizzly country, join us on a guided trip and we’ll help you build the skills you need to travel with confidence.
If you do decide to hike in grizzly country without a guide, be sure to read up on safety protocol, hike smart, carry bear spray, and keep a bear-safe camp. You’ll also need to be prepared to hang all of your food at the designated bear hangs in the Park. We’ve written all about in this blog post .
If you want to stay overnight in Yellowstone National Park, you’ll need to obtain a permit . Heart Lake is one of the more popular backpacking destinations in the park, so you should make an advanced reservation. However, permits are also available for walk-ups up to two days before your trip date. If you do decide to chance your trip with a last-minute permit, you should have a backup itinerary in place in case you can’t secure your ideal campsite.
9. Ancient Lakes, Eastern Washington

Mileage: 4 miles out-and-back | Length: 2 days | Elevation Gain/Loss: minimal
If you’re searching for the perfect early-season overnighter, look no further than Ancient Lakes near Quincy, Washington. This desert oasis is close enough to Seattle that you can squeeze in a quick weekend trip even if you only have Saturday and Sunday to play. As you wander among the columnar basalt rocks, you’ll watch waterfalls splash over the edges and create green streaks of life on the walls. Once you arrive at the lake, you’ll find many paths to explore the area. And nearly every campsite you can find has great views of the dark night sky.
Low-mileage and minimal elevation gain make this a great trip for beginners, kids, and the pup. While you do need to pack in all your water, you shouldn’t be deterred because you only have a 2-mile hike to the lake.
logistics and permits’
Pack in all the water you’ll need for your overnight trip! Even though you are hiking to lakes, all of the water is irrigation water from nearby farmlands. Agricultural runoff pollutes these water sources, so you’re better off bringing potable water from home. Also, you may want to avoid this one during the hot summer season. If you do backpack in this area during the summer, keep an eye out for rattlesnakes.
You do not need a permit to camp overnight in the Quincy Wildlife Recreation Area. However, you’ll need a Discover Pass to park at the trailhead.
10. Superior Hiking Trail, Minnesota

Mileage: varies (10+ mile one-way) | Length: varies (2+ days) | Elevation Gain/Loss: varies
We’re not recommending that you hike all 310 miles of this thru-hike for your first backpacking trip (not that we’d stop you…), but the Superior Hiking Trail (SHT) in Minnesota has many trail sections that you can complete in a weekend or on a three-to-four-day trip. Weave in and out of deciduous forests as you follow the shore of Lake Superior. You’ll cross deep gorges, pass fairytale-esque waterfalls, and even find your fair share of swimming spots. In the autumn, you’ll hike to vistas to see a sea of reds, oranges, and yellows. While the entire trail is stunning, some standout sections are from Caribou Falls State Wayside to Lutsen and from Two Harbors to Silver Bay .
The SHT hiker’s shuttle makes it easy to customize your route for your timeline and hiking ability, without having to do an out-and-back hike. Just choose one of 50 different trailheads and hike north or south! Most hikers travel from south to north. The trails are well-marked with a blue blaze.
When you’re on the trail, you encounter designated campsites very frequently. So, you never have to hike far to find a place to rest your head (unless you want to pack in the miles!) Additionally, some sections of the trail pass through towns. If you’re considering your first thru-hike or week-long trip, restocking supplies is incredibly easy.
No permits or reservations are required to hike and camp along the SHT. During busy weekends, you may have to share campsites with other hiking parties.
The trail does pass through state parks. In these areas, you can only camp with a reservation and fee. If you don’t want to make reservations, plan your itinerary so you camp in the other numerous campgrounds.
11. Glacier Gorge, Rocky Mountain National Park

Mileage: 10 miles roundtrip | Length: 2 – 3 days| Elevation Gain/Loss: 1,700 feet
If you don’t mind the company of other hikers, Glacier Gorge is a fantastic destination for a first backpacking trip in Rocky Mountain National Park . It’s hard to snag a backcountry permit for this coveted area, but if you do, you’ll stay in one of two designated campsites — either in the Glacier Gorge Valley or along Andrews Creek. If you’re staying at Andrews Creek, establish your basecamp and set out on a hike to Sky Pond , a sparkling alpine lake nestled beneath Taylor and Powell Peaks. Spend an extra day exploring the area and head up to Andrews Glacier. If you’re at the Glacier Gorge site, bring a fishing rod and test the waters at Jewel Lake. Or, hike up to Black Lake and Ribbon Falls.
The campsites are relatively close to the trailhead. Once you set up camp, you’ll have opportunities to explore stunning high mountain lake basins without the weight of a heavy pack. Starting from the Glacier Gorge Trailhead, you don’t have to gain much elevation to get some pretty impressive views.
You’ll need to reserve a wilderness camping permit if you plan to spend the night in Rocky Mountain National Park. As there are only two designated campsites in this area, the spots fill up quickly. If you plan to fish, you’ll need a valid Colorado fishing license .
In Rocky Mountain National Park, you must carry and store all your food and scented items in a bear canister. This is the only food storage method permitted in this park.
12. Observation Peak Trek, Yellowstone National Park

Milage: 10MI / 16KM roundtrip | Length: 2-3 days | Elevation Gain/Loss: 1300 ft
If you’re looking for an introduction to backpacking that will have you deep in the backcountry without having to hike for days, then a trek to Observation Peak is an excellent option. In the heartland of wild Yellowstone National Park, this relatively popular trail can be done in 2 or 3 days and gives you some of the most stunning scenery in the park. You can either chose to day hike to Observation Peak with a basecamp at Cascade Lake or include this summit on the first day of your trek before setting up camp. With moderate elevation gain and well maintained trails coupled with stunning lakes and vistas, this trail is one of the best extended weekend options in Yellowstone.
Why is it Great for a beginner?
An Observation Peak trek is a great option for first time backpackers as there are so many options for customizing the trip to what you want. Depending on if you are going for 2 or 3 days, you have options to hike to Observation Peak and take in the views, stroll to Grebe Lake and fish for trout, or simply relax at Cascade Lake if you want to rest your legs. Plus, the milage is minimal and doesn’t leave you exhausted by the time you reach camp. This trail is popular enough to make first time backpackers feel comfortable with others around, but doesn’t have so many people as to spoil the wilderness effect.
Logistics and Permits
The biggest logistical concern of hiking in Yellowstone is the wildlife. Grizzly bears are very active in this area and other wildlife such as bison and elk can also pose danger to hikers. This is one of the only downsides to embarking on this trip as an introduction to backpacking. However, with the moderate elevation and easy milage, you’ll be able to prepare for the possible dangers of wildlife and still complete this trip safely. If the wildlife seems like a bit much but the hike sounds appealing, Wildland Trekking offers this trip in both 2 and 3 day options so that you can get your feet wet before going out there on your own.
Like everywhere in Yellowstone, permits are required for overnight camping. Yellowstone’s traditional backpacking season is shorter than other national parks, mostly limited to summer, so you’ll want to make advanced reservations to ensure you get the route you want. Walk up permits are available at ranger stations 1 or 2 days before you begin your trek, but they go quickly each morning. It’s a good idea to have a back up itinerary in case you don’t get the permit you want. Permits are included on guided trips
Wildland Trekking offers this trip as an all-inclusive guided hike with meals, gear, transportation, permits, and an expert mountain guide all included. Guided trips are a great way to find out what backpacking is like before getting out there on your own. Click here to learn more!
13. Little Lakes Valley, Inyo National Forest, California

Milage: 8-10MI / 13-16KM Roundtrip | Length: 2-3 days | Elevation Gain/Loss: 1218 ft
Just north of Bishop on California’s Highway 395 is a blink-and-you’ll-miss-it turnoff with one of the Eastern Sierra’s best short distance hiking destinations: Little Lakes Valley. This valley, accessed from Mosquito Flats , is a great destination for a first time backpacking trip. With over a dozen serene alpine lakes, this valley is overflowing with campsite options, day hiking, fishing, and stunning views. While the trail is easily assessable, it’s no overly crowded and with the abundance of campsites, hikers may get an opportunity to have a lake to themselves. Located in the Inyo National Forest, there’s much less competition for permits compared to national park trails, but the scenery is no less spectacular.
Little Lakes Valley is great for beginner backpackers because of the big bank for your buck (or view for your step) that you get on this short and relatively flat trail. There is some elevation gain on the way into the valley, but that means it’s downhill on the way back! The abundance of lakes and streams make finding water a breeze and the pristine lakes with a back drop of snow capped, jagged peaks is unbeatable. Plus, the trail is easily accessible from Highway 395 and Tom’s Place at the turnoff is a great place to spot at for a burger on the way out!
Logistics for backpacking in Little Lakes Valley are pretty minimal as the short trail is out and back and there is only one access point. Your biggest concern is going to be the elevation as the trailhead is over 10,000 ft above sea level. All backpackers (not just beginners) who don’t live at elevation should spend at least one night (if not two) at a nearby campground that’s around 7,000 to 8,000 ft in order to acclimate to the elevation. Convict Lake is a good, close-by option for this.
Only attempt this hike in summer and early fall and make sure to check the weather before you go to assess road and snow conditions. Permits are required to spend the night here, but there is much less competition for them compared to national parks. You can make reservations online or get walk up permits at Inyo National Forest’s backcountry permit office.
This is bear country and you will need to use bear resistant containers for all food and smelly items. There are no campfires allowed anywhere in the valley and water collected from lakes and streams should be filtered.
14. Half Dome, Yosemite National Park

Milage: 16MI / 26KM Roundtrip | Length : 4 days | Elevation Gain/Loss: 2845 ft
First, a disclaimer: this trip is hard. Hiking to and up Half Dome is a challenge with large elevation gains and lots of exposure to heights. Beginning with the Mist Trail and ending with hiking the cables , this hike is not to be underestimated. But the views from the top are worth it. While many people do this hike in a single day, backpacking to the base of Half Dome and then summiting in the morning before any day hikers arrive is a great option, allowing you to skip the extremely long and strenuous milage day. It is notoriously difficult to get permits to hike Half Dome, but the backpacking permit is separate from the day hiking permit and will be easier to get.
So if this trip is so hard, why is it included in this list of best trips for beginner backpackers? Well, beginner trips don’t necessarily mean easy trips. If you are already an avid outdoors person, in good physical condition, and accustomed to hiking, you might want your first backpacking trip to be a bit of a physical (if not a technical or logistical) challenge. In this case, Half Dome may be a great option for you, especially if you’ve already done it as a day hike.
While the elevation is still hefty even for avid hikers, backpacking to the monolith cuts down the milage to reasonable days, making a backpacking trip arguably easier than a day hike. Of course, you might consider going with a guiding company due to the somewhat technical terrain on the granite and to avoid the hassle of getting permits.
Hiking Half Dome comes with some logistics to work out. The cables on the last miles of the climb are only up from late May through early October when there won’t be snow and ice on the granite. In addition, you won’t be able to hike on a rainy day (or even a day that is threatening rain) as the granite becomes extremely slippery when wet. Most accidents happen in wet weather. Check the forecast and make sure there are no storms brewing.
Permits are notoriously difficult to obtain for Half Dome, but backpacking permits are a little bit easier as you are not competing against all the day hikers for a spot. You can reserve permits on the National Park Service’s website.
The trail is in and back, so you won’t have to worry about transportation if you park your car at the trail head. Remember, this trail is commonly done as a day hike, so don’t expect to have backcountry solitude on this trek.
Backpacking to Half Dome with a guiding company can be a great way to challenge yourself physically, but have an expert guide to show you the ropes of backpacking before you get out there on your own. We offer this trek as a guided tour for anyone wanting a bit of a challenge with great rewards. All of our trips are all-inclusive with meals, gear, transportation, permits, and an expert mountain guide all included. Click here to learn more!
15. West Rim, Zion National Park

Milage: 16MI / 27KM Point to Point | Length: 2 days | Elevation Gain/Loss: 1700 ft
Beginning far from the gorgeous yet busy canyon that is Zion’s main attraction, the West Rim trail is a scenic, mostly downhill, 2 day backpacking trip that will knock the socks off any first time backpacker. Even seasoned backpackers will be kept interested on this moderate trail with non-stop views of Zion’s majestic red rock canyons and some campsites from which you can see both the sunset and the sunrise. Beginning at Zion’s highest point at Lava Point and hiking down toward the canyon, this trip takes hikers up to the alpine portions of Zion and then down into traversing through the classic canyons. And to top it all off, you’ll end at Scout Lookout with some of the most famous views in the park.
The West Rim in Zion is a great trip for first time backpackers because it is simply loaded with gorgeous views and isn’t too strenuous. You’ll be able to take leisurely mornings when hiking this trail over two days and if you start at Lava Point, it’s almost entirely downhill! (You will want to bring trekking poles however, all that downhill hiking can be hard on the knees). The elevation and milage are moderate and you simply can’t beat the views down into the canyon. While Zion is known for its crowds, you won’t find this trail overly crowded, giving first time backpackers a chance for some solitude on the trail.
Zion’s West Rim comes with a few logistical issues, but none that a first time backpacker can’t figure out. The trail is out and back so you will need to either park a car at the end of the trail and drive a second one to the trail head or use a shuttle service. Shuttles can be arranged from town easily.
Another logistical concern is water. There are seasonal springs along the trail, but the only one that flows year round is Cabin Spring. Water from streams and rivers may be impacted by a recent bacteria bloom that contain cyanotoxins, making the water unsafe for drinking and swimming. Please see the Zion’s official website for current updates on the cyanobacteria bloom.
Permits are required for overnight use and they double as campsite reservations for one of the 9 campsites along the trail. Walkup permits are available, but it’s best to reserve them online to make sure you get the permit you want. Zion has stricter regulations about backpacking compared to other national parks, so make sure to read the trail rules before setting out.
About Hannah Singleton

Hannah is a content strategist, writer, and guide for Wildland Trekking Company. She was born and raised on the East Coast but currently resides in Salt Lake City, UT where she spends her time exploring the wonders of the Rocky Mountain West. You can check out more of her freelance writing at www.hannah-singleton.com.

wildland Wires
Sign up to receive our exclusive Wildland Wire emails and stay up to date with Wildland Trekking's promotions, discounts, contests, outdoor tips and tricks, trip reports and more!
What to Take in Your Backpack When Traveling: The Ultimate Packing List and Tips
Backpacking is one of the most exciting and rewarding ways to travel the world. You get to explore new places, meet new people, and experience different cultures. But before you hit the road, you need to pack your backpack wisely. What to take in your backpack when traveling depends on many factors, such as your destination, duration, budget, and preferences. In this article, we will show you the ultimate packing list for backpacking, and give you some tips on how to pack smartly and efficiently.
1. Backpacking Essentials: What to Take in Your Backpack When Traveling
When you’re backpacking, you want to pack light and smart. You don’t want to carry unnecessary weight or items that you won’t use. You also want to pack items that are versatile, durable, and useful for different situations. Here are some of the essential items that you should take in your backpack when traveling:

1.1. Passport and Travel Documents
These are the most important items that you need to pack, as they are required for entering and exiting countries, booking flights, and proving your identity. Make sure your passport is valid for at least six months after your return date, and that you have all the necessary visas, permits, and vaccinations for your destinations. You should also make copies of your passport and travel documents, and store them in different places, such as your email, cloud, or a separate bag. This way, you can access them in case you lose or damage the originals. You can also use apps like Google Drive or Evernote to scan and save your documents online.
1.2. Money and Cards
You need to have enough money and cards to cover your expenses and emergencies. You should have a mix of cash and cards, and use them wisely. Cash is useful for paying for small items, tips, and places that don’t accept cards. Cards are useful for paying for large items, online bookings, and withdrawing cash from ATMs.
You should also have a backup card in case you lose or damage your primary card. Sometimes, you should inform your bank of your travel plans, and check the exchange rates and fees for your destinations. In addition, use a money belt or a hidden pocket to keep your money and cards safe from theft or loss. You can also use apps like XE Currency to track exchange rates and manage your money abroad.
1.3. Clothes and Shoes
You need to pack clothes and shoes that are suitable for your destinations, weather, and activities. The clothes are needed to be comfortable, breathable, and easy to wash and dry. They should also be versatile and can be layered, mixed, and matched. You should avoid packing clothes that are bulky, heavy, or require special care. Furthermore, pack shoes that are comfortable, durable, and appropriate for walking, hiking, or other activities. A pair of flip-flops or sandals for showering or relaxing. A hat, sunglasses, and a scarf or a bandana for protection from the sun, dust, or cold. You can use packing cubes or compression bags to organize your clothes and save space in your backpack.
1.4. Toiletries and Personal Items
You need to pack toiletries and personal items that are essential for your hygiene, health, and comfort. Toiletries that are travel-sized, biodegradable, and multi-purpose. They should also be specific to your needs, such as medication, contact lenses, or feminine products. You should also pack personal items that are useful for your well-being, such as earplugs, eye masks, travel pillows, or a book. Pack a towel that is quick-drying, lightweight, and compact. You may also need a reusable water bottle that is leak-proof, durable, and easy to fill and clean. You can also use a toiletry bag or a ziplock bag to store your toiletries and prevent leaks or spills in your backpack.
1.5. First Aid Kit and Emergency Items
You need to pack a first aid kit and emergency items that are essential for your safety and survival. A first aid kit contains basic items, such as bandages, antiseptic, painkillers, and tweezers. The first aid kit also contains items that are specific to your destination, such as insect repellent, sunscreen, or altitude sickness pills. Emergency items that are useful for unexpected situations, such as a flashlight, a whistle, a knife, or a fire starter. You may also need a phone that is unlocked, charged, and has a local SIM card. Moreover, you should pack a power bank that is portable, powerful, and compatible with your devices. You can also use a waterproof bag or a dry bag to keep your electronics and valuables dry and safe in your backpack.
These are some of the backpacking essentials that you should take in your backpack when traveling. Of course, you may need to adjust your packing list according to your personal preferences, needs, and circumstances. But remember, the key to packing your backpack is to pack light, smart, and essential. This way, you can enjoy your backpacking trip without hassle or burden.
2. Backpacking Extras: What to Take in Your Backpack When Traveling
Besides the essential items that you need to pack for your backpacking trip, some extra items can make your trip more enjoyable, comfortable, or fun. These items are not necessary, but they can enhance your travel experience and suit your personal preferences. Here are some of the extra items that you may want to take in your backpack when traveling:

2.1. Camera and Accessories
If you love photography or want to capture your memories, you may want to pack a camera and some accessories, such as a tripod, a lens, a memory card, and a battery. You should choose a camera that fits your budget, skill level, and style, such as a DSLR, a mirrorless, a point-and-shoot, or a smartphone. Additionally, you can use apps like Snapseed or Lightroom to edit your photos and make them look more professional.
You should consider the weight, size, and durability of your camera and accessories, and pack them in a protective case or bag. Don’t forget to check the rules and regulations of your destinations regarding photography, and respect the local culture and privacy of the people you photograph.
2.2. Books and Games
If you love reading or playing games, you may want to pack some books and games that can keep you entertained during your downtime, such as on a long bus ride, on a rainy day, or a lazy evening. I love reading the travel books for inspiration. Yet, you can choose books and games that are relevant to your destinations, such as a guidebook, a novel, a puzzle, or a trivia. You can also use apps like Kindle or Audible to read or listen to books on your device.
You should consider the weight, size, and number of your books and games, and pack them in a compact and organized way. Also, you should check the availability and compatibility of your apps and games in your destinations, and download them in advance if needed.
2.3. Snacks and Drinks
If you love snacking or drinking, you may want to pack some snacks and drinks that can satisfy your cravings, boost your energy, or quench your thirst. Remember to choose snacks and drinks that are healthy, tasty, and easy to carry, such as nuts, dried fruits, granola bars, chocolate, tea, coffee, or water.
You should also consider the shelf life, temperature, and packaging of your snacks and drinks, and pack them in a sealed and insulated container or bag. Make sure you check the customs and quarantine rules of your destinations regarding food and drink and avoid bringing any prohibited or restricted items.
2.4. Souvenirs and Gifts
If you love shopping or giving gifts, you may want to pack some souvenirs and gifts that can remind you of your trip, express your gratitude, or share your culture. You can choose souvenirs and gifts that are unique, meaningful, and affordable, such as magnets, postcards, stickers, keychains, jewelry, or handicrafts.
You should also consider the weight, size, and value of your souvenirs and gifts, and pack them safely and securely. Remember to check the customs and duty rules of your destinations regarding souvenirs and gifts, and avoid bringing any illegal or taxable items.
3. Backpacking Tips: How to Pack Your Backpack When Traveling
Now that you know what to take in your backpack when traveling, you also need to know how to pack your backpack properly. Packing your backpack well can make a big difference in your comfort, mobility, and safety. Here are some tips on how to pack your backpack when traveling:
3.1. Choose the Right Backpack
You need to choose the right backpack that fits your body, budget, and needs. You should choose a backpack that has a comfortable and adjustable harness, a sturdy and waterproof material, and a suitable capacity and weight. It would be best if you also chose a backpack that has multiple compartments, pockets, and straps to help you organize and secure your items.
3.2. Pack by Weight and Frequency
You need to pack your items by their weight and frequency of use. You should pack the heaviest items, such as clothes, shoes, and toiletries, in the bottom and center of your backpack, close to your spine. This will help you balance your load and reduce strain on your back. You should pack the lightest items, such as a sleeping bag, towel, and hat, in the top and sides of your backpack. This will help you fill the gaps and stabilize your backpack. You should pack the most frequently used items, such as your passport, money, phone, and snacks, in your backpack’s front and outer pockets. This will help you access them easily and quickly.
3.3. Pack by Category and Color
You need to pack your items by their category and color. You should pack your items in separate bags or containers, such as packing cubes, compression bags, ziplock bags, or dry bags. This will help you keep your items organized, clean, and dry. You should also pack your items in different colors, such as red, blue, green, or yellow. This will help you identify your items quickly and avoid confusion.
3.4. Pack by the Rule of Three
You need to pack your items by the rule of three. This means that you should pack only three sets of clothes: one to wear, one to wash, and one to spare. This will help you save space, weight, and money. You should also pack only three pairs of shoes: one for walking, one for hiking, and one for relaxing. This will help you cover different terrains, activities, and occasions. You should also pack only three toiletries: one for cleaning, one for moisturizing, and one for protecting. This will help you maintain your hygiene, health, and comfort.

4. Frequently Asked Questions
4.1. how do you prepare a backpack for a flight.
To prepare a backpack for a flight, you need to follow the airline’s regulations and guidelines regarding carry-on and checked baggage. Here are some steps to prepare a backpack for a flight
Check the Airline’s Baggage Policies
You need to check the airline’s baggage policies before packing your backpack, as they may vary depending on the airline, destination, and fare type. You need to check the size, weight, and number limits for carry-on and checked baggage, as well as the fees and restrictions for oversized, overweight, or extra baggage. Also, you need to check the prohibited and restricted items for carry-on and checked baggage, such as liquids, aerosols, gels, sharp objects, weapons, batteries, and electronics.
Choose Your Backpack Type
You need to choose whether you want to bring your backpack as a carry-on or a checked bag, depending on your preference, needs, and circumstances. If you bring your backpack as a carry-on, you can avoid baggage fees, lost or damaged luggage, and waiting time at the baggage claim. However, you need to make sure your backpack meets the size and weight limits for carry-on baggage, and that it contains only items that are allowed in carry-on baggage. If you bring your backpack as a checked bag, you can pack more items, including those that are not allowed in carry-on baggage, and have more freedom and comfort during the flight. However, you need to pay the baggage fees, secure your backpack from theft or damage, and label it with your name and contact information.
Pack Your Backpack Properly
You need to pack your backpack properly for a flight, following the tips mentioned above for packing a backpack for travel. In addition, you need to pack your valuables, essentials, and fragile items in your carry-on backpack, and your bulky, heavy, and non-essential items in your checked backpack. Besides that, pack your liquids, aerosols, gels, creams, and pastes in a clear, quart-sized, zip-top bag, and place it in a separate bin for screening. Remember, you need to remove your laptop, tablet, and other large electronics from your carry-on backpack, and place them in a separate bin for screening. You also need to lock your checked backpack with a TSA-approved lock and attach a luggage tag with your name and contact information.
4.2. How Strict are Airlines about Backpacks?
Airlines can be strict about backpacks, especially if they exceed the size, weight, or number limits for carry-on or checked baggage. The airlines may measure, weigh, or inspect your backpack at the check-in counter or the gate. They possibly ask you to check it, pay a fee, or remove some items if it does not comply with their baggage policies. Definitely, airlines may refuse to accept your backpack if it contains any prohibited or restricted items, such as weapons, explosives, flammable substances, or illegal drugs. To avoid any problems or delays, it is advisable to follow the airline’s baggage policies and guidelines and check your backpack before flying.
4.3. What is not Allowed in Personal Item Bag?
A personal item bag is a type of hand luggage that you carry onto the plane with you and is smaller than a carry-on. It must fit under the seat in front of you or the overhead bin. A personal item bag can include a purse, briefcase, laptop bag, backpack, or tote bag. However, some items are not allowed in a personal item bag, such as:
Sharp Objects
Anything with a blade, such as knives, scissors, razors, or corkscrews. These are not allowed in carry-on baggage and must be packed in checked baggage.
Anything that could be used as a potential weapon, such as guns, ammunition, fireworks, pepper spray, or martial arts equipment. These are not allowed in carry-on or checked baggage and may be confiscated or reported to the authorities.
Liquids, Aerosols, Gels, Creams, and Pastes That are Larger than 3.4 Ounces (100 Milliliters) per Item
Such as shampoo, lotion, perfume, or toothpaste. These are not allowed in carry-on baggage and must be packed in checked baggage. You can bring liquids, aerosols, gels, creams, and pastes that are 3.4 ounces or less per item in a clear, quart-sized, zip-top bag, and place it in a separate bin for screening.
Batteries, Electronics, or Power Banks That are Damaged, Defective, or Recalled
Such as lithium metal or lithium-ion batteries, hoverboards, or e-cigarettes. These are not allowed in carry-on or checked baggage and may pose a fire hazard or an explosion risk.
Food or Beverages That are not Sealed, Wrapped, or Packaged
Such as fresh fruits, vegetables, meats, cheeses, or liquids. These are not allowed in carry-on baggage and may be subject to agricultural inspection or quarantine. You can bring food or beverages that are sealed, wrapped, or packaged, such as snacks, candy, or water, as long as they comply with the liquids rule.
Wrap-Up: What to Take in Your Backpack When Traveling
Packing your backpack for traveling can be a daunting task, but it doesn’t have to be. With our ultimate packing list and tips, you can pack like a pro and enjoy your backpacking adventure. Remember to pack only the essentials, choose versatile and durable items, and organize your backpack well. And don’t forget to have fun and be flexible along the way. What are your backpacking essentials? Share your thoughts and experiences with us in the comments below. And if you liked this article, don’t forget to subscribe to our newsletter and check out our other travel guides.
“PIN IT” NOW TO SAVE YOUR TIPS OF WHAT TO TAKE IN YOUR BACKPACK WHEN TRAVELING

READ MORE PACKING TIPS FOR TRAVELERS
We hope you enjoyed this article on what to take in your backpack when traveling. If you want to learn more about how to pack your luggage, suitcase, or other travel items, check out our other articles on packing tips for travelers. You’ll find useful advice, hacks, and recommendations on how to pack like a pro and travel light and smart. Don’t miss this opportunity to improve your packing skills and make your travel experience more enjoyable and hassle-free. Read our other articles on packing tips for travelers now!
- Suitcase Travel Tips Everyone Should Know
- 5 Necessary Road Trip Essentials You Need To Be Packing
- 7 Common Packing Mistakes to Avoid for a Holiday Trip
- 5 Valuable Packing Tips for Travel You Need to Know
- Travel Essentials Checklist: 10 Items You Shouldn’t Forget to Pack

Khoi Nguyen
Khoi Nguyen builds The Broad Life with a desire to inspire people go exploring the world and live a more interesting, experience, and adventurous life. This blog shares the stories, pictures, and experiences at destinations where he has traveled to.

I found this article to be most helpful. I always overpack on trips so I am using your advice for my next trip!

I hope the article’s info helps you to enjoy your trip!

Nikki Wayne
These tips are really helpful especially for me because i really like travelling in different cities or countries.
I’m glad that the tips are helpful for you.

Good Info! Not much of a back packer myself but I know many who are and shall pass this on. Thank you
Thanks for your comment!

Renata Feyen
That’s a great list, and many people could benefit from it. I have never done it, and given my fysical condition, I don’t think I ever will.

Fransic verso
This is cool, we will be traveling soon and this will help a lot. Important things to have. Thank you for sharing!

Not much of a back-packer when it comes to my city travels. I have wanted to do a back pack and camping adventure trip in the mountains. Your tips will come in handy.
Leave a Reply Cancel reply
Your email address will not be published. Required fields are marked *
Notify me of new posts by email.
Post Comment

10 Tips for Forgetful Person When Traveling
Do you often forget things when you travel? Do you struggle to remember where you left your passport

How to Plan Your USA Road Trip
Although I love to grab my favorite backpack and travel wherever the wind takes me, I also love to d

Coronavirus Update from Vietnam
Hello, how are you? Are you still traveling, or staying at home to avoid the coronavirus? So, this i

Airport Etiquette: 10 Things Not to Do at the Airport
Traveling by air can be an exciting and enjoyable experience, but it also comes with some rules and

Sign up for Newsletter
Discover more from Travel Blog - Blog About Traveling | The Broad Life
Subscribe now to keep reading and get access to the full archive.
Type your email…
Continue reading
BEST WEEK EVER
Try out unlimited access with 7 days of Outside+ for free.
Start Your Free Trial
Powered by Outside
5 Perfect Backpacking Trails For Long Summer Weekends
You don't need a long trip to have a summer full of adventure. spend a 3-day weekend tackling any of these trails..
Heading out the door? Read this article on the new Outside+ app available now on iOS devices for members! >","name":"in-content-cta","type":"link"}}'>Download the app .
Summer’s here, and I want to fill it with adventure, but I don’t have the time to go on a long trip. Where are the best 3-day backpacking trips to spend a long weekend? —Weekend Warrior
Dear Weekend Warrior,
I’m a big fan of taking lots of mini adventures throughout the summer. You get little bites of hiking that keep you satiated throughout the season more than a single trip can. I also believe three days is the perfect length for a backpacking trip: Any shorter, and it’s hard to really get into the swing of things; any longer, and you have to do a lot more planning and training.
Here are five of our favorite hikes you can fit into a long weekend.
Four Pass Loop, Colorado
This 25-mile loop through Maroon Bells-Snowmass Wilderness gets its name from the four mountain passes above 12,000 feet along the trail: Buckskin, Trail Rider, Frigid Air, and West Maroon. Hike it clockwise and the views of lupines, Columbines, evergreen forests, and alpine lakes will get better and better with every pass. Fair warning: With 8,339 feet of elevation gain, you will certainly have to earn the views. This trek is a tough one thanks to sustained climbs and steep descents (especially down Buckskin Pass)—but navigation is simple, there are plenty of water sources, and it’s by far one of the most beautiful hikes in the country.
July, August, and September are the best times to hike the Four Pass Loop. Early summer brings snowmelt-swollen rivers and deep snow on the high passes. Permits are required year-round, which you can get here .
Got an extra day? Do the trail in four days, three nights, and summit one pass per day. You can also extend your trip with side excursions to Geneva Lake and Willow Pass.
Art Loeb Trail, North Carolina
Asheville is an iconic hiking town because of its proximity to Pisgah National Forest, the Great Smoky Mountains, and the Appalachian Trail. But, it’s also close to a thru-hike about one percent of the distance of the AT: The Art Loeb Trail. Named after a North Carolina hiker who “deeply loved these mountains,” this 29-mile point-to-point trail is also a National Recreation Trail.
With 8,333 feet of vert, this trail’s a hilly one with constant climbs and descents, but the biodiversity will keep you entertained through the steeps. In the summer, you’ll be surrounded by dense, verdant greenery—even if that means hiking through some overgrowth after particularly rainy springs. This trail’s also a forager’s paradise: Find mushrooms, blueberries, and more, with foraging tips from a local expert . Most take this trail from north to south for a slightly easier traverse.
Doing a point-to-point hike can be a logistical nightmare, but with shuttle services like Pura Vida Adventures , you can complete the whole trail without worrying about transportation. One thing to plan for: Irregular water sources, even during wetter months. Be prepared for long water carries and check online which streams are flowing before your trip.
Presidential Traverse, New Hampshire
Some people try to complete the whole 24-mile Presidential Traverse in one day. Those people are missing out. The best way to experience New England’s most iconic ridgeline is by taking advantage of the Appalachian Mountain Club’s pristine huts along the route , such as Lakes of the Clouds and Mizpah Spring. These huts have food, water, beds, and more amenities, which will feel like a royal treatment after facing sideways winds on an exposed ridgeline.

Most hikers travel from north to south between Mt. Madison and Mt. Pierce. No need to worry about the transportation logistics: There are AMC shuttles that drive hikers between trailheads. Because taxis and ride shares aren’t reliable, this is highly recommended. Check out the shuttle schedule here .
Ruby Crest Trail, Nevada
There is so much more to Nevada than dusty desert and slot machines. On the Ruby Crest Trail, you can hike through aspen forests, alpine lakes, sweeping canyons, and craggy, granite monoliths. Here, you traverse the spine of the Ruby Mountains in Humboldt-Toiyabe National Forest on a 36.6-mile point-to-point hike starting at Harrison Pass and finishing at Roads End Trailhead.
Not looking for much hassle? This permit-free hike also isn’t too popular, allowing for plenty of solitude.
One thing to keep in mind: Pack sunscreen. There is plenty of sun exposure on this trail—hardly any shady spots—but thanks to the elevations between 7,200 and 10,893 feet, temperatures are hikeable even through late July.
Timberline Trail, Oregon
Hiking the Wonderland Trail is so yesterday. The Timberline Trail, which circumnavigates Mt. Hood, offers as much grandeur as its sister trail around Mt. Rainier in fewer miles. On this aptly named trail, you hover the timberline—also known as the treeline, the altitude where trees stop growing—as you snatch glimpses of Mt. St. Helens, Mt. Rainier, Mt. Adams, and the Three Sisters; from a distance, you can see Portland, the Coastal Range, and the Columbia River. Got a geology buff in your group? Within the landscape, you can see evidence of lava from an ancient volcano that preceded Mt. Hood. Some other highlights include plenty of stream crossings and also towering waterfalls, glaciers, and even more glacier-carved canyons.
Most hikers move clockwise, starting and ending at Timberline Lodge (stay after your hike for their buffet); three-day backpackers can camp at Ramona Falls and Cloud Camp. The trail requires wilderness permits between May 15 and October 15, but they’re free and self-issued at multiple trailheads as well as at ranger district offices.
Want an adventure longer than a weekend? Hike farther on these week-long trails .
Popular on Backpacker
>", "path": "https://www.backpacker.com/gear/best-backpacking-knives/", "listing_type": "recirc", "location": "list", "title": "the best knives and multitools for outdoor adventures"}}'> the best knives and multitools for outdoor adventures, >", "path": "https://www.backpacker.com/skills/backpacking-haircare-tips/", "listing_type": "recirc", "location": "list", "title": "8 tricks for managing unruly trail hair—for all hair types"}}'> 8 tricks for managing unruly trail hair—for all hair types, >", "path": "https://www.backpacker.com/skills/backpacking-fitness/hiking-strength-test/", "listing_type": "recirc", "location": "list", "title": "think you’re a strong hiker test your trail strength with these 4 exercises"}}'> think you’re a strong hiker test your trail strength with these 4 exercises, >", "path": "https://www.backpacker.com/news-and-events/news/two-hikers-nearly-drowned-in-sequoia-national-park/", "listing_type": "recirc", "location": "list", "title": "two hikers nearly drowned in separate sequoia national park incidents. and the season is just beginning"}}'> two hikers nearly drowned in separate sequoia national park incidents. and the season is just beginning, testing gear on north carolina’s art loeb trail.
The 30-mile thru-hike was the ideal trip for putting our backpacking and hiking candidates through the wringer.
- 2024 Summer Gear Guide
Related content from the Outside Network
Navigation – desert, what’s it like to go on a 200-person hike better than you think., how to pack for backcountry skiing, the original yosemite firefall.
Costa Rica Travel Guide
Last Updated: November 2, 2023

Costa Rica is one of my favorite countries in the world. It was the first country I ever traveled to — and it was the country that sparked my wanderlust.
These days, Costa Rica is one of the most popular destinations in Central America . It’s popular with expats, luxury travelers, and backpackers alike. While it is on the higher end of the price spectrum for the region, it’s nevertheless a phenomenal country to visit and remains affordable.
I love the never-ending activities, gorgeous beaches, diverse wildlife, delicious food, and friendly people.
The country may be expensive by regional standards but that doesn’t make it any less amazing. The beaches are picturesque, there’s great surfing and amazing diving, and there are plenty of places to get away from the hordes of retired Americans that live here.
This guide to Costa Rica can help you have the trip of a lifetime — and save money in the process!
Table of Contents
- Things to See and Do
- Typical Costs
- Suggested Budget
- Money-Saving Tips
- Where to Stay
- How to Get Around
- How to Stay Safe
- Best Places to Book Your Trip
- Related Blogs on Costa Rica
Click Here for City Guides
Top 5 things to see and do in costa rica.

1. Climb a volcano
Volcanoes are among the country’s top tourist attractions. There are currently 5 active ones and over 60 dormant ones. Arenal is the most popular, famous for its beautiful hikes and scenic views. Irazu is known for its astonishing green-blue lake in one of its craters, while the Poas Volcano is home to a boiling acid lake within its crater.
2. Visit Monteverde
Monteverde is one of my favorite places in Costa Rica. I always found this town to be a nice base to hike the surrounding cloud forest, take canopy tours, and visit coffee plantations. I still dream of the coffee from here — it’s like drinking liquid chocolate! Be sure to take a nocturnal rainforest tour while you’re here — they’re super fun and educational.
3. Explore Tortuguero National Park
This park on the Caribbean coast is regarded as one of the most important breeding grounds for the endangered green turtle. The park also helps protect manatees, sloths, and monkeys. If you like jungles, birds, and quiet, this is a must-see! Admission is $16.95 USD. You can visit as a guided full-day tour from San Jose for $195 USD.
4. Explore Corcovado
Established in 1975, Corcovado National Park is on the remote Osa Peninsula in the southwest. Spanning 424 square kilometers (164 square miles), it’s a rugged, quiet, off-the-beaten-path destination. Here you’ll find pristine jungles, hiking trails, and plenty of diving opportunities. There’s lots of wildlife too, including tapirs, jaguars, pumas, and the rare Harpy eagle. The peninsula is not easy to get to but it’s the highlight of the country for me.
5. Stay in Puerto Viejo
Other things to see and do in costa rica, 1. visit san josé.
Costa Rica’s capital, San Jose is in the center of the country. It’s sort of gritty and there’s not a whole lot to do (the city only requires a few days) but while you’re here, visit the Museum of Contemporary Art & Design to check out the future of Costa Rican art, as well as the magnificent Teatro Nacional to take in its décor. There are also many tour companies that offer day trips to the surrounding jungle for hiking, zip-lining, canopy tours, and more. Most start around $150 USD.
2. Zip through the rainforest canopy
The highest 10% of rainforest is where most activity takes place, filled with squawking birds, slow moving sloths, and monkeys scampering from tree to tree. For an adrenaline-pumping view of these vast, diverse ecosystems, take a zip line tour. There are dozens of companies throughout the country, though Monteverde is my favorite place to do it. Expect to pay around $75-85 USD for a multi-line tour lasting a couple of hours .
3. Explore Baru Wildlife Refuge
With over 330 hectares (815 acres) of land, 7 kilometers (4 miles) of walking trails, and 3 kilometers (1.8 miles) of fantastic beaches, this refuge is another prime example of Costa Rica’s natural beauty. Located on the coast south of Manuel Antonio , here you can go birdwatching, take canopy tours, and explore the park via guided tours to see the wildlife. Don’t miss the orchid and butterfly gardens. For something more unique, take a nighttime guided tour to see the region’s nocturnal animals. Self-guided tours cost $15 USD while guided tours start at $35 USD.
4. Go surfing in Jaco
Located on the Pacific Coast west of San Jose, Jaco was once a sleepy resort town whose main attraction was its excellent surfing. Growing tourism has transformed it into a haven of beach parties and nightclubs. Surf lessons and rentals are widely available on the beaches and sport-fishing is also popular here. For a more laid-back visit, head to the nearby Carara National Park to spot scarlet macaws, armadillos, and hundreds of species of birds (admission is $11.30 USD).
5. Learn some Spanish
Costa Rica is one of the most popular countries for learning Spanish due to the country’s easy-to-understand dialect. Programs vary in length and cost, but most offer the opportunity to do an immersive homestay with a Costa Rican family. Expect to spend around $500 USD for a basic week-long homestay language learning program.
6. See La Paz Waterfall Gardens
Located just one hour from San Jose, this makes for a popular day trip. Aside from the many stunning waterfalls throughout the lush cloud forest, here you’ll also find several beautiful gardens, an aviary, a hummingbird garden, a butterfly garden, and a reptile area. Plan to stay at least two hours to see everything. Admission is $50 USD. You can also do a full-day tour to the Waterfall Gardens that includes a visit to a coffee plantation and Poás Volcano for $159 USD.
7. Go fishing
Costa Rica is home to Marlin, Sailfish, Dorado, Snapper, Wahoo, and more. If you love to fish (or just want to give it a try), consider doing a half-day or full-day fishing excursion. A basic group excursion costs around $105 USD and usually includes food, though prices can be ten times as high for multi-day or exclusive charters. A half-day private charter is around $400-600 USD. You can usually find places that can cook your catch as well.
8. Chill out in Santa Teresa
At the bottom of the Nicoya Peninsula is the hippy backpacker town of Santa Teresa. This “town” is really nothing more than a beach with a road lined with eateries, surf shops, and hostels. Not much goes on here as everyone is up early to hit the waves. I enjoyed my time here as it’s a good place to just lay on the beach, hang out with people, and relax. It’s an easy place to fall into and spend weeks. Or, like most people who visit, months.
9. Learn to surf
Puerto Viejo , Cahuita , Manuel Antonio , Jaco, Santa Teresa, or Tamarindo all offer plenty of waves and lots of places to learn to surf. In fact, most travelers come here to surf because the waves are world renowned. If you have never learned but always wanted to try, this is the best place in the region to learn. Group lessons cost around $60 USD and private lessons are around $80-100 USD, while all-inclusive surf camps (including food, accommodation, lessons, and more) can be up to $2,500 USD. Board rentals are usually around $10 USD per day.
10. Walk through the treetops
The Rainmaker Aerial Walkway, located one hour from Jaco, was the first aerial walkway to be built in Central America. Spanning the canopy of a private rainforest, it’s still considered to be one of the top aerial walkways in the region. At the highest point on the walkway, you’ll find yourself 20 stories above the ground, giving you ample opportunities to spot all kinds of birds and monkeys. A self-guided tour is $23 USD, while guided tours start at $74 USD.
11. Wander a coffee plantation
Costa Rican coffee is famous the world over. On a coffee plantation tour you can learn about the entire bean-to-cup process and see it all up close — all while learning about the lives of the local farmers who grow it. While I personally dislike the taste of coffee, the kind I had in Monteverde tasted like chocolate and was delicious! Prices vary but expect to pay around $40-50 USD for a tour.
12. Take a chocolate-making workshop
Cacao is Costa Rica’s other famous bean (also technically a seed). Once widely exported, Costa Rican chocolate is now mostly made in small batches on local artisan farms. There are many places around the country where you can take chocolate making workshops, where you can see the entire process, sample the goods, and try your hand at grinding raw cacao. Tours generally last 2-3 hours and cost around $30-40 USD.
13. Experience the rainforest by night
A guided night walk offers the chance to spot and learn about some of the countless nocturnal animals that call the forest home, including tarantulas, armadillos, and stick bugs. It’s a cool way to see a different side of the jungle as your guide will point out animals, insects, and plants that you might not have noticed otherwise. You can take night walks at national parks and nature preserves around the country. Tours generally last around 2 hours and cost $25-35 USD.
14. Take a cooking class
One of my favorite ways to learn about a new culture is through its cuisine, and taking a cooking class is one of the best ways to do that. Taking home new recipes is also a great souvenir from your trip! In this 3-hour cooking class in La Fortuna, you’ll learn about typical Costa Rican produce and ingredients, and then prepare a few traditional dishes like picadillos (a spicy stew), tortillas, and guisados (a meat dish).
For more information on specific destinations in the country, check out these guides:
- Arenal Travel Guide
- Manuel Antonio Travel Guide
- Monteverde Travel Guide
- Puerto Viejo Travel Guide
- San Jose Travel guide
- Tamarindo Travel Guide
- Tortuguero Travel Guide
Costa Rica Travel Costs

Hostel Costs – A bed in a hostel dorm with 4-6 beds costs between $15-25 USD per night, while dorms with 8 beds and up can be found for as cheap as $11-14 USD. Private rooms in hostels are usually $35-60 USD.
Free Wi-Fi is standard and some hostels also include free breakfast. The majority of hostels around the country also have self-catering facilities too. Many also have bars/restaurants on site. In the beach areas especially, some hostels even have pools.
Budget hotel costs – Budget hotels begin around $50 USD per night but average closer to $65-70 USD.Breakfast is often included and most have basic amenities like AC and TV. Many budget hotels even have pools, especially in beachside towns.
For Airbnb, private rooms start around $40-60 USD per night. For an entire home or apartment, expect to pay at least $75-125 USD. Prices double when not booked in advance.
For those traveling with a tent, camping is an option all around the country. Most campgrounds usually charge around $10 USD per night for a basic plot without electricity. Avoid wild camping as it is often unsafe and illegal in many areas due to the protection of natural areas.
Food – Costa Rican cuisine is centered around rice and beans, which are usually eaten for every meal. Potatoes, plantain, pork, and beef are also popular. Gallo pinto (rice and bean stir-fry) is the national dish. You’ll find it mixed with eggs for breakfast. Casado is a typical lunch dish, which consists of rice, beans, veggies, fresh salad, and your choice of meat. Generally, the food here is quite mild.
Note: While you can easily pay for tours and entrance fees in USD, in smaller establishments, such as local restaurants, you’ll need colones (CRC). Prices in this section are in CRC to reflect this.
At sodas (cheap local restaurants serving traditional cuisine), expect a filling meal of casado (rice, beans, veggies, and meat) to cost around 3,500-5,000 CRC. You can usually find empanadas and other savory snacks from traditional bakeries for around 2,000 CRC or less.
At a mid-range restaurant or in touristy areas (like right along the beach) expect to pay around around 7,000-8,500 CRC for a fish dish, 6,000-7,000 for a burger or a simple pasta dish, and 9,000-11,000 CRC for a steak dish or large pizza to share. Seafood dishes like lobster start around 12,000-17,000 CRC.
For fast food (think pizza or burgers) or a dish of fried rice at a Chinese takeout place, expect to pay around 4,500-5,000 CRC.
Domestic beer costs around 1,500-2,000 CRC, a glass of wine is 3,000 CRC, a cocktail is 3,500-5,000 CRC, and a latte/cappuccino is around 2,000 CRC. Bottled water is 1,000 CRC. Fruit smoothies, which you can get made either with water or milk, are 2,000-2,500 CRC.
If you plan on cooking for yourself, a week’s worth of groceries costs around 20,000-30,000 CRC depending on the area. This gets you basic staples like rice, beans, veggies, fruit, and some meat or fish.
Backpacking Costa Rica Suggested Budgets
If you’re backpacking Costa Rica, my suggested budget is $50 USD per day. On this budget, you can stay in a hostel, cook most of your meals, have some cheap street food, take public transportation to get around, and enjoy mostly free activities like hiking and the beach.
On a mid-range budget of around $135 USD per day, you can stay in an Airbnb or private hostel room, eat out at local sodas, enjoy a couple of drinks, take the occasional taxi, and do more paid activities like guided tours, surf lessons, and museum visits
On a “luxury” budget of $250 USD or more per day, you can stay in a hotel, eat out anywhere you want, rent a car to get around, drink as much as you’d like, and do as many excursions as you want, including diving and canopy tours. This is just the ground floor for luxury though. The sky is the limit!
You can use the chart below to get some idea of how much you need to budget daily, depending on your travel style. Keep in mind these are daily averages — some days you’ll spend more, some days you’ll spend less (you might spend less every day). We just want to give you a general idea of how to make your budget. Prices are in USD.
Costa Rica Travel Guide: Money Saving Tips
Costa Rica is one of the most expensive countries in Central America. Between food costs, accommodation, and activities, there’s a lot of ways to spend money. You can get by on a budget compared to other places in the world but it’s still an expensive place to visit. Fortunately, there are plenty of ways to save money while you’re here:
- Travel off-season – Late April to November is considered the rainy season and prices tend to be less expensive and the region is less crowded. If you’re on a budget, visit during this time.
- Avoid tour activities – There are a lot of great (but expensive) group activities and tours in the country. Skip them and do free activities like hiking, swimming, and relaxing at the beach instead.
- Eat at the sodas – “Sodas” are small family-run restaurants that specialize in inexpensive yet filling traditional meals, usually costing around 3,500-5,000 CRC. These hole-in-the-wall restaurants offer the best value in the country.
- Go camping – Some hostels let you camp on their property if you have a tent. If not, there are plenty of campgrounds around the country where you can pitch a tent. Usually, this costs around $10 USD per night.
- Visit the Caribbean side – Visiting the cheaper Caribbean side lets you see the beautiful country without the high prices of the popular Pacific destinations.
- Avoid the tourist shuttles – While local buses are a lot slower than tourist shuttles, they are also a fraction of the price (i.e the local bus from San Jose to Monteverde is $6 USD while a shuttle is $60 USD). If you aren’t rushed for time, take the local buses.
- Pack a water bottle – While the tap water is drinkable in most of the country, there are some remote and beach destinations where it’s recommended to drink bottled water. A reusable water bottle with a filter can help you save money (and thousands of plastic bottles) by purifying the tap water for you. My preferred bottle is LifeStraw .
Where to Stay in Costa Rica
Costa Rica has lots of fun, social, and affordable hostels. Here are some of my favorite places to stay in Costa Rica:
- Arenal Backpackers Resort (Arenal)
- Selina Puerto Viejo (Puerto Viejo)
- Stray Cat Hostel (San Jose)
- Costa Rica Backpackers (San Jose)
- Pura Natura Lodge Manuel Antonio (Manuel Antonio)
- Sloth Backpackers (Monteverde)
- Pura Vida Hostel (Tamarindo)
- Aracari Garden Hostel (Tortuguero)
How to Get Around Costa Rica

Bus – The cheapest and easiest way to get around Costa Rica is by bus. Short bus trips (under 3 hours) are usually around $2-10 USD while longer trips cost $10-20 USD. The Costa Rica tourism board has a comprehensive schedule and guide to help you plan your trip.
Minibus – Private minibuses or shuttles provide an easy way to get around the country, or to and from the airport. They are all over the place and are often quicker and more direct than the public buses (but also more expensive, starting at $50-60 USD). Ask your hotel/hostel staff for the local options as they vary around the country.
Flying – Since the country is so small, air travel within Costa Rica isn’t budget-friendly or efficient. I would skip this method of travel. It won’t save you time or money.
Car Rental – Car rentals are surprisingly affordable in Costa Rica. You can rent a car for as little as $30-45 USD per day. However, the roads here are not always great and drivers can be aggressive. Make sure you have insurance if you do rent a vehicle. Most rental companies require drivers to be 25 though some will rent to drivers who are 21. For the best car rental prices in Costa Rica, use Vamos (as a Nomadic Matt reader, you’ll get 5% off by using our link).
Hitchhiking – Hitchhiking isn’t common for long-distance rides, however, it’s possible in beach destinations or in remote places with less public transport. HitchWiki is the best website for additional hitchhiking tips and info.
When to Go to Costa Rica
Overall, temperatures and weather vary per region, but most people go to Costa Rica during the dry season, which takes place from December to April. Although it’s peak season and tourism is at its highest, there’s almost non-stop sunshine, ideal for enjoying the country’s beaches and rainforests. If visiting during this time, make all your reservations in advance since things fill up fast.
The rainy season is from May to November. This is when it’s cheapest to visit Costa Rica. It doesn’t rain all the time though and temperatures are still warm. The rain tends to lighten during June and July, making the country’s rainforests burst with life.
If you’re around the Caribbean coast and the Northern Plains, you can expect year-round humidity and temperatures somewhere in the 20s-30s°C (70s-80s°F). It’s not so humid in the North Pacific, but temperatures can get even hotter in this area during the dry season.
How to Stay Safe in Costa Rica
Costa Rica is one of the safest countries for traveling and backpacking in Central America . Most popular tourist towns are small and with little threat of violence. Solo female travelers should generally feel safe here, however, the standard precautions apply (never leave your drink unattended at the bar, never walk home alone intoxicated, etc.).
That said, it’s always good to play it safe. Petty theft (including bag snatching) is one of the most common types of crime here. Don’t flash your valuables and make sure they are always secure while you’re out. When going out for the night, only bring the money you need. Leave the rest of your cash and cards locked up in your accommodation.
There are some common scams here, including a taxi scam where the driver tells you the meter is broken once the drive has begun. For that reason, you should stick to metered taxis or negotiate a price in advance. You can read about common travel scams to avoid here .
If you rent a car, don’t leave any valuables in it overnight as break-ins do occur. Be mindful of missing road signs and potholes, as well as aggressive drivers.
Costa Rica’s natural wonders can be unpredictable. If you’re hiking in the jungle, always check the weather in advance and never stray from the trail. Doing so disturbs the fragile ecosystems, and opens yourself up to the possibility of encountering poisonous snakes and spiders. When in doubt, hire a guide. If you’re not a strong swimmer, stay out of the water. The currents and waves off the coast can be very strong, so heed signs and local advice on whether it’s safe to swim in a certain area or not.
If you experience an emergency, dial 911 for assistance.
The most important piece of advice I can offer is to purchase good travel insurance. Travel insurance will protect you against unexpected costs due to illness, injury, theft, and cancellations. It’s comprehensive protection in case anything goes wrong. I never go on a trip without it as I’ve had to use it many times in the past.
Costa Rica Travel Guide: The Best Booking Resources
These are my favorite companies to use when I travel. They consistently have the best deals, offer world-class customer service and great value, and overall, are better than their competitors. They are the companies I use the most and are always the starting point in my search for travel deals.
- Skyscanner – Skyscanner is my favorite flight search engine. They search small websites and budget airlines that larger search sites tend to miss. They are hands down the number one place to start.
- Hostelworld – This is the best hostel accommodation site out there with the largest inventory, best search interface, and widest availability.
- Booking.com – The best all around booking site that constantly provides the cheapest and lowest rates. They have the widest selection of budget accommodation. In all my tests, they’ve always had the cheapest rates out of all the booking websites.
- Get Your Guide – Get Your Guide is a huge online marketplace for tours and excursions. They have tons of tour options available in cities all around the world, including everything from cooking classes, walking tours, street art lessons, and more!
- SafetyWing – Safety Wing offers convenient and affordable plans tailored to digital nomads and long-term travelers. They have cheap monthly plans, great customer service, and an easy-to-use claims process that makes it perfect for those on the road.
- LifeStraw – My go-to company for reusable water bottles with built-in filters so you can ensure your drinking water is always clean and safe.
- Unbound Merino – They make lightweight, durable, easy-to-clean travel clothing.
- Top Travel Credit Cards – Points are the best way to cut down travel expenses. Here’s my favorite point earning credit cards so you can get free travel!
Costa Rica Travel Guide: Related Articles
Want more info? Check out all the articles I’ve written on backpacking/traveling Costa Rica and continue planning your trip:

The Ultimate Guide to Renting a Car in Costa Rica

Do You Need Travel Insurance for Costa Rica?

The Best Tour Companies in Costa Rica

The 8 Best Hostels in San José, Costa Rica

Is Costa Rica Safe to Visit?

Is Central America Safe to Visit?
Get your free travel starter kit.
Enter your email and get planning cheatsheets including a step by step checklist, packing list, tips cheat sheet, and more so you can plan like a pro!

- Where To Stay
- Transportation
- Booking Resources
- Related Blogs
16 epic hikes in Canada

Apr 15, 2024 • 12 min read

In Canada’s vast wilderness (and it doesn’t get more wild than Tombstone Territorial Park in Yukon), hikes you’ll never forget await © edb3_16 / Getty Images
It’s difficult to do justice to Canada ’s awe-inspiring landscapes.
Words can never fully capture what you see with your eyes: towering snow-capped mountains, azure lakes and lush evergreen forests filled with fascinating wildlife. And perhaps the best way to take it all in? On your own two feet.
Covering nearly 10 million sq km (3.8 million sq miles), Canada was built for adventurous hikers. There are so many gorgeous hiking trails and national parks to explore, you’ll always find a reason to come back, no matter how many hiking holidays you take here.
As you plan your first (or 17th) trip to Canada’s great outdoors, here’s our list of the best hikes in the country, from coast to coast.

1. East Coast Trail, Newfoundland
Best multi-day hike 336km (209 miles) round trip; 6 days, easy to challenging
This epic 336km (209-mile) trail, one of the longest in Canada, showcases another bit of the country’s natural beauty with each national historic site, coastal village, forest, cliff and bridge you pass.
The route is divided into 25 wilderness trails – all linked and arranged in a linear fashion. Most people choose a specific trail or two based on their personal comfort levels. The stages range from around 4km (2.5 miles) to 20km (12.4 miles).
It takes around six days of hiking to complete the trail; along the way, you can choose to camp at designated campgrounds or stay at local B&Bs and inns. The East Coast Trail website is an excellent resource to help you choose which paths are best suited for your level of ability.
2. Lower Little Harbour Trail, Newfoundland
Best hike for eerie vibes 4.8km (3 miles); 1½ hours, moderate to challenging
This 4.8km (3-mile) loop takes in just about everything that makes Newfoundland special. Think historic root cellars constructed by early settlers, a natural sea arch, rocky cliffs, scenic stretches of coast, green forests and the remains of a community since abandoned. The empty houses you’ll wander by on parts of this trail give an icy, fingers-on-the-neck vibe.

3. Skyline Trail, Nova Scotia
Best hike for water views 8.7km (5.4 miles) loop; 2–3 hours, easy
A highlight of Cape Breton Highlands National Park, the Skyline Trail is as dramatic as its dramatic-sounding name suggests. Following a boardwalk that stretches the entire length of the route to protect the area's delicate ecosystems, the hike can be completed as a 7km (4.3-mile) out-and-back hike, or an 8.7km (5.4-mile) loop.
If you can ignore the breathtaking views (this is an especially beautiful place to be at sunset), the wildlife spotting opportunities here are major. We’re talking moose, bald eagles, bears and numerous boreal bird species, plus whales offshore.

4. Cape Split, Nova Scotia
Best coastal hike 13km (8.1 miles) round trip; 5 hours, moderate
Located on a finger of land jutting into the Bay of Fundy, this 13km (8.1-mile) round-trip trail from Scots Bay takes around five hours to complete. It’s one of the most popular hikes in Nova Scotia , with little elevation change as you pass through a tunnel of forest cover.
The hike ends in a dramatic, windy clearing on cliffs high above the Bay of Fundy, with seabirds nesting below. Wander down to the rocky outcrop at the vertiginous end of the trail to see waves known as tidal rips that flow through a cluster of rock pinnacles. Take time before or after the hike to look for pretty agate stones along the beach at Scots Bay.
5. Fundy Footpath, New Brunswick
Best hike for experienced wilderness trekkers 49.3km (30.6 miles) one way; 4–5 days, challenging
A bucket-list itinerary for seasoned hikers, the Fundy Footpath is an incredibly challenging wilderness trail in Fundy National Park in New Brunswick . The trail covers 49.3km (30.6 miles) of rugged terrain, with steep changes in elevation. It’s backcountry hiking at its best, and though parts of the trail lie within the national park, the route is infrequently maintained.
It can take up to five days to complete the trek, and the route should only be attempted in the warmer months (the risk of hypothermia sets in from mid-October). Refer to the Fundy Hiking Trail Association planning guide if you plan to tackle this once-in-a-lifetime trail, as the route can be incredibly hazardous – and thrilling.
6. Parc d’Environnement Naturel de Sutton, Québec
Best summertime hike 80km (49.7 miles); 2 hours up to several days, easy
With two glorious lakes and various mountain ponds for swimming, Sutton Park is prime hiking territory in the summer. In this scenic conservation area in Québec , 80km (49.7 miles) of trails have been carved through the thickly forested mountains. Trails cover everything from 2-hour loops to multi-day excursions, and backpackers can unfold their tents at three primitive campgrounds.
On holiday weekends and during warm weather, buy your park tickets ahead of time on the Sutton Park website to guarantee entry. This park is a pretty reliable playground year-round, but sometimes icy winter conditions close the trails; check the park website ahead of time for closures.

7. Cup & Saucer Trail, Ontario
Best hike for families 9km (5.6 miles) round trip; 15 minutes to 4 hours, easy to challenging
Amazing views, interactive adventure experiences and a wide range of possible hike durations (from 15 mins to 4 hours) make this Ontario trail popular with families.
From its origin near the junction of Hwy 540 and Bidwell Rd, around 25km (15.5 miles) southwest of Little Current, this beautiful trail on the Niagara Escarpment leads to the highest point on Manitoulin Island.
At 351m (1152ft), hikers are treated to breathtaking views of the crinkled shoreline along the North Channel. Take a shortcut on the way back along the 500m (1640ft) Adventure Trail, which involves descending on rickety wooden ladders and clambering up, over, and down massive boulders.

8. Bruce Trail, Ontario
Best hike for fall foliage 900km (559 miles) one way; hike durations vary, moderate
The Bruce Trail winds along the top of the Niagara Escarpment for a staggering 900km (559 miles), from Queenston Heights Park on the Niagara Peninsula to Tobermory Harbour on the Bruce Peninsula . The wide, well-maintained path is excellent for hiking during summer, while those armed with cross-country skis put the trail through its paces in winter. Most people tackle the Bruce Trail in short stages.
The best time to hike here is in the fall: Ontario has some of the most vivid fall foliage in the world, and the thick canopy of reds, oranges and yellows is a photographer’s dream. Ontario weekenders love hiking these trails, so be sure to book your parking beforehand. Weekdays are less busy, and you can usually just show up. The Bruce Trail Conservancy has a comprehensive online guide covering how to get passes for the various trailheads.
9. Grey Owl Trail, Saskatchewan
Best hike for birding 20km (12.4 miles) one way; 10–12 hours, challenging
The Grey Owl Trail offers a serene hike through terrain dotted with wildflowers and patches of marshland, with great birding opportunities and the chance to visit a historic Canadian site in Prince Albert National Park in Saskatchewan .
Most of the trail is under a dense canopy of forest; at the end of the trail, just before you turn back, you can visit Grey Owl’s cabin. This simple structure was formerly the home of the writer and conservation activist Archibald Belaney (aka “Grey Owl”), his partner Anahareo – a member of the Kanienʼkehá:kaor (Mohawk) tribe – and their two pet beavers.

10. Lake Agnes & the Beehives, Alberta
Most iconic Canadian hike Lake Agnes round trip: 7km (4.3 miles), Big Beehive round trip: 10km (6.2 miles); 2–4½ hours, moderate
Two compelling attractions make this the most popular hike at Lake Louise in Banff National Park , Alberta . First up is the historic Lake Agnes Teahouse , where hikers have been refueling since 1901. At the 3.4km (2.1-mile) mark, it’s a supremely atmospheric spot to break for tea, sandwiches and baked goods.
The second wow factor is the phenomenal view over the lake from atop 2270m (7447ft) Big Beehive, the trail's ultimate destination.
Set off early to beat the crowds, and be sure to check out the Canada Parks page beforehand to make sure the roads to the trailhead are open (closures are common in the snowy months).

11. Johnston Canyon & the Inkpots, Alberta
Most popular Canadian hike 5km (3.2 miles) round trip; 3–4 hours, easy to slightly challenging
After the Lake Louise shoreline, no place in Banff National Park sees as much foot traffic as the wide, paved Johnston Canyon Trail. Such popularity makes total sense once you enter the canyon, where dramatic cliff faces compete for your attention with two gorgeous waterfalls (the Lower and Upper Falls).
The trail to the Lower Falls is around 1.1km (0.6 miles) in length and the walk takes about half an hour, while the hike to the Upper Falls is a little more challenging at 2.6km (1.6 miles), with a slight increase in elevation. More-intrepid hikers can climb to the Inkpots, two colorful natural pools in a high mountain valley.
This area is prone to extreme weather, so be sure to check the Canada Parks Banff website for up-to-date information on any avalanches or flooding.

12. Garibaldi Provincial Park, British Columbia
Best overnight hike 25km (15.5 miles) one way; 2 days, moderate
With five different trailheads to choose from and 90km (56 miles) of trails at varying degrees of intensity, Garibaldi Provincial Park is a hiker’s fantasy. Named after its towering namesake mountain – 2678m (8786ft) Mt Garibaldi – this area was established as a provincial park in 1927. Accessible via a long day trip from Vancouver and nestled in the nestled in the Coast Mountains of British Columbia , Garibaldi offers plenty of lakes and scenic vistas to keep you busy.
The longest trail is the hike from the Cheakamus Lake parking lot to the Garibaldi Lake parking lot via Helm Creek. The route covers 25km (15.5 miles) and is best attempted over two days, breaking the trip at the Helm Creek campground. A less ambitious trail of 3km (1.9 miles) links the Cheakamus Lake Parking lot to Cheakamus Lake.
Always check the British Columbia Parks page for trail closures on the morning of your hike, since volatile weather conditions can cause temporary closure of trails.
13. Wild Pacific Trail, British Columbia
Most informative hike 10km (6.2 miles) round trip; 3–4 hours, easy to moderate
Where the temperate rainforest comes down to kiss the ocean, this magnificent 10km (6.2-mile) trail is equally spectacular in sunshine and rain. The route starts with a 2.6km (1.6-mile) loop that winds past a lighthouse built in 1915 at Amphitrite Point, then progresses northwest as far as the Ancient Cedars loop and the Rocky Bluffs beyond.
The trail is well signposted and fastidiously mapped. To complete the whole trail, you’ll need to follow a couple of interconnecting paths along quiet roads, passing several attractive beaches on the way.
Various information boards provide background on the area’s history and ecological profile. The path is dotted with benches, lookouts and so-called “artist’s loops” with viewing platforms for those taking time to record the scenery.

14. Kinney Lake & Berg Lake Trails, British Columbia
Best scenic hike 4.5km (2.8 miles) one way; 2½ hours, easy
Situated in stunning Mount Robson Provincial Park , the trailhead for this easy round-trip hike to gorgeous Kinney Lake lies 3km (1.9 miles) north of the Mt Robson Visitor Centre .
From Kinney Lake, the longer, harder Kinney Lake–to–Berg Lake trail covers 23km (14 miles), with seven camping areas along the way. Severely damaged by extreme weather in 2021, the backcountry route has reopened – though reservations are now required, and may be made up to four months in advance .
All Berg Lake hikers must check into the Mt Robson Visitor Centre before heading out, so check with the park authorities for the latest information.
15. Canol Heritage Trail, Northwest Territories
Best multi-week hike 358km (222 miles) one way; 3–4 weeks, challenging
The wild, challenging Canol Heritage Trail runs southwest through the Northwest Territories for 358km (222 miles), traversing peaks, canyons and barrens until it reaches the Yukon border. Wildlife is abundant, there are numerous deep river crossings, and old Quonset huts provide the only shelter.
The trail was built at enormous monetary and human cost during WWII to transport oil to Whitehorse , the capital of the Yukon Territory (“Canol” is shorthand for “Canadian Oil”). This huge project was abandoned in 1945, with the war nearly over, as cheaper sources of oil were found.
Hiking the whole length of the trail takes three to four weeks; most people arrange food drops along the route. Contact Northwest Territories Tourism for information before you head out, as this is not a hike to be undertaken lightly.

16. Grizzly Lake Trail, Yukon
Best hike for major adventure 11km (6.8 miles) round trip; 6 hours, challenging
The Grizzly Lake Trail is located in Tombstone Territorial Park in Yukon , accessible via the Dempster Hwy (a dirt road). The views of the Grizzly Valley along the route will linger long in your memory.
This trail can be tackled as a day trip, but if you plan to stay longer and hike other popular trails at Tombstone – for example, adding another 37km (23 miles) on the Divide Lake and Talus Lake trail – you’ll need to stay overnight.
Campers will need a bear-proof food canister – even though the park’s squirrels will be your most persistent pests. Their favorite foods are sweaty backpack straps and the tops of hiking poles, so make sure to pack these away when you camp.
Book hiking passes well in advance, as they sometimes sell out for the entire year by January. This is a challenging hike, so all trekkers need to complete a mandatory backcountry hiking orientation for safety reasons. This applies even if you’re a seasoned hiker.
Keep planning your trip to Canada:
Curious about Canada? Here are a few things a local wants you to know Canada is big – here’s how to get around the country Here’s your four-season guide to the best times to visit Canada
This article was first published Aug 11, 2020 and updated Apr 15, 2024.
Explore related stories

Oct 10, 2023 • 7 min read
Lush with hardwood forests that turn a rainbow of colors in spring and fall, Vermont is made for hikers.

Dec 29, 2022 • 7 min read

Sep 6, 2022 • 7 min read

Aug 9, 2021 • 6 min read

Aug 9, 2021 • 4 min read

Jan 26, 2021 • 11 min read

Nov 2, 2020 • 5 min read

Sep 30, 2020 • 4 min read

Nov 23, 2019 • 2 min read

May 29, 2024 • 9 min read
IMAGES
VIDEO
COMMENTS
A good micro-fibre travel towers is essential travel gear on any ultimate backpacking gear list. The Matador micro-fibre towel range are made by travellers for travellers. They are super light, and most importantly dry very quickly and are perfect for all types of backpacking trips. Check Best Price.
BACKPACKING FOOD - Good food is really important for any backpacking trip, so it's well worth the effort to put together a simple meal plan before your trip. Keeping food weight down is a critical backpacking skill that usually takes experience to master. A good place to start is our Guide to Lightweight Backpacking Food.Most seasoned backpackers opt for lightweight, calorically-dense ...
This article is one of Backpacking Light's curated gateway pages (a trailhead, so to speak). Think of it as a starting point. Here, you'll find information and resources about how to plan a backpacking trip. We've got lists of our favorite software, gear guides for navigation and trip planning, video and podcast embeds, and other trip ...
Backpack. Typically a 50- to 80-liter backpack. Rain cover or waterproof pack liner. Waterproof compression sacks or storage sacks (optional) For three-season backpacking trips that take a weekend or longer to complete, you should carry a pack between 50 and 80 liters in size.
Overnight Backpacks. For multi-day hiking & backpacking, where you'll need to carry everything in on your back, I recommend choosing a 40-65 liter backpack that will hold your tent, sleeping bag, food, water, and other backpacking essentials. Gregory Mountain Zulu 55 - This is the backpack I take with me on most 2-3 day trips.
The sweet spot lies somewhere in the middle: a 40-70L backpack is fine for a long-term trip. The trick is to avoid stuffing it too full. First-time travelers are often tempted to take everything but the kitchen sink (just in case!), but limiting your backpack space is the best way to avoid this common pitfall.
Trip Planning. Photo: Peter Cade/Stone via Getty Images. For your first overnight, choose an easy route with low mileage and manageable elevation gain. Remember, you'll hike slower with a full pack than you might on a regular dayhike. Apps like Gaia GPS are useful for finding route suggestions, trail info, and maps.
5) Make your transportation plan. The next step in how to plan a backpacking trip is to make plans for getting to and from the trailhead. If your trail is a loop, you can typically leave your car at the trailhead parking area (check to see if there is an overnight fee or parking permit required). If you're doing a one-way hike, you have a few ...
Backpack. For an overnight trip, you should be able to get by with a backpack that holds 30-50 L. If you're backpacking for an extended trip (3-5 days), then you will need a larger pack (50-70 L ...
This gear list is most applicable for 3-day backpacking trips and up to 5-day backpacking trips (and obviously this list will work for 2-day trips as well). This list isn't fully optimized for really long thru-hiking trips though, since that takes a LOT more planning and coordinating, and your gear strategy will be a bit different. However ...
Also, this packing list is for backpacking travel…not for walking the Appalachian Trail. The old mantra of packing light is a cliché, and you have heard it so many times before, but really — DO NOT TAKE TOO MUCH! Packing too heavy will literally dictate and shape your entire trip experience, and not in a good way.
Backpacking Trip Guides We provide in-depth backpacking guides to some of the most beautiful places on our planet. Each guide includes all the pre-trip details you'll need to plan an awesome backcountry adventure. For more popular CleverHiker resources, we recommend checking out the following: United States & Canada Thru-Hikes Pacific Crest ...
This is a comprehensive packing checklist and packing advice for budget backpacking and light travel for adventurers (travel or hiking) — including backpacking essentials, electronics & accessories, adventure gear, toiletries, clothing, useful things and admin. Carrying all backpacking essentials on a wilderness trail in Canada.
The question of how to plan a backpacking trip is one you should never be afraid to ask! Planning your first backpacking trip can be very overwhelming. From deciding on how much to take with you on your hike, to deciding which route to take, there's a lot to think about. Before you get too overwhelmed, just remember that even the most ...
The West Coast Trail, Canada. One of the more difficult trails in Canada, the West Coast Trail will take you through 75km of rainforest, beaches, mud, rivers, and up more than 100 ladders. Expect to take five to seven days to finish this trek around the southwestern edge of Vancouver Island. The work is worth the views - and bragging rights!
The Hungry Hiker Backpacking Trip Planning Masterclass will cover everything (in detail) from how to prepare, research and plan for your trip to the backpacking gear you'll need. This masterclass also includes navigation and trip planning video tutorials and digital and printable trip planning resources along with tips and tricks for first ...
Big Meadow and Granite Falls, Colorado: This hike is great for viewing elk, moose and deer. Bridger Pass Road North, Wyoming: Take an optional side trip to the Teton Reservoir off this six-mile trek. Lemhi Pass toward Goldstone Pass, Montana: Follow the footsteps of Lewis and Clark on this variable-length trek. 4.
Backpacking Half Dome Quick Facts: Location: Yosemite National Park, California Type of Trail: Out and back Total Mileage: ~ 14.5 miles via the Mist Trail, ~16.5 miles round trip via the John Muir Trail, or you can choose to go up the Mist Trail (7.25 miles) and down the John Muir Trail (8.25 miles) for a round trip of around 15.5 miles.Its easier on your knees to go down the John Muir Trail ...
2. Shining Rock Wilderness, North Carolina. Mileage: 22 miles roundtrip | Length: 4 days | Elevation Gain/Loss: 2,300 feet with backpacking packs (plus 1,700 ft with a day pack) The Shining Rock Wilderness in the Blue Ridge Mountains of North Carolina is one of the most spectacular East Coast backpacking destinations.
This way, you can enjoy your backpacking trip without hassle or burden. 2. Backpacking Extras: What to Take in Your Backpack When Traveling. Besides the essential items that you need to pack for your backpacking trip, some extra items can make your trip more enjoyable, comfortable, or fun. These items are not necessary, but they can enhance ...
Four Pass Loop, Colorado. This 25-mile loop through Maroon Bells-Snowmass Wilderness gets its name from the four mountain passes above 12,000 feet along the trail: Buckskin, Trail Rider, Frigid Air, and West Maroon. Hike it clockwise and the views of lupines, Columbines, evergreen forests, and alpine lakes will get better and better with every ...
Hiking Daypack Sizes (1/2 day to full-day hikes) Most daypacks range from 15 liters to 35 liters on the high-end. While a smaller-sized 15-25 liter backpack is usually sufficient for 1/2 day hikes, you'll want a larger pack in the 25-30 liter range for all-day hikes or winter to carry extra water, food, clothing, and emergency gear.
Backpacking Costa Rica Suggested Budgets. If you're backpacking Costa Rica, my suggested budget is $50 USD per day. On this budget, you can stay in a hostel, cook most of your meals, have some cheap street food, take public transportation to get around, and enjoy mostly free activities like hiking and the beach.
Refer to the Fundy Hiking Trail Association planning guide if you plan to tackle this once-in-a-lifetime trail, as the route can be incredibly hazardous - and thrilling. 6. Parc d'Environnement Naturel de Sutton, Québec. Best summertime hike. 80km (49.7 miles); 2 hours up to several days, easy.
ROUTE 2: The Broadmoor Manitou and Pikes Peak Cog Railway. Start & End Point: Manitou Springs, CO. This famous train is the world's highest cog railway—and one of the most coveted bucket-list ...
Best Large Carry-On Backpack: Matador GlobeRider45 Travel Backpack. Best Convertible Carry-On Backpack: Lambert Sadie 2-In-1 Backpack. Best Expandable Carry-On Backpack: Aer Travel Pack 3. Best ...