Backpacking Essentials for Your Overnight Hike
Share this:.
- Click to share on Facebook (Opens in new window)
- Click to email a link to a friend (Opens in new window)

What do you need for a backpacking trip? This checklist of backpacking essentials will help you remember every important item.
The essential gear items that you bring on any backpacking trip will almost always be the same. Beginner backpackers and seasoned vets will agree that your exact backpacking essentials kit will change over time, and most of us are still refining our gear list each time we go. Yet our essentials seem to always make the list despite our unique needs and climates.
No matter your experience level, using a list can help you remember all the vital equipment. Along with the packing list we provided, we’ll break down how to choose appropriate gear for your overnight camping adventure.
Download Printable Checklist

This backpacking essentials checklist is meant to be a general guideline to give you a baseline of necessary gear. Item types and amounts will vary depending on the backpacker.
This isn’t an ultralight backpacking list, but it ensures you have all the items you need for an overnight trip in the backcountry.

Backpacking Essentials: Camping Gear
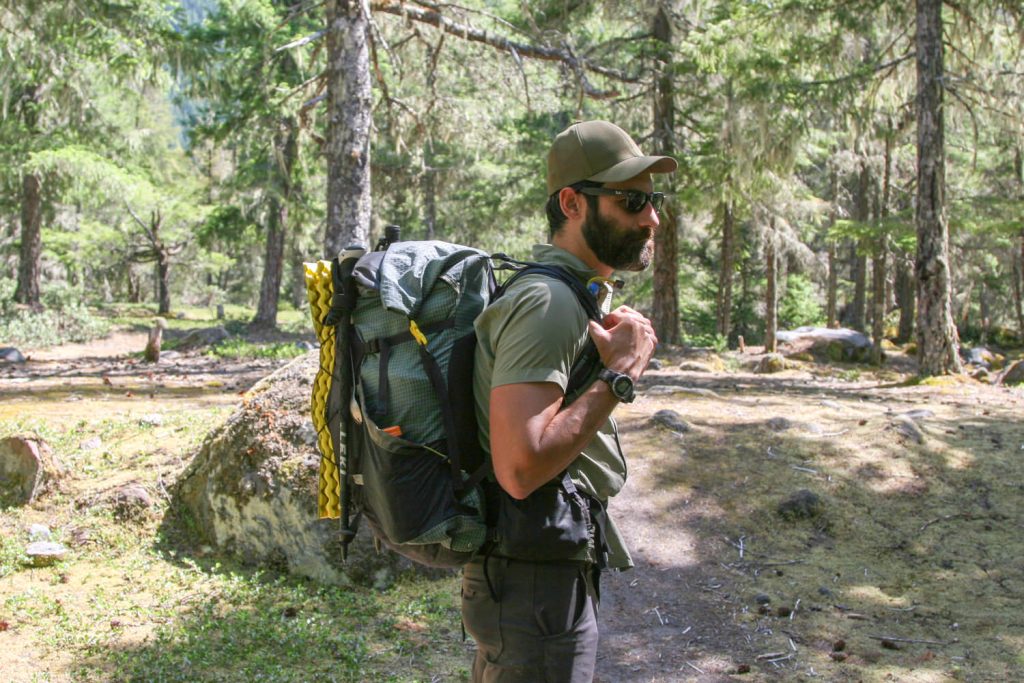
For an overnight trip, you should be able to get by with a backpack that holds 30-50 L. If you’re backpacking for an extended trip (3-5 days), then you will need a larger pack (50-70 L).
Other than the length of your trip, backpack size is determined by how bulky your gear is. Remember, all the additional layers for a winter trip will add more bulk to your bag than a standard summer outing.

Even if there’s no rain in the forecast, plan to bring something to cover your pack. A simple rain cover is fine, or you can bring a large trash bag.
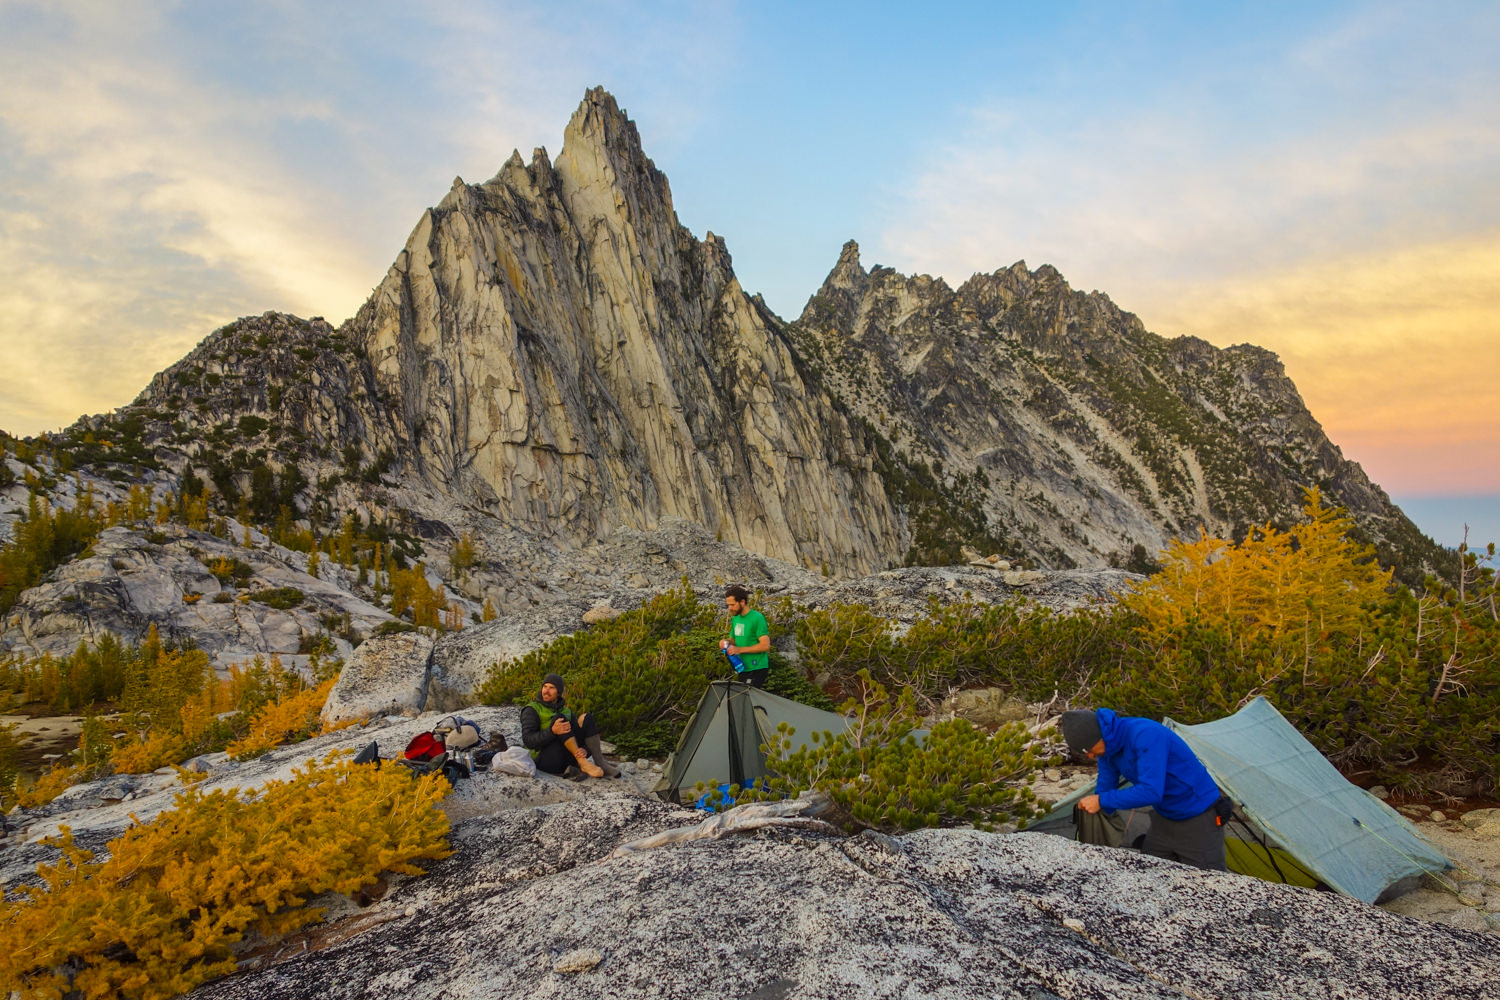
Sleeping Setup
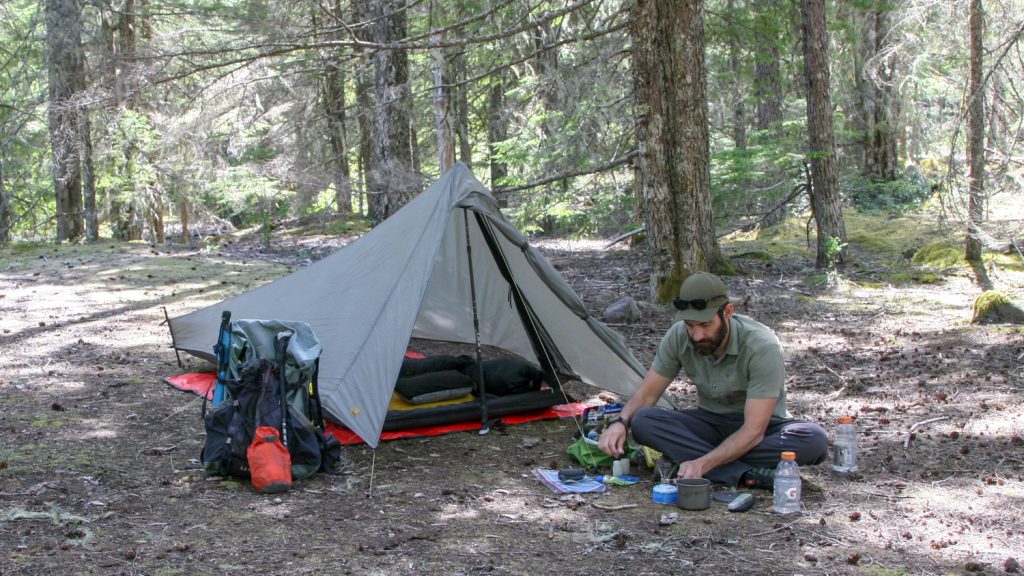
The first part of your sleeping setup to decide on is if you want to use a backpacking tent , tarp, bivy sack, or hammock. All of these sleeping shelters have their pros and cons and are very personal choices.
If you’re just busting out your tent for the season, make sure it’s in tip-top shape before your trip with our waterproofing, patching, and spring cleaning guide.

The sleeping bag you need depends on the climate and weather conditions. Be well-prepared for the night ahead by determining the appropriate bag temperature/comfort rating. Seek out a bag rated at least 10 degrees colder than the anticipated low temperature.
So if you expect the low for the night to be 30 degrees, pack a 20-degree bag or lower. Mummy bags are recommended for backpacking because they provide more warmth and are easier to pack down.
The next consideration should be if your bag is insulated with down or synthetic materials. Both have pros and cons, but the main difference is that down tends to be lighter and easy to pack down small with a higher price tag. Synthetics are bulkier, but they still insulate when wet and dry much faster.
For most skilled backpackers, keeping a bag dry isn’t too tough, so the light weight, compressibility, and long life of down bags makes them a top choice.

The Best Backpacking Sleeping Bags of 2024
A sleeping bag is one of your most important pieces of camping gear. We've found the best backpacking sleeping bags for every use and budget. Read more…
The final piece of the sleeping setup is a sleeping pad. Don’t forgo packing this item. While it’s tempting to think of a sleeping pad as only a comfort item, it provides much-needed insulation and warmth while you sleep.
No matter the shelter you’ve chosen, a sleeping pad is a must. Classic Therm-a-Rest Z Lite pads are an ideal and affordable sleeping pad choice, as you don’t have to worry about air leaks. Check out our list of the best sleeping pads on the market.
We didn’t include a pillow on the list. You may choose to bring an inflatable pillow for your sleeping arrangement. But for most backpackers, a great tip is to stuff some clothing into a stuff sack for a sufficient pillow for the trail.
Notice that we recommend a headlamp, not a flashlight. If a flashlight is all you have at the moment, it’s certainly usable. And some experienced campers love the power and versatility of a small flashlight.
However, for most people, a headlamp makes your life much easier during backpacking trips. It frees up your hands if you have to set up or cook in the dark. Plus, it makes hiking in early mornings or late at night much safer.
Even if you’re only out for one night, bring fresh batteries along. You can opt to change the batteries right before you go, but having a backup set should become a habit.
If you’re shopping for a new headlamp, pay careful attention to the battery life in the product specs. While extra lumens can be nice, you don’t need a ton of light for most backpacking, as you’re moving slowly or working close to your body. But long battery life is very helpful on multiday excursions.
Opt for a headlamp with a rechargeable battery versus disposable batteries for a more versatile headlamp. But keep in mind that you’ll likely need to bring a battery pack for recharges in the field when on longer trips.
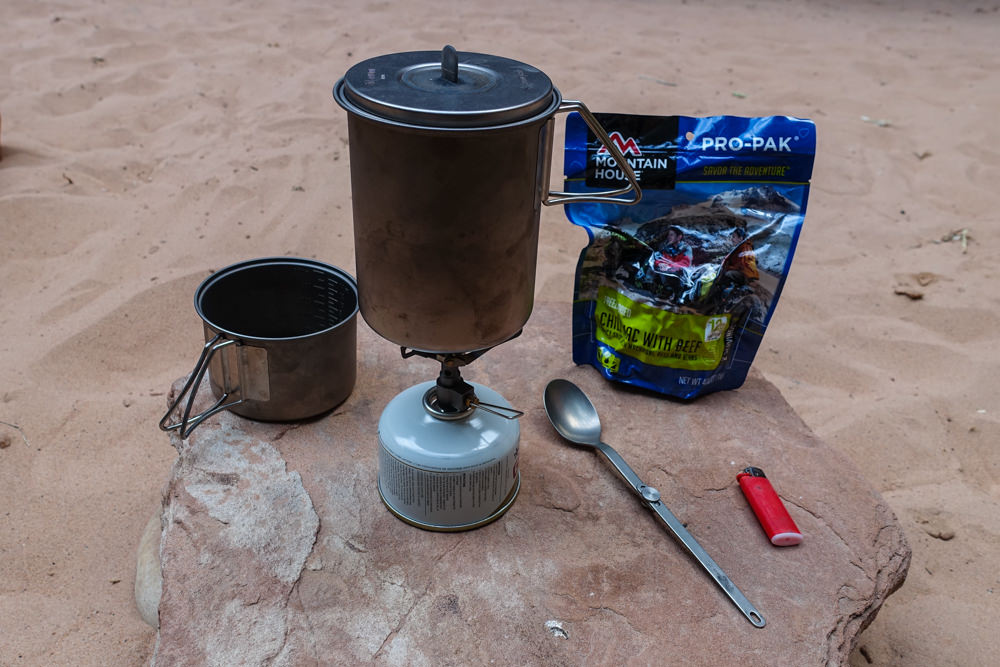
Camp Kitchen

Stove and Fuel
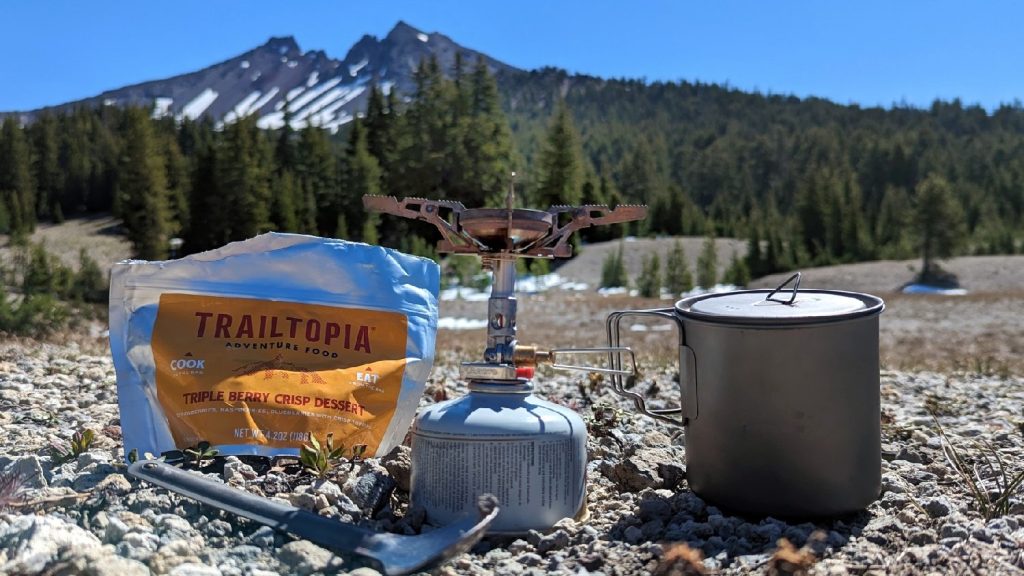
For overnight trips, there are ways to get around packing a stove. Still, part of the delight of a crisp morning outdoors is a hot cup of coffee and a warm breakfast. You can cook these using old-fashioned fire and coals, but there are fire restrictions in many areas.
Having a camp stove and fuel makes cooking after a long day of hiking quick and easy. There are many options of camp stoves, ranging from very simple and small, like the proven MSR Pocket Rocket , to cooking systems like the Jetboil Mini Mo and multifuel liquid stoves that can function well even in bitterly cold weather. Then you have the more minimalistic stoves like a biofuel stove that burns biomass or alcohol stoves for a lightweight heat source.
Check out our article on the best backpacking stoves to learn more.
Cooking Gear
Beyond your stove, you’ll need a cooking pot, mug, and utensils. To keep things minimal, consider using a compact cookset that packs down together. These will usually have one utensil, one cooking pot with a lid, and a mug that all pack back down into the size of the pot.
The Sea to Summit X-Set 21 Cookset and the Stanley Camp Cookset are both excellent examples of this kind of setup.
For silverware, a spork is a standard option. Try to research the materials and read product reviews. There are many plastic spork options available, but metal or titanium utensils will last you much longer.
Minimalism on the trail may be a learned skill, but it will save you pack weight without compromising necessary creature comforts.
Dishwashing
With minimal cookware, dishwashing becomes a breeze. We recommend bringing some biodegradable soap along and a packable microfiber cloth to dry the dishes. Still, with only a few dishes, you should be able to get by without the use of a dishwashing tub.
If you prefer a dishwashing tub, some innovative and packable designs make doing the dishes easy.
For an overnight trip, it may be possible to pack a bladder of water to last for the length of the trip. However, you don’t want that to be your only available option. Having at least one water bottle ready to drink from at all times is advised, and having a water filtering system on hand will give you the security and flexibility you need to have a safe and enjoyable trek.
If you bring a water bladder along with your water bottle, bring at least a 2L bladder, although a 4L bladder is ideal. MSR makes very durable dromedary bags for backpacking.
Looking for a water filter? Check out our list of the best water filters here .
Disclaimer: Your backpacking food shouldn’t gross you out, and you need to bring enough!
There are so many fantastic backpacking food options available. Some are prepackaged, so all you have to do is add boiling water.
For an overnight trip, it’s easy to plan for food. When planning, make sure to think beyond mealtimes. Bring plenty of snacks to fuel you as you hike. Things like trail mix, power bars, and fruit such as oranges and apples are all great options.
As most of our food is packaged, especially for backpacking, be sure to follow Leave No Trace guidelines. If you pack it in, pack it out!
Depending on the area you’re traveling to, you may need to keep your food away from bears. Be sure to do your research and bring either a bear canister or bear bag when necessary.
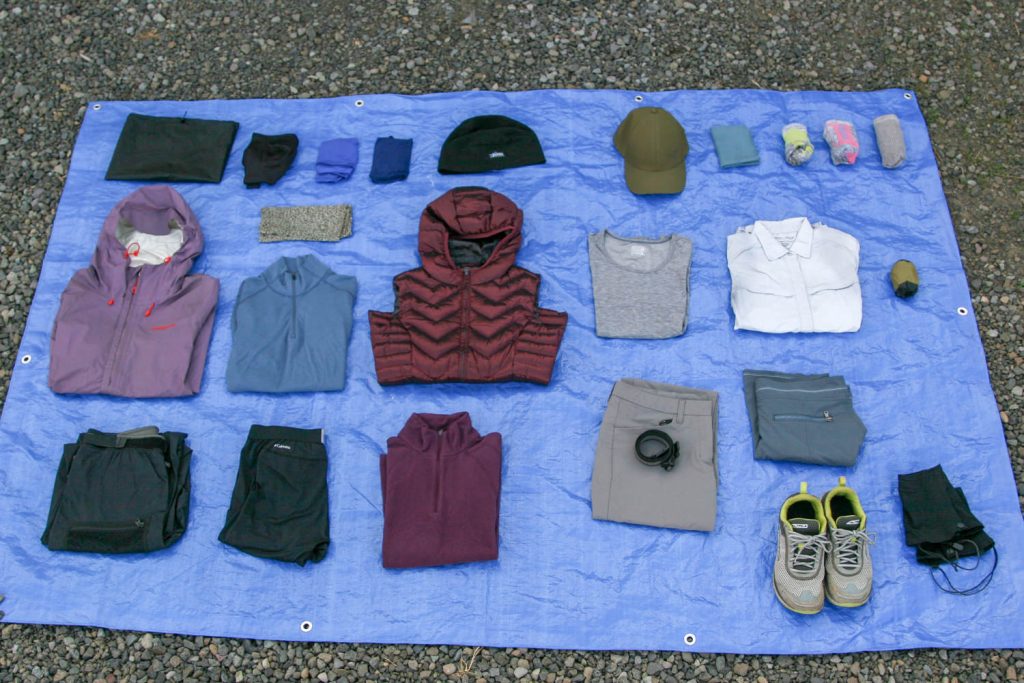
Apparel and Footwear
Three important things to remember about backpacking clothing and shoes are as follows:
- Your clothes should be moisture-wicking materials. Avoid cotton, as it absorbs moisture easily.
- Pack and wear layers of clothing. You can pack clothing according to weather forecasts, but layering is the best way to prepare.
- Make sure your shoes are broken in before your hike. No one likes blisters. Ouch!
When you’re backpacking, you don’t need to change your pants and shirt every day. Backpacking life often means you should expect to get a little dirty (and maybe a little smelly).
So if you’re planning a simple overnight trip, you can expect to wear what you had on the first day. Bring an extra pair of underwear and socks, though. It’s nice to have a fresh pair, and you won’t have much other clothing packed, so no worries about space.
The clothing you should bring depends on the climate and current weather conditions. Even if there is no rain in the forecast, it’s better to be safe and pack at least a light waterproof jacket.
Packing layers of clothing also makes things more comfortable because temperatures vary throughout the day. So having to put on or take off one layer is much easier than having to change a complete outfit.
Your clothing and layering system should also include jackets. The type and number of jackets you bring depend on the climate and weather conditions.
Hiking boots or trail shoes should be a priority when planning a backpacking trip. They protect you from rocks and carry you over varying terrain. You need to trust that they will support you the whole way.

Most importantly, know the climate and terrain. If you’re going to be in a cold, wet environment, consider waterproof shoes or gaiters to protect yourself. If it’s hot and dry, maybe trail running shoes will fit the bill. Each trip and each person has different needs for footwear.
You’ll also want to break in your shoes properly if they’re new. This process can be done through various day hikes or just wearing them throughout daily activities.
Personal Hygiene
There are only a few backpacking essentials on the personal hygiene list, so they’re easy to keep in one place. These should include basics like a toothbrush, toothpaste, hand sanitizer, and any prescription medications.
Other than that, also bring items like a trowel for digging catholes or wag bags to pack out your waste. If you use toilet paper or wipes for sanitation, bring a sealable bag so you can pack them out after you’re done.
For female backpackers, menstrual products are essential as well. It’s a good idea to pack some even if you aren’t expecting your cycle to start. If you don’t want to carry around disposable menstrual items, you can use a menstrual cup. If you have never used one before, test it out before your trip.
Emergency Kit and Personal Items
Emergency or survival kit items are the most frequently forgotten items for most backpackers. They’re easy to forget because they won’t necessarily be used each day. Even though you won’t use one often, they play an important role in your backcountry safety. So take emergency gear seriously and add it to your backpacking essentials list.
A simple emergency backpacking kit should include a first-aid kit , whistle, firestarter, waterproof matches, emergency shelter, and a multitool.
Other safety and personal items that can make life easier on the trail include a knife, a gear repair kit, sunscreen, a sun hat, and insect repellent. If there are bears in the area where you’re backpacking, bring bear spray as well.
Having a reliable navigation system should be included on this list. Many hikers now use their smartphones for this. However, smartphones always have the potential to die or break on the trail. Having a laminated map and a compass as backup is a safe way to ensure you know your current location and where you’re going.
Finally, don’t forget other personal items like keys, identification cards, your wallet, permits, and your phone.
Packing Tips
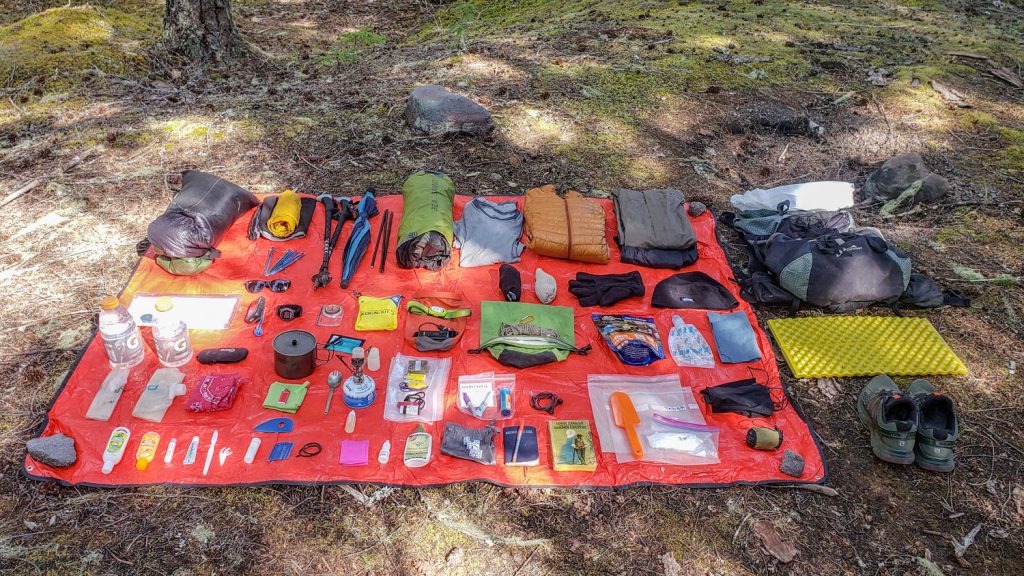
When you’re packing for your overnight backpacking trip, lay out all of the essential backpacking items on the floor before you pack them. This way, you can inspect your gear and make sure you have everything on your list.

If you want to keep your backpacking essentials organized in your pack, using stuff sacks or organizational bags can be very helpful. Separating items in pouches or bags can make gear more accessible, organized, and compact. Using this packing process will ensure that you don’t forget any of your backpacking essentials.
The final tip we will leave you with is to print out two copies of your itinerary the night before you leave on your trip, even if it’s only an overnight adventure. Give one to a friend or family member and leave the other one in your car.
If you can’t hand off a paper copy, at least contact a trusted friend or family member and tell them where you plan to be in as much detail as possible, including when to expect you to return. This way, if something happens to you while you’re gone, someone will be able to alert the authorities right away, and they’ll know where to start looking.
Planning, packing, and embarking on a trip as a beginner can be intimidating. Because this article is focused on your packing list, not specifically how to pack, here are some more backpacking tips and tricks to help you get out there.

The Best Backpacking Tents of 2024
Whether you're looking to spend 100 nights on the trail or stick to a tight budget, we've found the best backpacking tents of 2024. Read more…

The Best Backpacking Water Filters of 2024
We tested the best backpacking water filters and purifiers for your next trip into the great outdoors. Read more…
Follow Us On
Subscribe Now
Get adventure news and gear reviews in your inbox!
Join Our GearJunkie Newsletter
Gear Top Stories Deals
Table of contents
Ultimate Backpacking Checklist & Gear Essentials
Some of the links on this page are affiliate links
We’ve spent decades honing our backpacking gear to (our) perfect balance of weight and creature comforts. After 20,000 miles and 1,000 nights on trail, we’re pretty dialed in to what we want and need for any adventure, and we love helping people find their perfect kit as well.
We’ve organized the Ultimate Backpacking Checklist into categories to make it easier for you to gather your backpacking gear for your next trip. We also have adownloadable checklist. Print it out and have a hard copy with you as you organize your gear.
Ultimate Backpacking Checklist
DOWNLOAD OUR PRINTABLE CHECKLIST
*We consider items in italics to be optional
- Tent poles or trekking poles
- Groundsheet for tent floor durability
BACKPACK & STORAGE
- Trash compactor bag or waterproof stuff sacks for interior rain protection
- Large Ziploc for garbage
- Shoulder strap camera pocket
- Summit pack
ENTERTAINMENT
- Book or Kindle
- Crossword puzzles
- Cribbage or dice
- Notebook + pen
NAVIGATION EQUIPMENT
Always be prepared and know how to use your map and compass, even if you plan to use a GPS or GPS app.
- Topo map(s)
- Waterproof map bag / Ziploc
- GPS or GPS phone app with maps downloaded for offline use
- Satellite Messenger/PLB for remote locations
- Download driving directions for offline use
- Photos of guidebook pages
- Check current weather before trip
- Call ranger station pre-trip for trail conditions + regulations
- 2 copies of itinerary: 1 left with friend + 1 under car seat
- Backpacking permits
- Band-aids of various sizes
- Antibiotic ointment
- Medical tape
- Latex gloves
- Safety pins
- Antihistamines
- Antidiarrheal
- Check out our Best First Aid Kits list for more suggestions
PERSONAL TOILETRIES
- Sunscreen + lip balm
- Bug repellant
- Toiletries (biodegradable shampoo, etc.)
- Prescription Rx
- OTC meds + vitamins
- Contact lenses + supplies/glasses
- Toilet paper/wipes + sealable bag to pack it out
- Digging trowel
- Menstrual products
- Hand sanitizer
- Toothbrush, paste + floss
- Earplugs + eye mask
- Nail clipper
- Pre-trip: Clip nails, cut hair, shave, etc.
- Provisions – commonly between 2,500-3,500 calories per day
- Extra day’s supply of food for emergencies
- Food bag / Ursack
- 50’ nylon cord + small carabiner for bear bag hanging or bear canister where required
OPTIONAL EQUIPMENT FOR SNOWY & ICY TRIPS
- Ice axe – learn + practice proper self-arrest technique
- Traction devices
SLEEP SYSTEM
- Sleeping bag / backpacking quilt
- Pad attachment straps (optional)
- Sleeping pad
- Pump sack (optional)
TOOLS & ACCESSORIES
- Trekking poles
- Lightweight hammock
- Backpacking chair / sit pad
- Light pocket knife or multitool
- Phone (turn on low power/airplane mode)
- Waterproof phone case
- Bear spray for grizzly country
- Camera + waterproof case/Ziploc
- Extra camera battery
- Headlamp (check batteries pre-trip)
- Extra batteries for long trips
- Power bank + charging cords
- Wall plug for thru-hikes
- Assorted Ziploc bags
- Cash, ID, credit card, insurance card
EMERGENCY KIT
- Duct / Tenacious Tape for repairs
- Sleeping pad patch kit
- Needle + thread
- Small Sharpie
- Stormproof matches + small fire starters
- Small backup lighter
- Backup water treatment pills ( Chlorine Dioxide )
- 2-4 water bottles (ability to carry 2-6 liters depending on climate) or a hydration pack & bladder
- Collapsible water containers for carrying lots of water in dry locations
- Water treatment
- Pre-filter for water treatment, ex: pantyhose
All clothing items should be lightweight, moisture-wicking and quick-drying (synthetic or wool, no cotton).
- Hiking pants ( Men’s / Women’s ) & shorts ( Men’s / Women’s )
- Wicking shirt/tank & long-sleeve sun shirt ( Men’s / Women’s )
- 1-2 pairs quick-dry underwear
- Down jacket and/or fleece jacket
- Rain jacket
- Rain pants for wet trips
- Windbreaker depending on forecast
- Base layers
- 2-4 Pair socks
PACK IN CAR
- Parking pass for car
- Clean clothes + shoes to change into
- Gallon of water for trailhead shower
- Camp towel to dry off
- Water + snacks
Backpacking Tips
LIGHTEN YOUR LOAD – Start by weeding out things you don’t need. Be careful with every choice you make, a few ounces here and there can add a lot of weight in the end. A lightweight backpacking checklist, like the one here, will help you to focus on essential items. Next, focus on lightening your heaviest gear: shelter, backpack, and sleeping bag. Switching your traditional big three out for lightweight options is the best opportunity for weight savings, especially when you’re starting out. If you invest in a lightweight shelter, backpack, and sleeping bag, you can easily cut 10 or more pounds and be well on your way to having an ultralight backpacking setup.
CLOTHING FOR BACKPACKING – The clothing you pack will change slightly depending on the conditions you expect to encounter on specific trips, but the fundamentals remain the same. Clothing made with quick-drying fabrics that wick moisture away from your skin are best to help your body thermoregulate and stay comfortable in both hot and cold environments. Nylon, polyester, wool, bamboo, silk, and synthetic blends are all good options. Avoid cotton – it absorbs moisture and takes a long time to dry, which can cause a variety of problems including blisters and chafing. Choose items that can be worn together in layers. Fleece and goose-down have the best warmth-to-weight ratio and make the best insulation materials for backpackers. Rain gear should be lightweight, breathable, and waterproof.
BACKPACKING FOOD – Good food is really important for any backpacking trip, so it’s well worth the effort to put together a simple meal plan before your trip. Keeping food weight down is a critical backpacking skill that usually takes experience to master. A good place to start is our Guide to Lightweight Backpacking Food . Most seasoned backpackers opt for lightweight, calorically-dense foods that are very easy to prepare. Packaged freeze-dried meals and snack foods can be great, but keep in mind, they tend to be very high in sodium/sugar, which can take their toll, if eaten in excess.
Another approach is to prepare your own backpacking meals , using a food dehydrator to dry meats, fruits, veggies, and sauces. Combining them with spices and quick-cooking or easily rehydrated dried goods such as pasta, couscous, instant potatoes, instant refried beans, and minute rice is a great way to customize your own highly-nutritious meals. This method takes more time and effort, and you must be more willing to carry more weight, but making your meals can be more cost-effective and healthier for long trips. Our approach is usually a mix of both methods. For more specifics about food, check out our Best Lightweight Backpacking Food guide , where we outline our general backpacking food strategy and suggest some of our favorite meals .
CleverHiker Backpacking Video Series
If you’re new to backpacking, or have been hiking with outdated equipment, we highly recommend watching our two professionally-filmed video series (below), where we’ll teach you everything you need to know to start backpacking -the skills and the gear.
- Essential Trail Skills – 20 HD tutorial videos to teach the most critical skills for backpackers of all levels, such as: Leave No Trace, Backpacking Trip Planning, How to Find and Fit the Right Backpack, How to Pack a Lightweight Backpack, and much more.
- Lightweight Backpacking Basics – One of the main reasons to minimize your pack weight is to maximum your freedom on the trail. Backpacking with a lighter pack will reduce stress on your body, give you more free time on the trail, and allow you to hike farther with less effort. In this 10-episode series, you’ll learn all about the gear that will allow you to hike lighter to make the hiking the most enjoyable part of your trip.
Why trust us?
We understand how tough it is to find trustworthy gear advice, and that’s one of the main reasons we built CleverHiker. We live for outdoor adventure, and we take these guides very seriously.
- Our recommendations are completely independent and based on hands-on experience.
- We test outdoor gear for a living – we’ve logged over 20,000 trail miles and 1,000 nights in the wilderness.
- Our team has thru-hiked some of the most iconic long trails, including the Continental Divide Trail, Pacific Crest Trail, Appalachian Trail, Colorado Trail, Long Trail, Oregon Coast Trail, Arizona Trail, Pinhoti Trail, Superior Hiking Trail, as well as extensive peak bagging, and international treks.
- We field test every product we recommend, which is sadly not the norm.
- We travel to industry trade shows to stay up-to-date on product innovations.
- We continuously update our guides throughout the year and when new products launch.
- We treat recommendations to our readers as if they were for our family and friends.
- We’re lifelong learners and we’re always open to feedback. If you think we’ve missed a worthy product or got something wrong, we’d love to know about it.
Need More Backpacking Advice?

How to Lace Hiking Boots & Shoes

How to Clean Hiking Shoes & Boots

La Sportiva Spire GTX Hiking Shoes Review

Zpacks Duplex Zip Tent Review
Durston X-Mid Pro 2 Tent Review
100 Best Gifts For Hikers, Backpackers & Campers 2024

7 Best Trekking Poles of 2024

10 Best Rain Jackets of 2024
ZPacks Arc Blast Backpack Review
Six Moon Designs Lunar Duo Tent Review
SOTO Windmaster Backpacking Stove Review
Strawberry Mountain Wilderness Loop Backpacking Guide
Get the best content from cleverhiker & around the backpacking world.
Social media is great, but our bi-weekly newsletter is a much better way to stay in the know.
Sign up to get our curated emails with the best content from CleverHiker and around the backpacking world. You’ll be turned on to new videos, trip reports, gear reviews, inspiring outdoor stories and much more. So get in the mix!
2-FOR-1 GA TICKETS WITH OUTSIDE+
Don’t miss Thundercat, Fleet Foxes, and more at the Outside Festival.
GET TICKETS
BEST WEEK EVER
Try out unlimited access with 7 days of Outside+ for free.
Start Your Free Trial
Powered by Outside
The Ultimate Backpacking Checklist
Heading out on your first overnight use this handy list as your guide to packing for a three-season backpacking trip..
Heading out the door? Read this article on the new Outside+ app available now on iOS devices for members! >","name":"in-content-cta","type":"link"}}'>Download the app .
A backpacking trip can be the experience of a lifetime—as long as you’re properly equipped. Using a backpacking checklist is the best way to take stock of your kit before heading out. Our handy list covers the essentials for anything from an overnight to a week out in the wilderness. This list is meant for three-season backpacking only—you’ll need additional or different gear for special situations, like snow camping, desert camping, or thru-hiking. Time to get packing! For a printable PDF checklist, click here . Taking a shorter trip? Our dayhiking checklist has you covered.
- Typically a 50- to 80-liter backpack
- Rain cover or waterproof pack liner
- Waterproof compression sacks or storage sacks (optional)
For three-season backpacking trips that take a weekend or longer to complete, you should carry a pack between 50 and 80 liters in size. If you’re simply doing an overnight trip or have an ultralight kit, you can make do with a smaller pack. There are many considerations when choosing a backpack, including carrying capacity, features like sleeping bag compartments and ice axe fasteners, pockets, materials, and overall fit. Read more about properly choosing and packing a backpack here .

- Tent , tarp, or hammock
- Trekking poles (optional, can be used to pitch certain shelters)
- Groundsheet (optional)
Tents are the most beginner-friendly option, and offer the best combination of livable space and protection. Hammocks can be a comfortable choice in warmer weather below tree line but may require extra time for setup and tree selection, along with extra equipment like a tarp to protect against rain or an underquilt to guard against cold. By themselves, tarps are a weight and space-saving option, but lack protection against bugs and take time and consideration to pitch correctly. Make sure to take stock of every pole and stake before setting off. Read more about choosing the right tent here.

Sleep System
- Sleeping bag or quilt (15°F to 30°F comfort rating)
- Sleeping pad (foam, self-inflating, or inflatable with an R-value of 2 or higher)
- Camping pillow (optional)
Traditional mummy bags offer a good warmth-to-weight ratio compared to rectangular sleeping bags while offering more coverage than quilts. Quilts can provide great weight-savings as long as you bring a beanie or detachable hood for warmth but can take some getting used to. All sleeping bags have temperature ratings, which indicate the range that the bag is designed to handle. In warmer climates, like parts of the American Southwest, you can get away with a higher comfort rating. Your bag is only as good as your pad, so make sure it has the appropriate insulating R-value for your lowest expected temperature. (Normally 2 to 5 R-value for three-season pads; 5 or above in winter). Read more about choosing a sleeping bag here .
Water Storage and Filtration
- Water bottle and/or water reservoir
- Purification system (squeeze, pump, gravity, or press filter, or a UV purifier)
- Backup filtration system (chemical purification tabs, drops, or small secondary filter)
Every filter or purifier, regardless of style, will eventually clog up; always bring the tools required to clean your filter. If using a UV purifier, bring a mesh pre-filter for sediment if you expect anything but pure mountain water. If there’s a chance of freezing temperatures, place your filter in a leak-proof bag and stash it in your sleeping bag overnight—if it freezes it is no longer safe to use. Read about some of our favorite water filters here .

Stove and Cookware
- Stove (canister, liquid fuel, or alternative style)
- Fuel (isobutane-propane canisters, liquid fuel, or alternative fuel)
- Lighter or waterproof matches
- Pots if not integrated into stove system
- Cleaning rag or mini sponge
- Mug (optional)
- Biodegradable soap (optional)
Canister stoves are great for quickly boiling water to rehydrate food, purify water, and make hot drinks. Choose a stove with a wider burner head and a non-integrated pot for easier backcountry cooking. Many backpackers opt for canisters for their ease of use, but liquid fuel stoves can be more efficient in cold temps and higher altitudes, and readily accept multiple types of fuel. Read about some of our favorite camp kitchen equipment here.

Food and Snacks
- Enough food for each day of your trip based on your caloric needs, plus an extra day’s worth of food in case of emergency
- Snacks to stave off hunger and increase your caloric intake while you hike
- Hydration/electrolyte powder or tabs (optional)
- Bear canister (if required), Ursack-type bag, or 50 feet of nylon cord and a carabiner for a hang if you’re in bear country
Deciding how much food to bring comes down to personal physiology, pace, and trail conditions, although 2,000 to 5,000 calories per day is a rough range for many people. Packing calorie-dense foods like nut butter, cheese, and olive oil will help you save weight. When in doubt, pack more food than you think you’ll need.

- At least two pairs of socks
- At least two pairs of underwear
- Shorts, pants, or other bottoms such as a skirt or kilt
- Long-sleeve shirt (for insects and sun protection)
- Insulating midlayer, such as a fleece or light puffy
- Packable down jacket
- Hardshell jacket or rain poncho
- Warm beanie
- Top and bottom baselayers (optional)
- Light gloves or liners (optional)
- Rain pants (optional)
The saying “cotton kills” is popular amongst hikers for a reason: the material holds on to moisture and doesn’t insulate when wet—the perfect recipe for hypothermia. Only wear wool or synthetic layers for the best temperature regulation. Baselayers and gloves can be lifesavers in cold or high-altitude climates but overkill in warm, low-elevation climates. Bring adequate rain gear even if precipitation isn’t in the forecast, and always stash at least two pairs of socks (wet feet mean a miserable trip). Read more about dialing in your layering system here.

- Hiking boots , hiking shoes, trail running shoes, or hiking sandals
- Camp shoes or sandals (optional)
- Gaiters for snow/scree (optional)
Choosing hiking footwear is one of the most subjective decisions a hiker can make—there are fits and options for every hiker and hiking style out there. For stability under heavy loads, rough terrain, and better durability, mid-cut or high-top boots are a safer choice. Trail running shoes will help you move faster (a pound on your feet equals five pounds on your back) and tend to breathe better. Depending on how much weight you’re carrying, lighter shoes can be more comfortable over long distances in general. Some backpackers prefer to hike in sandals for breathability, weight, and easy water crossings but must contend with the potential for cold feet and stubbed toes. Read more about how to choose the perfect footwear here.

Personal Hygiene
- Toilet paper
- Hand sanitizer
- Sunscreen and SPF lip balm
- Bug repellent
- Toothbrush, toothpaste, floss
- WAG bag (if required)
- Menstrual products and pack-out bags (if not using a menstrual cup)
- Female urination device (optional)
- Pee rag (optional)
How you take care of business in the backcountry depends on the environment. The easiest scenario involves moving 200 feet from a water source, trail, or camping area, digging a six- to eight-inch deep hole, clearly marking your spot, and cleaning your hands thoroughly. In certain environments—such as deserts or tundra—or protected and popular parks, a WAG bag may be required. And remember: tampons are always a pack-out item. Read more about backcountry hygiene here.

Electronics
- Power bank and/or solar charger (optional) with charging cables
- Headlamp with extra set of lithium batteries
- Satellite messenger or personal locator beacon (optional)
Most hikers can get away with a small power bank to charge their phone and headlamp on a backpacking trip. On extended trips with no resupply, a solar charger is the best (albeit slow) solution. Remember to keep batteries (always lithium, never temperature-sensitive alkaloid) in your sleeping bag at night—they lose juice more quickly as the mercury drops. Read more about some of our favorite backcountry electronics here.

- Map, compass, and the knowledge to use both
- GPS device (optional)
- Navigation app, like Gaia GPS (optional)
Always carry a topographic map and compass and know how to use them. GPS devices and smartphone apps are great tools, but can run out of battery or malfunction. Peace of mind requires carrying only a few extra ounces and a quick navigation course. Read more about backcountry navigation here.

Repair and Emergency
- First aid kit
- Prescription medication
- Knife or multitool
- Bear spray (in grizzly country)
- Sleeping pad patch kit
- Waterproof matches/ firestarter
You can easily buy a first aid kit that has everything you need (and more), or simply grab a waterproof bag and raid your own medicine cabinet or pharmacy for a low-cost alternative. Duct tape is one of the most useful all-purpose tools you can carry, and can help with medical emergencies and gear repair. Sleeping pad patch kits are especially important if you’re sleeping on rough ground. Read more about building emergency kits here.
Popular on Backpacker
Related content from the outside network, what’s it like to go on a 200-person hike better than you think., how to pack for backcountry skiing, the original yosemite firefall, hiker charges mountain lion.
Discover the Trail
- Explore by State
- Interactive Map
- Frequently Asked Questions
- Thru-Hiking
- Multi-Day Hiking
- 2,000-Milers
- A.T. Community™ program
Plan Your Visit
- Trail Updates
- Hiker Resource Library
- Register Your Hike
- Hiking Basics
- Leave No Trace
- Transportation Options
- Report an Incident

A collection of resources for planning a safe, healthy, and responsible experience on the Appalachian Trail.
- Conservation
- Our Mission, Vision, and Identity
- Landscape Conservation
- ATC History
- Board & Leadership
- Science and Stewardship
- Justice, Equity, Diversity and Inclusion
- Education and Outreach
- Youth Outreach
- About the ATC

Obstacles arise every day that threaten the Appalachian Trail. Learn how the ATC stands up for the Trail and its surrounding landscape.
- Find an Opportunity
- Safety and Training
- Orientation
- A.T. Partner Resources
- Volunteer Blog
- Make a Donation
- Become a Member
- Ways to Give
- Planned Giving
- Corporate Partnership Program
Volunteer Opportunities

Volunteers are the soul of the Appalachian Trail, and there are many opportunities for you to help keep the Trail alive.
Find Opportunities
- Stay Informed
- Latest News
- Official Blog
- Trailway News
- eNewsletters
- A.T. Journeys Magazine
- Share Your Photos

Keep up-to-date with the latest alerts and conditions on the Appalachian Trail.
Ultimate A.T. Store™
Guides & Maps
Shirts & Apparel
A.T. Passport
Guides & Maps

We have partnered with Mountaineers Books for the warehousing and distribution of Appalachian Trail Conservancy Publications.
Shop for Guides & Maps
- Hike the A.T.
Plan and Prepare
- Corporate Partners
- Accountability and Transparency
- Stewardship – OLD
- A.T. Ed-Venture Series
- Contribute to the A.T.
- Corporate Giving
- A.T. License Plates
- NextGen Membership
Overnight Backpacking Checklist
Must-have gear for overnight backpacking and camping trips on the appalachian trail. .

ESSENTIAL SKILLS
- Setting up your personal shelter
- Storing your food properly
- Backcountry bathroom skills
- Backcountry handwashing skills
- Preventing the spread of COVID-19 and other illnesses
- Community safety practices
- Reporting incidents and emergency preparedness
- Learn these essential skills by visiting appalachiantrail.org/explore

- Multiple reusable masks/face coverings
- Hiking shirt
- Hiking shorts/pants/skirt/leggings/dress
- Underwear/bra
- Base layer top & bottom
- Insulating mid-layer
- Insulating jacket
- Rain jacket or poncho
- Hiking boots/shoes
- Camping/sleeping clothes

- First aid kit – including disposable face masks and nitrile gloves
- Personal shelter (tent, tarp, hammock)
- Sleeping bag
- Sleeping pad
- Map/compass/trail guide
- Water bottles or bladder
- Emergency Whistle
- Water treatment system
- Trowel and unscented hand sanitizer
- Toiletries – including handwashing kit

- Rain pants/skirt
- Sunscreen/sun hat
- Camp shoes/sandals
- Hiking poles
- Buff/neck gaiter
- Pocket knife
- Town clothes
- Satellite communication device

Consider COVID-19 transmission risks when planning meal spots
- Calorie-dense, lightweight food
- Bear canisters recommended
- Bear hang set up: 60 feet rope & bag for all edible and scented items.
- Fuel & lighter
- Stove & pot
- Spoon / spork
Download the PDF version of this checklist

The Hungry Hiker
Tips & Tricks on How to Plan Your Next Outdoor Adventure
How to Plan Your First (Or Next) Overnight Backpacking Trip
Want to go on an overnight backpacking trip and have no idea where to start with planning a trip like this? Trip planning for an overnight backpacking trip can be overwhelming and intimidating for a lot of people, especially if you’re new to backpacking.
I’m going to share with you some of my favorite tools I use to plan overnight backpacking trips, in hopes of helping you learn how to plan either your first or next overnight backpacking trip of your own.
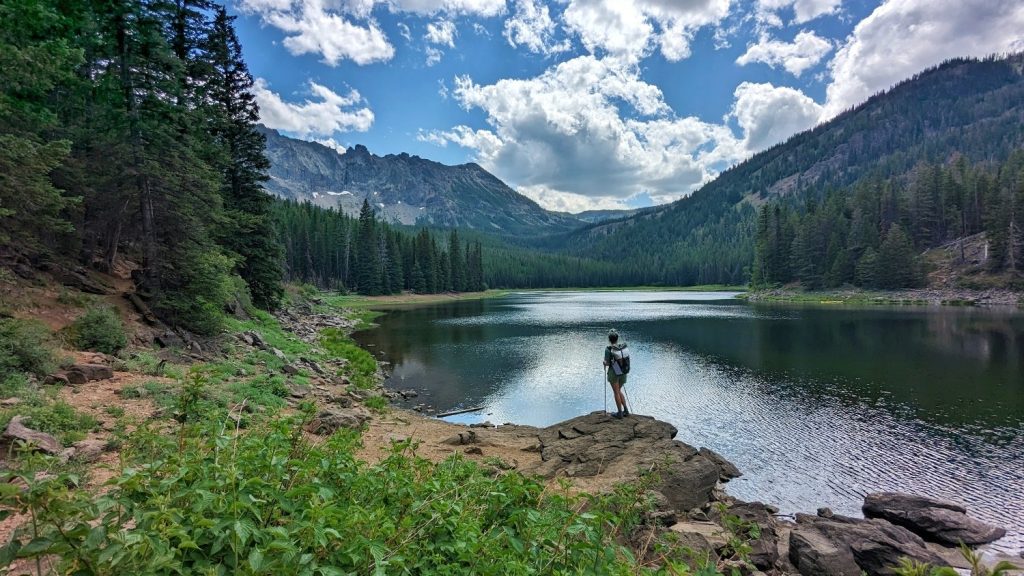
I recently took a group of my students from my online backpacking program for women, The Confident Solo Female Backpacker System out for an early season overnight backpacking trip to Ancient Lakes , here in Washington State. This turned out to be a very fun, successful and amazing trip!
In this blog post, I’ll walk you through my entire process of how I planned this trip for my students including how I decided where to go, why I chose this specific location and some of my favorite resources I used to plan our trip. Then I’ll share with you a special online tool I created that will help you start planning your first or next overnight backpacking trip.
If you’re feeling a little overwhelmed with the trip planning process, it’s okay. Trip planning for any trip, no matter where you’re going and how long you plan on being out there can be overwhelming for a lot of backpackers, AND not just beginner backpackers, but also experienced backpackers as well.
Here’s how I planned our recent overnight backpacking trip to Ancient Lakes . Starting with how I decided where to go for our group overnight backpacking trip.
How I Decided Where To Go Overnight Backpacking
When planning a group trip for my students, I always start by taking the trip objective and the experience level of my students into consideration when deciding where to go.
My objective for this group trip was to give my students a chance to practice using their gear in a low risk setting while having fun. I knew for most of the students in the group, this would be their first overnight backpacking trip this year. This would also be considered an early season trip, a first for a majority of the group. I wanted to pick a place where they could safely and comfortably ease back into the backpacking season, apply what they’ve been learning in my program out on trail and have fun while they’re out there.
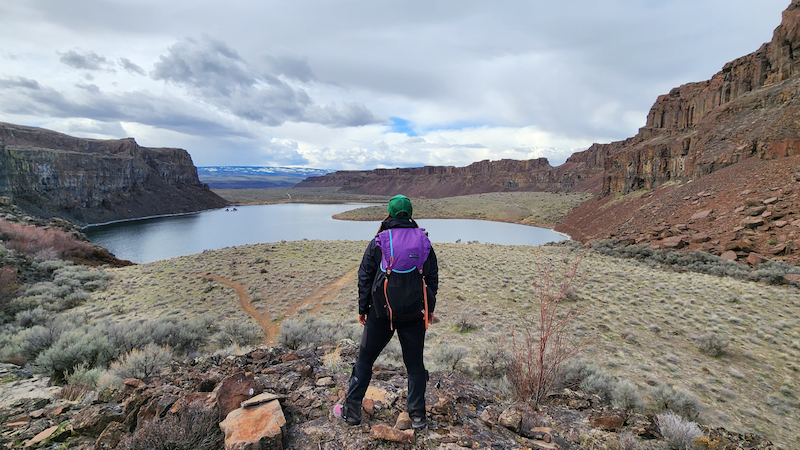
The time of year is another consideration I kept in mind when deciding where to go. We would be going on our overnight backpacking trip in March, which is still considered winter/early season here in Washington. When most places, especially at a higher elevation are still covered in snow, I knew Ancient Lakes over in Eastern Washington would be a good option, terrain and weather-wise. This time of year, the temperatures can be milder than most areas in Western Washington. There’s very little elevation gain and there’s no snow on the ground. Ancient Lakes is also a great option for this time of year because during the warmer months, the snakes and ticks come out, the area is exposed with very little shade and the water sources are extremely limited.
I also wanted to keep the total trip mileage and daily mileage in mind for my students. Since I knew this would be the first overnight backpacking trip of the year for most of the group, I didn’t want to pick a place where we’d have to hike a lot of miles just to get to camp.
Ancient Lakes has a number of different trails with multiple trailheads to access the area. I could make this trip – the hike to camp, water and our day hikes throughout the trip – as long or as short of a hike as I needed to, while keeping my students in mind.
I also didn’t want to have to deal with needing to secure a permit for this trip. There’s no permit needed to camp anywhere at Ancient Lakes. All of the tentsites are first come, first served and free. The only permit required is the Discover Pass at the trailhead.
Something else I wanted to take into consideration when choosing a place to take my students backpacking was picking an area that I was already familiar with. Since I would be leading the group, I wanted to pick a place where I felt comfortable and had been before.
I’ve day hiked the Ancient Lakes area multiple times before. I was familiar with the drive to get to the trailhead, the different trailheads we could start our trip from, the tentsites in the area, the terrain we’d be hiking through, and all of the day hike options we’d have while we were out there. I also knew that this area would be well-traveled and that we wouldn’t be the only group out there.
Part of my research for this trip included previous day hikes I’ve been on out in this area. I was familiar with the drive to get to the trailhead, the different trailheads we could start our trip from, the tentsites in the area, the terrain we’d be hiking through, and all of the day hiking options we’d have while we were out there.
I also read current trip reports for the area on both the WTA website and AllTrails , to get a feel for the current trail conditions.
Then, I looked at a map and created a route using Gaia GPS to determine our total trip and daily mileage, possible places to camp, water sources and day hiking options in the area.
While doing my research, I also learned that there would be limited water sources in the area. Even though there were lakes nearby, they wouldn’t be safe to drink out of, even if we filtered the water because all of the water in the lakes were irrigation runoff.
For this trip, we’d have to carry in a large amount of water on Day 1 and then plan to hike down to the river, which would be a 6-mile hike roundtrip from camp and back, to collect and filter safe drinking water to bring back to camp.
Also, while doing my research, I learned that since it was still considered early season (meaning that the area would be cooler days and even colder nights), local wildlife like ticks and snakes wouldn’t be an issue yet.
Checking The Conditions
Once I’ve completed my research for the Ancient Lakes area, I started checking the trail conditions, road conditions and weather forecast to get an idea of what we could expect while being out there.
Each day up until leaving for trip, I would look for any new trip reports on both the WTA website and AllTrails .
Since I knew I’d have to travel over a mountain pass to get to Eastern Washington, I also kept an eye on the road conditions for Snoqualmie Pass through the Washington State Department of Transportation (WSDOT) website .
And for weather, I checked the current weather forecast through the National Weather Service or NOAA website for the Ancient Lakes area a week prior to leaving for the trip, a couple of days before the trip and then again, the night before and morning of leaving for the trip, just to see if anything had changed.
Planning The Trip
Then for the actual planning for the trip, I used the routes I created on Gaia GPS to note total trip and daily mileage, elevation gain/loss, nearby trailheads and parking lots, possible tentsites, potential water sources and multiple day hiking options in case we wanted to make our hikes during the day shorter or longer.
Once I put together a plan for the whole trip and plotted out a route for each day we’d be out on trail, I put together my meal plan for the trip based on the number of days we were planning on being out on trail. Then I packed up my food and moved on to deciding what backpacking gear to bring for the trip.
Backpacking Gear To Bring
If you’re interested in seeing the backpacking gear I brought with me for this trip, check out my LighterPack.com list for this trip.
Keep in mind when deciding on what backpacking gear to bring for your trip, you’ll need to consider how long you plan on being out there, how many miles you plan on hiking during your trip, both daily mileage and overall trip mileage, the time of year, the forecasted weather for the area, the type of terrain you’ll be traveling through and camping on and nearby water sources..
There’s a lot of information out there about backpacking gear, but how do you sort through all of the information trying to figure out what gear is going to work for you, the type of trip you want to go on and the area and/or climate you’ll be hiking in?
I’ve put together a free Backpacking Gear Packing List you can download and print out to use when planning your trip. This packing list will help give you an idea on what gear you’ll need to bring with you for an overnight backpacking trip.
READY TO START PLANNING YOUR OVERNIGHT BACKPACKING TRIP?
Now that you’ve seen how I planned my recent overnight backpacking trip with my students using some of my favorite trip planning resources, you’re probably excited about planning your own trip, but maybe you’re still feeling overwhelmed about the whole process. This is why I created a special online tool that will help you start planning your first or next overnight backpacking trip.
Introducing The Hungry Hiker Backpacking Trip Planning Masterclass , a step-by-step guide on how to plan your first or next overnight backpacking trip.
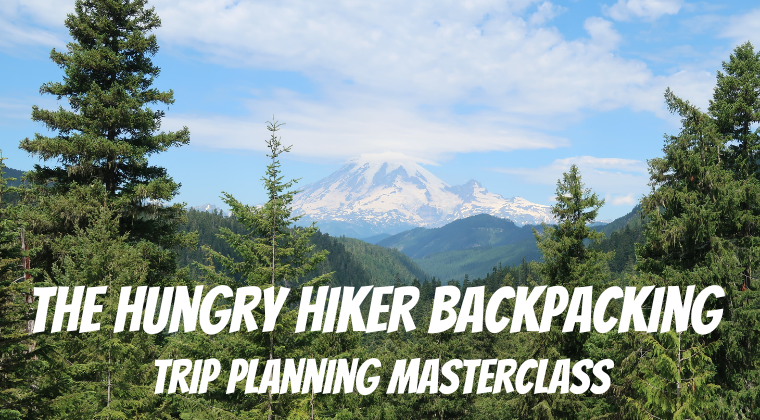
The Hungry Hiker Backpacking Trip Planning Masterclass will cover everything (in detail) from how to prepare, research and plan for your trip to the backpacking gear you’ll need.
This masterclass also includes navigation and trip planning video tutorials and digital and printable trip planning resources along with tips and tricks for first time solo backpackers.
This online class is self-paced so you can work through all of the material at your own pace and easily fit it into you own schedule and time zone whenever you’re ready to start planning your trip. Once enrolled, you’ll have lifetime access to the class so you can refer back to it whenever you’re planning future overnight backpacking trips.
If you’re ready to finally start planning your overnight backpacking trip this year, then this masterclass will help you get to the trailhead.
CLICK HERE to learn more and sign up for The Hungry Hiker Backpacking Trip Planning Masterclass.
Disclaimer: The-Hungry-Hiker.com is a participant in the Amazon Affiliate Links and AvantlInks Program, affiliate advertising programs designed to provide a means for sites to earn advertising fees by advertising and linking to Amazon.com and other affiliated sites at no cost to you. Please note, I only link to products and services I personally use and trust.
Inspired? Pin It!

1 Comment on How to Plan Your First (Or Next) Overnight Backpacking Trip
- Pingback: I Got Tired of Waiting for Someone Else to Go Backpacking With Me - The Hungry Hiker
Leave a Reply Cancel reply
Your email address will not be published. Required fields are marked *
Save my name, email, and website in this browser for the next time I comment.
Notify me of follow-up comments by email.
Notify me of new posts by email.

Kate Cooper

national parks

Hi, I'm Kate! I'm a nature lover and outdoor enthusiast who is always on a quest for the next adventure. I hope Kate Outdoors inspires you to spend more time outdoors and connect with the natural world.

Affiliate Disclaimer : This post may contain affiliate links. This means if you click a link and make a purchase, Kate Outdoors will receive a small commission at no extra cost to you. Having affiliate links on the site allows Kate Outdoors to provide you with valuable, free content.
Backpacking
What to pack for an overnight backpacking trip.
Whether you’re heading out on your first backpacking trip, or you’re a seasoned pro, knowing what to pack for an overnight backpacking trip can make or break your experience on the trail.
An overnight backpacking trip presents a special conundrum. Do you pack more luxury items because you need fewer essentials? Or do you take advantage of being able to lighten your load? I’d personally rather suffer a little bit more on the trail by carrying extra weight, in order to be more comfortable at camp later. That usually means carrying an extra change of clothes along with a few luxury items.
Regardless of your backpacking style, this packing list will ensure you have everything you need to stay safe and comfortable on the trail.

Where to Get Backpacking Gear On a Budget
Making the leap from day hiking to backpacking requires some major upgrades to your outdoor gear collection. Unfortunately, new backpacking gear is often expensive. You definitely don’t need the best or most expensive gear for an overnight trip, especially if you’re new to backpacking. It’s also completely normal to acquire gear over time. Despite the high costs there are a variety of ways that you can get backpacking gear on a budget for your overnight trip.

1. Rent or Borrow Gear
If you’re testing the waters on your first backpacking trip or traveling somewhere you don’t want to bring your own gear, renting backpacking gear can be a great way to save money. Research gear shops or outdoor programs near your backpacking destination to see what options are available. Many REI locations offer comprehensive backpacking gear rentals, so you can rent what you need whether it’s only one or two items, or a full backpacking kit.
You can also put out feelers to your friends, family, and local hiking groups to see if anyone has gear that you can borrow for your overnight backpacking trip. This is a great option if you only need a couple of items you may not be ready to invest in yet like an emergency GPS or pricey camp stove.
2. Shop Secondhand
Shopping secondhand is not only a great way to save money on backpacking gear, but it’s also better for the environment. You can find secondhand gear online in places like Facebook Marketplace, eBay, and Geartrade . Many outdoor retailers have used gear platforms, including REI Resupply , Patagonia Worn Wear , and The North Face Renewed . It’s worth noting that while these name brand outdoor retailers are pricey when purchased new, their products are (usually) high-quality and can last for years if taken care of properly. Some brands, like Patagonia, also have excellent repair policies.
You can find used gear shops in most outdoorsy areas and cities. Not only can used gear shops help you find a great deal on gear, they also support the local community and provide an opportunity to consign your old outdoor gear and clothing. This helps extend the lifespan of your gear, while giving you some extra cash!
3. Take Advantage of Sales
Most outdoor retailers run major sales throughout the year. For example, REI has seasonal sales and provides members with 20% off coupons a few times per year (an REI membership also gives you 10% back on what you spend on full-price items in dividends and is totally worth the upfront cost if you buy outdoor gear regularly).
End of season sales are also a great time to score steep discounts on new outdoor gear. Fall is a great time of year to purchase backpacking gear because many retailers are looking to clear their inventory to make room for skiing and snowboarding gear.

Do You Need Ultralight Gear to Pack for an Overnight Backpacking Trip?
Keeping your pack weight down is an essential part of staying comfortable on the trail during a backpacking trip and the best way to cut weight is investing in ultralight gear. While this seems like an obvious choice, ultralight gear is typically a lot more expensive than standard backpacking gear and isn’t always as comfortable. Having ultralight backpacking gear is absolutely NOT necessary for an overnight backpacking trip, but it may be worth purchasing depending on your long term backpacking goals and budget.
If you’re planning a thru hike or other longer backpacking trips, having ultralight gear can be a huge advantage on the trail. You expend a lot of energy when you do nothing but hike day in and day out for weeks or months on end. Keeping your gear light can play a huge role in minimizing your overall energy expenditure throughout the duration of your hike. Conserving energy isn’t that important on an overnight or short backpacking trip, and shaving a couple of pounds of pack weight really won’t make a significant difference.
Ultimately, you need to assess your budget, backpacking frequency, and comfort level when deciding whether or not investing in ultralight backpacking gear is right for you!

Ready to find out what you need to pack for an overnight backpacking trip?
This packing list is divided into 6 sections: Essentials ; Clothing ; Kitchen ; Hygiene ; Emergency ; and Luxury Items . Luxury items are not backpacking necessities, but they can help elevate your experience at camp and/or on the trail.
Depending on the environment and time of year that you’re backpacking, you may not need every single item on this list. I included information about whether you really need a piece of gear or not, and the considerations to keep in mind when making that determination. I also included some personal gear recommendations.
Keep in mind that many of these items can be shared amongst your entire group if necessary. While everyone will need their own sleeping bag, sleeping pad, headlamp, etc., you can split things like a water filter, stove, and first-aid kit.

The Essentials
Arguably the most important piece of gear for an overnight backpacking trip is going to be your backpack. Don’t underestimate the value of a well made backpacking pack. Outdoor gear technology has come a long way over the past few decades and modern packs are designed to evenly disperse weight and keep your shoulders and hips comfortable.
Remember hiking with a heavy pack is going to feel a lot different than wearing a daypack. The weight will be distributed differently and your center of gravity will likely feel off. If you buy a pack from REI or a local gear store you can have someone fit the pack properly for you.
The size backpack that you need will depend on how much you end up packing. You don’t necessarily need to have a large backpack for an overnight trip. My standard backpacking pack is 65L, which is a fairly large backpack. A 50-60L pack will likely be adequate for most people for an overnight backpacking trip. If you have ultralight gear and keep the clothes you pack to a minimum you can probably get away with something even smaller.
Most backpacking packs come with a rain cover, but if yours doesn’t and you’re hiking in an area where rain is common, then I recommend purchasing one (although a plastic poncho can also work in a pinch).
Kate Outdoors Recommends:
Osprey Aura AG 50L : $269.95
Osprey Aura AG 65L (what I use!): $289.95
Osprey Atmos AG 50L : $314.95
Do I Really Need It?: Yes. You can’t go backpacking without a backpack!

Your next most important piece of backpacking gear is going to be your tent. After all, this is going to be your home away from home for the night, so you want to make sure you pack a tent you’ll be comfortable sleeping in.
Here are some considerations when choosing a tent for your overnight backpacking trip:
- Size. How many people will your tent need to sleep? Do you have a dog or kids with you? Size is also a consideration when it comes to being able to pack the tent down and carry it in your pack. Depending on how bulky your tent is, you may want to strap it to the bottom of your pack.
- Weight. Tent weights can vary considerably. Typically, the larger the tent the heavier it’s going to be unless you specifically look for an ultralight tent.
- Season. Different tents are made for different seasons of camping. If you plan on backpacking in the winter you may want to consider investing in a four-season tent. If you only plan to backpack during warmer months, then a three-season tent will fit your needs and be more affordable.
- Affordability. Backpacking tents can range in price wildly. Ultralight tents are often the most expensive. You can find very inexpensive tents at places like Walmart or Amazon, but consider durability and how often you plan to use the tent.
Kate Outdoors Recommends:
REI Half Dome SL 2+ Tent with Footprint : $349
Do I Really Need It?: Yes, unless you have another form of shelter like a backcountry hut reservation.
Sleeping Bag
When choosing a sleeping bag to pack for an overnight backpacking trip you want to consider the weight, temperature rating, and how well the sleeping bag packs down. This is going to be one of the bulkiest items in your pack, so you want to make sure you choose a sleeping bag that is going to fit.
Packing Tip : Use a compression sack for your sleeping bag instead of the stuff sack it comes with to pack your bag down as small as possible!
Down vs. Synthetic:
Sleeping bags can either be filled with down fill or synthetic fill. Down sleeping bags are light and can easily compress, which makes them ideal for backpacking. They can also last for a long time if taken care of properly. The downside is that down sleeping bags are more expensive and not waterproof.
Synthetic sleeping bags are more affordable than down sleeping bags. They’re also water resistant and will continue to insulate you if wet. The tradeoff is that synthetic sleeping bags are heavier and bulkier than down and not as warm on an oz. for oz. basis. On an overnight backpacking trip this isn’t a huge concern, but it’s something to keep in mind if you’re conscious about your pack weight.
If you don’t like traditional sleeping bags you can also use a quilt. These are often lighter and more compact than a sleeping bag, but don’t provide as much coverage.
Nemo Forte 20 Sleeping Bag : $219.95-239.95 (regular & long length available)
Do I Really Need It?: Yes, if you want to stay warm at night.
Sleeping Pad
While you could just sleep on the floor of your tent in your sleeping bag, that won’t be very comfortable. A sleeping pad is an essential piece of backpacking gear, but choosing the right one for you comes with a few considerations.
There are 3 primary types of sleeping pads:
- Closed-cell foam
- Self-inflating foam
- Inflatable air
When considering which sleeping pad to pack for an overnight backpacking trip, consider the following:
- Weight. Sleeping pads are one area where you can make a significant dent in your pack weight. Closed-cell foam sleeping bags are extremely lightweight and often the sleeping pad of choice for ultralight backpackers. Self-inflating and inflatable air sleeping pads are typically heavier than a closed-cell foam pad, but are usually not more than a couple of pounds.
- Size. Some sleeping pads are bulkier than others. Closed-cell foam sleeping pads tend to be hard to pack down and fit in your pack, which means you’ll need to strap it to the outside of your pack. A self-inflating or inflatable air sleeping pad that is made for backpacking should be able to pack down compactly to fit in your pack, especially if it’s lightweight.
- Warmth. The R-value of the sleeping pad will inform how warm the sleeping pad will keep you at night. If you’re camping during the summer, this may not be a huge consideration, but it makes a big difference in comfort on a fall or winter backpacking trip. The R-value usually ranges on a scale of 1-7, with 1 being the coolest (ideal for backpacking in the summer) and 7 being the warmest (ideal for winter camping). High R-value pads are typically more expensive.
- Comfort. A sleeping pad is essential to a comfortable night’s sleep while backpacking. Foam sleeping pads tend to be thin and may not provide as much comfort as a self-inflating or air sleeping pad.
Sea to Summit Ether Light XT : $208.95
Closed-Cell Foam:
Therm-A-Rest Z Lite Original : $46.95
Do I Really Need It?: Technically no, but if you want to be able to sleep comfortably a sleeping pad is essential.

Having a source of light is essential on a backpacking trip. While you could carry a flashlight or lantern, a headlamp is going to be lighter and more practical since it’s hands-free.
Headlamps can get surprisingly expensive, especially if you want one with higher lumens (aka more light). On an overnight backpacking trip you just need to be able to see, so there’s no need for a pricey headlamp. I recommend getting a headlamp that has a red light setting so you don’t disrupt your night vision while wearing it.
Quick Tip : You can wrap a headlamp around a Nalgene water bottle to create a DIY lantern for your tent!
Black Diamond Cosmo 350 Headlamp : $34.95
Do I Really Need It?: Yes, unless you have another source of light like a flashlight or lantern. I would not recommend trying to rely on your phone flashlight while backpacking.
Water Bladder/Water Bottle
Water is crucial for survival, so it’s incredibly important to pack for an overnight backpacking trip. Whether you carry a water bladder or water bottle(s) is a matter of personal preference. Keep in mind that water is the heaviest thing you will be carrying on your backpacking trip, so be mindful of how much you need on the trail and at camp, and be sure to research whether there will be water sources available to refill ahead of time.
Water Bladder :
Osprey Hydraulics Hydration Reservoir 2L : $52
Water Bottle :
Nalgene : $17
Do I Really Need It?: Yes. Water is essential.
Water Filter
Water sources like lakes, rivers, and streams can contain bacteria, parasites, and viruses that can make you sick. Carrying a water filter that is designed to remove these pathogens is essential when backpacking.
There are a variety of water filters on the market, including tablets, squeeze filters, gravity filters, UV filters, and pumps. I personally like using a squeeze filter because they’re lightweight, easy to use, long-lasting, and very affordable. Gravity filters are also nice for backpacking trips because you can set one up when you get to camp and not have to worry about it, however they will take up more space in your pack. Purification tablets are a great option for a backup water purifying solution in the event your primary water filter fails.
Sawyer Squeeze : $40.95
Do I Really Need It?: Yes, unless you plan on packing in all of the water you need or boiling water to purify it.
Hiking Shoes
Your hiking shoe selection can make or break your experience on the trail. You want to avoid wearing sneakers on a backpacking trip because they’re not going to provide adequate support or traction, making you more susceptible to slipping, falling, or getting injured.
The best hiking shoe to wear backpacking is going to be a matter of personal preference. The most important consideration is making sure your shoes have good traction. Regular hiking boots work great, as do trail runners. Trail runners don’t provide as much support, so they may be uncomfortable with a heavy pack, but they allow you to move faster and be more nimble on the trail.
Hiking Boots: Merrell Moab 3: $140
Trail Runners: Altra Lone Peak 8s: $140
Do I Really Need It?: Yes. Proper footwear is important on any backpacking trip.

When it comes to packing clothing for an overnight trip you can keep things minimal and wear the same outfit the whole trip, or you can go all out with a set of PJ’s and a fresh outfit for the second day of hiking. Most clothing items that you need when you pack for an overnight backpacking trip can probably already be found in your closet. Carrying an extra outfit is up to you, but there are some clothing pieces that you should always pack in case you need them:
Extra Socks
Wet socks can put a damper on your backpacking trip and lead to poor foot health. Packing 1-2 extra pairs of socks in addition to the pair that you wear hiking on the first day helps ensure you’ll always have a dry pair of socks available if you need them.
If you wear wool hiking socks you can wear them multiple times before washing, which means you can hike in the same pair both days of your overnight backpacking trip. You may also consider carrying a heavier pair of socks to sleep in if it’s cold at night.
Smartwool Performance Low Ankle Sock : $19
Do I Really Need It?: Yes. Dry socks are essential for foot health on your backpacking trip.
Warm Jacket/Puffy
Regardless of the time of year that you’re backpacking, it’s a good idea to pack a jacket or puffy jacket in case you get cold. Remember temperatures are colder at night than they are during the day. This is particularly true in dry climates like the desert where you may not think you need a jacket. Of course, there may be a time and place where a warm jacket is truly unnecessary (like warm, tropical climates), but more often than not you’ll be happy you have one.
Patagonia Nano Puff : $229
Do I Really Need It?: In most situations, yes.
Raincoat
Weather can be erratic, especially in the mountains, so it’s always a good idea to pack a raincoat or other waterproof jacket in case things get wet. Staying dry during a storm is essential to having a comfortable backpacking experience and preventing hypothermia.
Patagonia Torrentshell 3L Jacket : $179
Do I Really Need It?: Not necessarily if there is absolutely no chance of rain (but as with many other pieces of gear, it’s better to have it and not need it, then need it and not have it). Always check the weather before heading out on a backpacking trip!
Hat & Sunglasses
Sun protection is essential when you’re going to be outdoors all day. In addition to wearing clothing that protects you from the sun, like a sun shirt , be sure to carry or wear a hat and sunglasses with you for additional protection.
If you’re hiking during cooler months or at higher elevations you may also want to pack a beanie to help keep your head warm.
Do I Really Need It?: Depends on your personal needs and preferences. I’ve gone on backpacking trips without a hat, but I can’t be in direct sunlight without sunglasses, so that’s an essential item for me.
If you’re hiking during cooler months, at higher elevations, or in a climate where temperatures drop at night, then carry a pair of gloves to keep your hands warm.
Smartwool Merino 150 Gloves : $30
Do I Really Need It?: Not necessarily in certain climates.

If you want to have a warm meal at camp you’re going to need a camp stove to cook and boil water. There are variety of camping stoves on the market ranging from inexpensive pocket rockets to pricier stove systems.
I personally use and recommend a Jetboil Flash stove for backpacking. The main feature of the Jetboil Flash is its ability to boil water quickly, which helps cut down on the amount of fuel you use. It also comes with its own pot so you don’t need to worry about packing an extra pot or pan. Another feature of the Jetboil Flash is its self-ignition, however my ignition button stopped working after 3 years of use (it’s not a huge deal, it just means I have to use a lighter to ignite the stove).
Jetboil Flash : $129.95
Do I Really Need It?: Yes, if you plan to cook or boil water.
Lighter/Waterproof Matches
Even if your camp stove comes with an ignition button it’s still a good idea to pack a lighter in case the ignition doesn’t work. Carrying a lighter can also come in handy if you plan on having a campfire or encounter an emergency situation where starting a fire is necessary.
Of course, lighters don’t work if they get wet, so it’s also a good idea to have waterproof matches in the event of an emergency. You likely won’t need them on an overnight backpacking trip, but if inclement weather is in the forecast you may want to consider packing some.
Surviveware Waterproof Matches : $17
Do I Really Need It?: Probably. If your stove is self-igniting (or you don’t plan to use a stove) then you may be able to get away with not having a lighter or waterproof matches on an overnight trip. However, having a fire starter is one of the 10 essentials .
In order for your camp stove to work properly you’ll need to carry fuel. Propane canisters come in a variety of sizes, but for an overnight trip a small, 100g can should be more than sufficient.
Quick Tip : To test how full a propane canister is, place it into a bowl of water. The water level on the canister indicates how much fuel is left!
Jetboil JetPower Fuel : $17
Pot/Pan/Mug
Depending on the type of camp stove that you’re using you may need to carry an extra pot to cook or boil water with. A pan may also be necessary depending on what you plan to cook. If you plan to make a warm bevvy in the morning, then be sure to carry a mug.
Sea to Summit Alpha Pot : $49.95
Do I Really Need It?: No, if your stove comes with a pot or you don’t plan to cook or boil water. A mug also isn’t necessary if you’re not planning on making coffee/tea/hot chocolate.
A spork combines a spoon and fork allowing you to pack only one utensil. If you’re planning on eating pre-packaged backpacking meals consider getting a long handle spork so you can get to the bottom of the bag without getting your hands dirty.
Sea to Summit Alpha Light Utensils : $10.95
Do I Really Need It?: Maybe. It depends on what you plan to eat.
Biodegradable Soap & Sponge
Carrying a small container of biodegradable soap can help keep your hands clean and wash dishes if you’re cooking directly in a pot or pan. Remember not to use soap in waterways, even if it’s biodegradable. Instead do your washing at least 200 ft. away from lakes and streams, and disperse gray water over a wide area.
Dr. Bronner’s Pure-Castile Soap : $8.99
Do I Really Need It?: No, you could get away without it on an overnight trip, especially if you’re planning to eat pre-packaged backpacking meals and carry hand sanitizer.
Food (including extra snacks)
For an overnight backpacking trip you’ll need to pack dinner and breakfast, along with snacks for both days of hiking. You may also need 1-2 lunches depending on how long you expect to be out on the trail.
Remember that you’re going to be burning more calories than usual during a backpacking trip, so don’t worry about eating too much. It’s always a good idea to carry more food than you think you’ll need on an overnight backpacking trip in case you’re hungrier than usual or you’re out longer than expected.
Backpacking Meal:
Peak Refuel Chicken Alfredo : $13.95
Do I Really Need It?: Yes, you obviously need food!
Bear Canister/Sack*
If you’re camping in bear country then having a way to properly store your food and scented items is essential. In some areas, including Rocky Mountain National Park and the Maroon Bells-Snowmass Wilderness in Colorado, you’re required by law to carry a bear canister.
Bear canisters come in a variety of sizes. I personally think the smallest size is limiting, even on an overnight trip, so I’d recommend getting the Bear Vault BV 450 and sharing it with a hiking partner. You can also hang your food and scented items in a bag like an Ursack , but make sure you practice your hang ahead of time and are backpacking in an area where the trees can support a proper bear hang.
Even if you’re not backpacking in bear country, small critter like mice may try to eat your food, so storing things in a durable bag is recommended.
Bear Vault BV 450 : $83.95
Do I Really Need It?: Yes, if hiking in bear country.

Personal Hygiene
If you’re backpacking in the desert, a high alpine environment, or an area that sees regular traffic, strongly consider packing a WAG bag in order to pack out your solid human waste. While going to the bathroom in a bag may take some getting used to, it’s one of the best ways to Leave No Trace and minimize your impact on the environment while backpacking.
Remember impacts are cumulative. More people than ever are getting outdoors and backpacking, which means more human waste accumulating in our outdoor spaces. Certain areas also require the use of a WAG bag. Learn more about best practices for pooping while backpacking .
Using a WAG bag is incredibly simple (in fact, it’s much easier than digging a proper cathole). Open the package; set the outer bag to the side; unroll the larger, inner bag and place the toilet paper and hand sanitizer to the side; open the large bag and do your business; make sure to pack everything out, including your toilet paper! Be sure to pack out pet waste as well.
Cleanwaste WAG Bags : $26.98
Do I Really Need It?: In my opinion, yes. I highly encourage using a WAG bag over digging a cathole, especially during an overnight backpacking trip in areas with regular visitation.
If you’re backpacking in an environment where digging a cathole is appropriate, pack a stainless steel trowel to help you dig one. A cathole should be 6-8″ deep and 2-4″ wide. A good backpacking trowel will include measurements on the side to ensure that you dig your cathole deep enough. Be sure to cover the cathole and bury your waste when you’re done!
Naceture Ultralight Backpacking Trowel : $16.99
Do I Really Need It?: If you aren’t carrying a WAG bag, yes.
Extra Toilet Paper/Kula Cloth & Extra Plastic Bag
Regardless of your human waste disposal method you’ll never regret carrying extra toilet paper. It adds basically nothing to your pack weight, but if you need it, you’re going to be really glad you have it! Also be sure to carry an extra plastic bag to pack out your used toilet paper (unless you’re using a WAG bag).
Women can also consider carrying a Kula cloth . This is an antimicrobial pee cloth that can attach to your backpacking pack and be used in lieu of toilet paper. Because the cloth is antimicrobial you can let it dry in the sun and use it over and over again on your trip.
Do I Really Need It?: Yes, extra toilet paper is 100% necessary. You don’t need a Kula cloth (I’ve never used one personally).
Hand Sanitizer
Hand sanitizer is the easiest way to keep your hands clean and practice personal hygiene while backpacking. Be sure to store it with your food along with any other scented items in bear country!
Dr. Bronner’s Organic Lavender Hand Sanitizer Spray : $11.92
Do I Really Need It?: Technically no, but it’s very helpful to have.
Toothbrush/Toothpaste
A toothbrush and toothpaste are essential for oral hygiene on the trail. You can use a travel sized toothpaste or toothpaste tabs to cut down weight even more. Make sure toothpaste is stored with other scented items in bear country. Hardcore ultralight backpackers will also break off the end of their toothbrush to shave off as much weight as possible.
Bite Toothpaste Bits : $19.99
Do I Really Need It?: If oral hygiene is a priority, yes.
Bug Spray
If you’re backpacking during the summer, it’s always a good idea to carry bug spray. Different areas have different levels of mosquitoes and different people are more or less susceptible to bites (if you get eaten alive, I feel your pain!).
DEET is considered the most effective chemical for repelling mosquitoes, and is safe when used properly. Natural bug sprays that contain essential oils like citronella, lemongrass, and eucalyptus oil are also an option, although I’ve found they aren’t as effective as DEET when mosquitoes get really heavy. You can also treat your backpacking gear and clothing with permethrin, which can provide protection for up to 6 weeks.
Natural: Quantum Health Buzz Away Extreme : $16.99
DEET: OFF! Deep Woods : $13.46
Do I Really Need It?: No, if you’re backpacking in an area where there aren’t mosquitoes or during certain times of the year.
Sun protection is important in the backcountry. Even if you don’t wear sunscreen regularly, having it available during a backpacking trip is important to help prevent sun burns if you find yourself on an exposed trail.
If you’re planning on going into any bodies of water be sure to wear a reef safe sunscreen to minimize the impacts on the ecosystem.
Mychelle Dermaceuticals Sun Shield Clear Spray SPF 30 : $25.05
Do I Really Need It?: Depends on your backpacking location, the weather, and your personal preferences. If you opt to forgo sunscreen be sure to have other means of sun protection, like a hat, pants, and long-sleeve top.
Tampons/Pads/Menstrual Cup
If you have a monthly menstrual cycle then it’s possible you might have your period during your overnight backpacking trip. If you’re not comfortable with the idea of backpacking with your period , no worries. An overnight trip is typically easy to reschedule. But if you still want to get out there (or you have a highly coveted permit you don’t want to abandon), then have a way to manage your period is essential.
What product(s) you bring and use will depend on personal preference. Be sure to pack out all waste including used pads and tampons. If you choose to use a menstrual cup, the proper way to dispose of waste is by digging a cathole and burying it.
Do I Really Need It?: No, if you won’t be menstruating during your trip.

Emergency Gear
First-aid kit.
A first-aid kit is an essential item to pack on an overnight backpacking trip is essential in case you injure yourself or get sick on the trail. There are many prepackaged first-aid kits available, but they may or may not have everything you need. It’s always a good idea to customize your first-aid kit to fit your needs.
Here are some helpful items to consider packing in your first-aid kit for an overnight backpacking trip:
- Advil or Tylenol
- Bandaids of different sizes (including butterfly bandages)
- Antibacterial ointment
- Antihistamine
- Ace bandage
- Finger splint
- Small scissors
- Medical tape
- Electrolytes and/or sugar
- Any medications you may need including an epipen for severe allergic reactions
Adventure Medical Kits Mountain Series Hiker Medical Kit : $29.95
Do I Really Need It?: Yes, a first aid kit is one of the 10 essentials .
Knife/Multi-tool
A knife can serve a variety of purposes on an overnight backpacking trip. It can help with quick gear repairs, assist with cooking, and serve as a means of protection from wildlife or other people (although the odds of you needing it for that purpose are exceptionally low!). You can carry a folding knife or multi-tool depending on your preference and needs.
Kate Outdoors Recommends:
SOL Stoke Folding Knife : $31.49
Do I Really Need It?: Yes, a knife is one of the 10 essentials .
Emergency GPS
Carrying an emergency GPS can serve a number of purposes in the backcountry. It can be used to alert authorities in the event of an emergency, track your hike, send your location and communicate with friends and family back home, or even check the weather. While you likely won’t need to use it on an overnight backpacking trip, having one can make a huge difference if you find yourself in an emergency situation.
There are a number of different emergency GPS’s on the market, but the Garmin inReach and inReach mini are the most popular amongst backpackers.
Garmin inReach-mini 2 : $399.99
Do I Really Need It?: Technically no, but it’s worth the investment if you plan on spending a considerable amount of time in the backcountry or you’re participating in risky activities. If you have an iPhone 14 you can also use the SOS feature in the event of an emergency.
Having a map of the area where you’re backpacking is crucial for navigation in the event you get lost.
Many apps, like AllTrails, allow you to download a map of your trail ahead of time. These maps are helpful because you can pinpoint your exact location on them in real time, but technology can fail. Phone batteries die. Service issues occur. And online maps aren’t always 100% accurate. Carrying and knowing how to read a paper map should always be prioritized.
Do I Really Need It?: Yes, anyone can lost, even on an “easy” trail.
Depending on where you’re backpacking you may want to consider carrying bear spray. If you’re hiking in grizzly country bear spray should be considered an essential. Black bears typically aren’t as much of a threat as grizzlies, but wildlife can be unpredictable and it won’t hurt to have it. Even if bears aren’t a direct threat, bear spray can also be used on two-legged predators if necessary.
Be aware, in California it’s illegal to carry any type of pepper spray over 2.5 oz.
Counter Assault Bear Deterrent : $51.99
Do I Really Need It?: Yes, if you’re in grizzly country.
If you’re bringing along electronic devices, it’s a good idea to carry a power bank and cord(s) to recharge as necessary. This is helpful for phones, headlamps, emergency GPS devices, and cameras.
Goal Zero Flip 36 Recharger : $39.95
Do I Really Need It?: Not necessarily for an overnight trip. If you’re judicious with your phone battery (i.e. you turn it off at night and keep it on airplane mode during the day) it will likely last your entire trip.

Luxury Items to Pack on an Overnight Backpacking Trip
The following are a list of items that you don’t necessarily need to pack for an overnight backpacking trip, but may want to consider carrying to make your time in the backcountry a little bit more comfortable.
Everyone has different preferences when it comes to bringing luxury items on a backpacking trip and this is by no means an exhaustive list. Technically you can bring anything you want backpacking, as long as you can carry it and it isn’t illegal. Just be sure to consider the size, weight, and whether you’ll actually use the item. For example, if you’re backpacking up to an alpine lake it might sound fun to bring an inflatable float, but consider whether you’ll actually be willing to get into the 40° water before packing the extra weight!
Hiking Poles
Hiking poles have a number of benefits if you use them correctly. They can help you maintain balance in rocky terrain or during stream crossings, protect your knees while hiking downhill, and give you more power when hiking uphill.
Hiking poles are especially helpful on backpacking trips when you’re carrying a heavy load. While you don’t necessarily need to have them, it will make your hike feel much easier, especially if you’re on a trail with significant elevation gain.
Trekology Trek-Z Collapsible Hiking Poles : $59.99
Do I Really Need It?: Maybe, depending on the trail conditions and your personal needs and preferences.
Camp Pillow
Most sleeping bags come with a pouch that you can stuff with extra clothing for a makeshift backpacking pillow, but if you want a more comfortable night’s rest, invest in a camp pillow. Camp pillows are inflatable and don’t take up much space or add much weight to your pack. They are, however, another item to purchase. While most camp pillows aren’t expensive, per se, they’re pricier than you may expect for such a small piece of gear. If there’s room in your budget it can make your experience more pleasant, but it’s definitely not a necessity for an overnight backpacking trip.
Nemo Fillo Pillow : $44.95
Do I Really Need It?: No, you can use extra clothing in a stuff sack or your sleeping bag as a makeshift backpacking pillow.

A number of outdoor brands sell lightweight, collapsible camp chairs that are designed to be carried on backpacking trips. While bringing a chair isn’t an essential item, it could make your time at camp more comfortable. Alternatively, you can carry a small foam eggshell pad or use a bear canister to sit on.
Helinox Chair One Camp Chair : $109.95
Do I Really Need It?: No.
Book/Deck of Cards/Watercolors
Depending on when you plan to arrive at camp, the time of year that you’re hiking, and who you’re with, you may want to pack something to keep you occupied at camp. A deck of cards is lightweight and provides endless options for passing the time. Books can be heavy and bulky, so a Kindle may be a better option if you want to read. If you’re artistic, pack along some watercolors for an en plein air session at camp.
String Lights
Packing string lights on your overnight backpacking trip is a lightweight and fun way to create an ethereal vibe at camp that’s prime for taking memorable photos. String lights are also a practical luxury item since they can take the place of wearing a headlamp and provide a single source of light at night for your entire group for a fraction of the weight of a lantern.
MPOWERD Luci Solar String Lights : $45.47
My favorite luxury item when I pack for an overnight backpacking trip is a cozy pair of camp shoes (typically my Birkenstocks). You definitely don’t need to carry an extra pair of shoes for camp, but I can tell you there’s nothing better after a long day on the trail than taking off your sweaty boots and socks, and slipping your feet into something comfy.
Carrying sandals can also be helpful for stream crossings when you don’t want to get your hiking boots wet.
Chaco Women’s Z Cloud Sandals : $100-105
Birkenstock Arizona Sandals : $140
Do I Really Need It?: Technically no, but this is an item that I find is well worth the extra weight.
If you’re backpacking in an area with heavy mosquitos, then a bug net might be the best luxury item you can pack. I bought one before a backpacking trip in the Wind River Range in Wyoming and it was the best purchase I could have made. The mosquitos were relentless and I wouldn’t have been able to spend any time outside of my tent at camp without it. Bug nets are very affordable and lightweight, so it’s a no brainer addition if you’re backpacking in thick mosquito country. Be sure to also bring a hat so the brim can keep the net away from your face!
Mosquito Head Net : $9.32
Do I Really Need It?: Technically no, but if you’re backpacking in an area with heavy mosquitoes I would highly recommend one, even if you typically don’t get a lot of bites.
Camera/Tripod
Whether you’re an amateur or professional photographer, packing a camera and tripod is a must for capturing high-quality footage of your backpacking trip. While you can get some pretty awesome photos with phone cameras these days, you’ll be happy you have your camera with you once golden and blue hour roll around.
Sony a7iii w/ 28-70mm lens : $2,198
Do I Really Need It?: Technically no, but photographers may disagree!
FREE Checklist of What to Pack For An Overnight Backpacking Trip:

Share this:
- Click to share on Twitter (Opens in new window)
- Click to share on Facebook (Opens in new window)
- Click to share on Pinterest (Opens in new window)
- Click to print (Opens in new window)
- Click to email a link to a friend (Opens in new window)
Leave a Reply Cancel reply
Your email address will not be published. Required fields are marked *
Save my name, email, and website in this browser for the next time I comment.
FREE guide: the top 5 resources for finding epic hikes

Download your free backpacking gear packing list
Get the Packing List

NATIONAL PARKS
GEAR GUIDES
thank you for subscribing!
Affiliate Disclaimer: As an Amazon Influencer, I earn from qualifying purchases made from affiliate links that I share. This means that Kate Outdoors will earn a small commission from any purchase that you make through an affiliate link at no additional cost to you.
Hiking Disclaimer: Hiking and other outdoor activities are inherently dangerous and can result in serious injury and/or death. The information provided on this Website is intended for general informational purposes only and should not be relied upon as a substitute for additional research, proper training, experience, and judgment. You may encounter certain risks and hazards when hiking or engaging in other outdoor activities. These risks and hazards include, but are not limited to, falling, injury, wildlife, dangerous terrain, inclement weather, falling rocks or debris, hypothermia, heatstroke, dehydration, and getting lost. Trail conditions are constantly changing. This Website is not liable for any errors, omissions, or inaccuracies in the information provided. All users of this Website should be aware of the risks involved with hiking and other outdoor activities and should exercise caution at all times. By using the information contained on this Website, you agree to assume all risks associated with hiking and other outdoor activities and release Kate Outdoors LLC from any liability for any harms, claims, injuries, losses, and/or damages that may occur. Always use your own judgment and discretion when hiking or participating in other outdoor activities, be prepared, and take responsibility for your own safety.
Privacy Policy
Terms & Conditions
© 2020-2024 Kate Outdoors LLC
Item added to your cart
Gear guides.
- Ultralight Backpacking Gear
- Best Ultralight Backpacks
- Best Ultralight Sleeping Bags
- Best Ultralight Tents
- Best Camp Shoes
- Best Down Jackets
- Best Rain Jackets
- Best Minimalist Sandals
Tips and How-To's
- Ultralight Backpacking Tips
- Animal Tracks ID Guide
- Contour Lines and Topo Maps
- How to Read Trail Signs
Food and Water
- Backpacking Food Ideas
- Backpacking Meal Recipes
- Best Meal Replacement Powders
- How Many Calories Do I Burn Backpacking?
- The Triple Crown of Hiking
- Appalachian Trail Map
- Gifts for Hikers
- What is Naked Hiking?
THE Ultimate Backpacking Checklist

Photo by @kaylinb1231
The following backpacking checklist pinpoints all the things you need to think about before and after your trip, as well as essential gear items to have in your pack. We start off with the list and continue with a description of each individual item. If you want to download the list a PDF, click here.
Backpacking Checklist
Click here to download this backpacking checklist as a PDF.
Trip Planning and Preparation
Sleep system, first aid kit, accessories, optional extras, once you're back, before you head out, 📅 figure out the logistics.
First, pick the hike you want to do and the direction you want to go, the season and month you’re beginning your hike in may influence this decision. Then, check trail conditions and do some research into the parking and logistics of getting to the trailhead ahead of time.
How are the roads? Are there any current closures? Are there shuttles in the area? What's the parking situation like? Can you park your car overnight, and what passes and permits are required for the area?
Since you might lose cell reception on the drive to the trailhead, it’s also not a bad idea to have a print-out of the directions and a map of the area.
Our free trail guides contain all the information you need to know.
⛈️ Check the Weather Forecast
Temperatures won’t be the same at ground level vs. 3,000 ft. up a mountain. Even in the desert , temperatures can range reaching into the 100’s during the day and down below freezing at night, which means you’ll need a variety of clothing for your hike.
Moisture-wicking, quick-dry fabrics are a good place to start and packing extra socks, liners and layers are valuable to change into for avoiding hypothermia in wet or sweaty conditions.
Checking weather predictions and average yearly temps ahead of time will give you some ideas into what to expect, and from there you can zero in on footwear and any extras you’ll need (sunglasses, sunblock, gaiters, etc.) by looking into the climate and terrain of where you’ll be hiking.
📞 Alert an Emergency Contact
Whether going on a day hike, an overnight backpacking trip or beginning the first leg of a thru-hike, informing someone about your plans ahead of time is always a good strategy. Nature can throw some curveballs your way, and in case you do get injured, lost, or don’t return on the day you originally planned for, it’s reassuring to know there’ll be someone to send out the search parties.
Here are three things you should share with a family/friend prior to beginning your hike:
- A detailed trip plan
- A map with the exact location of where you’ll be hiking
- When you think you'll be back
To avoid having search parties sent out looking for you, be sure to let your family, loved ones or whoever you designated to be your contact person know that you’ve made it home safe and sound following your trip.
Hiking Hack: Cairn App is a great new real-life tracking app that allows you to select a “safety circle” you can share your hiking progress and location with in case of an emergency. It also automatically alerts your circle in case you’re overdue from your trip.
🚰 Map Out Water Sources
One of the most important things to locate on a trail is available water sources, especially if you're hiking in dry desert climates where water is especially sparse.
Knowing how many miles lie between water stations will help you determine how much water you’ll need to carry on you between re-fills. It’s also important to consider your water purification system , whether that be drops, a filter, boiling, etc.

📦 Plan Your Resupplies
Food resupply can either take a little or a lot of planning, depending on how you go about it. Since you only have so much room available for food at a time, you’ll need to come up with a system for restocking your food supply along the way. Whether you stick with one method or combine a few, here are some of the most popular food resupply options:
- Buy food at towns, gas stations and resupply points along the trail.
- Set-up a “bounce box” where you take what you need and put the rest back in the box and keep mailing it ahead from point to point.
- Have food boxes arranged ahead of time to get shipped and held at post offices.
- Have someone drop food off at certain locations for you to pick up.
- Rely on hiker boxes and eat whatever’s available (not necessarily the most reliable plan.)
- “Cache” your food: stash food at certain points along the trail ahead of time for pickup.
🤝 Distribute Your Gear
If you’re hiking with a few mates, then why not disperse the weight? Chances are there are a few heavy items you’ll all want to use, and hiking is definitely the time to adopt the sharing is caring mentality. Plan ahead with your group on who’s bringing what.
You can even trade off on carrying things like the stove, the bulk of the water or food supply or any other items that could be mutually used among the group.
📝 Get Insurance (Optional)
Planning an exciting excursion abroad? Trip insurance could be one of the most important purchases you make prior to your backpacking trip. There are several different plans you can choose from, and it can be worth the peace of mind knowing you’re protected against accidentally racking up a whopping $50,000 medical bill overseas. Here’s a further look into why trip insurance may be right for you: The 5 Best Travel Insurances .
💲 Make a Budget (Optional)
Living in the great outdoors should be cheap, right? Not necessarily. Buying the proper gear, supplies, and food ahead of time can add up quickly, and if you’re planning to be gone for an extended period, you’ll also have bills back home to account for months in advance. Creating a budget can help lay out a plan and manage your finances. Some key things to consider when planning your budget include trip length, transportation and travel costs, bills, food, lodging, misc. expenses on the trail, your emergency cash stash and costs of buying gear.

Backpacking Essentials
Your backpack is one of your most important pieces of gear. Make sure to choose a pack that weighs less than 2 lbs, rests comfortably on your pack and is made of a breathable material like Dyneema or nylon. As for capacity, we recommend 40L to 65L, depending on the length and duration of your trip. And remember, the bigger the pack, the more stuff people tend to shove in it and the heavier their pack ends up being.
A liner helps protect your backpack and its content from the rain. If you don't own a liner, you can use a trash compactor bag instead. It is just a effective.
Trail shelters, tents, tarps and hammocks all can work for shelter. However, depending on the environment you’ll be spending your nights in one option may certainly be preferable over the other. Bugs, weather, and terrain can influence shelter selection.
Relying on camp shelters can be hit or miss in availability.
Hammocks are great on saving weight—as long as you’ve got somewhere you can hang them.
Tarps can work, but the no walls thing can be a bummer.
For harsher climates ultralight tents can come in handy and are surprisingly durable, however, they can cost a pretty penny.
🛏️ Sleep System
Sleep systems consist of a sleeping pad, sleeping bag, a liner and a pillow (if you want one).
The sleeping pad is your comfort and protection from the ground. It’s advised to test it out ahead of time in a few different settings to ensure it's comfortable and has enough insulation. Sleeping pads come in a variety of lengths, thicknesses, and they can be inflatable or foam.
Sleeping bags should fall between 1-3 pounds. Depending on the environment and temperature range you’ll be in, you can choose between down or synthetic insulation, a summer, three-season or winter bag, and the style (mummy, quilt, rectangular, etc.).
Liners are a good way to keep the inside of your sleeping bag clean and provide some extra insulation, although not indispensable.
Cooking equipment is all about ease and multi-purpose use. Take a spork, for example. The little utensil is light, practical, and gives the best of both worlds. On the note of utensils, plastic silverware can be tempting over steel or titanium because of its weight and cost, but it’s not durable.
You’ll also want to pack a good cutting knife, dishware (a steel cup or bowl should do) and plan on bringing something to boil water with like either a pot or jet boil with fuel .
Lastly, you can choose your clean up method: hot water and scrubbing or a biodegradable soap option .
🥑 Food and Water
As a rule of thumb, plan to carry 2 lbs of food for each day of hiking. For example, if your next resupply point is 5 days away, you should have about 10 lbs of food in your pack. A great way to optimize your food load is to stick with options that have a high calorie-per-ounce ratio. Here are some great candidates .
As for water, it highly depends on how far water sources are from another. If water is abundant on the trail, you might get away with not carrying any water at all—simply drink at the source. If water sources are scarce however, you'll want to fill up one or two 1-L bottles and take those with you on the trail. More on this topic here .

👕 Clothes (Worn and Packed)
Climate and weather will be the biggest determinants here. This is also where layering comes in handy.
You want to pack at least one set of clothes for hiking and another set for camp (including shoes). Your hiking clothes are unavoidably going to get wet from either sweat or rain. So when you'll be done hiking for the day, you'll be glad to to have dry, warm clothes to change into.
Hiking in cold weather? You'll have to pack a few extra items to stay warm—down jacket, rain shell, wool beanie, gloves, etc.
📍 Navigation
There are many GPS, Satellite or downloadable app options to choose from for navigation. Many apps even allow you to pre-load trail maps on your phone so you can use them both on and offline.
But, how you plan your trail navigation is all about preference—and how linked into technology you want to be. If you do decide to go the tech route, it’s not a bad idea to have a backup navigation plan… just in case.
Having a compass , a map or a guidebook of the trail that marks campsites, water sources and other notable features can be a great resource.
Headlamps are the most popular lighting option since they allow hikers to go hands-free and are multipurpose (many have floodlights, red beams, distress signals, adjustable lighting). There are even rechargeable headlamps you can choose from.
But, there are still hikers out there that prefer the good old flashlight, lantern or tent light instead. Since lighting options come in all different shapes and sizes, some starting steps to help decide what’s right for you is to consider the desired light output level and time estimate (lumen count), beam distance, battery type, water-resistance rating and activity you’ll be using the light for.
🧼 Toiletries
Just because you’re hiking for days on end with no shower, doesn’t mean you need to forgo all of your personal hygiene rituals. Toothpaste, a toothbrush, soap, washcloths and hand sanitizer can go a long way. Biodegradable wipes can also be great for a quick wipe-down when there’s no water around. Toilet paper is always an option too.
🚑 First Aid Kit
You never know what can happen on the trail. From cuts and blisters to fever, a complete first aid kit can take the worry out of your outdoor adventures. No need to overdo it though. A pair of tweezers, some gauze pads, antiseptic, band-aids and a handful of pain killers can go long way. To avoid excessive weight, repackage everything and stick to about a week's worth of supplies. If you find yourself running low, stock up at the next trail town.

🔥 Backpacking Accessories
Going hiking near a lake, or during the peak of mosquito season? Might want to bring along some bug spray . Does your hike lead into bear territory? Many parks require bear bags or canisters for overnight stays.
Ever heard how duck-tape can fix everything? It’s true, a roll can repair tears and rips and also be used as protection against an oncoming blister. A pocket knife or waterproof matches are a few other items you might want to consider packing.
☂️ Optional Extras
Depending on where you’ll be hiking, it may be valuable to pack gaiters, an ice ax, sunglasses, a sun hat, lip balm or a hiking umbrella . Some hikers even bring things like whistles, earplugs and trekking poles.
Then, there’s always the fun stuff you could bring along like a deck of cards, a journal to record your backpacking trip or a book for those evenings by the fire. What’s important to have on your thru-hike is up to you. Everyone’s experience is uniquely theirs, and after some time out on the trail you’ll pinpoint what extras you don’t want to go without.
✂️ Optimize Your Gear
Anything you can do to cut weight in your pack, do it! This could include re-packaging items, cutting off extra straps or tags on your pack or losing your toothbrush handle (who really needs that, anyway?) Whatever isn’t a necessity should get the boot, and there are tons of ways you can do this. Ultralight packing and living with the bare minimum is key here. Your back and legs will thank you.
After Your Trip
🧺 wash and store your gear.
You made it! You accomplished your trip and have had the experience of a lifetime. Congrats! Now before you start celebrating there are a few things you need to do first—like properly clean, dry out and store all your backpacking gear.
When washing clothes, shoes, sleeping bag, tent, jackets, etc. stick with specifically formulated washes rather than regular detergents, and always make sure you store your supplies when they’re fully dry.
Products like Nikwax (a DWR re-waterproofing agent) and Active Wash (a wash that removes odors) work well on a variety of items. Cleaning your gear will help it last and it also gives you a good opportunity to go through and inspect it for repairs (busted seams, tears, etc.)
📖 Record Your Memories
Like anything in life, practice will make you better at it. Backpacking is the same way. After a few trips, you’ll take note of the things you can and cannot go without. After each backpacking trip, take a moment to go back to your original packing list and make notes. Add things that were vital to you and cross out others you didn’t need, and do this while the experience is still fresh in your mind so you’ll already be setting yourself up for success next time around.

About Katie Licavoli
About greenbelly.
After thru-hiking the Appalachian Trail, Chris Cage created Greenbelly to provide fast, filling and balanced meals to backpackers. Chris also wrote How to Hike the Appalachian Trail .

Related Posts

- Choosing a selection results in a full page refresh.
Complete Backpacking Checklist {Printable Packing List & Best Backpacking Gear}
This post may contain affiliate links.

What gear should you pack for a backpacking trip? We share our complete backpacking checklist with all of our lightweight backpacking essentials!

In the summer of 2007, I decided to go on my first backpacking trip. I bought a backpack in the wrong size for $20 on Craigslist, loaded it up with my camping gear (like, my car camping gear), and hiked up into the San Gabriel mountains near my home. It was a rough hike, to say the least, but I loved it. And, hey, everyone has to start somewhere, right?
Since then, I’ve made some big changes to my backpacking gear list. I hiked the John Muir Trail in 2012, and that required me to think through what I was carrying and make some investments in quality items – many of which I’m still using today!
Save this post!
Enter your email and we'll send this post to your inbox! Plus, you'll receive our newsletter full of great tips for all your outdoor adventures.
Michael and I have been backpacking together for over a decade and even hiked the JMT for our honeymoon in 2019, so we’ve had a lot of time to work out the kinks in our backpacking checklist.
In this post, you’ll find our complete backpacking gear list. This list stays relatively the same whether we’re going on a weekend or multi-week trip, so it can apply to most backpacking trips.
Additionally, we offer suggestions for a mix of gear including budget items, lightweight and ultralight options, as well as the tried and true gear that makes it into our own packs.
Our Backpacking Checklist
Use this backpacking packing list to help you get organized for your next trip. If you want a printable backpacking checklist , sign up for our email list using the form above and we will send you one for free!
Backpacking Packing List
Cooking System Stove Stove fuel Cookset / pot Lighter Eating utensil Mug / cup (optional) Biodegradable soap + small sponge (optional) Water filter Water bottles / reservoir Bear canister / food bag Plenty of food
Clothing Hiking top non-cotton Hiking pants or shorts Underwear / sports bra Hiking socks Hiking boots or shoes Gaiters optional Warm base layer top Warm base layer pants Insulating jacket Rain jacket + pants Windbreaker optional Beanie Gloves Sun hat Sunglasses Bandana or buff optional Camp clothes / shoes optional Extra hair ties optional Mosquito heat net optional
Safety & Navigation Headlamp w/ extra batteries First aid kit Knife / multitool Gear repair kit Signal mirror Whistle Emergency fire starter Backup water treatment Compass / GPS device Printed maps Itinerary left w/ friend or family member
Toiletries Toothbrush + toothpaste Lip balm Hand sanitizer Trowel TP + waste bag Wet wipes Quick dry towel optional Medications
Misc. / Extras Permit if required Photo ID, cash, credit card Hiking poles Cell phone Camera, battery, memory card Battery bank & charger cords Solar panel optional Backpacking pillow optional Ear plugs / eye mask optional Journal + pen / pencil optional Lightweight chair / sit pad optional Extra trash bag & ziptop baggies

Essential Backpacking Gear
This section covers the essential backpacking gear systems: hiking, shelter, and sleeping. These items tend to be the heaviest pieces of gear you’ll carry, so it’s worth considering their weight in addition to other features to keep your total pack weight as low as you can.
Backpacking Backpack
Every successful backpacking trip starts with finding the right backpack. Most backpackers find a pack in the 40-65L capacity range to be versatile for nearly all trips.
If possible, go to a gear store like REI, have your torso sized properly, and spend time trying on a bunch of different packs to find the right one. When I first started backpacking, I hiked too many miles with packs that were just wrong for me. Finding the right pack made a huge difference!
Here are our top picks based on our experiences:
Ultralight Pick: Zpacks Arc Series — If you’re looking for a framed ultralight pack, I would highly recommend looking into the Zpack Arc Series backpacks . These packs come in several sizes, and all feature the “Arc Frame” system which helps transfer the load onto your hips and also creates an air gap between the pack and your back to help you stay cool, load lifters, adjustable shoulder straps, and will comfortably carry up to 35 lbs of gear. I have the women’s pack and find it to be perfect for my almost-ultralight kit.
Lightweight with high capacity: ULA Circuit or Catalyst — The Circuit (68L/35lb load) and the Catalyst (75L/40lb load) are two of the most popular packs among PCT thru-hikers for good reason: they are super versatile and can carry a lot of gear, despite being lightweight at 36.6oz and 46.7oz, respectively. The Catalyst was the first lightweight pack I owned and I hiked the JMT comfortably with it fully loaded. These packs are a great pick if you’re working on decreasing your load but aren’t yet at an “ultralight” base weight.
Budget pick: REI Flash 55L — For under $200, the REI Flash 55L is a great pack at a budget-friendly price. It’s available in both men’s and women’s styles.
Tried & true traditional backpacking packs: Osprey — Over the years, Osprey’s packs have stood out to us as solid, durable packs with great suspension and load-carrying capabilities, and at a pretty reasonable price point. At the end of the day, these packs are heavier but often they carry heavier loads more comfortably, despite their weight. The AG (Anti-Gravity) packs have been our favorites for their airflow and suspension designs, and the Eja / Exos line has gotten attention in recent years for their lighter-weight design for those with more dialed-in kits.

Backpacking Tent
Your tent is your home away from home and there are a number of important things to keep in mind when selecting the right tent. Besides the obvious factors like floor size, weight, and price, consider ease of setup, and “liveability” (I did not fully appreciate the livability of our tent until we spent an entire week backpacking in rainy conditions on our honeymoon!)—this includes things like peak height, interior pockets, ventilation, and room for your gear.
Here are some options to consider:
Ultralight Pick: Zpacks Plex Solo or Duplex — These are two of the lightest tents out there, which is probably why we saw so many of them out on the JMT! Made from Dyneema composite fabric, this ultralight tent weighs only 13.9oz for the solo version and 18.5oz for the two-person . It relies on trekking poles and stakes to set up properly, but that’s how it stays so light! However, we won’t sugarcoat it—this is a pricey tent, but if you’re looking for the best ultralight option, this tent is hard to beat.
Best freestanding: Big Agnes Copper Spur HV UL — The Copper Spur is a freestanding tent with lots of interior space. It’s double-walled and can be set up fly first. Its freestanding nature comes at a bit of a weight cost—the UL1 is just over 2 lbs and the UL2 is 2.7 lbs. Both the 1 and 2-person versions have “awnings” that can be set up using trekking poles to provide some shade or light weather protection for hanging out. The 2 person version has two doors so you don’t have to worry about crawling over your tent mate at night.
In our packs: Big Agnes Tigerwall UL — The Tigerwall is a great option if you want a double-walled tent and don’t mind if it’s semi-freestanding (meaning it does need to be staked out in a few spots). It can be set up fly-first which is helpful in rainy weather. The Tigerwall UL2 is just over 2 lbs, and it’s also $100 cheaper than the Copper Spur UL2.
Budget Pick: REI Passage — At about 4 lbs, the REI Passage isn’t exactly a lightweight tent, but if you’re on a budget, the price can’t be beaten—only $139 for the one-person version! This freestanding tent is easy to set up, is double-walled, comes with a footprint, and has a roomy vestibule and interior pockets for organizing your gear.
Sleeping Bag
At the end of a long hiking day, nothing beats cozying up in a warm, fluffy sleeping bag! When buying a sleeping bag, you’ll be confronted with a lot of different temperature ratings.
The rule of thumb when it comes to temperature ratings is that the listed rating is what you can survive in, but to be comfortable you’ll want to add ~15F , particularly if you’re a colder sleeper.
Another option for those looking to cut weight is a sleeping quilt or hybrid quilt/bag. This design eliminates the down on the bottom of the bag, which gets compressed under your body weight and loses a lot of its insulating property anyway.
Backpacking sleeping bags and quilts to consider :
Lightweight Pick: REI Magma — The REI Magma is a great all-around sleeping bag that comes in two temperature ratings (15F and 30F) in men’s and women’s configurations. The men’s 15F comes in just under 2 lbs and the women’s 15F just over 2 lbs, so they are fairly lightweight for the warmth they provide (the 30F bags are both under 1.5 lbs).
Best Hybrid Quilt/Bag (ultralight): Zpacks Classic — Zpacks’ Classic sleeping bag is actually a bag/quilt hybrid. It has a great warmth-to-weight ratio and comes in 30F , 20F , and 10F temperature ratings. It features 900 fill power water-resistant down and a 3/4 length zipper to save a little weight while also staying snug while you sleep. These are true ultralight bags with weights of .75lb-1.5lb depending on temperature rating and length.
Best Synthetic Bag: Marmot Trestles Elite Eco — The Marmot Trestles Elite Eco is a great synthetic bag that’s not too heavy and is budget-friendly, too! The major downside to synthetic bags is they are not as compressible as down, so these are not ideal for lower-volume packs. But if you’re looking to avoid animal products this bag is a good place to start.
Budget Down Bag: Kelty Cosmic 20 — Down bags can get pricey, but the Kelty Cosmic 20 does a good job balancing price, weight, and warmth. The men’s version is under $200 and the women’s is just over. Both versions use water-resistant down. It’s worth noting that while the women’s version is nearly a pound heavier, it also has a 10F warmer comfort & lower limit tested temperature rating.
In Our Packs: Enlightened Equipment Revelation Quilt — Michael and I both use the Enlightened Equipment Revelation Quilt . It’s light, compressible, and pretty versatile—in warmer weather, it can unzip all the way to allow some of the heat to escape so we don’t overheat. There is no women’s version and the temperature rating is definitely on the “lower limit” end of the spectrum, so I’d advise getting a bag at least 10F warmer than you think you need if you’re a cold sleeper.
Sleeping Pad
Your sleeping pad serves two purposes: it provides cushioning, and it insulates you from the ground. The insulating power of sleeping pads is measured in “R-Value”. Here is a rough estimate of what R-value to look for based on nightly lows:
Down to 50F: R-2 or less Down to 32F: R 2-4 Down to 20F: R 4-5.4 Below 20F: R 5.5+
Backpacking sleeping pads to consider:
In our packs: Nemo Tensor Insulated (R 4.2) — After trying multiple sleeping pads, the Nemo Tensor is the pad we keep coming back to. It’s lightweight at 15oz, super comfortable, easy to inflate, packs down small, and it’s quiet .
Ultralight & warm: Thermarest Neoair XLite NXT (R 4.5) — For a warmth-to-weight ratio, it’s hard to beat the Thermarest Neoair XLite . This 3-season backpacking pad weighs only 13oz and provides R-4.5 insulation.
Good for side sleepers: Sea to Summit Ether Light XT (R 3.2) — With a full 4 inches of cushion, the Ether Light XT is a great pad for side sleepers. It’s lightweight at 17.3oz, compact, and quiet.
Lightweight Budget Pick: Thermarest Trail Scout (R 3.1) — For $75 (regular length), the Thermarest Trail Scout is our budget pick. It weighs a pound and a half, offers R 3.1, and is self-inflating. However, this pad is only 1” thick, so it’s not a great choice for side sleepers who will want extra padding for their hips and shoulders.
Most Comfortable: Sea to Summit Comfort Plus SI (R 4.1) — When sleeping well is more important than packing light, look no further than the Comfort Plus SI pad . This is arguably the most comfortable sleeping pad we’ve used in the backcountry. It’s 3 inches thick, quiet to sleep on, and the stretchy fabric that it’s covered is a nice break from the plasticky feel of other pads. However, be ready for a compromise: in exchange for a great night’s sleep, this pad is the heaviest on our list and is much bulkier when packed down since it’s made with open-celled foam.
Camp Pillow [optional]
A pillow is totally optional and is entirely a personal preference. We use this lightweight Cocoon Pillow and the Sea to Summit Aeros Ultralight pillow . Or, you can just put your extra clothes in a stuff sack and call it a night!
Hiking Poles
We consider hiking poles to be part of our essential backpacking gear, but really they are optional. Poles will help you on the uphills and take the pressure off your knees on the downhills, so we think they are well worth the weight!
In My Pack: Black Diamond Trail Shock Pro — I’ve used these trekking poles for over 10 years and they have really stood the test of time.
Budget Pick: Cascade Mountain Tech Carbon Fiber — These poles will only set you back $45-$65 (depending on color) but they are solid, lightweight (just under a pound for a set), and have cork handle grips.

Backpacking Kitchen
In addition to the cooking gear below, you’re obviously going to want to pack enough food! Check out some of our best backpacking meal ideas here.
Backpacking Stove
Your cooking system is going to be very dependent on your food strategy, the number of nights you’re out for, and the number of people you’re cooking for. You can read all about the best backpacking stoves here.
Favorite Integrated System: JetBoil MiniMo — The JetBoil MiniMo is fuel-efficient, so we don’t have to worry about running out of fuel as quickly. It boils water lightning fast when we’re just cooking freeze-dried backpacking meals, but it also provides enough simmer control that we can cook our own dehydrated food. If you only boil water, check out the Jetboil Flash .
In our packs: Soto Windmaster — The Soto Windmaster is an efficient canister stove with a quick boil time, even in windy or colder conditions. It’s a lightweight 3 oz and has a lot of deluxe features like a fuel regulator and integrated ignition. What’s more, the 4-prong pot stand provides a super stable base to place larger pots.
Budget stove: AOTU Stove — You can usually find the AOTU stove for under $15. This stove is user-friendly, fairly lightweight (3.3oz), and has decent fuel efficiency and wind performance. If you are new to backpacking or on a tight budget, this stove is a great value.
Ultralight stove: BRS-3000T — This is the lightest canister stove out there at .89oz and it’s budget-friendly, too (not usually the case in the ultralight world!). It comes with some tradeoffs, namely, it requires a narrow pot for stability, and it’s kind of garbage in the wind, so you’ll want to bring a windscreen or be OK finding a sheltered spot in the field (we usually make one using a large rock and our bear canister).
Cooking pot
If you opt for a stove instead of an integrated system, you’ll need to pack a cook pot! For solo hikers, 650-750mL tends to be a good size, and for couples aim for a pot in the 1.2L+ range.
In our packs: Sea to Summit Alpha 1.2L — This is a solid lightweight pot with enough volume for two people to cook in. It’s 6.3oz and a little more compact than the MSR pot below, which is why we switched to it last season. It’s a perfect pot for our style of cooking, which is to bring our DIY backpacking meals to a boil for a few minutes and then take it off the heat to cook in our pot cozy , so we don’t have to worry about the food sticking or scorching since this is not a non-stick pot.
Best non-stick: MSR Ceramic 1.3L — If you like to cook on your backpacking trips, you can’t go wrong with MSR’s ceramic-coated pot . It’s light at 7.5 oz, the handle is removable for storage, and the ceramic coating makes cleanup a breeze. You’ll want to make sure you use non-metal cooking/eating utensils to protect the coating, but we’ve found it’s pretty durable with no flaking or scratching after several years of use.
Best ultralight titanium: TOAKS Pots — It doesn’t really get lighter than titanium, and TOAKS makes pots in a variety of sizes so you can get exactly what you need and nothing more!
Even if your backpacking stove has an auto-ignite switch, don’t rely on it 100%. Pack a lighter in the event it craps out.
Eating Utensil
We like to use a utensil that has a true spoon shape (not a spork) because it allows us to scrape down the last bits of food from our pot, making it much easier to wash it out. These Humangear GoBites utensils have served us well over the years, and they also have a fork end. This MSR folding spoon is also a good option and is a bit longer for reaching into freeze-dried meal bags.
Mug [optional]
If you’re morning coffee (or tea) drinkers like us, you’ll probably want to pack along a dedicated mug.
This GSI mug is lightweight at 3.5 oz – making it even lighter than our old titanium insulated mugs and they are a fraction of the price! Sure, this mug won’t keep your coffee hot for hours, but we find it’s perfect for backpacking mornings. Bonus, the cup has measures on the side, so you can use it for measuring out water for your breakfasts and dinners.
It’s always good to carry a small knife or multi-tool. I found that the only part of the multi-tool I ever used was the knife, so we ditched it in favor of our lighter Opinel knife .
Bear Canister
If you’re backpacking in bear country, it’s smart to use a bear canister (and in many places, it’s required!). We use the BV500 (there’s also a smaller version ). I have been able to pack 6-8 days of food for myself or 3-4 days for the two of us into it.
BearVaults are super durable and approved by nearly all agencies in the US, but they are on the heavy side. If you backpack in areas that allow it, an Ursack might be a better choice (while the Interagency Grizzly Bear Committee approved the Ursack in 2014, many places still do not allow them).
You can read more about how and when to use a bear canister here.
Water Treatment
You never know what is in the water sources you come across in the backcountry, so make sure you have a reliable way to filter water.
Here are our favorite water filters :
Best Gravity Fed: GravityWorks 4L — It’s not the lightest filter at 11.5 oz but gosh it is EASY to use! The GravityWorks filters water at 1.75L/min with essentially zero effort, and it’s easy to maintain on the trail. You simply fill the bag, then hang it so the “dirty water” bag is hung above the “clean water” bag. Gravity takes care of the rest. This is a great system for small groups or if you hike in areas where you might not set up camp right by water sources.
Best Squeeze-Style: Katadyn BeFree — The Katadyn BeFree is our pick for an ultralight squeeze-style filter and is the filter we currently use on our backpacking trips. It’s simple to use: just fill the soft flask and screw on the filter. Then you can drink right from the flask or squeeze filtered water into your pot or into another bottle.
Best UV: Steripen — The Steripen Adventurer Opti UV purifier uses a battery-powered UV lamp to kill harmful protozoa, bacteria, cysts, and viruses in your water. Simply fill your bottle and then submerge the lamp as directed. Since this isn’t a physical filter, you’ll want to pre-filter silty water with a bandana.
Water Bottles
These soft-sided bottles are great because they collapse when you don’t need them and they are super lightweight. We always bring at least one hard-sided water bottle (like a Smartwater bottle) in case the soft-sided bottles get holes in them. You could also opt for one of those water bladders with a drinking hose for easy sipping.

Dishwashing kit [optional]
If you cook in your pot, you may want to pack a small dishwashing kit. Here is what’s in ours:
✔︎ Small Piece of Sponge
✔︎ biodegradable soap.
We like the unscented Dr. Bronner’s biodegradable soap for washing dishes. Please read up on the proper way to use soap in the backcountry , and for the love of god don’t use it IN any water sources.
✔︎ Quick-Drying Dish Towel
The REI Multi Towel Mini is super light (optional, dishes can always air dry!)
Toothbrush & Toothpaste
We use folding travel toothbrushes . They take up less space and guard the bristles from touching anything else in your toiletry bag.
Travel-size toothpaste tubes are perfect for backpacking trips (no point in dragging a full tube out on the trail!). Personally, we have switched to these toothpaste tablets when backpacking—they weigh next to nothing and take up almost zero space.
An absolute must for faces, necks, and hands. We try to reduce the amount of sunscreen we need by covering up (long sleeves and pants), but a small travel container of sunscreen is critical.
Between the sun and the wind, it’s so easy for lips to get chapped on the trail. So we always make sure to pack some lip balm with SPF .
Hand Sanitizer
Let’s be honest, cleanliness becomes a relative term on a backpacking trip. But before we prepare our food and after we go to the bathroom, a quick spritz of hand sanitizer goes a long way to cover our bases.
We budget 2-3 of these wipes per day to clean off all the sweat and grime. The ingredients of these wipes are literally just water and grapefruit seed extract, so we find they don’t leave a weird residue feeling behind.
Bathroom Kit
This trowel is cheap, durable, light (3.1 oz), and is faster at digging a cathole than using a stick. If you want to spend an extra $15 to save weight and some space, check out The Tent Lab’s trowels .
✔︎ Toilet Paper + Trash Bag
If you’re following Leave No Trace principles (and we hope you are!), you’ll know that packing out all your trash is important–and that goes for your used toilet paper, too. I use a ziplock bag that I “black out” with painter’s tape.
If you’re looking for TP alternatives, you’re in luck! There are a number of products designed with backpackers in mind that will help you cut down on the trash you have to pack out.
- Kula Cloth: This is an antimicrobial pee cloth that can be used in place of toilet paper for #1. If the idea of a pee cloth is new to you, here are the answers to your first few questions: Yes, it’s sanitary when used properly, and no, it doesn’t stink. You can read allll about it on the Kula Cloth website .
- Bidet: A great TP alternative that gained attention last year is the bidet–and this TUSHY travel version is a great option for backpackers. We met a gal on the JMT who used this one and couldn’t say enough good things about the experience. It’s essentially a soft bottle that can be filled with water, then squeezed to create a gently pressurized spray to clean up after you use your cathole.
Trash Bag for Food & Misc Waste
Technically, you could have one trash bag for everything, but I like to keep opening and closing my TP bag to a minimum, so I bring a separate one for storing my used food packaging.
Health and Safety
The Biolite 325 headlamp has a minimalist headband design, which distributes the weight in a way that’s super comfortable. The light tilts, dims, and has a red light setting. Additionally, it’s USB charged so there’s no battery pack which helps make it one of the lightest headlamps we’ve found – it’s only 50 grams!
You can get up to 40 hours of use (on low) out of a charge, so you will need a solar panel or battery bank with a micro-USB port to charge it on longer trips.
First Aid Kit
You can make a DIY first aid kit, or buy a pre-packaged one like this .
Our current kit is a bit Frankensteined, but generally speaking, our basic kit includes things like band-aids of various sizes, 2nd skin/blister bandaids/moleskin, butterfly bandages/wound closure strips, gauze, tape, elastic bandage, antibiotic ointment, antiseptic towelettes, tweezers, safety pins, ibuprofen, Imodium, and antihistamine.
Backup Water Treatment
In the event something happens to our water filter, we keep these Micropur tablets in our first aid kit.
Gear Repair Kit
Usually sleeping pad patches, spare stove O-ring, duct tape, a sewing needle, and nylon thread.
Firestarter/Matches
Small mirror.
While there are plenty of expensive hand-held GPS devices out there, we have been happy over the years just using our iPhones and Gaia GPS ! The premium version will set you back a few bucks ( save 20% by using our link ) but allows you to download maps before your backpacking trip so you can use them offline, and you can create and print paper maps for your route as well.
While we usually use a GPS app on our phones for navigation while hiking, we still bring paper maps that we generate using Gaia (see above). If your phone runs out of juice, gets water damaged, or drops and the screen cracks, you don’t want to be stuck without a way to navigate. Maps are stored in a ziplock bag along with any required permits.
This Suunto A-10 Compass is a solid, lightweight option. Your map and compass will only help you if you know how to use them, so you might want to check out a navigation class at your local REI.
SOS/Satellite Device
We carry a Garmin In-Reach Mini which works outside of cell service, meaning we can text with our family or friends via satellite (for weather updates, wildfire info, or just to say “we’re having a blast!”), call for SOS help if needed, and acts as a GPS with tracking. It’s only 3.5oz, but it is a pricey item and it requires a subscription to use all the satellite functions. However, it’s been worth it for peace of mind for us and our families.

Backpacking Clothing
Insulated jacket.
For cool mornings and cold nights, a warm insulated jacket is essential. We look for jackets that can be compressed and packed down small so they don’t take up a ton of room in our packs.
- In our packs: Patagonia Down Sweater
- Ultralight (Down): Mountain Hardwear Ghost Whisperer 2
- Ultralight (Synthetic): Enlightened Equipment Torrid
- Budget: REI 650 Down Jacket 2.0
Base Layer Tops & Bottoms
Base layers can help you regulate your body temperature in camp and on the trail as the temperature fluctuates throughout the day. We opt for Patagonia Capilene base layers on warmer trips or Smartwool base layers if it’s going to be colder.
Quick Dry Shirt
Look for something that’s moisture-wicking and breathable. Avoid cotton as it holds onto moisture—opt for quick-drying material instead. Patagonia’s Capilene Cool Lightweight Shirt is a great place to start!
Long Sleeve Sun Shirt [optional]
When hiking at higher elevations and on exposed trails, we like to pack a lightweight UPF-rated long-sleeve shirt for additional sun protection.
- Hoodie: REI Sahara Shade
- Button Down: Columbia Silver Ridge Lite
Rain Jacket / Windbreaker
A lightweight waterproof rain jacket will be worth its weight in gold if you encounter rain on your backpacking trip! We’ll pack these regardless of the forecast since the weather in the mountains can be unpredictable, and it doubles as a wind-resistant layer.
- Budget: REI Rainier
- Ultralight: Outdoor Research Helium
- Ultralight *small biz made*: Enlightened Equipment Visp
- In Our Packs: Columbia OutDry
Hiking Pants / Shorts
Look for breathable, quick-drying materials. UPF sun protection is always a big plus! Here are a few of our favorites:
- Men’s Pants: Eddie Bauer Guide Pro
- Women’s Leggings: Eddie Bauer Trail Tight
- Women’s Shorts: Vuori Clementine
Quick Dry Underwear
We each pack 2-3 pairs of breathable, quick-drying, moisture-wicking hiking underwear. These get rotated daily and on longer trips, we’ll rinse them with water and some biodegradable soap.
Hiking Socks
Investing in some quality wool hiking socks will help keep your feet happy on multi-day hikes. FITS , Darn Tough , or SmartWool are all solid choices. If you’re prone to getting blisters on or between your toes, I’d highly recommend trying Injinji socks .
Hiking Boots
Footwear might be one of the most important pieces of backpacking gear! It doesn’t matter how lightweight the rest of your gear is if your feet are in pain or covered in blisters.
Spend some time really feeling things out when you’re selecting hiking boots or trail shoes. We recommend REI for this purchase because of their return policy. You can actually put your shoes to the test and if after a trip, it turns out they weren’t the right fit, you can return them for a refund within a year.
A brimmed hat is nice for keeping the sun off your face during the day, and a warm beanie is a must for when the sun goes down!
Warm Gloves
A pair of warm gloves always find their way into my pack—I personally like the REI Polartec Gloves . Michael finds that for most summer trips, a pair of merino wool glove liners are sufficient.
Camp Clothes [optional]
One of the luxuries that we bring along when backpacking is a different set of clothes to wear at camp and while sleeping.
At the end of the day, we strip off all our dirty, sweaty hiking clothes, wipe ourselves down with wet wipes, and change into our clean(ish) camp clothes. We feel fresher going to bed, and since these clothes don’t carry any residual hiking sweat, we sleep warmer, too.
We each pack a shirt, bottoms, underwear, Teva camp shoes , and cushy socks.
Camera Gear and Electronics
These are optional items, but ones that always make it into our packs!
We bring a Sony a6600 mirrorless camera on our backpacking trips, which weighs just over a pound (plus lens(es)). Or, on fast and light trips we might just use our iPhones. A smaller camera like the Canon G7X or the Sony RX100 is also a nice, lightweight option for casual picture-taking.
Peak Design Camera Clip
This handy clip attaches your camera to your backpack strap so you can have your camera easily accessible on the trail.
Battery Bank
A battery bank is optional, but if you have devices that need to stay charged, it might be worth the weight. They come in a number of mAh capacities. This 10,000mAh pack will charge your phone 2+ times.

We hope that this backpacking checklist will be helpful as you plan your next backpacking trip! If you’re looking to buy or upgrade gear, be sure to check out this post about where to buy discounted outdoor gear to save a bit of cash.
If you want to dig deeper, we have articles about choosing a backpacking stove , details on our backpacking kitchen , and articles about dehydrating food for backpacking and buying and packing backpacking food for your trip.
Megan & Michael are the creators of Fresh Off The Grid, a blog dedicated to helping you fuel your adventures by sharing camp cooking recipes, backpacking meals, and outdoor travel guides. Their recipes and outdoor cooking expertise have been featured in Backpacker Magazine, Outside, REI Co-Op Journal, Food & Wine, and New York Times Cooking.
13 Comments
Someplace you mentioned travel bottles that can hold sunscreen (maybe they aren’t silicone?) but I can’t find it now. Can you please tell me where to find them?
Yes, humangear GoToobs! You can find them here.
Great article! Can’t wait to try this!
great information i will try this tips thanks for sharing
I really like this checklist, it’s quite comprehensive to say the least. I’d only like to add one advice: always have one more pair of socks than you calculated necessary. Also, nowadays I also carry a pair of lightweight shoes to change into at the campsite.
I completely agree with you about packing an extra pair of socks! I have never once thought to myself “I packed too many socks” 😉
Really useful, thanks for sharing your advice and experience. It’s still too cold for me here in Ireland for camping but couple of months and I’ll be out! Great list.
Camping in Ireland sounds like a dream. Summer will be here soon enough!
Great list, but would love to see more budget friendly options. $50 for camp shoes when Crocs will do? No, thanks!
Thanks for the feedback! The Teva camp shoes we linked to do have multiple purposes – good for river crossings, and they are the sandals I wear around town in warmer weather too. I certainly wouldn’t shell out 50 bucks exclusively for camp shoes either 😉 But, we’ll work on including more budget-friendly options in these gear lists in the future!
You know that Crocs are also $50 right?
I really like this checklist, it’s quite comprehensive, to say the least. I’d only like to add one piece of advice: always have one more pair of socks than you calculated necessary. Also, nowadays I also carry a pair of lightweight shoes to change into at the campsite. https://bagcottage.com
Absolutely agree! We carry two pairs of socks to hike in, and one pair to sleep in. Camp shoes are a must for us these days, too. I left them behind on our last backpacking trip to see if I could get away without them, and boy did I miss them at the end of the day!!
Comments are closed.
- Privacy Policy
- Terms of Use
- Affiliate Disclosure
Overnight Backpacking Checklist: What to Pack

- Post author: Hiking People
- Post published: August 3, 2021
- Post category: Getting Started / Hiking Tips
- Post comments: 0 Comments
For beginners, overnight backpacking is a milestone to be achieved in their outdoor lives. Of course, staying a night away from your home in unfamiliar territory and facing the problems of that on your own is essential to be called an “outdoor adventurer” as a start.
Besides, overnight backpacking can be a great experience as it takes you away from the loud noises, the bright night lights and the polluted air of the city. It revitalizes your body through tough activities, exposes you fresh air and helps you regulate your sleep cycles; all being essential for your health. It can be frightening for beginners. The most common mistake beginners make is that they overpack. A heavyweight backpack is a killer for a good backpacking experience. The problem becomes even worse when they find out that even after all that weight, they have forgotten something useful.
So the first challenge that a first timer must face is that they must stay as lightweight as possible and still cover all they need i.e. carry only the essentials. So here is a checklist for an overnight backpacking trip.

Boots are the foundations of your backpacking trip. Bad boots can ruin the whole trip. So choose carefully here. Choosing your boots depends on what kind of terrain you will be walking on and for how long.
For a simple trail, you can use La Sportiva Mid GTX Hiking Boots. But if you are going through some rough terrain, our recommendation would be Asolo Fugitive Gore-Tex Boots. They can handle almost anything they step on. If you have mountains to climb, then La Sportiva Spantik will do the job.
2. Backpack

The size of your backpack depends on the time duration of your hike and also on how prepared you want to go; either you go fully prepared like heavy first aid kits or just pack the essentials. There are a lot of options on the market like Osprey, Gregory, Granite Gear, etc. Gregory Baltoro is a good option as it has enough capacity and a rigid frame while weighing just around 4lb. It is comfortable and can be used in all types of hikes.

Camping tents are essential when going on an overnight trip. The type of tent depends on what kind of environment you will be going and what kind of weather you will be facing and space that you want for yourself. The weight of the tent also matters as you don’t want to carry too much weight.
Nemo Hornet Ultralight Backpacking Tent is a great option as it is just around 2lb and provides adequate weather protection. However, if you are going for someplace with more rough weather like mountaintops, for example, then ALPS Mountaineering Lynx 2 is the option for you.
4. Sleeping Bags and Pads

Sleeping bags are required to keep you warm through the night and ensure comfortable rest throughout the night. But sleeping bags alone are not enough to keep you insulated.
You would still need a sleeping pad to keep you properly insulated.
The higher the R-value of the two, the higher the insulation they provide. When choosing a pad and a bag, there are no recommendations as it really comes down to what kind of weather you are going to deal with, and so, you must choose the both with the right R-value, otherwise, you might too warm or might not be warm at all.
5. Socks

At first, hiking socks seem expensive. But they developed specifically for this purpose. The normal cotton socks that you wear to work just won’t work in the rough terrain of the wilds. A lot of things matter while choosing your socks, e.g. height of socks, material and cushioning. Smartwool and Darn Tough are the recommended brands here which will provide you with adequate protection.
6. Water Bottles

Staying hydrated throughout the hike is very important and so you must make proper arrangements to stay hydrated. The volume of water that you would need depends on the weather. But still, you should have ample water storage with you at all time.
We prefer water bladders over water bottles because they don’t take a fixed amount of space. And they can hold a large volume of water which is necessary during an overnight trip.
7. Clothing

The clothing mainly depends on the weather. But it is recommended that you always keep spare clothing as there can be mishaps along the way like clothes getting a lot dirty or getting wet in which case you might catch a cold. So always keep spare clothing and keep separate warm clothes for the night because it gets cold no matter what the season.
You may want to get yourself some water-resistant and weather resistant pants and jacket like the Marmot Minimalist pants and jacket which are weather resistant and warm. Other than that, you should also keep a towel to keep you dry.
8. Food

Food is an essential item during the hike (well duh!), but some people overdo it by packing too much food and then dragging that extra weight with them which can ruin their hiking experience. Each person requires 2500-4500 calories depending on height and weight.
Fresh food is better if you are going for a one night trip. Otherwise canned food is a better option if you are going for a longer trip.
You would also need a pocket-sized canister stove like an MSR MicroRocket Stove or a liquid stove if you are in cold weather like MSR Whisperlite. A Snow Peak cooking set would suffice with that.
9. Knives and Multi-Tools

During an overnight hike, you would come across a lot of issues that would require tools to be solved. For that reason, you must have multi-tools and knives to help you with that. A Leatherman Multi-Tool is a good choice as it will everything you need depending on the number of tools you have.
You should also have a separate knife as the knife in the multi-tools is usually too small. Make sure you buy a fixed blade knife. A fixed blade is recommended over a foldable blade because of durability.
You can also consider a tomahawk if you are going for hunting or you think you might need it for wood works on the wild to make shelters for example. But all this depends on your enthusiasm and how adventurous you want to be. SOG is a good brand to pick a tomahawk.
10. Navigation

Now we all know that these days, technology has made life much easier. Our cell phones have everything we need today for navigation. But in the end, it is technology and unreliable nevertheless. The batteries can always die out or the phone can get damaged or you might not be to get proper service.
Always keep a paper copy of maps of the place you are going. Also, keep a compass with you as well. You never know when you might be lost in the jungle. Keeping a compass and a paper map will come in handy in case you have to find your way back home.
11. Waterproof Cases

If your hike includes going through a narrow water stream or a waterfall, then bringing waterproof cases is always a good idea. Waterproof cases add extra protection to your sensitive gear like cameras, cell phones or your clothes, in case they are not waterproof.
Sometimes, unexpected rainfall might hit you, and you can be in a lot of trouble if you are not prepared then. Waterproof cases like the ones offered by Pelican and Seattle Sports are good for protecting your gear.
12. Medical Kit

In the wild, there can be many things that can cause injury to you. Since you are away from your routine city facilities, any unlikely event can be a bigger problem than usual. Any physical injury can cause a lot of problems and will make it a lot harder for you in the wild to deal with such a problem. Furthermore, any cut or scratch, if not treated properly, can become infectious which is dangerous. Then there are insect stings that are another problem.
Having a medical or a first aid kit is essential for a hike. You might have to deal with any kind of injury. It is necessary to sterilize wounds or cuts that can potentially become infectious. It is also necessary to deal with allergic reactions. Medical kits can be made at home by putting together some aseptic cotton swabs and prescription medicines, anti-sting treatment or can be bought at the go. So it is really a personal preference.
13. Trekking Poles

Trekking poles are another great equipment to bring with you on a hike. They support your back and knees as you walk and down hills preventing knee and ankle pain. Knee and back pain can be a huge problem due to jerks while moving downhill and can ruin all your hiking experience.
Trekking pole like Alpine Ergo from Black Diamond is a good pick. However, Vario 4 Carbon offered by Komperdell is a great all-rounder being lightweight and durable.
14. Water Purification System

Let’s be very clear when it comes to diarrhea, it is a nightmare for a hiker. It can prove to be fatal in the wild as you lose a significant amount of water and electrolytes. Plus other stomach infections. Most of these diseases come from water. Clean water is essential for hiking. Apart from having a water reservoir of your own, you might still need water along the way as your water reserves run out. It is necessary that in such cases, you must have a water filtering system. Water purification system consists of a water filter and further water treatment. You can choose either a pump filter or a gravity filter.
Pump filters require manual force but are cheap whereas gravity filters don’t require any work but are expensive and can also be heavy. There are also ultralight filters to choose from but they are not as efficient.
Further water treatment is required of the water for killing small bacteria and viruses which the filters usually don’t filter out.
Katadyn Micropur Tablets are the most famous water purifiers, easy to carry and a great backup. Further ways of treatments include UV light, boiling. The treatment makes sure the water is clean from microbes that passed through filters.
Further Tips for Overnight Backpacking

If you have covered all the above requirements, there are always small stuff you can do that can help you further smooth your backpacking experience.
Bring snacks with you on the hike. You need to keep a high energy level when on a hike and snacks do just that. They provide an instant dose of energy. Keep a bag of dry fruits with you to keep your hunger satisfied and your energy, full.
Always bring a torch with you on an overnight hike. It can be pitch black in the dark so you would need light to navigate. Maglite Torch is best for camping. Furthermore, keep a headlamp with you as holding a torch can be inconvenient at times when you are working on something.
Make sure that you bring extra batteries and a power bank with you to keep your equipment i.e. cell phones, cameras, light sources charged. You should also have plenty of energy along the way. Power banks will add to your weight so it’s better to carry extra batteries.
Take extra clothing with you just to remain on the safe side. Your clothes might get dirty or wet and you would want to change them should such a situation occur. So always a good idea to carry extra clothing. Speaking of clothing, don’t forget your towel. People think towels are insignificant while packing. But it is only during the hike that they realize its importance. But it is too late by that time.
Other small stuff includes a small shovel or trowel, which can be part of your toilet kits. Insect repellent, very important. There are lots of mosquitoes in the wild and other insects that sting. Apart from having a painful sting, these insects also serve as a vector for many dangerous and even fatal diseases.
Now, you are good to go. Happy hiking!
Share with your Friends Share this content
- Opens in a new window X
- Opens in a new window Facebook
- Opens in a new window Pinterest
- Opens in a new window LinkedIn
- Opens in a new window Reddit
You Might Also Like

Best Hikes in the US: Top 20 Must-Do Hikes

Difference Between Hiking Boots And Sneakers

Top 10 Best Mountains to Climb in the US
Leave a reply cancel reply.
3-Day Backpacking Checklist (with Printable Packing List)
This complete backpacking checklist includes all the lightweight gear you’ll need when packing for an overnight trip in the backcountry.

Are you planning a backpacking trip and feeling overwhelmed with figuring out what gear and supplies you need to bring? Don’t worry, you’ve come to the right place.
In this post, we’ll share our ultimate 3-day backpacking checklist (tailored for women) to help ensure you have everything you need for a successful and enjoyable trip.
From essentials like shelter and a comfortable sleep system to practical clothing choices, we’ve thought of all the basic essentials you’ll need to be comfortable on a weekend-long backpacking trip – nothing more, nothing less.
While this is a comprehensive list, I encourage you to adjust your checklist based on your own needs. That being said, I also encourage you to try and stick to the essentials. You may be surprised at how little you need!
The Big Gear Items
These are the essential pieces of gear that should always be on your backpacking checklist for every single trip you plan.
Backpacking Pack
I’ve tried many backpacking backpacks, and funny enough, the least expensive one I’ve owned has also been my favorite.
At 4 lbs. 8.7 oz., the Deuter Aircontact Core 60 + 10 SL Women’s Pack isn’t super lightweight, but it still weighs nearly 2 pounds less than my old Gregory backpack and it seamlessly molds to my body.
Deuter’s Aircontact series packs can adjust for a variety of torso lengths and also comes in a men’s model .
The 60 +10 SL pack is plenty big for a multi-day trip. In fact, this is the pack I took on my 22-day John Muir Trail hike, a 10-day backpacking trip in Alaska, and my Trans Catalina Trail backpacking trip .
For a shorter backpacking trip or if you’re splitting carrying gear with a partner, check out the smaller 45 + 10 SL version . This version is what BFT Director Linda uses on backpacking trips.
Shop Deuter Aircontact Core 60 at:

Backpacking Tent
Your tent choice can make the biggest difference in weight out of all the big gear items. However, the lighter your tent, the more money you’ll spend.
If you know you’ll be doing a lot of backpacking, I recommend investing in a good-quality, ultralight tent like the Zpacks Duplex . At just over 1 lb 5 oz, it’s one of the lightest tents on the market yet still roomy enough so you don’t feel like you’re sleeping on top of your partner.
It’s important to note that this Zpacks Duplex is a semi-freestanding tent. It does require two trekking poles (or the Duplex Flex Kit ) and guy lines (included) to set up.
Shop The Zpacks Duplex Tent at:
If you would like more room or backpack with a pooch, the Zpacks Triplex is just a half-ounce heavier and gives a bit extra space. My partner Ryan and I use the Triplex for backpacking trips which fits us and our 2 dogs, Charlie and Gumbo.
Read next: Interested in the Zpacks Duplex, but want to learn more? Head over to our detailed review to see if it’s the tent for you.

If $600+ is too much to spend on a tent (we don’t blame you!) or you want a freestanding tent, the REI Half Dome SL 2+ is a more budget-friendly option. It is a few pounds heavier at 3 lbs 15 oz, but still a great lightweight option.
Shop REI Half Dome SL 2+ at:
Sleeping Pad
I currently use the women’s Sea to Summit Comfort Light Sleeping Pad and love it. It’s lightweight, packs up small, and still manages to be warm and comfortable.
It’s also easy to inflate and comes with a pump integrated into the stuff sack, and it’s made out of durable ripstop nylon.
There’s a unisex version too in case you want something a little bigger.
Shop The Sea to Summit Comfort Light at:

Sleeping Bag
More and more backpackers are opting for quilts over sleeping bags because they are more lightweight and versatile yet still keep you nice and cozy at night.
The Enlightened Equipment Revelation Quilt is our pick for a backpacking quilt. It’s incredibly lightweight at 1 lb 3 oz (850-fill, 30-degree) and we also love that you can customize it to your needs and preferences.
When ordering, you can choose between 850 and 950 fill power, select a temperature rating between 0 to 50-degree, and even customize your quilt length.
The Revelation Quilt is truly a revelation and one piece of gear I don’t leave at home when I’m heading out on a multi-day trip.
If you’re backpacking with your partner and prefer to cuddle, check out our post on the best double sleeping bags for backpacking .
Shop The Enlightened Equipment Revelation Quilt at:
More Big Gear Items
Backpacking accessories.
There are tons of backpacking accessories you can choose to pack, but here we list the most important ones that will keep you safe and comfortable on the trail.
Trekking Poles
On those uphill climbs, trekking poles help take some of the weight off your hips and legs by utilizing your arm strength. On the downhill, they help ease the pressure on your knees. And on those stream crossings, these puppies have saved me more times than I can count by helping me balance.
The Black Diamond Distance Carbon Z Trekking Poles are Black Diamond’s lightest foldable poles made of carbon fiber and come in 4 sizes to meet your height.
Shop The Black Diamond Carbon Z Trekking Poles at:

The BioLite Headlamp 325 is my new go-to headlamp for backpacking. It’s ultralight, low profile, and very bright with four lighting modes including red light so you won’t blind your basecamp buddies or compromise your night vision.
I also love that it is battery-free and USB-chargeable (just be sure to fully charge it before you head out!).
Shop The BioLite 325 Headlamp at:
Emergency Communication Device
I like to carry a tracking device with me that I can use to send a help signal in case of an emergency.
The Garmin inReach Mini 2 allows for two-way custom texting and also has GPS that you can use for navigating.
The Mini is much smaller and lighter than the regular Garmin inReach so I prefer it for hiking and backpacking when every ounce matters.
Shop the Garmin inReach Mini at:

First Aid Kit
You should always have a first aid kit when you are hiking in the backcountry. This ultralight, waterproof medical kit comes with the minimum supplies that you will need to address minor wounds, as well as travel-sized packs of some handy medications. I
In addition to what comes in this kit, you should supplement it with some extra blister band-aids and any medications that are specific to the hikers in your group .
Shop the Adventure Medical Kit at:
Read next: Prefer to put together your own medical kit? Read our guide on How to Build Your Own First Aid Kit .
Backpacking Chair
Packing a lightweight chair is definitely not essential for a backpacking trip, but it’s a nice-to-have item if you plan to spend a lot of time relaxing at camp. The Helinox Chair Zero packs down to roughly the size of 2 Nalgene water bottles and weighs only 1 pound, making it the perfect luxury item.
Shop the Helinox Chair Zero at:
Camping Accessories
Backpacking kitchen gear.
Next on our backpacking checklist is your camp kitchen gear. I tend to keep my cooking setup simple when backpacking. I mainly boil water for coffee or tea and oats in the morning and for backpacking meals in the evening.
Backpacking Stove & Fuel
The Jetboil Flash Cooking System is the most efficient backpacking stove I’ve found, especially if you are only boiling water.
Together, the stove and pot only weigh 13.1 oz. For a 3-day trip, one 230-gram fuel canister ( sold separately ) should be enough if you are using your stove for coffee, breakfast, and dinner.
Shop the Jetboil Flash at:

Water Bottles or Hydration Reservoir
I like to pack a few of these lightweight Platypus Soft Bottles that can be rolled up when they are empty. Compared to a hard water bottle like a Nalgene, these are much lighter and take up less space when backpacking.
Depending on water availability, I’ll bring up to three of these on my backpacking trips.
I also tend to use these instead of a hydration pack since a reservoir can be a pain to pull out of my backpacking pack each time it needs to be refilled.
But if you like to backpack with a hydration reservoir for easy water access while you hike, the Osprey Hydraulics Reservoir is a great option.
Shop the Platypus Soft Water Bottles at:

Backpacking Water Filter
The Platypus GravityWorks Water Filter System is absolutely the easiest way to filter your water in the backcountry, in my opinion.
This system relies on gravity to push water through, eliminating the need to pump by hand or manually squeeze water through a filter – meaning you can save your energy for the hike.
At 11.5 ounces you will barely notice this thing in your bag, and what’s really cool is you can connect the hose directly to your water bottle or any standard hydration reservoir.
For more details on how it works, read my complete review here .
I’ll also mention that it’s always good to carry a backup in case your water filter fails. These Katadyn Micropur Purification Tablets are great because they are super small and you can just throw a few in your first aid kit.
Shop the Platypus GravityWorks Filter at:

Lightweight Camping Mug
You’ll need something for that morning coffee and evening tea. The GSI Outdoors Infinity Backpacker Mug is lightweight and will keep your beverage warm in the coldest of conditions with its insulated wrap and sip lid. It even has a lightweight fabric strap as a handle.
Shop the GSI Outdoors Camp Mug at:
Eating Utensil
A girl’s gotta eat! Ramen, backpacker meals, oatmeal. This TOAKS Long-Handled Spoon is the only utensil you need, and it weighs shockingly little at 0.65 ounces!
It also has a long handle and can easily reach the bottom of that Mountain House bag.
Shop the TOAKS Long-Handled Spoon at:
Some people like to carry a multi-tool, but personally, I’ve always been able to get by with a simple, small knife.
This Gerber Mini Paraframe Knife can cut paracord or be used to prepare food and only weighs 1.4 ounces.
Shop the Gerber Mini Knife at:
Bear Canister
You may or may not need a bear canister depending on where you are hiking. They are required by law in California’s Sierra Nevada Mountains, spots in Alaska, Washington, Idaho, Wyoming, and more.
In some places, they may be available for rent but be sure to check before heading out.
If you are on a short trip and only carrying food for yourself, the Bear Vault 450 is a good inexpensive option. Or for a duo or longer trips, go for the larger version .
Shop the Bear Vault 450 at:
Backpacking Kitchen
Backpacking toiletries.
My beauty routine while backpacking is pretty limited and is focused purely on hygiene. That is what I’ve reflected in this backpacking checklist. No deodorant, no makeup, no hairbrush, etc.
The mountains can suck the moisture right out of those beautiful lips leaving them cracked and dry. Plus, your lips are just as vulnerable to sunburn as your face, so SPF is key.
Sun Bum Mineral SPF 30 has natural, organic ingredients and will keep your lips hydrated and protected.
Shop the Sun Bum Lip Balm at:
At high elevations, you can burn way quicker than you think, and all those hours hiking in the sun add up.
This Sun Bum sunscreen comes in a small tube, is water-resistant , and provides SPF 50.
Shop the Sun Bum Sunscreen at:
Toothpaste & Toothbrush
It’s all about those travel-size toiletries when backpacking. This Dr. Bronner’s Travel Toothpaste comes in a 1 oz size and is all-natural, fair trade certified, and the packaging is completely recyclable.
Shop the Dr. Bronner’s Toothpaste at:
Poop Kit – Trowel, Toilet Paper, & Ziploc Bag
In order to comply with the 7 Leave No Trace Principles , you need to dig a cathole that is at least 6-8 inches deep when you go #2.
You may think “I don’t need a shovel… I’ll just use a rock or stick.” I’ve made that mistake myself only to find that sometimes the dirt is so hard, you can’t dig a hole. And then panic ensues.
Make life easier for yourself by grabbing a BoglerCo Ultralight Trowel . It’s super lightweight and there’s really is no excuse to not bring it with you.
Also, when you go #2, you need to pack out your dirty toilet paper in order to maintain campsite and trail conditions for future campers.
There’s nothing grosser than finding a bunch of used dirty TP when you’re camping. I like to bring a Ziploc bag for my TP and then I store that in a small (not-see-through) stuff sack that I can rinse out later.
Shop Ultralight Trowel at:

While this might sound strange to you at first, bringing a pee rag on your backpacking trip, like this specially made, antimicrobial Kula Cloth , is super helpful.
Instead of having to wipe with TP each time and pack it into your zip lock bag, and instead of not wiping at all which can result in odors and discomfort, just wipe with this reusable cloth!
When going to the bathroom, I drip dry and then pat myself off with this in order to keep my lady parts clean.
Then, I use my water bottle to rinse off the towel 200 feet from any water sources (as recommended by Leave No Trace) and hang it from my pack to dry.
Shop the Kula Cloth at:

Quick Dry Towel
A lightweight quick-dry towel is always handy, whether it’s for drying your hands and face, doing dishes, or going for a swim and doing some sunbathing.
They come in a variety of sizes so you can pack what you need and nothing more.
Shop the REI Multi Towel at:
Hand Sanitizer
A travel-size hand sanitizer is a must before eating and after going to the bathroom while in the backcountry.
I prefer hand sanitizer to soap because it’s easier to follow Leave No Trace. If you do choose a biodegradable soap, like this one by Dr. Bronner’s , be sure to abide by Leave No Trace and rinse 200 feet away from water sources.
Shop Dr. Bronner’s Hand Sanitizer at:
For shorter trips, you might be able to get away without wet wipes, especially if you’re using the pee rag method and you want to save weight in your pack.
However, if you want a little refresh, these Sea to Summit Wilderness Wipes are soft and gentle on both your skin and the environment. They’re unscented (better for not attracting wildlife) and even come in an extra-large size in case you want to wipe your whole body down after a hot sweaty day on the trail. Be sure to pack them out in your ziplock trash baggie to dispose of them properly.
Shop Sea to Summit Wilderness Wipes at:
Backpacking Clothing
How much clothing should you bring on a 3-day backpacking trip? The absolute minimum you need to be comfortable.
You’ll appreciate it when you start to feel the weight of your pack after a couple of hours of hiking.
You really only need 1 hiking outfit and 1 set of dry, warm clothes to change into when you get to camp and for sleeping.
The only thing I bring extra of is underwear and socks and maybe an extra shirt I can swap out depending on how many days I’m backpacking.
Helpful Tip
Avoid cotton.
When backpacking, you want to avoid cotton because it retains moisture, takes a long time to dry, and tends to harbor smells. Instead, opt for quick-dry materials that wick sweat and resist odors.
Insulated Jacket
A lightweight, packable, insulated (down or synthetic) jacket is key for when the temps drop in the evenings.
I prefer something with a hood so I can keep my head warm when it’s windy or extra cold, so I pack my Arc’teryx Atom Hoody .
Shop the Arc’teryx Atom Hoodie at:

Rain Jacket
Always check the weather before you set out. Even if it’s looking like nothing but sun, I like to bring a lightweight rain jacket and the Arc’teryx Beta AR Rain Jacket is my top pick. It is definitely pricey (catch it on sale!) but once you invest in a piece like this, you’ll have it forever. It’s the rain jacket I wore on a backpacking trip in Alaska where it rained nearly every day.
For a more budget-friendly option, check out the REI Co-op Ranier Rain Jacket – it’s what Linda, BFT’s Director of Operations, currently uses and loves.
Also, if there is any chance of showers, I throw in a pair of rain pants too.
Shop the Arc’teryx Beta AR Rain Jacket at:

Base Layer Top
A warm, wool base layer is handy for changing into when you’re ready to get out of your sweaty hiking clothes and get warm at camp. It can be cozy to sleep in too.
I like the Icebreaker 200 Oasis Half Zip because it’s super soft and odor-resistant. I also opt for Icebreaker over other Merino wood brands because they have strong animal welfare standards.
Shop the Icebreaker 200 Oasis Top at:
Hiking Pants
I prefer to backpack in leggings (if it’s too cool for shorts that is). The REI Flash Hybrid Tights are a Bearfoot Theory team favorite because they’re designed specifically for hiking with thoughtful details such as snag-resistant fabric, a zippered pocket for keys, and a comfortable high-rise waist that won’t dig in or roll down while you’re hiking.
Shop the REI Co-op Flash Hybrid Tights at:
Moisture Wicking T-Shirt
I always hike in a non-cotton, quick-dry, moisture-wicking t-shirt, and most often it’s the Patagonia Cool Capilene T-Shirt .
As I get older, though, I’m preferring the long-sleeve version because it provides more protection from the sun. These shirts are lightweight, so even with the long sleeves, I stay nice and cool.
Shop Patagonia Capilene Tees at:

Hiking Shorts
I like to backpack in spandex shorts when the weather’s nice, but lately, I’ve been liking these REI Co-op Active Pursuits Shorts .
They’re comfortable and stretchy and offer a little more breathability than spandex.
Shop the REI Active Pursuit Shorts at:
Sports bras are my go-to even when I’m not hiking, and these days I’m personally loving the lululemon Run Times Bra .
It’s perfect for backpacking because it doesn’t shift around, my breasts are fully supported, and don’t bounce around AT ALL. I also love the thick straps becuase they don’t dig into my shoulders.
Shop the lululemon Run Times Bra at:
Quick Dry Undies
The lululemon InvisiWear Mid-Rise Boyshorts are lightweight and have a barely-there feel, making them great for backpacking.
I’ve tried two other cuts of these InvisiWear underwear, and the boyshorts stay in place the best out of all of them.
Shop the lululemon InvisiWear Boyshorts at:
Hiking Socks
I alternated between 2 pairs of Darn Tough Hiking Socks on my John Muir Trail hike. That was years ago, and I still wear these socks hiking.
They are extremely durable and stay put while you’re hiking so you don’t end up with nasty blisters. Plus, Darn Tough offers a lifetime warranty. Free socks for life!
Shop Darn Tough Socks at:
Hiking Boots
I’ve always been a big fan of Oboz and recently upgraded to a new pair of Bridger BDry Hiking Boots after wearing my last pair out through years of hiking and backpacking.
The mid-height helps support your ankles, plus they are waterproof and have a stiff sole, so you get plenty of support on those steeper, rockier slopes.
Shop the Oboz Bridger BDry Boots at:

Camp Sandals
It’s always nice to take those hiking boots off when you get to camp to let your feet breathe, and for that reason, a pair of camp sandals are a must on my backpacking checklist.
These Teva Universal Trail Sandals are lightweight (1 pound for the pair) and provide structure and grip for walking around camp.
They have padding around the ankle and anywhere there is a buckle to prevent rubbing, and they are one of the most comfortable pair of sandals I’ve ever owned.
Plus, they are made from recycled water bottles, so it’s a win-win! See my full review here .
Shop the Teva Universal Sandals at:
Even if you’ll be hiking in the woods or the forecast looks cloudy, you’ll want to bring a sun hat to protect your face, neck, and shoulders from harmful UV rays. Not only do hats ward off sunburns, but keeping your skin shaded can also help prevent dehydration and heatstroke.
The Wallaroo Sedona Hat has been my favorite for years. I love the wide brim, stylish look, and that it can pack down without losing its shape.
Shop the Wallaroo Sun Hat at: (Use the code BEARFOOT20 for 20% off)

Don’t forget your shades at home! You probably already own a pair of sunglasses, but if you’re in the market for some new backpacking sunglasses, Goodr makes fun, affordable options. We also love that they are a member of 1% For The Planet .
Shop Goodr Sunglasses at:
I also highly recommend packing a buff – a versatile piece that you can wear around your neck for sun protection, around your face and ears if it’s windy, and even as a headband soaked in water to help keep you cool.
Shop Buffs at:
If it’s going to be cold, you’ll also want to bring a pair of gloves. I like these lightweight Smartwool liners . They’re touchscreen compatible and not bulking, so they work well with trekking poles.
Shop the Smartwool Liner Gloves at:
It’s a good idea to pack a lightweight, quick-drying beanie to wear at night or if temps drop during the day. The REI Ribbed Beanie is a simple hat that does the trick.
Shop the REI Ribbed Beanie at:
Backpacking Clothes
Need help planning or preparing for your trip? Check out these helpful backpacking how-to guides:
- How to Train for Hiking & Backpacking
- How to Pack a Backpacking Pack for a Multi-Day Trip
- How to Plan a Backpacking Trip in 12 Simple Steps
- Backpacking for Beginners: Wilderness 101 Tips
- Beginner Backpacking Mistakes to Avoid
- Tips for Backpacking With a Dog
Save this post to Pinterest

What’s on your backpacking checklist that we missed? Is there anything you’d add or subtract? Do you have any questions about what to bring backpacking? Let us know in the comments below.

With two decades of hiking and seven years of van life under her belt, Kristen has dedicated her life to helping people experience the positive effects of nature. As a pioneer in the outdoor blogging space, she founded Bearfoot Theory in 2014 and has since authored more than 350 blog posts about outdoor travel, hiking, camping, and van life. Her work has been featured in National Geographic, Outside Magazine, and Backpacker, and when she’s not on the road, she lives in Park City, Utah with her partner Ryan, their son, and two adventure pups.
Leave a Reply Cancel reply
Your email address will not be published. Required fields are marked *
Save my name, email, and website in this browser for the next time I comment.
59 Comments
Pretty nice list! I need to have a look at the Nemo sleeping pad, my Thermarest is annoying me so much recently.. Need something light and rectangular.
I’m totally with you re: trying to find a comfortable and convenient way to carry photography gear. Have you tried the Peak Design capture clip? I’ve used it for day hikes and have liked it so far but am not sure how it will work for weekend backpacking trips. Of course, even with the clip you’d need some decent bag for protection if you’re going through rough terrain or if the elements don’t cooperate. I like your approach with the sling though. 🙂
I have tried the Peak Design clip. They are pretty cool and I might be taking one with me on my upcoming trip to Nepal.
Check out Cotton Carrier’s Strapshot camera holster for your DSLR. It wraps around your backpack shoulder strap and provides a secure place to hang your camera with a 1/4 turn quick release and safety tether. I use it and have the full chest harness. (I’m not at all associated with them, just find their gear really convenient.) Thanks for the good read.
I also use the cotton carrier system – a disc screws into the tripod attachment of my camera (I pack in a Sony a6000 with an 18-200mm lens) and then there’s a holster that clips/velcros on to my backpack strap on my shoulder. You keep the strap around your neck for safety (more than twice I’ve been over, the camera unhooked from the carrier and I would have dropped it without the neck strap!) and then the camera is easily accessible when you want to shoot something. The downside is no protection from dust/moisture, so on dusty trails I’m brushing off the lens a lot. But it went with me to Everest Base Camp, Kilimanjaro and numerous 2-7 day backpacking trips with a large ziplock in my bag for water protection if needed. Love this setup.
I love my cotton carrier. I carry a full sized Nikon on it..have for 3 years… zero accidental disconnects… its tough for a piece of plastic too….
Great list Kristen, these checklists are so handy for people that are new to doing these kind of hikes. Have a great holidays! Stephen – Uncharted Backpacker
This is an awesome and very specific list! It’s very helpful you listed brands that you specifically like to use!
Just got the Montrail hiking boots. Loving it so far. Great list.
I THINK I obtained permits for Havasu Falls for this spring (I received confirmation emails, but still have a fear something may go wrong, but I’m hoping for the best). Starting to plan and struggle with what camera equipment to bring. I have a Nikon d7100 that I love, but would like to get by with just my 35 mm/1.8 lens. Think that’s wide enough to get good waterfall shots?
Hey Des, I’d highly recommend a wide angle lens. I brought a 16-35mm last time and it worked out perfectly. Have fun!
Amazing list! Seems to be the go-to stuff when comparing to other lists. That said, I\’d strongly suggest bringing a compass and map! On a longer trip would you change change the gear or simply bring a few more items of clothes?
Thanks Sean for the added recommendation of a compass and map! For a longer trip I would just recommend having at least one change of clothes in case of weather or for added layering. I backpacked the entire PCT for 5 months with only 2 shirts and 2 pairs of bottoms, so you definitely don’t need to expand on bringing more items necessarily.
A great list and this is going to be so useful to me. I go on treks very frequently and usually don’t get much time for backpacking. Thanks a lot for posting!
You literally just saved my life. Thank you for making this list!
Its always good to have a small extra knife just to be sure and ready for everything. A roadeavour knife wont add that much. only a size of a credit card. but very reliable.
Also a good thing to have is a collapsible water bottle like the one in roadeavour
n NZ if I went hiking with an umbrella, I would be laughed out of the hills. It would be really good to see exactly what you take in all the small bags, as this is wear weight accumulates and my pack gets heavy. Thanks for sharing.
Hey man, this is a very specific and a great list. Thanks for sharing with us such a awesome list.
Great list Kristen. Thanks for taking the time to put this stuff together. Your site is full of great info. I do the same stuff on a much less professional level on my youtube channel. Your site always has a few gems that even experienced hikers can find useful. Keep up the good work!
Thanks good stuff
Wow you hit the lottery? Most hikers couldn’t afford have your list. Anyone can go into a REI and buy the best available but a true backpacker can use whats handy and go on a trip. I am an assistant scout master for a Boy Scout troop and do trips including gas for a 3 hour trip, food for 12 and snacks for around 12 bucks each using basic gear for 3 days on the trail. Contact me and I can teach you how to hike on a tight budget.
I am so grateful to have stumble across your website. I am a beach bum. I have only done one day hikes. But, I have been invited to a three day hike in Korea. I will be doing the Jirisan Nature Reserve over three days. I have a bag and sleeping bag. That’s it. What elae do I need to prepare for this three day trek? It will be in September. Your help would be appreciated. I am an Expat teaching in Korea. I am exploring Korea through Hikes and wone tasting. I am open to suggestion.
Hi Gabriela, we are so glad you found us! Will you need a tent for your trek or will they be provided? We would recommend a sleeping pad as well. If you’d like to reach out and email us at [email protected] we can provide you with additional links to great articles and packing lists on our site to help you prepare for your trip. Sounds like an incredible adventure you have ahead of you!
Just what I was going to say. This is nice list of gear for anyone who has, say, a couple of thousand dollars to drop on a three-day (two-night?) backpacking trip.
What is your total weight of your pack?
Hi Rolando, that really depends on how long you are going to be backpacking. For a 3-day backpacking trip, we recommend trying to keep your pack weight as minimal as possible, depending on if you need to carry water or not. A good rule of thumb is not having your pack weight more than 20% of your body weight.
It is interesting that trekking poles can help manage the weight on your hips and legs by using your arms. My wife and I are going on our first backpacking trip in three months and we are trying to get everything together. We may consider going to a few camping stores near us to see what they recommend we bring too.
Hi James, So exciting to hear you and your wife are getting into backpacking! Trekking poles are a game-changer on the trail. We have a ton of comprehensive blog posts here about backpacking that you’ll probably find helpful. I suggest you start here: https://bearfoottheory.com/backpacking-101/ Let us know where you go and if you have any questions!
On my must pack list is a brightly colored bandana or two. So many uses; shade, neck warmer/cooler, dishrag, splint maker, wash rag, hunter safety gear (thus, brightly colored), and on and on. Thanks for great list, Kristen!
My thoughts, exactly…Black Diamond everything! If I’m going to spend $1000, might as well be in a hotel. There are countless other, just as good, options out there. Off-Brand does not always mean that you are compromising durability and/or performance. Do yourself a favor and think logically–don’t always believe sites like this. Some great info in here, I’ll agree, but focus on being “prepared,” and not showing off at the trailhead as you unload from your Volvo.
Ho! these are some really good checklist, thanks for sharing 🙂
Thank you. I will try everything on my first hike this fall.
Thanks for reading, happy hiking!
What are your thoughts on a woman hiking solo? Safe?
We thinking hiking solo as women can be done safely. In fact, it can be fun and empowering. Check out this blog post for more on this topic as well as safety tips for solo hiking: https://bearfoottheory.com/hiking-alone/
Thanks for this list, I’m planning out my first backpacking trip for myself and my husband and struggling to find a minimalist approach! I don’t want to pack everything and the kitchen sink but every blog seems to have twenty million things that are unnecessary. I’m looking forward to following your list! Any tips on seating? My husband is struggling with not being able to pack his giant camping chair.
Hi Claire – we know what you mean! Taking only what you need to be safe and comfortable will help you have a better experience. If you’re suffering under the weight of your pack it’s hard to have a good time. The Helinox Chair Zero in the blog post below is a good option. It’s super lightweight and packs down small making it great for backpacking. The REI Trail Chair in the same blog post is a good option as well if you don’t mind sitting on the ground. Another option is a lightweight, folding stool (just search “camp stool” online and you should be able to find a few options). Happy hiking!
https://bearfoottheory.com/best-camp-chairs/
Look up thermarest trekker chair. It converts/folds your sleeping pad into a sitting position.
That’s a great suggestion, thank you!
I will definitely keep this in mind in my next travels. thank you!
Thanks for reading!
What is your total weight including pack for 3 days? Also check out Lume deodorant on line. Some folks can go 72 hours with out stink. Safe for any body part. And no I don’t work for Lume, just having great results.
It varies depending on a few factors including the weather (how much warmth, rain gear, and shelter we have to pack for example) and whether a bear canister is needed which adds a little weight as well. I’d say our standard pack weight is anywhere from 15-30 lbs depending on how lightweight we’re going. And thanks for that deodorant recommendation!
Hi, thanks for taking the time to write these articles and share them, much appreciated. I have shared them on my own webpage/blog with my own followers as well – spreading the love.
Thanks Tania!
I was meant to find this post. I am a woman about to go on my first 3 day hiking/backpacking trip. I can’t tell you how helpful this info is. Thank you so much!
You’re welcome – happy trails!
The point is that if you’re looking to list existing products – it pays to ensure that you’re using the most effective techniques to instill trust, desire, and confidence in your buyers.
I love the mansplainers out there shaming her for touting nice gear. We all like to spend on different things. Some of us might go to REI to pick up a fun toy or two, and the rest of us probably have the brains to know how to substitute a cheaper item or repurpose something we have. First timers can also borrow gear from friends or neighbors before they commit to more frequent backpackers. It’s a great way to figure out what you like. This list was very helpful, Kim. Thanks.
Where’s your straw hat from though?? So cute!
It’s a Wallaroo Sedona Hat . My favorite wide-brimmed hat!
As others have said…THANK YOU. I have not backpacked in 8+ years and this was a great reminder and check list. I actually cannot believe some of the folks who harassed you about buying quality gear…guess their Momma never told them that “if you can’t say something nice, don’t say anything”…you would think they would have learned that on the trail. Their packs must get heavy carrying all that hate around…lose the weight! Franklly, I am always looking for ways to time weight and cost, but that is part of the fun and the process. Thanks again for a great list/refresher as I plan a 3 day in the Smokey’s!
So glad to hear you found this helpful! Enjoy your trip to the Smokey’s, and welcome back to backpacking! We actually have a fall travel guide for the park here in case you need help planning: https://bearfoottheory.com/smoky-mountains-fall-guide/
This is a very nice list, but if you put all these things together, the weight is not going to be ideal. The tent and sleeping bag is just about 6 lbs for start. All these are good products, but for the weight conscious, I would definitely be going for lighter items, if you don’t mind the weight, great list.
Hi Nikki, thanks for the input! These are the gear items we’ve personally carried when backpacking, even though they might not be the lightest on the market. For someone just starting out, buying gear can be really expensive so we’ve tried to strike a good balance between cost and weight in our recommendations. However, we’re working on an ultralight backpacking gear guide at the moment which will focus more on lightweight items.
Do you have an article on what you pack for food for a three day hike? I have always day hiked, and know my go to list for snacks, but haven’t ever done overnights, so not sure what to bring for calorie packed real meals. Thanks.
Hi Melanie, this blog post gives tips for what to pack for backpacking food, how much to bring, and our personal favorites: https://bearfoottheory.com/backpacking-food-ideas/
Thanks since I’ve become an old man I haven’t backpacked in a few years. So this was a good reminder. Appreciate you taking the time to post this. All the best for a safe and healthy season. Dave H Fort kent, Maine
- Meet the Team
- Work with Us
- Czech Republic
- Netherlands
- Switzerland
- Scandinavia
- Philippines
- South Korea
- New Zealand
- South Africa
- Budget Travel
- Work & Travel
- The Broke Backpacker Manifesto
- Travel Resources
- How to Travel on $10/day
Home » Gear » backpacking packing list
The ULTIMATE Backpacking Packing List: Everything You Need To Travel (2024)
Deciding what to take on a backpacking trip and what to leave behind can be quite the challenge. You have one bag and so much stuff you could bring. How do you decide exactly what are the backpacking essentials, and what is excessive?
One of the most common questions that we consistently get from folks about to hit the road is – what gear should I take backpacking? What are the essential items I need? Well, read on cos we will show you exactly what to pack while backpacking by giving you my top-secret lightweight backpacking checklist.
This is the definitive backpacking checklist. We’ve put together this epic guide filled the backpacking essentials – just the things you do need, and some bold claims about the things you don’t need to take backpacking.

Backpacking Checklist
Choosing what to pack, what to bring backpacking – 10 essential backpacking items, best backpacking clothes checklist, backpacking necessities – technology checklist, backpacking packing list – adventure checklist, backpacking supply list – hiking gear checklist, backpacking packing list – toiletries packing list, backpacking packing list – medical checklist, backpacking packing list – documents checklist, faq about the best backpacking packing list, final thoughts on our definitive backpacking checklist.

Nomatic Travel Bag
- Capacity > 30L
- Price > $299

Nomatic Navigator Carry On
- Capacity > 37L
- Price > $400

GoPro Hero 11
- Resolution > 5k

Arc’teryx Beta AR Jacket
- Price > $600

Insurance From World Nomads
- Price > Click For a Quote
Our Top Tips and Packing Hacks…
Before we get into the details of this, let us start by sharing our absolute tip-top tip for travel packing – pack light.
Whether you are camping or hiking, travelling to Europe or Asia as a baller or on a budget, it doesn’t matter what sort of backpacking trip you’re planning. You need to travel as light as possible. This is why we’ll only be talking about the backpacking necessities .
Note that This is a purposely lightweight backpacking checklist to help you achieve this. We’ve only included things to take backpacking that you really need!

This is the most important backpacking packing tip I can give you. Travel light! And here are some of the reasons why packing light is so damn important;
- By travelling lighter you are saving yourself the strain and the stress of a weighted pack. Heavy bags suck, and more shit = more weight.
- Travelling lighter will enable you to have spare space, meaning you can fit more stuff in your bag if need be. See a nice souvenir for mum? Want to pick up some camping gear? If you pack light, you’ll have the space to add more gear to your pack…
You might be thinking, ‘But there are over 100 items recommended on your backpacking essentials checklist! I’ll need 4 backpacks to fit them all!’
This is true! We make a ton of backpacking travel gear recommendations in this guide, and it would be silly to try and bring all of them along with you on your backpacking trip.
We’ve done our best to break this backpacking checklist down into several sections so you can pick what to take backpacking based on the kind of trip you’re doing. Not everyone is going to need a sleeping bag and hiking boots, some will reserve more room for specialist camera gear and extra batteries. Others will rightly prioritise room for emergency toilet paper!
One thing that everyone should prioritize though is respecting mother nature and not leaving anything behind. The less you pack, the less you can leave behind. Packing eco-friendly products is an extra bonus of course 😉
So keep this in mind as you peruse this list – only pack the gear that best fits your travel style and itinerary. Doing so will turn this epic checklist into your perfectly tailored minimalist backpacking list.
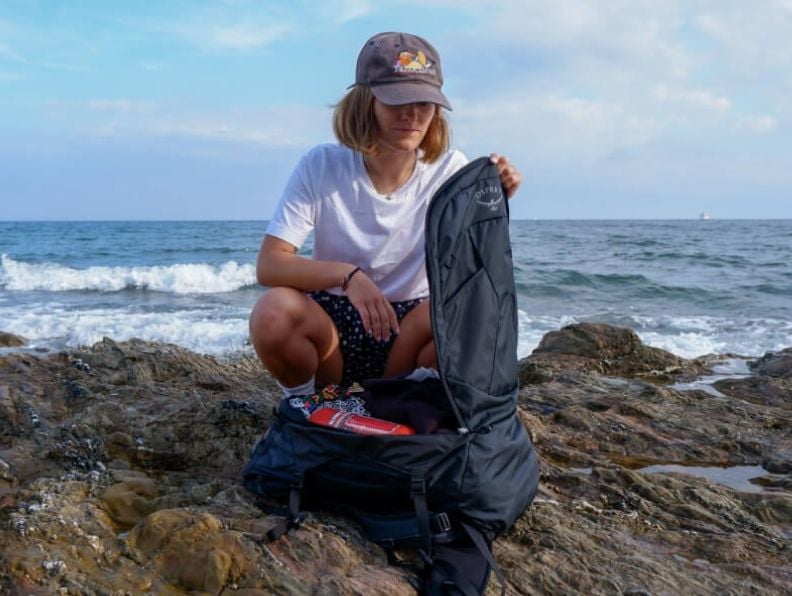
Another great tip is to always pack appropriately for your destination and for the kind of trip you intend to have. For example, keep a firm eye on climate – if you are backpacking Europe in July then you won’t need too much in the way of warm clothes (except a jacket for the UK!). Likewise, if you’re just going to be hitting the beach or exploring cities then hiking shoes are probably not all that essential! And if you aren’t a Digital Nomad or aspiring entrepreneur, then you can probably take that laptop off your backpacking list.
By keeping note of the travel style and itinerary of your backpacking trip, you’ll be able to quickly and easily identify which gear on this backpacking checklist is right for you to bring along on your travels…
Looking for a backpacking clothes list, hold your horse a little because that comes later, first you need to check off these backpacker essentials.
Looking to find your tribe?
Introducing the best Coworking Hostel in the World – Tribal Bali !
A unique coworking and co-living hostel for those that want to travel the world while working from their laptops. Make use of the massive open-air coworking spaces and sip on delicious coffee. If you need a quick screen break, just take a refreshing dip in the infinity pool or grab a drink at the bar.
Need more work inspiration? Staying at a digital nomad-friendly hostel is a really smart way to get more done whilst still enjoying the social life of travelling… Mingle, share ideas, brainstorm, make connections and find your tribe at Tribal Bali!
Out of all the things you could bring on your backpacking adventure, these are my 10 highest recommendations. This is the backpacking gear that we have been using for over a decade as we travel around the world.
There’s a lot of gear out there that you don’t need but in my opinion, every traveller should have these ten backpacking essentials on their checklist…
#1 Travel Backpack! (Like the Osprey Aether Plus 70 Pack)

The most important item on this backpacking gear list is a good backpacking backpack! After all, you can’t be a backpacker without a backpack and picking the right backpack is key! I mean, it wouldn’t be a backpacking trip packing list without something to pack it all in!
I myself am a big fan of Osprey packs They are really bloody comfortable, well designed, ergonomic, hard wearing and they come with a lifetime warranty. Backpacks come in all kind of shapes and sizes but we suggest picking a backpack in the forty- to the sixty-litre (40l – 60l) range.
Lots of us here at TBB use the Osprey Aether backpack (read the full review here ) but there are lots of great options out there.
Picking the right travel backpack is very important; you are, after all, going to be pretty much living out of your pack.
You can’t compile your ultimate backpacking gear list without the right backpack! Remember to throw in some good packing cubes too so you can keep everything organised, they’re another must have for backpacking.

REI is one of America’s biggest and most-loved outdoor gear retailers.
Now, for just $30, get a lifetime membership that entitles you to 10% OFF on most items, access to their trade-in scheme and discount rentals .
#2 Daypack – (Like the Osprey Daylite Pack)

Most of us here at TBB travel with a big backpack which we use for keeping most of our stuff and traveling and then a smaller pack which we use for day trips and stuff.
We recommend looking at the Osprey Daylite ; it’s super comfy and of great quality. It’s versatile as hell so can be used for beach days, going shopping, day hikes, overnight camping trips or simply for carrying your backpack to the coffee shop.
Want a few more options? Have a look at our guide to the best travel backpacks to see which suits you best.
If you don’t like the look of the Exos then go and check out our detailed post on how to choose the best daypack for travel.
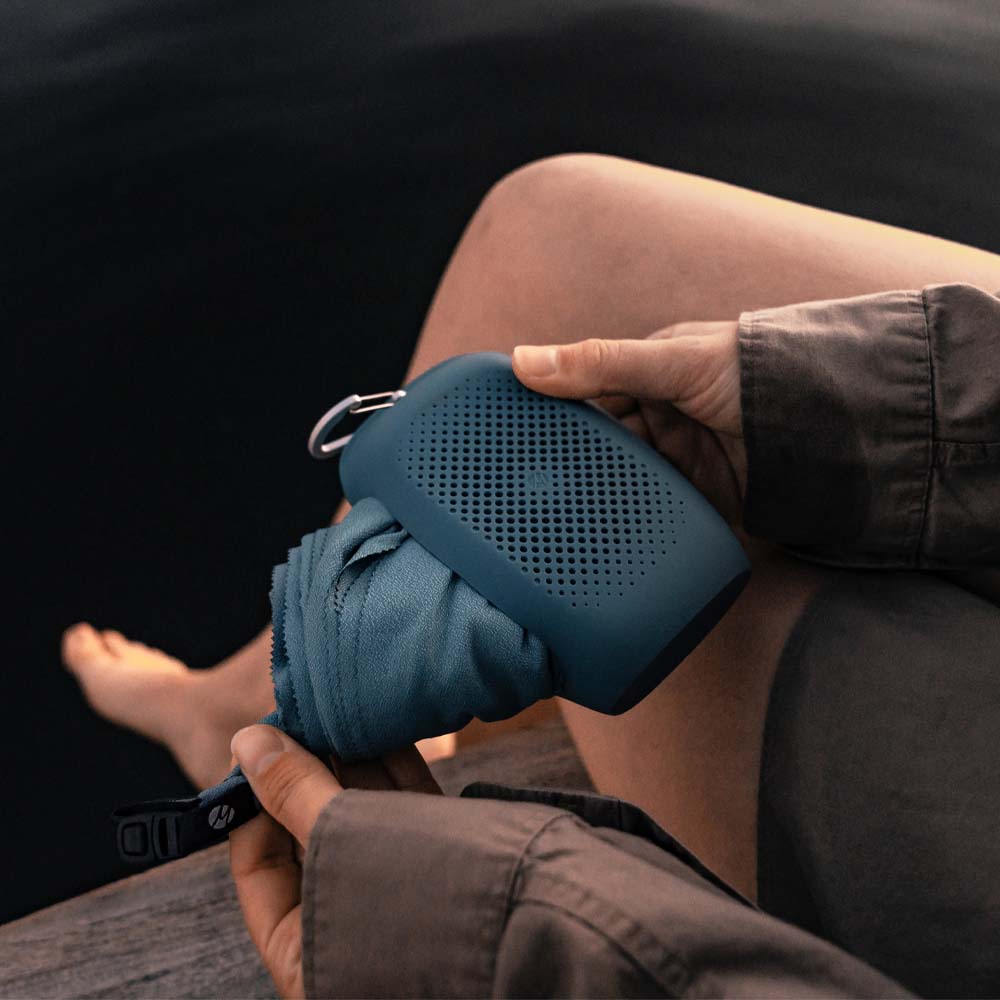
#3 A Proper Travel Towel (Gotta stay dry!)
Towels are essential backpacking gear as a lot of hostels don’t provide them or if they do, they may not really be all that clean. However don’t bring a ‘normal’ towel on your backpacking journeys, they are big and take up loads of room in your pack and they take ages to dry.
Travel pros like use micro-fibre dry towels series that roll up into tiny, space saving proportions AND they dry unbelievably quick. Granted, they are not quite as comforting as a cotton towel but its a trade of that travellers need to make. A good micro-fibre travel towers is essential travel gear on any ultimate backpacking gear list.
The Matador micro-fibre towel range are made by travellers for travellers. They are super light, and most importantly dry very quickly and are perfect for all types of backpacking trips.
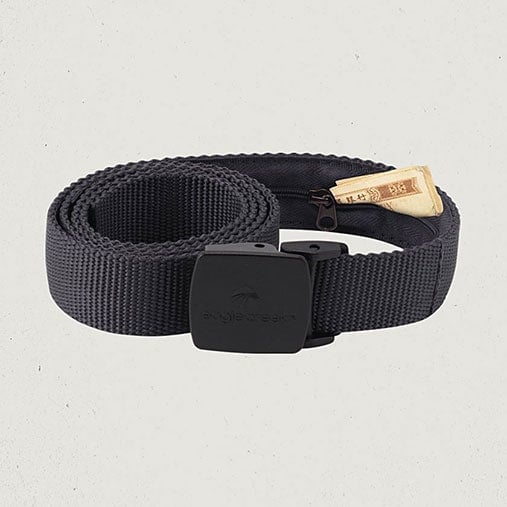
#4 Travel Security Belt (hide your cash!)
I take travel security very seriously, so I never travel without this incredible product.
To keep your money hidden on the road, I strongly recommend picking up one of these beauties – it has a hidden inner pocket in which you can hide up to twenty notes or some marijuana…
I never travel without a security belt and it’s helped me keep my money hidden and on my body whilst travelling through more dodgy countries but it’s useful for all types of backpacking trips. Travelling with a money belt is a small investment that helps keep your money safe.

#5 Combination Padlock (For your backpack and hostel lockers!)
Travel Padlocks are very important for a few reasons.
First, you can lock your bag up when you need to. Connect the lock between the two zippers and BOOM! Your bag is safe from any intruders. This will help keep you at ease when you have to be apart from your bag.
Padlocks are also VERY handy when staying in hostels. Most hostels provide some sort of lockers, but not all of them provide locks for those lockers (or even worse – they charge for them!). However, I don’t always trust hostel padlocks for security reasons and of course, little padlock keys are all too easy to lose.
Always pack a few good quality, combination padlocks. They slot easily into the little pockets and compartments of your backpack and are so very useful. Just remember to remember the combination…

#6 World Travel Adapter (a MUST have)
Travellers all hope for the same thing, that one day the world will unite, and all decide upon a universal size for power adapters…
Well until that happens, you’re going to need a travel adapter and they’re useful for all types of backpacking trips.
There are currently 15 different types of power adapter sizes in use around the world! The best way to ensure your beloved electronics get charged regardless of the country you are in is by using a universal adapter.
It’s worth splashing out a bit here and getting one that can charge a laptop and two USB devices at once.

#7 Wandrd Packing Cubes
In case you have never used them, packing cubes are little compression cubes that allow you to neatly pack clothes in in order to help facilitate better packing. They allow you to pack more stuff, and to keep it all better organised.
For the longest time, I thought that packing cubes were a superfluous indulgence, but boy was I wrong. Now I never travel without a few and they are the perfect way to organise yourself when you’re packing for a backpacking trip.
These ones from WANDRD are great quality and excellent value for money.
#8 A travel-friendly laptop!
We only really recommend bringing a laptop traveling for a few reasons. 1) You make money or need to work online, or 2) you really really love your laptop. Otherwise, backpacking is a great opportunity to unplug and get offline for a while.

For the Digital Nomads and laptop enthusiasts out there, you’ll want a high-quality piece of technology – and we’ve got just the thing for you.
One of the best investments we ever made was our MacBook Pros. It’s got a great UI, it’s very durable, and it helped us take The Broke Backpacker to the next level.
If you looking to start a blog, or make money online, it’s our highest recommendation. Check out this post for a full breakdown of travel-friendly laptops.
#9 Nomatic Toiletry Bag (Convenience in ways you never thought possible)
Hygiene, haircare and skin care all need to be maintained during a backpacking trip and so you will need to bring along some toiletries.
The best way to do this is to invest a dedicated toiletry bag.
This one by Nomatic is possibly the best toiletry bag on the market. It is made from water resistant, wipe cleanable material that guarantees longevity and it offers excellent organisational capabilities. It is also comes with a hang-up-hook so you can hang it over the shower head or your hostel bed.
We like to say that we’ve never really feel like I’ve moved into a place until we hang up our toiletry bags. Backpacking travel toiletry bags rock!

#10 GoPro Hero9 Black
Every traveller needs a camera, right?
The performance of action cameras has increased significantly, whilst the overall price has come down – making them more affordable. GoPro is the leading action cam brand for a reason: the image quality and stabilization technology of their cameras are unmatched. What’s great is that you get a decent piece of camera gear in such a small package.
Of course, not everybody needs a camera as many of us are quite content to use our smart phones. Still, investing in one of these means you can take some awesome videos and capture those special treasured travel memories.

#11 – eSim by Onesim
The good news about Planet Earth is that there is excellent 4g and 5g Internet coverage, taxi apps and food delivery apps in pretty much all cities and towns (but it does get patchy once you venture out into the wilds and wilderness). The bad news is that your native SIM card will probably not work once your leave your native country and so you will not be able to access any of this online goodness until you rectify that particular situation.
You can waste time hanging around phone shops queuing to get a plastic sim or you can is,ply install a eSim onto your phone before you leave home. You just access the OneSim site, choose the package for whatever country you wish to visit, download it and off you go – you are online the moment you land at the airport.
eSims are easier to set up and better than the environment than plastic sims. The downside is that not all phones are eSim ready.
#12 – GPS Luggage Tracker
You may know this, but right now airlines are losing record amounts of bags and suitcases some of which are never to be seen again. To help to find your bag in the event it does go missing, just pop a GPS luggage tracker inside it and you will be able to identify exactly where on earth it is.
A good, reliable GPS luggage tracker has emerged as an essential piece of travel packing.

Do You Want to Travel FOREVER??
Pop your email in below to get a FREE copy of ‘How to Travel the World on $10 a Day!’.
Whilst we were all born naked, and have some of our best times naked, clothes are nevertheless a part and parcel of life pretty much anywhere on earth. Whilst dressing for day-to-day life at home is presumably second nature to you by now, dressing for travel can be a bit more complicated.

As such picking the right clothes when backpacking is super important. Here are a few tips to get you all started when compiling your backpacking clothes checklist…
- Pack light clothes – Hot or cold weather, pack clothes that fold up small and don’t weigh too much – avoid denim jeans and pack hiking pants instead! Even if you are heading to freezing weather, it’s better to bring clothes that you can layer up with rather than bringing a big heavy jacket. Cotton is light and breathes. Splurge on the more sweat-resistant stuff if you can and always pack some rain gear!
- Dress dark – Unleash your inner goth and dress dark! Darker clothes hide annoying stains and can be worn for longer. This is extra important because you can expect your backpacking clothes to be on a quicker rotation than your normal wardrobe.
- Bring fewer clothes – Clothes can be found for pretty cheap in most parts of the world, so rather than overpack, bring slightly less than what you need and pick up anything else you might need on the road. This is especially true for places like India and Thailand where you can find amazing, local made clothes for amazing prices.
These are my top recommendations for the best clothes to wear while travelling/backpacking. This travel packing list will see you through heaps of different scenarios.
- Underwear (x5) : It can be surprisingly hard to find underwear that fits in Asia… Pack enough before you go backpacking!
- Thin hiking trousers (x1) : Craghoppers for both men and women make the best stuff and their NosiLife range is impregnated with mosquito repellent. I’ve been wearing Columbia hiking pants for years and swear by them – it’s tough, light, good value and keeps mosquitoes at bay.
- Long-sleeved mosquito repellent shirt : A long sleeve sun shirt is a backpacking necessity when travelling to certain areas, mosquito repellent shirts are a lifesaver when trekking or hanging out in tropical climates.

- T-shirts / Tank tops (x4) : Easy to find on the road, don’t stress too much about these.
- Base Layer (x1) : Crucial for keeping warm, I swear by my Helley Hansen . Many can also double as a long sleeve sun shirt.
- Lightweight technical fleece : Essential when you’re on buses or trains that have the AC turned to ‘freezing’.
- Evening wear (x1) While not quite backpacking necessities, it’s nice to have for a night on the town! Again, I tend to stick to Craghoppers; they have some smart shirts which are also tough and practical.

- Sunhat (x1) : If you’re heading to the scorched plains of Backpackistan, you need to keep your head covered. My Barmah bush-hat has accompanied me on many adventures.
- Buff (x1) : One of my favourite travel accessories on this backpacking checklist, I wear one on my wrist at all times; it’s great for keeping the sun off or covering your mouth and nose to keep dust out. I also use it as an eye mask on long haul transport and in dorm rooms.

- Indestructible sunglasses : I have probably destroyed over one hundred pairs of sunglasses… For a backpacking adventure, it’s worth investing in a decent pair of sunnies and I recommend Abaco; these are specifically built for travellers and are pretty much impossible to break.
- Warm Gear : If you’re heading into the mountains this is the most important section of the backpacking gear list. Do yourself a favour and pick up a pair of water-resistant gloves , a hat with ear-flaps , a down jacket, good quality rain gear and some lightweight hiking shoes.
I’ve been using my RAB Neutrino for years and it was a great investment. I never travel without my RAB, I know that if I have to sleep rough I can survive a night as long as I have my trusty down jacket. It weighs just 650grams, folds down super small and will keep you very warm indeed.

- Trekking trainers : Don’t go travelling around the world without decent shoes! I personally swear by North Face Hedgehogs and have been wearing them for nearly a decade. They are a good lighter option to hiking boots.
- Technical sandals : If you’re going to be spending a lot of time trekking in the jungle, hanging out on the beach or sailing then it’s worth bringing a pair of good quality technical sandals; Teva make the best hiking sandals in my opinion. Alternatively, you could pick up some lightweight hiking shoes.
- Flip Flops : Not all backpacking clothes has to be techy. You can make yourself comfy by packing a pair of these along. They’re essential on any backpacking clothing list!

Camera: If you want to take a camera and you’re new to photography I suggest getting something by Lumix , they offer great bang for your buck and is ideal for taking quality travel photos. Check out this incredibly detailed post for a breakdown of the best travel cameras, or best travel tripods if you’re really interested in travel photography.

Laptop : Since I make a living online, I travel with some top-notch tech. Buying a MacBook Pro was the single best investment I ever made. Whilst a laptop might not be on every backpacking trip list, if you’re blogger or photographer then you’ll be needing one.
Check out this incredibly detailed post for a breakdown of the best travel laptops for digital nomads and backpackers.

USB flash drive : Endlessly helpful.
USB card reader : Essential if you’re into your photography.
World Travel Adapter : This could easily top the list of backpacking essentials. It’s worth splashing out a bit here and getting one that can charge a laptop and two USB devices at once.

Smartphone : If you have a good smartphone, you might not need a camera – it totally depends on how much you care about your photos.
Portable battery : Extremely useful for keeping your phone and camera charged whilst adventuring. I travel with two as I’m often trekking and away from power.
If you’re a keen hiker or adventurer, you know that you’ll need to carry more gear… It’s great to pack light but if you’re spending a lot of time camping out or hiking through the mountains, it’s important to be prepared. This camping gear checklist has got you covered on everything you’ll need for your epic hikes and camping delights.

Head-torch : One of the most useful items on this backpacking checklist! Head torches are useful for caving, hiking and bathroom trips when the power’s gone out.
Check out my post on the best headlamps for travel.
Pocket Blanket: Lightweight, waterproof, super compact pocket blanket is a great addition to your backpacking checklist. Doubling up as an emergency poncho, a picnic blanket is worth its weight in gold when chilling, or camping, on the beach. This is a great item to have, even for someone looking for a minimalist backpacking list and if you want to roll around with your significant other, a picnic blanket is well worth packing.
Camping Hammock : Lighter and more portable than a tent. Plus, chicks dig hammocks… I always travel with a parachute hammock. Not an absolutely essential item, but one of my favourite items on this backpacking packing list.
Mosquito Net : Put a box-shaped net on your backpacking list if you’re headed to the Tropics.
Cable ties : Always worth packing a couple, especially if you’re off on a motorbiking adventure.

Carabiners : I always pack a couple of these. Simply clip them to your pack and use them when you need to attach stuff to the outside of your pack, fix things, hang up mosquito nets… They’re super useful on any backpacking trip checklist.
Sleeping bag liner : Useful when the sheets are not so clean or you want to sleep under a blanket but it’s damn hot. Check out all our favourite sleeping bag liners . If you’re serious about camping you might also want to look at some lightweight sleeping pads too.
Small sewing kit : Fix your own shit, you’ll save some money. In fact, whether you’re camping or not we reckon this should be on any backpacking packing list.
Pens and notebook : Don’t go travelling without them!
Travel workout equipment: You may want to throw a jump rope, a light yoga mat, and stretching strap to stay on top of your travel fitness game.

You may not need a lot of the gear below, but if you’re planning an epic expedition and will be away from civilization a lot it does make sense to invest in some of this must-have hiking gear. Some of us at TBB always travel with a tent as it has saved a ton of money on accommodation over the years. This is our hiking/camping gear checklist…
Multi-tool : We’ve been using our ultra-lightweight Leatherman Skeletool for years, it’s the perfect companion for any backpacking adventure. Check out our guide to the best multitools here for some more options.
Portable Stove : If you are hiking/camping, then this obviously needs to be on your backpacking equipment list. I have a pocket rocket which serves me well – check out my post on the top backpacking stoves to find out if you really need a stove for your travels.

Tent : If you’re camping, you’ll need a tent… Check out my detailed post on the best tents to take backpacking.
Hammock: Even if you’re not sleeping on the beach, a camping hammock always comes in handy when backpacking and most hammocks take up next to no room in your pack. Check out my article on the best camping hammocks for travelling!
Sleeping pad and sleeping bag : Klymit makes the best value sleeping pads. Check out my post on the best sleeping pads to take backpacking. If you are hiking and camping a lot, this is obviously a must when it comes to your backpacking equipment list – without a sleeping pad, you will get seriously cold. You can also pick up a top-quality travel pillow too if you want to get extra comfy – we suggest one from the good people at TRTL .

Water bottle : Every backpacker should hit the road with a water bottle – it’ll save you money and help reduce your plastic footprint on our amazing planet.
Grayl Geopress: The best option for purifying water. – Once upon a time I lost my original Grayl… and soon after contracted a parasite from some questionable water. Since replacing it with the Geopress, I’ve been able to stay parasite-free at multiple high-altitude campsites and other escapades. It’s revolutionized my travels, and by buying one, you’ll also be helping out the planet by not adding to the plastic problem.
Water purification tabs : A much cheaper option for purifying water.

In our wash bags, my backpacking essentials are…
- Microfiber trav e l towel -super lightweight and fast-drying
- Toothbrush and toothpaste
- Cotton buds
- Pack of tissues
- Decent sunscreen (often expensive to buy abroad)
- Razor with replacement blades
- Shaving gel
- Lau ndry bag
This travel toiletries list has all the essentials. Ladies – pack more as you may need.
It’s always worth packing a small first-aid kit. On our travels, we’ve been hospitalized multiple times between us, been in a couple of motorbike accidents and had more hangovers than you can count. They’re essential on any backpacking packing guide and our first aid kits saved my ass on more than one occasion…
I recommend picking up a pre-assembled first-aid kit and then pimping it out with all of the below.
- Personal medicines such as inhalers
- Paracetamol, ibuprofen, and aspirin
- Disinfectant spray
- Disinfectant wipes
- Mosquito repellent (at least 40% DEET)
- Antihistamines
- Bandages and gauze
- Plasters in various sizes
- Steri-strips
- Throat lozenges
- Ciprofloxacin (the best thing to take for traveller’s diarrhoea. Prescription only in the UK so please take medical advice before taking)
- Malaria pills if applicable
It helps to be organized before you hit the road; we travel with all of the below in a plastic wallet, it may sound nerdy but when you’re at a politically charged border crossing you will get across a lot faster if you are organized.
- Flight, train, and bus tickets
- Travel Security Belt: The best way to keep your money hidden.
- Address of your first hostel (even if it’s fake).
- Valid Passport
- A laminated copy of your passport
- Debit Cards x 2
- Credit Card
- Dollars or Euros
- Some, one-dollar bills for tips
- Driver’s license
- half a dozen passport photos for visas on arrival (you normally need two per visa).
- Insurance information, home contact details, and health information as part of a laminated card.
Backpacking Essentials – Travel Insurance!
Do you need Travel Insurance for your trip? Even if you’re only going for a few days, that’s more than enough time to get smote by wrathful angels. Have fun, but take it from us, overseas medical care and cancelled flights can be seriously expensive – insurance can, therefore, be a life-saver.
Travel mishaps can and do happen and it is well worth thinking about insurance before you leave home. This is a backpacker’s essential item that many either forget about or ignore and we don’t want you to regret that!
We use World Nomads which specialises in covering digital nomads and backpackers. Why not get a quote from them yourself?
Do be sure to read the terms and conditions to make sure that the policy covers your needs.
ALWAYS sort out your backpacker insurance before your trip. There’s plenty to choose from in that department, but a good place to start is Safety Wing .
They offer month-to-month payments, no lock-in contracts, and require absolutely no itineraries: that’s the exact kind of insurance long-term travellers and digital nomads need.

SafetyWing is cheap, easy, and admin-free: just sign up lickety-split so you can get back to it!
Click the button below to learn more about SafetyWing’s setup or read our insider review for the full tasty scoop.
Still, have some questions about our backpacking travel essentials guide? No problem! We’ve listed and answered the most commonly asked questions below. Here’s what people usually want to know:
What are the essential items for backpackers?
Every backpacker needs a good backpack ! After that pick up a good water bottle, some hiking boots and a compass.
What to pack for 3 months of backpacking?
Make sure you have a good travel backpack . Then bring a rain jacket, good shoes, 10 sets of underwear, and always remember a headtorch!
How much weight should you carry in a backpack?
Don’t pack more weight than you can carry and don’t put too much pressure on your backpack. As a general rule, don’t try to carry more than 20% of your own body weight.
What size backpack do I need for 3 months?
It depends on your travel style and what activities you hage planed. However typically we would suggest you bring a size between 50-65L.
We’ve been around the world a handful of times. My backpacking list comes with ten years of travel blood, sweat, and tears so have a proper read over this backpacking checklist and heed my advice, pack light but be sure to pack the things you need for your own travel style…
With the help of these packing lists, you’ll be able to figure out exactly what to pack for your trip so you can gallivant around the world knowing you’ve got everything you need for your adventure…
For more travel gear inspiration, check out my buddy Gianni’s ultralight packing list and for the ladies, this excellent travel packing list for women by Two Scots Abroad.
My friend Gemma has put together this detailed post on how to choose high-quality hiking pants for men.
Have we missed anything off our backpacker checklist? Are there any backpacking must-haves that you swear by that we’ve forgotten? Let us know below.

And for transparency’s sake, please know that some of the links in our content are affiliate links . That means that if you book your accommodation, buy your gear, or sort your insurance through our link, we earn a small commission (at no extra cost to you). That said, we only link to the gear we trust and never recommend services we don’t believe are up to scratch. Again, thank you!

Joe Middlehurst

Share or save this post

71 Comments
Hi all !!! I’ve been going through your website for days now as I am planning my FIRST 6-months solo backpacking trip in southeast Asia (a way to end my student years on a high note ?).
Being a big nature addict, I will be traveling off the beaten paths as much as I can… (ex : planning several five-day-ish hikes in the mountains) BUT I also plan on enjoying some touristy, beach, chill activities + working from my laptop!!!
Therefore, I’ve been wondering how much of all this camping gear I should take with me… For instance, it’s great to have a portable stove when you need one, but is it necessary to carry it around for six months ? Is it realistic to carry a tent+a laptop+all the backpacking necessities+all the camping gear ? In short, how would you recommend combining adventure, working nomad and tourist modes in my backpack ? + Where do you leave your unnecessary stuff (ex: laptop…) when you go camping in the mountains for a week ?
Thanks a lot for taking the time to answer me, and for your amazing website !!!
Generally you can pay to have your stuff stored either at hostels or guesthouses in most SEA countries. If you are really going off grid you will need to be self sufficient and have the items you need with you, including a way to cook.
Some things you will be able to get in SEA but quality camping gear can be harder to come by and expensive. It’s certainly feasible to carrying all the gear you need plus laptop etc and store other things while camping.
Really good post you have there. One thing I would like to add is this Cocoon Grid It Organiser my boyfriend got for his Christmas present. It keeps all your techy electrical things together in one place and they never fall out. We have the one which stores his MacBook air, his kindle, charging cables, adaptor plugs, spare batteries and pens. You can mix and match. You should have a look as you have quite a bit of gadgets there.
great tips for backpackers and checklist. Must give suggestions about hygiene during such adventurous trips.
Long time fan, first time caller. Thanks for this excellent packing guide, and for all the other useful content on the site. I’m off to India & South America so this resource has proved super useful!
My question was, do you have any “best practice” tips on how best to store your passport + other small valuables? I’m guessing keeping them on you is your best bet, but was specifically wondering if there was anything similar to the cash storage wallet that you’d recommend?
Many thanks in advance!
Hey Will! So personally, I always keep emergency cash and a photocopy of my passport rolled up and hidden in a zipper in my security belt – it’s basically a normal looking belt but on the inside there’s a zip and you can hide stuff in there – really helpful! For my passport, personally I hide it as deep in my backpack as possible, it isn’t practical to take it out on nights out or when exploring so it stays, hidden, with my main backpack.
The broke backpacker promoting links to a towel that costs 45-50 quid. You think you might have lost touch with your target audience from getting so much sponsorship you’ve forgotten what it’s like to be an actual broke backpacker?!
Hi Kayleigh,
I think you may have happened upon a listing on amazon.co.uk for one of our Active Roots towels. This is not being sold by us, nor does that company act as a reseller for us.We would not recommend buying from them. We only sell on amazon.com, the towel is around 19.99usd. Hope that helps clarify.
Hi, the link for the Backpacker Bible isn’t working! Is there another link I can try? I’d like to check it out and possibly purchase! Preparing for a huge RTW trip, and this site has been a literal lifesaver!
Hey, the link is now working! It looks like there was a temporary error, but NO FEARS!!! Now you get your free reading material for your adventure! 🙂
I just want to say thanks for this entire site. Everything about it is super useful and you’ve made it easy to read and navigate. I’m very grateful for you! Best wishes in your future travels xx
Thanks as always for visiting! Good luck on your next backpacking adventure!
Such a complete list. I will keep it in my mind and remember this before my next trip. Thanks for the sharing such an informative article.
Glad you found it useful.
thanks for the post
Thanks for the information
Nice list…except for the 70Lts backpack. as much space you have, you always tend to fill it up. I wont go for more than 40Lts
At the last minute, I chucked a small roll of duct tape into my pack. This tape patched a ripped daypack, stopped a cracked glass bottle from leaking, made a makeshift handle for heavy bags after the handles broke, and covered the open ports on my phone/camera when I went to the beach. Genius product which made other travellers extremely jealous 🙂
Antibiotics (ciprofloxacin) should only be used in special cases of traveller’s diarrhoea, and at least not self-diagnosed! You shouldn’t be advising people bringing it on their trip.
Trust me buddy, when you are in the middle of the mountains with no clinic or hospital for several days walk, it’s worth having a well packed medi-kit.
Being a 46 year old backpacker myself this was still extremely informative! I’m heading out next month for what may be my last year solo. Doing All of South America! Would you happen to have this list in a printable format?
Hi! Great tips – great list, thank you.
I have backpacked a lot – and am now dragging my husband and kids around the globe as much as I can. Sadly, I have discovered that I am getting more sqeamish about sleep. Really prefer to avoid other people’s grime and itchy blankets (argh the thoughts of wet, dirty, woolly blankets in a hostel i Nainitaal)… So, am thinking of investing in some ultra-thin sleeping bags for us – or travel sheets. Do you have any thoughts or recommendations? I realise something ultra-thin and backpack friendly won’t be warm, but it is just so we can sleep in our own dirt – dirty, wet woolly blankets can go on top…
Wow, I do sound like an old, prissy lady!
Thanks in advance
– where are you now? we are going to Iran next month 🙂
I traveled with a silk sleeping bag liner for this exact reason – they are really great! 🙂
that’s what i thought, thanks 🙂
there are items on this list that cannot be in a carry on backpack (like the leatherman multitool), how do you solve that issue?
thanks in advance.
Valid point about the leatherman skeletool… normally however I travel overland or with hold luggage as I DO have a fair bit of stuff – camping equipment mostly 😉
Hi Will!!! Big fan of your blog as your writing is captivating and has inspired me to do more with the years left on my clock! and for that my friend I thank you! Now I was really curious how you keep your stuff save from petty theft when camping out with your hammock? Vietnam in particular.
Hey Josh! Personally, most or all of my valuables usually stay in my daypack which never leaves my side unless I’ve been able to lock it up somewhere… petty theft can be a problem for sure, for a longtime though I had nothing worth stealing 😛
Great list. After reading this I realized my packing suit needs to be upgraded. And first of all, I need to replace the heaviest items with lighter ones. And it’s high time that I obtained a dry bag. Have no idea how I could do without it. Thank you for sharing this.
Hi question about the day pack you recommend, the zomake small pack… some of the reviews I ve read say it s not waterproof as advertised. what is your experience with it in the rain? We are traveling to Colombia at the end of their rainy season and I would like a day pack that is waterproof. By the way I love your website, Thank you.
Hey Michelle, it certainly isn’t super waterproof but it can take some rain… just not being dumped in a river! 🙂
Wow what a tremendous checklist. I just love your list. I love travelling. And i have been thinking about my next travelling. Many time i love to pack my backpacking. This time i will must follow your checklist and hope so it will be more comfortable for me. From here i know some new items which is essential for bring with me when i am packing my backpack. If you had more insight i will greatly appreciate it. Thanks for the sharing such a informative also helpful article.
Thank you so much for sharing your tips and experience. I always bring my travel towel and my hammock – it can be a lifesaver.
Awesome checklist, man! I have to say that the most important thing I’ve ever brought with me on my backpacking trips—especially to South Sudan—has been a hammock. Having a hammock is like having a heaven bed and a partner at the same time. I’ve laughed with, cried with, and disclosed my innermost secrets to my hammock, whom I consider to be my best friend and potential marriage partner.
Well, I don’t want to be rushing about from place to place, going everywhere and not really getting to see much if you know what I mean, so SE Asia?
Hi, I really like your list, my boyfriend and I have just started to plan our travels. We are going for a year, I’d love to go for longer but I’m a nurse and the longer I go without working the harder it is to get back into nursing. Is there anywhere in particular you would recommend? So far we are thinking a month of interrailing in Europe then getting the Trans-siberian railway to Beijing and winging it from there so any adivce would be appreciated!
A year of backpacking sounds like an epic trip! As for advise – can you be a bit more specific about what you’re looking for? There’s so many epic places in the world to visit…
So very hard to know what to pack in that small bag, but your guidance and tips certainly help with the selection.
Great work.
Cheers Sharon…
Great article! I love reading about what other travelers bring with them. A few of those I wished I realized before I started my travels (eg first-aid kit and ear plugs). I also love that you included condoms twice…you can never be too careful.
I read one of the comments above that discussed how bringing as many electronics as you suggest makes it “too comfortable.” I disagree, I believe that travel is different for everybody and you should be as comfortable as you want to. I have no plans on going on any vision quests or anything, so making sure I have my laptop and chargers on me is a necessity.
My trip might be a bit less intense than yours (less camping), so if you’re ever curious on what a city-dwelling traveler brings in his bag you can check out my new “what’s in my bag” post:
http://www.citizensofeverywhere.cc/2018/02/09/round-the-world-packing-list/
Look forward to reading the rest of your posts, looks like I have a lot to catch up on!
Adam http://www.citizensofeverywhere.com
Hi Will, Love the packing list and your blog in general! Despite having travelled for years I have just started in the travel blogging world. I’m developing my website at the moment and would love it if you have the time to take a look and give me your feedback. Apologies if you get requests all the time but if you are game then I would appreciate it! Kind Regards Charlie
Great packing list!! Most of the time i over pack my backpack. This will help me a lot. Which size backpack do you prefer for travel?
You have shared a great list. And I must say that a simple and light weight camera is a must. Who would not want to capture the great moments while on a trek
I think this is a great list.Your Article is Wonderful! A lot of Great Tips and Very nicely written. I have learned a lot from your article Thank you for sharing with us.
Great list and images alongside 🙂 Think we need to upgrade some of our gear before our next trip after reading this! Cheers.
After reading your list I tend to leave the laptop at home and just stick with my phone, I try to reduce the whole electronics and leave what I can behind.
But I agree you have to pack for the kind of trip your taking. I tend to find that backpacking is a great way with getting to know yourself more and you do meet a lot of people from all walks of life. The amount of friends I have made over my time backpacking its nice.
But I do try and stick to the essentials when I backpack. 🙂
Great Read and great list 😉
Cheers dude and yeah I totally hear you – there are advantages to leaving the electronics behind; harder when you’re going for years at a time though!
Hi there,Im heading to south east asia for about 5 months end of november, i was just wondering the vaccinations you recommend which I should get done as hospitals try hook you up with things that are not really needed.
Tetnus and the Heps are usually worth getting… 🙂
Will, great list of gear…but how much does your kit generally weigh? Seems like it could be damn heavy!!!
I agree that toiletries is the most important things we should carry with us whenever we plan to travel somewhere. If you’re going on a short trip and you don’t have any check-in baggage, you need to make sure that any toiletries you bring don’t fall foul of the 100 ml/3 oz limit.
This is especially relevant for women (who tend generally to carry more cosmetics type stuff) and first time travellers. The number of newly bought toiletries I have seen confiscated at airport security, by now, would number in the high hundreds of litres. Check it in or keep it under 100ml for hand luggage. I can only imagine where all that product ends up.
Hello Will,It’s a good list for easy living.I have just done a 4 month motorcycle trip around most of S/East Asia and as far as electronics go,all I took was a $15 cell phone.My total pack weight was 18kg and did trip in the wet season.Lots of fun.I feel that too much gear and all the electronics you suggest,makes the trip to easy,(comforts of home)might as well stay home.It is fun getting lost,you do finish up in some cool places,you might never have,discovered.
I love your bio. I from Venezuela
very nice post. thanks for sharing! will definitively check it before I travel next time.
All this goes in one bag that you have on you all the time? it all fits?
Nah, I tailor what I take based on what kind of trip it is…
But i dont get it, what do you do to all the stuff, i mean, you are backpacking, if you have sleeping bags to go hiking and then you go to a city and you dont need it, you throw it away?
sorry my english sucks haha love your blog, i click on every sponsor you have 😉
Epic list Will! I wish we bought a GSP device when we started travelling. I thought it was a bit overkill but it would have saved the day a few times in India!
A valid point!! It’s not often I miss something like that… my hat off to you Sir!
for the more adventurous ones, hammocks and a good tent. travelled 4 months in SEA, and quite possibly spent a month in the tent to reduce accommodation expenses.
A hammock or a tent are a great way to save money but they do weigh you down, you need to work out what kind of trip you want and plan accordingly – whenever I hitchhike, I take camping gear 🙂
Excuse me, when you sleep outside in a tent how do you go to the bathroom?
Dig a hole my friend, dig a hole.
Bandanas (2), shemagh scarf, Paracord, pharaoh rod (metal match). What does your pack weigh? Mine is currently 35lbs. Id prefer 30 but doesn’t seem possible to lose anything.
You can never have enough Bandanas….. Mine is around the 30 mark 🙂
You can do almost anything with a shemaugh and paracord!
Thanks, Serena
I haven’t heard of this but it sounds pretty awesome; going to check it out now! 🙂
Digital copies of your preferred travel guides can be loaded onto your tablet. Save the weight, don’t take the book!
Leave a Reply Cancel reply
Your email address will not be published. Required fields are marked *
Save my name, email, and website in this browser for the next time I comment.
Notify me of followup comments via e-mail.
Backpacking Checklist for 2023
We cover everything you need for a successful backpacking trip, from essentials like shelter and insulation to extras like matches and sunscreen.

Switchback Travel
We use affiliate links and may receive a small commission on purchases. Read more about us .
Whether you’re a first-time backpacker or a seasoned veteran, everyone could use a good list to make sure they’re prepared when they head out on the trail. Our detailed checklist below covers everything from critical backpacking equipment (tent, pack, sleeping bag, etc.) to kitchen gear , footwear and clothing , health and hygiene products , and personal items and extras . For more information on each product category, many of the headings link to our detailed product round-ups, which are the result of years of testing and opinions (we do love backpacking). And for all our product recommendations in one place, see the landing page for our backpacking gear reviews .
Editor's note: The table above provides a brief overview of what you'll need to get outside, but our full PDF version is printable and offers a more comprehensive breakdown of the necessities and nice-to-haves. See Our Backpacking Checklist PDF
Backpacking Equipment

Backpacking Tent
Our top pick: Big Agnes Copper Spur HV UL2 ($550) What we like: Highly competitive combination of weight, livability, and ease of use. What we don’t: Expensive; thin floor is susceptible to tears (we advise using a footprint).
Backpacking Pack
Our top pick: Osprey Atmos AG 65 ($340) What we like: Great carrying comfort, thoughtful organization, and class-leading breathability. What we don’t: On the pricey end and far from the lightest design available.
Sleeping Bag
Our top pick: Feathered Friends Hummingbird YF 20 ($509) What we like: Very warm for the weight and built by a very reputable down specialist. What we don’t: Feathered Friends bags don’t come cheap; lacking some modern features.
Sleeping Pad
Our top pick: Therm-a-Rest NeoAir XLite NXT ($210) What we like: Three-season warmth and great comfort at a competitively low weight. What we don’t: Warm-weather backpackers can save with a lower R-value pad.
Water Filter or Purifier
Our top pick: Sawyer Squeeze ($41) What we like: Impressively light, fast flow rate, and covered by Sawyer’s lifetime warranty. What we don’t: Best for the solo backpacker—groups will likely prefer a larger gravity filter like the Platypus GravityWorks 4L.
Hydration Bladder and/or Water Bottles
Our top pick: Osprey Hydraulics 3L ($37) What we like: Highly reliable and built to last. What we don’t: Rigid backer adds weight and bulk (you can’t roll it up when empty).
Our top pick: Petzl Actik Core ($80) What we like: Great output, long battery life (via AAAs or the rechargeable battery), and easy-to-use interface in a feathery build. What we don't: Expensive and not the most water-resistant option on the market.
Optional Backpacking Equipment
- Trekking poles
- Backpacking chair/sit pad
- Backpacking pillow
- Sleeping bag liner
- Tent footprint/ground cloth
- Extra stakes and guylines
Kitchen Gear

Backpacking Stove and Fuel
Our top pick: MSR PocketRocket 2 ($60) What we like: Surprisingly powerful for how light and cheap it is. What we don’t: Noticeably less stable and wind-resistant than integrated canister systems like the Jetboil Flash.
- Backpacking Food
Our top pick: Backpacker's Pantry ($10-$13) What we like: Affordably priced, easy to find, and extensive selection of tasty meals. What we don’t: Relatively long cook times and less innovative than some upstarts.
Cookware and Utensils
- Spork or long spoon
Optional Food Items
- Instant coffee
- Coffee press or dripper
- Electrolyte tablets
Footwear and Clothing

Hiking Boots or Hiking Shoes
Our top pick: Salomon X Ultra 4 Mid GTX ($175) What we like: Trail runner-like agility with hiking boot protection and stability. What we don’t: Those shuttling serious weight might want to step up to a more cushioned and supportive design like Salomon’s own Quest 4.
- Hiking Socks
Our top pick: Darn Tough Micro Crew Cushion ($21) What we like: Great padding and breathability for three-season use; backed by Darn Tough’s lifetime warranty. What we don’t: A bit too thick for sweltering summer days; highly durable build sacrifices a little plushness.
Hiking Pants or Hiking Shorts
Our top pick: Outdoor Research Ferrosi ($99) What we like: Ferrosi fabric nicely balances weight, durability, and mobility. What we don’t: No built-in belt; not the most everyday-friendly option due to the thin construction and basic pocket layout.
Rain Jacket or Hardshell Jacket
Our top pick: Patagonia Torrentshell 3L ($179) What we like: Confidence-inspiring protection and classy looks at a hard-to-beat price. What we don’t : Fairly crinkly and stiff; doesn’t have a chest pocket.
Down Jacket or Synthetic Jacket
Our top pick: Patagonia Down Sweater ($279) What we like: Comfortable fabrics, competitive warmth for the weight, and highly versatile. What we don’t: Not the lightest option for dedicated backcountry use.
Our top pick: Smartwool Classic Thermal Merino 1/4 Zip ($115) What we like: All-merino build is warm and comfortable, regulates temperature well, and doesn’t hold stink like polyester. What we don’t: Pricey, too warm for high-output use, and requires more care to last than synthetics.
Optional Footwear and Clothing
- Sun protection shirt
- Gaiters (for snow or water crossings)
- Neck gaiter/buff
Health and Hygiene

- Toilet paper and/or baby wipes
- Wag bags or trowel (check local regulations)
- Hand sanitizer
- Personal medications
- First aid kit
Sun and Bug Protection
- Insect repellent
Optional Health and Hygiene Items
- Mosquito net
Personal Items and Extras

- Basic repair kit (multi-tool, duct tape, extra cord)
- Navigation (map, GPS, compass)
- Cell phone with charger
- Extra batteries and/or solar charger
- Notebook and pen/pencil
- Book or Kindle
- Bear canister and/or bear spray (if required)
- Ziploc bags (for trash and waterproofing electronics)
- Lighter and/or waterproof matches
- Backup water purification tablets
- Pack rain cover (if not included)
- Quick-drying towel
- ID, cards, and cash
- Backcountry permit or reservation (if required)
- Forest Service/park pass (if required)
- Satellite messenger device
Additional Backpacking Tips
- Check restrictions before you go to ensure you're up to date on current fire bans, required bear-proofing measures (such as bear canisters or bear bags for food), etc.
- A balanced and organized load is key for maintaining comfort on the trail. It’s best to place heaviest gear in the middle of your back and pack in a way that allows you to access certain items easily on the go. For a detailed breakdown, see our article on How to Pack a Backpack .
- Use resealable bags for toiletries and other small items you don’t want to lose or get wet, such as lighters and matches.
- If you’re limited on space, consider using dedicated compression sacks for soft gear like your sleeping bag, clothing, etc.
- Research your route ahead of time to verify where you’ll encounter water sources for fill-ups. If they’re plentiful, you may be able to get away with carrying in less water.
- We recommend a 10-degree buffer for your sleeping bag. For example, if your bag is rated to 20 degrees Fahrenheit, expect to be comfortable down to around freezing.
- Pack foods that you know you’ll enjoy eating and remember to drink water often. It’s common to not feel hungry or thirsty after heavy exertion, but refueling properly is key to maintaining energy and feeling good on the trail.
- Always bring backup water purification in case your filter fails. Iodine tablets are a cheap and easy way to ensure you’ll have clean drinking water, and adding electrolyte tablets will help eliminate any aftertaste.
- Be sure to share your itinerary with a trusted friend or family member before heading out, including your expected route and arrival/departure dates.
Where to Buy Backpacking Gear
Perhaps our Seattle roots makes us biased, but we do much of our gear shopping at REI Co-op . The selection is excellent, the return policy is generous (make sure not to abuse it if you want it to continue), the staff generally are knowledgeable and helpful, and you get the brick-and-mortar bonus. A good option for online shopping is Backcountry.com , which has free standard shipping on orders over $50 and solid selection overall (we use Backcountry more for winter purchases but it does well in the hiking/camping world as well). For cheaper items and those who need gear quickly, it’s hard to beat Amazon.com and the sheer volume of sellers and product options. Last but not least, we always support buying gear at your local shop. It’s a great way to support the community, get real information about your trip, and be able to try things on in person. Back to Our Backpacking Checklist See Our Backpacking Gear Reviews
Learn More About Outdoor Gear

Hiking Gear Reviews

Best Backpacking Tents of 2024

Best Stuff Sacks of 2024

How to Choose a Backpacking Stove

The West Coast Trail: Vancouver Island's Iconic Hike

Best Backpacking Sleeping Pads of 2024

Best Hiking Shoes of 2024

Trekking Peru's Cordillera Huayhuash

Best Tent Brands of 2024
Mobile Menu
Megamenu - desktop hamburger menu.
- Hiking Gear
- Backpacking Gear
- Biking Gear
- Camping Gear
- Footwear Reviews
- Climbing Gear
- Skiing Gear
- Winter Gear Reviews
- In-Depth Gear Reviews
- Hiking Shoes
- Hiking Boots
- Trail Running Shoes
- Mountain Bike Shoes
- Approach Shoes
- Climbing Shoes
- Beginner Climbing Shoes
- Mountaineering Boots
- Winter Boots
- Rain Jackets
- Down Jackets
- Synthetic Jackets
- Fleece Jackets
- Hardshell Jackets
- Softshell Jackets
- Windbreaker Jackets
- Ski Jackets
- Winter Jackets
- Hiking Pants
- Trekking Poles
- Baby Carriers
- Running Vests
- Backpacking Tents
- Backpacking Packs
- Backpacking Sleeping Bags
- Backpacking Sleeping Pads
- Backpacking Stoves
- Water Filters
- Altimeter Watches
- Handheld GPS
- Mountain Bike Helmets
- Mountain Bikes
- Mountain Bikes Under $1,000
- Mountain Bikes Under $2,000
- Gravel Bikes
- Bike Brands
- Kids' Bikes
- Hitch Bike Racks
- Camping Tents
- Rooftop Tents
- Camping Sleeping Bags
- Camping Mattresses
- Camping Chairs
- Camping Stoves
- Duffel Bags
- Rock Climbing Shoes
- Climbing Helmets
- Climbing Harnesses
- Climbing Quickdraws
- Belay Devices
- Climbing Ropes
- Climbing Backpacks
- Winter Gloves
- 4-Season Tents
- Ski Helmets
- Ski Goggles
- Ski Backpacks
- All-Mountain Skis
- Ski Bindings
- Backcountry Skis
- Backcountry Ski Boots
- Skis for Beginners
- Hardpack Skis
- Mirrorless Cameras
- Full-Frame Cameras
- DSLR Cameras
- Point-and-Shoot Cameras
- Travel Cameras
- DSLR Lenses
- Mirrorless Lenses
- Lofoten Islands
- Lofoten Hiking
- Hardangervidda
- Jotunheimen
- 10 Great Norway Hikes
- Public Huts
- Torres del Paine
- Chalten and Glaciares
- Lake District
- Patagonia National Park
- Milford Sound
- Abel Tasman
- Marlborough
- Great Walks
- Adventure Towns
Add adventure to your inbox
- Privacy Policy
- Terms of Use
© 2024 Switchback Travel. All Rights Reserved. No part of this site may be reproduced without our written permission.
This site has limited support for your browser. We recommend switching to Edge, Chrome, Safari, or Firefox.

- Shop Cube Sets
- Shop Cubes by Size
- Shop Toiletry Bags
- Shop Makeup Bags
- Shop All Travel Accessories
- Create account
Browse categories
- All Products
Overnight Trip Packing List: Tips + Free Checklist

Packing Tips for an Overnight Trip
You’ve got one night only. That should be easy, right? Wrong! Many things could still go south if you’re not adequately prepared. It’s one night only. Make sure you pack things right! Here are some tips to help you out.
Tip #1 - Go small or go home
Drop that suitcase. You’re gonna need a smaller bag. Having a small sized bag will allow you to pack less and will keep you from overpacking. This is just a one-night trip! Don’t end up looking like you’re packing for a month overseas. Remember to bring only the essentials of all essentials. Start with the basics and move your way down to the least significant items that you can live without for one night. Ultimately, you can choose between these three types of bags:
✓ Duffel Bag - This type of bag makes packing, carrying, and unpacking your essentials hassle free for an overnight trip. It has a wider space for your necessities to fit. Bonus: It also fits 2 medium size packing cubes so you can pack for 2 persons in 1 bag!
✓ Backpack - No, we’re not talking about that 10-foot backpack for a hiking trip. You don’t need anything fancy. Just a regular backpack will do. Again, this is just a one-night trip. Don’t overthink.
✓ Tote bag - Not the regular ones you bring to the beach. Take the size up a notch, like this Vera Bradley Tote Bag . Tote bags can be used for your daily-grind essentials and it can expand to become the perfect overnight trip bag.

Essentially, you are only going to carry 2 bags during your overnight trip. The first one is your purse (for your personal items), and the second one is the travel bag of your choice. Either of the three works best for a short trip. Go with what you’re comfortable with.
Tip #2 - Minimize with Clear Pouches
Yes, you still need to organize your stuff even though it’s just a handful of items. An overnight trip is not an excuse to just cram all your essentials in the bag and go. Organizing for a long journey starts with minimizing things for an overnight trip. No matter the length of your travel, clear cubes and pouches will always be your friends.
✓ Small Cube - Perfect to store your clothes for a two-day, one-night trip.
✓ Circle Pouch Set - Use the larger pouch to keep your phone, cash, keys, cards, and other daily essentials. The smaller pouch can be used to keep your charger, cord or earphones from tangling.
✓ Half Moon Bag - Organize your basic makeup products in a cute and stylish way. This pouch is perfect for your beauty essentials and will keep your overnight bag neat and tidy.

Tip #3 - The only ‘extra’ you need is an extra small cube
Steer clear away from any “just in case” ideas. That’s the beginning of overpacking. We’re not only talking about clothes here but even when it comes to your toiletries, hygiene kit, medicine kit (yes, you still need one), and snack pack, keep everything light. Use Extra Small Cubes for your simplified toiletries, downsized hygiene kit, personalized medicine kit, or a favorites-only snack pack so you can easily organize them inside your travel bag.
Tip #4 - Despite the weather, wear Layers
Checking the weather will help you pack appropriate layers and outfits. Looks like a hot day for shorts? Bring a jacket just in case it gets chilly later on. Looks like a cold day? Layer your outfit with a t-shirt underneath just in case the day heats up. Layers, layers, layers!
Tip #5 - Leave heavy electronics behind
If you’re thinking of entertainment for your trip, don’t even think about bringing your huge Bose earphones or your laptop (unless you’re planning to do some necessary work). Your phone and earbuds are the best for your short trip. Music, movies, books, news, basically, everything’s on your phone. No need to bring paperback novels, magazines, or game consoles. These things are just dead weight.
Tip #6 - Simplify your toiletry bag
Split your holiday-trip-packed toiletry in half and that will be good enough for your overnight trip. Remember, try to pack as light as possible. You’ll be gone and back in a jiffy, so take time to simplify your toiletry using travel size (TSA Approved) containers.

Pro Tip: Keep one ‘travel-ready’ toiletry bag pre packed under your sink and check if something needs to be refilled. That way you don't have to always pack from scratch whenever you go on overnight or longer trips.
Tip #7 - Personalize a "mini meds" kit
Some people may think, it’s just a one night trip, why bother bringing a first aid kit? First of all, accidents don’t pick the kind of trip they wish to happen. Whether it’s for a long holiday vacation or an overnight one, the best you can do is to be ready. For overnight travels, personalize your medicine kit and bring all the important ones. Do you get dizzy during any sort of transit? Take Dramamine. Are you allergic to anything? Pack antihistamine cream or tablets. Do you have sensitive skin? Bring your skin rash cream. You get the idea.
Tip #8 - Mini hygiene kit (#covid19)
You can never be too careful while traveling these days. If there’s one thing the pandemic has taught us, it’s to be keen on hygiene and washing of hands. That being said, always have your hygiene kit at your disposal. Wipe before you touch, and sanitize afterwards. Place your sanitation pack in your purse, along with your other personal items, for easy access.
Tip #9 - Downsize to 10 makeup products
Twenty different makeup brushes, eyeshadow palettes and more seem a bit too much for a one-night getaway, don’t you think? Let’s break it down to what you will really need for a quick overnight trip. Select the items that you think are the most essential. Challenge yourself to bring no more than 10 items in your makeup bag. Can you do it?

Tip #10 - Three outfits will do
You only need 3 outfits for an overnight trip: one, what you’re wearing for Day One; two, pajamas; and three, change of clothes for the next day. Now, sometimes things take an unexpected turn and you might not be able to stay just for a night (in case of an emergency). Instead of worrying, just bring an extra shirt and extra pair of undies. You’ll be fine! Also, throw in a jacket in case you go out for the night to throw over your Day 1 Outfit.

Pro Tip: Lay out your outfits all flat. This helps you decide whether what you’ve gathered is just enough or a little bit too much.
What to Pack for an Overnight Trip - Checklist

Save this checklist to your phone. Get your bag ready and let’s pack together. Here’s a breakdown of the essentials that you’ll need for your overnight trip.
Purse / Personal Items Bag
🗹 Snacks & Mints
🗹 Phone, Charger, Earphones
🗹 Power bank
🗹 Wallet (IDs, cash, and cards)
🗹 Hygiene Kit (see list below)
🗹 Makeup Pouch (see list below)
🗹 Small Hairbrush & Compact Mirror

Hygiene Kit (all in travel sizes)
🗹 Wet Wipes
🗹 Alcohol Spray
🗹 Hand Sanitizer
🗹 Sanitary Pads / Tampons
🗹 Oil Blotting Sheets
🗹 Face Mask (COVID-19)
Basic Makeup Essentials
🗹 Concealer / Foundation / Face Powder
🗹 Lip gloss / Lipstick
🗹 Makeup Remover Wipes
🗹 Mascara & Eyelash Curler

🗹 Shampoo & Conditioner (if destination won’t provide)
🗹 Body Wash / Soap
🗹 Deodorant
🗹 Toothbrush & Toothpaste
🗹 Floss & Mouthwash
🗹 Facial Cleanser
🗹 Moisturizer (Face & Body)
🗹 Contact Lens, Solution & Contact Case
🗹 Hair Ties / Clips
🗹 Razor & Shaving Cream (or shave the night before!)
Personalized Med Kit
🗹 Vitamins & Health Supplements
🗹 Ibuprofen
🗹 Anti-diarrhea tablets
🗹 Antibacterial ointment
🗹 Motion sickness pills
🗹 Prescription Meds
Clothing Items (Remember! 3 Outfits)
🗹 2 casual shirts / tops
🗹 1 pair of pants / leggings / shorts
🗹 1 dressier top
🗹 1 pair pj’s(pajamas /tank top & shorts)
🗹 1 bras (make sure this bra goes with all outfits)
🗹 2 pair of socks
🗹 2 pairs of shoes (one worn in transit, the other packed in a travel shoe bag )
🗹 1 swimsuit (if applicable)

Now, that was quick, wasn’t it? Remember, take the time to pack and prepare even if it’s just for an overnight trip. People usually think it’s very easy to pack for a one-night getaway that they could do it even a few hours before leaving. That’s where things usually get messy and necessities get left behind. But with this complete guide, tips, and a free checklist, you’re on the right path. Have a great short trip!
← Older Post Newer Post →
Leave a comment
Cart is Empty
Complete your set

Circle Pouch Set

Complete Bundle (For Checked Bags)

Large Cosmetic Bag
Plan, Ready, Go
Essential Overnight Trip Packing List
It’s far too easy to overpack for short trips. That is why you need an overnight trip packing list. With a solid overnight bag list, you’ll be able to keep organized and not forget anything important.
With just an overnight trip, the temptation to overpack can really strong. Let’s avoid that if we can. Ready for the list? Just keep reading!

This post includes affiliate links. If you make a purchase through one of these links, I may earn a small commission at no additional cost to you. As an Amazon Associate, I earn from qualifying purchases. See disclaimer.
Need help planning your overnight trip? Check out our list of essential travel planning resources .
Packing list for your overnight trip
Use this overnight trip packing list as the basis for creating your own list for each of your trips. Of course, you don’t need to follow this list exactly. It’s designed to be customized. Use it as a starting place.
The key thing is to keep it simple.
Tip : use an editable digital packing list to easily make changes to your list as you pack.
Clothing
You only need to pack two outfits at the most :
- One outfit that’s appropriate for whatever activity or occasion you have during the one evening of your trip.
- One outfit for anything you have planned for the second day.
For overnight trips, my preference is to pack only one pair of pants and then wear home the next day the same pants or even the same outfit that I wore for travel the day before.
Pajamas —a simple lightweight set of pajama bottoms paired with a T-shirt like this works. I love my Amazon Essentials pajamas.
One pair of shoes for whatever you have planned for your trip. Make sure they work with whatever outfits you are taking.
- I usually just take one bra with me for overnight trips…the one I wear to travel to my destination.
- 2 pairs of underpants. I always pack a spare pair.
- Optional: camisole
Socks —to work without whatever shoes you have packed.
- Ultra low-cut liner socks like these you can buy on Amazon are great to wear with flats or even slip-on casual shoes like Vans or TOMS.
- I love to wear these liners with athletic shoes.
- Wool socks like these are perfect for outdoor activities in cold weather.
Jacket or cardigan to keep warm in case of sudden weather changes, cold event venues or restaurants, etc.
Optional clothing you could pack for an overnight trip
If your hotel has a gym and you enjoy working out when you travel make sure to take your workout clothes with you. Or if you want to check out your hotel’s pool, add a swimsuit and coverup to your packing list.
If you have room in your bag, consider packing a pair of flip-flops or slippers for wearing around your hotel room or in case you need to make a quick run down the hall for ice.
- These are my favorite flip-flops . I almost never travel without them…unless it’s the dead of winter.
- These are my absolute favorite slippers .

Toiletries
For a trip of just one night, keep skincare, haircare, and makeup products to a minimum. I always recommend that you just use your hotel bathroom product amenities when possible. That means you won’t need to pack shampoo, conditioner, soap, or perhaps even a facial cleanser or body lotion.
Pack a basic toiletries bag with only the essentials. Here are some examples of what you might pack (all are products I actually pack for trips and have used for many years):
- Foundation —get one with SPF in it like this .
- Concealer — I love this one because it lasts. All. Day. Or try a “foundcealer” like this to save even more space since it’s a foundation and concealer in one.
- Makeup sponge — this one is a great affordable option .
- Powder — this talc-free powder travels well.
- Eyeliner — this retractable pencil makes a great travel companion.
- Eyebrow pencil — this affordable version of more expensive pencils is one of my favorites.
- Eyebrow gel —a good brow gel will help you look made up even when you only have a few minutes to get ready. This one is my favorite .
- Mascara —a tubing mascara like this one is great for travel since it doesn’t smudge.
- Lip gloss or lipstick —or both. They’re small.
- Disposable razor
- Daytime moisturizer with sunscreen — this one is SPF 50 , works well under makeup, and doesn’t leave a white cast.
- Night cream — this one is my favorite .
- Toner —I enjoy traveling with a hydrating toner like this one .
- Cotton rounds — these are perfect for applying toner and whatever else you need.
- Travel size toothpaste
Miscellaneous essentials
There are a few other things you might want or need to pack to make sure you have a good trip.
- Charger for phone and other electronics
- Umbrella
- Prescription medications
- Essential dietary supplements or over-the-counter medications
- A few first-aid items. You can bring a small selection of things from home or purchase a compact first-aid kit designed for travel .
Things you can leave at home
- Multiple outfit options for every possible scenario
- Extra shoes
- Large makeup bags
- Extra electronics (e.g., you don’t need to pack a laptop AND a tablet)
- Hair dryer. Use the one provided by the hotel.
- Shampoo, conditioner, and soap. Use the hotel amenities.
- Multiple jewelry options
Minimize your overnight bag
I find that the danger of overpacking is strongest with short trips . And overnights are no exception. Because it’s so easy to overpack for overnight trips, I recommend you use the smallest bag you can but still have room to pack the things you genuinely need.
Using a small bag will help you avoid the temptation to overpack because you simply won’t have the room.
A small rolling carry-on bag like this one from Amazon makes a great overnight bag.
A large tote bag like this popular weekender would also be great for a short one-night trip.

Get your overnight bag list organized
Why do you need to get organized for your overnight trip? All you have to do is toss a few things in a bag, right? But when heading out on an overnight, it’s so easy to simultaneously overpack and yet forget important items .
So, pause for a few minutes to think about what you really need . What plans have you made for your trip?
- A nice dinner out?
- A special event like a concert?
- Outdoor activities like hiking?
- Do the accommodations you booked include pool or gym facilities you want to use?
Final thoughts on the overnight bag list
When traveling for just an overnight getaway, try to resist the temptation to overpack. You don’t need multiple outfit options “just in case.”
But you don’t want to go to the opposite extreme either and not give any thought to what you need to take with you. That’s how you forget to pack essentials in your overnight bag.
The packing list in this post is all you need to make sure that you pack well for your short trip.
More articles related to packing for overnight trips
- Essential travel planning resources
- Romantic getaways in the South you need to consider
- Travel essentials for women
Pin this post!

Darcy Vierow is a busy professional and travel planning expert with years of experience maximizing travel with limited time and on a less-than-average salary. Her tips have been published by Forbes, MSN.com, Yahoo! News, Yahoo! Finance, Aol, Newsbreak and GOBankingRates. Read more about Darcy Vierow .
One Comment
You made a good point that it’s important to have a thorough plan first when planning to stay in a vacation home rental. I want to look for a good vacation home rental soon because I want to start planning for my honeymoon. I think that a simple staycation in a villa would be a good option.
Leave a Reply Cancel reply
Your email address will not be published. Required fields are marked *
By using this form you agree with the storage and handling of your data by this website. *
Privacy Overview

The Ultimate Overnight Train Trip Packing List
Our checklist has items to help you get comfy, stay entertained, sleep well, and more.
During my travels around the world, I’ve taken overnight trains in England, all over Europe, in the U.S. and Canada, plus throughout Asia. These trips have been some of the most memorable travel experiences of my life — the unique point-of-view, unexpected social interactions between fellow travelers, and overall holistic experience offered by train trips definitely make the journey itself part of the destination.
When you book an overnight train, it might take longer to get where you’re going, but you’ll have a literal window into your destination that takes you by places a car, bike, and plane can’t reach. Your overnight train will vary depending on where you are and where you’re going, mainly hinging on if the train is private or government-owned, and the type of onboard accommodation in your budget. The cheap seats are your standard airplane-like rows of semi-reclinable seats, but there are also shared sleeper cars with bunks, and a handful of completely private room types.
No matter where you rest your head, this essential checklist of what to pack for an overnight train trip suggests everything you need to stay comfortable, entertained, and on track for a great trip.
Packing Checklist for an Overnight Train Trip
Even on the most scenic and luxe of trains, you’re likely to encounter times along the way when the view isn’t much to look at, fellow travelers get annoying, and you feel a bit stir crazy. This packing checklist will keep your bases covered when it comes to comfy clothing, convenient and functional bags, and all the necessary gear and accessories you’ll be thankful you brought along for the ride.
Clothing and Shoes
- Best Loungewear Set for Women: PrettyGarden Women’s Two Piece Outfit
- Best Wrinkle-free Shirt for Men: L.L.Bean’s Wrinkle-free Everyday Shirt
- Best Wrinkle-free Shirt for Women: Wayre Shift and Snap Tank
- Best Socks: Bombas Everyday Compression Sock
- Best Slip-on Shoes: Vans Classic Slip-on
- Best Shower Shoes: Showaflop Sandal
Luggage and Bags
- Best Toiletry Bag: Sea to Summit Hanging Toiletry Bag
- Best Accessories Pouch: Cotopaxi Nido Accessories Bag
Best Insulated Cooler: Tirrinia Small Insulated Lunch Bag
Best backpack: cotopaxi allpa 35l travel pack, best carry-on suitcase: samsonite freeform carry-on spinner.
- Best Travel Water Bottle: Thermoflask Double Stainless Steel Insulated Water Bottle
- Best Noise-isolating Earbuds: Skullcandy Jib 2 True Wireless Earbuds
- Best Power Bank: Anker Portable Charger 325 Power Bank at Amazon
- Best eReader: Amazon Paperwhite at Best Buy
Accessories
Best Earplugs: Loop Quiet Earplugs
Best sleep mask: manta sleep mask.
- Best Travel Blanket: Sagefinds PGI Traders Soft Travel Blanket with Bag
- Best Travel Pillow: Dot and Dot Adjustable Travel Pillow
Even though you can get up and walk around on most trains (or post up in your own private room), you’ll want to make sure you are in comfortable clothing for the duration of the ride. Consider that most overnight train trips are slightly more comfortable than an overnight flight in coach where you’ve got the whole row to yourself. The key here is lightweight, loose, breathable, and presentable clothing items (plus, wrinkle-resistant, if possible).
For starters, you’re going to want to have a separate outfit to sleep in, as well as fresh clothes (or at least tops) for each day. Also key is a pair of shoes that easily slips on and off for when you want to stretch your legs, grab a snack or meal, check out the observation car (if there is one), or get some fresh air at a stop. Unless you’re on a fancy luxury train, your seat or bench will likely have seen better days, so I always opt to bring clothing with a full back, some sleeves, and bottoms with some length so I’m not touching too much with my bare skin.
Best Loungewear Set for Women: PrettyGarden Women's Two Piece Outfit
Buy at Amazon.com
Whether you’ve got your own private cabin or you’re spending the night in a standard seat, being comfortable is going to be key. This PrettyGarden 2-Piece pullover and drawstring loungewear set works double duty as a comfy full-coverage outfit to sleep in comfortably and a casual pant-and-top set that can pass as daywear so you don’t have to feel like you’re on display in pajamas in front of strangers. It comes in 34 vibrant solid colors and color blocks making it a cinch to find your perfect shade, or to buy a few and mix and match.
Price at time of publish: $46
Best Wrinkle-free Shirt for Men: L.L.Bean Wrinkle-free Everyday Shirt
Buy at Click.linksynergy.com
After a few days in your suitcase, you’ll be glad you packed some wrinkle-free shirts. This L.L.Bean Wrinkle-free Everyday Shirt is comfortable against the skin and doesn’t require an iron. It is also designed to be worn untucked, so you can be presentable without feeling restricted. The limited patterns on these long-sleeved poplin cotton button-ups leave a bit to be desired, but they check the boxes for moisture-wicking breathability and are easy for almost anyone to pull off. Plus, you can roll up the sleeves!
Price at time of publish: $60
Best Wrinkle-free Shirt for Women: Wayre Shift & Snap Tank
Buy at Shopwayre.com
This wrinkle-resistant tank is a go-to when you’re looking for a bit of style coupled with sustainability and comfort. This is something I’d wear during the daytime, and it pairs perfectly with dress pants, leggings, jeans, and shorts. Since it’s odor-resistant, breezy, and can be worn a few different ways (tied up, tied back, and all down), you can get away with wearing it a couple of times no problem. The slightly cropped, open waist design means you’ll stay cozy and covered while seated, too — and I love the neutral color choices and inclusive sizing.
Price at time of publish: $69
Related: The Best Loungewear for Comfortable Travel
Best Socks: Bombas Men’s Everyday Compression Sock
Buy at Bombas.com
Think compression socks are just for plane travel? Think again! You’ll be doing your fair share of sitting on an overnight train, so I recommend packing a few pairs of compression socks to keep your legs comfy during the trip. These Bombas Everyday Compression Socks are easy to get on and off, and provide a low level of compression (15-20mmHg) so they are loose enough to wear all day. Women’s sizes range from 4-13 and men’s sizes range from 6-16. I particularly like that they are in attractive, “normal” sock colors so your neighbor won’t even know you’re wearing compression socks. And, for every pair purchased, Bombas will donate a pair.
Price at time of publish: $28
Best Slip-on Shoes: Vans Classic Slip-On Shoes
Buy at Anrdoezrs.net
This classic slip-on shoe from Vans gives you style, tons of color and pattern options (43 to be exact), and has good traction on the bottoms to help you while climbing stairs on the train, getting on and off the platform, and, ahem, in the bathroom. (Shoes with good traction are clutch in the swaying, jolting small spaces of the toilet on a train so you don’t have to brace yourself by touching the walls.) I also find these shoes really easy to wiggle on in a snap, and you don’t need to touch them to pop them off your heels. Plus, depending on the color, they can work with a variety of dress styles.
Price at time of publish: $60
Best Shower Shoes: Showaflops Men's Antimicrobial Slip-Resistant Lightweight Sandal
If your train has a shower, even a private shower, packing a decent and dependable pair of shower flip-flops is an absolute must. Aside from the world’s most luxurious trains , you should treat your train shower like a shower at the YMCA, as in, there’s a lot of foot traffic. The Showaflop Sandal gets the job done in this small space, and I particularly like how the soles have small holes in them, which not only help your feet breathe and prevent slipping on your flops in the shower but also help the shoes to dry quicker once you’re out. The soft-velcro closure keeps the shoes snug for wide and narrow feet alike.
Price at time of publish: $32
When I travel by plane, I avoid checking a bag if at all possible — and even more so on a train. When backpacking through Europe and Asia, my 80-liter pack came with me in my room, and I stored it with me on my bunk. With the multiple stops trains make, sometimes at all hours of the night, it feels more secure to have my luggage on board with me and that's why I suggest bringing a regular backpack plus a carry-on suitcase. Even if you’re sitting in coach at a proper seat (versus a cabin), you can often stuff your luggage and/or backpack above your head and your valuables under the seat in front of you.
For extra security, get a suitcase with obvious locks, and buy a small lock for your backpack if you plan on leaving it unattended. Packing your electronics in their own travel pouch, separating your toiletries out for easy access, and keeping anything you can’t live without in a hip bag are highly recommended. If you’re in a private room or on a luxury train, you don’t have to be as worried about security, but I’d still recommend using a carry-on size suitcase so you have access to everything you need whenever you need it.
Best Toiletry Bag: Sea to Summit Traveling Light Hanging Toiletry Bag
The Sea to Summit Hanging Toiletry Bag has four breathable mesh compartments and a built-in hook, giving you easy access to your items and allowing you to better maneuver in any small space. Easy-grip zippers can be opened with wet fingers, and there’s also a detachable shatterproof mirror (though, unless the bag is hung high enough, it doesn’t do much).
What I like about this small bag is that it’s only about 16 inches long when hung up, unlike other hanging toiletry bags that can dangle several feet down. (This bag also comes in large which extends to be about 21 inches.) Each can stand on its own, if you prefer, and the whole thing is water-resistant with four colors to choose.
Price at time of publish: $45 for small
Best Accessories Pouch : Cotopaxi Nido Accessory Bag
I always like to travel with a packing cube mentality, especially when it comes to keeping the things I need close at hand. The Cotopaxi Nido Accessory Bag has a four-liter capacity across three zippered pouches with interior organization sleeves and pockets to please even the most particular compartmentalizer. Think of it as a pencil case-meets-electronics bag where you can put your charger, eReader, cables, train ticket, pens, and more. The colorful Del Dia option is bright and easy to spot, even in dim light, but there’s a Rust or Spruce color, too. The side carry handle is also convenient for pulling out of your backpack or seat front pocket and toting it where you need to go.
Price at time of publish: $45
Measuring 9.5 by 8.5 by 4 inches, the small size of this insulated cooler makes it perfect for packing in your backpack without taking up too much real estate — and the leak-proof interior means you won’t have to worry too much about spills. The exterior is slash-proof, and the insulation can keep your food hot or cold for several hours. (You can also stuff the interior mesh pouch with cold or hot packets to extend the temperature insulation inside.) The exterior side pocket works for holding a 12-ounce can or water bottle, and there’s a front pocket for cutlery or napkins. You can use this to bring your own food on board, or to store food from the train’s snack shop, too.
Price at time of publish: $19
Related: The 19 Best Insulated Cooler Bags of 2023
Buy at Rei.com
If you’ve been sleeping on the Cotopaxi Allpa 35L Travel Pack, now’s the perfect time to get on board. This colorful and durable bag is an organizational dream come true, with pockets, zips, and stash spots galore. What I love about this bag is that it has a clamshell design for quick access, plus mesh pockets to easily locate whatever you need. There’s also a back-access pocket if you need to grab something packed at the bottom of either side, and the laptop sleeve fits up to a 15-inch laptop (with a separate slip pocket for a tablet or eReader). It’s big enough to use for a weeklong trip, streamlined enough to easily store away, and can be carried on your shoulders or via the side handles.
Price at time of publish: $200
This hardside carry-on suitcase earned a perfect score from T+L testers who put it to the test in various conditions over six months. The thermoplastic outer shell took a beating both in our lab and in the real world, and any scuffs were easily buffed out. It also has a wide selection of 14 colors and rolls smoothly on its four spinner wheels across several surface types, making it great for the train platform and aisles. Depending on your train, this case may not fit above your seat, but the sleek, modern design fits easily onto the luggage rack with a double TSA lock for extra peace of mind. Inside, you’ll have two compartments, including one fully-zippered side where you can separate out your shoes or delicate items.
Whether you’re overnighting with swagger on a luxury train or swaying down the rails on a regular train, this is the gear you’ll want to be sure to pack. A refillable water bottle ensures you’ll always have hydration on hand, while including a versatile, reliable power bank will keep your tech from running low on juice. Even the best of train rides have their lulls, which is exactly why you’ll want to pack along some entertainment like an eReader and some good noise-canceling headphones so you can zone out that noisy passenger or the rattle of the rails.
These items are the essential minimum so, if you’ve got extra space, I’d recommend some other forms of entertainment like a deck of cards, a coloring book, a retro disposable camera for snapping scenery, and luggage trackers if you’ve checked suitcases or are worried about your carry-on belongings.
Best Travel Water Bottle : Thermoflask Double Stainless Steel Insulated Water Bottle with Two Lids
Buy at Goto.target.com
The Thermoflask Double Stainless Steel Insulated Water Bottle is a go-to for keeping your favorite drink on hand, whether that’s cold water or hot coffee. During our tests , the double-wall insulation kept our drink cool for six hours, only raising the beverage temperature by three degrees Fahrenheit. Depending on your train, you may experience a whole lotta shakin’ going on as you rumble down the tracks, so having a bonafide leak-proof water bottle that can hold up even after a few drops, rolls, and shakes, is crucial. This water bottle comes in six colors and with two lids, a chug and straw, so you can personalize it to your preferences. We’ve priced out the 40-ounce size, but it’s also available in 18, 24, 32, and 64-ounce alternatives.
Price at time of publish: $35 for 40-ounce
Best Noise-isolating Earbuds: Skullcandy Jib True 2 Wireless Bluetooth Earbuds
I know there are more expensive, possibly higher quality earbuds out there, but it’s hard to beat the quality, and battery life, of the Skullcandy Jib True 2 Wireless Earbuds. If you pack these noise-isolating earbuds on a full charge you’ll get 33 hours of playback, nine hours in the earbuds and 24 in the carrying case. The IPX4 and sweatproof earbuds come with three different-sized silicone tips so you can find your best fit, and once they’re in, they’re comfortable to wear for hours. They’ve also got built-in Tile locators, in case you lose or leave them somewhere on the train. Sound quality is clear and crisp, and you can listen in one or both ears. I like that they are noise-isolating (good at blocking out distracting background noise), but not fully noise-canceling so you can stay alert for announcements and communication. Plus, they come in four colors instead of just black or white.
Price at time of publish: $39
Best Power Bank: Anker Portable Charger 325 Power Bank
Buy at Anker.com
Unfortunately, your tech is no good if it runs out of juice on your trip. Fortunately, the Anker Portable Charger 325 Power Bank packs enough power to charge up your stuff, even two things at once. Having both a USB-C and USB-A port (and accompanying cords) means it’ll pretty much charge up any device on the market right now — and it will do so quickly.
The 20000AmH battery takes about 24 hours to fully charge, so you’ll definitely want to pack it fully charged and recharge it as much as possible every night. The power bank itself is slim and lightweight and can easily slip into your pocket, making it easy to add juice without being tethered to your seat or room.
Price at time of publish: $43
Related: The 11 Best Noise-canceling Headphones of 2023, Tested and Reviewed
Best eReader: Amazon Kindle Paperwhite
Buy at Bestbuy.7tiv.net
The latest Amazon Paperwhite has a 6.8-inch display with an adjustable light for easy reading in a range of settings. The six-week battery life means you likely won’t have to charge the device at all during your trip, saving your power bank for other pieces of gear. The screen for this device is easy on the eyes, reading like paper and without glare, but unlike a book you can adjust the size of the font as needed. In addition to countless titles to purchase or rent, you can also download audiobooks to the Kindle Paperwhite and listen to them on headphones via Bluetooth. We’ve priced out the 8GB version, but there’s also a 16GB version available.
Price at time of publish: $140 for 8GB
When you’re packing for your train trip, consider this list your army of accessories in the battle to stay comfortable. Sitting for hours and sleeping on a train can get cramped, even on a luxury line. These accessories are comfort must-haves to keep you feeling good and sleeping well, especially since many older trains have a central air conditioning system that leaves passengers up to the staff’s mercy, even in private rooms.
When I rode overnight on Amtrak during the pandemic , I had limited control over the air vent in my private room. I could only change the direction of the airflow, but not the temperature (which always seemed freezing or not cold enough). In Thailand, my VIP private room didn’t even have air conditioning (but it did have several cockroaches, so you may want to pack some insect repellant). In Canada, on the Rocky Mountaineer, I was comfortable the entire time. All this to say, it’s a crapshoot, so packing some kind of travel blanket is a must. You’ll also want to stash a travel pillow, sleep mask (especially if you’re not in a private room), and a good, comfortable set of earplugs to block out rail noise and any station announcements through the night.
Buy at Goto.walmart.com
In addition to noise-isolating earbuds, I also like to travel with noise-canceling earplugs that I can pop in my ears when it’s time to sleep. Loop Quiet Earplugs have a soft silicone ear tip (each pair comes with eight tip sizes to try out) and a flexible silicone loop that fits inside your outer ear. This makes them extremely comfortable to wear overnight since there isn’t any part of the earplug sticking out, which could cause them to dig into your ear if you sleep on your side. These earplugs will reduce sound up to 27 decibels and have a noise reduction rating of 14. There are nine colors to choose from, making them a stylish accessory, too. If you’re a light sleeper, these will block out snores and rattling rails to help you snooze.
Price at time of publish: $25
Buy at Mantasleep.com
Blocking out nearby and background light is also key when it comes to catching a good night’s sleep on a train. Sometimes the window curtains are thin or broken, your neighbor is reading with a light on, or you want to take a nap during the daytime. The Manta Sleep Mask blocks out 100 percent of surrounding light to give you a truly pitch black environment. The sleep mask has two adjustable padded rings that fit over your eye sockets (but don’t push on your eyes themselves) to create a light-proof seal around your eyes. The thick band has a velcro closure at the back of your head so you can get the right fit, and the mask is comfortable enough to wear for side sleepers.
Best Travel Blanket : Sagefinds PGI Traders Soft Travel Blanket with Bag
This general-use travel blanket unfolds to 65 by 40 inches which is long enough to cover someone who is 5-foot 7-inches from tip to toe. The material is made from polyester and cotton, making it soft, lightweight, and breathable. When not in use, the blanket easily folds up to fit inside of a 6-by-9-inch carrying pouch, which also allows the blanket to function as a backup pillow in a pinch. There’s a trolley strap on the back of the pouch so you can easily slip it onto the handle of your suitcase (or just slide it into a pocket in your backpack). This blanket comes in five colors, giving it a bit more personality than your average travel blanket (that seems to almost always be blue). At the end of your trip, all you have to do to clean is toss it in the washing machine and dry on low and it’s ready for round two (or three or four or more!).
Price at time of publish: $30
Related: The 11 Best Travel Pillows of 2023, Tested and Reviewed
Best Travel Pillow : Dot & Dot Twist Memory Foam Travel Pillow
The Dot and Dot Adjustable Travel Pillow is a game changer. We love how easy it is to shape the flexible center rod, making it superbly functional in a variety of situations and positions (and, no, you can’t feel the rod). The bendable memory foam pillow gives you a versatile spot to lay your head when it’s time to nap or sleep, but also works as lumbar support while you’re passing time in your seat. I like that it can be bent to use against the window or formed into a “U” shape for upright sleeping or as extra lift under the pillow on your train bed. The outer cover is soft against your skin, but still breathable, and it can be taken off to wash. This pick comes in seven solid color options, making it easier to match your travel style.
Price at time of publish: $40
Frequently Asked Questions
Where do I store my things on an overnight train?
Where you store your belongings will depend on the exact train, but you can usually expect to have some kind of overhead bin or rack space to store a backpack and/or carry-on luggage. Trains that don’t have a lot of overhead space will usually have a luggage area at the end of each car, but beware they’re not usually monitored by anyone. If you’re on a sleeper train and have a room, there will be space to store a couple of bags. Any checked luggage will be stored in the hold.
What should you not bring on an overnight train trip?
Don’t bring anything extremely valuable (or at least keep it with you at all times, if you do), and don’t bring anything that needs to stay a certain temperature for more than a few hours. Unless you’ve got your own cabin on board, leave the Bluetooth speakers or anything else that will disrupt your fellow passengers’ trip. Do not bring any hazardous materials or banned items on your train trip either which can vary from country to country.
Where do I shower and sleep on an overnight train?
Unless you book a private room that lists a personal bathroom with a shower (the highest category room on North American trains), expect to share a bathroom and possibly a shower room with your fellow travelers. On many overnight trains in Southeast Asia, shared facilities are the only option and showers are not common.
Sleeping quarters will vary by train and country. Some trains have semi-private rooms with bench seating that converts into two to four single beds (often shared with other travelers), while other trains may have completely private rooms available. If you book a regular-class fare, you’ll be expected to sleep in your seat.
Why Trust Travel + Leisure
Katherine Alex Beaven is a veteran traveler who has had the pleasure to travel through several countries on overnight train trips. She knows there’s something special about traveling by train and has used her many experiences on overnight trains of all types — all good, bad, and in between — to create this ultimate packing list.
Related: The Ultimate Paris Packing List
Love a great deal? Sign up for our T+L Recommends newsletter and we'll send you our favorite travel products each week.
For more Travel & Leisure news, make sure to sign up for our newsletter!
Read the original article on Travel & Leisure .
We independently evaluate all recommended products and services—learn more about our process .If you click on links we provide, we may receive compensation.

- Search Please fill out this field.
- Manage Your Subscription
- Give a Gift Subscription
- Sweepstakes
- Travel Products
- Trends + Deals We Love
8 Plane Habits That Really Annoy Your Flight Attendants — and the Travel Accessories That Solve Them
These travel accessories ensure you’re not “that” passenger.
:max_bytes(150000):strip_icc():format(webp)/Alexandra-Domrongchai-Headshot-0b9572e52b9c4f69b7b8c388c2f830d3-a0d22381cba940719a3100a66044827a.jpg "overnight backpacking trip packing list")
We independently evaluate all recommended products and services. If you click on links we provide, we may receive compensation. Learn more .
Travel + Leisure / Marcus Millan
Flight attendants play an important role in ensuring the safety, security, and comfort of all airline passengers. Between preparing the cabin for takeoff and liaising important updates with the pilot and passengers, they serve as emergency responders in the air. Above all, flight attendants warrant your consideration and respect before, during, and after takeoff.
At Travel + Leisure , we aim to offer travel guides , inspiration, and tips to guarantee the safety and comfort of travel professionals, such as airline crew members, who work tirelessly to ensure our comfort. In fact, one of our contributors delved into the minds of flight attendants to compile a list of what passengers do that annoy flight attendants, and ever since, I’ve been dedicated to finding solutions for these easily avoidable flying faux pas.
I’ve gathered a comprehensive list of accessories that you should consider adding to your travel bag that address common annoyances. Below, you’ll discover why you should bring a reusable water bottle onboard and a legroom hack that’ll keep you from inconveniencing others. And the best part? All of these items can be found at Amazon starting at just $11.
Don’t: Ask for Water Immediately After Boarding
Do: Bring a Reusable Water Bottle
Hydro Flask Stainless Steel Water Bottle
One flight attendant told Travel & Leisure how frustrating it can be when passengers request water upon boarding, not realizing that they “only have a few minutes to get everyone seated and buckled up so that we can close the boarding door." If you anticipate being thirsty as soon as you sit, consider bringing a reusable water bottle like this insulated Hydro Flask one. The water bottle is a stellar choice for travel since it features a leak-proof flex cap and double-wall vacuum insulation, which means it’ll keep liquids hot or cold for hours.
Don’t: Stretch in the Middle of the Isle
Do: Get an Airplane Footrest
Basic Concepts Airplane Foot Hammock
A flight attendant expressed how frustrating it can be when people stretch their legs in the aisle. And we get it: Being crammed on a plane is far from the ideal way to start any trip. But there’s a solution to get more leg room without upgrading your seat: the Basic Concepts Portable Foot Hammock at Amazon. The footrest comes with an adjustable strap that can be wrapped around the seat tray in front of you for quick assembly. In fact, one frequent flier gushed that “they have no idea how I managed to travel without these in the past.” They continued, writing, “I usually have swelling when I fly, and this [footrest] helped alleviate any discomfort and allowed more space for my legs."
Don’t: Demand Snacks or Food After Service is Complete
Do: Pack a Snack
KIND Minis Dark Chocolate Nuts and Sea Salt Caramel Pack
If you sleep through snack time or refuse meal service, you might not be able to get food later. Rather than go hungry, opt to pack a few extra snacks, like these mini KIND granola bars that are studded with nuts and won’t take up too much space in your bag.
Don’t: Ask for Headphones
Do: Bring a Bluetooth Connector
Isobel Store Bluetooth Transmitter Receiver
As important as in-flight entertainment is to a comfortable flight, it is not a prerequisite for a safe one. And with more people carrying cord-free Bluetooth headphones to watch movies during the flight, it’s a smart idea to bring a Bluetooth connector. To pair the two devices, simply power them both on and pair them to connect. It’s that easy. This device is also rechargeable and can hold up to 10 hours of playtime.
Don’t: Ask for a Pillow or Blanket
Do: Pack Travel-sized Versions of Your Own
Pavila 2-in-1 Travel Pillow Blanket
We promise you’ll become the most popular passenger if you take the time to properly prepare for your flight. This includes bringing your own pillow and blanket. Opt for this innovative two-in-one pillow and blanket set that comes with a compact pillow and ultra soft blanket. When neatly packed, it measures in at just 11 inches by 12 inches and comes with a convenient strap that effortlessly attaches to your suitcase.
Don’t: Put Your Backpack in an Overhead Bin
Do: Get a Compact Backpack or Underseat Carry-on
Matein Large Travel Backpack
Overhead bin space is precious and designated for larger carry-on suitcases and duffels — not backpacks. If you’re struggling to fit your backpack underneath your seat, take that as a sign that it’s time for an upgrade. Opt instead for this $32 backpack that I refuse to travel without . It’s equipped with plenty of spacious compartments, is easy to carry, and features proactive padding for personal belongings, all while remaining compact enough to tuck under your seat.
Amazon Basics Underseat Carry-on
Another great lightweight option that fits under your seat is this Amazon basics carry-on bag. This soft-side rolling carry-on is specifically designed to fit under airplane seats, making it an excellent option for business travel, short weekends, and more. At roughly 13.4 inches by 9.5 inches by 14 inches, this carry-on bag is designed to hold plenty of items, yet remains compact enough to slide under the seat.
Don’t: Ask Your Flight Attendant to Help with a Bag That's Clearly Too Heavy
Do: Get a Lightweight Carry-on Instead
Travelers Club Chicago Hardside Spinner 20-inch Carry-on
Flight attendants don’t get paid until the aircraft takes off , so if they get injured during the boarding process they are not eligible for workers’ compensation. It’s important to pack a bag that you can lift yourself, and that begins with a lightweight carry-on. Claiming the highly coveted spot as one of Amazon’s best-selling carry-on suitcases , this under-$50 suitcase weighs less than 6 pounds and is a mere 20 inches in size, so it’s easy to lift. In addition to its convenient size, this suitcase boasts an organized, lined interior with multiple pockets, leaving plenty of space for your personal belongings.
Don’t: File or Clip Your Toenails During Your Flight
Do: Wear Compression Socks to Avoid Temptation and Relieve Tension
Charmking Compression Socks
Even though we have the utmost trust in our readers to know that you would never clip your toenails on a flight, I’ll use any opportunity to gush over how much compression socks make long travel days more comfortable. Wearing a pair of compression socks will not only wade off any temptation to clip or file your nails mid-flight, but the socks will also relieve tension by stimulating circulation in your legs and feet to reduce swelling in the air. These socks come in a convenient pack of three and are available in a plethora of colors including black , nude , and white .
Love a great deal? Sign up for our T+L Recommends newsletter and we’ll send you our favorite travel products each week.
See More T+L Shopping Deals
:max_bytes(150000):strip_icc():format(webp)/tl-weekender-bag-roundup-tout-2cdf64b5f5e6429f956c5678a599bef9.jpg "overnight backpacking trip packing list")
IMAGES
VIDEO
COMMENTS
Backpack. For an overnight trip, you should be able to get by with a backpack that holds 30-50 L. If you're backpacking for an extended trip (3-5 days), then you will need a larger pack (50-70 L ...
BACKPACKING FOOD - Good food is really important for any backpacking trip, so it's well worth the effort to put together a simple meal plan before your trip. Keeping food weight down is a critical backpacking skill that usually takes experience to master. A good place to start is our Guide to Lightweight Backpacking Food.Most seasoned backpackers opt for lightweight, calorically-dense ...
Typically a 50- to 80-liter backpack; Rain cover or waterproof pack liner; Waterproof compression sacks or storage sacks (optional) For three-season backpacking trips that take a weekend or longer to complete, you should carry a pack between 50 and 80 liters in size. If you're simply doing an overnight trip or have an ultralight kit, you can ...
Overnight Backpacks. For multi-day hiking & backpacking, where you'll need to carry everything in on your back, I recommend choosing a 40-65 liter backpack that will hold your tent, sleeping bag, food, water, and other backpacking essentials. Gregory Mountain Zulu 55 - This is the backpack I take with me on most 2-3 day trips.
Bear canisters recommended. Bear hang set up: 60 feet rope & bag for all edible and scented items. Fuel & lighter. Stove & pot. Spoon / spork. Download the PDF version of this checklist. Click Here. Must-have gear for overnight backpacking and camping trips on the Appalachian Trail. Updated with COVID-19 safety recommendations.
The Hungry Hiker Backpacking Trip Planning Masterclass will cover everything (in detail) from how to prepare, research and plan for your trip to the backpacking gear you'll need. This masterclass also includes navigation and trip planning video tutorials and digital and printable trip planning resources along with tips and tricks for first ...
Most backpacking packs come with a rain cover, but if yours doesn't and you're hiking in an area where rain is common, then I recommend purchasing one (although a plastic poncho can also work in a pinch). Kate Outdoors Recommends: Osprey Aura AG 50L: $269.95. Osprey Aura AG 65L (what I use!): $289.95.
Packing List: Overnight Backpacking Trip . 12 Essential Items for Shoulder Seasons. July 01, 2021. ... The "shoulder seasons" of Spring and Fall can be an ideal and memorable time for an overnight backpacking trip in the mountains. In the Spring, the snowline has begun to lift, the winter access roads are starting to open up, and the ...
Gear. Best Backpacking Tent: MSR Freelite 2 Tent: 2-Person 3-Season. Best Sleeping Bag: Therm-a-rest Hyperion 20F/-6C Ultralight Down Mummy Sleeping Bag. Best Sleeping Pad: Therm-a-rest NeoAir ...
Nothing more. This is a complete backpacking checklist that you can download as a PDF. It encompasses everything you need to think of to prepare for an long-distance hike. Includes trip preparation (resupply points, insurance, emergency precautions) and essential gear items (food, clothing, navigation and much more).
Down to 20F: R 4-5.4. Below 20F: R 5.5+. Backpacking sleeping pads to consider: In our packs: Nemo Tensor Insulated (R 4.2) — After trying multiple sleeping pads, the Nemo Tensor is the pad we keep coming back to. It's lightweight at 15oz, super comfortable, easy to inflate, packs down small, and it's quiet.
So the first challenge that a first timer must face is that they must stay as lightweight as possible and still cover all they need i.e. carry only the essentials. So here is a checklist for an overnight backpacking trip. 1. Boots. Boots are the foundations of your backpacking trip. Bad boots can ruin the whole trip.
The Jetboil Flash Cooking System is the most efficient backpacking stove I've found, especially if you are only boiling water. Together, the stove and pot only weigh 13.1 oz. For a 3-day trip, one 230-gram fuel canister ( sold separately) should be enough if you are using your stove for coffee, breakfast, and dinner.
A good micro-fibre travel towers is essential travel gear on any ultimate backpacking gear list. The Matador micro-fibre towel range are made by travellers for travellers. They are super light, and most importantly dry very quickly and are perfect for all types of backpacking trips. Check Best Price.
Editor's note: The table above provides a brief overview of what you'll need to get outside, but our full PDF version is printable and offers a more comprehensive breakdown of the necessities and nice-to-haves. See Our Backpacking Checklist PDF. Backpacking Equipment. Whether you're headed out for a quick overnight or embarking on a multi-day mission deep into the backcountry, the gear below ...
This is a comprehensive packing checklist and packing advice for budget backpacking and light travel for adventurers (travel or hiking) — including backpacking essentials, electronics & accessories, adventure gear, toiletries, clothing, useful things and admin. Carrying all backpacking essentials on a wilderness trail in Canada.
Tip #6 - Simplify your toiletry bag. Split your holiday-trip-packed toiletry in half and that will be good enough for your overnight trip. Remember, try to pack as light as possible. You'll be gone and back in a jiffy, so take time to simplify your toiletry using travel size (TSA Approved) containers. Pro Tip: Keep one 'travel-ready ...
This gear list is most applicable for 3-day backpacking trips and up to 5-day backpacking trips (and obviously this list will work for 2-day trips as well). This list isn't fully optimized for really long thru-hiking trips though, since that takes a LOT more planning and coordinating, and your gear strategy will be a bit different.
Use this overnight trip packing list as the basis for creating your own list for each of your trips. Of course, you don't need to follow this list exactly. It's designed to be customized. Use it as a starting place. The key thing is to keep it simple. Tip: use an editable digital packing list to easily make changes to your list as you pack ...
In this backpacking checklist, I share every item I bring on a 3-day backpacking trip in the late spring, summer, and fall seasons. I hope that this backpacking gear list will help simplify your ...
Packing Checklist for an Overnight Train Trip. Even on the most scenic and luxe of trains, you're likely to encounter times along the way when the view isn't much to look at, fellow travelers ...
The trip duration, weather conditions, and necessary gear will have some bearing on how much you need to pack, but a general rule of thumb is that a backpacking backpack should not exceed 20 ...
Are you prepping for a backpacking trip this summer? Want to get the backpacking experience without carrying all the weight? ... Your camping gear will be delivered back to Benicia SRA; Packing List. Hiking Gear: Sturdy shoes for hiking; Day pack; Water: 2 liters or more; Food: Lunch for day 1, snacks for both days; Hat / Sunglasses & Sunscreen ...
Flight attendants work hard to ensure a safe and smooth flight, so we compiled a list of airplane habits that bother them, along with the travel essentials to pack instead. Grab compression socks ...