

Should a Travel Trailer be Stored Level? (Answered)

The average RVer usually only takes three to five trips a year in their travel trailer, which means that most RVs spend the bulk of their time sitting in long-term storage.
Because of this, it’s important to ensure that the travel trailer is properly stored.
As this will go a long way in caring for the RV and ensuring that it’s in tip-top shape for your next trip.
A question that’s often debated though, when storing a travel trailer is the importance of storing the RV level.
As some RVers feel that storing an RV slightly out of level allows for better drainage, especially if the RV has a flat roof.
However, it’s our contention, as you’ll see below, that an RV should always be stored level, for a variety of reasons .
Why Should a Travel Trailer Be Stored Level?

There are several reasons why you should always store your travel trailer level when not in use.
So let’s take a look at some of the top reasons below.
1. Decreases Stress on the Frame and Structure of the RV
One of the most important reasons to store your travel trailer level is to decrease stress on the frame and structure of the RV.
As storing an RV unlevel can place unnecessary stress on the RV frame as well as its structure, walls, and roof.
Which can weaken the RV and cause warping, separation, and cracking over time, leading to expensive repairs down the road.
Additionally, if you live in an area with extreme temperature changes, storing your travel trailer level will also help to prevent cracking or other damage that can occur from the expansion and contraction of the RV’s materials.
2. Distributes the Trailer’s Weight Evenly and Prevents Tire Overloading

When you store your travel trailer level, it helps to evenly distribute the weight of the trailer and prevent tire overloading.
Which can cause premature tire wear and lead to early tire replacement, if the imbalance and tire overload are great enough.
3. Reduces the Likelihood of Water Leaks
If you store your travel trailer unlevel, it can increase the likelihood of leaks developing in the roof, windows, doors, and seams.
Due to the fact that unlevel RVs allow water to pool, rather than drain properly, which can cause leaks to develop over time.
In addition, RV trim pieces, weather stripping, and gutters are designed to work best on a level RV.
So if your travel trailer is stored unlevel, it can cause these trim pieces and gutters to not function properly.
Preventing them from moving and channeling water away from the RV and more importantly its seams and openings, which are always the most vulnerable points for water intrusion on an RV.
Plus, if water is allowed to sit on caulking and weather stripping for extended periods of time, due to an unlevel RV, it can cause these materials to prematurely break down.
Which can lead to costly repairs and early maintenance issues.
4. Provides Accurate Tank Level Readings

If you have holding tanks on your travel trailer, which just about every camper does, with the exception of a few teardrop campers , it’s important to store the RV level.
As not properly leveling your RV will give inaccurate tank level readings, on your fresh, grey, and black water tanks.
Due to the fact that RV tank level sensors, which are typically attached to the exterior of the holding tanks and connected to a control panel to display the levels, are only as accurate as the RV is level.
As an unlevel RV will cause the liquids inside the holding tanks to also be unlevel, which will cause inaccurate tank level readings.
Showing the RV tank levels either more or less full than they actually are.
Which can not only be an issue when figuring out when to dump the grey or black water tank but can also lead to overfilling the freshwater tank as well.
5. Minimizes Stress on Slide-Outs and Allows them to Function Properly
If your RV has slide-outs, it’s important to park and store the RV level.
As storing an RV unlevel can place unnecessary stress on the slide-out mechanisms and seals when bringing them in and out.
Which can cause a slide-out to break or fail.
Additionally, RV slide-outs are designed to work best when the RV is level.
So storing an RV unlevel can cause the slide-outs to not open or close properly, as well as not seal correctly when they’re retracted.
Which can cause issues with both using and enjoying the RV as well as leaks developing over time, leading to expensive repairs down the road.
6. Allows Appliances to Function Properly, Especially the Refrigerator
All RV appliances should only be operated while the RV is level for best operation.
As RV appliances, just like home appliances, are designed to work best when they’re level.
This is especially true, however, for RV propane/electric refrigerators, which are one of the most popular types of RV fridges.
As RV propane/electric refrigerators need to be level, in order to maintain proper cooling and to prevent fire risk.
As propane refrigerators are absorption-style fridges, which means they use a chemical absorption process for their cooling, as opposed to compression like a standard kitchen refrigerator.
But why does using a propane fridge unlevel lead to a risk of fire?
Well, it has to do with the above-mentioned absorption process.
As RV absorption fridges that aren’t level can cause the ammonia/water solution in the fridge to not flow properly and accumulate at low points in the system.
Which can interfere with the boiling/condensing process of the fridge, causing an increase in heat.
Ultimately leading to a potential fire risk if the heat is allowed to go unchecked.
Because of this, it’s important to make sure the RV is level if you plan to use the refrigerator while the RV is parked or stored.
7. Allows RV Entry, Baggage, and Cabinet Doors to Function Properly

Another area where being level helps is with RV entry, baggage, and cabinet doors and drawers.
As an unlevel RV can cause RV doors as well as cabinet doors and drawers to not close or seal properly, which can be quite frustrating.
More important than this though is that an unlevel RV can also lead to problems with pests and leaks.
As it can be more challenging to properly close entry and baggage doors when an RV is unlevel.
Which can cause the exterior doors to not seat properly.
Leading to pest issues inside the RV as well as water intrusion issues around the doors
So if you want your RV doors and drawers to function properly and your exterior doors to have a tight seal, it’s important to make sure the RV is level when parked or stored.
8. Improves Walkability and Comfort Inside the RV
The final main reason to level an RV when stored or parked is that it helps to improve both walkability and comfort inside the RV.
As an unlevel RV can cause you to feel off-balance and unsteady when walking around inside and even lead to trips and falls.
In addition, an unlevel RV can also cause items inside cabinets to move around or shift, causing them to fall out when cabinets are opened.
Which can be quite annoying and potentially lead to broken items and messy clean-ups.
Additionally, an unlevel RV can also make it more challenging to use the various features and amenities inside the RV as well.
So if you want to be able to comfortably move around inside the RV, avoid accidents, and use the features and amenities of the RV without issue, it’s important to make sure the RV is stored and parked level.
While you should always look for the levelest ground to store an RV, you can store a travel trailer on a slope. In fact, on most occasions, you’ll be storing a travel trailer on a slight slope or incline, as the ground will rarely be completely level. However, as is always the case, when storing an RV on a slope, it’s important to level the RV and make sure the wheels are chocked. To prevent damage to the RV and to ensure it’s stable and secure.
You should ideally always level an RV first before putting its slides out, as this helps to protect the slide-out mechanisms, reduces stress on slide-out motors, and helps to prevent damage to the slide-outs. As slide-outs are designed to work best when the RV is level.
Jacks or stabilizer jacks on travel trailers are designed to stabilize the RV to prevent it from shaking or rocking while in use. Because of this, stabilizer jacks serve no real purpose while the RV is stored. So it’s generally best not to store your travel trailer with the jacks down, as there’s no real benefit to it unless you’re planning to regularly use the RV while it’s stored.
While there is some debate in the RV community about where to place an RV level to get the most accurate reading. In general, the best place to put a level on a travel trailer is centered on the rear and side walls.
As you can see, there are several important reasons why you should always store your travel trailer level when it’s not in use.
So, be sure to keep this in mind the next time you go to store your RV, as it could save you a lot of money and headaches down the road.
Thanks for reading!
Jason is an avid lover of RVs and the RV lifestyle. He is both a writer and editor for RV Owner HQ and has been RVing and camping for over 20 years.
Recent Posts
23 Inspiring Farmhouse RV Decors to Transform Your Camper
Are you looking to give your RV a cozy, rustic makeover? If so, farmhouse decor is the perfect style to transform your camper into a warm and inviting home on wheels. In this blog post, I'll...
15 Farmhouse RV Decorating Ideas for a Cozy Retreat
As a budding interior design enthusiast, I've always been drawn to the charm of farmhouse style. Recently though, I've discovered that using this popular design style in my Forest River Rockwood...
- RV Ownership
Parking Trailer on Sloped Driveway Safely: The How-to Guide
It’s your turn to pull the trailer, and you’re trying to park it for the first time, but the trailer hardly reacts to your maneuver.
So how do you park a trailer on a sloped driveway? Does it matter if it’s a single or dual axle? What kind of blocks do you need? Do you have to buy blocks? Is leveling a camper hard? Does the hitch matter?
If you’re new to RVing, how to park a trailer on a sloped driveway is a skill you need to cultivate. Not only is it a matter of safety for you and those around you, learning this skill also saves you the time and stress of parking a trailer on a sloped driveway.
And you’ll be happy to know that it’s less about skill than about using the right tools and techniques.
So let’s save you time and frustration with a simple process for how to park a trailer or RV on a sloped driveway.
STEP 1: Have the Essential Equipment for Safely Parking a Trailer on a Sloped Driveway
Before getting into the backing-up part, you need to make sure you’re using the right tools to safely park a trailer on a sloped driveway.
The Proper Tow Vehicle:
You need a tow vehicle that’s rated to tow your trailer’s weight. That means you need to weigh your trailer when it’s loaded and ready to go on a road trip. Then double-check that number with your vehicle’s towing capacity and that your transmission can handle it.
Pro Tip: Some hybrid engines don’t run in reverse. It’s strictly electric in reverse. So while your towing capacity is capable, it may not have the “umph” you need to get it up a steep slope safely. So have a plan B.
The Right Wheel Chocks or X Chocks
A wheel chock is a wedge-shaped device that stops your vehicle from unintentionally rolling or moving . On a sloped driveway, wheel chocks are a vital safety to keep your trailer stationary.
Some trailers have tandem axles , where the wheels are next to each other. For these axles, use X chocks to position between the two wheels . X chocks keep wheels from rolling forward or backward.
You can find good plastic or rubber chocks for your wheels at Harbor Freight.
Leveling Blocks for your RV
Once you’ve parked your RV on a sloped driveway, you need to level it to prevent undue stress.
Leveling blocks assist in leveling the trailer and offer extra stability. When selecting between plastic blocks and wood leveling blocks, consider the size and mass of your vehicle.
Now they do make special leveling blocks that you can use to level your RV. But you can always build up your own blocks with pavers or wood, adding to the stack as needed. Just make sure your blocks are stable.
Functional Tongue Jack and Stabilizers
These keep your RV stable on an incline. Stabilizers and a tongue jack usually come with your RV. But you need to make sure they’re functioning well before you park your trailer.
A tongue jack , mounted at the front of a trailer, is used to raise and lower the front of the trailer, so you can align it with your vehicle. It pivots up into the tongue while you’re traveling.
Stabilizer jacks ensure a level position for an RV or travel trailer. They are back and front stabilizers on your travel trailer or RV.
STEP 2: Use These Proper Techniques for Parking Your Trailer on Sloped Driveway
Now that you know you have the right tools for the job, let’s back this trailer up and park it.
The first step of parking doesn’t happen in the truck. You’ve got to Get Out and Look. Evaluate the driveway’s slope and select the best spot.
The best spot is…
- The flattest part of the parking area. Yes, there may still be an incline to deal with, but we’ll do that in step 3.
- Has a clear path to back through . Move obstructions. If it’s not movable – like a tree – then remember it when you’re backing up.
- Firm ground . Make sure the surface you’re parking on won’t shift. If the camper might sink into the surface, then use pavers or wood beneath your stabilizers to distribute the weight.
A careful assessment of the slope goes a long way to safely backing up and parking your RV.
Once you’ve got a handle on your surroundings, you got to back it on up.
But you’ve got nothing to worry about because you’ve got these three tricks to back up a trailer .
- Push the trailer . Picture yourself pushing the trailer. When you push on the right it turns to the left and vice versa.
- Hold the wheel at 6 o’clock . Not 10 and 2 like you learned in driver’s ed. Here’s why. When you turn it right, the trailer moves left. It feels backward and can stir confusion. By holding it at 6 o’clock, you synchronize your movement. When you move your hand left, the trailer turns left.
- Don’t rely on a spotter . It’s always best to trust your own eyes. But that doesn’t mean you abandon the spotter entirely. Your job is to push the trailer in. The spotter’s job is to position the ramp (if one is needed) and yell when you’re about to hit something. This avoids the circus of trying to communicate with someone in your rearview mirror.
- Don’t be in a hurry . Truck drivers only back up at idle speed . So even though you’re going up a slope, go easy on the gas. This allows you to adjust to what the trailer’s doing before it goes too far. Back up slowly, only moving the steering wheel as much as you need. Short trailers are responsive to tiny movements. But longer trailers need exaggerated turns.
There it is. You’ve got the know-how. Now the only way to improve is to get out there and do it. Practice in your driveway or in an empty lot.
Congratulations! You’ve backed in. Get out of the vehicle. Take a bow for your audience. And then move on to the last step of parking your camper on a steep driveway.
How Neighbor is changing RV storage
Transparent monthly savings.
Renters save 30-50% on RV storage, on average. No rate hikes.
Keep your RV nearby
25,000 locations means that your RV is always close by.
Storage made simple
Don't settle for stone age tech and long contracts. Neighbor makes it easy.
Step 3: Positioning and Leveling Your Trailer on a Steep Driveway
Here’s where you bring out the leveling blocks to level your RV.
RVs and travel trailers are designed to be level . And leveling is actually pretty easy with a yard level. When you park RVs on a not leveled surface, points of the structure that weren’t meant to carry weight get stressed. Your appliances – especially your fridge – also have trouble functioning if they’re not level when you park your wheels.
You’ve got the RV on the slope where you want to park it. Even if it’s not too steep, you want to make sure it doesn’t roll away. That’s where the wheel chocks come in.
Here’s how to use wheel chocks to lock your camper in place:
- Choose the right chock for the trailer’s weight and wheels’ size . Cheap plastic may work for small travel trailers, but anything over 20 feet should use the more heavy-duty rubber or metal wheel chocks.
- Position them flush against the tire. If your trailer tries to move, its tires should immediately feel resistance. If they aren’t flush, your RV could gain enough momentum to roll over them.
- Inspect the wheel chocks. Make sure they’re in good condition and provide sufficient stability to prevent the trailer from moving forward.
You’ve lock trailer is in place. It’s not going to roll away on you. Now it’s time to level it so that it doesn’t rock from side to side.
Here’s how to level your trailer:
- Use a bubble level to determine just how unlevel you are and what side needs to be adjusted. To level side-to-side, hold the level vertically against your RV and raise or lower your stabilizers to get the bubble in between the lines. To level front-to-back, hold the level horizontally and raise the jack as needed.
- Adjust the stabilizer jacks to get the camper as level as possible. These stabilizers adjust individually so you can level the camper based on the terrain. But if you’re on a very steep slope, you may need to dig a little and build up a block using wood or cement pavers for your stabilizers to sit on. Pro Tip: Just like the human body, these stabilizers are weaker when they’re fully extended. It’s better to build a block underneath your jack than to fully extend it.
- Build up a block for your trailer jack . Once you’ve got your trailer leveled on the slope, you may find that your jack needs a taller block beneath it to keep the stress off the stabilizers. Wood or cement blocks work great here.
- DO NOT SKIP THIS STEP. Go back and check your wheel chocks. Sometimes during the leveling process, the wheels shift. Check and be sure they’re firmly in position before you call it a day.
Save up to $1,200/year on RV storage & parking
A summary of other things to think about….
Before you set your heart on keeping your RV at your house or on the street before your trip, make sure your city ordinances allow it.
Many cities and HOAs have rules governing how and where you can park RVs.
Along with HOA regulations, you’ll also need to consider the long-term effects of parking your trailer on a slope for an extended period.
It’s hard on the frame, the appliances, and the tires . Leveling your trailer on a slope is an option, but the best method of keeping your trailer level is actual level ground.
If your property is located on a hill or mountainside, you might consider searching for a leveled storage space for your RV or trailer. Whether you’re looking for indoor or outdoor RV/trailer storage, peer-to-peer storage marketplaces like Neighbor.com
Let’s wrap up with some frequently asked questions.
Should a trailer be leveled when parked?
Yes. Many appliances won’t work unless it’s level when you park it . But it’s also safer and more comfortable to live in. Have you ever tried to sleep with your head downhill? Yeah, it doesn’t work well.
Can you back a travel trailer up a steep driveway?
Yes, you can back a travel trailer up a relatively steep driveway .
If it scrapes when going uphill, consider swapping axles or raising the suspension . A swap gives the front axle and the rear axle a lift. Just be sure your hitch still works with it.
A wood ramp at the bottom of the driveway can also help. But using a ramp can be tricky and cumbersome. But if you figure on increasing clearance is a permanent solution.
Is it OK to store an RV on a slope?
Storing an RV on a slope is not recommended. It’s much better to park an RV on a level surface.
Is an RV or a Trailer Easier to Park on a Sloped Driveway?
Yes, but you still need to get out and look and follow the same safety precautions.

Related Posts
How to level a camper: the simple step-by-step guide, top 20 travel trailer essentials for stress-free adventures on the road.
- Self Storage
A Complete RV Setup Checklist

Justin earns $650/mo on Neighbor. Find out how you can too!
Stay in the loop ↓
How To Level a Travel Trailer on a Slope

Sharing is caring!
Thanks for your support! If you make a purchase using our links in this article, we may make a commission. And, as an Amazon Associate, I earn from qualifying purchases. See the full disclosure here .
Updated March 29, 2024
I was looking through some RV forums recently and noticed many questions about how to level a travel trailer on a slope. So I did some research and learned a few things myself that I thought would be interesting to share.
Leveling your travel trailer is important for two reasons. First, it makes your camper much more comfortable for sleeping and walking around inside.
Second, and most people don’t know this, it helps to ensure that your gas refrigerator functions properly. The reason a gas powered refrigerator needs to be level is that it relies on gravity to cool properly. The more out of level the camper and refrigerator are the less efficient the fridge is at keeping food cold.
How To Level Your Travel Trailer
So how do you level a travel trailer on a slope? Begin by leveling the travel trailer from side to side, chocking the wheels, and then leveling it from front to back by adjusting the tongue jack. When done properly, your travel trailer will be stable and ready for you to safely enjoy.
Things You Will Need
- A Two Foot Level
- Plastic or Wood Leveling Blocks
- Wheel Chocks
Level The Camper From Side to Side First
First things first. Before you level the travel trailer find the flattest place to park. Clear the area of any debris like big rocks or branches to avoid having them interfere with leveling the travel trailer.
Finding the flattest place to park will minimize the amount of slope and make leveling the camper a little easier. If possible, try to position the travel trailer so the slope runs from front to back rather than side to side. Once you have the travel trailer or camper in the best position, it’s time to begin leveling it.
Use the level to estimate how much you will need to raise the low side of the travel trailer to level it. An inexpensive bubble level is all you need to level the travel trailer.
Sometimes people get confused when using a level. Lay the level from left to right on the camper’s rear bumper. The bubble in the level will float to the high side of the camper.
You will need to raise the lower side of the camper which is the side opposite the bubble. It is important to remember to keep the travel trailer hitched until you are finished leveling it from side to side.
Once you have guesstimated the number of blocks you will need to level the camper it’s time to place the leveling blocks in front of the tires. Plastic leveling blocks are like super strong Lego blocks for campers.
Snap them together to form a ramp for the camper and place them in front of the wheel you need to raise. If your travel trailer or camper has dual wheels you will need to place the leveling blocks in front of both wheels.
You can also use DIY wood leveling blocks instead of plastic leveling blocks. Just remember that the wood should be slightly wider than the tires.
The downside to using wood is that it is heavier than plastic leveling blocks and it can crack. Wood blocks can also slide out of place when driving the travel trailer on them. Obviously, if the wood is rotten or broken, it shouldn’t be used.
Once you have the leveling blocks in place, drive the camper onto the blocks. Slowly drive the camper forward onto the leveling blocks and have someone to guide you so you know exactly when to stop.
The tires should be directly on top of the blocks. If part of the tire is not on the leveling blocks you will need to drive off and reposition the blocks to make sure the entire tire is supported by the leveling blocks.
Check to see if the camper is level once you have it situated on the leveling blocks. If the camper is not level you will need to slowly back off the blocks and add or remove a block to level the camper. Once your camper is leveled, place the wheel chocks on the wheels on both sides of the camper.
Place the chocks under each wheel, wedging them in place by hand. Place them beneath the downhill side of the wheels. Wheel chocks are important to hold the camper still but many folks don’t think they need to use them – you DO need wheel chocks .
Normally a camper will move after people start walking around inside the camper, which makes the camper rock a little bit and then it can move. The wheel chocks keep the camper still, so use them even when you think you don’t need them.
Another Option to Level Your Travel Trailer
Another way to level your travel trailer is with Andersen Levelers . Andersen Levelers take the guesswork out of leveling your travel trailer. Therefore, you won’t drive onto the leveling blocks, find out the camper is still not level, then drive off and add or remove a block and then drive back on.
Anderson Levelers have a wedge system that allows you to drive onto the wedge and pull forward until the camper is level and then you chock the wedge. It is also very important to chock the wheels on both sides of the travel trailer when using the Anderson Levelers. Just check out the video below to see how they work.
Level The Camper From Front To Back
To level the travel trailer from front to back start by either setting the jack in a wheel dock or placing a few pieces of thick strong wood under the tongue jack. The tongue jack is the front part of the travel trailer that connects to your vehicle.
Once you have a solid resting spot for the jack, raise it and unhitch the camper from your vehicle’s bumper. Move your vehicle out of the way so you can finish leveling and stabilizing the camper.
Place the level inside your camper door on the floor and check to see how level it is from front to back. Then raise or lower the jack to level the camper. Usually, the jack will have a hand crank or an electric crank that you can turn to raise or lower it on its metal shaft. Continue to raise or lower the jack until the camper is level from front to back.
Place a plastic or wood leveling block wood under each of the camper’s stabilizing jacks, which are located at the four corners of the camper. The stabilizing jacks aren’t meant for leveling your camper so never use them for that purpose or they could break.
Stabilizer jacks are simply meant to prevent your camper from rocking and falling out of level. If your camper doesn’t have stabilizer jacks, you can have them professionally installed or you can place jack stands under the camper’s four corners.
How To Level a Travel Trailer on a Steep Slope

The best advice is to park your travel trailer somewhere else! But, if that isn’t an option you can follow the steps above but you need to add additional blocking under the leveling blocks on the low side of the travel trailer.
However, this can be very difficult because the base you create needs to be level, and you will be building on uneven ground. So, what do you do?
The best option is to dig down a couple of inches and level the ground itself like in the picture to the right. You will need a shovel and a small level to do this and it doesn’t take long.
Most importantly, it is the safest way to create a safe level base for your camper to sit on. I’ve seen folks try to shove rocks or small boards under the bottom board to try to make it level and it is very unsafe.
If you start with a good base you can ramp your travel trailer up higher and level it even on a steep slope.
Slides In or Out Before Leveling a Travel Trailer
We have tons of people asking us if the slides should be in or out before leveling an RV or trailer. The quick answer is that your slides should be in before you level your travel trailer.
Once you are level you can put your slides out. We are asked this question so often we wrote a blog article about it called Should You Level RVs With Slides In Or Out?
Learn More:
– 5 Best RV Leveling Apps For Your RV – Can You Add Auto Leveling Jacks to an RV or Trailer? – Best RV Jack Pads To Level And Stabilize Your RV
I hope you have found this article helpful for leveling your travel trailer or camper. If done correctly your camper will be sturdy and safe and the fridge will operate efficiently too! Check out some of our other articles related to this topic such as Can I Park an RV in My Driveway? Most of the time I see RV’s out of level they are parked in people’s driveways.
Do you have an idea or suggestion to share about how to level a camper, travel trailer or RV? Please leave your comments below!
If you would like to contact us directly, please feel free to visit our Contact Page to send us an email.
To see a list of all of our articles, check out the Blog Archive !
Mike Scarpignato – Bio
Mike Scarpignato created RVBlogger.com over five years ago in 2018 to share all we have learned about RV camping.
Mike is an avid outdoorsman with decades of experience tent camping and traveling in his 2008 Gulf Stream Conquest Class C RV and 2021 Thor Challenger Class A motorhome.
We attend RV Shows and visit RV dealerships all across the country to tour and review drivable motorhomes and towable trailers to provide the best evaluations of these RVs in our blog articles and YouTube videos.
We are 3/4-time RVers who created RVBlogger.com to provide helpful information about all kinds of RVs and related products, gear, camping memberships, tips, hacks and advice.

5 thoughts on “How To Level a Travel Trailer on a Slope”
I’m bringing my 34′ camper to my dad’s house in a month and the slope on his driveway is insane. It’s a concrete driveway and we really have no other place to keep it. If I run boards or blocks under the tires, it should lift the back end of the trailer, correct? If not, is there another way to make this work? Trying to not stay at a campsite since his driveway is massive, just slopes down towards the house.
I think this is great information for rvers new like me. It help me more understand about level rv . Thanks so much!
Glad you liked the article Natalie!
I always level the bottom of the refrigerator with a torpedo level. Side to side first, than front to back. It is better to have the fridge level than the bumper or floor. A out of level refrigerator may not work properly or completely die of a vapor lock in the system. This is on a propane / electric refrigerator. I do believe that residencial refrigerators also need to be level.
Hi Wayne, What a great suggestion! I never thought of putting the level right in the fridge! Thanks for sharing!
Leave a Comment Cancel reply
Save my name, email, and website in this browser for the next time I comment.
- Skip to main content
- Skip to secondary menu
- Skip to primary sidebar
- Skip to footer

Jeffsetter Travel
Travel Consultants and Travel Tips
How to Park a Travel Trailer on a Sloped Driveway
November 19, 2022 by Stephanie Lane
Last updated on December 10th, 2022 at 12:13 pm

All of our reviews are based on exhaustive research, industry experience and whenever possible, hands-on testing. When you make a purchase using one of our chosen links we’ll get a small percentage of the proceeds. This supports the site and keeps Jeffsetter running. You can read more here .
RVs, campers, and travel trailers are all great mobile ways to travel and see the world. It’s all well and good when you’re out on the open road, but what about when it comes time to park your camper?
On a flat surface, it’s almost as easy as parking a standard car or truck, but you can’t guarantee that every parking spot you find is going to be on nice, even ground. Parking on a slope requires a little bit more preparation.
So, how do you park a travel trailer on a sloped driveway?
Parking on a sloped driveway requires a bubble level, wheel chocks, leveling blocks, and patience. Park your camper on the most level part of the slope and then use your level to figure out how many leveling blocks you need. Place the blocks, park your camper, then use wood chocks to secure it in place.
It sounds easy, and with practice it gets easy. Below you’ll find a more detailed explanation of how to park your trailer, RV, or camper on a sloped driveway or any slope.
What Tools You Need To Park A Travel Trailer on a Sloped Driveway
Below are a few tools that will assist you in getting your RV or travel trailer level when parking on a slope. What you will and won’t need will depend on how steep the slope is that you’re trying to park on.
Two-Feet Bubble Level
It might sound obvious, but making sure you have a level on hand is a good start when you need to park on a slope. You don’t need anything fancy, just a standard bubble level will do the trick. I do recommend getting a taller one so that you can actually use it effectively.
Bubble levels are easy to read. There will be multiple leveling bubbles going both vertically and horizontally. Each one will have two black lines and you know it is level once the bubble is squarely between the two lines.
Leveling Jacks
Some RVs will have automatic leveling jacks built into their systems. These are easy to operate and only require pressing a button. You may also have manual leveling jacks which you will need to use the bubble level with in order to get it perfectly level.
Wheel Chocks
Wheel chocks are wedge-shaped and usually made of rubber or sturdy plastic. They are designed to be wedged under the wheel of a vehicle to keep it from rolling accidentally.
Leveling Blocks
You’ll need a number of leveling blocks to park your travel trailer on top of to level out the wheels. There are plastic leveling blocks on the market, but you can also use wooden blocks. Just make sure that if you use wood it is in good condition and not rotten or broken.
Keep in mind the size and weight of your vehicle. If it’s particularly large, the wood and the plastic blocks might not be a safe option for you to use.
The best case scenario when you are looking for a place to park your RV or your travel trailer is to find a nice even piece of ground to park on .
That’s not always possible, so it’s good to know how to level your travel trailer when your only option is to park it on a slope. It’s an important skill to keep in your arsenal so that you can ensure your travel trailer is always level.
When you are looking to park on a slope, my first advice is that you try to position your vehicle so that the slope is running from back to front instead of side to side, but let’s take a look at both options in case that’s not possible!
How to Level From Side to Side
You might be parking on a slope, but try to find the flattest, least sloped area to put your vehicle. Make sure that you clear away any debris that might get in the way of your parking before trying to level your travel trailer. Now that’s done, you should be ready to level your trailer.
You’ll want to use your bubble level to estimate how much you’re going to need to raise the side of the trailer that’s lower to make it level. Lay the level on the rear bumper of your camper first. The bubble will lean towards the higher side of the camper. Then estimate the number of blocks that you are going to need in order to make the camper level.
Place the block in front of the tires, if you have dual wheels, then place them in front of both of the wheels. Drive slowly on top of the blocks . You should definitely have someone guiding you at this stage so you know when to stop the vehicle. Your tires should be squarely on top of the blocks, if they aren’t, then you will need to reposition the blocks.
Check if the camper is level or not. It is a bit of a guessing game about how many blocks you are going to need, so it might take a few tries to get it right. Add or remove blocks to level the camper again.
As soon as your camper is leveled, make sure to place the chocks under each wheel. You’ll want to put them under the downhill side of each wheel to keep your camper from moving.
Don’t skip out on this step, it’s important for the safety of your travel trailer and those around it that it’s as secure as possible. This is especially true if you are going to be inside your travel trailer while it’s parked on the slope. People moving around inside will make the vehicle rock , even gently, which can unbalance it.
How to Level From Front to Back
To level your travel trailer from front to back, you’ll want to start setting the jack on a wheel dock. The tongue jack is the part of your trailer that connects to your vehicle. When you are sure your trailer is at a solid resting spot, you can unhitch the trailer from your vehicle.
Place your level on the inside of your camper door, and see how level it is from front to back. The jack will usually have a hand or an electric crank to raise or lower it. Crank it until you have reached equilibrium from front to back.
Then place your leveling blocks under each of the stabilizing jacks on your camper. These are not designed for the purpose of leveling your camper, so don’t use them for that purpose unless you want them to break. They are there to keep your camper from rocking or moving.
You might find that your camper doesn’t have stabilizer jacks, you can have them installed or you can place jack stands on the four corners of the camper.
You can also look into Andersen Levelers, these are nifty tools that make this whole process even easier. If you have an Andersen Leveler, then you won’t need any leveling blocks. It’s a wedge system where you drive onto the wedge and simply pull forward until your camper is level. Even with this tool, make sure to use wheel chocks once you’ve parked.
What if It’s A Really Steep Slope?
Some slopes are really really steep, and if that’s the case, then the first thing I would advise is for you to find a different place to park. If you have no other choice, then you can park your camper there but be extra careful.
Follow the same steps as above, but you need to add extra blocking under your leveling blocks on the lower side of your camper. To make that work, you’ll need to dig a couple of inches into the ground so that you are starting on level ground.
You would need a small shovel and a level to do this. Dig a few inches down and pat it as level as you can get it. Place the extra blocking inside and then your leveling blocks on that. It might sound like an extra step, but this is the safest way to ensure that your camper isn’t going anywhere when parked on a steep slope.
The video below has great instructions on how to park a travel trailer on a sloped driveway.
Parking a camper, travel trailer, or RV on a sloped driveway can be intimidating the first time you do it. There are a lot of things that can go wrong, and if you don’t do it correctly, it can have disastrous results. Not only do you not want your vehicle to roll away, but you also don’t want it to be unlevel which can have adverse effects on your camper.
Following the steps laid out in the article should make parking on a slope a breeze and give you confidence in your ability to level your camper. All you really need is the ability to read a level and the patience to stack your blocks until they are level.
Important Links
- Advertising Policy and Affiliate Disclaimer
- Privacy Policy
- Contact Jeffsetter Travel Blog
- Ask Jeffsetter a Question
Recent Posts
- CBP Trusted Traveler Fees Are Increasing
- Manhattan Congestion Fee
- 8 Airlines Joined TSA PreCheck
- The Boeing vs Airbus Argument is Getting Old
- Chase Devalues Its Priority Pass Benefit

How To Level A Travel Trailer On A Slope: (EasyTips And Tricks)
Many buyers believe that once you’ve taken the plunge and purchased a travel trailer, you’ve gotten the hard part out of the way.
While that’s true in a sense, your job is far from over. You’ll still have to learn how to level your travel trailer properly, even if you never take it out of your driveway.
When a travel trailer isn’t level, it can cause problems that are difficult to live with. Not only will you feel as if you’re living in a sinking ship, the appliances won’t run properly if the unit is sitting off-kilter.
Fortunately, leveling a travel trailer is fairly simple once you know what you’re doing. Here’s a primer to help you get started.
Table of Contents
How To Level A Travel Trailer The Right Way
What you’ll need.
Before you make your first attempt, you should arm yourself with the following equipment:
- Sturdy blocks or a stand for your jack
- Tire chocks
- Plastic Leveling blocks or wedges (see Options For Side To Side Leveling, below
- RV bubble level (these might be included on the exterior or interior of your rig)
- 4 wood scraps of uniform size and thickness
Whenever you head out on a camping expedition, make sure you bring all these things along. They should be the first things you pack before loading any other gear.
Check the owner’s manual and inspect the travel trailer to see if the bubble levels are included. If not, you’ll have to purchase them yourself at a home improvement or camping supply store.
The Leveling Procedures
1. find a suitable spot to park your camper..
It’s a good idea to practice at home before taking your new travel trailer on the road. For some, finding a spot that’s large and flat enough to accommodate the rig might be a challenge, but the knowledge you’ll gain will be worth the effort.
The good news? The spots you’ll find at most campgrounds and RV parks are fairly level to begin with, making your job that much easier. You might have to back the trailer in for prime positioning, so this is another technique you should practice at home.
When you’re positioning your RV for leveling, there are several factors to consider:
- Solar panels —If your travel trailer has solar panels installed on the roof, you’ll want to park in a spot that allows them to get as much direct sunlight as possible.
- Refrigeration —Conversely, try to keep the side that houses the refrigerator out of the sun. If this side gets too warm, the fridge will have to work that much harder to remain cool, especially in warmer climates.
- Visual Appeal —You bought a travel trailer so you could enjoy the great outdoors, so try to position it in a way that affords you a prime view.
- Neighbors —If you’re new to RVing, you should know that it’s considered taboo to park with your door facing a neighbor’s door. This is especially true if you’re boondocking (camping off the grid), where you have plenty of options when it comes to the positioning of your rig.
Obviously, it might not always be feasible to satisfy all these criteria at once. Think about your priorities before choosing a spot, and plan accordingly.
If you can’t find a spot that’s perfectly level, don’t worry. It’s still possible to level your RV on slightly uneven ground. Check out this video demonstration for tips.
Once you’ve chosen the perfect spot and positioned your camper accordingly, DON’T unhitch the trailer yet. The first stage of the leveling procedure (side-by-side leveling) has to be done while the trailer is still attached.
2. Leveling From Side To Side
If the levels aren’t already installed on your rig, test them on the tongue jack before finding spots for them on the front and side of the trailer. Alternatively, you can put one in your fridge, but you’ll have to run in and out of the camper frequently during the leveling process if you go this route. We’ve found that it’s far easier to keep them outside.
Use the levels to determine which side of the RV is lower. You’ll need to set up your leveling equipment on this side.
Options For Side To Side Leveling
As we mentioned earlier, you have two choices when it comes to this part of the leveling procedure.
The Wedge Method Wedge systems are available at camping supply stores, as well as big-box outfits such as Walmart. Andersen is our preferred brand, but any similar product (usually branded as “levelers”) should work just fine.
Once you’ve identified the tires that need lifting, position the wedges in front of each one.
Next, get in your tow vehicle and slowly drive forward. It helps if you have a second person standing outside to tell you when to stop. If you’re performing the operation alone, it will take a lot longer, as you’ll have to keep stepping out of the vehicle to check on your progress.
It may also be necessary to pull backward slightly in order to correct your position. Having a partner makes this process go much more smoothly.
Once you’re satisfied that the trailer is level, you’ll need to chock the leveling wedges to ensure that they remain in place. It’s also a good idea to chock the tires on the other side, just in case. Even if the terrain appears to be flat, you should never assume that the trailer will remain in place at all times.
Now that the trailer is level and secure, it’s safe to unhitch.
The Block Method To begin, grab your leveling blocks and place them in front of the tires on the lower side. They can also be placed behind the tires, depending on the positioning of the trailer. Use your judgment as to how many blocks you’ll need to even out the rig.
Drive your towing vehicle slowly forward (or backward, if the blocks are behind the tires) until your tires are sitting atop the blocks. Have your partner check to see if the trailer is level, or get out and check for yourself.
If the trailer isn’t level, you’ll have to either add more blocks or take some away to compensate. Drive off the blocks, adjust them as needed, and repeat the process until you’re level.
When you’re satisfied that the unit is level, chock the wheels on the opposite side and unhitch the trailer.
You don’t have to purchase any fancy equipment to use this method. It’s possible to create your own, using ordinary blocks of wood. This technique will work in a pinch, but store-bought plastic leveling blocks are more durable and reliable than the DIY versions.
Wedges Versus Blocks: Which Is Better?
In case you couldn’t tell from our instructions, we find the wedge method to be quicker and easier than the block method.
Even with the help of a second person, the block method usually involves a lengthy trial-and-error process. It usually takes three or four tries before the trailer is level, and don’t forget that you still have the front to back process to deal with. If you have a choice, go for wedge levelers over blocks.
3. Leveling From Front To Back
After unhitching the trailer, shore up your tongue jack by placing a block or stand underneath it. Alternatively, you can use wheel chocks, available at camping supply stores.
Place the level in the door of your camper so that the ends point to the front and back. Adjust the tongue jack as needed, raise or lower the camper until you’re level. If you don’t know how to do this, check the owner’s manual—it’s usually fairly simple.
Next, position your 4 wood scraps beneath the stabilizer jacks. If stabilizing jacks aren’t included with your travel trailer, you can substitute jack stands from an automotive supply store.
Carefully lower the jacks onto the wood scraps until they’re positioned firmly.
When your travel trailer has been leveled from side to side and front to back, you’re good to go! The process isn’t difficult, just slightly time-consuming. The more you practice, the easier it will be in the long run.
Best of luck, and happy camping!
Check out our article on: How To Stop A Travel Trailer From Rocking? (9 Step Guide)
Please keep in mind that we may receive commissions when you click our links and make purchases. However, this does not impact our reviews and comparisons. We try our best to keep things fair and balanced, in order to help you make the best choice for you.
As an Amazon Associate, I earn from qualifying purchases.
Home » Guides » How To Level A Travel Trailer On A Slope
How To Level A Travel Trailer On A Slope

- Last Updated: Apr 4, 2024
Want to learn how to level a travel trailer on a slope? Don’t worry, you’re not alone. Many people find it difficult to get their RV perfectly level, but with a few simple tips and tricks, you can do it in no time.
In this blog post, we’ll show you how to level your travel trailer on a slope using both manual and electronic methods. So whether you’re camping in a tricky spot or just trying to get your RV ready for winter storage, keep reading for all the information you need.

What You’ll Need To Level A Travel Trailer The Right Way
Before you attempt to level your travel trailer, you must arm yourself with the proper equipment. This includes blocks or a stand for your jack, tire chocks, plastic leveling blocks or wedges, and an RV bubble level. You will also need four wood scraps of uniform size and thickness.
The first step is to check the owner’s manual and inspect the travel trailer to see if the bubble levels are included. If not, you will need to purchase them before proceeding. Once you have all of the necessary equipment, you can begin the process of leveling your travel trailer.
Find A Suitable Spot To Park Your Camper
When you’re ready to level your travel trailer, the first thing you need to do is find a suitable spot to park it. Look for a spot that’s large and flat, with no inclines or dips. If you’re practicing at home, you might have to get creative to find such a spot.
Most campgrounds and RV parks have plenty of level spots available, so you shouldn’t have too much trouble when you’re out on the road. Just remember to position your trailer so that it’s easy to level. You might have to back the trailer in for prime positioning, but this is a skill you can practice at home before you hit the road.
Once you’ve found a level spot, there are several other factors to consider before you start leveling your travel trailer. First, take a look at the ground around your trailer. Is it soft? If so, you might want to look for another spot because the soft ground can make leveling more difficult. Second, make sure there are no obstacles around your trailer that could get in the way of leveling jacks or blocks.
Once you’ve considered all of these factors, you’re ready to start leveling your travel trailer.

Options For Side To Side Leveling
As we mentioned earlier, you have two choices when it comes to this part of the leveling procedure.
The Wedge Method
The Wedge Method is the process of leveling a travel trailer from side to side. This is done by placing wedges under the trailer’s wheels on the low side until the trailer is level. The number of wedges needed will depend on how unlevel the ground is. Once the wedges are in place, the trailer can be moved forward or backward to create a level surface.
The advantage of this method is that it does not require any specialized equipment. However, it is important to make sure that the wedges are placed securely so that they do not slip out from under the trailer’s wheels. In addition, this method can be time-consuming, and it may be necessary to readjust the wedges if the ground settles.
Block Method
Leveling a travel trailer is crucial for ensuring that all the appliances inside work correctly and that your sleeping arrangements are comfortable. The block method is one way to get your trailer level from side to side. To begin, grab your leveling blocks and place them in front of the tires on the lower side. They can also be placed behind the tires , depending on the positioning of the trailer.
Use your judgment as to how many blocks you’ll need to even out the rig. Drive your towing vehicle slowly forward (or backward, if the blocks are behind the tires) until your tires are sitting atop the blocks. Have your partner check to see if the trailer is level, or get out and check for yourself.
If the trailer isn’t level, you’ll have to either add more blocks or take some away to compensate. Drive off the blocks, adjust them as needed, and repeat the process until you’re level.
Leveling From Front To Back
To level your travel trailer from front to back, start by placing the level in the camper’s door. Check that the ends of the level are pointing toward the front and back of the trailer. If needed, adjust the tongue jack to raise or lower the camper until it is level. You can check your owner’s manual for specific instructions on how to do this if needed.
Next, position four wood scraps beneath the stabilizer jacks . If your trailer does not have stabilizer jacks included, you can substitute jack stands from an automotive supply store. With the trailer now level front to back, your sleeping, cooking, and living areas inside will be much more comfortable.
Plus, you’ll help prevent unnecessary wear and tear on your appliances and plumbing.
Safety Measures
Many people enjoy spending time outdoors camping in their travel trailers. However, camping on a slope can present some challenges. If not done carefully, leveling a travel trailer on a slope can be dangerous. Here are some safety measures to keep in mind when leveling a travel trailer on a slope:
- First, make sure the trailer is properly hitched to the tow vehicle. The last thing you want is for the trailer to become unhitched while you are leveling it.
- Second, use blocks or jacks to support the trailer before you begin leveling it. This will help prevent the trailer from tipping over while you are working on it.
- Third, level the trailer from front to back and from side to side. This will help ensure that the trailer is stable and will not roll down the slope.
- Fourth, once the trailer is level, put out chocks at all four corners to prevent it from moving.
- Finally, make sure all doors and windows are closed and secured before you leave the trailer unattended. This will help prevent wind damage or theft while you are away from the campsite.
Following these safety measures will help ensure that your experience leveling a travel trailer on a slope is safe and enjoyable.
Final Thoughts
That’s it! You now know how to level a travel trailer on a slope. With these simple steps, you can make sure your camper is stable and ready for your next outdoor adventure. Have you tried leveling your trailer before? Were there any challenges or surprises that you encountered? We want to hear about it! Share your experiences in the comments below and help others who might be struggling with this task. Happy camping!
You May Also Be Interested In
How To Carry Kayaks With A Travel Trailer
How Does an RV Toilet Work?
What Size Generator For A Travel Trailer

Leave a Comment Cancel reply
Recently published guides.

Buying a Generator for RV Life

RV Refrigerators: How Do They Work?

How to Repair Norcold Fridge Flap
6 Easy Tips To Level Your Travel Trailer (On A Slope)
by Glynn Willard | Nov 23, 2023 | Fulltime RV Living | 2 comments

Last Updated on 04/07/2024 by Glynn Willard
Your Blog Post with Divi-Style Box
Don’t feel like reading? Listen to the audio version of this blog.
Tips To Level Your Travel Trailer
There are a lot of right ways to level a travel trailer.
Many of the suggestions I list simply evolved out of necessity from experience by boondocking on government land.
I discuss how to level a dual-axle travel trailer in this article. That said, leveling a single-axle or tandem-axle trailer requires the same approach.
For the most part, all of these suggestions will apply to fifth wheels too. If you have an auto-leveling system, some of these suggestions will still apply.
Bottom line, whatever you do to make your trailer level is fine pending the outcome is a level RV.
We wanted to sum up some methods that may help expedite the leveling process for you.
The following six leveling methods have served us well in our travels (and still do).
Numbers 3 & 4 explain how to get the RV level on a sloped driveway, steep driveway or any slope for that matter.
Why level your trailer? Not only is it better for sleeping, if you have a propane refrigerator, it requires a level surface to function properly.
Check out the video for clear explanations.
A few of the images are affiliate links, which we make a small commission on if you use the link to make a purchase. It also makes it easier to show you what we mean.
There’s More To It Than Just Wheel Levelers And Wood Blocks For Campers
Establish definitive hand signals between the driver and copilot..
Hand signals may not level a travel trailer, but they are a good idea for getting into camping sites without spousal/partner carnage.
They’re the first thing that should be mastered when leveling a travel trailer.
Campgrounds and RV parks are one thing, but BLM and National Forest land are a completely different animal.
There’s a lot more uneven ground, which requires a lot of manipulation.
And good hand signals can speed up the process of finding the most level spot within a site.
It doesn’t matter what the signals are, only that they are defined and agreed upon.
Why not use a cell phone? Well, yes use a phone if you have a signal. But most of the great spots we find have no signal or very poor signal.
Our weBoost helps, but it’s useless outside the rig.
So, the best way is to define hand signals before the first time you’re being directed into your parking spot.
Don’t be afraid to maneuver the trailer around the site to find level ground.

This may seem obvious, but with so many things to consider when pulling into a site, it’s often overlooked.
Oftentimes, one can maneuver the sides of the trailer enough to maximize a level position.
In fact, we frequently forgot early on and did more work than we needed to do.
Having bubble levels mounted to the outside of your trailer can also make a big difference with this particular tip.
When facing uphill, roll back on the Anderson levelers.
This only applies if you’re using a “roll up on” leveling device that changes the degree of lift by going forward or backward. We happen to use Anderson levelers, which work great for our travel trailer.

They don’t work for all trailers, so research before buying if you decide to go down that path.
Nonetheless, if the front of your trailer is facing uphill, set the levelers behind the tires on the lower side and roll back onto them.
In essence, this acts like a wheel chock behind the rear axle, preventing backward roll.
As importantly, it relieves some of the pressure on the tongue jack.
Any directional force that is large on the tongue jack increases your chances of the tongue jack slipping off its base.
If you’re already level surface side-to-side, then place an Anderson Leveler behind both the driver and passenger rear wheel and roll up onto them.
Next, place wheel chocks behind the front wheels on both sides of the trailer.
Finally, deploy your stabilizer jacks maximizing the upward pressure on the back of the trailer.
Use jack pads, wood blocks or plastic blocks under the stabilizers to minimize the distance between the frame and the ground.
You’ll encounter many situations where you’ll end up leveling a travel trailer on a slope, which is why we have to reverse this situation.
When facing downhill, roll forward onto the Anderson levelers.
If the front of your trailer is facing downhill, set the leveler in front of the wheel on the low side and roll up on it by pulling forward.
Of course, if the trailer is level side-to-side, place the levelers in front of the tires on both sides of the trailer and roll forward onto them.
Again, this acts like a chock preventing forward roll. This releases the tension on the tongue jack stand as well.
Next, place your wheel chocks in front of the rear tires, preventing forward roll.
Finally, deploy your stabilizing jacks placing maximum downward force on the front jacks (front of the trailer).
The real jacks can just touch down to prevent a lot of movement.
If it’s a really steep slope, you’ll need more blocks under the tongue jack. The less you have to extend the jack, the better.
Even though this makes perfect sense, when we started, we still got it wrong on occasion.
Many of the times that we arrived at a site, we had been driving for many hours. And this translates into fatigue, which is where mistakes happen.
Dig a trough or ditch under the wheels on the high side.
Again, a no-brainer when leveling a travel trailer side to side on soft ground. This is your best option. Sadly, we often forgot this in the beginning and spent a long time elevating one side.
So, travel with a small shovel (the right tools) to dig a trough under the elevated side.

It doesn’t take a very deep trench most of the time, so keep it shallow and test.
That way you can pull out of the trough and dig out or add a little bit back the appropriate amount of soil.
All of this said, if you are parked on a slope, use a combination of the Anderson levelers and a shallow trough.
For good reason, this is to help minimize the constant force on the tongue jack.
In other words, the trailer wants to stay in one place.
Before uncoupling, place your tow vehicle in neutral briefly to release the tension.
Kofa National Wildlife Refuge
This can cause the coupler to get hung up on the hitch ball and then drop once the force is overcome.
It can be scary and sometimes moves the trailer jack off the base.
We experienced this when we were a new RV owner and then had to figure out how to get the coupler high enough to reach the hitch ball.
You can watch that in our first video titled “ It Fell .” The video quality is subpar, but it delivers a clear message. No judgment, please.
So, before jacking the coupler off the hitch ball, take a moment to release the emergency brake with your foot on the brake and shift to neutral.
Then reapply the emergency brake and shift to park.
This relieves any pressure on the hitch ball and generally allows for a smooth lift off the hitch ball.
Not Sure What You Need For Your RV?
Things That You’ll Actually Use In Your RV
Essential Tools You Should Have For Any RV
Essentials For Boondocking
What Do We Think Is The Best Travel Trailer Leveling System?
Beautiful Ouray, CO
It’s undeniable how easy Anderson Levelers are to use (and quick)!
They’re a lot better than just using plastic leveling blocks or concrete blocks.
Final Thoughts on Leveling A Travel Trailer
And yes, many people are stressed after a long day of driving and getting into a difficult site.
Simply practicing these methods just a few times will make finding and leveling a site a total breeze.
Do you have any leveling tips to add?

Can I dig under high side tires after rig is already parked and set up?

This is a great question! We have not tried it, but after digging out A LOT of high-side situations, I suspect it will only work if the consistency of the soil is close to sand. Otherwise, hard-packed dirt will remain in place even if you remove soil in front and behind the tire. It’s best to dig directly in front of or behind the current spot and “inch” the trailer into the depression. Thank you so much for the question!!
Submit a Comment Cancel reply
Your email address will not be published. Required fields are marked *
Save my name, email, and website in this browser for the next time I comment.
Recent Posts
- Outdoors RV Manufacturing Owners Review | Full-Time ORV
- 5 Benefits To Roadschooling Kids | RV Living & Homeschooling
- Best Mattress Solutions For Campervan RV (2024)
- Roadtrek Zion | Our Personal RV Camper Van Review | Best RV?
- Important Things To Know Before Buying A Travel Trailer
How to Store an RV Outside: The Complete Guide
This post contains affiliate links.
Whether you already have an RV or are thinking of getting one, you have probably already considered where and how to store your RV. Most RV owners store their RV outside since indoor storage options are few and far between. However, improper RV storage could lead to major damage to your vehicle that could potentially cost you thousands of dollars. This is especially true if you live in a state with intense winters and summers.
So, how do you store an RV outside? These are the basic steps needed to safely store your RV outside
- Choose the right location
- Wash the exterior
- Clean the inside
- Maintain proper ventilation and humidity
- Shut off propane tanks
- Add fuel stabilizer
- Rodent, pest, and critter proofing
- Take care of tires
- Consider your batteries
- Drain the fluids in your RV
Read on to get the full details on each step and make sure you are all set to store your RV outside.

Table of Contents
Storing Your RV Outside
RV storage is very climate-specific. In other words, outdoor winter storage and summer storage require different and sometimes overlapping methods of care. Also, the climate you live in will affect how you store your RV too. This article will focus on important points that are useful for both seasons and all environments.
When it comes to leaving your RV outside, there are a few essentials you need to take into consideration before you get into the nitty-gritty. Read below to find out all the preparations for storing your RV outside.
Choose the Right Location
Step 0 is deciding where you will store your RV. It’s best to figure this out early on since there can be limitations of how long you can park it for at your house or if you have an HOA if you are even allowed to. You don’t want to be all set up to leave your RV for the winter only to find out you can’t park it there. When it comes to storing your RV outside, you can either park it near your home or at a designated outdoor storage area.
If you’re going to park your RV near your home consider the following:
- Trees drop sap, twigs, and leaves. You already know this from camping trips. So imagine that over several months. It’s a real pain in the neck to get rid of tree sap off your RV cover so avoid parking under trees despite the shade they provide.
- Nesting birds will get your RV dirty. Avoid areas where birds could easily create nests. You’ll thank me later.
- Keep it accessible. Park your RV where you can still have access to it so that you can make sure it is okay and even take it out for a drive from time to time.
- Take advantage of overhangs. If you have an extended cover on your front lawn or garage, then store your vehicle under that. It will provide extra shielding from the sun.
- Avoid parking your RV on grass, sand, or dirt. Even if you jack-up your vehicle, which you definitely should, you are still at risk of sliding when it rains or gets a little damp. The RV could also sink into the ground, so stick to asphalt and concrete.
- Choose smooth, dry blocks to store your RV on . Blocks will help protect your tires and keep your RV off the ground.
Pro Tip: Unfortunately, just because it’s your property doesn’t necessarily mean your RV can hang around in storage mode forever. There may be local laws or regulations that determine how long an RV can remain on your property.
If you can’t store it on your own property, whether it’s due to lack of space or HOA rules, ask your friends if they would be willing to let you store it on their property. This is the next best thing to having it at your house. Don’t forget to show your buddy your appreciation for parking your rig at his house with a gift card or dinner out.

Outside Storage Area
Storing your RV outside doesn’t just mean storing it in front of your house or garage, you could also park it in a large outdoor RV storage facility.
If you do decide to go down that route out of choice or necessity keep a few things in mind.
- These places aren’t always the most secure. Ideally, you will get a nice storage zone with security, fences, and cameras but that’s not always the case.
- Even if you don’t have anything inside, thieves don’t know that. Your fixtures or anything that can be sold for scrap metal is valuable.
- You also need to consider the fact that, if your vehicle is far away, you may not have the time or capability to plug in the battery, start it up every now and then, and check the cover for any rips or holes.
So storing your RV off site should be left as a last resort. Instead, keep your precious vehicle where you have access to it all the time.
Start With a Wash
Before putting your RV into storage for the season, you should give it a thorough washing. This will prevent damage caused by dirty and grime build up and also keep your RV looking good.
The basics of washing an RV:
- Start from the top and move down as you go with a quick prewash. Make sure your vents and windows are all sealed, so you don’t leak into your RV.
- Scrub the roof down with a non-abrasive cleaner; otherwise, you risk chipping the paint. Use a soft-bristled brush and go in circles with both hands giving a bit of pressure. Don’t miss any spots, and get rid of all the dirt and grime.
- Hose down and then use a carwash cleaner or soap safe for automotive use. If you have a foam gun, go for it!
- Use Windex for the windows and clean both the inside and outside of your windshield. Use a microfiber towel for windows and to dry off all areas after you hose down the RV and let it dry a bit.
- Use a soft-bristled brush for any corners that could hold rust or grime.
- Finally, use a spray tire cleaner for your tires and a high-gloss polish for your rims but don’t overdo it.
Make sure the RV is completely dry before you store it. It also won’t hurt to wax the exterior of the vehicle to protect the paint from chipping and cracking under the heat of the sun, essentially aging your RV. A clean RV is the first line of defense against corrosive sand and dirt, and waxing the vehicle is the last step to seal everything before you cover it.

Consult with your dealer to see what sort of washing material is optimal for your specific brand and model. Also, don’t skimp on the wax, seriously… go with something high quality or you are going to regret it when its time to drive again.
Finally, you should wash the cover or any tent material you intend to cover your RV with and make sure it’s dry before you shield the vehicle.
Clean the Inside
It’s kind of a no brainer. I mean, if you have to clean the exterior, you can’t really leave the interior dirty.
This is where it gets a bit tricky. Sure, you have a lot of seams and windows to take care of on the outside but there are so many little details to clean, dust, and wash on the interior of your RV.
Not to sugar-coat it or anything, this is going to take some time and elbow grease.
Get rid of everything! By the time you’re ready to store your RV outside, there should be no food, valuables, or other perishable items in the vehicle.
- Start by removing all food items, and yes, that includes things in cans and packages you haven’t opened. Check your refrigerators, freezers, and cupboards.
- While you’re at it, remove all valuables. Stored RVs, even if they are on your property, are prime targets for thieves, so take your expensive items with you. Anything from pictures to tools should be taken out.
- Defrost your fridge and freezer and leave some small baking soda containers behind to prevent any smells from accumulating in your RV. You’ll also want to keep the fridge and freezer ajar while stored.
- Dust off everything from top to bottom and pay particular attention to cupboards, shelves, and ventilation. You are going to want to leave your rooftop vents slightly open, so dust is going to accumulate no matter what. It’s good to get in there every month or so to do a quick check and dust around a bit.
- Wipe down hard surfaces with soap and water, or disinfecting wipes. Pay particular attention to tables and counters. If you or your kids have spilled drinks in the past especially sugary drinks like juice or alcohol that can leave a stain or a sticky spot, you need to wipe these off.
- Clean your window sills on both sides using a brush and detergent like dish soap. If you didn’t clean the inside of your windows earlier grab the Windex or a vinegar and water mixture and use a lint-free cloth or newsprint to clean them.
- Bleach or disinfect the cupboards and corners inside your RV especially areas prone to moisture like the bathroom and under the sink. This will prevent mold and fungus from forming, which we will go over more in the humidity and ventilation section below. Use Clorox wipes if you are allergic to bleach.
- Finally, vacuum and mop away! Don’t leave any traces of dust, crumbs, or any sand or dirt. By the time you are done, the RV should look like it did when you first got it… that is unless you bought it off a friend or someone you found online.
Before you leave and lock up, take one final look for any valuables. Also, this one is obvious, but like food, you shouldn’t leave anything that could perish or freeze like shampoo, deodorant, toothpaste, or medicine.

Ventilation and Humidity
This is where weather conditions play a huge role. Where you live and store your RV is the number one thing you need to consider when you store your vehicle outside. Depending on where you live, humidity can work in your favor or completely destroy the RV.
People in humid states like Florida and Alabama should decrease humidity in their vehicles to prevent the formation of mold, fungus, and bacteria. Ventilation plays a huge role when it comes to maintaining the proper amount of humidity in your RV. Leaving your rooftop vents completely open could make the RV too humid, and shutting them off completely could make it too dry.
Tips for Reducing Humidity in Your RV
- Besides the fact that you should clean the interior of your vehicle, you can also place charcoal throughout the interior to absorb moisture from the air. You can pick up charcoal bags from Amazon that will help reduce moisture and smell in a neat little package.
- Open all cabinets and closed off shelves to prevent air from accumulating in one place and promoting molding.
- Only slightly leave your vents open to provide some air-flow. It’s a good idea to have vent covers as well to protect your interior for water. As long as you have charcoal in place and a proper RV cover, you should be safe from fungus and bacteria.
On the other hand, if you are in a dry state like Arizona, your main concern might be wood chipping and cracking.
Tips for Increasing Humidity in Your RV
- To increase humidity, you can place a few large buckets of water in the RV.
- Again open all cabinets and shelves.
- If you are in a dry state, you should almost entirely shut off your ventilation, leaving just enough of an opening to allow for some airflow to help circulate moisture and keep your RV from cracking.
Airflow is paramount, but like humidity, it’s a double-edged sword. Too much ventilation leaves the interior highly exposed to leakage caused by rain or melting snow. Not enough ventilation doesn’t allow for proper airflow. Slightly open the ventilation sliders on the top of your RV, not too much but just enough. As I mentioned, having covers on your vents will help keep the weather out.
Disconnect Propane Tank
To start off, you should shut off your propane tank. This is a great way to prevent certain odors that are especially attractive to rodents and insects, and more importantly, shutting off your propane tanks is an important safety practice that should be at the top of your outdoor RV storage checklist.
If your propane tank is not built in you can remove your tank altogether to be extra safe. If you do so, make sure to cap off the propane lines to keep insects and sand out. You can pick some caps up at your nearest hardware store. If you remove the tanks, store them in a dry and well-ventilated spot to prevent damages or rust.
Add Fuel Stabilizer
Now, if you have a motorized RV, you should change the oil and oil filter before storing it since acid accumulation can take place, which will corrode your engine. It is also very important that you add a fuel stabilizer to prevent deposits from forming throughout the fuel tank.
To add stabilizer simply:
- Add the stabilize, be sure to pick one that is correct for your vehicles fuel type
- Fill the fuel tank
- Take your RV for a drive to ensure the stabilizers makes its way through the entire tank and fuel lines. If your generator runs off the same fuel tank as your engine you should run it for a little bit too.
Pro Tip: When you store your RV, try to run the generator at least once every month for 15-30 minutes to keep everything in tip-top shape.
Rodent, Pest, and Critter Proofing
Think about it, if you were a small creature, where would you rather be during the cold winter? In the snow or inside a nice safe, and secluded vehicle. Yeah, I’m picking the latter as well.

Here are some tips for keeping your RV pest free:
- Check for cracks . When cleaning the interior, make sure there are no cracks, crevices, or holes in the corners, bottom, or on the walls of the vehicle, no matter how small! You can do this by looking for any places where you see daylight creeping through.
- Seal the cracks. Seal off these imperfections with expanding foam or silicon. Don’t just place tape it off. This is not an effective way to prevent pests from getting into your RV.
- Consider a repellant. As a final precaution, you may consider getting a deterrent or repellent. Unfortunately, some of the heavy-duty stuff isn’t necessarily organic or natural, but it gets the job done. So figure out for yourself if cleaning and covering is enough for you then don’t get deterrents.
Otherwise, here is a list of some great repellants for every specific problem.
- For mice and other rodents: Fresh Cab lasts up to 90 days
- For roaches: Combat Max 12 Month Roach Killing Bait
- For most insects: bugs hate peppermint. You could get a highly condensed extract and place a few drops on curtains and beds inside the RV.
- For ant: Diatomaceous Earth , sprinkle around the wheels of the RV, kills ants and other insects but safe for humans and pets.
- Also for insects and other pests: Ultrasonic pest repellers
Pro Tip: Leave some baking soda in specific places like cupboards, in corners, and in the fridge. This will prevent funky odors from accumulating and inviting nasty pests.
Take Care of Your Tires
RV’s are heavy, and you don’t need me to tell you that. So having a large load resting on the same spot for months on end is extremely damaging to the tires.
Flat spots and other complications can occur from improper tire care, including low tire pressure and expansion. In winter months the asphalt could get frozen and cause the RV to skid. Whereas in hot weather, your tires could expand, and they are at the full mercy of the sun.
Take proper care of your tires with the following tips:
- Jack up your RV. A slab of wood is ideal for separation between the hot or frozen asphalt or concrete. Make sure it’s wide enough so that there are no parts of the tire hanging off the sides.
- Get tire covers and protectors because the sun’s rays can be very deteriorating, especially for black surfaces. Learn more about Why You Should Cover Your RV Tires in my article
- You should also drive your RV every month or so, which will release pressure off the tires. However, just keep an eye on the weather and pick a fair weather day for your little jaunt.
If your tires get damaged you will need to replace them, which is costly, so take that extra step and make sure you’re all set for the winter or whenever you decide to store your vehicle outside.
Pro Tip: Make sure to check your tire pressure and inflate as necessary before getting back on the road.

Consider Your Batteries
This part is especially important for the cold winter months, but RV owners in warm climates should also take note. In instances where you will not have your vehicle attached to an independent power source, remove your RV battery before storing it outside . This is especially true for RVs that have much larger and more expensive batteries
If you don’t want to remove your battery, then you need to keep it fully charged while in storage outside. Ideally, you should have electricity available so you can keep your batteries constantly charged.
A trickle charger is the best way to keep your batteries constantly charged. We have a solar panel on the roof of our RV that trickle charges our batteries even when our battery switch is shut off. If you do this and you cover your RV, make sure your solar panel still has access to the sun. Learn more in our article How to Store an RV Battery for Winter.
Pro Tip: This isn’t the battery we talked about above, but while we are on the subject of batteries, make sure you remove dry cell batteries from your smoke alarm, clocks, and other devices when you store your vehicle, so they don’t corrode. Do NOT drive or use your RV without the batteries placed back in the smoke alarms.

Drain the Water from Your Water System
This one may seem obvious, but a lot of people miss it. You need to drain all of the water tanks, holding systems, and plug your sinks and shower drain.
In colder climates, water is obviously going to freeze, causing damage to your pipes, fittings, and lines. This kind of destruction is going to be extremely costly to repair and not to mention time-consuming.
In warmer climates, you will find that freshwater that is standing still for days, weeks, and often months is an ideal breeding ground for all sorts of bacteria, algae, fungus, and mold. These gross things will set off a chain of events from bad odor to decay and rot to an all-out infestation.
Warmer climates will also damage your pumps, tubes, and tanks because they will essentially heat up the water inside, causing expansion and moisture accumulation, which will not only reek but could destroy your RV in the long run.
How to Drain Your Holding Tanks
You’ll need to drain down all of your tanks, which means the black, gray and freshwater tanks.
To drain your gray and black water tanks follow your normal process but be sure to rinse your tanks. You should have a spot to hook up a hose (DO NOT use your drinking water hose) that will give your tanks a nice rinse. If you are still new to the process follow the steps below.
- Put on gloves and go to your nearest RV dumping site.
- Start with the black tank first. Attach the dumping hose that should come with your RV to the dumping hole in the ground first! Do NOT attach it to the RV first.
- Once you have clamped to the dumping site, attach the other end of the hose to your drain outlet by removing the lid and clamping tight. Make sure all elements click before draining.
- Pull open the black holding tank valve FIRST and attach a hose with clean water to the rinse system to allow for everything to fully clear out of the RV.
- Then empty the grey tank. You could repeat this process a few times to be safe.
- Make sure you don’t hear any more water draining out before you disconnect from the RV first then holding the hose up high detach from the dumpsite.
- Rinse your hose, pack it up, throw those gloves away, washup, and you’re all set!
But you still aren’t done yet, the freshwater tank is the most important one to drain! It’ll take ages to empty your freshwater tank if you just let the pump run plus you will never get all the fluid out of the system.
Your RV should have a drain on the freshwater tank. Simply unplug the drain or open the valve and let the water out. Just make sure there is somewhere for all that water to drain into, you don’t want it pooling next to your house or under your RV.
Make sure your water pump is turned off, you don’t want to run it dry! After all the water is out, open all the faucets inside and flush the toilet to help let out any leftover water pressure.
Don’t forget about your hotwater tank! This is a commonly overlooked part of your water system that would be a pain to replace. There should be a drain plug on your hot water tank. Open that up and let all the water out.
At this point, you still have to get the rest of the residual water out of the system or you end up with a burst pipe. Two common methods are using Anti-Freeze or compressed air to flush your system.
Pro Tip: Water draining is something you can do yourself even if you have never done it before but if you want to be extra cautious and have the budget there are many trained professionals that would be happy to help.
Anti-Freeze for Your Water System
After you have drained all the water out, it’s recommended that you pump some RV antifreeze throughout the water system. Many RV will have a specific port for this, check your owners manual on how to do this. Make sure you get something that is non-toxic because you will pump the antifreeze throughout your freshwater supply tank as well as the tubes that feed into your faucets.
So unless you want to end up in the emergency room, consult your RV dealer for the best non-toxic antifreeze. Your vehicle manual should have a storage checklist, which will likely highlight the water draining steps you need to take before storing it for the winter.
Compressed Air to Blow Out Your Water System
This is our preferred method of winterizing our RV’s water system. We use a small compressor and a little adapter found at your local hardware store. Follow these simple steps to blow the residual water out of your system.
- Disconnect the water line between the pump and the rest of the RV, i.e. the pump outlet
- Open all faucets and taps in the RV, if you don’t water will spew back out at you from the open line in front of your face.
- Put the compressor adapter in the waterline and apply air pressure
- Continue until no water sprays out of the taps. Have a buddy hold open the toilet valve as well, you should be able to only partially depress it so you are letting water in but not opening black water valve.
At this point, there should be no water left in the system and your RV should be safe no matter how cold it gets.
Cover Up Your RV
Arguably the single most important accessory, that should ideally come with your RV, is the cover! You need to cover up your RV for a number of reasons especially if you are going to store it outside.
No matter how well you follow all the steps above, clean the inside and outside of your vehicle, apply wax, and hoist your RV up, nothing can prepare it for the environment it’s in except a nice quality cover.

Why You Need an RV Cover
There are many positives to owning an RV cover and protecting your rig:
- Extreme weather conditions like snow, hail, and blazing heat from the sun will slowly but surely damage your vehicle.
- You can expect anything from paint chipping and cracking, to tires losing pressure, your dashboard changing color, and overall decay.
- During the winter months, a lot of snow is likely going to accumulate on the roof of your RV. With a cover on it will be easy to clean.
- They are great against damage from wind, bird droppings which can corrode into the paint and stay there forever, and tree sap which is another nightmare altogether.
- Covers are excellent ways to shield your RV from UV rays and water from seeping through. Especially since you should keep your roof ventilation slightly open to allow for air-flow, you need a heavy-duty waterproof and UV reflecting or at least blocking cover.
There are a few downside to RV covers though too:
- Can be awkward and difficult to put in place
- A poorly fitting cover can scratch up your RV
How to Maintain Your RV Cover
Your cover and your covered RV will require some maintenance throughout the off season.
- Like you would shovel snow off the front of your garage, you should also jump up on top of that vehicle you love so much and get shoveling! Of course, make sure you are safe up there. High quality covers will be less likely to freeze and cause a slippery situation.
- If the temperature doesn’t go below freezing, you can hose down your cover while it’s still strapped on the vehicle to get rid of any droppings and sand.
- Remember to wash and dry your cover before placing it on your RV and before storing it when not in use.
What if You Don’t Have a Cover?
Unfortunately, most RV’s do not come with a cover. You can find them easily enough at Camping World or Amazon but they do get expensive. But it is a good investment to protect your big investment in an RV.
Avoid using standard tents or tarps. These are ineffective and will often do more bad than good. Plastic tarps will trap moisture in-between your RV and the cover, causing leakage and decay.
If you don’t have a cover and you live in a dry, warm area, then the least you can do is cover your tires after you hoist the RV up and get special windshield covers to protect your dashboard. As I mentioned above I have an article dedicated to Why You Should Cover Your RV Tires .
Pro Tip: When shopping for covers, look for something with tight straps that will keep your RV in place and something that is breathable.
I hope this guide has helped you navigate the best practices for storing your RV outside. Each step in the process is crucial to maintaining your vehicle in good shape. So, avoid costly repairs, clean up jobs, and easily avoidable maintenance jobs by creating a storage checklist and following it to a T.
Diane is a lover of all things travel. She and her young family wanted to explore North America from the comfort of their own home so they bought an RV. After fully rehabbing a 1994 Safari Trek, they set out to explore both Canada and the USA.
Recent Posts
Why You Need to Disconnect Your RV Battery When Not In Use
It's always fun to get the RV ready for another adventure after it's been in storage but what isn't fun is finding out your house batteries are dead. Without your house batteries, most of the...
Best Campgrounds in Yellowstone National Park for RVs
Yellowstone National Park is one of those places that should be on your bucket list. And one of the best ways to get there and enjoy the park is in your RV. Whether you are looking for a full...

Tips For Parking Travel Trailer On Sloped Driveway

Owning a trailer is every traveler’s dream. After all, nothing makes you feel at ease more than having a safe and comfortable camper to return to after a tiring day of escapade.
It provides better protection than a tent and has all the amenities you need to maintain your lifestyle while enjoying the outdoors.
Unless you’re a nomad, you will probably use your trailer only two or three times a year, meaning it will be parked on your property for at least 45 weeks. That’s a long time.
So, instead of leaving it idle until your next trip, why not use it as an additional living quarter ? For example, you can let one of your children use it as their bedroom. Or, maybe renting it out sounds more interesting.
No matter how you’d like to use your trailer during the months you’re not traveling, you must carefully consider how to park it . If your driveway is flat, this isn’t a big deal, but if it’s a slope, you need to be creative in leveling it .

Here’s why leveling your trailer is critical:
- Even the slightest inclination can make your trailer uncomfortable , as you must always maintain a foothold.
- All standalone furniture pieces will keep falling over .
- If your work desk and chair have wheels, they will keep rolling toward the lowest point of your trailer.
- It’s hard to cook when your stovetop is tilted . When making soup, you risk burning yourself if the pot slides off and spills out its boiling content. The flames are also slightly tilted, making it hard to cook evenly.
- Most appliances that use torsion are designed to operate symmetrically. With the slope, their centers of gravity also change, disrupting the balance of forces necessary for them to work correctly. It also makes them more prone to damage since their components rotate while tilted.
- Your dual-fuel refrigerator will stop cooling . If it’s running on propane, the small flame that’s supposed to heat the boiler will miss its target because it’s slightly skewed .
Built-In Leveling System
Late RV models now have leveling jacks . This feature comes with a control panel inside the RV, and beside it is a spirit level that shows you whether the RV is already level or off-center.
But this doesn’t apply to high slopes because it can only level your vehicle around two degrees .
Parking Travel Trailer on a Sloped Driveway
Parking Considerations
Before thinking of ways to level your trailer, consider the following:
- Size and weight of your trailer – How big is your trailer? Will it fit your driveway? Will there be enough space for your other cars to park or pass through? You must ask yourself these questions to determine if the driveway is the best place to park your trailer. You must also consider the trailer’s weight , including additional loads. On average, an empty trailer weighs from 2 to 5 tons.

- Angle of inclination – How steep is your driveway? Five degrees? 10? 30? The leveling method your will use depends on your driveway’s slope . If it’s less than 10 degrees, commercial plastic levelers might suffice. But if it’s more than that, you might need leveling blocks or wheel chocks .
- Drivetrain – How many wheels does your trailer have? Is it a dual-axle trailer? Does it come with a stabilizer leg support? The drivetrain plays a vital role in choosing which end of the trailer should be on the lowest or highest point of the slope. In most cases, the side with the wheels is at the highest point.
Preparing the Parking Area
So you found an excellent spot to park. Then, it’s time to prepare for the big task . You don’t need to do anything if the surface is solid concrete at least half a foot thick. That’s stable enough to hold up even the heaviest motorhome.
But if the surface is soil, you must build base support for the levelers , such as thick wood planks or concrete slabs.
The wider the surface area of the footing, the less likely the leveler will settle. Don’t just lay them down on the ground, though. They must be at least two inches from the surface to resist lateral movements.
Compress the soil by pounding with a rammer or vibrator tamper . The soil must be compact enough to preserve its density even when subjected to pressure. Or, if you have the time and budget, consider having a concrete driveway. It’s a good investment since you’ll use it all year round.
Center of Gravity
Assuming you have a tandem axle trailer, meaning one end has wheels, and the other is where you connect the tow vehicle . If you let it stand without support on either side, which side hits the ground? That side is where the trailer’s center of gravity is located.
The center of gravity tells you which side should be on the highest or lowest point of the slope . The rule of thumb is to place the side closest to the center of gravity on the highest point of the slope . This way, you don’t need support on both ends since gravity will pin down one of them.
RVs, motorhomes, coaches, and camper vans are easier to level because their weight is evenly distributed across their lengths . This means their center of gravity is near their midpoint, so it doesn’t matter which side is placed where.
It’s Leveling Time
As mentioned, the leveling method depends on how high you need to raise your trailer . There are several options you can explore, each suitable for specific leveling needs:
- Plastic Levelers
If you only need to raise your trailer a few inches high, plastic levelers would do. Different types and designs exist, but the curve leveler ramp is the most effective.
This leveler consists of a large curve piece that goes from thin to thick and a small one that serves as a lock. The larger piece is where you roll over your trailer’s rear wheels.
The trailer is raised as the wheels reach the thicker end of the ramp. Its thinner end is also lifted in the process . You then place the smaller piece underneath the thinner end of the ramp to lock it and prevent the wheels from rolling back down.

- Wheel Chocks
If you need to raise your trailer a bit higher, say a foot or two, you need a much larger and more elaborate apparatus—for example, wheel chocks. Prepare several pieces of wood boards. They should be wide enough to cover your trailer’s wheels and have extra space for the wheel chocks .
Place the boards on top of each other on the driveway. Pull down each board, so their edges are at least a couple of inches apart . This arrangement will form a ramp for the wheels to roll on. Once you have enough height and width, fasten the wood boards together.
Of course, you will need a stopper for the wheels , or it will roll off the rear end of the ramp you’ve just made. This is where the wheel chocks come in. They’re thick wood blocks attached to the back end of the ramps. This setup should lift your trailer a foot or two from the surface, depending on how many wood boards you use.
Do not forget, though, that wood is an organic material . It decays over time. Some wood types are more rigid and more resilient than others. Choose those naturally resistant to infestation and weathering . Or, you can treat the wood boards and wheel chocks first to make them more durable.
- Trailer Jacks
A trailer jack is a device used to temporarily raise a trailer so that you can safely connect or disconnect it to the tow vehicle. It can lift your trailer around three feet off the ground , so it can help level it on a slope.
Then again, it’s designed to be just as high as the trailer’s wheels . So if the wheels are on the highest point on the slope, you still need to put something underneath the jack .
This means more than the jack alone will be required. Adding a solid ramp where the jack can stand stably is a good idea.
But there’s also the issue of longevity. As mentioned, trailer jacks only provide temporary stability . There’s no telling what might happen if it’s exposed to so much stress for an extended period.
Of course, you can still use it to level your trailer, but it needs additional support . For instance, you can set up the trailer stands if there are any.

Spirit Level
Also called bubble level , this device is used to determine whether or not a surface is level . It has a vial with fluid inside and a bubble that moves around according to the slope of the surface where the device is placed.
If you put it on a level surface, the bubble should move to the center of the vial . The bubble will be slightly off the center mark if the surface isn’t level. This device is handy when leveling trailers.
You can see that leveling a trailer on a slope takes a little bit of engineering and carpentry skills. It’s mostly common sense, but dealing with heavy objects requires understanding the interaction between forces . A slight mistake could lead to a severe accident.
When in doubt, feel free to hire an expert to help you out . The RV manufacturer or your dealership has a hotline for clients with technical inquiries. You don’t want to feel anxious every time you stay in your trailer because you’re unsure if the setup could hold and for how long.
Leave a Comment Cancel reply
Save my name, email, and website in this browser for the next time I comment.

Subscribe To Email List
Free Camper & Camping Tips
Don't Miss Out On Interesting Updates.
We won't send you spam. Unsubscribe at any time.
How to Level a Travel Trailer on a Slope
There are few things more annoying and disappointing than turning up to the campsite and finding the only space left is on a slope.
An incline is not the best place to park something on wheels, especially something like a travel trailer that will list and move around if not level.
Making sure it doesn’t roll is one reason to make sure that your travel trailer is level on a slope, but it’s not the only one.
Even if you’re only on a gentle slope, the angle can make it awkward to move about in your travel trailer. It can also make it uncomfortable to sleep in and you will be constantly concerned that something may fall.
Another reason is that being on a slope can affect your refrigerator. Gas refrigerators need to be level in order to work properly.
Gas refrigerators will still work on a slope, but not as well as when leveled and it’s not worth the risk. Other appliances and features also may not function as well on a slope, but this varies and it’s the refrigerator that is the biggest risk. (And also the most important, no one wants to spoil food).
The best thing to do when you find yourself on uneven ground at a campsite is to go somewhere else. But, if you’re reading this, then you probably know that isn’t always an option.
But, don’t worry, before you head out on your trip, make sure you read through our guide on what to do to make sure your travel trailer stays level while on a slope.
And, most importantly, stays there and doesn’t roll towards the bottom (although if you’re on that steep an incline, you should definitely move).
How to Level a Travel Trailer
One of the best ways to level a travel trailer is with leveling blocks, like these Camco Leveling Blocks . Leveling blocks sit underneath the wheels of the travel trailer which gives them extra height.
Leveling blocks of different heights are available or, like these Camco Leveling Blocks, they can come as one block which has varying heights.
These leveling blocks have three different heights, so you can alter your travel trailer to make sure that it is exactly level.
It can be difficult to find the exact height to level your travel trailer, so having three options is one is really useful.
Now you know the best tools to use, read on for a few tips on how best to use leveling blocks on your travel trailer.
How to Use Camco Leveling Blocks
Leveling blocks are definitely the best option for leveling your travel trailer.
Sure, you can use bricks, a wooden log, or just hope for the best. But using these blocks (which are specifically designed for the purpose) is a much better idea.
Here’s a step by step guide to using leveling blocks to level a travel trailer on a slope:
Step 1: Choose your spot. When parking, make sure you’re exactly where you want to set up.
Make sure that the travel trailer is as straight or at the angle that you want. Otherwise, you will have to keep removing and rearranging the leveling blocks. This isn’t difficult, just frustrating and a hassle.
Make sure you do this before you unhitch, it will make things much easier. There is only so much leveling blocks can do, so try and find somewhere that isn’t too sloped and uneven.
Step 2: Check the level. Using a carpenter’s level (or an app on your phone) check the level of the trailer. Even if it seems pretty level, it might not be level enough for your refrigerator to work properly and you may notice it eventually.
If it’s not level, you will also definitely notice it when you’re trying to sleep as you won’t be as restful as usual.
Step 3: Position the blocks. Now take out the Camco leveling blocks. These blocks are great as they have three levels available so you can make sure the level is perfect.
Place the thinnest end of the leveling block behind the wheel and then reverse onto it.
Unless you’re sure that you will need more height, try leveling it a step at a time. Try the first height and then stop and re-check the level. Do this until it’s perfect.
Step 4: Chock the wheels! Whatever you do, make sure to CHOCK THE WHEELS before you unhitch! You can kiss your trailer buh-bye if you don't do this, especially when parked on a slope!
I recommend using a set of rubber chock blocks ( like these ones ), and for added peace of mind, you could also use the BAL X Chocks to stop the wheels from moving at all!
Step 5: Park and unhitch. Now your travel trailer is level, and fully chocked, you can unhitch. Before unhitching, make sure to extend the rear and front jacks so your trailer is absolutely level and to minimize bounce. And now you’re done!
Now you know the best way to level a travel trailer on a slope, here are a few dos and don’ts to help you out a little more.
- Use a spirit level. Whether you use a proper carpenter’s spirit level or an app on your smartphone, make sure to check that your travel trailer is level. Even if it seems pretty level, this perception might change when you get on.
- Level your trailer before unhitching. This will keep the trailer steady and make leveling easier.
- Use proper leveling blocks. Make sure to use blocks that are specifically designed to level out a travel trailer.
- CHOCK THE WHEELS! Do NOT unhitch the trailer from your vehicle until you chock BOTH SIDES and make sure your trailer isn't going to roll away.
- Try to level your travel trailer on wooden blocks. Balancing the wheels of your travel trailer on wooden or concrete blocks can damage your tires, especially if the blocks are too small. They are also dangerous as they are not a solid base and the trailer may fall off.
- Use rocks or wooden boards to level your travel trailer. Similarly to the above “don’t”, this isn’t stable and can be dangerous.
- Dig into the ground. Some sites might suggest digging into the ground the help level out your travel trailer. This is an option, but it’s a laborious job and won’t leave the campsite owners, or campers who come after you, very happy. Even if you replace the earth afterward, it’s best to leave a campsite as you found it.
Leave a Comment Cancel Reply
Your email address will not be published. Required fields are marked *
Save my name, email, and website in this browser for the next time I comment.
Little Household Additions For Long-Lasting Happiness
- Cookware & Bakeware
- Food Storage Solutions
- Kitchen Furniture & Decor
- Kitchen Gadgets & Utensils
- Kitchen Renovation Ideas
- Small Kitchen Appliances
- Bathroom Accessories
- Bathroom Fixtures
- Bathroom Furniture
- Bedroom Furniture
- Kitchen Furniture
- Living Room Furniture
- Office Furniture
- Outdoor Furniture
- Interior Design Trends
- Space-Saving Solutions
- Garden Tools & Equipment
- Home DIY & Maintenance
- Landscaping Ideas
- Outdoor Entertaining
- Outdoor Lighting
- Outdoor Recreation & Activities
- Outdoor Structures
- Patio & Deck Designs
- Pet & Wildlife Care
- Plant Care & Gardening Tips
- Pool & Spa Care
- Seasonal & Event Decor
- Energy-Efficient Appliances
- Home Entertainment Systems
- Home Office Tech
- Latest Tech Trends in Home Improvement
- Security & Surveillance
- Smart Home Devices
- DIY Projects & Ideas
- Flooring & Tiling
- Home Renovation Guides
- Painting & Decorating
- Plumbing & Electrical
- Tools & Equipment
- Appliance Maintenance & Repair
- Bathroom Appliances
- Cleaning Appliances
- Heating & Cooling
- Home Automation Appliances
- Kitchen Appliances
- Laundry Appliances
- Lighting Appliances
- Other Appliances
- Air Quality & Filtration
- Ergonomic Home Solutions
- Family & Pet-Friendly Home Design
- Healthy Home Cooking
- Home Fitness Equipment
- Mindfulness & Relaxation Spaces
- Building Materials
- Construction Techniques
- Electrical and Plumbing Systems
- Hand & Power Tools
- Professional Contractor Advice
- Safety Gear & Equipment
- Worksite Management
- Energy-Saving Tips
- Home Insulation & Ventilation
- Solar Power Solutions
- Child & Elderly Safety at Home
- Emergency Preparedness
- Home Maintenance Checklists
- Pest Control Solutions
- Safety Equipment & Products
- Seasonal Home Care
- Budgeting & Planning Guides
- Buying Guides
- How-To Guides
- Maintenance & Care Guides
- Product Reviews
- Style & Inspiration Guides
- Bathroom Storage Ideas
- Closet & Wardrobe Organization
- Decluttering Tips & Tricks
- Garage Storage Solutions
- Kitchen Organizing Tools
- Living Room Organization
- Office & Desk Organizers
- Eco-Friendly Products
- Home Hacks & Tips
- Personalized Home Decor
- Seasonal & Holiday Decor
- Specialized Home Improvement Topics
- Unique Home Solutions
- How to Store
Home > Articles > How To Store A Trailer Outside

How To Store A Trailer Outside
Modified: February 22, 2024
Written by: Henry Campbell
Learn how to properly store your trailer outside to protect it from the elements and extend its lifespan. Read our informative articles for helpful tips and advice.
- Gardening & Outdoor
- How to store
- How To Store Vehicles & Transportation
(Many of the links in this article redirect to a specific reviewed product. Your purchase of these products through affiliate links helps to generate commission for Storables.com, at no extra cost. Learn more )
- Introduction
Welcome to our comprehensive guide on how to store a trailer outside. Whether you have a travel trailer, utility trailer, or boat trailer, proper storage is vital to keep it in good condition and extend its lifespan. Storing a trailer outside requires careful planning and implementation to protect it from the elements and ensure its security.
Choosing the right storage location, preparing the trailer, covering it, securing it, and performing regular maintenance are essential steps in the storage process. By following these guidelines, you can help prevent damage and maintain the value of your trailer, ultimately saving you time and money on repairs.
In this article, we will take you through each step of storing a trailer outside, offering valuable tips and advice along the way. So, let’s dive in and learn how to properly store your trailer to keep it in optimal condition!
Key Takeaways:
- Choose a secure, accessible, and sheltered location for outdoor trailer storage to protect it from theft and harsh weather, ensuring its longevity and minimizing the need for repairs.
- Properly prepare, cover, secure, and maintain your outdoor-stored trailer to prevent damage, deter theft, and ensure a smooth towing experience, ultimately saving time and money.
Read more : How To Store A Travel Trailer Outside
- Choosing the Right Location
When it comes to storing a trailer outside, the location you choose plays a critical role in its overall safety and protection. Here are some factors to consider when selecting the right storage location:
- Accessibility: Look for a location that allows easy access to your trailer. This will make it convenient for you to retrieve the trailer whenever needed.
- Security: Ensure that the storage location provides adequate security measures, such as surveillance cameras, gated access, and on-site staff. This will help deter theft and vandalism.
- Shelter: If possible, choose a location that offers covered or indoor storage. This will provide additional protection against harsh weather conditions, such as rain, snow, and extreme heat.
- Surface: Opt for a storage location with a solid and level surface, such as concrete or asphalt. This will prevent the trailer from sinking into the ground and reduce the risk of damage.
- Proximity: Consider the distance between the storage location and your home. If it is conveniently located nearby, it will be easier for you to monitor and maintain the trailer regularly.
- Local Regulations: Check with local authorities or homeowner associations to ensure that storing a trailer outside is permitted in the chosen location. Some areas may have specific restrictions or regulations regarding trailer storage.
Remember, the chosen location should meet your specific needs and preferences. Take the time to visit and evaluate different options before making a final decision. By choosing the right storage location, you can have peace of mind knowing that your trailer is in a secure and accessible place.
- Preparing the Trailer
Before you store your trailer outside, it is essential to properly prepare it to avoid any potential damage and ensure its longevity. Here are some steps to follow when preparing your trailer for storage:
- Clean the trailer: Thoroughly clean the interior and exterior of the trailer to remove any dirt, dust, or debris. Pay attention to the wheels, undercarriage, and hitch area. Use a mild detergent and water to clean, and allow it to dry completely.
- Empty and clean storage compartments: Remove all items from the storage compartments of the trailer. Clean them thoroughly and ensure there are no leftover food items or anything that can attract pests.
- Inspect for damage: Carefully inspect the trailer for any signs of damage, including cracks, leaks, or rust. Address any issues before storing the trailer to prevent further deterioration during the storage period.
- Remove perishable items: Take out all perishable items such as food, beverages, and toiletries. These items can spoil and attract pests if left inside the trailer during storage.
- Empty and clean water tanks: If your trailer has water tanks, drain them completely and flush them out. This will prevent any water from freezing and causing damage to the tanks and plumbing system.
- Disconnect the battery: If your trailer has a battery, disconnect it to prevent drainage during storage. Clean the battery terminals and keep it in a cool, dry place to maintain its lifespan.
- Check the tires: Inspect the tires for any signs of wear or damage. Inflate them to the recommended pressure and consider using tire covers to protect them from the sun’s harmful UV rays.
By following these steps, you will ensure that your trailer is clean, in good condition, and ready for storage. This preparation will help prevent any issues that may arise during the storage period and ensure a smooth start when you retrieve the trailer for future use.
- Covering the Trailer
One crucial step in storing a trailer outside is covering it properly to protect it from the elements. Here are some tips to consider when covering your trailer:
- Choose a high-quality cover: Invest in a durable, water-resistant cover specifically designed for trailers. Look for a cover that is UV-resistant to protect your trailer’s paint and finishes from sun damage.
- Measure the trailer: Ensure that you choose a cover that fits your trailer properly. Measure the length, width, and height of your trailer to find the right size. A snug fit will prevent the cover from flapping in the wind, which can cause damage.
- Remove antennas and accessories: If your trailer has any antennas, awnings, or other accessories that can be easily removed, take them off before covering the trailer. This will prevent them from getting damaged or causing the cover to tear.
- Secure the cover: Use straps or bungee cords to secure the cover firmly to the trailer. This will prevent it from blowing off in high winds. Be sure not to overtighten, as this can potentially damage the cover or the trailer.
- Elevate the cover: To prevent moisture buildup and promote airflow, consider using supports or poles to create a dome-like shape over the trailer when covering it. This will allow moisture to evaporate and reduce the risk of mold or mildew forming.
- Inspect the cover regularly: Periodically check the cover for any signs of wear or damage. Repair or replace any damaged areas promptly to ensure continued protection for your trailer.
- Consider climate-specific covers: If you live in an area with extreme weather conditions, such as heavy snow or intense sunlight, look for covers designed specifically for those climates. They will provide extra protection and durability.
Remember, properly covering your trailer will shield it from rain, snow, UV rays, dirt, and other environmental elements. It will help prevent damage and keep your trailer looking its best for years to come.
To store a trailer outside , use a waterproof cover to protect it from the elements. Make sure to secure the cover tightly to prevent it from blowing off in strong winds. Additionally, consider using wheel chocks to prevent the trailer from rolling.
- Securing the Trailer
Ensuring the security of your trailer is crucial when storing it outside. Here are some essential tips to help you secure your trailer:
- Lock the hitch: Use a high-quality hitch lock to secure the trailer to your vehicle. This will prevent unauthorized towing attempts and deter potential thieves.
- Invest in a wheel lock: A wheel lock can immobilize the trailer by securing one of the wheels, making it difficult for anyone to move or steal it.
- Install a trailer alarm: Consider installing a trailer alarm system that will sound an alarm if someone attempts to tamper with or move the trailer. This can be a deterrent and provide an extra layer of security.
- Use a coupler lock: A coupler lock prevents the trailer from being connected to another vehicle. This can be a helpful security measure if you leave your trailer unattended for an extended period.
- Secure the trailer with chains: Use high-quality chains to secure your trailer to a fixed object, such as a post or a tree. This adds an additional layer of security and makes it more challenging for thieves to steal the trailer.
- Consider using a GPS tracker: Depending on the value and importance of your trailer, you may want to invest in a GPS tracking device. This will allow you to locate your trailer in the event of theft and assist law enforcement in recovering it.
- Regularly check security measures: Inspect the locks, alarms, and chains regularly to ensure they are in good working condition. Replace any worn-out or damaged security devices promptly.
Taking these security measures will significantly reduce the risk of theft and unauthorized access to your trailer. It’s important to remember that no security measure is entirely foolproof, but employing multiple layers of security will make your trailer a less attractive target for potential thieves.
Read more : How To Store A Utility Trailer Outside
- Regular Maintenance
Performing regular maintenance on your trailer is essential, even when it is stored outside. This will help keep it in good condition and minimize any potential issues that may arise. Here are some maintenance tasks to consider:
- Inspect for damage: Regularly inspect your trailer for any signs of damage, such as cracks, leaks, or rust. Address these issues promptly to prevent further deterioration and more costly repairs.
- Check the tires: Monitor the tire pressure regularly and ensure they are inflated to the manufacturer’s recommended levels. Look for signs of wear or damage and consider rotating the tires periodically to ensure even wear.
- Grease the bearings: Apply grease to the trailer’s wheel bearings at least once a year or as recommended by the manufacturer. Properly lubricated bearings will prevent friction and extend their lifespan.
- Inspect the electrical system: Check the trailer’s electrical components, including the brakes, lights, and wiring. Repair or replace any faulty parts to ensure they are functioning correctly when you need to use the trailer.
- Keep it clean: Regularly clean the trailer to remove dirt, debris, and any corrosive substances that may have accumulated. Use a mild detergent and water, and pay attention to areas prone to rust or oxidation.
- Weatherproof seals and seams: Inspect the seals and seams of your trailer for any signs of wear or damage. Reapply sealant or caulk as necessary to maintain water resistance and prevent leaks.
- Test safety equipment: Check the functionality of safety equipment, such as fire extinguishers, smoke detectors, and carbon monoxide detectors. Replace or recharge them according to the manufacturer’s instructions.
- Perform test runs: If possible, take your trailer for a short test run periodically. This will help ensure that the wheels, brakes, and other mechanical components are in working order.
By incorporating these maintenance tasks into your routine, you can keep your trailer in optimal condition and minimize the risk of unexpected issues when you’re ready to use it again. A well-maintained trailer will provide you with peace of mind and a smoother towing experience.
Storing a trailer outside requires careful planning and implementation to ensure its safety, protection, and longevity. By choosing the right location, preparing the trailer, covering it properly, securing it, and performing regular maintenance, you can effectively store your trailer outside without compromising its condition.
When choosing a storage location, prioritize accessibility, security, and shelter to provide the best protection for your trailer. Preparing the trailer involves cleaning it thoroughly, inspecting for damage, and removing perishable items. Covering the trailer with a high-quality, properly fitting cover will shield it from the elements and prevent damage. Securing the trailer involves using locks, alarms, and chains to deter theft and unauthorized access. Regular maintenance, including inspections, tire checks, and electrical system checks, is essential to keep your trailer in optimal condition.
Remember, investing time and effort in properly storing your trailer outside will pay off in the long run by extending its lifespan and reducing the need for costly repairs. So, follow these guidelines, establish a routine, and enjoy the peace of mind that comes with knowing your trailer is stored safely and will be ready for your next adventure.
- Frequently Asked Questions about How To Store A Trailer Outside
Was this page helpful?
At Storables.com , we guarantee accurate and reliable information. Our content, validated by Expert Board Contributors , is crafted following stringent Editorial Policies . We're committed to providing you with well-researched, expert-backed insights for all your informational needs.
0 thoughts on “ How To Store A Trailer Outside ”
Leave a comment cancel reply.
Your email address will not be published. Required fields are marked *
How To Organize A Messy Room
Why are mums turning brown, how often should you change the cat litter box, how to calibrate a home theater, how to take off toto toilet seat, related post.

By: Grace Wilson • Articles

By: Olivia Parker • Articles

By: Benjamin Parker • Articles

By: Sophie Thompson • Articles

By: James Anderson • Articles

By: Samuel Turner • Articles

By: Emma Thompson • Articles

By: Oliver Mitchell • Articles

Please accept our Privacy Policy.
STORABLES.COM uses cookies to improve your experience and to show you personalized ads. Please review our privacy policy by clicking here .
- Privacy Overview
- Strictly Necessary Cookies
This website uses cookies so that we can provide you with the best user experience possible. Cookie information is stored in your browser and performs functions such as recognising you when you return to our website and helping our team to understand which sections of the website you find most interesting and useful.
Strictly Necessary Cookie should be enabled at all times so that we can save your preferences for cookie settings.
If you disable this cookie, we will not be able to save your preferences. This means that every time you visit this website you will need to enable or disable cookies again.
- https://storables.com/articles/how-to-store-a-trailer-outside/
The Savvy Campers
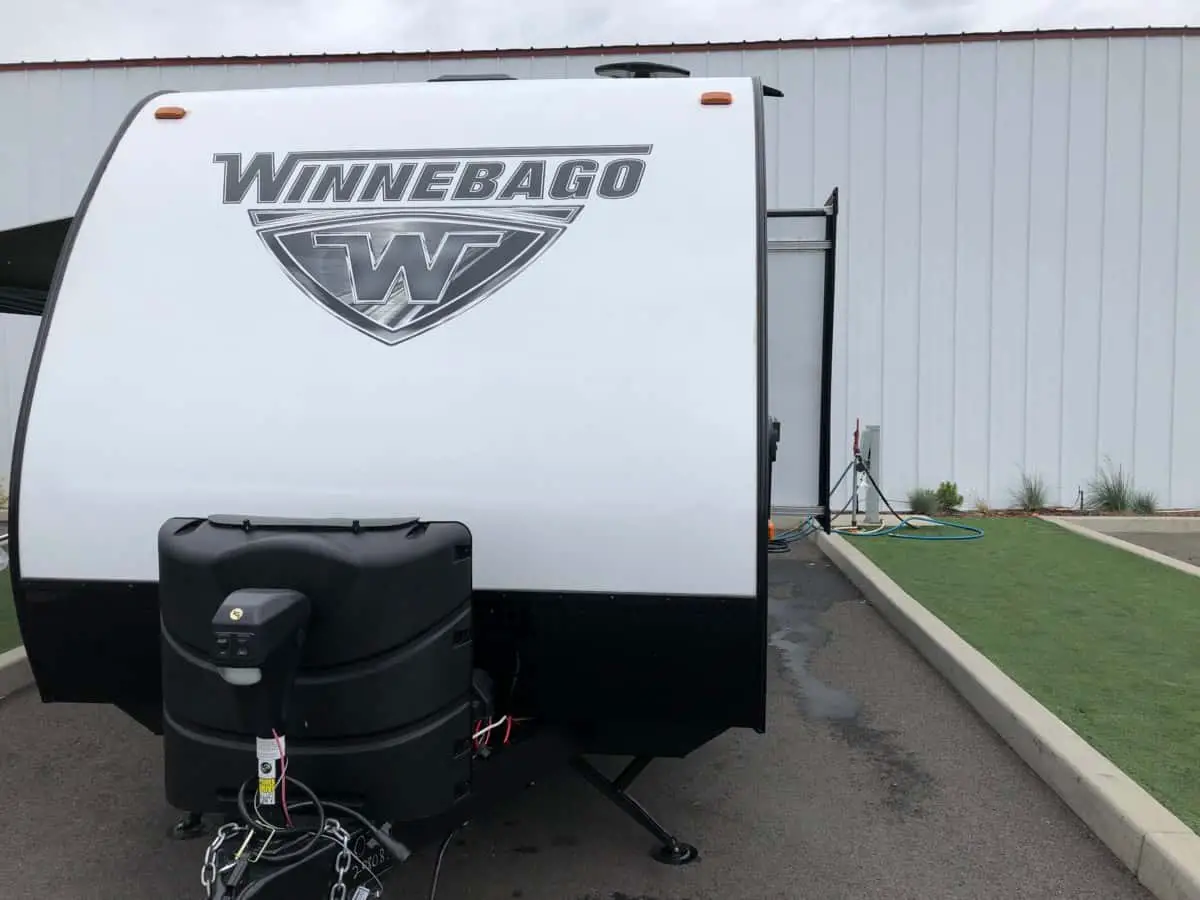
How to Store Your RV at Home: The Complete Guide
One question you should ask yourself prior to purchasing a travel trailer, camper, or RV, is where you will store it. Many of us forget that question and have to figure it out after the fact. Here are the facts to consider when storing your RV at home or at a storage unit.
Should you store a RV at Home? Why it can be a good idea.
Should you store your RV at home or at a dedicated storage facility? There are pros and cons to both, but there are several reasons why it can be a fantastic idea to store your RV or travel trailer at home, on your own property.
For instance, it is much easier. You can keep all of your appliances plugged in, meaning that you can leave food items in your fridge or utilize other appliances. In addition, if you have several guests visit your home at once, they can sleep, cook, and hang out in the RV, thus essentially creating more space in your home. They will be able to use the fridge, heater, or air conditioning to create a comfortable space to rest and relax. There are several other benefits, as well.
By storing your RV at home, you are also ready to leave with it incredibly quickly. If you get the sudden urge to go on a trip, find out the fish are biting at your favorite fishing hole, or want to see a time-sensitive natural phenomenon, you can. You can be ready to go in the amount of time it takes you to put your things, or your family’s things and some food, in the RV. If you were storing it in a facility, this would not be possible as it would require additional time to go get it, cool down the refrigerator, pack it, etc.
Storage facilities often require advanced notice, or may only allow access from 8 AM to 9 PM which is what ours allows, meaning that you might not be able to get it out right away. Plus, if your RV was in storage, there are likely several systems that need to be gotten ready before departing. This slows you down considerably and makes it less likely for you to be able to leave quickly.
It also saves money to store your RV on your property if possible. Storing an RV, even in the most basic facility can cost at least $50 dollars a month in the United States, essentially an extra phone bill. If you want security, heating, or any other amenities, however, it can be upwards of $450 per month. This is a considerable investment that may limit the amount of trips you will be able to take, so it is likely a better idea for you to store RV at home.
By using a facility, you also forfeit your ability to be able to check on your camper constantly without the hassle of driving to your offsite storage unit, which can make some owners uneasy. By keeping your camper at home, you can check on it and work on it whenever you like, a great benefit.
In addition to being able to go at a moments notice, you will likely perform more routine maintenance due to the convenience of having the trailer handy. In our experience, whenever we take our trailer out of storage, we are getting ready for a trip, not thinking about resealing windows or patching the roof.
Can you store your Travel Trailer at home?
It seems likely storing a travel trailer at home is a beneficial way to house it during the off-season, but it is not possible for everyone. First of all, do you have enough space? If you live in an apartment or your house is on a small lot, it is likely that you won’t have enough space to store your RV. Additionally, if you live in an apartment or have a HOA, there are likely rules to prevent you from doing so. Consider where you would like to park your RV, if you have determined that you have enough room.
- Less likely to get vandalized
- Quick Access
- Managing vehicles in Driveway
- Upset Neighbors
One of the most common places to park a camper is the driveway. Undoubtedly, you have driven past many houses that have a camper parked in the driveway. Of course, like anything, there are both pros and cons to this method. Other than saving money, your RV will most likely be much safer in your driveway than it would be in most facilities. Travel trailers are less likely to get vandalized in a driveway than in a storage facility as you can keep a tight watch, obtain insurance , and set up a security camera to always have an eye out. Still, there are safer methods. It is also great to have the RV so close to home as it allows for quick getaways and can act as an extension of your living space.
There are some cons and considerations, however, for storing an RV in your driveway. Firstly, depending on the status of your house, your HOA (homeowner’s association) or your landlord may have rules or preferences about parking an trailer in the driveway. In our area, we are allowed to have our trailer in our driveway for up to 72 hours. Check with them first. The city or town you live in may also have local laws.
How big is your driveway? If you have to do complex steering and take an hour to get it in and out of the driveway without hitting anything… it may be too small of a driveway. Also be sure that there is a way to park your RV without blocking the other, smaller and everyday cars that need to park there as well. This will become annoying very fast, otherwise.
Also assess the safety of your neighborhood, as this can impact where you decide to park. If you have a trailer full of camping gear and a generator, you may find that you could be a target for theft.
- Least likely to get vandalized or have theft
- Least likely to have rodents or bugs
- Best Protection from elements
- Larger vehicles may not fit
- Managing other items that need stored in garage
Your garage has the potential to be a great storage place for your travel trailer as well, however as always, there are considerations to be made. Standard size garages will be able to fit most class B and some class C trailers, but anything bigger than 35 feet or taller than 8’6 will likely not fit. But, if your RV is smaller than that, the garage can still be a great option. It is also free, unlike a storage facility.
A garage offers protection for burglars and vandals, as well as from the elements. This can save a lot of money in repairs later down the line. This has the convenience of being able to leave quickly, as this is one of the benefits of home storage.
Despite these fantastic benefits, however, there are some cons about storing an RV in the garage. Garages are often highly coveted storage spaces in more homes, so using the garage for the RV will take up a lot of that space. This means that cars, tools, lawn equipment, bikes, etc. will have to be stored elsewhere – which could be a bit of a conundrum.
If you choose to use the garage, be sure to have a plan for where to store other things. If the garage storage method won’t work for you, there are still other great storage options.
Backyard or Side Yard
- Exposed to Elements
You can consider storing a travel trailer in your backyard. It is not ideal for everyone, but for some owners it may be the perfect location. This offers free storage as well as the convenience of being close to home, but backyard storage probably also has the most negative considerations of any other storage location.
For instance, just as with any other outdoor storage, the RV will be completely exposed to the elements as well as more vulnerable to theft. This can end up costing more money in the long run than a storage facility.
Your neighbors or neighborhood associations may not be pleased with the eyesore of backyard RV storage, but if you live on a large parcel or in a spread out neighborhood, this is no concern. If you are going to go with the backyard or any option outdoors, invest in a cover for your RV to reduce the suns UV rays which will deteriorate your seals and fade your paint. When you store RV in the backyard, wrap the cover around it and make sure that it is secure. This way, the trailer is protected from the elements much better, as well as from creatures that may want to get in. It is not 100% effective, but the cover will still most likely save you money in the long run.
If the backyard is your only option, consider getting a carport built. These can be put in for under $10,000 most of the time, but can provide significant coverage for your trailer. It is not as good as a full garage, but it definitely provides an increase in protection.
Finally, is the backyard pavement, dirt, or gravel. Driving an RV or getting in and out of it in a muddy mess is not necessarily recommended as you will make your RV filthy or get it stuck, so use caution in those scenarios. If you have determined that your backyard may not work, there are other options for storing a camper on your property.
RV Garage or Shop
- Save Money in the long run
- Protection from Elements
- HOA Rules/ Building Permits
- Costly up front
In extreme cases, you can build a RV garage or shop, or even lean-to covering beside. These will be an investment initially, as a basic steel RV covering costs upwards of $13,000 as well as several hours of labor and permits.
But, these create a designated space for your trailer on your property, as well as helping to keep your RV out of the weather. For covered storage in an RV facility, it will take five and a half years for the home storage to make up the difference in cost. So, this method will save you money, but it will take several years.
Thus, consider this, but realize that money alone is not a good enough reason to build your own shelter. If you were dead set on having a dedicated space on your property for your RV, however, then that is a much better reason.
Offsite Storage for your RV
For some people, in some scenarios, RV storage may be the best option. There are three different types of storage at an RV facility, and they are outdoor, covered, and indoor. Outdoor is the most common and least expensive, but it also has the least amount of protection overall.
Outdoor Storage Facility
An outdoor storage at an RV facility is the cheapest method of professional storing on the market. The RVs are usually parked in a big parking lot and surrounded by a large barbed wire fence protected with a gate with an access code. This can keep out thieves and vandals. Some of these facilities also have guards, but not all of them do.
Additionally, you may not be able to get your RV out of these places as quickly, which is less convenient. At the storage yard we use, we only have access from 8AM to 9PM. Taking a last minute trip in the middle of the night or early morning is just not possible. In this outdoor storage, they are also exposed to the elements, which as discussed, can be damaging so make sure to cover your RV as well as tires to protect it from the elements.
Covered Storage Facility
Covered RV storage at a facility is a middle ground between indoor and outdoor storage. In general these parts of the facility will be covered by a big roof or awning, not unlike a carport. This is more expensive than the outdoor options, but not as expensive as the indoor options. It boasts the same security benefits, as well as added protection from the elements. While the awning will help with weather including snow and rain, it is not completely effective as the RV will still be exposed on the sides and can still allow insects or rodents to attack. Still, it is better than nothing and can help your RV stay safer.
Indoor Storage Facility
Finally, there is the option of storing a camper in an indoor storage facility. These are the most expensive way to store your RV, but they are also one of the best ways to store them. This is the most secure option, as your RV will be behind at least one locked door, as well as guards and security cameras. It will also be completely protected from the weather.
Some facilities, but not all, offer 24 hour access to indoor storage, which means that you can still benefit from the convenience of being able to leave whenever you want but still have your trailer in storage. These types of facilities are expensive, as they usually run upwards of $400 monthly, or more. Some RVs won’t fit, usually bigger class A or class C RVs, so be sure to measure before signing up.
These types of facilities can be hard to find, however, but they offer things that you would likely be unable to create at home, such as advanced security. Indoor storage can be a single garage door which will fit your RV as part of a larger building, but it could be a large building such as an old airplane hanger or big box store where multiple units are stored. If this is the case, sometimes you will need a week or so notice in able to extract your RV as they may need to shift their inventory in able to get your unit out.
Storage Tips
Hopefully, this article has helped you decide where you want to park your RV. Once you have decided on where you want to store it, there are several things that need to be done to prepare it for storage. First and foremost, assess where you want to park and make absolute certain that the site is level. If it is not, this can cause serious issues down the line as many components in your RV need to be level to work in the case you leave it plugged in.
In addition, make sure that the ground below the trailer is compacted and stable, but to be sure.
Preparing your Travel Trailer or RV for storage
Once the RV is parked in a secure place, it is then time to prepare it for storage. The first step is to wash the outside thoroughly. This includes the wheels, wheel wells, and any other neglected areas. In addition to this, clean out the interior. If you are not going to be using it while it is in storage, remove all traces of food so that it does not attract animals or other creepy crawlies. Vacuum the carpets and disinfect everything. Basically, try to get the inside looking as nice as it did the day you bought the trailer so it is easier and quicker to take your next trip.
Fresh Water, Black, Grey Tanks
The next step in getting your RV ready for storage is to prepare the water system. This means all of the drains, pumps, tanks, and faucets in the vehicle. You should also clean and sanitize your fresh water tank prior to putting your RV into storage and after or about every 6 months. To do this, drain all of the fresh water tanks in the RV and fill the fresh water tank three quarters of the way full. After this, pour in a cup of bleach and let it sit for 20-30 minutes total and then drain. Refill it to the same level and add bleach a second time, but this time, only let it sit for 10-15 minutes. After draining it for the second time, continue to flush the tank with clean water until you don’t smell the bleach chemicals anymore. Make sure to drain all of the remaining water, even on your drive to storage, leave your fresh water dump open so all of the remaining water sloshes out. Read our fresh water guide to learn all of the ins and outs of the fresh water tank.
This will keep your water tank from freezing in the winter and ensures that there are no harmful bacteria hiding in there.
For the black water and grey water tanks , use an enzyme cleaner. This will rid the tanks of any built up solid waste as well as harmful bacteria. Different types of enzyme cleaners will have different instructions, but in general, it is best to follow the cleaner tab up with a gallon of water to flush everything out afterwards. Make sure to always dump the black water tank before the grey water tank so the grey water can flush out your sewer hose.
Finally, you can either leave your tanks empty during storage, or fill them with some antifreeze. It is recommended that you leave them empty, however, because the antifreeze may require additional work to flush your fresh water system once you take the RV out of storage, but the choice is yours.
Heating System
For your heating system, be aware that several different types of insects and small animals are attracted to the smell of natural gas. The specific creatures will obviously depend on your geographic location, but it is best to deter them from entering the heating system of the RV at all. Cover all of the vents and intakes of the heating system with a porous cover, such as this recommended one here . This will allow harmful odors that you don’t want building up in the RV to escape, but keep out wasps, marmots, or other creatures.
Clean your Roof
You will want to clean your roof a few times per year so you do not get a buildup of dirt and grime. We use a simple soft bristle car wash brush with dish detergent to clean ours every few months.
Seal your RV
Be sure to take a close up look underneath the RV and seal any other vents or exhausts that may attract animals. This is a small investment of time now that can save you a lot of time in the future. We use expanding foam to make sure all penetrations under the RV or around the RV are filled. Make sure to check the seals on the vehicle as well. Look at the seams on the body, roof, and windows.
Make sure to be thorough with this inspection, because even the smallest cracks or holes can allow water and moisture in, which is a big problem. Invest in a high quality sealant product and fix these holes before they become an even bigger issue. The user manual for your particular model of RV should have recommendations on which sealants will be the best fit for the specific materials used in the construction of your trailer.
Interior/Battery Storage Prep
There are a few other interior preparations necessary before putting your RV into storage. Remove the fuses in your fuse box or turn off your batteries at the cutoff switch, if equipped, especially those for the biggest appliances and store in your house or somewhere warm. If you are in a cold climate, remove the batteries from everything in the RV and store inside on a piece of wood not directly on concrete. Storing your batteries inside will prevent your batteries from freezing and permanently damaging them. You will also want to remove batteries from items to preserve their life including small things like flashlights.
Turn off all appliances and clean them thoroughly, including interiors if possible. Leave all of the appliances open, so that there is no opportunity for anything such as moisture or mold to gather inside them. After one final check of the interior, it is time to prep the exterior of the RV for storage.
If you have blinds and curtains, make sure they are closed to prevent natural light from entering the RV. If you have a cover, you may skip this step. If you have cellular blinds, make sure they are stored all the way up as they can stretch out if left down for months at a time.
Tire Storage Prep
If you are going to park the travel trailer in storage for a significant length of time without removing the tires, make sure to periodically move the RV so that the tires do not develop flat spots. Also check the tire pressure in all tires and inflate or deflate according to manufacturer’s recommendations. If the RV is being stored outside, cover the tires to protect them from sun damage. Be sure to put something between the tires and the ground as well, especially if outside.
Engine/fuel Prep (if equipped)
The engine of the vehicle must also be prepared for storage. If you are not planning on (or can’t) start the RV while it is stored, use marine fogging oil in and around the engine’s cylinders to protect them and hopefully prevent engine damage while the RV is in storage.
If you can start it, try to let the engine run for at least two hours monthly. This will ensure that the engine is still functioning as it should. If you have a generator, you will also want to either start it, or run fogging oil in the head.
Before putting your camper in storage, fill the fuel tank most of the way full and add some type of fuel stabilizer. This will keep the engine healthy and prevent freezing. Before storing, also make sure you take care of regular maintenance, such as checking antifreeze levels, and getting an oil change. This will make sure that the RV and its engine system is completely healthy before entering storage. Plus, by not doing this routine maintenance, damaging compounds could be building up in the engine. Be sure to read the owner’s manual for your specific model of RV to ensure that it is prepared properly.
Security in Storage
Make sure you have locked up your trailer and/or changed your baggage locks as many keys on trailers or RV’s are keyed alike. To learn more about locking your RV, read the full guide here.
Slide Out Prep
Should your RV have any slideouts, make sure to lubricate the seals as well as mechanical hardware so they do not get stuck shut and rip a seal the next year while taking it out of storage or get brittle. Learn more about this from our top 22 maintenance tips article .
Now that your camper is prepared for storage, don’t forget to consider insurance. You likely already have some form of insurance on the vehicle that covers accidents as well as roadside assistance. If you don’t, it may be illegal, as in the U.S. there is a minimum amount of insurance required on all road vehicles.
But, does that insurance policy cover damages that occur in storage or thefts of personal items? This could be animal damages, weather, or vandalism. Either way, check your policy and update it if it does not cover the risks of storage. This will provide increased security for your vehicle as well as peace of mind for you.
Hopefully, this article provided and informational and educational run down of the different options for RV storage as well as the benefits and detriments of them. In addition, basic preparations to store a camper were also covered.
Overall, there are so many different places to store a travel trailer that it can be hard to definitively state which one is best overall, but rather, it depends highly on an individuals situation. Furthermore, it depends on the amount of resources and capital available to the person looking to store their trailer.
Any storage method can work, however, as long as the RV is properly prepared for storage. This means that both the inside and the outside of the vehicle must be adequately cleaned and prepared. The ways to do this will vary widely between RV models, but the information for your specific model can be found either in your owner’s manual or online. If both these methods fail, or you lack the technical know-how to complete them, there are services that will help you prepare your RV for storage available at your local dealer.
Be the first to be notified about FREE tips, hints, coupon codes, and email-exclusive information. All for FREE!
Related Posts:

Similar Posts

How often do you need to repack travel trailer bearings?
Whether you are an experienced RV owner or you have recently acquired a new travel trailer, there is one thing that all trailer owners can agree on: repacking your wheel bearings is essential to the art of RVing. How often do you need to repack travel trailer bearings? It is recommended that travel trailer bearings…

How Do You Winterize an RV Washing Machine?
Winterizing your RV is an essential part of ensuring it doesn’t sustain damage from the winter’s unforgiving temperatures. But while most people are familiar with the steps for winterizing their motorhome, things can get hazy when it comes to washing machines because they need special treatment. So how do you winterize an RV washing machine?…
Can You Use Synthetic Oil in a Champion Generator?
While they only started creating generators in 2003, Champion generators quickly soared to the top of the market. Their relatively low prices combined with their revolutionary dual-fuel technology have greatly aided their popularity. One of the most commonly asked questions about Champion generators is whether or not you can use synthetic oil in them. Once…

Can a Travel Trailer be painted?
You own a travel trailer that is in good overall condition, but it has an outdated paint job, aged colors, and/or a peeling exterior. How can you renew the look of your trailer while also adding value to your investment? Painting a travel trailer is a great way to update the look of your trailer,…

Do Popup Tent Trailer Campers have Bathrooms?
Most of us purchase a camper for one reason, a bathroom to go to in the middle of the night and not have to wander through the forest with bears and other items lurking in the shadows, or so you perceive with every movement in the dark. Many popups have bathroom facilities, but many do…

How to Remove Black Streaks From Your Fiberglass RV
You have unleashed an entire arsenal of cleaning supplies, sponges, scrubbing techniques, and onslaughts of pressurized water, but they are still there. Cleaning your recreation vehicle and achieving a polished shine is challenging enough on its own, but black streaks add an additional series of problems to the event. These black streaks are not only…
Join our Newsletter to stay up to date on the latest RV topics and receive our FREE RV Inspection Cheat Sheet Today. Use this tool to inspect new or used campers you are looking at purchasing.
No thanks, I’m not interested!
How to Level Travel Trailer on Slope
The following steps are necessary to level a trailer on a slope.
1. Put the trailer in gear and drive it forward until the front of the trailer is even with the back of the trailer.
2. Put your hand on top of the tongue and push it down until it is even with the ground.
3. Drive forward again, but this time steer so that you are driving up onto your hand, rather than driving straight ahead as before
4. Drive up onto your hand until you feel resistance from your hand pushing against the ground, then stop and put your other hand on top of your first one to push down
5. Drive forward again, steering so that you are driving up onto both hands rather than driving straight ahead as before
6. Continue to drive
How do you level an RV on uneven ground?
When you arrive, park the front end of the RV to the downhill side of an uneven campsite or parking space. Place blocks or jack pads under your jacks. Use your control panel to level your RV using your Auto-Leveling System. [1]
Where is the best place to level a travel trailer?
The easiest way to do this is to place the level on the tongue of the trailer. This will let you know if one side is higher than the other, which will inform which side you want to raise. Now that you know which side is too low, put boards or leveling blocks behind the wheels you need to raise. [2]
Does RV need to be perfectly level?
If your RV is not level, you are adding stress to many areas including door frames, plumbing, cupboards, and even the chassis. An RV was built to be level so you could be causing long term issues and damage if you are using it without it being properly leveled. [3]
Is it OK to store a travel trailer unlevel?
In a storage situation (fridge is off)unleveled is the way to go, helps the water run off faster. I park on our concrete driveway which is level side to side, but I always raise it so it is high in the front by about an inch. Unless you want to run the fridge, you should be fine. [4]
How unlevel can an RV be?
How level does an RV need to be? An RV should be level within 1 – 2 degrees from the plum. Visually, this would be about half a bubble on a bubble level. It should be leveled from side to side and then from front to back. [5]
How do you level a trailer with a sloped driveway?
So how do you level a travel trailer on a slope? Begin by leveling the travel trailer from side to side, chock the wheels and then level it from front to back by adjusting the tongue jack. When done properly your travel trailer will be stable and ready for you to safely enjoy. [6]
Why does my camper shake when I walk in it?
You may be asking yourself, why is my travel trailer shaking? The answer could be many reasons, including that you aren’t parked on a level surface, your trailer is unevenly weighted, you may need wheel chocks and stabilizers, or there are simply people walking around inside the travel trailer! [7]
How do you level a camper without moving it?
Generally, you can level a camper without moving it using an auto-leveling system or a wedge system. However, larger campers can take longer to level, and some large campers do need to be moved to level properly depending on what they have on board and if they have an auto-leveling system. [8]
What happens if your trailer is not level?
An unlevel trailer will put extra weight on one axle rather than an equal weight distribution between all of the axles. Obviously, this will cause excessive tire wear to the tires that have more weight on them. If your trailer is nose high, you may notice your rear axle tires being more “flattened” than the front. [9]
How much does it cost to level a RV?
Auto RV leveling systems will typically cost between $2,000 and $5,000 for the system itself. If you want to have it professionally installed, you’ll typically be looking at installation fees of $500 to $1,000+, depending on the system, your RV, and where you have it done. [10]
Do you level your RV with slides out?
So what’s the right answer? Level and put your slides out according to your RV’s user manual. Any professional should tell you that the typical recommendation is to level first, then put your slides out. However, they’ll also state you should go with what your manufacturer states in your owner’s manual. [11]
How do you level a parked travel trailer?
Choose Your Site. Clear the Area of Debris and Clutter. Check Your Travel Trailer With A Level. Place Leveling Blocks Near Your Travel Trailer’s Tires. Bring the RV onto the Blocks. Install the Wheel Chocks. Slowly Start Lowering The Tongue Jack. [12]
Related posts:
- Is Buying a Used Travel Trailer a Good Investment
- What is Travel Trailer GVWR
- How Much Are License Plates For a Travel Trailer in Ohio
- Do Travel Trailers Hold Their Value
Leave a Comment Cancel reply
Save my name, email, and website in this browser for the next time I comment.
How to Store a Utility Trailer Outside
A utility trailer can be a great addition to your home, providing extra storage space for all of your outdoor gear. However, if you don’t take the time to properly store your trailer, it can quickly become an eyesore and a hazard. Here are a few tips on how to store a utility trailer outside: 1. Choose a level spot in your yard that is out of the way of foot traffic. 2. Place blocks underneath the tongue and wheels of the trailer to keep it level and steady. 3. Cover the trailer with a tarp or plastic sheeting to protect it from the elements. 4. If possible, secure the tarp or plastic with bungee cords or straps to keep it from blowing away in strong winds. 5. Periodically check on the condition of your trailer and make sure that everything is still in place and secure.
- If you are going to store your utility trailer outside, you will need to choose a spot that is level and well-drained
- Once you have found the perfect spot, you will need to clean off the trailer
- Be sure to remove any dirt, debris, or leaves that may have accumulated on it
- Next, apply a layer of protection to the trailer
- This can be done with a tarp or a cover specifically designed for trailers
- Finally, secure the tarp or cover in place so that it does not blow away in the wind
- You may want to use some bungee cords or tie downs to help keep it in place
How to Store a Trailer Upright
If you have a trailer, whether it’s a boat trailer or a utility trailer, you need to know how to store it properly when you’re not using it. Storing a trailer upright is the best way to ensure that it stays in good condition and doesn’t become damaged. Here are some tips on how to store your trailer upright: 1. Use blocks or stands. Place blocks or stands under the tongue of the trailer so that it’s supported and level. This will help prevent the tongue from sagging over time. 2. Park on level ground. It’s important to park your trailer on level ground so that it doesn’t become unbalanced and tip over. If you don’t have level ground available, use blocks or ramps to level out the area where you’ll be parking your trailer. 3. Chock the wheels. Once your trailer is parked and leveled, chock the wheels so that it can’t roll while stored upright. You can use tire chocks, wood blocks, or rocks for this purpose – just make sure that whatever you use is sturdy enough to keep the wheels from moving. 4 . Cover the tires . To protect your tires from UV damage and weathering, cover them with tire covers or place them inside a storage shed if possible . This will also help prevent flat spots from forming on the tires .
Storing Aluminum Trailer Outside
If you have an aluminum trailer, you know how important it is to keep it in good condition. Unfortunately, if you don’t store it properly, it can become damaged and unusable. Here are a few tips to help you store your aluminum trailer outside: 1. Cover the trailer with a tarp when not in use. This will protect it from the elements and prevent any dirt or debris from getting on it. 2. If possible, park the trailer under a tree or other shelter so that it’s not directly exposed to sunlight or rain. 3. Inspect the trailer regularly for any signs of corrosion or damage. If you see anything that concerns you, take action immediately to prevent further damage. 4. When winter arrives, make sure the trailer is completely dry before covering it with a tarp or storage bag. If there’s any moisture on the surface of the trailer, it could freeze and cause permanent damage.
How to Store a Travel Trailer Outside
Assuming you don’t have the luxury of a garage to store your travel trailer in, there are still some things you can do to prolong the life of your trailer and protect it from the elements. Here are a few tips on how to store a travel trailer outside: 1. Choose your spot wisely. Try to find a spot that is level and well-drained. If possible, find an area that is sheltered from wind and sun. Also, make sure the area is clear of any overhanging branches or power lines. 2. Invest in a cover. A good quality cover will help protect your trailer from sun damage, wind damage, and even hail damage. Make sure the cover fits snugly and securely around your trailer. 3. Use jack stands or leveling blocks. This will help keep your trailer level and stable, which will prevent stress on the frame and minimize wear and tear on the tires. 4 . Inspect regularly . Even with a cover in place, it’s important to inspect your trailer regularly for any signs of weather damage or other problems . Be sure to check both the inside and outside of your trailer for any issues .
Storing Utility Trailer in Garage
If you own a utility trailer, chances are you don’t want to leave it out in the elements. But what’s the best way to store your trailer in your garage? Here are a few tips: 1. If possible, park your trailer on a concrete pad. This will help keep it level and prevent it from sinking into soft ground over time. 2. Use wooden blocks or chocks to support the tongue of the trailer and keep it from rolling while parked. 3. Cover the trailer with a tarp or other breathable cover when not in use. This will protect it from UV damage and debris accumulation. 4. Inspect your trailer regularly for signs of wear and tear, especially if you live in an area with severe weather conditions. Make sure to fix any issues as soon as they arise to prevent further damage down the road.
Utility Trailer Cover
If you have a utility trailer, you know how important it is to keep your belongings dry and protected from the elements. A utility trailer cover is a great way to do this. Utility trailer covers come in a variety of sizes and styles to fit any type of utility trailer. They are made from durable materials that will stand up to the elements and protect your belongings. There are many different features available on utility trailer covers, such as: -Tie downs or straps to keep the cover in place -Vents to allow for air circulation -Zippered doors for easy access -Windows for visibility Choose a utility trailer cover that fits your needs and budget. Then relax knowing your belongings are safe from the weather!

Credit: trailerlegs.com
How Do You Store a Utility Trailer When Not in Use?
If you don’t have a garage or carport to store your utility trailer when not in use, there are still several options available to you. One option is to purchase or rent a storage unit specifically for storing your trailer. This option is especially convenient if you live in an area where winter weather conditions make it difficult to keep your trailer stored outside. Another option is to build a simple storage shed for your utility trailer. This can be a relatively easy and inexpensive project, and it will provide protection from the elements for your trailer when not in use. If you have some basic carpentry skills, you can easily build a small shed that will be just the right size to store your utility trailer. Whatever option you choose, be sure to take into consideration the height of your trailer when planning how to store it. You’ll need enough clearance so that the door of the storage shed or unit can open fully without hitting the top of the trailer. Also, be sure to leave enough space around the sides and front of the trailer so that you can easily walk around it when needed.
How Do You Store a Small Utility Trailer?
If you have a small utility trailer, you may be wondering how to store it. There are a few things to consider when storing a small utility trailer. First, you will need to find a level spot to park the trailer. This will help keep the trailer from tipping over while it is stored. You will also want to make sure that the area around the trailer is clear so that you can easily access it when you need to. Finally, if you live in an area with severe weather conditions, you may want to consider adding some type of cover or tarp to the top of the trailer to protect it from the elements.
How Do I Protect My Utility Trailer in the Winter?
If you live in an area where snow and ice are common during the winter, it’s important to take steps to protect your utility trailer. Here are a few tips: 1. Cover your trailer with a tarp or other waterproof covering. This will help keep snow and ice off of your trailer, and will also protect it from the elements if you need to store it outside. 2. If possible, store your trailer in a garage or other protected area. This will keep it out of the weather and make it easier to access when you need it. 3. Inspect your trailer regularly during the winter months, paying attention to the condition of the tires, brakes, and lights. Make sure everything is in good working order before taking your trailer out on the road. 4. When using your trailer in snowy or icy conditions, be sure to take extra care when braking and turning. Allow for extra stopping distance, and go slowly around corners to avoid sliding or tipping over.
Should You Cover Your Utility Trailer in the Winter?
As the mercury starts to dip, many trailer owners wonder if they should cover their utility trailers during the winter months. While there are pros and cons to doing so, ultimately the decision comes down to personal preference. On the plus side, covering your trailer can help protect it from the elements and extend its lifespan. Snow and ice can cause rust and other damage, so a cover can be a good way to prevent that. In addition, if you store your trailer outdoors, a cover can help keep it clean and dry. On the downside, a cover can make it more difficult to access your trailer when you need it. And if you live in an area with heavy snowfall, you may find that a cover makes it harder for the snow to melt off of your trailer (meaning you’ll have to do some shoveling before you hit the road). If you decide to cover your utility trailer this winter, be sure to use a breathable fabric that won’t trap moisture underneath. And take care not to put any unnecessary strain on the cover by securing it too tightly or weighing it down with heavy objects.
Tips for Storing Trailer Tires
If you own a utility trailer, chances are you use it for hauling things around town or taking your boat to the lake. But what do you do with it when you’re not using it? If you don’t have room to store it inside your garage, don’t worry – there are still some great options for storing your trailer outside. Here are a few tips on how to store a utility trailer outside: First, make sure that the area where you will be storing the trailer is level and firm. This will help prevent the trailer from tipping over or becoming damaged. Next, invest in a good quality cover for your trailer. This will protect it from the elements and keep it looking new. Finally, consider investing in a storage system specifically designed for utility trailers. These systems typically include a heavy duty frame and straps that secure the trailer in place.
Leave a Reply Cancel reply
Your email address will not be published. Required fields are marked *
Save my name, email, and website in this browser for the next time I comment.
COMMENTS
If you store your travel trailer unlevel, it can increase the likelihood of leaks developing in the roof, windows, doors, and seams. ... While you should always look for the levelest ground to store an RV, you can store a travel trailer on a slope. In fact, on most occasions, you'll be storing a travel trailer on a slight slope or incline, as ...
How do I level my travel trailer? Before leveling your travel trailer, make sure you find the lowest grade slope to park on, if possible. If you can, avoid parking somewhere where your trailer is leaning to the side. This will make the process much easier. Keep your trailer hitched to the vehicle while leveling.
STEP 2: Use These Proper Techniques for Parking Your Trailer on Sloped Driveway. Now that you know you have the right tools for the job, let's back this trailer up and park it. The first step of parking doesn't happen in the truck. You've got to Get Out and Look.
An inexpensive bubble level is all you need to level the travel trailer. Sometimes people get confused when using a level. Lay the level from left to right on the camper's rear bumper. The bubble in the level will float to the high side of the camper. You will need to raise the lower side of the camper which is the side opposite the bubble.
Parking on a sloped driveway requires a bubble level, wheel chocks, leveling blocks, and patience. Park your camper on the most level part of the slope and then use your level to figure out how many leveling blocks you need. Place the blocks, park your camper, then use wood chocks to secure it in place. It sounds easy, and with practice it gets ...
3. Leveling From Front To Back. After unhitching the trailer, shore up your tongue jack by placing a block or stand underneath it. Alternatively, you can use wheel chocks, available at camping supply stores. Place the level in the door of your camper so that the ends point to the front and back.
Yes, in fact, you will need to ensure that your RV is parked as level as it possibly can be. In a case where you do have an uneven surface, then you should position the fuel tank at the lower end. Please note that all of the information provided in this article is based on my past experience as an RV owner. Without wasting any more time, let's ...
To level your travel trailer from front to back, start by placing the level in the camper's door. Check that the ends of the level are pointing toward the front and back of the trailer. If needed, adjust the tongue jack to raise or lower the camper until it is level. You can check your owner's manual for specific instructions on how to do ...
Of course, if the trailer is level side-to-side, place the levelers in front of the tires on both sides of the trailer and roll forward onto them. Again, this acts like a chock preventing forward roll. This releases the tension on the tongue jack stand as well. Next, place your wheel chocks in front of the rear tires, preventing forward roll.
Start by leveling the camper from side to side; preferably, start with the low side. Use a bubble level or carpenter's level to level the trailer. Place leveling blocks in front of the wheels. Drive the trailer so it rests on top of the leveling blocks. [2]
Hose down and then use a carwash cleaner or soap safe for automotive use. If you have a foam gun, go for it! Use Windex for the windows and clean both the inside and outside of your windshield. Use a microfiber towel for windows and to dry off all areas after you hose down the RV and let it dry a bit.
A mild slope may not be harmful, but a steep incline can cause problems. 2. Verify that your travel trailer's wheels are secure and chocked before parking it on a slope. This will prevent it from rolling or sliding down the slope. 3. Avoid parking your travel trailer on a slope if the ground is wet or slippery.
It can lift your trailer around three feet off the ground, so it can help level it on a slope. Then again, it's designed to be just as high as the trailer's wheels. So if the wheels are on the highest point on the slope, you still need to put something underneath the jack. This means more than the jack alone will be required.
If you do want to store your RV inside, this is going to be even costlier. An indoor storage facility that's unheated may charge you anywhere between $50 and $125 per month. If you want a heated, indoor space, prepare to pay the big bucks, anywhere between $100 and $500. Another important reason to consider storing your RV at home is the long ...
Use Wheel Chocks: To prevent your travel trailer from rolling or shifting during storage, use wheel chocks. Place these wedges behind the trailer's wheels to keep it securely in place. Elevate or Level the Trailer: Properly leveling your travel trailer is important to prevent water pooling and potential damage. Use leveling blocks or other ...
Here's a step by step guide to using leveling blocks to level a travel trailer on a slope: Step 1: Choose your spot. When parking, make sure you're exactly where you want to set up. Make sure that the travel trailer is as straight or at the angle that you want. Otherwise, you will have to keep removing and rearranging the leveling blocks.
Here are some steps to follow when preparing your trailer for storage: Clean the trailer: Thoroughly clean the interior and exterior of the trailer to remove any dirt, dust, or debris. Pay attention to the wheels, undercarriage, and hitch area. Use a mild detergent and water to clean, and allow it to dry completely.
Harbor freight has some very nice heavy duty rubber chocks for less than $10.00 each. Big timber like railroad ties will be hard (they are very heavy) to put under the trailer and will probably slide easier than rubber chocks. Of course a lot depends on the driveway surface. ·. PNWtabber Member Posts: 491.
With your travel trailer secured in place, you can then take the front-back level measurements. Instead of rolling your RV onto blocks, you'll adjust the A-frame or fifth-wheel landing jack down onto the blocks to obtain balance. ... If the front end of the RV is on the lower end of the slope, you'll be able to lift them instead as you level ...
September 8, 2022 by Douglas. It is not recommended to put your trailer on blocks. Even if it is not in use, it should be stored on a flat surface. For a long time, people have been debating this question. There are many reasons why you should store your trailer on blocks, but there are just as many reasons why you shouldn't.
Fresh Water, Black, Grey Tanks. The next step in getting your RV ready for storage is to prepare the water system. This means all of the drains, pumps, tanks, and faucets in the vehicle. You should also clean and sanitize your fresh water tank prior to putting your RV into storage and after or about every 6 months.
September 21, 2022 by Douglas. Last Updated on September 21, 2022 by Douglas. The following steps are necessary to level a trailer on a slope. 1. Put the trailer in gear and drive it forward until the front of the trailer is even with the back of the trailer. 2. Put your hand on top of the tongue and push it down until it is even with the ground.
Here are a few tips on how to store a utility trailer outside: 1. Choose a level spot in your yard that is out of the way of foot traffic. 2. Place blocks underneath the tongue and wheels of the trailer to keep it level and steady. 3. Cover the trailer with a tarp or plastic sheeting to protect it from the elements. 4.